Go Back
- 16 Oreo cookies, crushed - 4 tablespoons unsalted butter, melted - 8 oz cream cheese, softened - 1/2 cup powdered sugar - 1 teaspoon vanilla extract - 1 cup heavy whipping cream - 1/2 cup mini chocolate chips (for garnish) - Additional Oreo cookies, for topping To make these Oreo cheesecake cups, you will need the right tools. Here’s what I recommend: - Mixing bowls: You’ll need a couple to mix your ingredients. - Whisk: A hand whisk works well for beating the cream cheese. - Measuring cups: Ensure you have accurate measurements for your ingredients. - Serving cups or glasses: Clear cups show off the layers nicely. These items make the process easy and fun. Having the right tools helps you create this dreamy treat without any fuss. Plus, it makes cleanup a breeze! To start, take 16 Oreo cookies and crush them into small bits. You can use a food processor or a zip-top bag and a rolling pin. Next, add 4 tablespoons of melted butter to the crushed Oreos. Mix them well until the crumbs feel like wet sand. Now, take your serving cups and press this mixture firmly at the bottom. Make sure it’s even and compact. This will hold the cheesecake filling later. In a new bowl, take 8 ounces of softened cream cheese. Beat it with a mixer until it’s smooth and creamy. Gradually add in 1/2 cup of powdered sugar and 1 teaspoon of vanilla extract. Keep mixing until everything is well blended. This creates a sweet, creamy base for our cheesecake cups. Now, let’s whip the heavy cream. Pour 1 cup of heavy whipping cream into a bowl and whip it until it forms stiff peaks. This means it should hold its shape well. Once done, gently fold this whipped cream into the cream cheese mixture. Be careful not to mix too hard, as we want to keep the fluffiness of the whipped cream. Time to put it all together! Spoon the cheesecake filling over the Oreo crust in each cup. Fill them generously, leaving some space at the top for garnish. After that, crush a few more Oreo cookies for garnish. Sprinkle these crushed cookies on top of each cheesecake cup. Finally, chill the cups in the fridge for at least 2 hours. This helps the cheesecake set and makes it easier to serve. To get a smooth and creamy cheesecake, start with cold ingredients. This helps the cream cheese mix better. When you whip the heavy cream, beat it until you see stiff peaks. This means the cream holds its shape. Be gentle when folding the whipped cream into the cheese mixture. If you mix too hard, the air will escape and make your cheesecake dense. To prevent lumps in your mixture, make sure the cream cheese is softened. I usually let it sit at room temperature for about 30 minutes. If you mix your cream cheese too quickly, lumps can form. Take your time and beat it until smooth before adding powdered sugar and vanilla. When it comes to serving, think about how to make it pretty. Use decorative trays to make your dessert stand out. You can use clear cups to show off the layers inside. For a special touch, add a dollop of whipped cream on top of each cup. Mini chocolate chips or crushed Oreos also make great garnishes. You can even add a sprig of mint for color. No-bake cheesecakes are different from baked ones. You want to avoid baking tips that don’t apply here. For example, don’t rush the chilling time. Letting your cups chill for at least 2 hours helps them set properly. One common mistake is over-mixing the whipped cream. This can turn it into butter instead of keeping it light and fluffy. Mix just until you see stiff peaks, then stop. This ensures your cheesecake stays airy and delicious. {{image_2}} You can change the flavor of your Oreo cheesecake cups easily. Try adding chocolate syrup to the filling for a rich taste. Peanut butter works well too; just stir in a few spoonfuls. You can also use flavored cream cheese, like strawberry or lemon, for a fun twist. For the crust, feel free to swap out Oreo cookies. Use chocolate graham crackers or even vanilla wafers. Each choice brings a unique flavor to the dessert. If you need a gluten-free version, use gluten-free Oreo cookies. They taste just as good and keep the same texture. For a dairy-free option, swap cream cheese with a dairy-free cream cheese spread. Use coconut cream instead of heavy cream for a light texture. Fruits make great pairings with these cups. Fresh berries or banana slices add a nice touch. You can also drizzle caramel or chocolate sauce on top for extra sweetness. Creative toppings like chopped nuts or sprinkles can add fun colors and textures. Enjoy making these cheesecake cups your own! To keep your Oreo cheesecake cups fresh, store them in the fridge. Place them in an airtight container. This will help maintain their taste and texture. If you want to freeze them, wrap each cup tightly in plastic wrap. You can also use a sealable freezer bag. This helps avoid freezer burn and keeps the cups tasty. In the fridge, these cheesecake cups stay fresh for about 3 to 5 days. After that, they may lose some flavor and texture. If you freeze them, they can last up to 2 months. However, the longer they sit, the more the quality drops. Always check for signs of spoilage. If you see any mold or if they smell off, it’s best to throw them away. If you want a substitute for cream cheese, use Greek yogurt or mascarpone. Both options give a creamy texture. You can also try cottage cheese for a lighter option. Blend it smooth for the best results. Each choice will change the taste a bit, but it can still be tasty. Let the cheesecake cups chill for at least 2 hours. This time helps the filling set well. You can chill them longer if you like. The longer they chill, the better the flavors mix. Just keep them in the fridge until you are ready to serve. Yes, you can make these cups in advance! They store well in the fridge. Prepare them up to two days before you need them. Just add the toppings right before serving for freshness. This saves you time and helps with party planning. Here are a few fun no-bake dessert ideas: - Chocolate mousse with whipped cream - Fruit parfaits with yogurt and granola - No-bake chocolate peanut butter bars - Rice Krispie treats with marshmallows These treats are simple and quick to make. They also taste great and please any crowd! In this blog post, we explored how to make delicious Oreo cheesecake cups. We covered the ingredients, step-by-step instructions, and useful tips to perfect your dessert. Remember the key points: whip your cream well and avoid over-mixing. Feel free to try different flavors or cookie bases to suit your taste. With practice, these treats will impress everyone. Enjoy making and sharing your Oreo cheesecake cups!

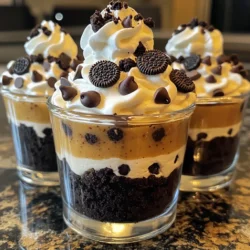
No Bake Oreo Cheesecake Cups

Indulge in the delightful world of Oreo Cheesecake Cups! These mini desserts combine the rich flavors of cream cheese, whipped cream, and crushed Oreos for a treat that’s sure to impress. With a simple 20-minute prep time and just a few easy steps, you can create these no-bake, decadent cups to wow your guests or satisfy your sweet tooth. Click through to explore the full recipe and bring this deliciousness to your table!

Ingredients
  

16 Oreo cookies, crushed

4 tablespoons unsalted butter, melted

8 oz cream cheese, softened

1/2 cup powdered sugar

1 teaspoon vanilla extract

1 cup heavy whipping cream

1/2 cup mini chocolate chips (for garnish)

Additional Oreo cookies, for topping

Instructions
 

In a mixing bowl, combine the crushed Oreo cookies with melted butter. Stir until the crumbs are well coated and resemble wet sand.

    Line serving cups or glasses with the Oreo mixture, pressing it down firmly to create an even layer at the bottom of each cup.

      In a separate bowl, beat the softened cream cheese until smooth and creamy. Gradually add powdered sugar and vanilla extract, mixing until well combined.

        In another bowl, whip the heavy cream until stiff peaks form. Gently fold the whipped cream into the cream cheese mixture, being careful not to deflate the whipped cream.

          Spoon the cheesecake filling over the Oreo crust in each cup, filling them generously.

            Crush additional Oreo cookies and sprinkle them on top of each cheesecake cup for garnish.

              Chill the cheesecake cups in the refrigerator for at least 2 hours before serving to allow them to set.

                Prep Time: 20 mins | Total Time: 2 hours 20 mins | Servings: 6 cups

                  - Presentation Tips: Serve on a decorative tray, and consider adding a dollop of whipped cream on top of each cup before serving for an extra touch!