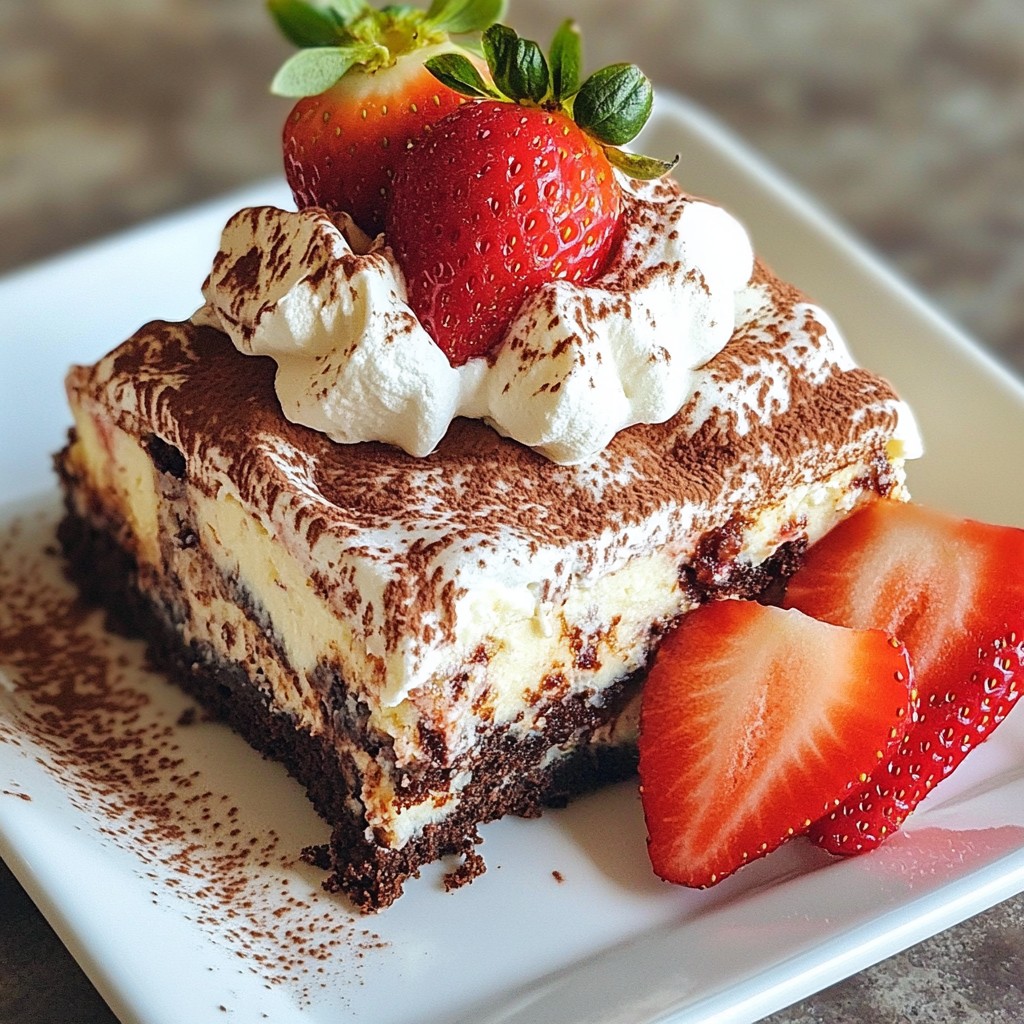
Are you ready to mix up a dessert that will wow everyone? The Strawberry Earthquake Cake is a delicious blend of soft cake, sweet strawberries, and a creamy swirl. This recipe not only looks stunning but also delights your taste buds. Whether you're baking for a special event or just want a treat at home, I’ll guide you step by step. Let’s dive in and create this irresistible dessert together!
Why I Love This Recipe
- Decadent Chocolate Flavor: This cake combines the richness of chocolate with fresh strawberries, creating a delightful dessert that satisfies every sweet tooth.
- Easy to Make: With simple ingredients and straightforward steps, this recipe is perfect for bakers of all skill levels.
- Perfect for Any Occasion: Whether it’s a birthday, picnic, or just a treat for yourself, this cake fits any celebration beautifully.
- Stunning Presentation: The marbled chocolate and cream cheese layers topped with fresh strawberries make for an eye-catching dessert.
Ingredients
Full List of Ingredients
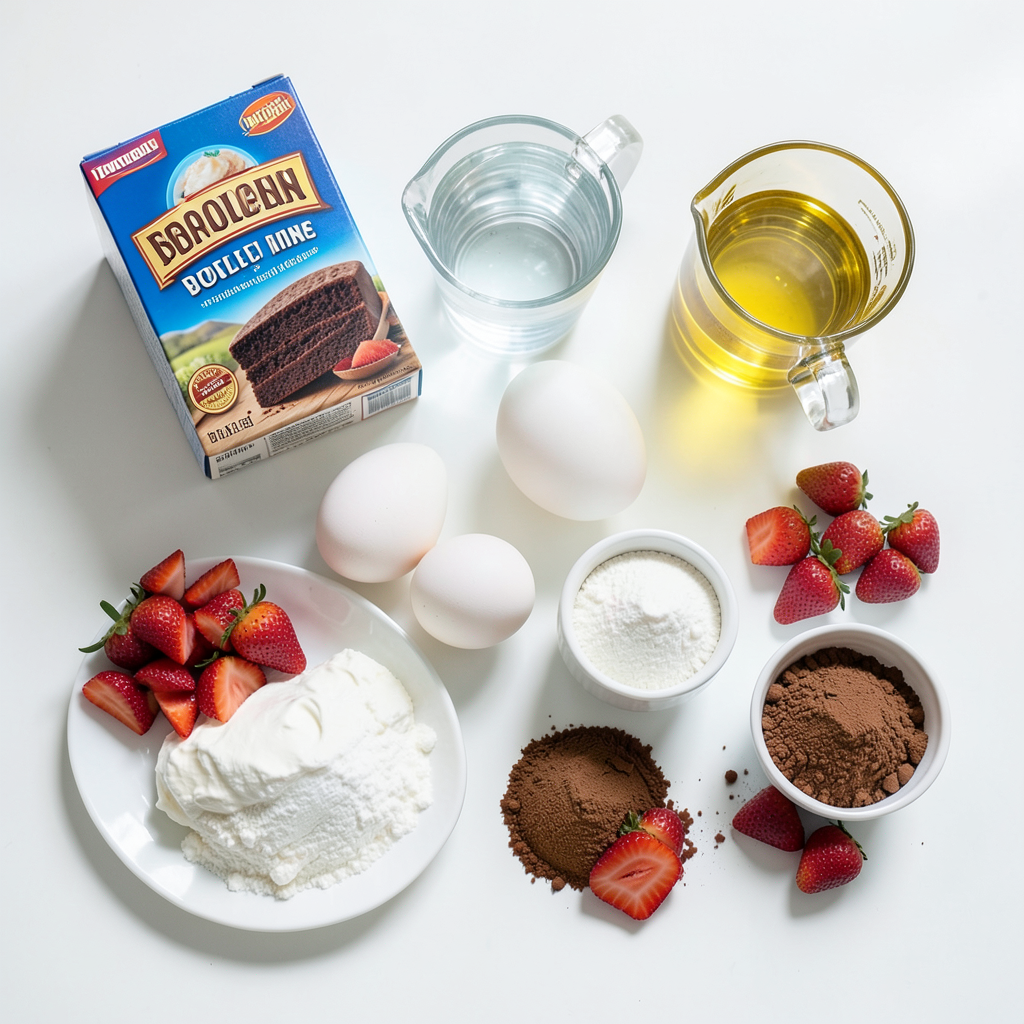
To make your Strawberry Earthquake Cake, you will need:
- 1 box of chocolate cake mix (15.25 oz)
- 1 cup of water
- 1/2 cup of vegetable oil
- 3 large eggs
- 1 cup of fresh strawberries, diced
- 8 oz cream cheese, softened
- 1 cup powdered sugar
- 1/2 cup unsweetened cocoa powder
- 1/2 cup of fresh strawberries, sliced for topping
- Whipped cream (optional for serving)
Ingredient Substitutions
If you need to swap ingredients, try these options:
- Chocolate Cake Mix: You can use a gluten-free mix for a gluten-free version.
- Vegetable Oil: Substitute with melted coconut oil or applesauce for a healthier choice.
- Cream Cheese: Use Greek yogurt or a dairy-free cream cheese for a lighter option.
- Powdered Sugar: Make your own by blending regular sugar until fine.
Fresh vs. Frozen Strawberries
Fresh strawberries offer the best flavor and texture for this cake. They stay firm when baked. Use ripe strawberries for sweetness and color. If fresh ones are not available, frozen strawberries work too. Just thaw them first and drain any excess liquid. This helps keep your cake from becoming soggy.
Step-by-Step Instructions
Prepping the Baking Pan
First, you need to prep your pan. Take a 9x13 inch baking pan. Grease it well with butter or cooking spray. Then, sprinkle a little flour over the butter. This helps the cake not stick. Make sure to cover all sides. Once done, set the pan aside for later.
Mixing the Cake Batter
Next, grab a large mixing bowl. Add the chocolate cake mix, 1 cup of water, 1/2 cup of vegetable oil, and 3 eggs. Use a whisk or an electric mixer to blend these together. Mix until it looks smooth and free of lumps. This will be the main base of your cake. After mixing, pour half of this batter into your prepared pan. Spread it evenly across the bottom.
Creating the Cream Cheese Swirl
Now it's time for the cream cheese swirl. In another bowl, combine 8 ounces of softened cream cheese, 1 cup of powdered sugar, and 1/2 cup of cocoa powder. Mix this until it is creamy and smooth. Take spoonfuls of this mixture and dollop it over the chocolate batter. Use a knife to gently swirl it into the batter. This creates that delicious marbled effect you want. After swirling, pour the remaining chocolate batter over the cream cheese layer. Smooth it out with a spatula. Finally, sprinkle 1 cup of diced strawberries evenly on top of the batter. Now you are ready to bake!
Tips & Tricks
Baking Tips for Perfect Texture
To get a great texture, follow these steps:
- Use room temperature eggs. This helps the batter mix better.
- Don’t overmix your batter. Mix just until smooth for a light cake.
- Keep your oven at 350°F. An even temperature makes for a perfect bake.
- Check the cake at 30 minutes. If a toothpick comes out clean, it’s done.
Swirling Techniques for the Cream Cheese
Swirling the cream cheese adds flair and flavor. Here’s how:
- Use a knife to dollop the cream cheese mix. Place it in spoonfuls over the batter.
- Gently swirl the knife in a figure-eight pattern. This creates a lovely marbled look.
- Don’t mix too much; you want to see both the chocolate and cream cheese.
Cooling and Serving Suggestions
Cooling and serving are key to enjoying this cake:
- Let the cake cool for 15 minutes in the pan. This helps it set well.
- After that, transfer it to a wire rack to cool completely.
- For serving, top with sliced strawberries and whipped cream. It adds a nice touch.
- Use colorful plates for a fun presentation. A sprinkle of cocoa powder is a nice finish.
Pro Tips
- Use Fresh Strawberries: Fresh strawberries enhance the flavor and texture of the cake. Opt for ripe, sweet strawberries for the best results.
- Swirl with Care: When swirling the cream cheese mixture, use a gentle hand to avoid overmixing, which can lead to a less visually appealing marbled effect.
- Check for Doneness: Ovens can vary, so check your cake a few minutes before the recommended time. A toothpick should come out clean or with a few moist crumbs.
- Serve Chilled: For a refreshing twist, chill the cake in the refrigerator for an hour before serving. This allows the flavors to meld beautifully.
Variations
Alternate Fruit Add-ins
You can switch up the fruit in your Strawberry Earthquake Cake. Try using blueberries, raspberries, or chopped peaches. Each fruit adds a unique flavor and look. The tartness of raspberries pairs well with chocolate. Blueberries bring a sweet burst in every bite. Feel free to mix fruits for a colorful twist!
Gluten-Free Options
If you want a gluten-free version, use a gluten-free chocolate cake mix. Check the label to ensure it meets your needs. You can also make your own mix with almond flour or a gluten-free flour blend. The texture might change slightly, but it will still taste amazing.
Flavor Variations with Extracts
Adding extracts is a great way to change the flavor. Use vanilla extract for a classic touch. Almond extract adds a nutty flavor that complements the strawberries. For a fun twist, try orange or mint extracts. Just add one teaspoon to the cake batter. This small change can make a big difference!
Storage Info
How to Store Leftovers
To keep your Strawberry Earthquake Cake fresh, store it in an airtight container. Place it in the fridge. Proper storage helps maintain its flavor and texture. You can enjoy leftovers for up to five days. Just remember to cover it well to prevent it from drying out.
Freezing the Cake
You can freeze Strawberry Earthquake Cake for longer storage. First, let the cake cool completely. Wrap it tightly in plastic wrap. Then, place it in a freezer-safe bag or container. It will stay good for up to three months. When you're ready to eat, thaw it in the fridge overnight. This keeps the cake moist and delicious.
Reheating Instructions
To reheat your cake, you can use the microwave or oven. If using a microwave, place a slice on a microwave-safe plate. Heat for about 15-20 seconds. Check to ensure it's warm but not hot. If you prefer the oven, preheat it to 350°F (175°C). Place the cake on a baking sheet and cover it with foil. Heat for about 10-15 minutes. Enjoy it warm for the best taste.
FAQs
Can I make Strawberry Earthquake Cake ahead of time?
Yes, you can make Strawberry Earthquake Cake a day in advance. Just bake it and let it cool. Then, cover it with plastic wrap. Keep it in the fridge until you are ready to serve. This helps the flavors meld together. You can also add the toppings right before serving for freshness.
How do I know when the cake is done baking?
To check if the cake is done, use a toothpick. Insert it into the center of the cake. If it comes out clean, your cake is ready. The edges should pull away slightly from the pan too. Bake for 30-35 minutes, but keep an eye on it as oven times can vary.
What are the best toppings for Strawberry Earthquake Cake?
The best toppings for Strawberry Earthquake Cake are fresh strawberries and whipped cream. You can slice extra strawberries on top for color and flavor. Consider adding a dusting of cocoa powder for a nice touch. If you like, drizzle some chocolate sauce over the cake for extra sweetness.
This blog covers how to make a Strawberry Earthquake Cake, from ingredients to baking tips. You learned about ingredient swaps, fresh versus frozen strawberries, and swapping flavors or fruits. I shared step-by-step instructions and common questions to help you succeed. Remember, practice makes perfect. Enjoy your cake and share it with friends or family. You can always try new variations to keep things fun!