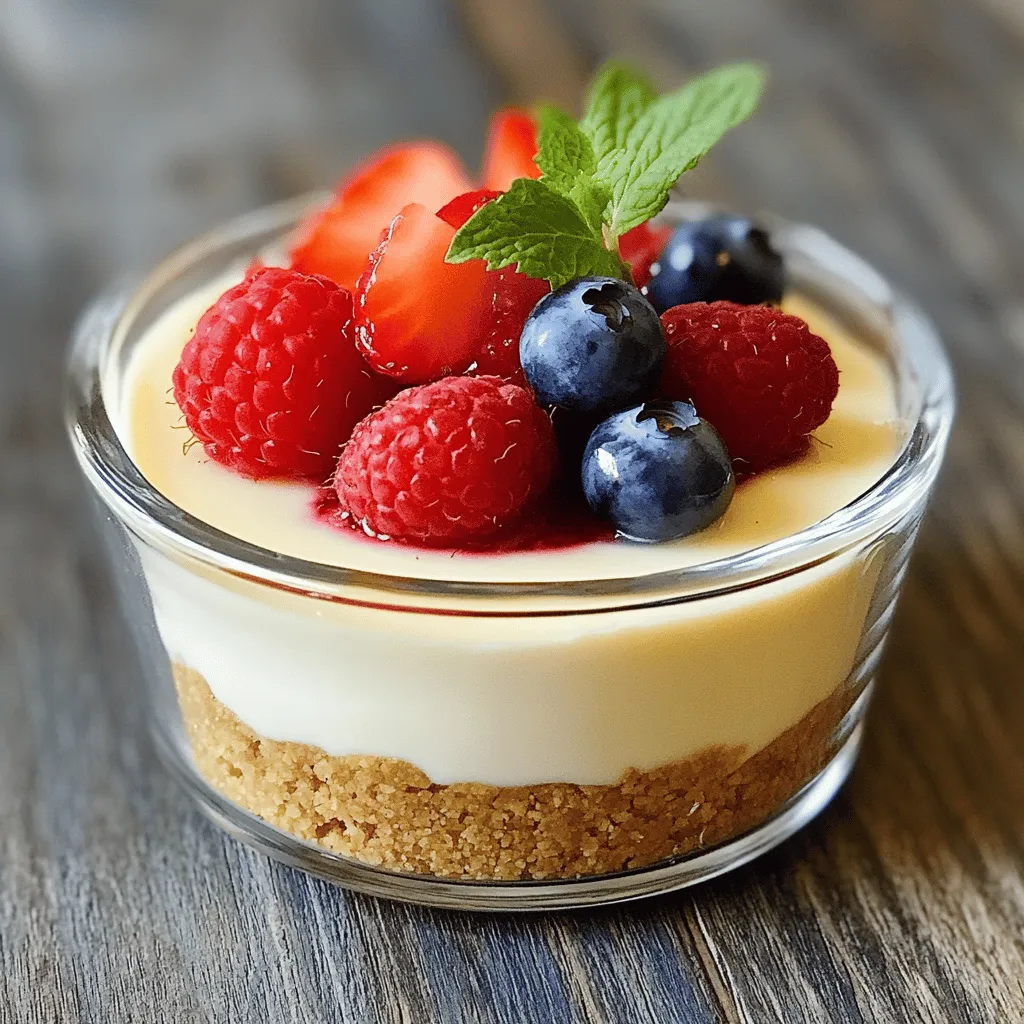
If you crave a sweet treat that’s quick to whip up and oh-so-delicious, this Single Serve Cheesecake is for you! With simple ingredients and easy steps, you’ll enjoy a perfect dessert made just for you. No need to share. I’ll guide you through the process, ensuring your cheesecake has a creamy texture and delightful flavor. Let’s dive into this easy recipe that promises to satisfy your dessert dreams!
Ingredients
List of Ingredients
– Cream Cheese
– Sugar
– Sour Cream
– Vanilla Extract
– Heavy Cream
– Crushed Cookies
– Unsalted Butter
– Fresh Berries
– Mint Leaves
Each ingredient plays a key role in making your cheesecake smooth and tasty.
– Cream Cheese: This gives the cheesecake its rich and creamy base. Use softened cream cheese for easy mixing.
– Sugar: This sweetens the cheesecake. Adjust it to match your taste.
– Sour Cream: This adds a nice tang to balance the sweetness.
– Vanilla Extract: This adds flavor depth. Use pure vanilla for the best taste.
– Heavy Cream: This helps make the cheesecake light and fluffy. Whip it well.
– Crushed Cookies: These form the crust. Graham crackers are a great choice.
– Unsalted Butter: This binds the cookie crust together. Melt it before mixing.
– Fresh Berries: These make a perfect topping. Use strawberries, blueberries, or raspberries.
– Mint Leaves: These add a fresh touch to your dish.
Nutritional Information
– Calories per serving: About 300 calories.
– Macros breakdown: Approximately 22g fat, 30g carbs, and 4g protein.
– Dietary considerations: This recipe is not gluten-free due to the cookies used. Substitute with gluten-free cookies if needed.Enjoy making your delightful single-serve cheesecake!
Step-by-Step Instructions
Preparation of the Crust
To start, gather your crushed cookies and melted butter. You can use any cookies you like, but I love Graham crackers for their classic taste. In a medium bowl, mix the crushed cookies and melted butter. Stir until the crumbs are coated and feel like wet sand. Next, grab a small serving glass or ramekin. Press the cookie mixture firmly into the bottom of the glass. Make sure it’s even and compact. For the best results, chill this in the freezer for about 10 minutes. This step helps the crust to set nicely.
Making the Cheesecake Filling
Now, let’s move on to the filling. Take your softened cream cheese and place it in a bowl. Beat it until it’s smooth and creamy. This step is key for a nice texture. Next, add in the granulated sugar, sour cream, and vanilla extract. Mix these together until they are well combined. In another small bowl, whip the heavy cream until it forms soft peaks. Gently fold this whipped cream into the cheesecake mixture. This helps to keep the filling light and fluffy.
Assembling the Cheesecake
It’s time to put it all together! Spoon the cheesecake filling over the chilled crust in your glass. Use a spatula to smooth the top. After that, cover the glass with plastic wrap. Place it in the fridge for at least 2 hours. This chilling time is important for the cheesecake to set properly. When you’re ready to serve, add some fresh berries on top. Garnish with a sprig of mint for a pop of color and flavor.
Tips & Tricks
Perfecting the Texture
To make a smooth cheesecake, soften your cream cheese first. Cold cream cheese can make lumps. Let it sit at room temperature for about 30 minutes. This simple step makes a big difference.
When adding whipped cream, use a gentle folding technique. Start by adding a small amount of whipped cream to the cheesecake mix. Stir just enough to combine. Then, fold in the rest slowly. This helps keep the mixture light and fluffy.
Common Mistakes to Avoid
One common mistake is overmixing the filling. Mixing too much can add air and change the texture. Mix just until everything blends well.
Another mistake is not chilling the cheesecake long enough. You need to let it set for at least 2 hours. This helps the flavors develop and the cheesecake firm up.
Presentation Tips
For a lovely look, serve the cheesecake in the glass. It gives a rustic vibe that is fun and easy. If you want something fancier, transfer it to a plate. Drizzle with berry compote for a touch of elegance.
Garnish your cheesecake with fresh berries and a mint leaf. Berries add color and a burst of flavor. Mint brings a fresh note that complements the creaminess.

Variations
Flavor Additions
You can easily change the flavor of your cheesecake. Adding lemon zest brings a fresh, citrus twist. Just mix a teaspoon of lemon zest into the filling. It brightens the taste and adds a zing! You might also like to add chocolate or peanut butter. For chocolate, mix in two tablespoons of cocoa powder. For peanut butter, use two tablespoons of creamy peanut butter. Both options create a rich and delightful dessert.
Different Crust Options
Try using different cookies for the crust. Oreos or vanilla wafers work great! Simply crush them the same way as Graham crackers. You can also make a no-bake crust using oats and melted coconut oil. This option gives a chewy texture. Just mix one cup of oats with two tablespoons of melted coconut oil. It’s simple and tasty!
Seasonal Toppings
Seasonal fruits make great toppings. In spring, use fresh strawberries or blueberries. In summer, consider peaches or raspberries. In fall, try sliced apples or pumpkin puree. In winter, warm berry sauces add a cozy touch. You can also drizzle flavored syrups like caramel or chocolate over the top. These toppings not only look pretty but also enhance the flavor of your cheesecake.
Storage Info
Best Practices for Storing Cheesecake
To keep your cheesecake fresh, store it in the fridge. Place it in an airtight container. If you used a glass, cover it with plastic wrap. This keeps the cheesecake from drying out and absorbing other smells.
If you want to save some for later, you can freeze it. Wrap the cheesecake tightly in plastic wrap, then place it in a freezer bag. This helps prevent freezer burn. You can freeze it for up to two months. When you’re ready to eat it, thaw it in the fridge overnight.
Shelf Life
In the fridge, your single serve cheesecake will stay fresh for about 3 to 5 days. After that, it may start to lose its taste and texture.
To know if it’s no longer good, look for changes. If it smells off or has a strange texture, it’s best to throw it out. Always trust your senses! Enjoy your cheesecake while it’s fresh for the best taste.
FAQs
Can I use low-fat ingredients?
Yes, you can use low-fat cream cheese or sour cream. However, the texture may change. Low-fat options can make the cheesecake less creamy. The taste might also be less rich. If you want a lighter cheesecake, this is a good choice. Just expect some differences in flavor and feel.
How long does it take to set?
The ideal setting time is at least 2 hours. This allows the cheesecake to firm up perfectly. If you want a firmer texture, let it set longer, up to 4 hours. Remember to keep it in the fridge while it sets. This keeps it cool and tasty.
Can I make this in advance?
Yes, you can make this cheesecake ahead of time. It stays fresh for about 2-3 days in the fridge. Cover it well to keep it from drying out. For the best taste, add toppings just before serving. This keeps the berries fresh and bright.
Where can I buy pre-made single serve cheesecakes?
You can find pre-made options at many grocery stores. Look for brands like Cheesecake Factory or individual bakery shops. These often come in fun flavors, like strawberry or chocolate. Check the frozen section too for more choices. Enjoying a store-bought cheesecake is great for quick treats!
This cheesecake blog post covered the key ingredients, step-by-step instructions, and helpful tips to create a tasty treat. You saw how to prepare the crust, make the filling, and assemble everything perfectly. With variations and storage tips, you can customize this dessert for any occasion.
Remember, the right texture and chilling time matter. You can enjoy this dessert with confidence, knowing it will impress your guests. So go ahead and make your own delicious single-serve cheesecake!