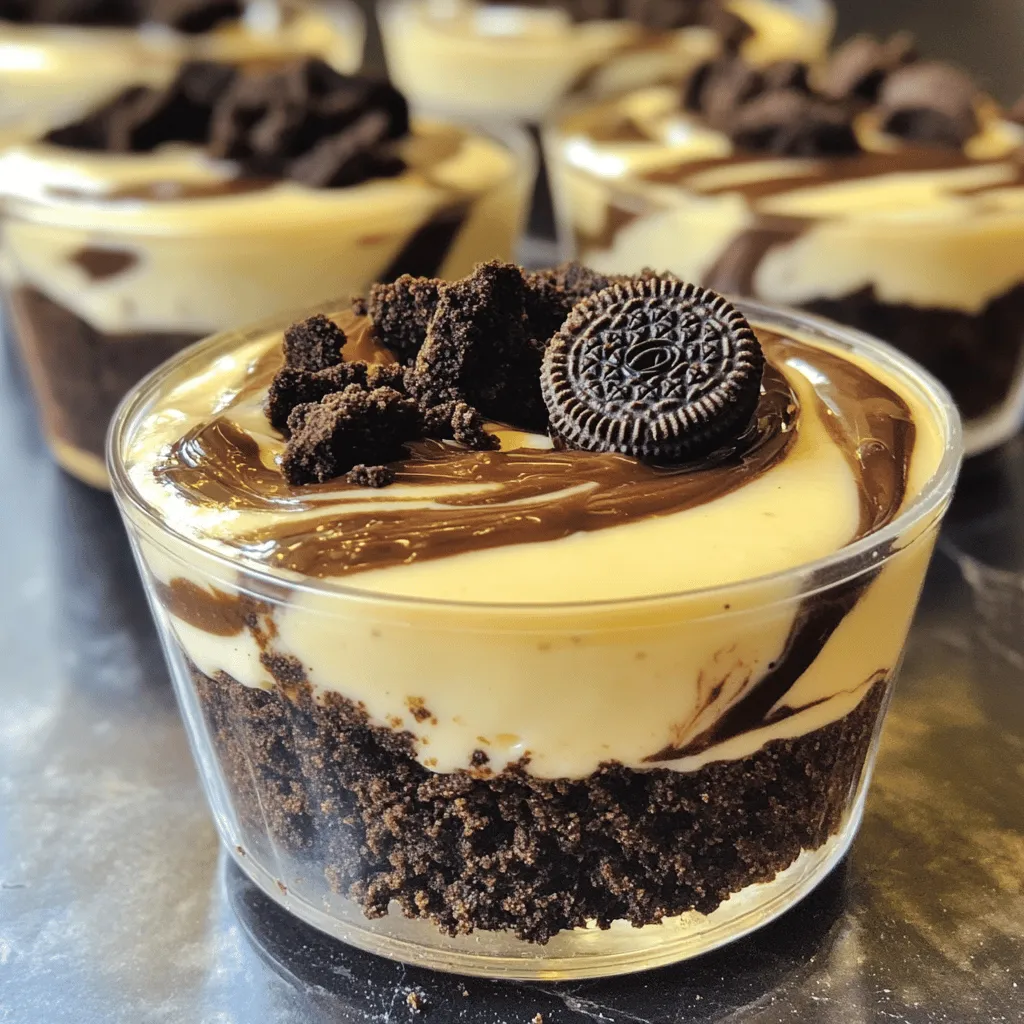
Looking for a simple and creamy dessert that impresses? Dive into the world of Oreo No-Bake Cheesecake Cups! This treat is easy to make and full of rich flavor. With just a handful of ingredients, you’ll create a delightful dessert that’ll wow your friends and family. Follow along as I guide you through the quick steps to whip up this delicious dessert in no time!
Ingredients
To make Oreo no-bake cheesecake cups, you need simple ingredients. Here’s what you will need:
– 1 ½ cups Oreo cookie crumbs
– 5 tablespoons unsalted butter, melted
– 2 cups cream cheese, softened
– 1 cup powdered sugar
– 1 teaspoon vanilla extract
– 1 cup heavy whipping cream
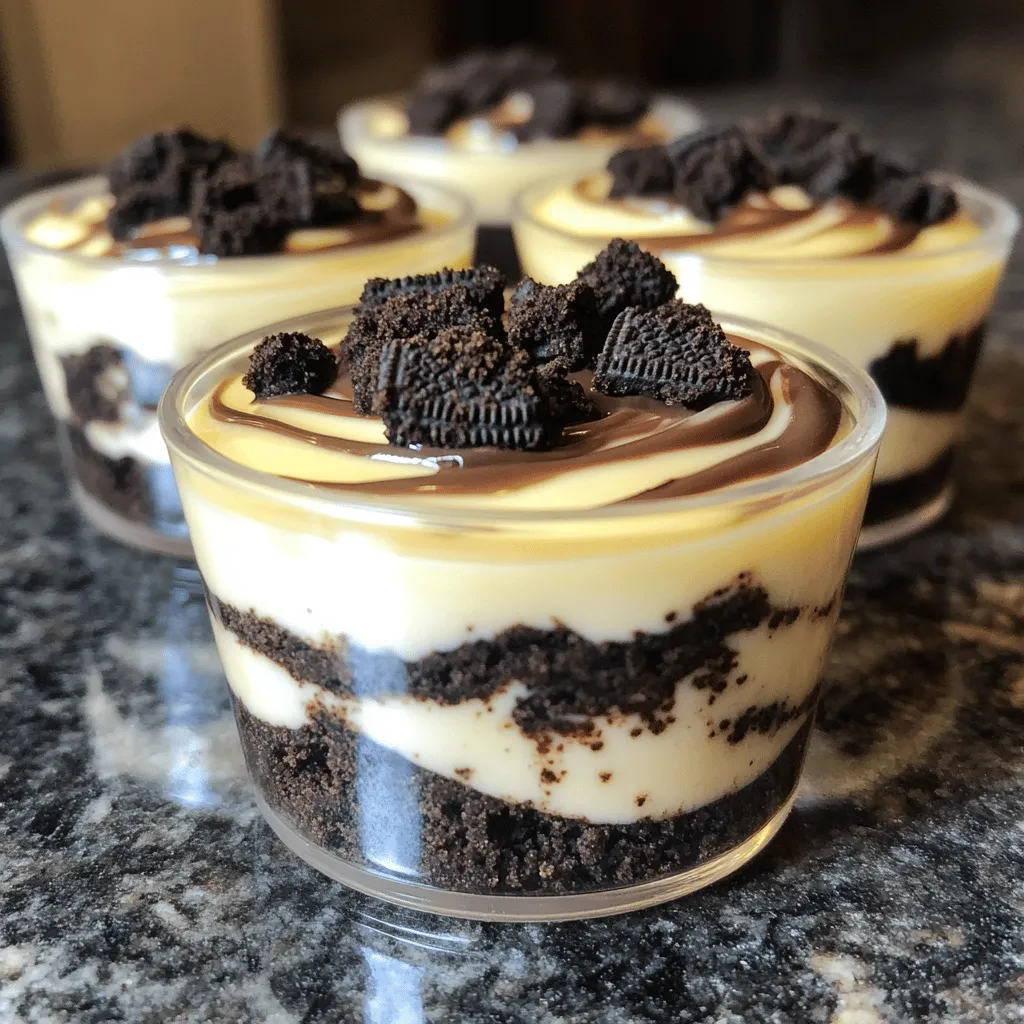
– 10 Oreo cookies, chopped (for mixing in)
– Extra Oreos for garnish
These ingredients come together to create a creamy and delightful treat. The Oreo cookie crumbs give a rich base, while the cream cheese adds that smooth texture. Don’t skip the heavy whipping cream; it makes the filling light and fluffy. The chopped Oreos mixed in add extra flavor and crunch. Use extra Oreos to top off your cups for a fun finish.This will help you create the best Oreo no-bake cheesecake cups!
Step-by-Step Instructions
Preparation of the Crust
To start, gather your Oreo cookie crumbs and melted butter. In a medium bowl, combine the crumbs with the butter. Mix until the crumbs look like wet sand. This step is key for a tasty crust. Next, divide the mixture evenly into your serving cups. Press it down firmly to form a solid base. Chill the cups in the refrigerator for about 15 minutes. This helps the crust set well.
Making the Cheesecake Filling
Now, let’s make the filling. In a large mixing bowl, beat the softened cream cheese with an electric mixer. Aim for a smooth and creamy texture. Once it’s ready, gradually add the powdered sugar and vanilla extract. Mix until everything is well combined. This step gives your cheesecake a sweet and rich flavor.
Assembling the Cheesecake Cups
Next, we whip the heavy cream. Use a clean bowl and whip until stiff peaks form. This means the cream will hold its shape well. Now, gently fold the whipped cream into the cream cheese mixture. Be careful not to deflate the whipped cream. After that, fold in the chopped Oreos until they are evenly mixed. Now, spoon the cheesecake mixture over the chilled crust in each cup. Fill them to the top and smooth the surface with a spatula. Finally, chill the cups for at least four hours. This waiting time allows the flavors to blend and the cheesecake to set perfectly. For a fun touch, garnish each cup with a crushed Oreo before serving. Enjoy your creamy delight!
Tips & Tricks
Ensuring the Perfect Texture
To get the best texture for your Oreo no-bake cheesecake cups, start with softened cream cheese. Beat it until it’s smooth and creamy. Use an electric mixer for this. It helps mix the cream cheese well. Next, whip the heavy cream until stiff peaks form. This means you can lift the whisk, and the cream stands up tall. Gently fold the whipped cream into the cream cheese mixture. Be careful not to mix too hard. You want it light and fluffy.
Chilling time is very important. After you assemble your cups, chill them for at least four hours. This allows the flavors to blend and the cheesecake to set. If you skip this step, your cheesecake may be too runny.
Presentation Tips
Make your cheesecake cups look great with some fun garnishes! You can crush extra Oreos and sprinkle them on top. You can also add whipped cream for a fancy touch. Fresh berries like raspberries or strawberries add color and flavor.
For serving, these cups are great for parties or family gatherings. You can place them on a tray or a dessert table. They are also perfect for a movie night or a cozy dinner. Just remember, these treats are easy to grab and eat.
Variations
Different Flavor Combinations
You can easily change the flavor of your Oreo no-bake cheesecake cups. One fun option is to add cocoa powder. This makes a rich chocolate version that chocolate lovers will adore. Start with two tablespoons of cocoa powder mixed into the cream cheese. Blend it well for a smooth texture.
You can also incorporate fruit flavors or extracts. Try adding lemon extract for a zesty twist. A few tablespoons of strawberry or raspberry puree can bring a fruity burst. Mix these flavors into your cheesecake filling for a fresh and vibrant taste.
Alternative Base Options
If you want a change from Oreos, use different cookies for the base. Try chocolate wafer cookies for a similar taste. Vanilla wafers can offer a lighter flavor. Just crush them the same way as Oreos.
For those needing gluten-free options, use gluten-free chocolate cookies. They work great as a base and still provide that crunchy texture. This way, everyone can enjoy your creamy dessert!
Storage Info
Proper Refrigeration Techniques
To keep your Oreo no-bake cheesecake cups fresh, store them in the fridge. Place them in an airtight container. This will help prevent any odors from mixing in. If you have leftovers, make sure to cover them tightly with plastic wrap. This keeps moisture in and flavors intact. Use small containers if you have extra cups. This helps save space and keeps them organized.
Freezing Instructions
Yes, you can freeze Oreo no-bake cheesecake cups! They freeze well and can last up to three months. Just be sure to wrap each cup tightly in plastic wrap. Then, place them in a freezer-safe bag or container. When you are ready to eat them, move them to the fridge overnight to defrost. This slow thaw helps keep the texture creamy and smooth. Enjoy your delightful treat whenever you want!
FAQs
How long do Oreo no-bake cheesecake cups last?
Oreo no-bake cheesecake cups can last in the fridge for up to five days. Make sure to keep them covered to avoid drying out. If you want to keep them longer, you can freeze them for up to two months. Just remember to thaw them in the fridge before serving.
Can I use low-fat cream cheese?
Yes, you can use low-fat cream cheese. It will change the texture slightly. The cheesecake may not be as rich, but it will still taste great. Just ensure it is softened before mixing for the best results.
What can I substitute for heavy whipping cream?
You can use coconut cream or a non-dairy whipped topping as a substitute. These options work well and can still give you that creamy texture. However, the flavor may differ slightly, so choose what suits your taste.
Can these cheesecake cups be made ahead of time?
Absolutely! These cheesecake cups are perfect for making ahead. You can prepare them a day or two in advance.This way, you can save time and enjoy them fresh without the rush.
To recap, this guide walks you through making delicious Oreo no-bake cheesecake cups. You learned about the key ingredients and followed simple steps for preparation, filling, and assembly. I shared tips for perfect texture and presentation, along with variations to try. Remember to store your treats properly and explore the FAQs for more details. Enjoy creating these delightful cheesecake cups and impress your friends and family with your skills!