No-Bake Espresso Chocolate Truffles Simple and Sweet

WANT TO SAVE THIS RECIPE?

Craving a sweet pick-me-up? You’ll love these No-Bake Espresso Chocolate Truffles! They’re rich, creamy, and super easy to make. With just a few ingredients, you can whip up a delightful treat that pairs perfectly with your coffee. Plus, I’ll guide you through each step, share tips to avoid common mistakes, and offer tasty variations. Get ready to indulge your taste buds with this simple and sweet recipe!

Ingredients

Main Ingredients for No-Bake Espresso Chocolate Truffles

To make these truffles, you need the following main ingredients:

– 8 oz (225g) dark chocolate, finely chopped

– 1/2 cup (120ml) heavy cream

– 1 tablespoon instant espresso powder

– 2 tablespoons unsweetened cocoa powder

– 1 teaspoon vanilla extract

– A pinch of sea salt

These ingredients create a rich and smooth chocolate truffle. The dark chocolate gives a deep flavor that pairs well with espresso. The heavy cream makes the truffles creamy and soft. The instant espresso powder adds a strong coffee taste, boosting the overall flavor. The cocoa powder, vanilla, and salt enhance the chocolate taste.

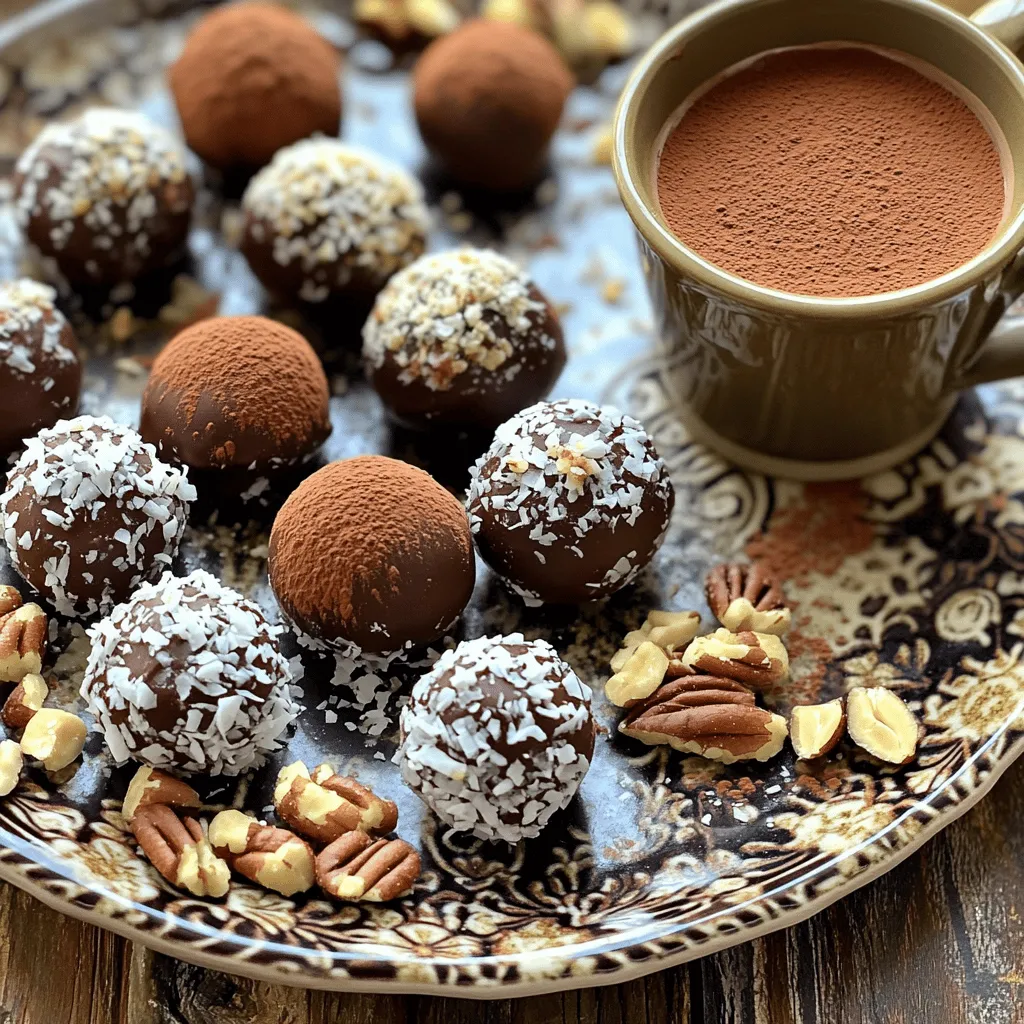
Optional Coating Ingredients

You can roll the truffles in different coatings to add texture and flavor. Here are some great options:

– Cocoa powder

– Chopped nuts

– Shredded coconut

Choosing a coating can make your truffles unique. Cocoa powder adds a classic touch. Chopped nuts give a nice crunch, while shredded coconut adds a tropical twist. You can mix and match these coatings to suit your taste!

Ingredient Substitutions

If you want to make some swaps, here are a few ideas:

– Use milk chocolate instead of dark chocolate for a sweeter taste.

– Coconut cream can replace heavy cream for a dairy-free option.

– Try using flavored extracts, like almond or hazelnut, for a fun twist.

These substitutions help you customize the truffles to fit your needs. Always choose quality ingredients for the best flavor. With these options, you can enjoy the truffles your way!

Step-by-Step Instructions

Preparing the Espresso Chocolate Mixture

To make the base for your truffles, start with a small saucepan. Pour in the heavy cream and add the instant espresso powder and a pinch of sea salt. Heat this mixture over medium heat. Stir it gently and wait until it warms up. This should take about 2-3 minutes. Make sure the mixture does not boil; we just want it warm.

Once warm, take the saucepan off the heat. Now, add the finely chopped dark chocolate into the cream mix. Let it sit for about 3-4 minutes. This allows the chocolate to melt gently. After the time is up, grab a spatula and stir the mix until it becomes smooth and shiny. Lastly, add the vanilla extract and mix it well.

Forming the Truffle Balls

Now that your espresso chocolate mixture is ready, it’s time to form the truffles. First, transfer the mixture to a bowl. Cover the bowl with plastic wrap and pop it into the fridge. Let it chill for about 1-2 hours. This helps the mixture firm up.

Once it is firm, use a teaspoon or a small scoop to take some chocolate mix. Roll it into a ball with your hands. Each ball should be about the size of a small marble. This step is fun, and you can involve the kids if you like!

Coating and Setting the Truffles

After forming the balls, it’s time for the fun part: coating them! Pick your favorite coating options. You can use cocoa powder, chopped nuts, or shredded coconut. Roll each truffle ball in your chosen coating until it is fully covered.

Once coated, place the truffles on a plate or tray lined with parchment paper. Now, put them back in the fridge for another 30 minutes. This helps the coating set and makes them easier to handle. After that, your no-bake espresso chocolate truffles are ready. Enjoy them chilled or at room temperature!

Tips & Tricks

Achieving the Perfect Texture

To get a smooth texture, use high-quality dark chocolate. The chocolate should be finely chopped before mixing. This helps it melt evenly. When heating the cream, do not let it boil. Boiling changes the texture and taste. Stir the mixture gently. This keeps it smooth and prevents air bubbles. After chilling, the mixture should be firm but not hard.

Common Mistakes to Avoid

One common mistake is using too much heat when melting chocolate. This can cause the chocolate to seize or become grainy. Always heat the cream slowly and stir well. Another mistake is not letting the mixture chill enough. If it’s too soft, rolling will be hard. Make sure to cover the bowl while chilling to prevent drying out.

Enhancements for Flavor and Presentation

For a richer flavor, try adding a pinch of sea salt to the chocolate mix. This enhances the taste and balances sweetness. You can also add a splash of coffee liqueur for depth. To make your truffles look nice, roll them in cocoa powder or chopped nuts. Arrange them on a decorative plate. A small espresso cup on the side adds a nice touch.

Variations

Flavor Variations

You can change the flavor of your truffles easily. Try adding different extracts, like almond or hazelnut. A pinch of cinnamon gives a warm touch. For a fruity twist, mix in orange or raspberry zest. You can even replace the espresso with matcha for a green tea flavor. Each variation makes a unique treat!

Different Coating Options

The coating can change your truffles’ look and taste. You can roll them in cocoa powder for a classic touch. Chopped nuts add a nice crunch. Try using shredded coconut for a tropical vibe. If you want a sweet finish, dip them in melted chocolate. The options are endless!

Dietary Modifications

Making these truffles vegan is simple. Use coconut cream instead of heavy cream. Swap dark chocolate for vegan chocolate. For gluten-free truffles, just ensure all your ingredients are gluten-free. These changes keep the flavor while meeting dietary needs. Enjoy the rich taste without worry!

Storage Info

Best Storage Practices

To keep your no-bake espresso chocolate truffles fresh, store them in an airtight container. Use parchment paper between layers to prevent sticking. Place the container in the fridge. This method keeps them cool and tasty.

Shelf Life of Truffles

When stored properly, these truffles last about one week in the fridge. After a week, they may lose flavor and texture. Always check for any signs of spoilage before enjoying.

Freezing Truffles for Longer Storage

If you want to save truffles for later, freezing works well. Place them on a baking sheet and freeze for about an hour. Once they are firm, transfer them to an airtight container. They can stay frozen for up to three months. When ready to eat, let them thaw in the fridge for a few hours.

FAQs

Can I make these truffles ahead of time?

Yes, you can make these truffles ahead of time. They stay fresh in the fridge for up to a week. Just store them in an airtight container. This makes them great for parties or gifts. You can prepare them a day or two in advance. Just remember to let them chill before serving. It gives the flavors time to blend and improves the taste.

How do I customize my truffles?

Customizing your truffles is easy and fun! You can change flavors or coatings to suit your taste. Try using flavored extracts, like almond or hazelnut, instead of vanilla. Add a touch of spice with cinnamon or chili powder for a kick. For coatings, options are endless. Roll them in crushed nuts, shredded coconut, or even colorful sprinkles. You can also mix in different types of chocolate for variety. The possibilities are truly limited only by your imagination!

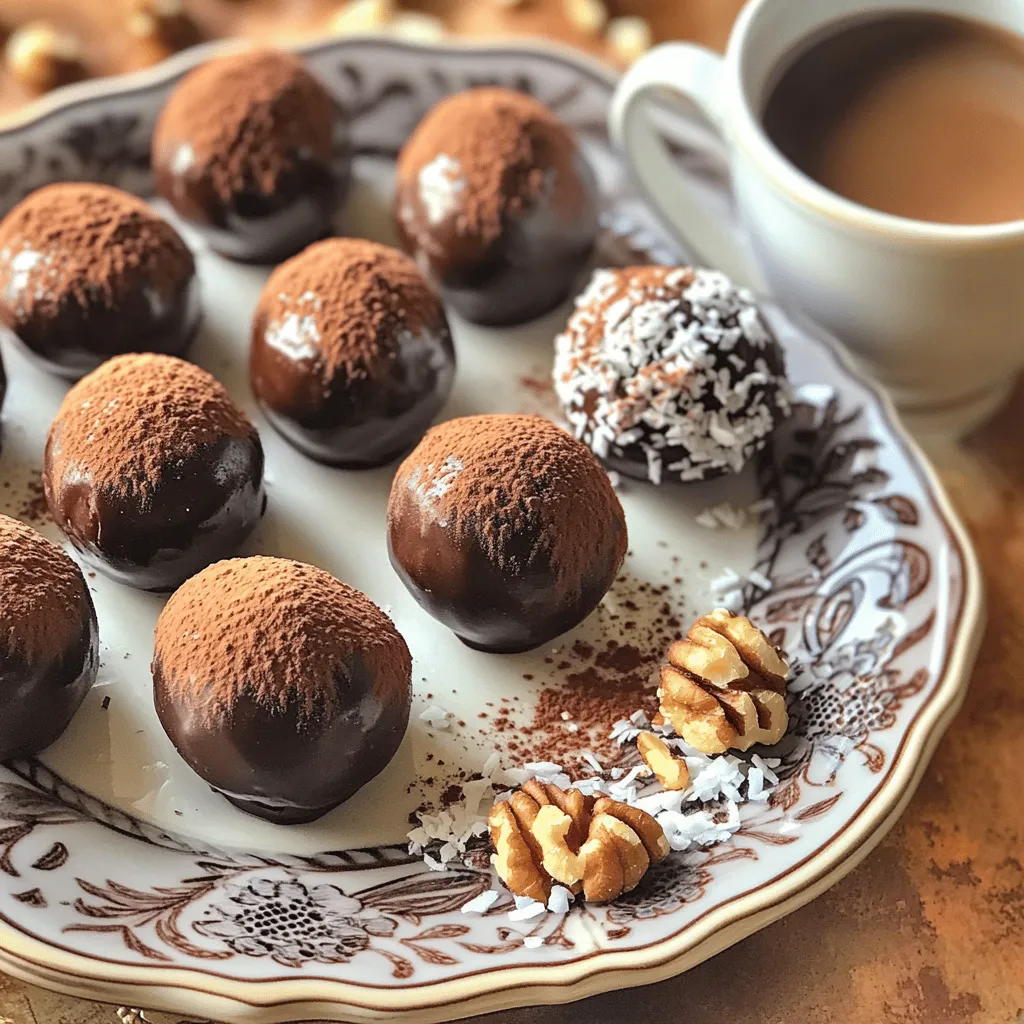
What is the best way to serve No-Bake Espresso Chocolate Truffles?

Serving these truffles is simple and delightful. Arrange them on a pretty plate for a nice display. You can sprinkle some cocoa powder on top for a touch of elegance. Pair them with a small cup of espresso or coffee for a perfect match. This enhances the coffee flavor and adds a cozy vibe. Serve them chilled or at room temperature, based on your preference. These truffles make great treats for gatherings or a sweet snack anytime!

You learned how to make No-Bake Espresso Chocolate Truffles with simple steps. We covered key ingredients, techniques, and fun variations. Remember to avoid common mistakes for the best texture. You can customize flavors and coatings to fit your taste, too. Store them well to keep them fresh. Feel free to make these truffles in advance for later. Enjoy making and sharing these tasty treats!

To make these truffles, you need the following main ingredients: - 8 oz (225g) dark chocolate, finely chopped - 1/2 cup (120ml) heavy cream - 1 tablespoon instant espresso powder - 2 tablespoons unsweetened cocoa powder - 1 teaspoon vanilla extract - A pinch of sea salt These ingredients create a rich and smooth chocolate truffle. The dark chocolate gives a deep flavor that pairs well with espresso. The heavy cream makes the truffles creamy and soft. The instant espresso powder adds a strong coffee taste, boosting the overall flavor. The cocoa powder, vanilla, and salt enhance the chocolate taste. You can roll the truffles in different coatings to add texture and flavor. Here are some great options: - Cocoa powder - Chopped nuts - Shredded coconut Choosing a coating can make your truffles unique. Cocoa powder adds a classic touch. Chopped nuts give a nice crunch, while shredded coconut adds a tropical twist. You can mix and match these coatings to suit your taste! If you want to make some swaps, here are a few ideas: - Use milk chocolate instead of dark chocolate for a sweeter taste. - Coconut cream can replace heavy cream for a dairy-free option. - Try using flavored extracts, like almond or hazelnut, for a fun twist. These substitutions help you customize the truffles to fit your needs. Always choose quality ingredients for the best flavor. With these options, you can enjoy the truffles your way! To make the base for your truffles, start with a small saucepan. Pour in the heavy cream and add the instant espresso powder and a pinch of sea salt. Heat this mixture over medium heat. Stir it gently and wait until it warms up. This should take about 2-3 minutes. Make sure the mixture does not boil; we just want it warm. Once warm, take the saucepan off the heat. Now, add the finely chopped dark chocolate into the cream mix. Let it sit for about 3-4 minutes. This allows the chocolate to melt gently. After the time is up, grab a spatula and stir the mix until it becomes smooth and shiny. Lastly, add the vanilla extract and mix it well. Now that your espresso chocolate mixture is ready, it’s time to form the truffles. First, transfer the mixture to a bowl. Cover the bowl with plastic wrap and pop it into the fridge. Let it chill for about 1-2 hours. This helps the mixture firm up. Once it is firm, use a teaspoon or a small scoop to take some chocolate mix. Roll it into a ball with your hands. Each ball should be about the size of a small marble. This step is fun, and you can involve the kids if you like! After forming the balls, it’s time for the fun part: coating them! Pick your favorite coating options. You can use cocoa powder, chopped nuts, or shredded coconut. Roll each truffle ball in your chosen coating until it is fully covered. Once coated, place the truffles on a plate or tray lined with parchment paper. Now, put them back in the fridge for another 30 minutes. This helps the coating set and makes them easier to handle. After that, your no-bake espresso chocolate truffles are ready. Enjoy them chilled or at room temperature! To get a smooth texture, use high-quality dark chocolate. The chocolate should be finely chopped before mixing. This helps it melt evenly. When heating the cream, do not let it boil. Boiling changes the texture and taste. Stir the mixture gently. This keeps it smooth and prevents air bubbles. After chilling, the mixture should be firm but not hard. One common mistake is using too much heat when melting chocolate. This can cause the chocolate to seize or become grainy. Always heat the cream slowly and stir well. Another mistake is not letting the mixture chill enough. If it’s too soft, rolling will be hard. Make sure to cover the bowl while chilling to prevent drying out. For a richer flavor, try adding a pinch of sea salt to the chocolate mix. This enhances the taste and balances sweetness. You can also add a splash of coffee liqueur for depth. To make your truffles look nice, roll them in cocoa powder or chopped nuts. Arrange them on a decorative plate. A small espresso cup on the side adds a nice touch. {{image_2}} You can change the flavor of your truffles easily. Try adding different extracts, like almond or hazelnut. A pinch of cinnamon gives a warm touch. For a fruity twist, mix in orange or raspberry zest. You can even replace the espresso with matcha for a green tea flavor. Each variation makes a unique treat! The coating can change your truffles' look and taste. You can roll them in cocoa powder for a classic touch. Chopped nuts add a nice crunch. Try using shredded coconut for a tropical vibe. If you want a sweet finish, dip them in melted chocolate. The options are endless! Making these truffles vegan is simple. Use coconut cream instead of heavy cream. Swap dark chocolate for vegan chocolate. For gluten-free truffles, just ensure all your ingredients are gluten-free. These changes keep the flavor while meeting dietary needs. Enjoy the rich taste without worry! To keep your no-bake espresso chocolate truffles fresh, store them in an airtight container. Use parchment paper between layers to prevent sticking. Place the container in the fridge. This method keeps them cool and tasty. When stored properly, these truffles last about one week in the fridge. After a week, they may lose flavor and texture. Always check for any signs of spoilage before enjoying. If you want to save truffles for later, freezing works well. Place them on a baking sheet and freeze for about an hour. Once they are firm, transfer them to an airtight container. They can stay frozen for up to three months. When ready to eat, let them thaw in the fridge for a few hours. Yes, you can make these truffles ahead of time. They stay fresh in the fridge for up to a week. Just store them in an airtight container. This makes them great for parties or gifts. You can prepare them a day or two in advance. Just remember to let them chill before serving. It gives the flavors time to blend and improves the taste. Customizing your truffles is easy and fun! You can change flavors or coatings to suit your taste. Try using flavored extracts, like almond or hazelnut, instead of vanilla. Add a touch of spice with cinnamon or chili powder for a kick. For coatings, options are endless. Roll them in crushed nuts, shredded coconut, or even colorful sprinkles. You can also mix in different types of chocolate for variety. The possibilities are truly limited only by your imagination! Serving these truffles is simple and delightful. Arrange them on a pretty plate for a nice display. You can sprinkle some cocoa powder on top for a touch of elegance. Pair them with a small cup of espresso or coffee for a perfect match. This enhances the coffee flavor and adds a cozy vibe. Serve them chilled or at room temperature, based on your preference. These truffles make great treats for gatherings or a sweet snack anytime! You learned how to make No-Bake Espresso Chocolate Truffles with simple steps. We covered key ingredients, techniques, and fun variations. Remember to avoid common mistakes for the best texture. You can customize flavors and coatings to fit your taste, too. Store them well to keep them fresh. Feel free to make these truffles in advance for later. Enjoy making and sharing these tasty treats!

No-Bake Espresso Chocolate Truffles

Indulge in the rich flavors of these No-Bake Espresso Chocolate Truffles! With just a few simple ingredients, you can create a delicious treat that's perfect for any occasion. This easy recipe combines dark chocolate, espresso, and creamy goodness to delight your taste buds. Discover how to make these mouthwatering truffles at home and impress your friends and family. Click through for the full recipe and enjoy a sweet escape!

Ingredients
  

8 oz (225g) dark chocolate, finely chopped

1/2 cup (120ml) heavy cream

1 tablespoon instant espresso powder

2 tablespoons unsweetened cocoa powder

1 teaspoon vanilla extract

A pinch of sea salt

Coating options: cocoa powder, chopped nuts, or shredded coconut

Instructions
 

In a small saucepan over medium heat, combine the heavy cream, instant espresso powder, and a pinch of sea salt. Stir until the mixture is warm and the espresso is fully dissolved, about 2-3 minutes. Do not boil.

    Remove the saucepan from heat and add the finely chopped dark chocolate to the cream mixture. Let it sit for about 3-4 minutes to allow the chocolate to melt.

      Using a spatula, gently stir the mixture until it is smooth and glossy. Add the vanilla extract and mix well.

        Transfer the mixture to a bowl, cover it with plastic wrap, and refrigerate for about 1-2 hours or until it is firm enough to handle.

          Once firm, use a teaspoon or a small scoop to portion the chocolate mixture, then roll it into balls using your hands.

            Roll each truffle ball in your choice of coating: cocoa powder, chopped nuts, or shredded coconut until fully covered.

              Place the coated truffles on a parchment-lined plate or tray and refrigerate for another 30 minutes to set.

                Serve chilled or at room temperature as a delightful treat!

                  Prep Time: 15 minutes | Total Time: 2 hours 30 minutes | Servings: 12 truffles

                    - Presentation Tips: Arrange the truffles on a decorative plate, garnish with a sprinkle of cocoa powder, and include a small espresso cup on the side for an elegant touch. Enjoy!

                      WANT TO SAVE THIS RECIPE?

                      Leave a Comment

                      Recipe Rating