Mini Pineapple Upside-Down Cakes Delightfully Sweet Treat

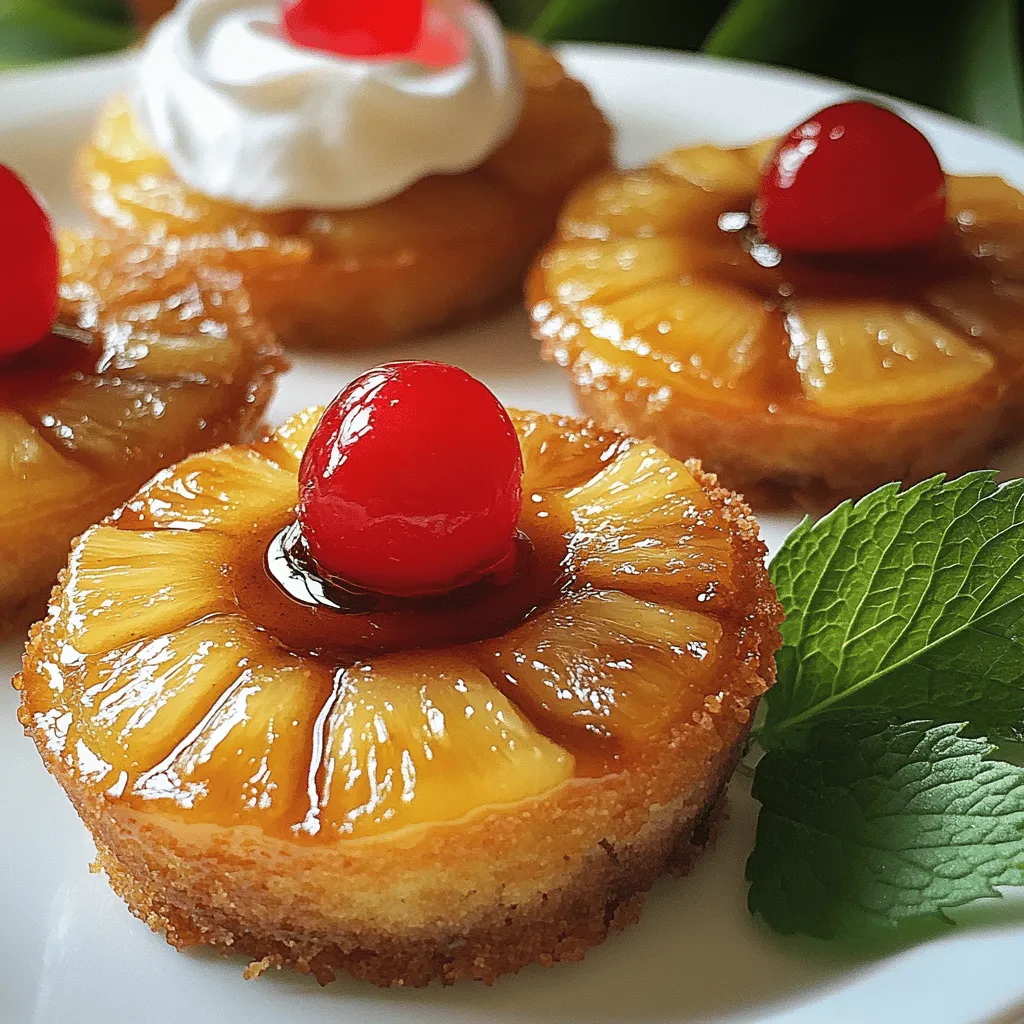
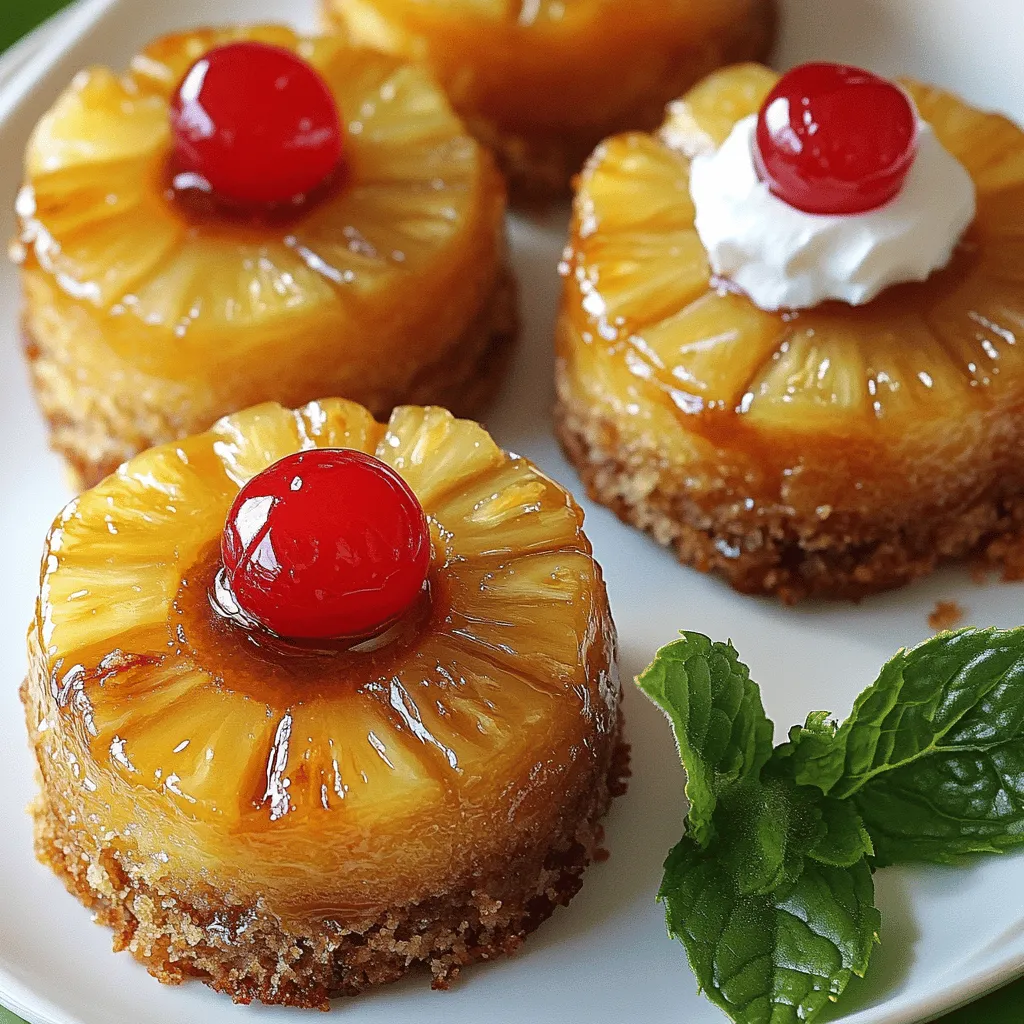
If you love classic desserts with a twist, you’ll adore these Mini Pineapple Upside-Down Cakes! They pack all the sweet, juicy flavors of the original but in adorable little portions. Whether you’re hosting a party or just want a treat for yourself, these mini delights will impress everyone. Join me as we explore simple steps, fun variations, and tasty tips to make your baking experience a breeze!

Ingredients

List of Ingredients

– 1 cup all-purpose flour

– 1/2 cup granulated sugar

– 1/2 teaspoon baking powder

– 1/4 teaspoon baking soda

– 1/4 teaspoon salt

– 1/2 cup unsalted butter, melted

– 1 large egg

– 1/4 cup milk

– 1/2 teaspoon vanilla extract

– 1 can (8 oz) pineapple slices, drained (reserve juice)

– 1/4 cup brown sugar

– Maraschino cherries for garnish

Ingredient Substitutions

For those who need alternatives, you can swap all-purpose flour with almond or oat flour. Granulated sugar can be replaced with coconut sugar or a sugar substitute like stevia. If you want a dairy-free option, use almond milk or oat milk instead of regular milk. These swaps make the recipe more flexible and still tasty!

Step-by-Step Instructions

Preparation Steps

– Preheat your oven to 350°F (175°C).

– Grease a 12-cup muffin tin with non-stick spray or butter.

– In a large bowl, whisk together:

– 1 cup all-purpose flour

– 1/2 cup granulated sugar

– 1/2 teaspoon baking powder

– 1/4 teaspoon baking soda

– 1/4 teaspoon salt

– In another bowl, mix:

– 1/2 cup melted unsalted butter

– 1 large egg

– 1/4 cup milk

– 1/2 teaspoon vanilla extract

– Stir the wet mixture into the dry mix until just combined.

Assembling the Cakes

– Spoon about 1 teaspoon of brown sugar into each muffin cup.

– Place a pineapple slice on top of the brown sugar.

– Add a maraschino cherry in the center of each pineapple slice.

– Carefully fill each cup with batter, about 3/4 full.

– Bake for 20-25 minutes. Check with a toothpick; it should come out clean.

Cooling and Serving

– After baking, allow the cakes to cool in the pan for 5 minutes.

– Run a knife around the edges to loosen each cake.

– Invert the cakes onto a serving plate.

– Let them cool for a few more minutes.

– For a lovely touch, serve warm with whipped cream and mint.

Tips & Tricks

Perfecting the Mini Cakes

Common mistakes to avoid:

Be careful not to overmix the batter. This will make your cakes tough. Also, fill each cup only three-quarters full. Overfilling can lead to messy cakes.

How to check for doneness:

Insert a toothpick into the center of a cake. If it comes out clean, your cakes are done. If not, bake them a bit longer. Keep an eye on them to avoid burning.

Enhancing Flavor

Using the reserved pineapple juice:

Use the leftover pineapple juice in your batter. This adds moisture and flavor. Mix a few tablespoons into the wet ingredients for a tasty boost.

Adding spices for extra flavor:

Try adding a pinch of cinnamon or nutmeg to your batter. These spices enhance the sweetness. They make the cakes taste even better.

Serving Suggestions

Ideal accompaniments like whipped cream:

Serve the mini cakes warm with a dollop of whipped cream. The cream balances the sweetness of the cakes. It adds a nice touch.

Creative plating ideas:

For a pretty presentation, stack the mini cakes on a plate. Drizzle some reserved pineapple juice around them. Add a mint sprig on top for color. This makes your dessert look fancy and inviting.

Variations

Fruit Alternatives

You can switch up the fruit in mini pineapple upside-down cakes. Try using peaches or berries for a fresh twist. Each fruit brings its own flavor, making your cakes unique. Mixing different fruits is another fun idea. Imagine a cake with pineapple and strawberries! The bright colors and tastes will impress everyone.

Flavor Variations

Add coconut or rum to your batter for a tropical vibe. This change gives the cakes a fun flair. You can also infuse the cakes with vanilla or almond flavors. Just a few drops can change the taste. These flavors work well with the sweetness of the fruit.

Healthier Versions

You can make these mini cakes healthier. Use lower sugar options to keep them sweet but light. For a gluten-free version, swap all-purpose flour with almond or coconut flour. If you need it dairy-free, try using almond milk instead of regular milk. These changes keep the tasty charm while catering to different diets.

Storage Info

Best Storage Practices

To keep your mini cakes fresh, store them in an airtight container. This helps keep moisture in and prevents them from drying out. If you want to keep them longer, refrigeration is a good option. Place the container in the fridge and enjoy them for up to a week. Freezing is another choice if you need to store them longer. Wrap each cake tightly in plastic wrap and then place them in a freezer bag. They can last up to three months in the freezer.

Reheating Instructions

To reheat your mini cakes, use the oven for the best results. Preheat the oven to 350°F (175°C). Place the cakes on a baking sheet and heat for about 10 minutes. You can also use the microwave, but be careful. Heat them in short bursts of 10-15 seconds to avoid drying them out. For both methods, check that they are warm all the way through. This helps keep the texture nice and soft.

Shelf Life

Mini pineapple upside-down cakes can last about a week in the fridge. If you see any mold or if they smell off, it’s best to throw them away. Signs of spoilage may include a dry texture or a change in color. If you freeze them, they can last up to three months. Just remember to check for any freezer burn before eating.

FAQs

Can I make mini pineapple upside-down cakes ahead of time?

Yes, you can make these cakes ahead of time. Bake them, cool, and store in an airtight container. They stay fresh for about two days at room temperature. For longer storage, keep them in the fridge for up to a week. You can reheat them in the oven for a warm treat.

Can I use fresh pineapple instead of canned?

Absolutely! Fresh pineapple adds vibrant flavor. Cut the pineapple into rings and slice them thick enough to hold their shape. You can use the juice from fresh pineapple in your batter for extra taste. Just make sure to drain the rings well before using them.

How can I prevent the cakes from sticking to the muffin tin?

To prevent sticking, grease your muffin tin well with non-stick spray or butter. You can also line the cups with parchment paper for extra security. Let the cakes cool for a few minutes before inverting them. This allows the sugar to harden and makes removal easier.

What’s the best way to serve these cakes warm or cold?

These mini cakes shine when served warm. A dollop of whipped cream adds a nice touch. If you prefer them cold, they still taste great, but warm cakes bring out the sweetness of the caramelized sugar and pineapple. Try them both ways!

Can I double the recipe for a larger batch?

Yes, you can easily double this recipe. Just use a larger muffin tin or two regular ones. Keep an eye on the baking time, as larger batches may need a bit longer to bake. Always check with a toothpick to see if they are done!

You now have a complete guide on making mini pineapple upside-down cakes. We covered the necessary ingredients, step-by-step instructions, and tips for success. Don’t forget the fun ways to add your twist with fruit and flavors. Remember to store them properly and enjoy at their best. This easy recipe can bring joy to any gathering. I hope you feel ready to bake delicious treats everyone will love!

- 1 cup all-purpose flour - 1/2 cup granulated sugar - 1/2 teaspoon baking powder - 1/4 teaspoon baking soda - 1/4 teaspoon salt - 1/2 cup unsalted butter, melted - 1 large egg - 1/4 cup milk - 1/2 teaspoon vanilla extract - 1 can (8 oz) pineapple slices, drained (reserve juice) - 1/4 cup brown sugar - Maraschino cherries for garnish For those who need alternatives, you can swap all-purpose flour with almond or oat flour. Granulated sugar can be replaced with coconut sugar or a sugar substitute like stevia. If you want a dairy-free option, use almond milk or oat milk instead of regular milk. These swaps make the recipe more flexible and still tasty! - Preheat your oven to 350°F (175°C). - Grease a 12-cup muffin tin with non-stick spray or butter. - In a large bowl, whisk together: - 1 cup all-purpose flour - 1/2 cup granulated sugar - 1/2 teaspoon baking powder - 1/4 teaspoon baking soda - 1/4 teaspoon salt - In another bowl, mix: - 1/2 cup melted unsalted butter - 1 large egg - 1/4 cup milk - 1/2 teaspoon vanilla extract - Stir the wet mixture into the dry mix until just combined. - Spoon about 1 teaspoon of brown sugar into each muffin cup. - Place a pineapple slice on top of the brown sugar. - Add a maraschino cherry in the center of each pineapple slice. - Carefully fill each cup with batter, about 3/4 full. - Bake for 20-25 minutes. Check with a toothpick; it should come out clean. - After baking, allow the cakes to cool in the pan for 5 minutes. - Run a knife around the edges to loosen each cake. - Invert the cakes onto a serving plate. - Let them cool for a few more minutes. - For a lovely touch, serve warm with whipped cream and mint. - Common mistakes to avoid: Be careful not to overmix the batter. This will make your cakes tough. Also, fill each cup only three-quarters full. Overfilling can lead to messy cakes. - How to check for doneness: Insert a toothpick into the center of a cake. If it comes out clean, your cakes are done. If not, bake them a bit longer. Keep an eye on them to avoid burning. - Using the reserved pineapple juice: Use the leftover pineapple juice in your batter. This adds moisture and flavor. Mix a few tablespoons into the wet ingredients for a tasty boost. - Adding spices for extra flavor: Try adding a pinch of cinnamon or nutmeg to your batter. These spices enhance the sweetness. They make the cakes taste even better. - Ideal accompaniments like whipped cream: Serve the mini cakes warm with a dollop of whipped cream. The cream balances the sweetness of the cakes. It adds a nice touch. - Creative plating ideas: For a pretty presentation, stack the mini cakes on a plate. Drizzle some reserved pineapple juice around them. Add a mint sprig on top for color. This makes your dessert look fancy and inviting. {{image_2}} You can switch up the fruit in mini pineapple upside-down cakes. Try using peaches or berries for a fresh twist. Each fruit brings its own flavor, making your cakes unique. Mixing different fruits is another fun idea. Imagine a cake with pineapple and strawberries! The bright colors and tastes will impress everyone. Add coconut or rum to your batter for a tropical vibe. This change gives the cakes a fun flair. You can also infuse the cakes with vanilla or almond flavors. Just a few drops can change the taste. These flavors work well with the sweetness of the fruit. You can make these mini cakes healthier. Use lower sugar options to keep them sweet but light. For a gluten-free version, swap all-purpose flour with almond or coconut flour. If you need it dairy-free, try using almond milk instead of regular milk. These changes keep the tasty charm while catering to different diets. To keep your mini cakes fresh, store them in an airtight container. This helps keep moisture in and prevents them from drying out. If you want to keep them longer, refrigeration is a good option. Place the container in the fridge and enjoy them for up to a week. Freezing is another choice if you need to store them longer. Wrap each cake tightly in plastic wrap and then place them in a freezer bag. They can last up to three months in the freezer. To reheat your mini cakes, use the oven for the best results. Preheat the oven to 350°F (175°C). Place the cakes on a baking sheet and heat for about 10 minutes. You can also use the microwave, but be careful. Heat them in short bursts of 10-15 seconds to avoid drying them out. For both methods, check that they are warm all the way through. This helps keep the texture nice and soft. Mini pineapple upside-down cakes can last about a week in the fridge. If you see any mold or if they smell off, it’s best to throw them away. Signs of spoilage may include a dry texture or a change in color. If you freeze them, they can last up to three months. Just remember to check for any freezer burn before eating. Yes, you can make these cakes ahead of time. Bake them, cool, and store in an airtight container. They stay fresh for about two days at room temperature. For longer storage, keep them in the fridge for up to a week. You can reheat them in the oven for a warm treat. Absolutely! Fresh pineapple adds vibrant flavor. Cut the pineapple into rings and slice them thick enough to hold their shape. You can use the juice from fresh pineapple in your batter for extra taste. Just make sure to drain the rings well before using them. To prevent sticking, grease your muffin tin well with non-stick spray or butter. You can also line the cups with parchment paper for extra security. Let the cakes cool for a few minutes before inverting them. This allows the sugar to harden and makes removal easier. These mini cakes shine when served warm. A dollop of whipped cream adds a nice touch. If you prefer them cold, they still taste great, but warm cakes bring out the sweetness of the caramelized sugar and pineapple. Try them both ways! Yes, you can easily double this recipe. Just use a larger muffin tin or two regular ones. Keep an eye on the baking time, as larger batches may need a bit longer to bake. Always check with a toothpick to see if they are done! You now have a complete guide on making mini pineapple upside-down cakes. We covered the necessary ingredients, step-by-step instructions, and tips for success. Don't forget the fun ways to add your twist with fruit and flavors. Remember to store them properly and enjoy at their best. This easy recipe can bring joy to any gathering. I hope you feel ready to bake delicious treats everyone will love!

Mini Pineapple Upside-Down Cakes

Delight your taste buds with these Mini Pineapple Upside-Down Cakes! Perfect for any occasion, these mini treats combine fluffy cake with sweet pineapple and a touch of brown sugar. With simple ingredients and easy steps, you’ll whip up a batch in no time. Ideal for parties or a cozy dessert after dinner. Click through to explore this delicious recipe and impress your friends and family with your baking skills!

Ingredients
  

1 cup all-purpose flour

1/2 cup granulated sugar

1/2 teaspoon baking powder

1/4 teaspoon baking soda

1/4 teaspoon salt

1/2 cup unsalted butter, melted

1 large egg

1/4 cup milk

1/2 teaspoon vanilla extract

1 can (8 oz) pineapple slices, drained (reserve juice)

1/4 cup brown sugar

Maraschino cherries for garnish

Instructions
 

Preheat your oven to 350°F (175°C) and grease a muffin tin (12-cup) with non-stick spray or butter.

    In a large bowl, whisk together the flour, granulated sugar, baking powder, baking soda, and salt until well combined.

      In another bowl, mix the melted butter, egg, milk, and vanilla extract until smooth. Slowly add this mixture to the dry ingredients and stir until just combined.

        In the muffin tin, sprinkle about 1 teaspoon of brown sugar into the bottom of each cup.

          Place a pineapple slice on top of the brown sugar in each cup, adding a maraschino cherry to the center of each slice for a pop of color.

            Spoon the batter evenly over the pineapple slices, filling each cup about 3/4 full.

              Bake in the preheated oven for 20-25 minutes, or until a toothpick inserted into the center comes out clean.

                Remove the cakes from the oven and let them cool for about 5 minutes. Carefully run a knife around the edges to loosen and then invert them onto a serving plate.

                  Allow the cakes to cool for a few more minutes before serving, allowing the pineapple and brown sugar topping to glisten.

                    Prep Time: 15 min | Total Time: 40 min | Servings: 12

                      - Presentation Tips: Serve mini cakes warm with a dollop of whipped cream and a sprig of mint on top for an elegant finish.

                        Leave a Comment

                        Recipe Rating