Maple Brown Butter Rice Krispie Treats Irresistible Snack

WANT TO SAVE THIS RECIPE?

If you love sweet, gooey snacks, you’re in for a treat! Maple Brown Butter Rice Krispie Treats are not just any dessert; they are a step above the classic. The rich flavor of browned butter, combined with mellow maple, makes this snack irresistibly delicious. In this article, I’ll show you how to make these easy treats, share helpful tips, and explore fun variations. Let’s get started on your new favorite treat!

Ingredients

Key Ingredients for Maple Brown Butter Rice Krispie Treats

For these treats, you need simple, tasty ingredients. Here’s what you will need:

– 4 tablespoons unsalted butter

– 1/2 cup maple syrup

– 1 package (10 oz) mini marshmallows

– 6 cups Rice Krispies cereal

– 1/4 teaspoon sea salt

– 1/2 teaspoon vanilla extract

These ingredients create a sweet, chewy snack with a lovely nutty flavor. The brown butter is the star here. It adds depth and richness. Maple syrup brings sweetness that pairs perfectly with the butter.

Optional Add-ins for Extra Flavor and Texture

You can add fun extras to make your treats even better. Here are some ideas:

– 1/4 cup chopped pecans or walnuts for crunch

– A sprinkle of cinnamon for warmth

– Mini chocolate chips for a sweet twist

These add-ins can give your treats a special touch. They add both texture and flavor. Feel free to mix and match based on what you like!

Substitutions and Alternatives

If you need to swap out some ingredients, here are some easy options:

– Use coconut oil instead of butter for a dairy-free version.

– Try agave syrup or honey instead of maple syrup for a different taste.

– Swap Rice Krispies with another puffed grain, like puffed rice or corn.

These substitutions can fit your needs and still taste great. Don’t hesitate to get creative!

Step-by-Step Instructions

Detailed Instructions for Preparing Brown Butter

To make brown butter, start with unsalted butter. Place four tablespoons in a medium saucepan over medium heat. As the butter melts, stir it often. This step helps it cook evenly. Keep an eye on the color. After about four to five minutes, you’ll see the butter turn golden brown. It will also give off a nutty scent. This is the key to great flavor. Be careful not to let it burn. Once it’s golden, take the pan off the heat.

How to Combine and Melt Ingredients

Next, add half a cup of maple syrup and a quarter teaspoon of sea salt to the browned butter. Stir it well until everything mixes together smoothly. Return the pan to low heat and add the mini marshmallows. Keep stirring until they melt completely. This should take a few minutes. You want a smooth mixture with no lumps. Once melted, remove it from the heat and stir in half a teaspoon of vanilla extract.

Now, it’s time to add the Rice Krispies. Gradually fold in six cups of the cereal. Make sure every piece gets coated in the marshmallow mix. If you want more crunch, add a quarter cup of chopped pecans or walnuts at this stage.

Tips for Shaping and Pressing the Treats

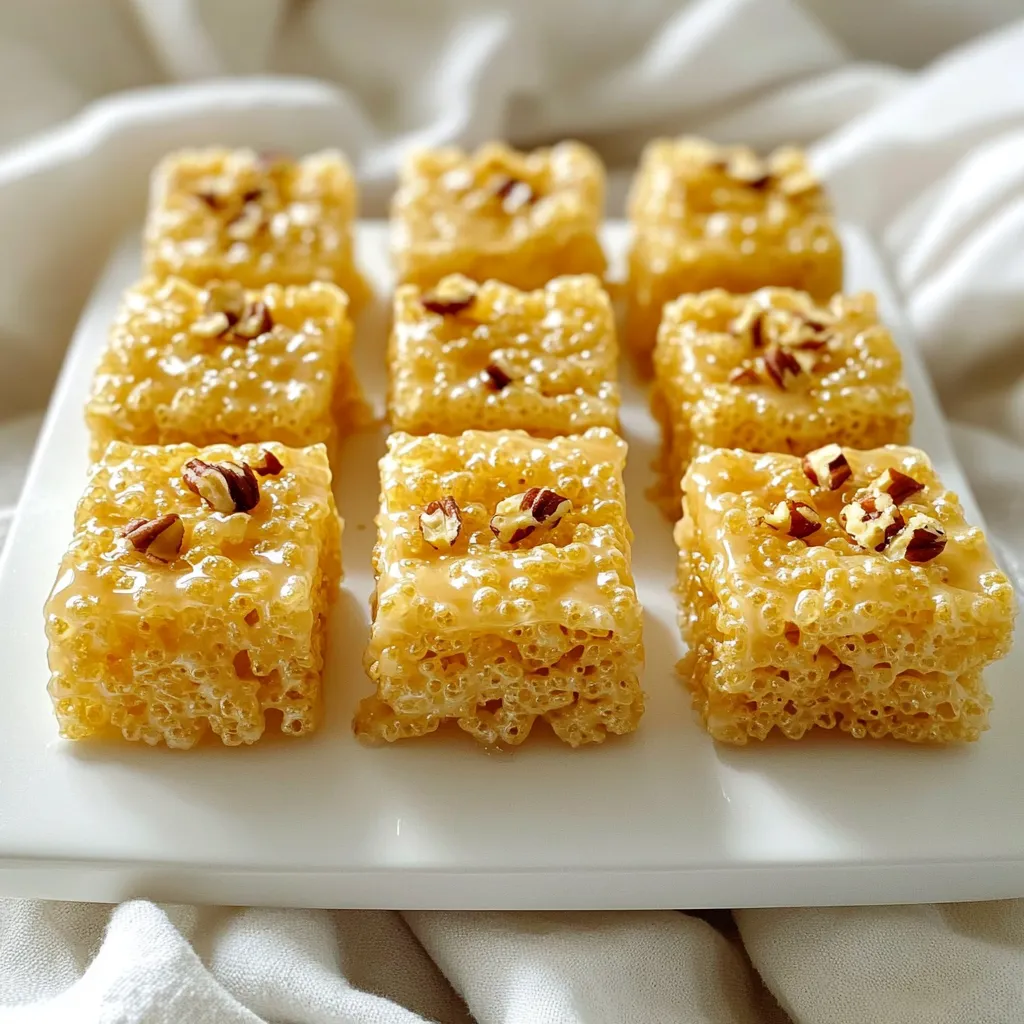
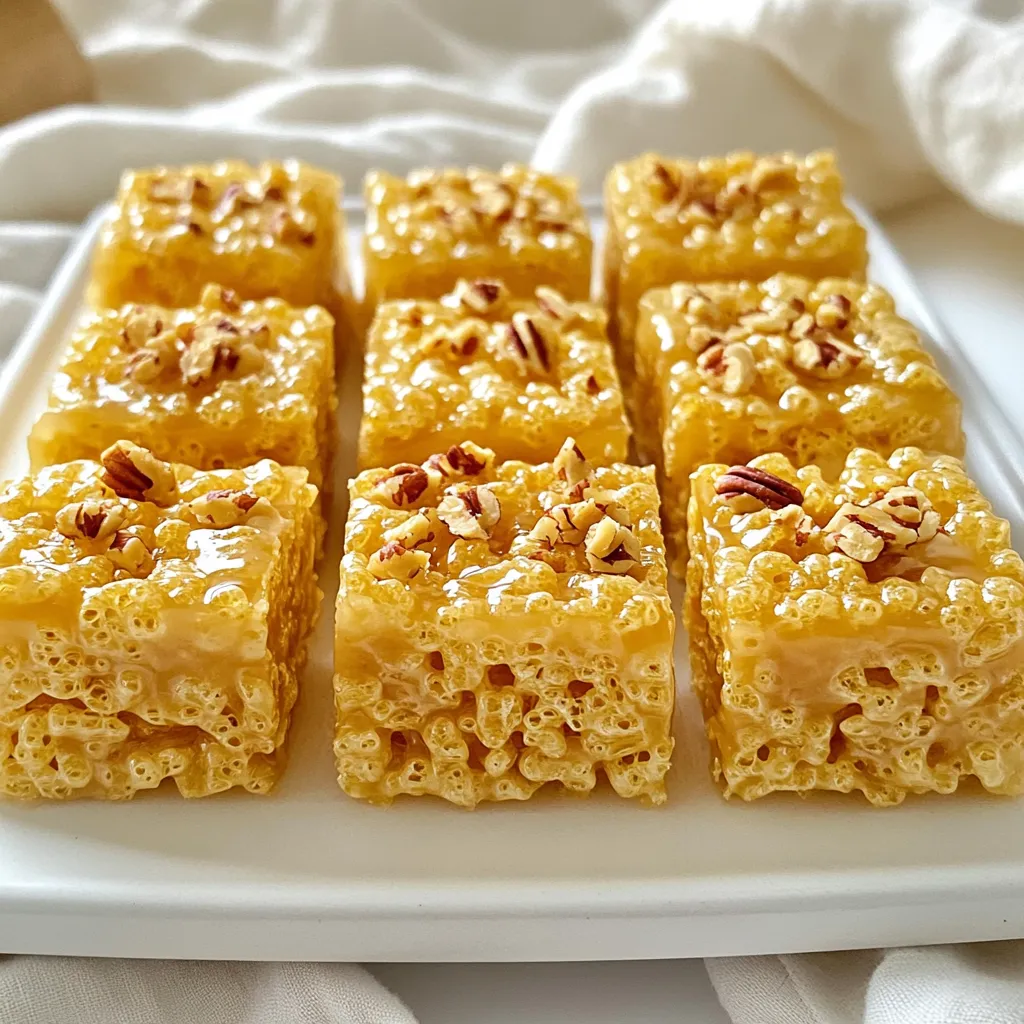
To shape your treats, grab a greased 9×13-inch baking dish. Pour the mixture into the dish. Use a slightly damp spatula or your greased hands to press it evenly. This helps avoid sticking. Press it down gently but firmly. You want a nice, flat surface. Let the treats cool at room temperature for about 30 minutes. When they are set, you can cut them into squares or rectangles. Enjoy your Maple Brown Butter Rice Krispie Treats!

Tips & Tricks

Best Practices for Browning Butter

Browning butter adds a rich, nutty flavor to your treats. First, use a light-colored pan. This allows you to see the butter’s color change. Melt the butter over medium heat. Stir it often to prevent burning. Watch for a golden hue and a nutty smell. This process takes about 4-5 minutes. If you see dark bits, remove the pan from heat. These bits can taste bitter.

How to Avoid Sticky Treats

Sticky treats can be a hassle. To prevent this, grease your hands and tools. Use a bit of butter or cooking spray on your spatula. When mixing, fold gently to coat the cereal without crushing it. Press the mixture into the pan firmly but not too hard. This helps them hold their shape. Let them cool completely before cutting. This ensures they set well and are less sticky.

Enhancing Flavor with Variations

You can play with flavors to make your treats unique. Try adding a pinch of cinnamon or nutmeg for warmth. Swap maple syrup with honey for a different sweetness. For crunch, mix in chopped pecans, walnuts, or even chocolate chips. You can also add a splash of almond or coconut extract for more depth. Each variation makes a tasty twist on the classic treat.

Variations

Different Nut Options and Other Add-ins

You can change the texture of your treats by adding nuts. Pecans and walnuts work great. They add crunch and flavor. You can also try almonds or cashews for a twist. If you want extra sweetness, consider adding mini chocolate chips or dried fruit. Raisins or cranberries can add a nice touch.

Making Vegan or Gluten-Free Rice Krispie Treats

To make vegan treats, swap the butter for coconut oil or vegan butter. Use vegan marshmallows to keep them dairy-free. For gluten-free options, check the Rice Krispies label. Some brands offer gluten-free cereal. This way, everyone can enjoy these delicious snacks.

Creative Flavor Infusions using Extracts

You can bring new life to your treats by adding extracts. A little almond or maple extract can enhance the flavor. Just a few drops go a long way. If you like spice, try adding a pinch of cinnamon or nutmeg. This adds warmth and a hint of fall to your treats.

Storage Info

How to Store Maple Brown Butter Rice Krispie Treats

To keep your Maple Brown Butter Rice Krispie Treats fresh, store them in an airtight container. This container should be at room temperature. Make sure they are completely cool before sealing them. This helps keep their texture just right.

Best Practices for Keeping Treats Fresh

Here are some tips to keep your treats fresh:

Layer with Parchment Paper: If you stack them, place parchment paper between layers. This prevents them from sticking together.

Avoid Heat and Moisture: Store them in a cool, dry place. Heat and moisture can make them soggy.

Check for Freshness: Always check for any off smells or changes in texture before eating.

Freezing and Reheating Instructions

You can freeze your Rice Krispie Treats to enjoy later. To do this:

1. Wrap Individually: Wrap each treat in plastic wrap or foil. This prevents freezer burn.

2. Store in a Bag: Place the wrapped treats in a freezer bag. Squeeze out as much air as possible before sealing.

3. Freeze for Up to 3 Months: They can stay fresh in the freezer for up to three months.

To reheat, just take a treat out and let it thaw at room temperature. If you want to warm it up, place it in the microwave for a few seconds. This will make it soft and gooey again, just like when you first made it.

FAQs

How long do Rice Krispie Treats stay fresh?

Rice Krispie Treats stay fresh for about a week. Store them in an airtight container. This helps keep them soft and chewy. If you notice them getting hard, they may need a little moisture. You can add a slice of bread to the container. This will help keep them fresh for longer.

Can I use regular butter instead of brown butter?

Yes, you can use regular butter. However, brown butter adds a rich, nutty flavor. It gives your treats an extra depth that plain butter won’t provide. If you’re in a hurry, regular butter can work in a pinch. Just melt it as you normally would and follow the rest of the recipe.

What can I do if my mixture is too sticky?

If your mixture is too sticky, try these tips. First, let it cool a bit before shaping. If it’s still too sticky, you can lightly grease your hands. This will help you press the mixture into the pan without sticking. You can also sprinkle a bit of powdered sugar on your hands. This can help with stickiness too.

In this article, we explored how to make Maple Brown Butter Rice Krispie Treats. We discussed key ingredients, step-by-step instructions, and helpful tips. I shared variations like nut options and gluten-free choices. Lastly, we covered storage methods to keep your treats fresh.

Remember, cooking is about trying new things. So go ahead, mix it up and enjoy your treats!

For these treats, you need simple, tasty ingredients. Here’s what you will need: - 4 tablespoons unsalted butter - 1/2 cup maple syrup - 1 package (10 oz) mini marshmallows - 6 cups Rice Krispies cereal - 1/4 teaspoon sea salt - 1/2 teaspoon vanilla extract These ingredients create a sweet, chewy snack with a lovely nutty flavor. The brown butter is the star here. It adds depth and richness. Maple syrup brings sweetness that pairs perfectly with the butter. You can add fun extras to make your treats even better. Here are some ideas: - 1/4 cup chopped pecans or walnuts for crunch - A sprinkle of cinnamon for warmth - Mini chocolate chips for a sweet twist These add-ins can give your treats a special touch. They add both texture and flavor. Feel free to mix and match based on what you like! If you need to swap out some ingredients, here are some easy options: - Use coconut oil instead of butter for a dairy-free version. - Try agave syrup or honey instead of maple syrup for a different taste. - Swap Rice Krispies with another puffed grain, like puffed rice or corn. These substitutions can fit your needs and still taste great. Don't hesitate to get creative! To make brown butter, start with unsalted butter. Place four tablespoons in a medium saucepan over medium heat. As the butter melts, stir it often. This step helps it cook evenly. Keep an eye on the color. After about four to five minutes, you’ll see the butter turn golden brown. It will also give off a nutty scent. This is the key to great flavor. Be careful not to let it burn. Once it's golden, take the pan off the heat. Next, add half a cup of maple syrup and a quarter teaspoon of sea salt to the browned butter. Stir it well until everything mixes together smoothly. Return the pan to low heat and add the mini marshmallows. Keep stirring until they melt completely. This should take a few minutes. You want a smooth mixture with no lumps. Once melted, remove it from the heat and stir in half a teaspoon of vanilla extract. Now, it’s time to add the Rice Krispies. Gradually fold in six cups of the cereal. Make sure every piece gets coated in the marshmallow mix. If you want more crunch, add a quarter cup of chopped pecans or walnuts at this stage. To shape your treats, grab a greased 9x13-inch baking dish. Pour the mixture into the dish. Use a slightly damp spatula or your greased hands to press it evenly. This helps avoid sticking. Press it down gently but firmly. You want a nice, flat surface. Let the treats cool at room temperature for about 30 minutes. When they are set, you can cut them into squares or rectangles. Enjoy your Maple Brown Butter Rice Krispie Treats! Browning butter adds a rich, nutty flavor to your treats. First, use a light-colored pan. This allows you to see the butter's color change. Melt the butter over medium heat. Stir it often to prevent burning. Watch for a golden hue and a nutty smell. This process takes about 4-5 minutes. If you see dark bits, remove the pan from heat. These bits can taste bitter. Sticky treats can be a hassle. To prevent this, grease your hands and tools. Use a bit of butter or cooking spray on your spatula. When mixing, fold gently to coat the cereal without crushing it. Press the mixture into the pan firmly but not too hard. This helps them hold their shape. Let them cool completely before cutting. This ensures they set well and are less sticky. You can play with flavors to make your treats unique. Try adding a pinch of cinnamon or nutmeg for warmth. Swap maple syrup with honey for a different sweetness. For crunch, mix in chopped pecans, walnuts, or even chocolate chips. You can also add a splash of almond or coconut extract for more depth. Each variation makes a tasty twist on the classic treat. {{image_2}} You can change the texture of your treats by adding nuts. Pecans and walnuts work great. They add crunch and flavor. You can also try almonds or cashews for a twist. If you want extra sweetness, consider adding mini chocolate chips or dried fruit. Raisins or cranberries can add a nice touch. To make vegan treats, swap the butter for coconut oil or vegan butter. Use vegan marshmallows to keep them dairy-free. For gluten-free options, check the Rice Krispies label. Some brands offer gluten-free cereal. This way, everyone can enjoy these delicious snacks. You can bring new life to your treats by adding extracts. A little almond or maple extract can enhance the flavor. Just a few drops go a long way. If you like spice, try adding a pinch of cinnamon or nutmeg. This adds warmth and a hint of fall to your treats. To keep your Maple Brown Butter Rice Krispie Treats fresh, store them in an airtight container. This container should be at room temperature. Make sure they are completely cool before sealing them. This helps keep their texture just right. Here are some tips to keep your treats fresh: - Layer with Parchment Paper: If you stack them, place parchment paper between layers. This prevents them from sticking together. - Avoid Heat and Moisture: Store them in a cool, dry place. Heat and moisture can make them soggy. - Check for Freshness: Always check for any off smells or changes in texture before eating. You can freeze your Rice Krispie Treats to enjoy later. To do this: 1. Wrap Individually: Wrap each treat in plastic wrap or foil. This prevents freezer burn. 2. Store in a Bag: Place the wrapped treats in a freezer bag. Squeeze out as much air as possible before sealing. 3. Freeze for Up to 3 Months: They can stay fresh in the freezer for up to three months. To reheat, just take a treat out and let it thaw at room temperature. If you want to warm it up, place it in the microwave for a few seconds. This will make it soft and gooey again, just like when you first made it. Rice Krispie Treats stay fresh for about a week. Store them in an airtight container. This helps keep them soft and chewy. If you notice them getting hard, they may need a little moisture. You can add a slice of bread to the container. This will help keep them fresh for longer. Yes, you can use regular butter. However, brown butter adds a rich, nutty flavor. It gives your treats an extra depth that plain butter won't provide. If you're in a hurry, regular butter can work in a pinch. Just melt it as you normally would and follow the rest of the recipe. If your mixture is too sticky, try these tips. First, let it cool a bit before shaping. If it’s still too sticky, you can lightly grease your hands. This will help you press the mixture into the pan without sticking. You can also sprinkle a bit of powdered sugar on your hands. This can help with stickiness too. In this article, we explored how to make Maple Brown Butter Rice Krispie Treats. We discussed key ingredients, step-by-step instructions, and helpful tips. I shared variations like nut options and gluten-free choices. Lastly, we covered storage methods to keep your treats fresh. Remember, cooking is about trying new things. So go ahead, mix it up and enjoy your treats!

Maple Brown Butter Rice Krispie Treats

Indulge in the deliciousness of Maple Brown Butter Rice Krispie Treats! This easy recipe combines the rich flavors of browned butter and maple syrup with classic Rice Krispies for a delightful twist on a beloved treat. Perfect for snack time or a sweet dessert, these treats are sure to impress! Click through to discover the full recipe and customize with crunchy nuts if you like. #RiceKrispieTreats #MapleDesserts #SweetTreats #BakingFun

Ingredients
  

4 tablespoons unsalted butter

1/2 cup maple syrup

1 package (10 oz) mini marshmallows

6 cups Rice Krispies cereal

1/4 teaspoon sea salt

1/2 teaspoon vanilla extract

Optional: 1/4 cup chopped pecans or walnuts for added crunch

Instructions
 

Brown the Butter: In a medium saucepan, melt the unsalted butter over medium heat. Continue to cook, stirring frequently, until the butter turns golden brown and has a nutty aroma (about 4-5 minutes). Be careful not to burn it!

    Add Maple Syrup: Once the butter is browned, remove it from heat and stir in the maple syrup and sea salt. Mix well until combined.

      Melt Marshmallows: Return the pan to low heat, and add the mini marshmallows. Stir continuously until the marshmallows are completely melted and the mixture is smooth.

        Combine with Rice Krispies: Remove from heat and immediately stir in the vanilla extract. Gradually add in the Rice Krispies cereal, folding gently until all the cereal is coated with the marshmallow mixture. If desired, fold in the chopped nuts for extra texture.

          Shape the Treats: Press the mixture evenly into a greased 9x13-inch baking dish. Use a slightly damp spatula or your hands (greased with a little butter) to flatten the mixture without sticking.

            Cool and Cut: Allow the treats to cool at room temperature for about 30 minutes. Once set, cut into squares or rectangles as preferred.

              Prep Time: 10 minutes | Total Time: 40 minutes | Servings: 12-15 squares

                WANT TO SAVE THIS RECIPE?

                Leave a Comment

                Recipe Rating