Are you ready to elevate your side dishes? In this post, I’ll share my simple and tasty recipe for Honey Butter Skillet Corn. This dish is a perfect blend of sweet and savory, and it only takes a few minutes to make! Whether you use fresh or canned corn, you’ll discover easy steps, helpful tips, and fun variations. Let’s get cooking and bring some joy to your table!
Why I Love This Recipe
- Deliciously Sweet and Savory: The combination of honey and butter creates a delightful balance of sweetness and richness that elevates the natural flavors of the corn.
- Quick and Easy Preparation: This recipe comes together in under 20 minutes, making it perfect for a busy weeknight or a last-minute side dish.
- Versatile Ingredient: Fresh corn is a seasonal treat, but this recipe also works well with canned corn, making it accessible year-round.
- Bright and Flavorful Finish: The addition of lime zest and fresh parsley adds a refreshing twist and a pop of color to the dish, making it visually appealing.
Ingredients
Fresh Corn vs. Canned Corn
You can use fresh corn or canned corn for this dish. Fresh corn gives a sweeter taste and a nice crunch. I love using 4 cups of fresh corn kernels. If you choose canned corn, use 2 cans of sweet corn. Just make sure to drain them well. Both options work great, but I prefer fresh when it's in season.
Essential Ingredients for Honey Butter Skillet Corn
Here are the main ingredients you need:
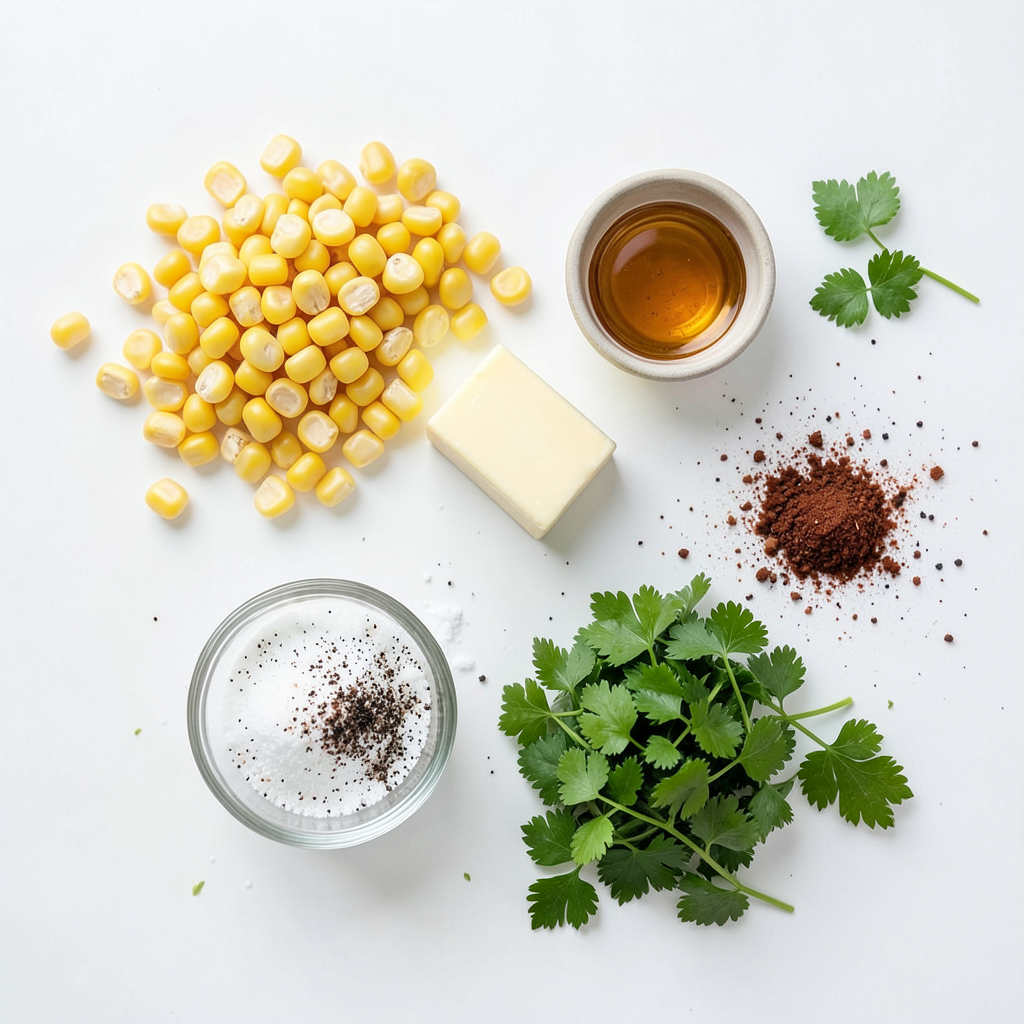
- 4 cups fresh corn kernels (or 2 cans of sweet corn, drained)
- 3 tablespoons unsalted butter
- 2 tablespoons honey
- 1 teaspoon salt
- 1/2 teaspoon black pepper
These ingredients come together to create a sweet and savory dish. The butter adds richness, while honey gives that lovely sweetness. The salt and pepper balance the flavors perfectly.
Optional Ingredients for Added Flavor
You can enhance your skillet corn with a few optional ingredients:
- 1/4 teaspoon smoked paprika (for a smoky flavor)
- 2 tablespoons fresh chopped parsley (for garnish)
- Zest of 1 lime (for a refreshing twist)
Adding smoked paprika gives a nice depth to the corn. The lime zest brings a bright flavor that lifts the dish. Fresh parsley adds color and freshness. You can mix and match these for your taste!
Step-by-Step Instructions
Preparing the Skillet
First, grab a large skillet. Place it on the stove over medium heat. Add three tablespoons of unsalted butter. Watch the butter melt and bubble. This is the start of something delicious!
Cooking the Corn: Timing Matters
Next, it's time to add the corn. If you use fresh corn, add it right after the butter melts. If you go with canned corn, wait until the butter begins to brown. Stir the corn in the butter for even coating. Cook for about 5-7 minutes. Keep stirring occasionally. You want the corn tender and slightly caramelized.
Final Touches and Garnishing
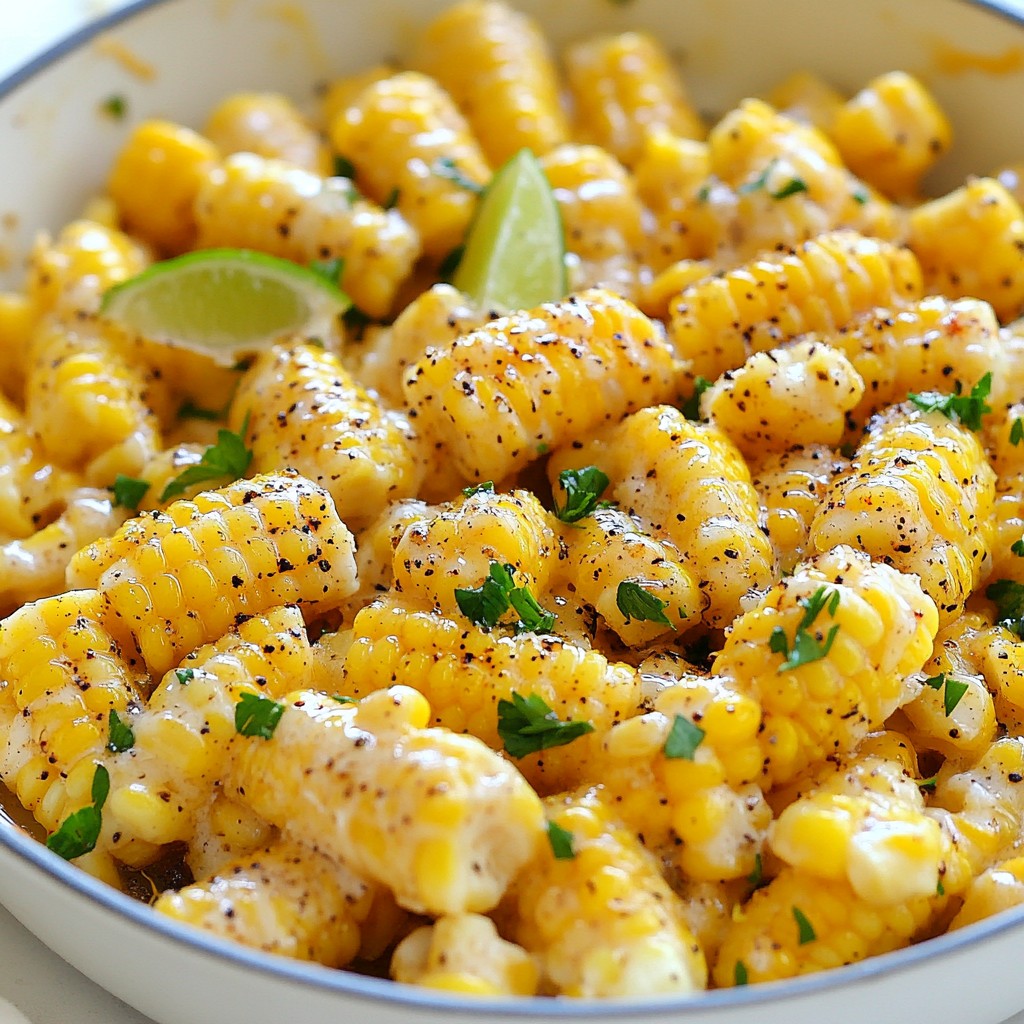
Now, lower the heat to low. Drizzle in two tablespoons of honey. Sprinkle in one teaspoon of salt, half a teaspoon of black pepper, and smoked paprika if you want a smoky kick. Stir well to mix everything. Remove the skillet from the heat. For a bright flavor, zest one lime over the corn. Finally, sprinkle fresh chopped parsley on top. This adds color and freshness. Serve right from the skillet or a nice bowl. Enjoy your tasty honey butter skillet corn!
Tips & Tricks
Achieving the Perfect Caramelization
To get that nice caramel color, use fresh corn. When you melt the butter, let it bubble a bit. Add the corn and cook for 5-7 minutes. Stir often to avoid burning. You want the corn to brown slightly. This step brings out the natural sweetness. If you use canned corn, add it when the butter is bubbling.
Adjusting Sweetness and Seasoning
Taste your corn as you cook. Honey adds sweetness, but you can adjust it. Start with 2 tablespoons of honey. If you want it sweeter, add a bit more. You can also play with salt and pepper. If you like spice, try adding smoked paprika. It adds a rich, smoky flavor that pairs well with the sweet corn.
Making Ahead and Reheating Tips
You can make this dish ahead of time. Cook it, then let it cool. Store it in an airtight container. When you are ready to eat, reheat it on the stove. Add a splash of water if it seems dry. Stir until it is heated through. This keeps the corn juicy and delicious.
Pro Tips
- Fresh Corn is Best: Using fresh corn kernels will provide the sweetest and most vibrant flavor. If you can, opt for fresh corn on the cob, which you can cut off just before cooking.
- Adjust the Sweetness: Feel free to adjust the amount of honey based on your taste preference. Start with less and add more as needed to achieve your desired sweetness.
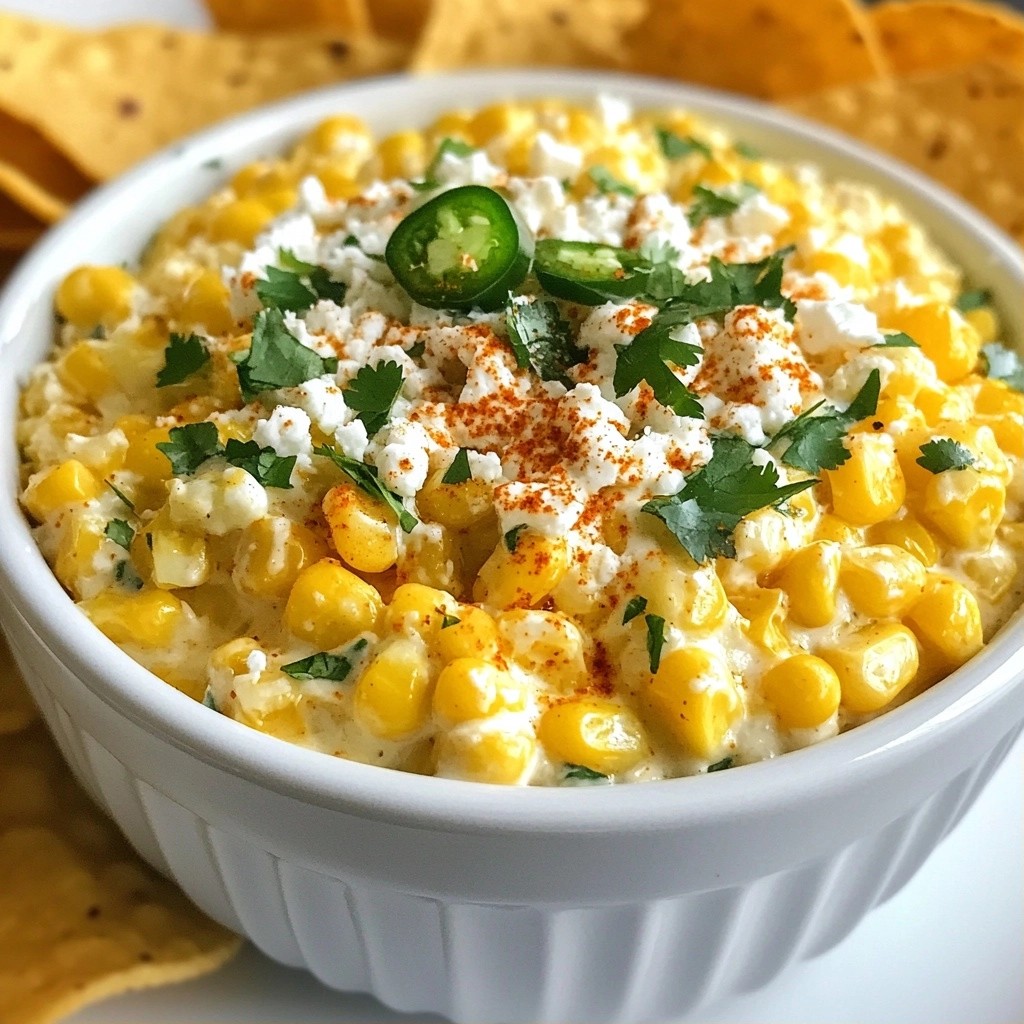
- Enhance with Cheese: For an added layer of flavor, sprinkle some crumbled feta or cotija cheese on top of the corn just before serving for a delicious creamy finish.
- Perfectly Caramelized Corn: Allow the corn to get slightly browned for deeper flavor. Keep the heat medium to avoid burning, stirring occasionally to ensure even cooking.
Variations
Adding Spices for Extra Flavor
Want to spice up your honey butter skillet corn? You can add a range of spices to make it unique. Try adding a pinch of cayenne pepper for heat. If you love a smoky flavor, use smoked paprika. You can also add garlic powder or onion powder for a savory twist. Just remember, start small. You can always add more.
Incorporating Other Vegetables
Mixing in other vegetables can add great taste and color. Sweet bell peppers or diced zucchini work well. You can also try adding cherry tomatoes for a burst of flavor. Just sauté them along with the corn. This makes your dish not only tasty but more nutritious.
Serving Suggestions and Pairings
Honey butter skillet corn pairs well with many meals. Serve it alongside grilled chicken or fish for a complete plate. You can also enjoy it with tacos or BBQ dishes. For a fun twist, top it with crumbled feta or avocado slices. This dish is perfect for summer cookouts or family dinners. Serve it warm for the best taste!
Storage Info
How to Store Leftovers
To store leftover Honey Butter Skillet Corn, let it cool first. Place the corn in an airtight container. This helps keep it fresh. You can store it in the fridge for up to three days. If you want to save it longer, consider freezing it.
Reheating Instructions
When you're ready to enjoy your leftovers, reheating is easy. You can use the microwave or a skillet. If using the microwave, heat in short bursts. Stir well between heats to avoid hot spots. If using a skillet, add a little butter or oil. Heat over low until warm.
Freezing Honey Butter Skillet Corn
Freezing this dish is a great option. After cooling, pack the corn in freezer-safe bags. Remove as much air as possible to prevent freezer burn. Label the bags with the date. You can freeze it for up to three months. When ready to eat, thaw it in the fridge overnight before reheating.
FAQs
What can I substitute for honey?
You can use maple syrup instead of honey. Both add sweetness. Agave nectar works well too. These substitutes keep the taste similar. They add a nice touch to the corn.
Can I use frozen corn instead?
Yes, frozen corn is a great option. It saves time and is easy to use. Just thaw it before cooking. Add it to the skillet like you would with fresh corn. You still get a tasty dish.
How do I make this dish vegan?
To make this dish vegan, swap the butter for vegan butter. Use maple syrup instead of honey. This keeps the dish rich and sweet. You won’t miss the dairy!
What is the best type of skillet to use?
A cast-iron skillet works best for this recipe. It heats evenly and holds heat well. Non-stick skillets are good too. They make for easy stirring and cleanup.
How can I spice things up?
Add spices like cayenne pepper for heat. A pinch of chili powder adds depth. You can also include fresh herbs like cilantro. These add a nice twist to the flavor.
In this post, we explored how to make delicious Honey Butter Skillet Corn. We looked at fresh versus canned corn, essential ingredients, and cooking tips. You learned ways to enhance flavor and how to store leftovers. Remember, cooking is about fun and creativity. Try variations with spices or veggies to make it your own. Use these tips and enjoy a tasty, quick side dish anytime!