Get ready to take your snack game to the next level with my Crispy Potato Cheese Bombs! This easy recipe transforms simple ingredients into a crispy, cheesy treat that's perfect for any occasion. You'll love the melty cheese center that’s surrounded by a crunchy coating. Whether you’re hosting a party or just craving something delicious, these bites are sure to impress. Let’s dive into this tasty adventure!
Why I Love This Recipe
- Comfort Food at Its Best: These crispy potato cheese bombs combine the warmth of mashed potatoes with gooey melted cheese, making them the perfect comfort food for any occasion.
- Easy to Make: The straightforward steps ensure that anyone, regardless of cooking skill, can whip up these delicious snacks in no time.
- Customizable Ingredients: You can easily swap the cheese or add extra spices to suit your taste, making this recipe versatile for any palate.
- Perfect for Sharing: These bite-sized delights are ideal for parties, game days, or family gatherings, inviting everyone to enjoy a tasty treat together.
Ingredients
Main Ingredients
- 2 large russet potatoes
- 1 cup shredded cheese (cheddar or mozzarella)
- 1/4 cup cream cheese
Additional Ingredients
- 1/4 cup green onions
- 2 cloves garlic
- Spices and seasoning (paprika, salt, and pepper)
Coating and Frying Ingredients
- 1 cup all-purpose flour
- 1 cup breadcrumbs (preferably panko)
- 2 large eggs
- Vegetable oil for frying
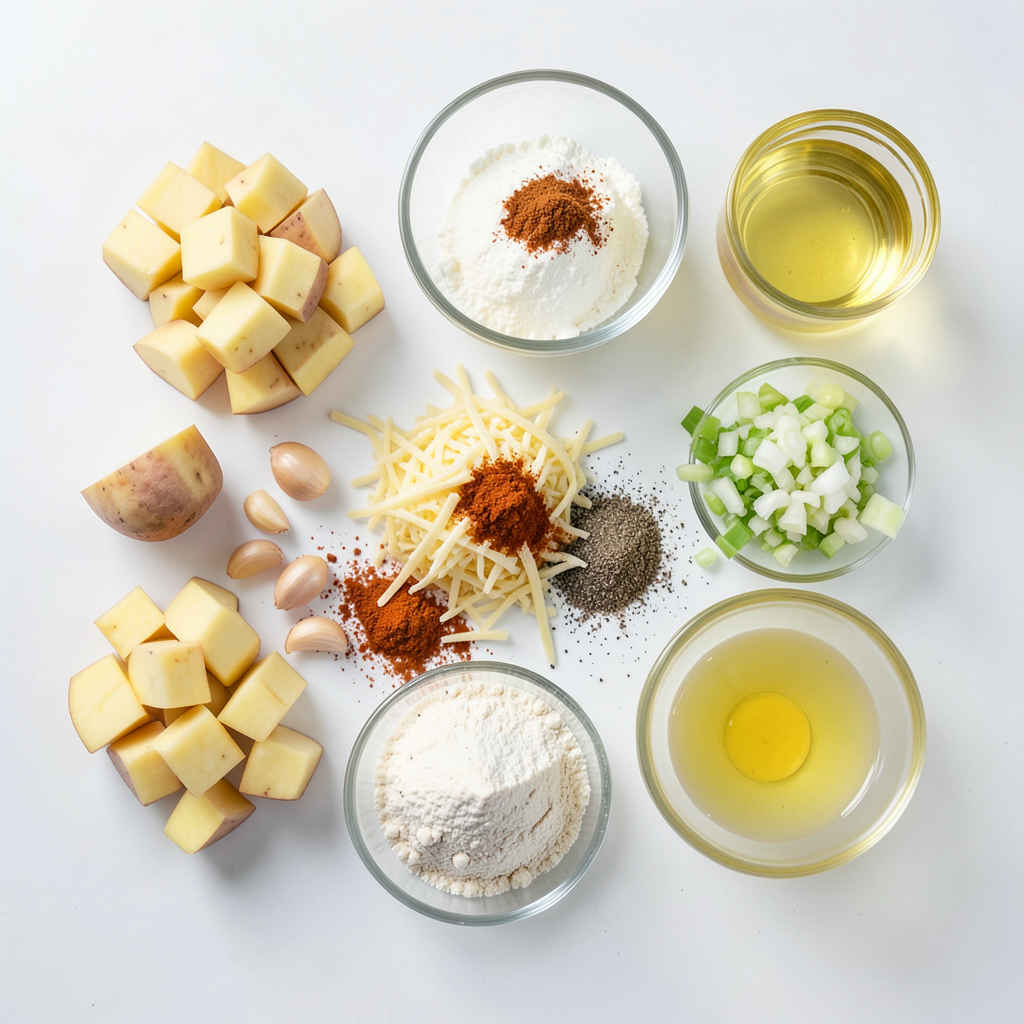
To make Crispy Potato Cheese Bombs, you need simple yet flavorful ingredients. Start with two large russet potatoes. These potatoes are perfect for mashing and hold their shape well. Next, grab one cup of your favorite shredded cheese. Cheddar or mozzarella works great, adding rich flavor and gooey texture. You also need a quarter cup of cream cheese for creaminess.
Next, gather some extra goodies. You will need a quarter cup of finely chopped green onions for a fresh taste. Two cloves of minced garlic add a savory kick. Don’t forget to include spices. Use paprika for color and flavor, and season with salt and pepper to taste.
For the coating, you'll need one cup of all-purpose flour. This helps the bombs stay crispy. One cup of breadcrumbs, preferably panko, adds a nice crunch. You will also need two large eggs, beaten, to help the coating stick. Finally, vegetable oil is essential for frying. It gives the bombs their golden, crispy finish.
With these ingredients on hand, you're ready to create a delightful dish that everyone will love!
Step-by-Step Instructions
Preparing the Potatoes
- Boil the potatoes until tender.
Start by filling a large pot with water. Bring it to a boil. Add the cubed russet potatoes. Cook them for about 15 to 20 minutes. You want them soft enough to mash easily. Drain the water and let the potatoes cool slightly.
- Mash the potatoes in a mixing bowl.
Take the cooled potatoes and place them in a mixing bowl. Use a potato masher to mash them until smooth. Ensure no lumps remain. This texture helps the cheese bomb hold together better.
Mixing the Cheese Filling
- Combine cheeses, green onions, and garlic.
Add the shredded cheese, cream cheese, chopped green onions, and minced garlic to the mashed potatoes. The cheese adds creaminess and flavor.
- Add seasoning and mix until smooth.
Sprinkle in paprika, salt, and pepper to taste. Mix all the ingredients well until fully combined. This step is key to achieving that delicious cheesy filling.
Forming and Coating the Bombs
- Shape the potato mixture into balls.
Take a handful of the potato mixture and roll it into a ball. Aim for about 1.5 inches in diameter. Repeat until you form all the bombs.
- Set up a dredging station.
Prepare three shallow dishes. Place flour in one, beaten eggs in the second, and breadcrumbs in the last. This setup makes coating easier.
- Coat the balls in flour, egg, and breadcrumbs.
Roll each bomb first in flour. Then dip it into the beaten eggs. Lastly, coat it with breadcrumbs, pressing gently to stick. This process creates a nice, crispy outer layer.
Frying the Bombs
- Heat vegetable oil in a skillet.
In a deep skillet, pour enough vegetable oil to cover the bottom. Heat the oil over medium heat. You want it hot but not smoking.
- Fry in batches until golden brown.
Carefully place the coated bombs in the hot oil. Fry in small batches for about 4 to 5 minutes per side. They should turn golden brown and crispy. Remove them and drain on paper towels to get rid of excess oil.
Serving Suggestions
- Drain excess oil and serve.
After frying, let the bombs rest briefly on paper towels. This step helps remove any extra oil.
- Garnish with green onions.
For a pop of color and flavor, sprinkle some chopped green onions on top. Serve with marinara or ranch sauce for dipping. Enjoy your crispy potato cheese bombs!
Tips & Tricks
Achieving the Perfect Crispiness
To get that nice crunch, fry at 350°F (175°C). This temperature keeps the bombs from soaking up too much oil. When using panko breadcrumbs, you get an extra crispy shell. Panko is lighter and creates a better texture than regular breadcrumbs.
Customizing the Recipe
You can switch up the cheese in the filling. Try pepper jack for some heat or gouda for a smoky flavor. Adjust the spices too! Add more paprika for a kick or some herbs for freshness. Make it your own!
Cooking Equipment Recommendations
A cast-iron skillet works great for frying. It heats evenly and stays hot. If you want to check oil temperature, use a thermometer. This helps you fry at the right heat. Too hot, and the bombs burn. Too low, and they get soggy.
Pro Tips
- Use Starchy Potatoes: Russet potatoes are ideal for this recipe due to their high starch content, which makes for a fluffier interior.
- Chill Before Frying: For extra crispy bombs, chill the coated potato balls in the refrigerator for at least 30 minutes before frying.
- Experiment with Cheese: Feel free to mix different types of cheese or add spices to the filling for a unique flavor profile.
- Don’t Overcrowd the Pan: Fry in small batches to maintain oil temperature, resulting in even cooking and crispiness.
Variations
Adding Different Ingredients
You can make crispy potato cheese bombs even more exciting by adding different flavors. Herbs like parsley, chives, or thyme give a fresh taste. Spices such as cumin or chili powder can add a nice kick.
You can also switch up your fillings. Try adding cooked bacon, ham, or even diced veggies like bell peppers or spinach. These additions can make each bite unique and tasty. Feel free to mix and match to find your favorite combination!
Baking Option
If you prefer baking, you can skip the frying. Preheat your oven to 400°F (200°C). Line a baking sheet with parchment paper to prevent sticking. Place the coated potato bombs on the sheet, leaving space between them.
Bake for about 20-25 minutes or until golden brown. Turn them halfway through for even cooking. Baking gives you a lighter version, but still delicious!
Serving Alternatives
Crispy potato cheese bombs taste great on their own. However, they shine with dipping sauces. Marinara, ranch, or garlic aioli make excellent choices. You can also serve them with a fresh salad or a side of roasted veggies for a complete meal.
Experiment with different combinations to please your taste buds!
Storage Info
Refrigeration Guidelines
To store leftover crispy potato cheese bombs, let them cool first. Place them in an airtight container. This keeps them fresh and tasty. You can use glass or plastic containers. Make sure they are sealed well to avoid moisture.
Freezing Instructions
You can freeze both uncooked and cooked bombs. To freeze uncooked bombs, shape them and place them on a tray. Then, put the tray in the freezer until they are firm. Transfer the frozen bombs to a bag or container. For cooked bombs, let them cool. Then, place them in a container or bag.
To reheat frozen bombs, bake them at 375°F for 15-20 minutes. This helps them stay crispy. You can also fry them straight from the freezer. Just adjust the time and fry them a bit longer.
Shelf Life
The crispy potato cheese bombs last about 3-5 days in the fridge. If you freeze them, they can last up to 2-3 months. Always check for signs of spoilage. If they smell bad or look off, it’s best to throw them away.
FAQs
Can I make Crispy Potato Cheese Bombs in advance?
Yes, you can make these bombs ahead of time. Prepare the potato mixture and shape them into balls. Place them on a baking tray and cover with plastic wrap. You can store them in the fridge for up to a day. When ready to cook, just coat them and fry as usual. This makes meal prep easy.
What types of cheese work best?
I love using cheddar or mozzarella for these bombs. Cheddar adds a nice sharpness, while mozzarella gives that gooey texture. You can also mix different cheeses for a unique blend. Experiment with pepper jack for a spicy kick or gouda for a smoky flavor.
Can I use sweet potatoes instead of russet?
Sure! Sweet potatoes will change the flavor and texture. They will add a hint of sweetness to the bombs. The texture may be softer, so adjust your cooking time. You might want to add a bit more flour to help bind them.
How do I prevent the bombs from falling apart while frying?
To keep the bombs intact, make sure to mash the potatoes well. Mixing in cream cheese helps bind the mixture. When coating, ensure a thick layer of breadcrumbs sticks to each bomb. Fry them in batches to avoid overcrowding the pan, which can lower the oil temperature.
Can these be baked instead of fried?
Yes, you can bake these potato bombs! Preheat your oven to 400°F (200°C). Place the coated bombs on a baking sheet lined with parchment paper. Bake for about 25-30 minutes, turning halfway through. They won’t be as crispy as fried ones, but still delicious!
Crispy potato cheese bombs are delightful and easy to make. We covered the ingredients, from russet potatoes to various spices. I shared step-by-step instructions for preparation, frying tips, and storage information. Plus, I explained how to customize your bombs.
Incorporating personal touches can elevate your dish. Don’t be afraid to experiment with flavors or cooking methods. Enjoy these tasty snacks fresh or reheated. They’re sure to be a hit at your next meal or gathering.