Are you ready to dive into a treat that blows your mind and taste buds? The Chocolate Peanut Butter Earthquake Cake combines rich chocolate with creamy peanut butter in a delicious swirl. It's perfect for any occasion, from cozy evenings to festive gatherings. In this post, I’ll guide you through the ingredients, steps, and tips to make this delightful cake. Let's get started on creating a dessert that will impress everyone!
Why I Love This Recipe
- Decadent Flavor Combination: This cake masterfully blends rich chocolate and creamy peanut butter, creating a luscious dessert that satisfies every sweet tooth.
- Easy to Make: Using a box cake mix simplifies the process, making this recipe accessible even for novice bakers.
- Impressive Presentation: The swirls of peanut butter and chocolate chips on top make this cake a showstopper at any gathering.
- Perfect for Any Occasion: Whether it's a birthday, holiday, or just a treat for yourself, this cake is versatile enough to fit any celebration.
Ingredients
Complete List of Ingredients
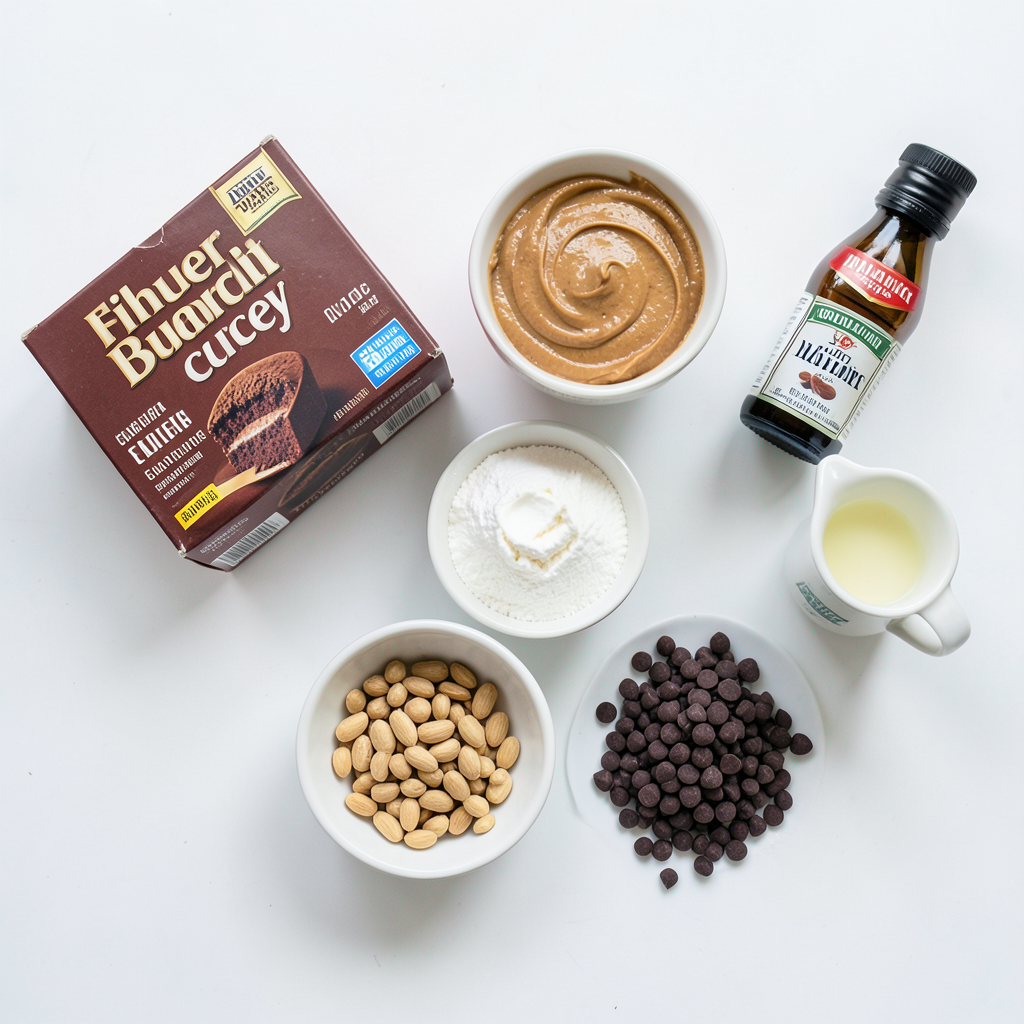
Let’s gather everything you need to make this delicious Chocolate Peanut Butter Earthquake Cake. Here’s the complete list:
- 1 box chocolate cake mix (plus ingredients as per package)
- 1 cup creamy peanut butter
- 8 oz cream cheese, softened
- 1 cup powdered sugar
- 1 cup chocolate chips
- 1/2 cup chopped peanuts (optional)
- 1/4 cup milk (for thinning mix if needed)
- 1 teaspoon vanilla extract
Ingredient Substitutions
You can still enjoy this cake even if you need to make some swaps. Here are a few easy substitutions:
- Chocolate Cake Mix: Use a gluten-free mix for a gluten-free option.
- Creamy Peanut Butter: Swap with crunchy peanut butter for extra texture.
- Cream Cheese: Replace with mascarpone for a different flavor.
- Powdered Sugar: If you want less sweetness, use less sugar or a sugar substitute.
- Chopped Peanuts: Leave them out if you want a nut-free cake.
Measuring Tips for Baking
Measuring ingredients correctly is key for a great cake. Here are some helpful tips:
- Fluff Up: For dry ingredients like flour or powdered sugar, fluff them up in the container first. Then spoon into your measuring cup.
- Level Off: Use a knife to level off the top of the measuring cup for accuracy.
- Room Temperature: Make sure your cream cheese and butter are at room temperature. This helps them mix smoothly.
- Liquid Ingredients: Measure liquids in a clear measuring cup. Check the measurement at eye level for accuracy.
Step-by-Step Instructions
Preparation of Cake Batter
Start by preheating your oven to 350°F (175°C). This step is key for baking. Grease and flour a 9x13 inch baking pan. Next, grab a box of chocolate cake mix. Follow the package instructions to make the batter. Once mixed, pour half of the batter into your prepared pan. It should cover the bottom evenly.
Making the Peanut Butter Cream Cheese Swirl
In a mixing bowl, add 8 oz of softened cream cheese and 1 cup of creamy peanut butter. Add 1 cup of powdered sugar and 1 teaspoon of vanilla extract. Mix these together until smooth and creamy. This swirl will add a rich flavor to your cake. Now, drop spoonfuls of this mixture evenly over the chocolate batter in the pan. Use a knife or spatula to gently swirl the cream cheese mixture into the chocolate batter. Don’t worry about making it perfect; the fun is in the mix!
Baking and Cooling Instructions
After swirling, pour the rest of the chocolate cake batter on top of the cream cheese layer. Make sure to cover it completely. Now, sprinkle 1 cup of chocolate chips and, if you like, 1/2 cup of chopped peanuts on top. These add a nice crunch. Bake the cake in your preheated oven for 30-35 minutes. Check for doneness by inserting a toothpick into the center. It should come out clean, or with a few crumbs. Once baked, let the cake cool in the pan for about 15 minutes. Carefully transfer it to a wire rack to cool completely. Enjoy the aroma while it cools!
Tips & Tricks
Common Mistakes to Avoid
When making Chocolate Peanut Butter Earthquake Cake, be careful not to overmix your batter. Overmixing can lead to a dense cake. Follow the box instructions for the cake mix exactly. If you forget to soften the cream cheese, your swirl will be lumpy. Always use softened cream cheese for a smooth blend.
Another mistake is not greasing the pan well. A good coat of grease helps the cake come out easily. Also, don’t skip the swirling step! Swirling adds flavor and makes the cake fun to eat. If you rush this, you may miss those lovely chocolate-peanut butter pockets.
How to Achieve the Perfect Swirl
To get the perfect swirl, drop spoonfuls of the peanut butter mix onto the chocolate batter. Use a knife or spatula to gently swirl it in. Do not stir too much! You want to see ribbons of peanut butter in the cake. The key is to use a light touch. If you push too hard, you’ll mix it all together. This step creates those delicious pockets of flavor.
Best Practices for Baking Evenly
For even baking, make sure your oven is preheated to 350°F (175°C). Use the middle rack for the best heat flow. If you have a dark pan, it may bake faster, so check it a few minutes early. Insert a toothpick into the center to see if it's done. If it comes out clean or with a few crumbs, it’s ready. Let the cake cool in the pan for 15 minutes, then transfer it to a wire rack. This helps the cake cool evenly and prevents sogginess.
Pro Tips
- Use Room Temperature Ingredients: Make sure your cream cheese and peanut butter are at room temperature for easier mixing and a smoother texture.
- Swirl Gently: When swirling the peanut butter mixture into the batter, do it gently to create a marbled effect without fully combining the layers.
- Check for Doneness: Begin checking for doneness a few minutes before the recommended baking time to avoid overbaking; a toothpick should come out with a few moist crumbs.
- Cool Properly: Allow the cake to cool in the pan for at least 15 minutes before transferring it to a wire rack to prevent it from breaking apart.
Variations
Flavor Variations
You can change the flavor of your cake by adding different mix-ins. Try using butterscotch chips or white chocolate chips instead of regular chocolate chips. You can also add chopped up candy bars like Snickers or Reese's for a fun twist. If you want a fruity flavor, consider adding some mashed bananas or diced strawberries into the mix. Each option brings a new taste and makes the cake even more exciting.
Alternative Frosting Options
While the cake is great on its own, you can add frosting for extra sweetness. Cream cheese frosting pairs well with this cake. Just mix cream cheese with powdered sugar and a splash of vanilla. Another option is a simple chocolate ganache. Melt chocolate with heavy cream, and drizzle it over the cake once it cools. This will add a rich layer of flavor.
Gluten-Free and Vegan Adaptations
You can easily make this cake gluten-free. Use a gluten-free chocolate cake mix and check that all other ingredients are gluten-free. For a vegan version, swap the cream cheese for a vegan cream cheese alternative. You can also use a plant-based milk and a vegan chocolate cake mix. These changes keep the cake tasty while meeting dietary needs. Enjoy creating your own unique version!
Storage Info
How to Store Leftovers
After enjoying this delicious cake, store leftovers properly. Let the cake cool completely. Then, cover it tightly with plastic wrap or aluminum foil. You can also use an airtight container. This keeps the cake moist and fresh. Store it in the fridge for up to five days.
Freezing the Cake
If you want to keep the cake longer, freezing works well. Slice the cake first for easy serving later. Wrap each slice in plastic wrap. Then, place the wrapped slices in a freezer bag. Remove as much air as possible before sealing. The cake can last up to three months in the freezer.
Reheating Tips for Best Taste
When you want to enjoy your cake again, reheating is simple. Preheat your oven to 350°F (175°C). Place the slice on a baking sheet. Heat it for about 10 minutes or until warm. You can also use a microwave. Heat each slice for 15 to 20 seconds. Enjoy the rich, gooey taste of the cake just like fresh!
FAQs
How long does Chocolate Peanut Butter Earthquake Cake last?
Chocolate Peanut Butter Earthquake Cake lasts about 3 to 5 days. Keep it in an airtight container. If you store it well, the cake will stay fresh and tasty. After a few days, it may dry out.
Can I make this cake in advance?
Yes, you can make this cake in advance. Bake the cake and let it cool completely. Wrap it in plastic wrap and store it in the fridge. It stays good for up to 5 days. You can also freeze it for longer storage. Just thaw it overnight in the fridge before serving.
What can I substitute for the chocolate cake mix?
You can use homemade chocolate cake batter instead of store-bought mix. Just make sure it’s a similar consistency. You can also try a gluten-free mix if needed. For a fun twist, use a red velvet cake mix for a unique flavor.
You learned about the key ingredients needed for the Chocolate Peanut Butter Earthquake Cake. We covered ingredient swaps, measuring tips, and the steps to prepare rich batter and the cream cheese swirl. Avoid common mistakes and use best practices for even baking. We explored different flavors, frostings, and how to make the cake gluten-free or vegan. Finally, we discussed how to store and reheat leftovers. With these tips, you’re ready to create a tasty cake that impresses everyone. Enjoy your baking!