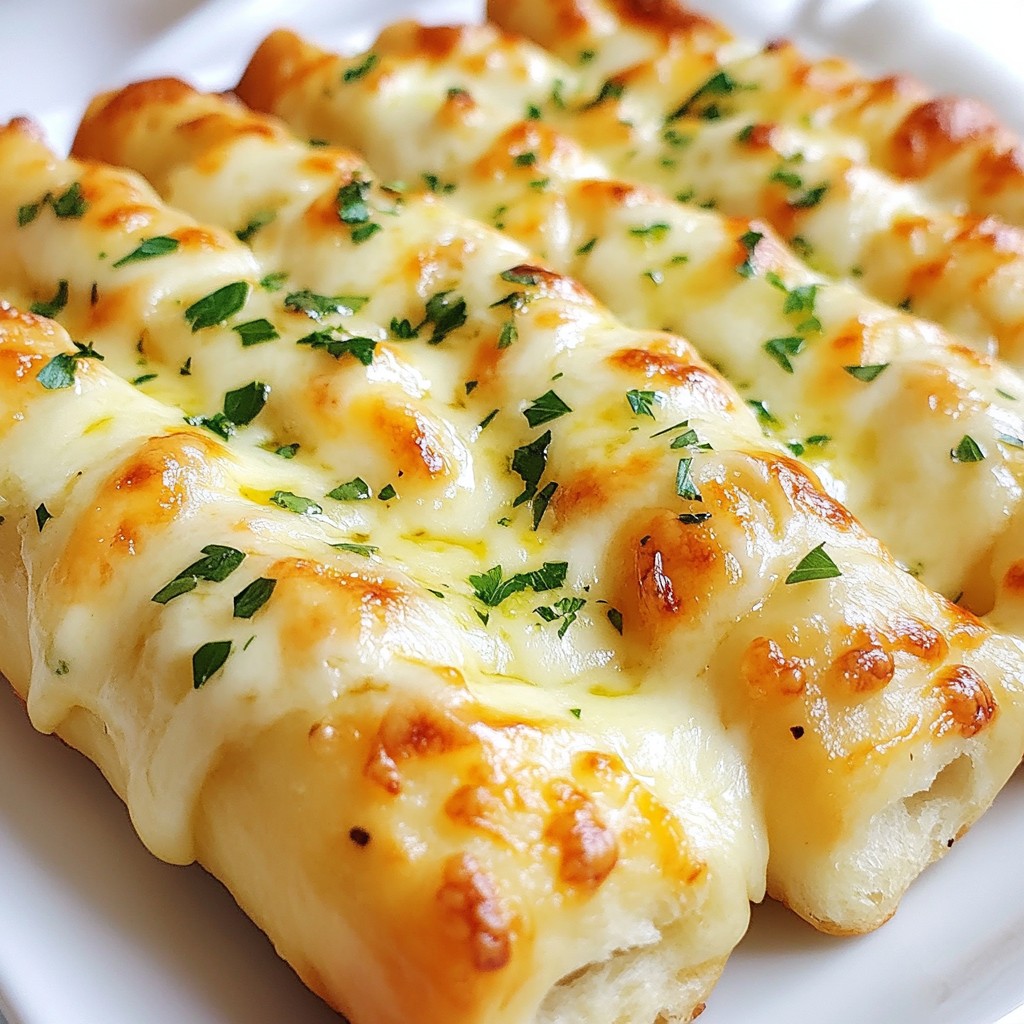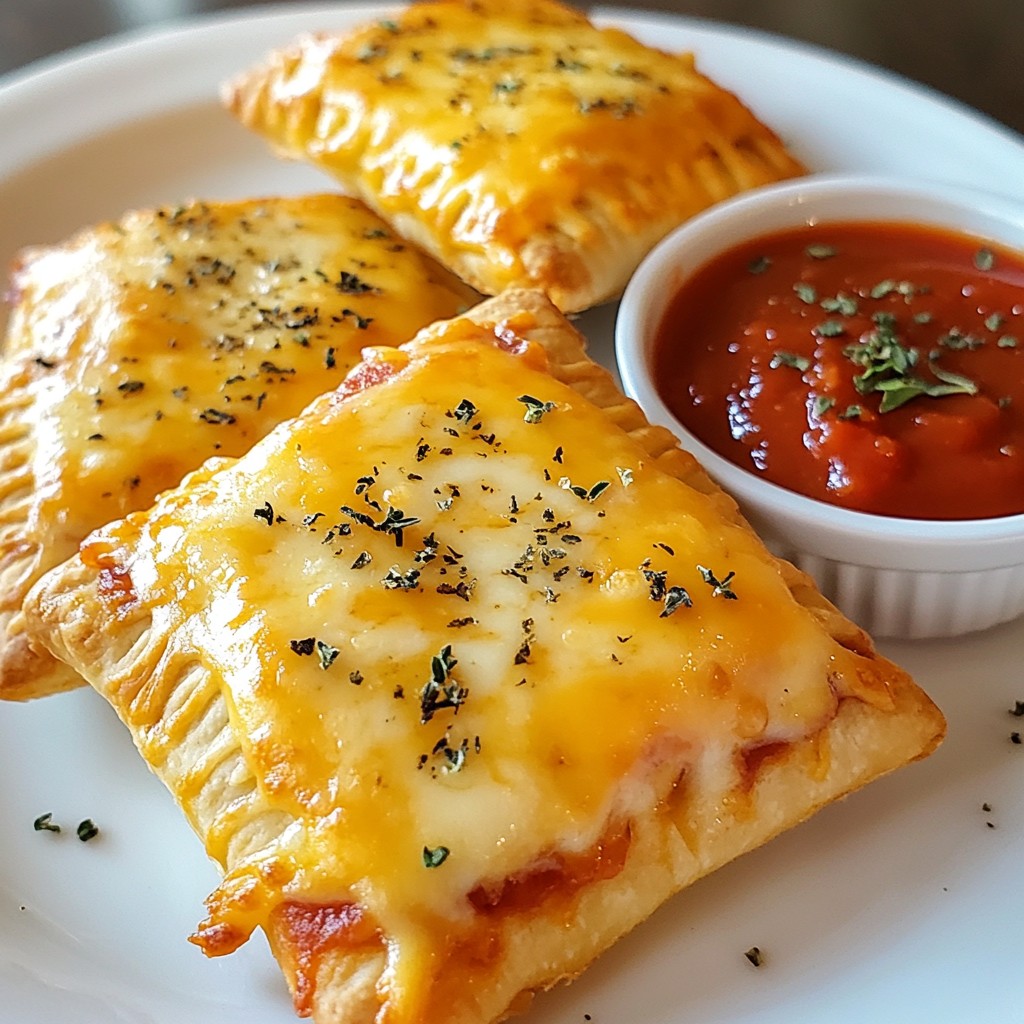
Are you looking for a quick and tasty meal? These cheesy pizza pockets are perfect! They are fun to make and easy to customize. Imagine biting into warm dough filled with gooey cheese and your favorite toppings. In this article, I'll share everything you need to create these delicious pockets. Let’s dive into the ingredients and steps to make this meal a hit at your table!
Why I Love This Recipe
- Quick and Easy: This recipe is perfect for a fast meal or snack, taking only 35 minutes from start to finish.
- Customizable Fillings: You can easily customize the fillings to your liking—add vegetables, different cheeses, or your favorite meats.
- Fun for All Ages: Making these pizza pockets can be a fun activity for kids and adults alike—perfect for family cooking time!
- Great for Dipping: Serve with extra pizza sauce on the side for dipping, adding an extra layer of flavor to every bite.
Ingredients
To make cheesy pizza pockets, gather these simple ingredients:
- 2 cups all-purpose flour
- 1 tablespoon baking powder
- 1 teaspoon salt
- 1 tablespoon olive oil
- 3/4 cup water
- 1 cup shredded mozzarella cheese
- 1/2 cup pizza sauce (plus extra for dipping)
- 1/2 cup sliced pepperoni (optional)
- 1/2 teaspoon dried oregano
- 1/2 teaspoon garlic powder
- 1 egg (for egg wash)
These ingredients create a tasty, cheesy treat for quick meals. The dough is easy to make and uses common kitchen staples. The mozzarella cheese gives that classic cheesy flavor, while the pizza sauce adds a zesty kick. You can add pepperoni if you like a meaty bite.
Let’s not forget the herbs! Dried oregano and garlic powder bring wonderful flavor to each bite. The egg wash gives the pockets a shiny, golden finish when baked.
Make sure to measure your ingredients accurately. This will help your pizza pockets turn out just right. If you want to customize, feel free to add your favorite toppings.

Step-by-Step Instructions
Preparing the Dough
1. In a large bowl, mix 2 cups of flour, 1 tablespoon of baking powder, and 1 teaspoon of salt.
2. Add 1 tablespoon of olive oil to the dry mix.
3. Gradually pour in 3/4 cup of water while stirring.
4. Once the dough forms, knead it on a floured surface for about 5 minutes until smooth.
Rolling Out the Dough
1. Divide the dough into 4 equal pieces.
2. Roll each piece into a circle about 6 inches wide on a floured surface.
Filling and Sealing the Pockets
1. On one half of each dough circle, spread 1 tablespoon of pizza sauce.
2. Add 1 cup of shredded mozzarella cheese on top.
3. If you like, add 1/2 cup of sliced pepperoni.
4. Sprinkle 1/2 teaspoon of dried oregano and 1/2 teaspoon of garlic powder.
5. Fold the other half of the dough over the filling.
6. Press the edges to seal, then crimp with a fork.
Baking the Pockets
1. Preheat your oven to 400°F (200°C).
2. Place the filled pockets on a baking sheet lined with parchment paper.
3. Beat 1 egg in a small bowl and brush it over the top of each pocket.
4. Bake for 15-20 minutes, until golden brown.
Tips & Tricks
Achieving the Perfect Dough
To make great dough, you need to knead it well. Kneading helps develop gluten, which gives the dough structure. Use your palms to push down and fold the dough. Do this for about five minutes. The dough should feel smooth and elastic when ready.
You can tell if the dough is ready by doing a simple test. Press your finger into the dough; it should bounce back. If it stays indented, knead it a bit more.
Customizing Fillings
You can switch up the cheese for fun. Instead of mozzarella, try provolone or cheddar. Both add different flavors. You can also mix cheeses for a unique taste.
Don’t forget the toppings! You can add veggies like bell peppers and mushrooms. If you like spice, throw in jalapeños. The options are endless.
Baking Tips
To bake evenly, space each pocket apart on the baking sheet. This helps hot air flow around them. Parchment paper also helps prevent sticking and makes cleanup easy.
For a crispy crust, brush the tops with an egg wash. This gives them a nice shine and crunch. Bake until golden brown, about 15 to 20 minutes. Keep an eye on them to avoid burning.
Pro Tips
- Use Cold Water: Using cold water helps to keep the dough firm and makes rolling it out easier.
- Customize Fillings: Feel free to add your favorite pizza toppings such as bell peppers, mushrooms, or olives for a personal touch.
- Perfectly Crimped Edges: Crimping the edges with a fork not only seals the pockets but also adds a decorative touch.
- Serve with Dipping Sauce: Pair these pizza pockets with a variety of dipping sauces like ranch or marinara for added flavor.
Variations
Vegan Cheesy Pizza Pockets
For a vegan version, you can substitute dairy cheese with plant-based cheese. Look for brands that melt well. You can also use nutritional yeast for a cheesy flavor without dairy.
Instead of an egg wash, you can brush the tops with almond milk or soy milk. This gives a nice shine and helps with browning.
Gluten-Free Options
If you need gluten-free pizza pockets, use a good gluten-free flour blend. I recommend blends that include rice flour and tapioca starch. This keeps the texture light and fluffy.
You may need to add a bit more water when mixing the dough. Gluten-free flours often absorb more liquid.
Different Flavor Profiles
To change up the flavors, try Mediterranean-inspired ingredients. Add feta cheese, sun-dried tomatoes, and olives for a fresh twist.
If you like spice, add jalapeños or chili flakes to the filling. This gives your pockets a nice kick and makes them exciting!
Storage Information
Storing Unbaked Pizza Pockets
To keep your unbaked pizza pockets fresh, you can freeze them. Wrap each pocket in plastic wrap. Then, place them in a freezer bag. This prevents freezer burn. They can stay frozen for up to three months.
If you want to store them in the fridge, place the pockets in an airtight container. They will last for about two days. Make sure to use them before they dry out.
Storing Baked Pizza Pockets
To keep baked pizza pockets fresh, store them in an airtight container. This helps keep them soft. You can also wrap them in foil. They will stay good for about three days.
For reheating, use your oven for the best results. Preheat it to 350°F (175°C). Place the pockets on a baking sheet and heat for about 10 minutes. This keeps the crust crispy and warm.
Shelf Life
Baked pizza pockets last for three days in the fridge. In the freezer, they can last for up to three months. Unbaked pockets can also freeze well for three months. Always label your containers with dates for easy tracking.
FAQs
Can I make cheesy pizza pockets ahead of time?
Yes, you can make cheesy pizza pockets ahead of time. First, prepare the dough and fill it as per the recipe. Then, you have two great options for storage.
- Refrigerate: Place the filled pockets in the fridge for up to 24 hours. Just cover them with plastic wrap.
- Freeze: For longer storage, freeze the unbaked pockets. Wrap each one in foil or plastic wrap, then place them in a freezer bag. They can last for up to three months.
When you're ready to enjoy them, bake straight from the freezer or fridge. Just add a few extra minutes to the baking time.
What can I use instead of mozzarella cheese?
If you want to switch up the cheese, there are many tasty options. Here are a few you can try:
- Cheddar: This cheese adds a sharp flavor. It melts well and is a favorite for many.
- Provolone: This cheese has a smooth texture and a mild taste, making it a good choice.
- Ricotta: For a creamier filling, use ricotta. Mix it with some grated cheese for better melt.
- Vegan Cheese: For a dairy-free option, many brands offer plant-based cheese that melts nicely.
Feel free to mix and match these cheeses to create your perfect pizza pocket!
How do I know when the pizza pockets are done baking?
To check if your pizza pockets are done, look for these signs:
- Golden brown color: The tops should have a nice golden hue.
- Firmness: When you gently press on the pockets, they should feel firm, not soft.
You can also peek underneath. If the bottom is golden and crisp, they're ready. Let them cool for a few minutes before serving. Enjoy your cheesy pizza pockets!
You learned how to make cheesy pizza pockets from scratch. You gathered easy ingredients and followed simple steps. From mixing the dough to baking the pockets, these treats are fun and tasty. You can also customize them to fit your tastes with different cheeses and flavors. Whether you make them vegan or gluten-free, the options are endless. Enjoy making and sharing these delicious pockets. Happy cooking!