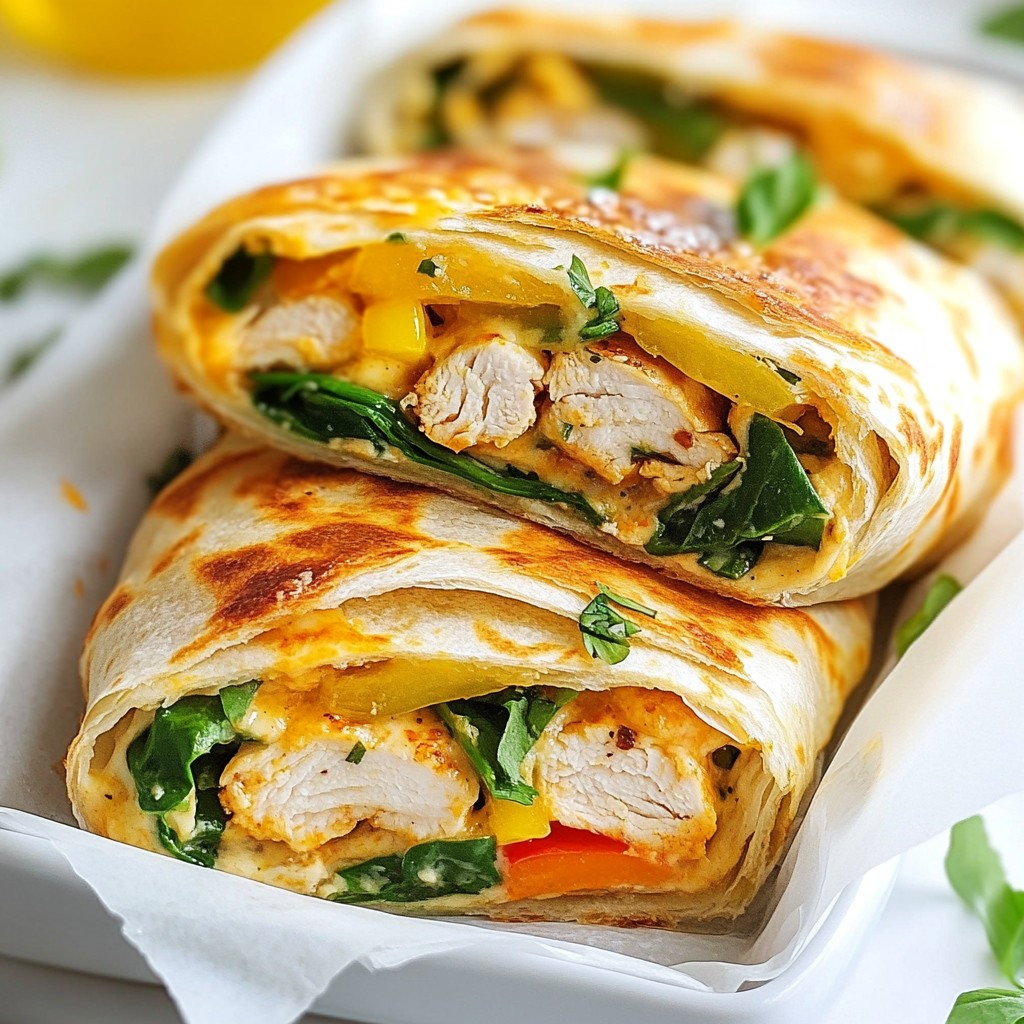
If you love cheesy, garlicky goodness wrapped in a warm tortilla, you're in for a treat! My Cheesy Garlic Chicken Wraps are not just easy to make—they're downright irresistible. Packed with shredded chicken, creamy cheese, and fresh veggies, these wraps will become your new go-to meal. Let’s dive into the ingredients and steps needed to whip up this tasty dish that your whole family will love!
Why I Love This Recipe
- Quick and Easy: This recipe can be whipped up in just 30 minutes, making it perfect for busy weeknights.
- Cheesy Goodness: With a delightful mix of mozzarella and cream cheese, these wraps are a cheesy lover's dream.
- Versatile Filling: You can customize the filling with your favorite veggies or leftover meats for a unique twist.
- Great for Meal Prep: These wraps can be made ahead of time and stored, perfect for a quick lunch or snack.
Ingredients
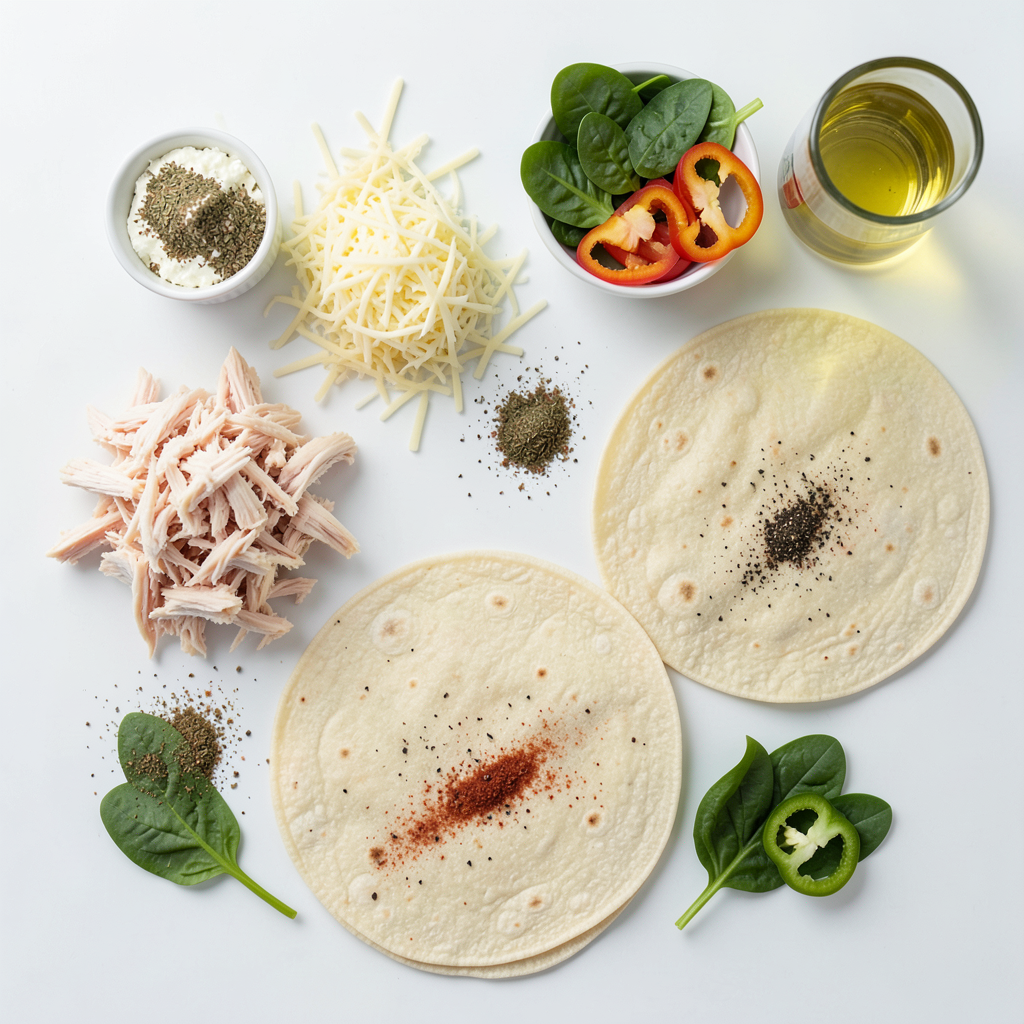
To make cheesy garlic chicken wraps, you need the following items:
- 2 cups cooked chicken, shredded
- 1 cup shredded mozzarella cheese
- 1/2 cup cream cheese, softened
- 3 cloves garlic, minced
- 1 teaspoon dried oregano
- 1 teaspoon paprika
- Salt and pepper to taste
- 4 large tortillas or wraps
- 1 cup fresh spinach leaves
- 1/2 cup sliced bell peppers (any color)
- Olive oil for brushing
- Optional garnishes (e.g., fresh parsley, garlic sauce)
Each ingredient plays a key role in making these wraps packed with flavor. The chicken provides protein, while the cheeses add creaminess. Garlic brings a bold taste, and herbs like oregano and paprika add depth. Fresh spinach and bell peppers give a nice crunch and color.
Using quality ingredients makes a big difference. Choose fresh chicken and good cheeses for the best taste. Don’t skip olive oil; it helps achieve that crispy finish when grilling. Adjust salt and pepper based on your preference.
Feel free to get creative with the ingredients! You can swap out the bell peppers for other veggies or try different cheeses. Enjoy making these wraps with your favorite flavors!
Step-by-Step Instructions
Preparation Process
- Mixing the Chicken Filling
In a large bowl, combine 2 cups of shredded chicken, 1 cup of shredded mozzarella cheese, and 1/2 cup of softened cream cheese. Add in 3 minced garlic cloves, 1 teaspoon of dried oregano, and 1 teaspoon of paprika. Season with salt and pepper to taste. Mix until all ingredients blend evenly.
- Assembling the Wraps
Take a large tortilla and lay it flat. Place a handful of fresh spinach leaves in the center. Add a few slices of bell peppers on top. Spoon a generous amount of the cheesy chicken mixture over the spinach and peppers, leaving space around the edges. Fold in the sides and roll tightly from the bottom to form a wrap.
- Grilling the Wraps
Preheat a skillet or grill pan over medium heat. Brush each wrap lightly with olive oil on the outside. Place the wraps seam side down in the pan. Grill for 3-4 minutes on each side until golden brown and crispy. Remove from heat and let cool for a minute before slicing in half.
Cooking Times
- Preheat Instructions
Preheat your skillet or grill pan to medium heat. This helps the wraps cook evenly and get a nice crisp.
- Grilling Time and Techniques
Grill each wrap for 3-4 minutes on one side. Then flip and grill for another 3-4 minutes. Look for a golden brown color to know they are ready.
Serving Suggestions
- Presentation tips
Serve the sliced wraps upright in a small basket lined with parchment paper. Drizzle some extra olive oil or garlic sauce on the side for dipping. Garnish with fresh parsley for a pop of color.
- Recommended sides to serve with
Pair the wraps with a fresh salad, crispy fries, or a light soup. These sides balance out the cheesy richness of the wraps.
Tips & Tricks
Cooking Tips
- To get a crunchy outside, heat your grill pan well before cooking.
- Brush the wraps with olive oil. This helps them crisp up nicely.
- You can use leftover chicken from other meals. Shredded chicken works great here.
Flavor Enhancements
- Add more spices, like cayenne pepper, for some heat.
- Fresh herbs, such as cilantro or basil, can brighten the flavor.
- Serve with garlic sauce or ranch dressing for dipping. These add extra taste.
Common Mistakes to Avoid
- Do not overfill the wraps. This makes them hard to roll.
- Grill at medium heat. Too high can burn the outside and leave the inside cold.
- Make sure to seal the wraps tightly. This keeps the filling inside while grilling.
Pro Tips
- Use Rotisserie Chicken: For a quicker prep time, use store-bought rotisserie chicken. It adds a great flavor and saves you from cooking the chicken yourself.
- Experiment with Cheeses: While mozzarella is delicious, try mixing in some cheddar or pepper jack for a different flavor profile and a kick of spice.
- Customize Your Veggies: Feel free to add other vegetables like zucchini, mushrooms, or red onions. This not only enhances the flavor but also adds more nutrition.
- Perfect Grilling: Ensure the skillet is preheated before adding the wraps to achieve a crispy texture. Don’t overcrowd the pan; grill in batches if necessary.
Variations
Ingredient Substitutions
You can switch up the cheese to add your twist. Try cheddar or feta for a new taste. For protein, use turkey or tofu instead of chicken. Both options keep the wraps tasty and filling.
Dietary Modifications
Want a gluten-free version? Just use gluten-free tortillas. For vegetarian or vegan options, swap the chicken for beans or lentils. You can also use vegan cheese to keep it dairy-free.
Creative Flavor Additions
Adding veggies is a fun way to change the flavor. Try diced tomatoes, zucchini, or even mushrooms. You can also add sauces or spreads like BBQ sauce or spicy hummus. These will give your wraps a delicious twist.
Storage Info
Storing Leftovers
To keep your cheesy garlic chicken wraps fresh, store them in the fridge. Wrap each one in plastic wrap or foil. Place them in an airtight container. This helps them stay moist and tasty for up to three days. If you want to save them for later, freezing is a great option. Place the wrapped wraps in a freezer bag. They can last up to three months in the freezer. When you're ready to eat, just thaw them in the fridge overnight.
Reheating Instructions
Reheating your wraps can be tricky. You want them warm and crisp, not soggy. For the best results, use an oven or skillet. Preheat your oven to 350°F (175°C). Place the wraps on a baking sheet. Heat for about 10 minutes. In a skillet, heat a little oil over medium heat. Place the wraps seam side down and cook for about 3-4 minutes on each side. If you use a microwave, heat them for 30 seconds at a time. This may not keep them crispy, but it's quick and easy. Enjoy your tasty wraps again!
FAQs
Common Questions
How long can I store cheesy garlic chicken wraps? You can store these wraps in the fridge for up to three days. Keep them in an airtight container. This helps keep them fresh and tasty.
Can I make this recipe ahead of time? Yes, you can prepare the cheesy chicken filling a day before. Just store it in the fridge. You can assemble the wraps right before cooking to keep them crispy.
What are some good dips to serve with these wraps? Some tasty dips include garlic sauce, ranch dressing, or marinara sauce. Each adds a new flavor twist to your wraps.
Nutritional Information
Overview of calories and nutrition per serving Each serving of cheesy garlic chicken wraps has about 400 calories. This includes protein from chicken and cheese, plus veggies for fiber.
Tips for making a healthier version To make these wraps healthier, use whole wheat tortillas. You can also add more veggies like zucchini or carrots. Use low-fat cheese for fewer calories.
Best Tools to Use
Recommended kitchen tools for this recipe Use a mixing bowl for the filling, a skillet for grilling, and a knife for slicing. A spatula will help flip the wraps with ease.
Importance of using quality cooking equipment Good tools make cooking easier and safer. A sturdy skillet helps evenly cook the wraps, giving you a nice golden crust.
This blog post guides you through making delicious cheesy garlic chicken wraps. You learned about the key ingredients, step-by-step instructions, and essential tips for success. Remember to avoid overfilling and check your grill’s heat for a perfect crunch. You can also tailor the recipe to fit your dietary needs with easy swaps. Enjoy trying different flavors and always store your leftovers wisely. With this simple recipe, you can impress your family and friends any day!