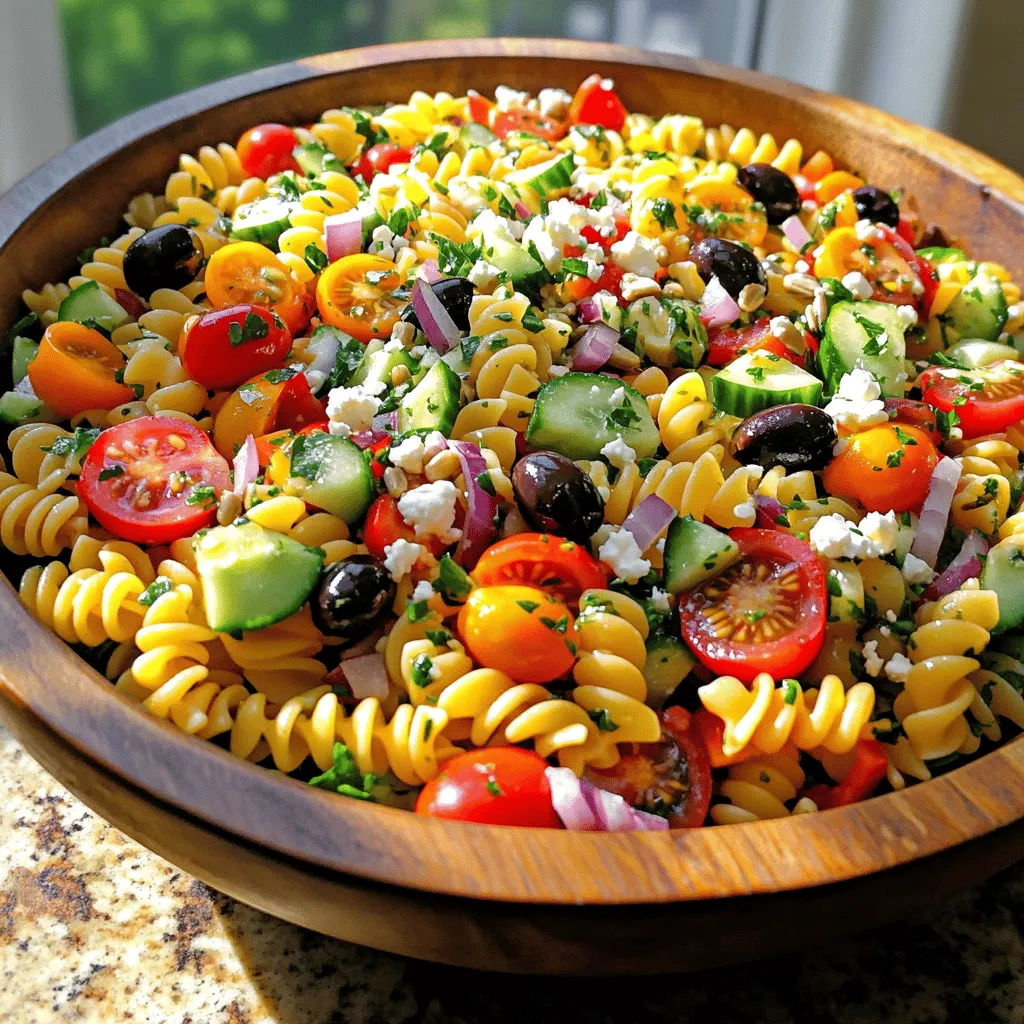
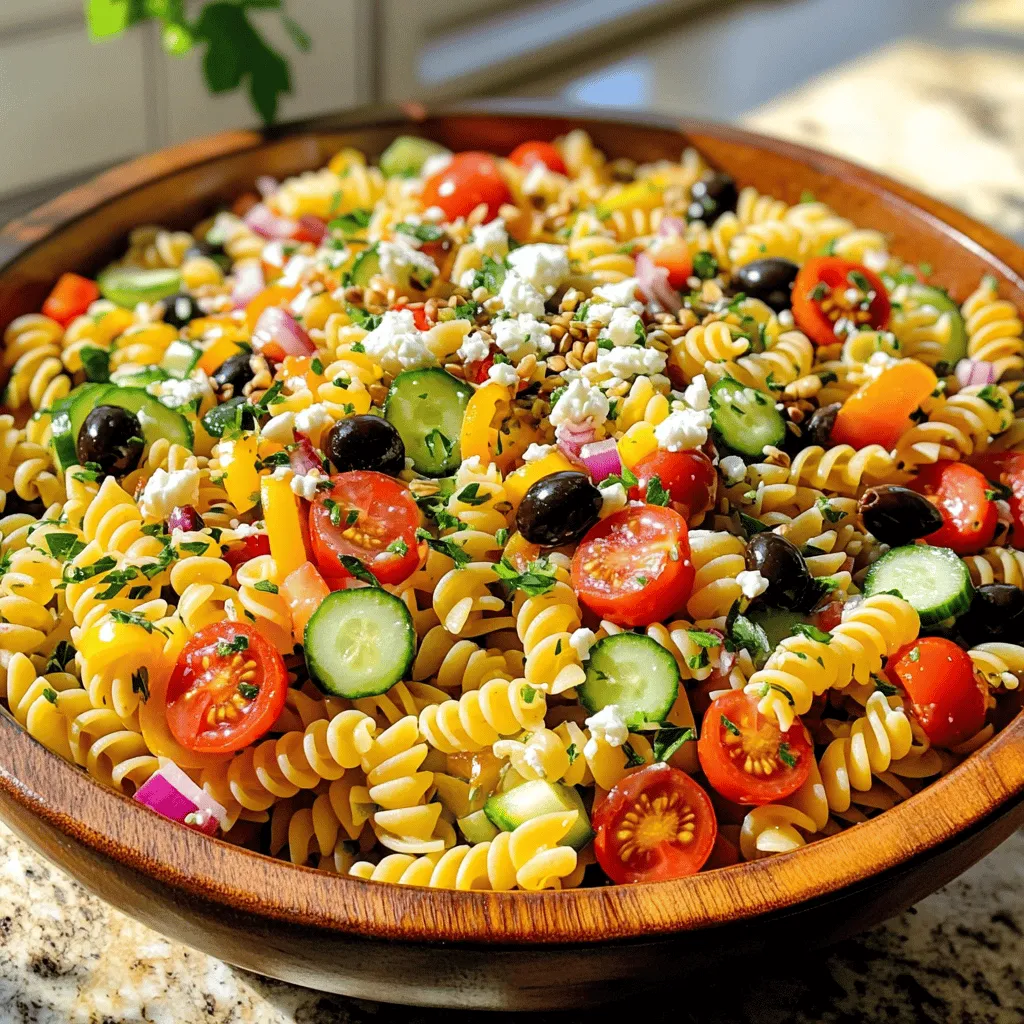
Are you ready to whip up a dish that is colorful, fresh, and packed with flavor? California Pasta Salad is the perfect choice! With vibrant veggies and tasty pasta, this salad is a crowd-pleaser for any gathering. Whether you want a quick dinner, a fun side, or a meal prep champion, I’ll guide you step-by-step to make the best version. Let’s dive into this tasty recipe that will brighten your table!
Ingredients
List of Essential Ingredients
To make the best California Pasta Salad, you need a few key items:
– 8 oz (about 2 cups) tri-color rotini pasta
– 1 cup cherry tomatoes, halved
– 1 cup cucumber, diced
– 1 cup bell peppers (mixed colors), diced
– 1/2 cup red onion, finely chopped
– 1/2 cup black olives, sliced
– 1/4 cup fresh parsley, chopped
– 1/4 cup feta cheese, crumbled
– 1/4 cup sunflower seeds
– 1/4 cup olive oil
– 3 tablespoons apple cider vinegar
– 1 teaspoon garlic powder
– 1 teaspoon dried oregano
– Salt and pepper to taste
These ingredients create a colorful and tasty salad.
Optional Add-ins
You can customize your salad with these fun add-ins:
– Cheese options like mozzarella or goat cheese
– Seeds like pumpkin or sesame for crunch
– Protein options such as grilled chicken or canned tuna
Adding these can make the salad more filling and flavorful.
Equipment and Tools Needed
You will need some basic kitchen tools:
– A cooking pot for boiling the pasta
– Mixing bowls for combining ingredients
– A whisk for making the dressing
These items make the process easy and fun.Enjoy making your California Pasta Salad!
Step-by-Step Instructions
Cooking the Pasta
To start, boil a pot of water. Add a pinch of salt to the water. This helps flavor the pasta. Once the water is boiling, add 8 oz of tri-color rotini pasta. Cook it per the package instructions, usually about 8 to 10 minutes. Stir occasionally to keep it from sticking.
After cooking, drain the pasta in a colander. Rinse it under cold water. This stops the cooking process and cools the pasta down. Make sure to rinse well to remove excess starch. This helps the pasta stay firm in the salad.
Mixing the Salad Ingredients
Now, let’s prep the salad ingredients. Grab a large mixing bowl. Add the cooled pasta first. Next, slice 1 cup of cherry tomatoes in half and toss them in. Dice 1 cup of cucumber and add that too. Then, chop mixed bell peppers and finely chop 1/2 cup of red onion. Toss all these into the bowl.
Next, slice 1/2 cup of black olives. Add them along with 1/4 cup of chopped fresh parsley. Mix all the ingredients gently. You want everything to be evenly distributed for great flavor in every bite.
Making the Dressing
In a small bowl, whisk together the dressing. Combine 1/4 cup of olive oil and 3 tablespoons of apple cider vinegar. Then, add 1 teaspoon of garlic powder and 1 teaspoon of dried oregano. Season with salt and pepper to taste. Whisk until the dressing is well mixed.
Pour the dressing over the pasta and vegetable mix. Gently toss everything together. Ensure the pasta and veggies are well coated. Lastly, fold in 1/4 cup of crumbled feta cheese and 1/4 cup of sunflower seeds. This adds a nice crunch.
Let the salad chill in the refrigerator for at least 30 minutes. This helps the flavors blend better.
Tips & Tricks
Enhancing Flavor
To boost the flavor of your California Pasta Salad, think about your seasonings. Start with salt and pepper. They help bring out the fresh taste of your veggies. You can also add garlic powder for a nice kick. If you want, sprinkle in a bit of red pepper flakes for heat. For a zesty twist, try a squeeze of lemon juice. This adds brightness that pairs well with the salad.
Fresh herbs can take your salad to the next level. I love using parsley, but you can try basil or cilantro too. Just chop them finely and mix them in. They add a burst of flavor that makes each bite special.
Time-Saving Tips
Prep work helps save time when making this salad. You can chop your veggies ahead of time. Store them in the fridge until you’re ready to mix. This way, you can whip up the salad quickly when you need it.
You can also make the salad a day ahead. Just keep it in the fridge. The flavors will blend nicely overnight. Just remember to add the feta cheese and sunflower seeds right before serving to keep them fresh.
Serving Suggestions
California Pasta Salad pairs well with many sides. Grilled chicken or shrimp complements the flavors perfectly. You can also serve it with fresh bread or garlic bread for a hearty meal.
For a great presentation, use a large, colorful bowl. Layer the salad to show off the vibrant colors of the veggies. Add some extra parsley on top for a pop of green. This makes the dish look inviting and appetizing.
Variations
Mediterranean Twist
To give California pasta salad a Mediterranean twist, you can add different vegetables. Try artichoke hearts, sun-dried tomatoes, or zucchini for extra flavor. These veggies can change the taste and texture.
You can also use alternative proteins. Chickpeas or grilled shrimp can boost the protein content. Both options add a unique taste and make the salad more filling.
Vegan or Vegetarian Options
If you want a vegan or vegetarian version, simply remove dairy products. Skip the feta cheese and replace it with diced avocado for creaminess. You can also use nutritional yeast for a cheesy flavor without dairy.
For plant-based protein suggestions, consider adding lentils or tofu. Both options add protein and fiber while keeping the salad light.
Seasonal Adaptations
California pasta salad can change with the seasons. In spring, add fresh peas or asparagus. In summer, use ripe tomatoes and sweet corn. Fall brings options like roasted butternut squash or Brussels sprouts. Winter can include hearty greens like kale.
Make adjustments based on availability. Use what you have on hand. This makes the salad fresh and exciting each time you make it, and it helps you avoid waste.
Storage Info
How to Store Leftovers
To keep your pasta salad fresh, use airtight containers. Glass or plastic containers work well. Make sure the lid fits tightly. This helps keep moisture in and air out. Store the salad in the fridge right after serving. This way, you preserve its great taste and crunch.
Freezing Instructions
Can you freeze pasta salad? Yes, you can freeze it, but it may change texture. Freezing can make the vegetables mushy. If you still want to freeze it, place the salad in a freezer-safe container. Make sure to leave some space at the top for expansion.
To thaw, move the container to the fridge for several hours. If you want it quick, use the microwave on low power. After thawing, stir the salad and check the taste. You may need to add more dressing or seasoning.
Shelf Life
How long does pasta salad last in the fridge? It stays fresh for about 3 to 5 days. Keep an eye on it to ensure it stays tasty. Look for signs that it has spoiled. If the salad smells sour or looks slimy, it’s best to throw it away. Always trust your senses when it comes to food safety.
FAQs
Can I make California Pasta Salad ahead of time?
Yes, you can make California Pasta Salad ahead of time. This dish tastes even better after sitting in the fridge. I suggest making it a few hours before serving. If you want the best flavor, chill it overnight. Just remember to keep it in a sealed container.
What makes California Pasta Salad unique?
California Pasta Salad stands out due to its bright colors and fresh flavors. The key ingredients that define it include:
– Tri-color rotini pasta
– Cherry tomatoes
– Crunchy cucumbers
– Mixed bell peppers
– Black olives
– Feta cheese
– Fresh parsley
These ingredients give it a fun, vibrant look and a tasty mix of textures.
How can I make it gluten-free?
To make California Pasta Salad gluten-free, you can use gluten-free pasta. Many brands offer options like brown rice or quinoa pasta. Both work well and keep the same great taste. Just cook them according to the package instructions. This way, everyone can enjoy your salad!
This blog post covered all you need for a tasty California pasta salad. We explored the essential ingredients and possible add-ins, along with clear instructions for cooking and mixing. I shared tips for flavor, time-saving, and serving ideas. You also learned about variations and how to store your salad. With these easy steps, you can create a fresh and delicious salad any time. Enjoy making it your own and share it with friends and family!