Skip to content
DisclaimerTerms Of UseGDPR PolicyCookie Policy

flavorsprint

  • Home
  • Drinks
  • Appetizers
  • Dinner
  • Dessert
  • About
  • Contact
  • Privacy Policy
DisclaimerTerms Of UseGDPR PolicyCookie Policy

Lillian

To make this drink, you need: - 2 cups fresh strawberries, hulled and sliced - 1 cup freshly squeezed lemon juice (about 4-6 lemons) - 1 cup granulated sugar (adjust to taste) - 4 cups cold water - 2 cups ice cubes - 1 lemon, sliced (for garnish) - Fresh mint leaves (for garnish) The key ingredients create a bright, refreshing drink. Fresh strawberries offer sweetness and vibrant color. Lemon juice adds a zesty tartness. Sugar balances the flavors. Cold water keeps it light and refreshing. Ice cubes make it frosty and fun. Garnishes add flair to your drink. A lemon slice gives a pop of color. Fresh mint leaves add a lovely aroma. For a special touch, you can place whole strawberries on the rim. These garnishes make the drink look and taste even better. To make the best Strawberry Frosted Lemonade, start by preparing your strawberries. Wash and hull two cups of fresh strawberries. Slice them to help with blending. Next, add the sliced strawberries to a blender. Pour in half of the cold water, about two cups. Blend until you have a smooth puree. If you want, strain the mixture through a fine-mesh sieve for extra smoothness. Set the strawberry puree aside. In a large pitcher, squeeze the juice from about four to six lemons until you have one cup. Add one cup of granulated sugar to the lemon juice. Stir the mixture well until the sugar dissolves completely. Now, pour in the strawberry puree and the remaining two cups of cold water. Mix everything together until it looks uniform. To achieve that frosted texture, you must crush the ice properly. Place two cups of ice cubes into the blender. Pulse the ice until it is finely crushed. This creates a great texture. You can also adjust the amount of ice based on how frosted you want your drink. Now it's time to serve your Strawberry Frosted Lemonade. Start by filling serving glasses with a layer of crushed ice. Pour the strawberry lemonade mixture over the ice until the glass is about three-quarters full. For an eye-catching finish, garnish each glass with a slice of lemon and a sprig of fresh mint. You can even add whole strawberries on the rim for an extra special touch. Serve with colorful straws and enjoy your refreshing summer drink! To get the right sweetness, taste as you go. Start with one cup of sugar. If it's too sweet, add more lemon juice. If it’s not sweet enough, add a bit more sugar. Remember, the strawberries also add sweetness. Always adjust to your taste. For a great frosted texture, use crushed ice. You can crush ice in a blender or use a mallet. If you want it finer, blend it longer. Make sure to layer the crushed ice in your glass for that nice frosted look. It keeps your drink cold and fun. You can make this drink even better by adding more flavors. Try adding a splash of lime juice for a zesty kick. Fresh mint mixed in adds a cool taste. You could even add some coconut milk for creaminess. Be creative; mix and match to find your favorite flavor! {{image_2}} You can mix strawberry with other fruits for fun flavors. Mango adds a tropical twist. Its sweetness complements the tartness of lemon well. Raspberry also works great. It gives a bright color and a delicious taste. Try mixing two or three fruits. This way, you can create your own unique drink! If you want a healthier drink, think about sugar substitutes. Honey or agave syrup can replace granulated sugar. They add sweetness without refined sugars. You can also use stevia or monk fruit sweetener. These options reduce calories and keep the flavor. Adjust the amount to suit your taste. Both frozen and fresh ingredients work well for this drink. Fresh strawberries bring a bright flavor. If fresh ones are not available, frozen strawberries are a good choice. They also chill the drink quickly. Use frozen lemon juice for a convenient option too. Both types will yield a tasty Strawberry Frosted Lemonade. After enjoying your Strawberry Frosted Lemonade, store leftovers in a pitcher. Cover it with plastic wrap or a lid. Keep it in the fridge. This drink tastes best within two days. If you notice any separation, just shake it gently before serving again. If you want to freeze your Strawberry Frosted Lemonade, pour it into ice cube trays. This makes it easy to use later. Once frozen, transfer the cubes to a zip-top bag. Remove as much air as you can. This helps avoid freezer burn and keeps the flavor fresh. Prepared Strawberry Frosted Lemonade lasts about two days in the fridge. After that, the taste and texture may change. If frozen, enjoy it within three months for the best flavor. Always check for any off-smells or changes in color before consuming. Yes, you can make Strawberry Frosted Lemonade ahead of time. I suggest mixing the strawberry and lemon mixture first. Store it in the fridge. When it's time to serve, blend the ice and pour it over the mixture. This keeps the drink fresh and frosty. If you prepare it too early, the ice may melt and dilute the flavor. The nutritional facts may vary, but here’s a general idea: - Calories: About 150 per serving - Carbohydrates: Around 38 grams - Sugar: Roughly 30 grams - Fiber: 2 grams - Vitamin C: A good source from lemons and strawberries This drink is refreshing and provides some vitamins. Adjust the sugar to make it healthier. Yes, Strawberry Frosted Lemonade is naturally non-alcoholic. It is perfect for kids and anyone who prefers a fresh drink. Use the full recipe to enjoy this tasty treat without any alcohol. You can sip it on a hot day or serve it at parties. You now have a clear path to make Strawberry Frosted Lemonade. Start with the right ingredients and follow the steps to create a refreshing drink. Remember the tips for sweetness and ice texture. Feel free to try different fruits or sweeteners. Store any leftovers properly to keep them fresh. Enjoy this yummy drink with friends and family, or make it for yourself. Each glass can be a tasty treat. I hope this recipe inspires you to get creative in the kitchen!

Strawberry Frosted Lemonade Refreshing Summer Drink

Beat the heat this summer with my delicious Strawberry Frosted Lemonade! This drink combines the sweet taste of strawberries with

- Ground beef - Fresh Thai basil leaves - Garlic and ginger The main ingredients in Thai Basil Beef Rolls create a vibrant flavor. Ground beef gives a hearty base. Fresh Thai basil leaves add a fragrant kick. Garlic and ginger bring warmth and depth to the dish. - Soy sauce - Fish sauce (optional) - Sugar and sesame oil Seasonings are key to great flavor. Soy sauce gives a savory taste. Fish sauce adds umami, but it's optional. A touch of sugar balances saltiness. Sesame oil enhances the dish with nutty notes. - Rice paper wraps - Lettuce leaves - Fresh mint leaves Wrapping ingredients make the rolls fun and fresh. Rice paper wraps are soft and easy to use. Lettuce leaves add a crisp texture. Fresh mint leaves serve as a bright garnish. You can find the full recipe to make these delightful rolls. To start, gather all your ingredients. This includes: - 1 lb ground beef - 1 cup fresh Thai basil leaves, chopped - 2 cloves garlic, minced - 1 tablespoon ginger, grated - 2 tablespoons soy sauce - 1 tablespoon fish sauce (optional) - 1 teaspoon sugar - 1 tablespoon sesame oil - 8 rice paper wraps - Lettuce leaves (for wrapping) - Fresh mint leaves (for garnish) Next, soak the rice paper wraps. Fill a shallow dish with warm water. Dip each wrap for about 10-15 seconds. You want them soft, not too soggy. Place them on a clean surface to prepare for rolling. Now it’s time to cook the filling. Heat the sesame oil in a skillet over medium heat. Add the minced garlic and grated ginger. Sauté them until you smell their aroma, which takes about 1 minute. Then, add the ground beef to the skillet. Cook it until it’s brown and fully cooked, which should take about 6-8 minutes. Break the meat up with a spatula as it cooks. After the beef is cooked, stir in the soy sauce, fish sauce (if using), and sugar. Mix everything well and let it simmer for 2-3 minutes. Finally, remove the skillet from heat and fold in the chopped Thai basil. The heat will wilt the basil perfectly. Now, let’s assemble the rolls. Start with a softened rice paper wrap. Lay a lettuce leaf on top. Spoon a good amount of the beef mixture onto the lettuce. Carefully fold the sides of the rice paper over the filling. Then, roll it tightly from the bottom up, like a burrito. Repeat this process with the remaining rice paper and filling. Serve the rolls on a platter. Add fresh mint leaves on top for a lovely garnish. For the full recipe, check the previous section. Enjoy your Thai Basil Beef Rolls! To cook ground beef well, use medium heat. This keeps the beef juicy. Break it into small pieces as it cooks. This ensures even browning. Aim for a nice brown color without burning. For the rice paper, soak it in warm water. Do this for about 10-15 seconds. It should feel soft and pliable. If it gets too soft, it may tear. So, check it closely. Work with one sheet at a time to avoid sticking. You can add more herbs or spices to boost flavor. Try adding cilantro or chili flakes for heat. A splash of lime juice can brighten the taste too. Experiment until you find your favorite mix. For dipping sauces, peanut sauce or sweet chili sauce pair well. They add a nice contrast to the savory beef. Feel free to try other sauces you love. Pair these rolls with fresh veggies or a light salad. This adds crunch and freshness to the meal. You can also serve them with rice for a fuller dish. To present for guests, arrange the rolls on a nice platter. Garnish with mint leaves for a pop of color. You can even add small bowls of dipping sauce for fun. This makes your dish look inviting and tasty. For the full recipe, check out the recipe section above. Enjoy your cooking adventure! {{image_2}} You can switch the ground beef in this recipe. Ground chicken or turkey works well. They have a lighter taste but still absorb the flavors nicely. If you want a vegetarian option, use mashed tofu or lentils. Both give a great texture and soak up the sauces. Adding vegetables can boost nutrition and flavor. Think about bell peppers, carrots, or cucumbers. These add a nice crunch. You can also mix in other herbs like cilantro or mint. Each herb brings a new taste to your rolls. You can easily change the spice level. If you like heat, add red pepper flakes or sliced chili. For a milder version, skip the spicy extras. You can serve these rolls as a meal with a salad or as an appetizer at a party. They fit any setting! To keep your Thai Basil Beef Rolls fresh, use airtight containers. Glass or plastic containers work well. Store them in the fridge. They stay good for 2-3 days. After that, the rice paper can get too soft. The beef may lose its flavor. If you want to freeze the rolls, first wrap them tightly in plastic wrap. Then, place them in a freezer bag. Make sure to squeeze out any air. These rolls can stay frozen for up to 2 months. To reheat, let them thaw in the fridge overnight. Next, place them in a warm skillet for a few minutes. This keeps the rice paper soft and tasty. You can make these rolls ahead of time for a quick meal. Prepare the filling and soak the rice paper wraps. Store everything separately in the fridge. When you’re ready to eat, assemble the rolls quickly. This saves time and keeps them fresh. You’ll enjoy a flavorful meal in no time. For the full recipe, check above. To make these rolls gluten-free, swap regular soy sauce with tamari. Tamari gives a similar taste without gluten. You can also check if your fish sauce is gluten-free. It's best to use fresh rice paper wraps as they are usually gluten-free too. Yes, you can make these rolls ahead. Prepare the beef filling and store it in the fridge. For best taste, wrap the rice paper just before serving. If you make the rolls early, keep them in an airtight container. Use parchment paper between layers to avoid sticking. These rolls pair well with many sides. Try a light salad with lime dressing or a bowl of steamed rice. For dips, a sweet chili sauce or peanut sauce works great. You can also serve cucumber slices for a fresh crunch. To avoid tearing, handle rice paper gently. Soak it in warm water until soft but not too long. Lay it flat on a clean surface. Don’t overfill the wraps; a little goes a long way. Roll them loosely at first, then tighten as you go. Thai Basil Beef Rolls are fun and easy to make. You learned how to prepare the filling, assemble the rolls, and enhance their flavors. Remember to try different proteins and customize your dish to fit your taste. Store leftovers properly to keep them fresh. With these tips, you can impress your guests or enjoy a tasty snack at home. Keep experimenting and enjoy every bite of your delicious Thai Basil Beef Rolls.

Thai Basil Beef Rolls Flavorful and Easy Delight

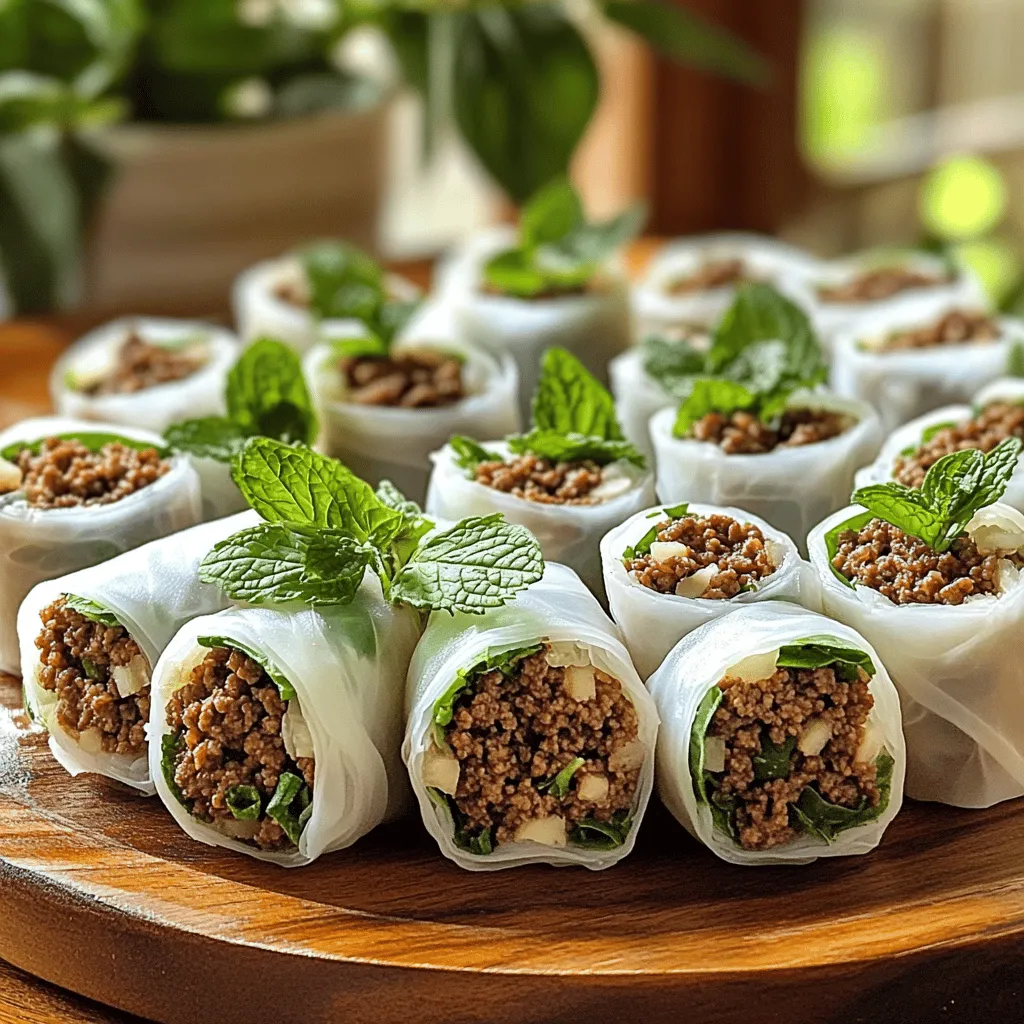
Are you ready to try something new in the kitchen? Thai Basil Beef Rolls are a tasty and fun dish

- Strawberries - Blueberries - Mango - Kiwi - Watermelon To make a bright and tasty summer fruit salad, you need fresh fruit. Each fruit adds flavor and color. I like to use strawberries, blueberries, mango, kiwi, and watermelon. These fruits are sweet, juicy, and perfect for hot days. - Strawberries: They bring a nice sweetness and bright red color. Pick ones that are firm and smell sweet. - Blueberries: These tiny berries burst with flavor and add a lovely blue hue. Look for plump berries with no wrinkles. - Mango: This tropical fruit is sweet and creamy. When ripe, it gives off a fruity smell. - Kiwi: This fuzzy fruit has a tangy taste and green flesh. Choose kiwis that feel slightly soft to the touch. - Watermelon: This refreshing fruit is hydrating and sweet. A ripe watermelon will sound hollow when tapped. - Honey - Lime zest - Lime juice - Sea salt The dressing makes the salad shine. It is simple to make and adds a burst of flavor. You will need honey, lime zest, lime juice, and a pinch of sea salt. - Honey: This adds sweetness and helps blend the flavors. Use raw honey for a richer taste. - Lime zest: This gives a fresh aroma and a citrus kick. Grate just the green part of the lime. - Lime juice: This adds acidity and balances the sweetness. Freshly squeezed lime juice works best. - Sea salt: A small pinch enhances all the flavors. It makes the fruit taste even better. - Fresh mint leaves Fresh mint leaves bring a pop of color and taste. They add a cool, refreshing note to the salad. Just chop a small handful and sprinkle it on top. You can also use whole leaves for decoration. For the full recipe, check out Sunny Bliss Summer Fruit Salad. This salad is not just pretty; it is also good for you. Enjoy making it! First, let's get our fruits ready. Start by hulling and halving the strawberries. This makes them easier to eat. Next, dice the mango and kiwi into small pieces. Aim for bite-sized cubes. For the watermelon, cut it into cubes too. This keeps the salad colorful and fun. Now, we need to make the dressing. In a small bowl, whisk together the honey, lime zest, and lime juice. This mixture adds a sweet and tangy flavor. Don't forget to add a pinch of sea salt. It enhances all the flavors in the salad. Once everything is prepped, it is time to combine. Toss the fruits with the dressing in a large bowl. Make sure every piece of fruit gets coated. Finally, add the chopped mint leaves for a burst of freshness. Mix gently so you don’t break the fruit. Let the salad sit in the fridge for about 15-20 minutes. This resting time helps the flavors mix. For the full recipe, check out Sunny Bliss Summer Fruit Salad. To make your salad shine, pick the best fruits. Look for strawberries that are bright red and plump. They should smell sweet and have no white spots. Mangoes should feel slightly soft when you press them. The skin should also have a rich, golden hue. For kiwis, choose ones that give a little when you squeeze them. They should feel firm but not hard. When it comes to choosing a watermelon, look for one that feels heavy for its size. The skin should be smooth and firm, with a nice yellow spot. This spot shows where the fruit rested on the ground and ripened in the sun. Serve your summer fruit salad chilled. It tastes best when it is cold and refreshing. Keep the salad in the fridge for about 15-20 minutes before serving. This helps the flavors blend. Use a clear bowl for a beautiful display. The bright colors of the fruits will pop. You can also garnish the top with mint leaves for a fancy touch. To add a twist to your salad, consider fresh herbs. Basil or cilantro can give it a unique taste. Just chop a few leaves and toss them in. If you want to try different dressings, swap honey for agave syrup. You can also mix in a splash of orange juice for brightness. For those who like a bit of spice, a pinch of cinnamon can add warmth and depth. For the full recipe, check out Sunny Bliss Summer Fruit Salad. {{image_2}} You can give your summer fruit salad a fun twist by adding pineapple or papaya. These fruits add sweetness and a tropical vibe. Just chop them into bite-sized pieces. You can also sprinkle some coconut flakes on top. This adds a nice crunch and enhances the island feel of your salad. For a berry medley, mix in fresh raspberries and blackberries. These berries add a pop of color and a tangy taste. If you want to change the flavor of the dressing, swap honey for agave syrup. The agave syrup keeps it sweet while giving a different, rich taste. To make your salad even more exciting, try incorporating cucumber or feta cheese. Cucumber adds a crisp and refreshing crunch. Feta cheese brings a creamy, salty flavor that balances the sweetness of the fruits. You can cube the cucumber and crumble the feta for easy mixing. For the full recipe, check out the Sunny Bliss Summer Fruit Salad. This salad is sure to impress at any summer gathering! To store leftovers, place the salad in a clean bowl. Cover it tightly with plastic wrap or a lid. This keeps the salad fresh and helps prevent browning. Glass containers work well for this. They let you see the colorful fruits inside. The salad lasts for about three days in the fridge. After that, fruits may lose their crunch. You'll know it's bad if you see mushy fruit or an off smell. Trust your senses to judge freshness. You can freeze fruit salad, but it may change texture. Fruits like watermelon and kiwi do not freeze well. To freeze, separate the fruits. Freeze berries and mango in a single layer on a tray. Once frozen, transfer them to a freezer bag. Use them later in smoothies or desserts. For the best taste, eat frozen fruits within three months. For the full recipe, check out Sunny Bliss Summer Fruit Salad. Enjoy your refreshing treat! For a great summer fruit salad, choose fresh fruits that shine in the warm months. Some top picks include: - Strawberries - Blueberries - Mango - Kiwi - Watermelon These fruits offer a mix of sweet and tart flavors. Their bright colors make your salad look amazing too. Yes, you can prepare the fruit salad ahead of time. Just keep a few tips in mind: - Cut fruits like mango and kiwi right before serving. - Mix the dressing separately and add it just before you serve. - Store the salad in an airtight container in the fridge. This way, your salad stays fresh and tasty! To stop fruits from browning, you can use a few simple tricks: - Squeeze lime juice on cut fruits like apples or bananas. - Use an airtight container to limit air exposure. - Keep the salad cold until serving. These methods will keep your salad looking bright and fresh. You can turn your summer fruit salad into a delightful dessert. Here are some ideas: - Top with whipped cream or yogurt for creaminess. - Add a sprinkle of granola for a crunchy texture. - Drizzle with extra honey or a fruity sauce for sweetness. These toppings will elevate your salad into a dessert that everyone will love. For the full recipe, check out Sunny Bliss Summer Fruit Salad. Summer fruit salad is a fun mix of fresh fruits and tasty dressing. You can make it with berries, mango, and watermelon. Don't forget to add a bit of mint for flavor. Follow the steps to prepare and combine everything right. Always choose ripe fruits for the best taste. Try different options and variations to keep it exciting. Store leftovers properly for later enjoyment. With these tips and ideas, your summer fruit salad will be fresh, vibrant, and delicious! Enjoy every bite!

Summer Fruit Salad Refreshing and Flavorful Delight

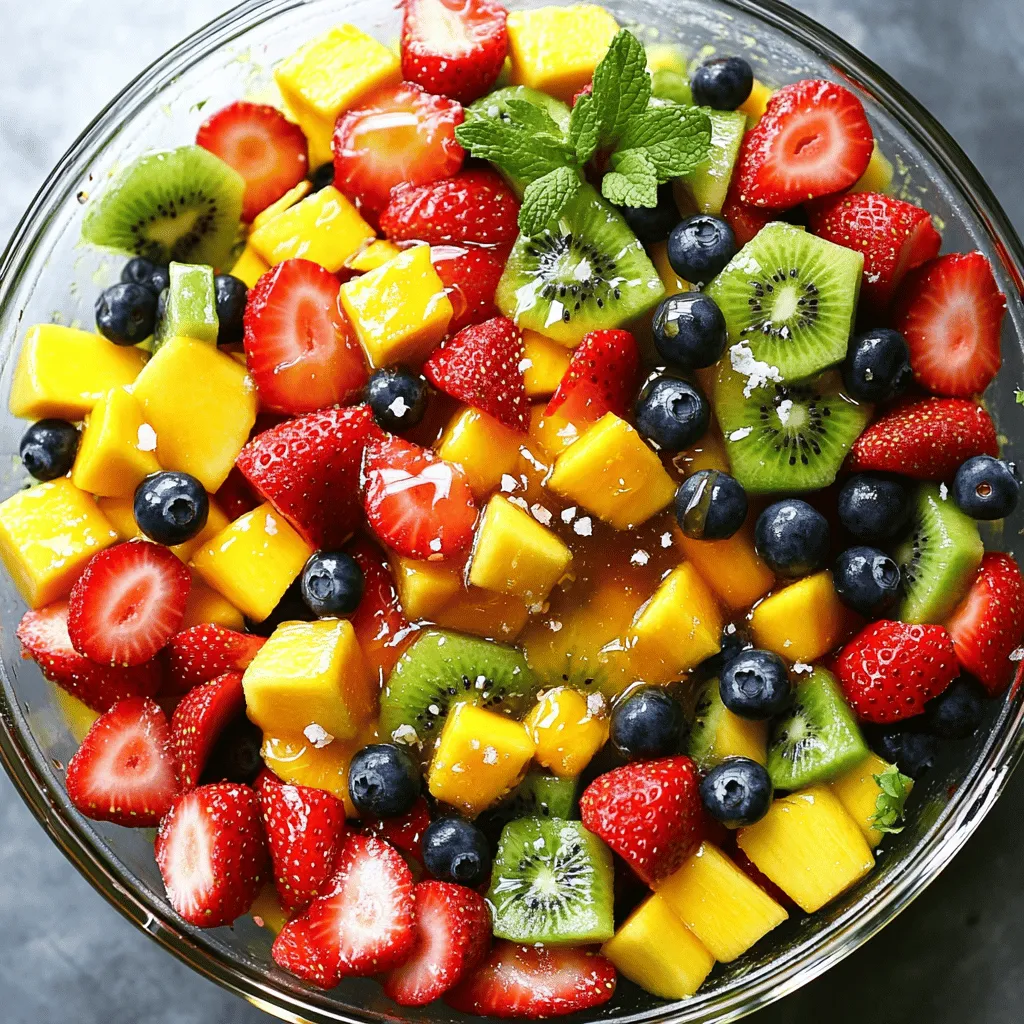
Summer brings a burst of flavors, and nothing captures that joy quite like a Summer Fruit Salad. Picture juicy strawberries,

- 3 large red bell peppers - 2 tablespoons olive oil - 3 cloves garlic, minced - 1 small onion, diced - 1 teaspoon crushed red pepper flakes - 1 cup vegetable broth - 1 cup heavy cream (or coconut cream for a dairy-free option) - 1 pound spaghetti or your pasta of choice - ½ cup grated Parmesan cheese (or nutritional yeast for a vegan option) - Salt and pepper to taste - Fresh basil leaves, for garnish - Baking sheet - Blender or immersion blender - Large skillet - Pot for boiling pasta This dish is not only tasty but also filling. Each serving has about 450 calories. You get healthy fats from the cream and olive oil. It has about 15 grams of fat, 55 grams of carbs, and 12 grams of protein. The heavy cream gives it that rich taste. Roasting the red peppers adds a sweet flavor. They turn soft and bright. You’ll enjoy the garlic and onion too. They mix well with the peppers. If you like a little heat, add crushed red pepper flakes. This meal is great for weeknights. It takes about 45 minutes to make. Plus, it’s fun to cook! You can share it with friends or family. Don’t forget, you can find the Full Recipe in the article. - Preheat your oven to 450°F (230°C). - Place the three large red bell peppers on a baking sheet. - Roast the peppers for 20-25 minutes until the skins are charred and blistered. - Remove them from the oven and let them cool for a bit. - Once cool, peel off the charred skin and remove the seeds. - In a large skillet, heat 2 tablespoons of olive oil over medium heat. - Add one small diced onion and sauté until it’s soft, about 3-4 minutes. - Stir in three minced garlic cloves and 1 teaspoon of crushed red pepper flakes for some heat. Cook for one more minute. - Add the roasted red peppers, chopped, to the skillet. - Pour in 1 cup of vegetable broth and season with salt and pepper. - Use an immersion blender to puree the mixture until smooth. - Stir in 1 cup of heavy cream and let it simmer gently for 5-7 minutes until slightly thickened. - Boil 1 pound of spaghetti in a large pot of salted water until al dente. - Drain the pasta, keeping ½ cup of the pasta water. - Toss the drained pasta with the creamy sauce until well coated. - If the sauce is too thick, add a splash of the reserved pasta water. - Plate the pasta into bowls, topping with ½ cup of grated Parmesan cheese. - Garnish with fresh basil leaves for a pop of color. - A drizzle of olive oil on top adds a nice touch. - Serve with garlic bread to complete the meal. For detailed steps, refer to the Full Recipe. To roast peppers, start with the right temperature. Preheat your oven to 450°F (230°C). Place the red bell peppers on a baking sheet. Roast them for 20-25 minutes. Turn them often until their skins are charred. This gives them a nice smoky flavor. You can also roast peppers on a grill. Just place them directly over the flame and turn until charred. Another option is the stovetop. Use tongs to hold each pepper over a flame. This method adds a nice char as well. You can change the heat in your dish easily. For a mild flavor, skip the crushed red pepper flakes. If you want more heat, add more flakes. You can also use fresh chili peppers for a kick. To enhance flavor, consider adding fresh herbs. Basil and parsley work well. You can also add a splash of balsamic vinegar. It adds depth and brightness to the sauce. Making the sauce dairy-free is simple. Swap heavy cream for coconut cream. It gives a rich texture without dairy. You can also use cashew cream for a nut-based option. For a thicker sauce, let it simmer longer. This helps the flavors develop and the sauce to thicken. You can also add a bit of cheese to help with thickness. Nutritional yeast is a great option for a vegan twist. For the Full Recipe, check the recipe section above. {{image_2}} You can easily add protein to your roasted red pepper pasta. Here are some tasty options: - Chicken: Cook and slice grilled or sautéed chicken. Toss it in just before serving. - Shrimp: Sauté shrimp until pink and add them to the pasta. They cook quickly and add great flavor. - Tofu: For a plant-based choice, use firm tofu. Sauté it until golden, then mix it in with the sauce. These additions make the dish heartier and more filling. If you want to keep it vegetarian or vegan, consider these ideas: - Spinach: Add fresh spinach to the sauce for extra greens. It wilts down nicely and adds color. - Mushrooms: Sauté sliced mushrooms with the onion and garlic. They bring a nice umami flavor. - Chickpeas: Add canned chickpeas for protein. They also help to make the dish more filling. These swaps keep the meal tasty while catering to different diets. You can choose various pasta types based on your needs: - Gluten-Free Pasta: Look for gluten-free brands made from rice or chickpeas. They work great with the sauce. - Whole Grain Pasta: Whole grain options add fiber and a nutty flavor. They make the dish more nutritious. - Pasta Shapes: You can try different shapes like penne or fusilli. They hold onto the sauce well. These choices ensure everyone can enjoy this creamy delight. For the Full Recipe, check out the main article. To keep your roasted red pepper pasta fresh, store it in an airtight container. This method prevents moisture loss and keeps flavors intact. You can refrigerate it for up to three days. After that, the taste and texture may change. You can freeze portions of this pasta for later enjoyment. Let it cool completely before packing. Use freezer-safe containers or bags. This way, you can keep it for up to three months. To thaw, move it to the fridge overnight. Reheat on the stove or in the microwave. To enjoy the best taste, reheat your pasta gently. Use low heat on the stove with a splash of water or olive oil. Stir often to avoid sticking. If using a microwave, cover it with a damp paper towel. This keeps moisture in and helps heat evenly. Enjoy your creamy delight again! Yes, you can! This dish is great for meal prep. Cook the pasta and sauce separately. Store them in airtight containers. The sauce keeps well in the fridge for up to three days. When ready to eat, just reheat the sauce and cook the pasta fresh. This keeps everything tasty and fresh! I love serving this pasta with garlic bread or a fresh salad. A crisp Caesar salad adds a nice crunch. You can also pair it with steamed veggies for a healthy side. For a heartier meal, try grilled chicken or shrimp as a protein option. To add heat, use more crushed red pepper flakes. You could also add diced jalapeños to the sauce. If you enjoy a smoky flavor, try chipotle peppers in adobo sauce. They bring heat and a unique taste. Just remember to adjust the spice level to your liking! Roasted Red Pepper Pasta stands out due to its rich and creamy sauce. The roasted peppers provide a sweet, smoky flavor. Combining them with garlic and cream creates a delightful taste. Plus, you can customize it with different cheeses or proteins. It’s an easy way to enjoy gourmet flavors at home! You can find the Full Recipe [here](#). It has all the details you need to make this delicious dish! This blog post covers a tasty Roasted Red Pepper Pasta recipe. We discussed ingredients, equipment, and step-by-step instructions. You learned how to roast peppers and make a creamy sauce. We shared storage tips and creative variations to suit your needs. In conclusion, cooking this dish is simple and fun. You can customize it to fit any taste. Enjoy this bright, flavorful meal with friends or family. Embrace your inner chef and make this recipe yours!

Roasted Red Pepper Pasta Rich and Creamy Delight

If you’re craving a dish that’s both rich and creamy, look no further! This Roasted Red Pepper Pasta is my

To make this delightful lemon tiramisu, gather these fresh and simple ingredients: - 1 cup freshly squeezed lemon juice - Zest of 2 lemons - 1 cup granulated sugar - 1 cup mascarpone cheese - 1 cup heavy whipping cream - 1 teaspoon vanilla extract - 20 ladyfinger cookies - 1 cup strong brewed coffee, cooled - Additional lemon zest for garnish - A sprinkle of powdered sugar for dusting These ingredients blend to create a bright and zesty dessert. Fresh lemon juice is key. It gives the tiramisu its vibrant flavor. The zest adds extra fragrance and depth. You need granulated sugar to sweeten and balance the tartness. Mascarpone cheese makes the dessert creamy. Heavy whipping cream adds lightness and fluffiness. The vanilla extract rounds out the flavors. Ladyfingers soak up the coffee and lemon mixture, creating layers of taste. Brew your coffee strong. This will help it stand up to the sweet and tangy lemon. You can also use a sprinkle of powdered sugar for a lovely finish. For the full recipe, check out the complete instructions on how to bring this lemon tiramisu to life! 1. Start by whisking together the lemon juice, lemon zest, and sugar in a bowl. Make sure the sugar dissolves well. This mix gives the dessert a bright and zesty flavor. 2. Next, grab another bowl and combine the mascarpone cheese, heavy whipping cream, and vanilla extract. Use an electric mixer to whip this mixture until soft peaks form. This step creates a rich and creamy base for your tiramisu. 3. Now, gently fold the lemon-sugar mix into the mascarpone mixture. Be careful to keep the mixture light and airy. This folding is key to a fluffy texture. 1. Take each ladyfinger and dip it quickly into the brewed coffee. Don’t let them soak; just a quick dip will do. This keeps the ladyfingers from getting too soggy. 2. Arrange the dipped ladyfingers in the bottom of a rectangular dish. Make sure to cover the base completely with no gaps. This creates a solid layer for your dessert. 3. Spread half of the lemon mascarpone mixture over the ladyfingers. Use a spatula to smooth it out evenly. Then, add another layer of dipped ladyfingers on top, followed by the rest of the lemon mascarpone mixture. 1. Cover the dish tightly with plastic wrap. Chill the dessert in the fridge for at least 4 hours. For the best taste, let it sit overnight. This time allows the flavors to blend well. 2. Just before serving, dust the top with powdered sugar. You can also garnish with extra lemon zest for a pop of color and flavor. 3. For a fun twist, serve in individual dessert glasses. Each glass can get a sprinkle of powdered sugar and a twist of lemon zest on top. This makes for a beautiful presentation. For the full recipe, check out the details above. Enjoy your zesty lemon tiramisu! Using fresh lemon juice is key. Fresh juice gives a bright taste. Bottled juice can taste flat and dull. Always zest your lemons too. The zest adds a strong lemon flavor and aroma. Balancing sweetness is also important. You want a nice contrast to the tartness of lemon. Adjust the sugar to fit your taste. Start with the recipe's amount and tweak as needed. To keep the mascarpone light, don’t over-mix it. Fold the lemon mixture gently into the mascarpone. This keeps the airiness you want. When dipping ladyfingers, act fast. Quickly dip them in coffee; don’t soak them. If they soak too long, they’ll become mushy. A quick dip keeps them firm yet tasty. Garnishing makes a big difference. Add extra lemon zest on top for color. A sprinkle of powdered sugar gives a nice finish. You can serve this in individual glasses. This adds a fun touch to your dessert. Or, you can use a big dish for sharing. Both options look great and taste amazing. For the full recipe, check the link. {{image_2}} You can boost your lemon tiramisu with fun flavors. Try adding layers of berries, like raspberries or strawberries. The tartness of the berries pairs well with the lemon. Just place them between the layers of the creamy mascarpone mix. You can also infuse the dessert with herbs. Mint adds a fresh twist. Chop some mint leaves finely and mix them into the mascarpone. It brightens the dish and adds an unexpected flavor. If you need gluten-free options, use gluten-free ladyfingers. They taste just as good and keep the recipe intact. You can find these at many grocery stores or online. For dairy-free needs, try using coconut cream instead of mascarpone. It gives a rich texture and a subtle coconut taste. Almond or soy cream works too. Just make sure it is thick enough to whip. To make your lemon tiramisu even more fun, transform it into cakes. Use a round cake pan and layer the ingredients. Once set, cut into slices for serving. You can also serve it with lemon curd or fruit compote. The extra tartness of the lemon curd enhances the flavor. It adds a nice contrast to the creamy layers. For the full recipe, check out the earlier section. To keep your lemon tiramisu fresh, store it in the fridge. Cover it with plastic wrap or a lid. This prevents it from absorbing other smells. Avoid sogginess by not soaking ladyfingers too much. Just a quick dip in coffee is enough. This keeps them firm and tasty. Yes, you can freeze lemon tiramisu! This is great if you want to save some for later. Cut it into portions before freezing. Wrap each piece tightly in plastic wrap. Then place them in an airtight container. To thaw, move the dessert to the fridge overnight. This keeps the texture nice and creamy. In the fridge, lemon tiramisu lasts about 3 to 5 days. If it starts to smell sour or looks watery, it’s time to toss it. Always check for signs of spoilage before enjoying your dessert. Keeping it covered helps it last longer and stay fresh. For the full recipe, check out the Zesty Lemon Tiramisu. Can you use store-bought lemon curd? Yes, you can use store-bought lemon curd. It saves time and adds great flavor. Just spread it between layers of mascarpone for a zesty kick. Is there a non-coffee alternative for dipping? Yes, you can use herbal tea or lemon juice mixed with water. This keeps the dessert light and fresh without the coffee flavor. What can I use instead of mascarpone? You can use cream cheese or ricotta. Mix with a bit of heavy cream for a similar texture. This works well if you want a lighter option. Can I use other citrus fruits for a twist? Absolutely! You can try lime or orange. Each fruit will give a unique taste, making it fun to experiment with flavors. How far in advance can I prepare it? You can make it up to two days in advance. This gives the flavors time to blend beautifully. Just cover it well in the fridge. Is it still good the next day? Yes, it tastes even better the next day. The layers soften, and the flavors deepen, making each bite delightful. This blog post covered how to make a delicious lemon tiramisu. We looked at every step, from the perfect ingredients to expert storage tips. Remember to use fresh lemon juice for the best flavor. Enjoy the fun of layering your dessert and take advantage of creative variations. Whether you serve it in individual cups or a big dish, it will impress every time. Try this recipe, and savor each bite of this bright, zesty treat. Your guests will love it!

Lemon Tiramisu Delightful and Easy Dessert Recipe

Are you ready to impress your guests with a fresh twist on a classic dessert? This Lemon Tiramisu is simple,

To make a tasty lemon cheesecake mousse, you need a few key items. Here is the list of essential ingredients: - 1 cup cream cheese, softened - 1/2 cup powdered sugar - 1 cup heavy whipping cream - 1/4 cup fresh lemon juice - Zest of 1 lemon - 1 teaspoon vanilla extract - 1/4 teaspoon salt These ingredients create the smooth and creamy texture that we love in this dessert. The cream cheese adds richness, while the heavy cream makes it light and fluffy. Fresh lemon juice and zest give that bright flavor. Using the right tools helps you create the best mousse. Here are some recommended tools: - Mixing bowls - Electric mixer - Spatula - Measuring cups and spoons - Serving glasses or dishes Having these tools ready will make your cooking time easy and fun. An electric mixer is great for beating the cream cheese and whipping the heavy cream. To make your dessert even better, consider some fun garnishes and add-ins: - Lemon slices - Fresh mint leaves - Berries (like blueberries or raspberries) - Crushed graham crackers These extras can add color and taste to your mousse. Lemon slices and mint leaves make it look pretty. Berries bring a nice burst of flavor. If you like a crunchy texture, sprinkle some crushed graham crackers on top. For the full recipe, refer to the section above. This mousse is a delight to make and eat! To start, gather your tools. You need a mixing bowl and an electric mixer. In the bowl, add 1 cup of softened cream cheese and 1/2 cup of powdered sugar. Beat them together on medium speed. Mix until smooth and creamy. Make sure there are no lumps. Next, slowly pour in 1/4 cup of fresh lemon juice. Add the zest of one lemon, 1 teaspoon of vanilla extract, and 1/4 teaspoon of salt. Mix until everything blends well together. This step makes your mousse rich and tangy. Now, take another bowl and pour in 1 cup of heavy whipping cream. It’s best if the cream is cold. Use your electric mixer again to whip the cream. Whip until medium to stiff peaks form. This process takes about 3 to 5 minutes. Be careful not to over-whip. You want a light and airy texture. This whipped cream adds fluffiness to your mousse. It’s time to combine the two mixtures. First, gently add the whipped cream to the cream cheese mixture. Use a spatula to fold them together. Be very gentle. You want to keep the air in the whipped cream. Fold until there are no streaks of cream left. This step is key to making your mousse light and fluffy. Once mixed, spoon the mousse into serving glasses. Chill in the fridge for at least 2 hours, or until set. This cooling time helps the flavors develop. For the full recipe, check the complete list of steps above. To get the lightest mousse, whip the cream until it forms medium to stiff peaks. This step adds air and makes your dessert fluffy. Be gentle when folding the whipped cream into the cheese mixture. Use a spatula and fold slowly to keep the air in the whipped cream. If you mix too hard, your mousse may become dense. You can easily change flavors in this recipe. Instead of lemon, try lime for a fresh twist. You can also use orange juice and zest for a sweet and tangy mousse. For a berry flavor, blend in pureed strawberries or raspberries. Just remember to adjust the sugar level based on the sweetness of your chosen fruit. Using the right tools makes this recipe easier. An electric mixer helps achieve the best texture for your whipped cream. A spatula is key for folding without losing air. I also recommend using serving glasses to layer the mousse. It makes a beautiful presentation, plus it’s easy for serving. Check out the Full Recipe for more details! {{image_2}} To make a gluten-free lemon cheesecake mousse, focus on the ingredients. All the items in the full recipe are naturally gluten-free. You can enjoy this treat without worry. Just ensure that any brand you choose for cream cheese and whipped cream is marked gluten-free. If you want a vegan option, substitute cream cheese with a plant-based spread. Look for brands made from nuts or soy. For whipping cream, use coconut cream. Chill a can of coconut milk overnight. Then, scoop out the solid cream. Whip it just like heavy cream. This will give you a light and creamy mousse, perfect for any vegan diet. Want to add more flavor? You can swirl in fresh berries like raspberries or strawberries. Just mash the berries slightly and fold them into the mousse before chilling. This creates a beautiful and tasty effect. You can also drizzle melted dark chocolate on top. It adds a rich taste that pairs well with lemon. Just make sure to let the chocolate cool slightly before drizzling. To keep your lemon cheesecake mousse fresh, store it in an airtight container. This protects the mousse from air and moisture. Use a glass or plastic container that seals well. Avoid touching the mousse with utensils to prevent contamination. Always chill the mousse in the refrigerator after making it. This helps maintain its fluffy texture. You can keep lemon cheesecake mousse in the refrigerator for about 3 days. If you want the best taste and texture, eat it within the first two days. After that, the mousse may start to lose its lightness. Always check for any changes in smell or texture before serving. You can freeze lemon cheesecake mousse, but it may change texture. To freeze, first, spoon the mousse into a freezer-safe container. Leave some space at the top for expansion. Wrap the container tightly to avoid freezer burn. You can store it for up to 2 months. When ready to eat, thaw it in the refrigerator overnight. After thawing, it might need a gentle stir to restore its creamy consistency. For the full recipe, refer to the earlier section. Mousse is light and airy. It has whipped cream or egg whites folded in. Cheesecake is denser and creamier. It uses cream cheese as the main base. You can think of mousse as a fluffy, light dessert. Cheesecake is rich and filling. They both have great flavors, but their textures and weights are quite different. You can use bottled lemon juice if you must. However, fresh lemon juice gives the best flavor. It tastes brighter and more vibrant. Fresh zest also adds a nice touch to the mousse. If you use bottled juice, ensure it is 100% lemon juice for better taste. To check if your mousse is set, gently touch the top. It should feel firm but still slightly soft. If it jiggles a little, that’s okay. Chill it longer if it seems too runny. After two hours in the fridge, it should be ready to serve. Enjoy your creamy treat! This blog post covered how to make lemon cheesecake mousse. We explored the essential ingredients, tools, and tasty garnishes. I shared step-by-step directions for preparing the dish and tips to perfect the texture. You now know how to customize the mousse to fit your needs, whether gluten-free or vegan. Proper storage tips will help keep it fresh. Enjoy making your mousse, experimenting with flavors, and impressing everyone with your new skill. Happy cooking!

Lemon Cheesecake Mousse Creamy and Light Dessert Delight

Lemon Cheesecake Mousse is a creamy and light dessert that delights the senses. If you love cheesecake but want a

- 4 bone-in, skin-on chicken thighs - 1 cup cherry tomatoes, halved - 1 zucchini, sliced into half-moons - 1 bell pepper (red or yellow), sliced - 1 red onion, cut into wedges For this dish, I love using bone-in, skin-on chicken thighs. They stay juicy and flavorful during cooking. I pair them with fresh vegetables like cherry tomatoes, zucchini, bell pepper, and red onion. These veggies roast beautifully and soak up all the tasty flavors. - 1/4 cup balsamic vinegar - 1/4 cup olive oil - 3 tablespoons honey - 3 cloves garlic, minced - 1 teaspoon dried oregano - Salt and pepper to taste The marinade is key to making this dish shine. I combine balsamic vinegar, olive oil, and honey for a sweet and tangy flavor. I add minced garlic and dried oregano for depth. Don't forget salt and pepper for seasoning. This marinade not only flavors the chicken but also the veggies. For the full recipe, be sure to check the full recipe section. First, gather your ingredients for the marinade. In a small bowl, whisk together: - 1/4 cup balsamic vinegar - 1/4 cup olive oil - 3 tablespoons honey - 3 cloves garlic, minced - 1 teaspoon dried oregano - Salt and pepper to taste This mix combines sweet and tangy flavors, perfect for the chicken. Once you have whisked it well, set it aside. Next, take your chicken thighs and place them in a large bowl or a zip-top bag. Pour half of the marinade over the chicken. Make sure each piece is well coated. Let the chicken marinate for at least 30 minutes. For even better flavor, marinate it in the fridge for up to two hours. While the chicken marinates, it’s time to prepare your sheet pan. Preheat your oven to 425°F (220°C). On a large sheet pan, arrange the marinated chicken thighs on one side. On the other side, add: - 1 cup cherry tomatoes, halved - 1 zucchini, sliced into half-moons - 1 bell pepper (red or yellow), sliced - 1 red onion, cut into wedges Drizzle the remaining marinade over the vegetables. Toss them gently to coat evenly. This ensures that every bite is bursting with flavor. Now, bake the sheet pan in the preheated oven. Cook it for about 30-35 minutes. The chicken should be cooked through, the skin crispy, and the vegetables tender. If you want extra crispy skin, turn on the broiler for an additional 2-3 minutes at the end. Just keep an eye on it to avoid burning. Let it rest for a few minutes before serving. This allows the juices to settle, making each bite juicy and flavorful. Don't forget to garnish with fresh basil before serving. For the complete recipe, check [Full Recipe]. To marinate chicken well, always use a bowl or a zip-top bag. This helps coat the chicken evenly. I suggest marinating for at least 30 minutes. For more flavor, try to marinate up to 2 hours. This lets the chicken soak up all the lemon and balsamic goodness. For even cooking on the sheet pan, place chicken and vegetables apart. This allows heat to circulate. Bake the chicken at 425°F (220°C) for 30-35 minutes. Check that the chicken is cooked through and the skin is crispy. If you want extra crispiness, broil for 2-3 minutes at the end. Fresh herbs can really make your dish pop. I love using basil for this recipe. It adds a lovely color and flavor. You could also sprinkle nuts or cheese on top for extra texture. Toasted pine nuts or crumbled feta work great! Check out the Full Recipe for more ideas. {{image_2}} You can easily switch the chicken for other proteins. Chicken breasts work well if you prefer leaner meat. They cook faster, so watch the time. If you want a vegetarian option, try firm tofu or tempeh. These soak up flavors nicely and add a nice texture. Using seasonal veggies can create a fresh twist. Asparagus, green beans, or squash can replace zucchini. Root vegetables like carrots and potatoes add a hearty touch. They not only increase flavor but also make the dish more filling. Feel free to play with herbs and spices. Fresh thyme or rosemary can add a lovely aroma. You can also tweak the sweetness in the marinade. If you like it less sweet, reduce the honey. For extra zing, try adding a splash of lemon juice or red pepper flakes. These small changes can transform the dish and keep your meals exciting. For the full recipe, check out the complete guide. To store leftovers safely, let the chicken cool first. Place it in an airtight container. Make sure the vegetables go in the same container or a separate one. This keeps them fresh. You can store the leftovers for up to four days in the fridge. The best method for reheating chicken is using the oven. Preheat it to 350°F (175°C). Place the chicken on a baking sheet with the veggies. Cover with foil to keep it moist. Heat for about 15-20 minutes. This helps the chicken stay juicy. For veggies, heat them just until warm. This keeps their texture. To freeze leftovers effectively, let them cool completely. Put the chicken and veggies in freezer-safe bags. Remove as much air as you can. They will last for about three months in the freezer. For defrosting, place them in the fridge overnight. This keeps the chicken and veggies from getting soggy. You can marinate chicken for at least 30 minutes. This time allows the flavors to soak in. For the best taste, marinate for up to 2 hours. The longer you marinate, the more intense the flavor becomes. Just remember not to exceed 24 hours. If you marinate for too long, the chicken can become mushy. Yes, you can use different vinegars. Apple cider vinegar adds a fruity touch. Red wine vinegar brings a robust flavor. Each type of vinegar changes the taste slightly. Adjust the sweetness in the marinade as needed. For example, if using a sharper vinegar, you may want to add a little more honey. I love serving this dish with rice or quinoa. They soak up the tasty juices well. You can also pair it with a fresh salad. Roasted vegetables make a great side too. For a complete meal, try serving it with garlic bread. Each of these options complements the chicken perfectly. You can find the full recipe [here](#). This recipe for Sheet Pan Lemon Balsamic Chicken is simple and tasty. You prepare a marinade, add chicken and veggies, then bake it. Enjoying great flavors is easy with this dish. Try different veggies or proteins to make it your own. Remember to marinate well for the best taste. With these tips, you can create a nutritious meal that your family will love. Enjoy your cooking!

Sheet Pan Lemon Balsamic Chicken Flavorful and Easy

Looking for a simple, tasty dinner? You’ve found it with my Sheet Pan Lemon Balsamic Chicken! This dish brings together

- 1 cup almond flour - 1 cup all-purpose flour - ¾ cup unsalted butter, softened - 1 cup granulated sugar - 3 large eggs The almond flour gives the cake a nice nutty taste. It also keeps the cake moist. All-purpose flour adds structure to the cake. Softened butter helps create a fluffy texture. Granulated sugar adds sweetness and helps with browning. The eggs bind everything together. - 1 cup unsalted butter, softened - 4 cups powdered sugar - ½ cup fresh raspberries (pureed) The butter in the buttercream makes it rich and creamy. Powdered sugar sweetens it and gives it that smooth finish. Fresh raspberries add a fruity flavor. Their bright color makes the cake look beautiful, too. - 1 teaspoon almond extract - 1 tablespoon lemon juice - Serving suggestions (e.g., fresh raspberries, powdered sugar) Almond extract enhances that nutty flavor. Lemon juice adds a fresh zing to the buttercream. You can serve the cake with fresh raspberries on top or dust it with powdered sugar for a lovely finish. For the full recipe, check out the detailed instructions. 1. Preheat your oven to 350°F (175°C). This step helps the cake rise well. 2. Grease and flour two 9-inch round cake pans. This prevents the cake from sticking. 3. In a bowl, whisk together the almond flour, all-purpose flour, baking powder, baking soda, and salt. Set this mix aside. 1. In a large mixing bowl, cream the softened butter and granulated sugar together until light and fluffy. This adds air to the batter. 2. Add the eggs one at a time, beating well after each addition. This helps the eggs blend in fully. 3. Mix in the vanilla and almond extracts. These flavors add depth to your cake. 4. Gradually add the dry ingredients to the wet mixture, alternating with the milk. Mix just until combined to avoid a dense cake. 1. Divide the batter evenly between the prepared cake pans. Smooth the tops for even baking. 2. Bake for 25-30 minutes. Check with a toothpick; it should come out clean when the cake is done. 3. Let the cakes cool in the pans for 10 minutes. Then turn them out onto wire racks to cool completely. 4. Meanwhile, prepare the raspberry buttercream. In a separate bowl, combine softened butter with powdered sugar using an electric mixer until well blended. 5. Add raspberry puree, lemon juice, and vanilla extract to the butter mixture. Beat on high speed until light and creamy. Adjust the consistency with more powdered sugar if needed. 6. Once the cakes are completely cool, place one layer on a serving plate. Spread a layer of raspberry buttercream on top. 7. Place the second layer on top and frost the entire cake with the remaining raspberry buttercream. Create swirls or decorative peaks as you like. For the full recipe and more details, check out the [Full Recipe]. Enjoy the process and get ready to share a delightful treat! - Ensure butter is softened properly: Softened butter blends well with sugar. It makes the cake light and fluffy. Leave your butter out for a bit before baking. - Use room temperature eggs: Cold eggs can shock the batter. Room temperature eggs mix smoothly. This helps create a better rise in your cake. - Adjusting consistency of frosting: If your buttercream is too thick, add a splash of milk. If it’s too thin, add more powdered sugar. Aim for a spreadable yet firm texture. - How to achieve decorative swirls: Use a spatula or a piping bag to create fun designs. Rotate the cake as you frost to make even swirls. Practice makes perfect! - Overmixing the batter: Mixing too long can make the cake dense. Mix just until the ingredients are combined. This keeps your cake airy and light. - Not cooling the cakes adequately: Cool your cakes completely before frosting. Frosting a warm cake can melt the buttercream. This step is key for a neat and pretty finish. For all the detailed steps, check the Full Recipe. {{image_2}} You can easily make a gluten-free almond cake. Use only almond flour or a gluten-free flour blend. This keeps the cake moist and delicious. For vegan options, replace eggs with flax eggs or applesauce. Mix one tablespoon of flaxseed meal with three tablespoons of water. Let it sit until it thickens. This works well and keeps the cake light. Want a citrus twist? Add lemon zest to the batter. This gives a fresh and bright flavor. Just one tablespoon can change the whole cake. You can also try different fruit purees. Instead of raspberries, use strawberries or blueberries. Each fruit brings its own unique taste. It’s fun to experiment with what you like best. Pair your cake with ice cream for a special treat. Vanilla or raspberry ice cream works great. The cold creaminess balances the sweet cake. Get creative with your presentation. Use fresh raspberries on top and dust with powdered sugar. You can also drizzle extra raspberry sauce around the cake for a splash of color. For the complete recipe, check out the Full Recipe section. Enjoy making your almond cake with raspberry buttercream delight! To keep your almond cake fresh, store it in an airtight container. This keeps moisture in and prevents it from drying out. If you have leftover raspberry buttercream, store it in a separate container. This will help it maintain its texture. You can also freeze the cake and frosting for longer storage. To freeze the cake, wrap each layer in plastic wrap. Then, place them in a freezer-safe bag. This protects the cake from freezer burn. For the frosting, use a clean, airtight container. You can freeze both for up to three months. The almond cake stays fresh for about three days at room temperature. If you keep it in the fridge, it lasts up to a week. When you want to enjoy a slice, you can reheat it. To reheat, use the microwave for about 15-20 seconds. This warms the cake without drying it out. If you prefer, you can heat it in the oven. Preheat the oven to 350°F (175°C), and place the cake in for about 10 minutes. This method keeps the cake moist and fluffy. When it’s time to enjoy your frozen cake, you need to thaw it safely. The best way is to move it from the freezer to the fridge. Let it thaw overnight. This method prevents it from getting soggy. If you need it quickly, you can thaw it at room temperature. Just allow it to sit for about two hours. After thawing, if the cake seems dry, you can refrost it with fresh raspberry buttercream. This adds moisture and flavor back to the cake. To make almond cake gluten-free, you can swap all-purpose flour with a gluten-free blend. Look for a blend that includes xanthan gum for better texture. You can also use only almond flour, but the cake might be denser. Yes, you can use frozen raspberries! Just thaw them first and drain any excess liquid. Puree the raspberries after thawing to keep the flavor strong. This way, your buttercream stays bright and tasty. If your buttercream gets too runny, add more powdered sugar. Start with a half cup and mix well. If it’s still not thick enough, keep adding sugar until you reach the right consistency. A thicker buttercream holds its shape better for decorating. To check if the cake is done, use a toothpick. Insert it into the center of the cake. If it comes out clean or with a few crumbs, the cake is ready. If it has wet batter on it, bake for a few more minutes. You now know how to make a delicious almond cake with raspberry buttercream. We covered key ingredients, step-by-step baking instructions, and helpful tips. Remember, you can adapt the recipe for dietary needs or add fun flavors. Storing your cake properly keeps it fresh for days. Enjoy your baking adventure and impress your friends with this tasty treat! A homemade cake is always a great way to celebrate.

Almond Cake with Raspberry Buttercream Delight

Are you ready to bake a stunning dessert that will wow your family and friends? My Almond Cake with Raspberry

Making Garlic Parmesan Grilled Chicken is easy with the right ingredients. Here’s what you need: - 4 boneless chicken breasts - 4 cloves garlic, minced - 1/2 cup grated Parmesan cheese - 1/4 cup olive oil - 1 tablespoon lemon juice - 1 teaspoon dried Italian herbs (oregano, thyme, basil) - Salt and pepper to taste - Fresh parsley for garnish These ingredients blend well to create a savory, rich flavor. The garlic gives a nice kick, while Parmesan adds a creamy touch. Olive oil helps keep the chicken moist as it cooks. Don't forget lemon juice; it brightens the dish. Using fresh herbs can add more depth to the flavor. I love how these simple items come together to make a tasty meal. Once you gather them, you're ready to start cooking! For the full recipe, you can check the instructions outlined above. To start, gather your ingredients. You need garlic, Parmesan, olive oil, lemon juice, herbs, salt, and pepper. Combine them in a mixing bowl. Mix well to create a flavor-packed marinade. The garlic gives a strong taste while the Parmesan adds creaminess. This marinade makes your chicken juicy and full of flavor. Next, take your chicken breasts and place them in a large resealable bag or a shallow dish. Pour the marinade over the chicken, making sure to coat it evenly. Seal the bag or cover the dish tightly. Refrigerate for at least 1 hour. You can leave it overnight for even more flavor. This step is key, as it helps the chicken absorb all those tasty flavors. Now it’s time to grill! Preheat your grill to medium-high heat. Lightly oil the grates to stop the chicken from sticking. Take the chicken out of the marinade and toss the leftover marinade. Place the chicken on the grill. Cook for about 6-7 minutes on each side. Make sure the internal temperature reaches 165°F. Once cooked, remove the chicken from the grill. Let it rest for 5 minutes. This helps keep it juicy. Finally, garnish with freshly chopped parsley before serving. For the full recipe, check the details above. Enjoy your tasty Garlic Parmesan Grilled Chicken! To boost the flavor of your Garlic Parmesan Grilled Chicken, consider adding a few spices. You can try smoked paprika or a pinch of cayenne for heat. Fresh herbs like basil or rosemary can also add a nice touch. Marinating the chicken is key. Let it soak in the marinade for at least an hour. For the best flavor, marinate overnight. This allows the chicken to absorb all those tasty flavors. If you don’t have a grill, you can bake or pan-fry the chicken. Baking at 375°F for 25-30 minutes works well. For pan-frying, use medium heat and cook for about 6-7 minutes on each side. Always check that the chicken reaches 165°F to ensure it is safe to eat. To keep the chicken juicy, don’t overcook it. Letting it rest for a few minutes after cooking helps, too. Serve your grilled chicken on a wooden platter for a rustic look. Garnish it with lemon wedges and extra Parmesan cheese for flair. For sides, grilled veggies or a fresh salad pair nicely. You could also add some garlic bread for a complete meal. These touches make the dish feel special and inviting. {{image_2}} You can change the herbs in the marinade to make this dish your own. Here are some ideas: - Rosemary: Adds a piney taste that pairs well with chicken. - Cilantro: Gives a fresh, bright flavor, especially if you love Mexican food. - Dill: Adds a light, tangy note that brightens the dish. Each herb can give the chicken a unique twist. For example, using rosemary brings a taste of the South while cilantro adds a hint of the Southwest. If you want to try different cheeses, here are a few options: - Feta: This cheese gives a salty, tangy flavor to the chicken. - Mozzarella: Adds creaminess and melts beautifully on the grill. - Goat Cheese: It offers a rich and unique taste that many enjoy. For a dairy-free version, look for vegan cheese options like cashew cheese or nutritional yeast. These can provide a similar flavor without the dairy. You can also cook Garlic Parmesan Chicken in different ways. - Oven-Baked: Preheat your oven to 375°F (190°C). Place marinated chicken on a baking sheet. Bake for 25-30 minutes or until it reaches 165°F (75°C). This method keeps the chicken juicy and tender. - Slow Cooker: For a hands-off approach, place the marinated chicken in a slow cooker. Cook on low for 4-6 hours. This method allows the flavors to deepen and makes the chicken very tender. These variations and methods can help you enjoy Garlic Parmesan Chicken in new ways. For the full recipe, check above! To store leftover grilled chicken, let it cool first. Place it in an airtight container. This helps keep it fresh. I suggest using glass or BPA-free plastic containers. These keep odors from spreading. Store the chicken in the fridge for up to four days. If you want to freeze the chicken, wrap each piece in plastic wrap. Then, place them in a freezer bag. Remove as much air as you can from the bag. This helps prevent freezer burn. You can freeze the chicken for up to three months. To defrost, move it to the fridge overnight. For quicker results, use the microwave's defrost setting. To reheat grilled chicken, avoid the microwave if you can. Instead, use the oven at 350°F (175°C). Cover the chicken with foil to keep it moist. Heat for about 20 minutes or until warm. You can also reheat on the stovetop. Just use low heat and add a splash of broth or water to keep it juicy. Enjoy your Garlic Parmesan Grilled Chicken! For the full recipe, check out the earlier section. You should marinate the chicken for at least 1 hour. This time allows the flavors to soak in. For even better taste, marinate it overnight in the fridge. The longer it sits, the more delicious it becomes. Yes, you can use frozen chicken. Just thaw it completely before marinating. Thaw in the fridge overnight for best results. This way, the chicken absorbs the marinade well. If you need a substitute for Parmesan cheese, try using Pecorino Romano. It has a strong flavor, just like Parmesan. You can also use nutritional yeast for a dairy-free option. This gives a cheesy taste without the dairy. To check if the chicken is done, use a meat thermometer. The internal temperature should reach 165°F (75°C). You can also look for clear juices when you cut into it. The meat should not be pink inside. In this blog post, we explored how to make Garlic Parmesan Chicken. You learned about the key ingredients and steps for a delicious marinade, along with grilling instructions. We discussed tips for enhancing flavor, various cooking methods, and ideas for serving. Remember, marinating is key for great flavor. Don’t hesitate to try different herbs and cheeses to suit your taste. Enjoy making this easy, tasty meal and impress your friends and family!

Garlic Parmesan Grilled Chicken Simple and Flavorful Meal

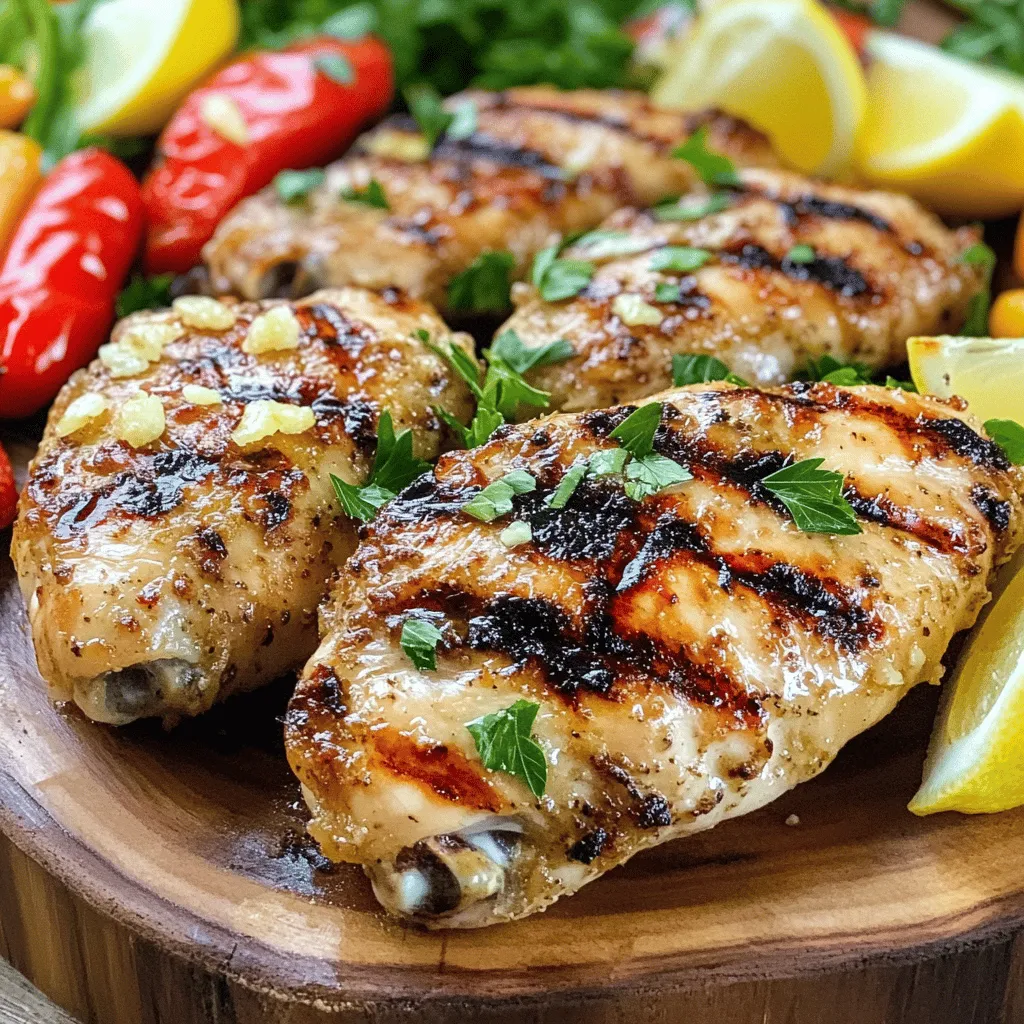
Looking for a simple yet tasty dinner idea? My Garlic Parmesan Grilled Chicken is a must-try! This dish combines juicy

To make Easy Dango, you need a few key ingredients. Here’s what you will need: - 1 cup sweet rice flour (mochi flour) - 1/3 cup granulated sugar - 1/2 cup water - A pinch of salt These ingredients blend well to create a sweet and chewy treat that you will love. You can add a twist to your dango with optional flavorings. Here are some ideas: - Food coloring (pink or green for fun colors) - Soy sauce or sweet soy glaze for dipping These options let you customize your dango to fit your taste and style. Having the right tools makes cooking easier. Here’s what you will need: - Mixing bowl - Slotted spoon - Pot for boiling water - Bamboo sticks (if you want to skewer the dango) With these tools, you can prepare and enjoy your Easy Dango without hassle. For the full recipe, check out the Sweet & Chewy Dango section. Enjoy making this delightful treat! To make the dough, start by mixing the sweet rice flour and sugar in a bowl. This mix is the base for your dango. Next, slowly add water while stirring. This helps the dough become smooth and thick. If you want to add color, put in a few drops of food coloring. Mix until the color spreads evenly. Let the dough rest for 10 minutes. This step makes it easier to shape. Bring a pot of water to a gentle boil. Take your dough and form small balls, about 1 inch wide. Gently drop the balls into the boiling water. Cook them for 5-7 minutes. You’ll know they’re done when they float. Use a slotted spoon to take them out and place them in cold water for 2 minutes. This stops the cooking. After that, drain the dango and let them cool. You can enjoy dango in many ways. For a classic touch, skewer the dango on bamboo sticks. This makes them easy to eat. If you like, dip them in soy sauce or sweet soy glaze. Both add a tasty twist. The dango can be served warm or at room temperature. They are perfect for any snack or dessert time. For the full recipe, check the earlier section! When making dango, watch out for a few common mistakes. - Too Much Water: Adding too much water can make the dough too sticky. Use the water slowly for the right texture. - Boiling Too Long: If you boil the dango too long, they may become tough. Aim for 5-7 minutes until they float. - Skipping the Rest: Let the dough rest for 10 minutes. This helps the texture and makes it easier to shape. To make your dango even better, consider these tips: - Use Sweet Rice Flour: This flour gives dango its unique chewy texture. Don't substitute with regular flour. - Food Coloring: Add a few drops of food coloring for fun. Pink or green colors make your dango pop! - Glaze Options: Try a sweet soy glaze for a rich flavor. It pairs well with the chewy dough. Make your dango look nice on the plate: - Skewering: Use bamboo sticks to skewer the dango. This adds a traditional touch. - Colorful Layers: Layer dango of different colors on a plate. It looks inviting and fun. - Garnishes: Add fresh fruit or mint leaves for a pop of color. This makes your dish even more appealing. For the full recipe, check out the Sweet & Chewy Dango section. {{image_2}} You can make your dango colorful and fun! Use food coloring to create bright shades. Pink and green are popular choices. Mix a few drops into your dough before cooking. This makes your dango look festive and appealing. You can even create a rainbow effect by using different colors for each ball. It’s a great way to impress friends and family! Dango can be sweet or savory. Sweet dango often uses sugar and is served with sweet sauces. You can try a sweet soy glaze for a tasty treat. For savory dango, add salt or miso to the dough. This gives it a unique flavor. Pair savory dango with a soy sauce dip for a delicious snack. Each option offers a different taste experience. Dipping sauces add a special touch to your dango. Sweet soy glaze is a popular choice; it’s rich and sticky. You can also use plain soy sauce for a salty kick. If you like a hint of sweetness, mix soy sauce with sugar. This creates a great balance. Experiment with different sauces to find your favorite! Each dip enhances the dango's flavor and makes it more enjoyable. After you enjoy your dango, you may have some left. To store leftover dango, place them in an airtight container. This helps keep them fresh. If you have a glaze on them, it’s best to store them without the glaze. This way, the dango won’t get soggy. Keep the container in the fridge. The dango will last for about three days. When you're ready to eat your stored dango, reheating is easy. You can steam them for a few minutes for the best taste and texture. If you don’t have a steamer, you can microwave them too. Place the dango on a microwave-safe plate. Add a damp paper towel on top. Heat for about 10-15 seconds at a time. Always check to make sure they are warm, not hot. Want to save dango for later? Freezing is a great option! First, let the cooked dango cool completely. Then, place them in a single layer on a baking sheet. Freeze them for about one hour. Once frozen, transfer them to a freezer-safe bag or container. Make sure to remove as much air as possible. You can freeze dango for up to one month. When ready to eat, just reheat them using the steaming method. Dango is a Japanese sweet made from rice flour. It comes in small round shapes. People often enjoy it on a stick. Dango can be served plain or with toppings. You can find it in many flavors, like sweet or savory. It is a popular treat during festivals and special events. Yes, you can use regular rice flour. However, the texture will change. Sweet rice flour gives dango its chewy and soft feel. If you use regular flour, the dango may be less sticky. For the best results, I recommend using sweet rice flour. You can find it in most Asian grocery stores. To change the texture, try adjusting the water content. More water makes softer dango. Less water will create a firmer texture. You can also experiment with steaming instead of boiling. Steaming gives dango a different feel and taste. Adding ingredients like mashed sweet potatoes can also change the texture. Making dango is simple and fun. We explored key ingredients, tools, and step-by-step instructions. You learned to prepare dough, cook it, and serve it well. Plus, we shared tips to avoid mistakes and enhance flavor. Don't forget the colorful variations and sauces that make dango exciting! In conclusion, dango offers endless possibilities. Enjoy experimenting with flavors and textures. Share your creations with friends and family to bring joy to your table. Your dango journey starts with the basics, but it can grow into something special.

Easy Dango Delight Simple Step-by-Step Recipe

Are you ready to make your own delicious dango? This Easy Dango Delight recipe breaks it down in simple steps.

Older posts
Newer posts
← Previous Page1 … Page6 Page7 Page8 … Page40 Next →

dsad

© 2025 flavorsprint • Built with GeneratePress

Our Policies

  • Copyright Policy
  • Cookie Policy
  • GDPR Policy
  • Privacy Policy
  • Disclaimer
  • Terms Of Use

More Information

  • Home
  • About
  • Contact
  • Appetizers
  • Dessert
  • Dinner
  • Drinks
©2025, flavorsprint About Back To Top