![To make No Bake Oreo Cheesecake Bars, you need some key ingredients. These items create a creamy and rich dessert that everyone loves. - 24 Oreo cookies, crushed (plus extra for topping) - 1/4 cup unsalted butter, melted - 2 cups cream cheese, softened - 1 cup powdered sugar - 1 teaspoon vanilla extract - 2 cups whipped cream (or cool whip) - 1/2 cup chocolate sauce (for drizzling) Optional ingredients for customization: - Add flavored extracts like mint or almond for a twist. - Mix in fruit like raspberries or strawberries for a fresh taste. - Use gluten-free Oreo cookies if needed. These ingredients are easy to find and fun to work with. You can create a tasty treat that everyone will enjoy. For the full recipe, check out the instructions in the next section. 1. Start with the crust. In a bowl, combine 24 crushed Oreo cookies and 1/4 cup melted butter. Mix until it looks like wet sand. 2. Press the crust mixture firmly into a 9x9-inch baking dish. Use a measuring cup to smooth it out. This will help make a solid base. 3. Now, let’s make the cream cheese filling. In another bowl, beat 2 cups of softened cream cheese until it is nice and smooth. 4. Add 1 cup of powdered sugar and 1 teaspoon of vanilla extract. Mix until fluffy and creamy. Make sure it is well combined. 5. Next, gently fold in 2 cups of whipped cream. Keep folding until you see no streaks. This step adds air and lightness to the filling. 6. Spread the cream cheese mixture over the crust you made. Use a spatula to smooth the top evenly. 7. For a fun touch, crush a few more Oreo cookies. Sprinkle them on top of the cheesecake layer. 8. Drizzle 1/2 cup of chocolate sauce over the top for a sweet finishing touch. - Chill the cheesecake bars in the fridge for at least 4 hours. This helps them set well. - When it’s time to serve, cut the bars into squares. Use a sharp knife for clean cuts. - Place the bars on a decorative plate. You can add extra whipped cream and chocolate sauce on top for a pretty look. This method ensures you get delicious, creamy bars that everyone will love! For more details, check the Full Recipe. - Overmixing the cream cheese filling: Mixing too much makes it dense and heavy. Beat just until smooth and fluffy. - Not pressing the crust firmly enough: A loose crust will crumble when you cut the bars. Press down firmly to get a solid base. - Ensure cream cheese is at room temperature: Cold cream cheese makes it hard to blend. Let it sit out for about 30 minutes before you start. - Use quality whipped cream for better texture: A good whipped cream makes the filling light. Look for ones with simple ingredients for the best taste. - Ideas for garnishing each bar: Top with extra Oreo crumbs, a dollop of whipped cream, or fresh fruit for a pop of color. - Pairing options: Enjoy these bars with a cup of coffee or a glass of dessert wine. The flavors blend well and enhance each bite. For the complete recipe, check out the [Full Recipe]. {{image_2}} You can make No Bake Oreo Cheesecake Bars even more fun by playing with flavors. Adding different extracts can change the taste. For example, mint extract gives a cool twist. Almond extract brings a nice nutty flavor. Simply replace the vanilla extract in the recipe with the one you choose. You can also add fruit to the mix. Chopped strawberries or raspberries add a fresh taste. Fold them into the cream cheese filling for bursts of flavor. You could even make a berry sauce to drizzle on top! This adds color and a fruity touch to each bite. If you need to make some swaps, you have options. You can use gluten-free Oreo cookies for a gluten-free treat. They taste just as good, and no one will know the difference. Just crush them up like regular Oreos. For cream cheese, there are dairy-free options. You can use vegan cream cheese made from nuts or soy. This way, you can serve the bars to those with dairy allergies. They will still be creamy and delicious. You can find the full recipe above to try these variations and substitutions! To keep your No Bake Oreo Cheesecake Bars fresh, store them in the fridge. Place them in an airtight container. This helps prevent them from drying out. If you don’t have a container, wrap them tightly with plastic wrap. Make sure to cover all sides to keep them safe from odors. If you want to save some for later, you can freeze them. First, cut the bars into squares. Then, wrap each square in plastic wrap. Place them in a freezer-safe bag or container. This way, they won’t stick together. When you want to enjoy them, just thaw them in the fridge overnight. For the best taste and texture, consume your bars within a week. After that, they may start to lose flavor. If you see any signs of mold or an off smell, it’s best to toss them. Fresh bars should look creamy and have a nice chocolate aroma. Enjoy them while they are at their best! No Bake Oreo Cheesecake Bars can last about 5 days in the fridge. Make sure to store them in an airtight container. This keeps them fresh and tasty. After a few days, the texture may change, but the flavor stays good. You can enjoy them cold for a nice treat. Yes, you can make these bars ahead of time. I often prepare them the night before a party. Chilling them overnight helps the flavors blend well. Just make sure to cover them tightly with plastic wrap or foil. This keeps them fresh until you are ready to serve. If you don’t have whipped cream, try using cool whip. You can also whip up some heavy cream with sugar. This gives a similar light texture. For a dairy-free option, use coconut cream. It adds a nice flavor and still keeps it creamy. While these bars are meant to be no-bake, you can bake them if you prefer. Just bake the crust at 350°F for 10 minutes before adding the filling. Let it cool completely before spreading the cream cheese mix. Baking changes the texture, so it will taste a bit different. Yes, you can use reduced-fat cream cheese and whipped cream. The taste may change slightly, but the bars will still be delicious. Many people enjoy them just as much. Just remember, using full-fat ingredients often gives a richer flavor and creamier texture. No Bake Oreo Cheesecake Bars are simple and fun to make. We covered key ingredients, preparation steps, and tips to avoid mistakes. Remember to chill the bars for the best texture. You can even customize flavors or substitute ingredients based on your needs. With proper storage, these treats last longer and taste great. Enjoy your creation; it is sure to impress!](https://flavorsprint.com/wp-content/uploads/2025/06/502ac5f7-68f3-4851-ba8a-193489a85c2c.webp)
No Bake Oreo Cheesecake Bars Easy and Delicious Treat
Looking for a quick, tasty dessert? You’ll love these No Bake Oreo Cheesecake Bars! They are easy to make and
Looking for a quick, tasty dessert? You’ll love these No Bake Oreo Cheesecake Bars! They are easy to make and
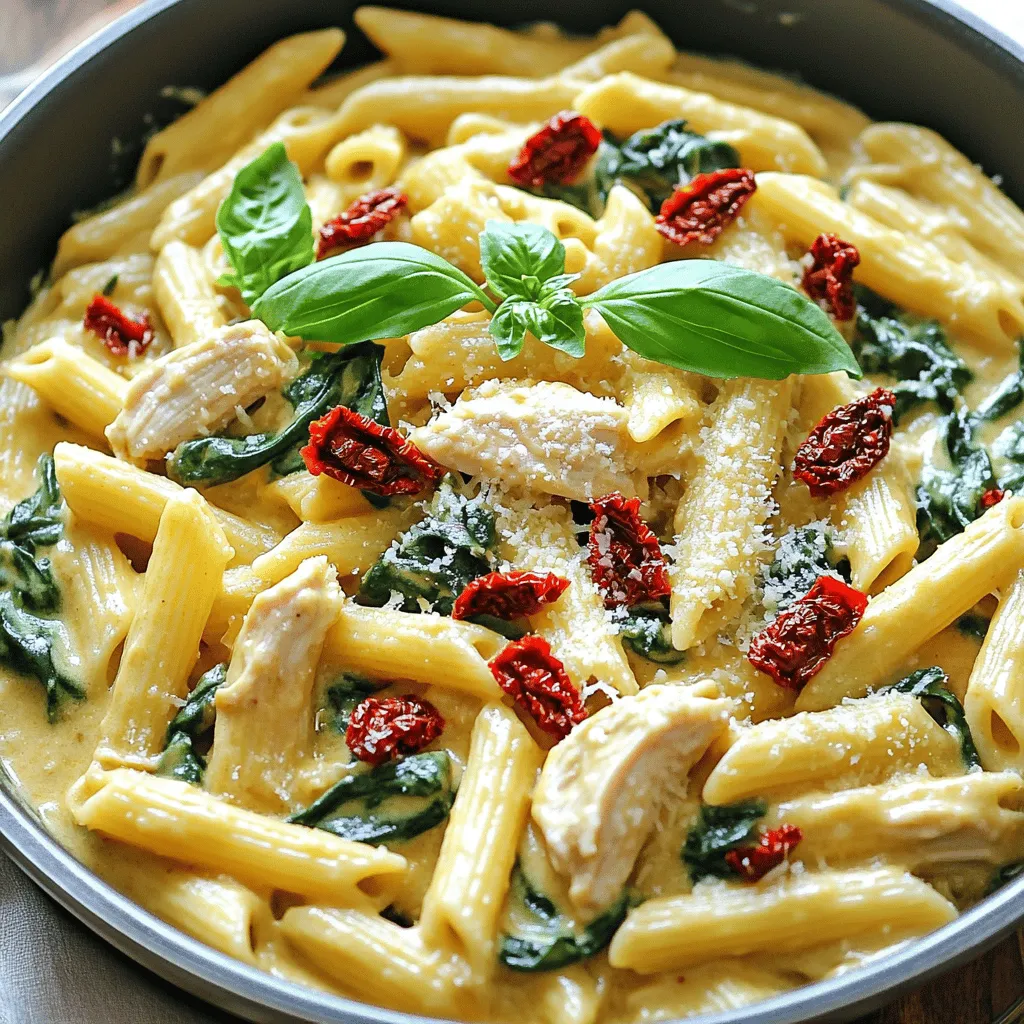
Are you looking for a simple and tasty dinner? My One Pot Tuscan Chicken Pasta is your answer! This dish
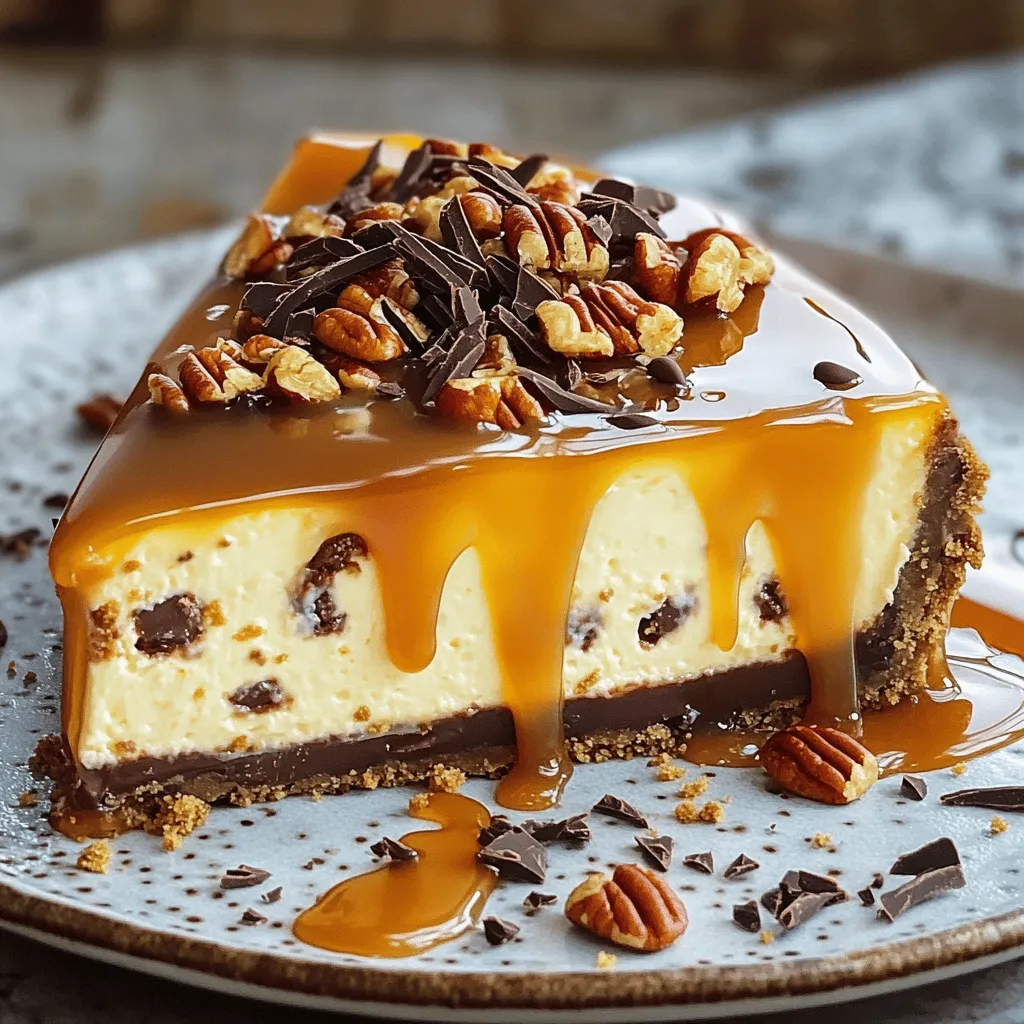
Do you crave a dessert that delivers rich flavors with a twist? Turtle cheesecake is your answer! This irresistible and
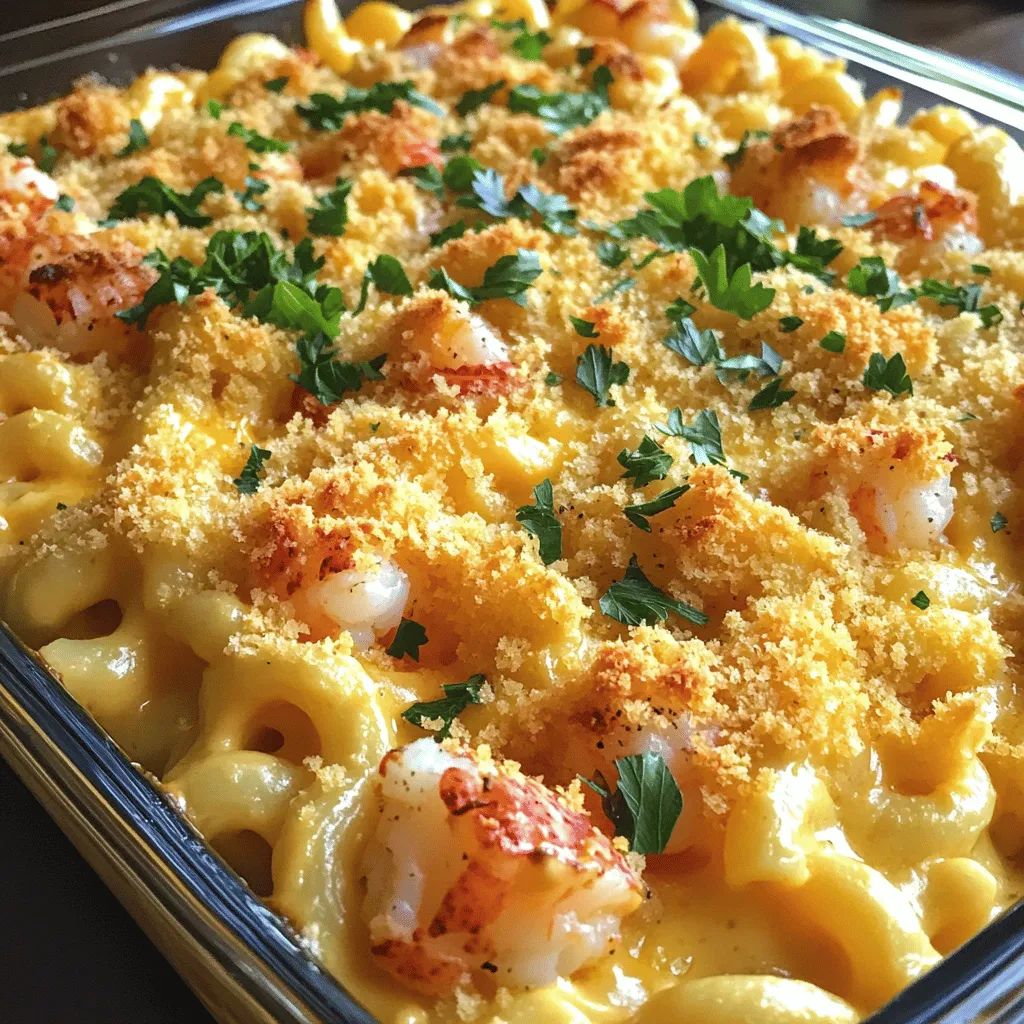
Are you ready to dive into a creamy Seafood Mac and Cheese with Lobster and Shrimp? This dish blends classic
![- 1 pound large shrimp, peeled and deveined - 2 tablespoons unsalted butter - 4 cloves garlic, minced - 1 cup jasmine rice - 2 cups vegetable broth (or water) Shrimp is the star of this dish. Choose large, fresh shrimp for the best taste. The butter adds richness, while garlic gives a wonderful aroma. Jasmine rice provides a soft base that pairs well with the shrimp. - 1 cup broccoli florets - 1 carrot, finely sliced - 1 tablespoon soy sauce - 1 tablespoon lemon juice - 1 teaspoon red pepper flakes (adjust for spice preference) - Salt and pepper to taste Broccoli and carrots add color and crunch. They also boost the nutrition of your bowl. Soy sauce and lemon juice bring a savory and tangy kick. The red pepper flakes add just the right amount of heat. - 2 green onions, thinly sliced - Fresh cilantro (optional) Green onions add a fresh bite. They also enhance the dish's visual appeal. If you like, add fresh cilantro for extra flavor. It gives a nice touch to your butter garlic shrimp rice bowl. This recipe is simple yet full of flavor. Check the Full Recipe for all the steps to make this delicious meal. Cooking Jasmine Rice To cook jasmine rice, start by measuring 1 cup of rice. Rinse it under cold water until the water runs clear. This removes excess starch and keeps the rice fluffy. In a medium saucepan, combine the rinsed rice with 2 cups of vegetable broth. Bring it to a boil over high heat. Once boiling, reduce the heat to low, cover, and let it simmer for 15 minutes. After cooking, remove it from heat and let it rest for 5 minutes. Fluff the rice with a fork before serving. Tips for Fluffing Rice Fluffing rice is key to a great texture. Use a fork, not a spoon, to fluff. This helps separate the grains without breaking them. You can also let the rice sit covered for a few minutes to steam. This makes it even fluffier. Melting Butter and Cooking Garlic In a large skillet, add 2 tablespoons of unsalted butter over medium heat. Let it melt slowly. Once melted, add 4 minced garlic cloves and 1 teaspoon of red pepper flakes. Cook for about 1 minute. You want the garlic to smell wonderful but not burn. Adding Shrimp and Seasoning Next, add 1 pound of large, peeled, and deveined shrimp to the skillet. Season with salt and pepper. Cook for 2-3 minutes on one side until they turn pink and slightly crispy. Flip the shrimp and cook for another 2 minutes. Once done, pour in 1 tablespoon of soy sauce and 1 tablespoon of lemon juice. Toss everything well to coat the shrimp in that tasty sauce. Preparing Broccoli and Carrots While the shrimp cooks, prepare 1 cup of broccoli florets and 1 finely sliced carrot. You want them fresh and vibrant. Cooking Time for Perfect Tenderness In a separate pot, steam the broccoli and carrots for about 3-4 minutes. You want them tender but still bright. This keeps the dish colorful and crunchy. Once cooked, set them aside until you are ready to assemble your bowl. Knowing When Shrimp is Done Shrimp cook quickly. They turn pink and curl when done. Look for a nice, firm texture. If you see them turning opaque, it means they are ready. The cooking time is usually 2-3 minutes per side. Avoiding Overcooking To avoid overcooking shrimp, keep a close eye on them. Use medium heat for even cooking. If you cook them too long, they become rubbery. Once they're cooked, remove them from the heat right away. Alternative Liquid Options You can use vegetable broth for more flavor. Water works too, but broth adds depth. If you want something different, try coconut milk for a creamy taste. Using a Rice Cooker vs. Stovetop A rice cooker simplifies the process. Just add rice and liquid, then press a button. On the stovetop, bring the liquid to a boil before covering and lowering the heat. Both methods work well, but rice cookers are more hands-off. Additional Seasonings to Consider For more flavor, think about adding herbs like parsley or dill. A splash of fish sauce can deepen the taste too. Experiment with these options to find your favorite mix. Customizing Spice Levels If you like heat, add more red pepper flakes. For a milder dish, reduce the amount. You can also try adding fresh chopped chili or even sriracha for a different kick. Adjust spice to suit your taste buds. For the complete Butter Garlic Shrimp Rice Bowl recipe, check out the [Full Recipe]. {{image_2}} You can switch the shrimp for chicken or tofu in this dish. - Using Chicken or Tofu: For chicken, use bite-sized pieces. Cook them until golden brown. Tofu is a great option for a vegetarian meal. Press it first to remove extra water, then cube and cook until crispy. - Seafood Alternatives: If you want to try other seafood, consider scallops or crab. Both add unique flavors that pair well with garlic and butter. Feel free to mix in different veggies based on what you have. - Other Vegetables that Work Well: Bell peppers, snap peas, and zucchini all taste great in this dish. They add color and crunch. - Seasonal Variations: Use seasonal veggies for the best taste. In summer, try corn or cherry tomatoes. In fall, add pumpkin or kale for warmth. Not a fan of jasmine rice? There are many other options. - Brown Rice or Quinoa Options: Brown rice offers a nutty flavor and more fiber. Quinoa is a protein-packed choice. Both are easy to cook and will work well with the shrimp. - Cauliflower Rice for Low-Carb Version: Cauliflower rice is a fantastic low-carb substitute. It’s light and absorbs flavors well. Simply pulse cauliflower florets in a food processor and sauté until tender. Explore these variations to make this dish your own! For the full recipe, check the detailed cooking instructions provided above. How to Store in the Refrigerator To keep your butter garlic shrimp rice bowl fresh, place it in an airtight container. This way, the flavors stay intact. Make sure to cool the bowl to room temperature before sealing it. You can store it in the fridge for up to three days. Freezing for Future Meals If you want to save it longer, freezing is a great option. Divide the bowl into portions and use freezer-safe containers. Label them with the date. This dish will last for up to three months in the freezer. When you’re ready to eat, just thaw it overnight in the fridge. Best Methods for Reheating The best way to reheat your shrimp rice bowl is on the stove or in the microwave. If using the stove, add a splash of water or broth to avoid dryness. Heat it on medium until warm. In the microwave, cover the bowl with a damp paper towel to keep moisture in. Avoiding Soggy Rice To prevent soggy rice, do not overheat. Always reheat only until the shrimp is hot. If the rice feels too wet, you can fluff it with a fork before serving. Duration Leftovers Will Last Your leftovers will stay good for about three days in the fridge. If frozen, they can last up to three months. Signs of Spoilage Be sure to check for off smells or strange textures. If the shrimp looks dull or slimy, it’s best to toss it. Fresh ingredients will keep your meal safe and tasty. You can make this dish healthier by swapping some ingredients. Use olive oil instead of butter. This change cuts saturated fat. You can also use brown rice instead of jasmine rice. Brown rice has more fiber and nutrients. If you want more veggies, add spinach or bell peppers. These options boost vitamins without adding many calories. Yes, you can prepare this meal ahead of time. Cook the rice and shrimp, then store them separately. Keep the shrimp in the fridge for up to two days. You can store the rice in an airtight container. This makes meal prep easy. Just reheat everything before serving. You can also steam the veggies ahead of time. This saves you time during busy days. To reheat shrimp, use low heat in a skillet. Add a splash of water or broth to keep them moist. Cook for just a few minutes until warm. Avoid using high heat, as it can make shrimp tough. You can also microwave shrimp on a plate. Use a damp paper towel to cover them. This method helps steam them gently. Always check that shrimp are heated evenly. Enjoy your delicious meal again! We’ve covered a lot in this guide. You learned about shrimp, rice, and tasty veggies. The step-by-step instructions help you create a great butter garlic shrimp dish. Remember the tips for cooking shrimp and rice just right. You can customize it with your choice of protein and vegetables. Storing leftovers safely is key for later meals. Enjoy this dish fresh or reheated. Now, you have all the tools to make this recipe your own. Happy cooking!](https://flavorsprint.com/wp-content/uploads/2025/06/afa5a591-de29-4626-8017-bbab77ee6fcc.webp)
Craving a delicious meal that’s easy to whip up? My Savory Butter Garlic Shrimp Rice Bowl is here to satisfy!
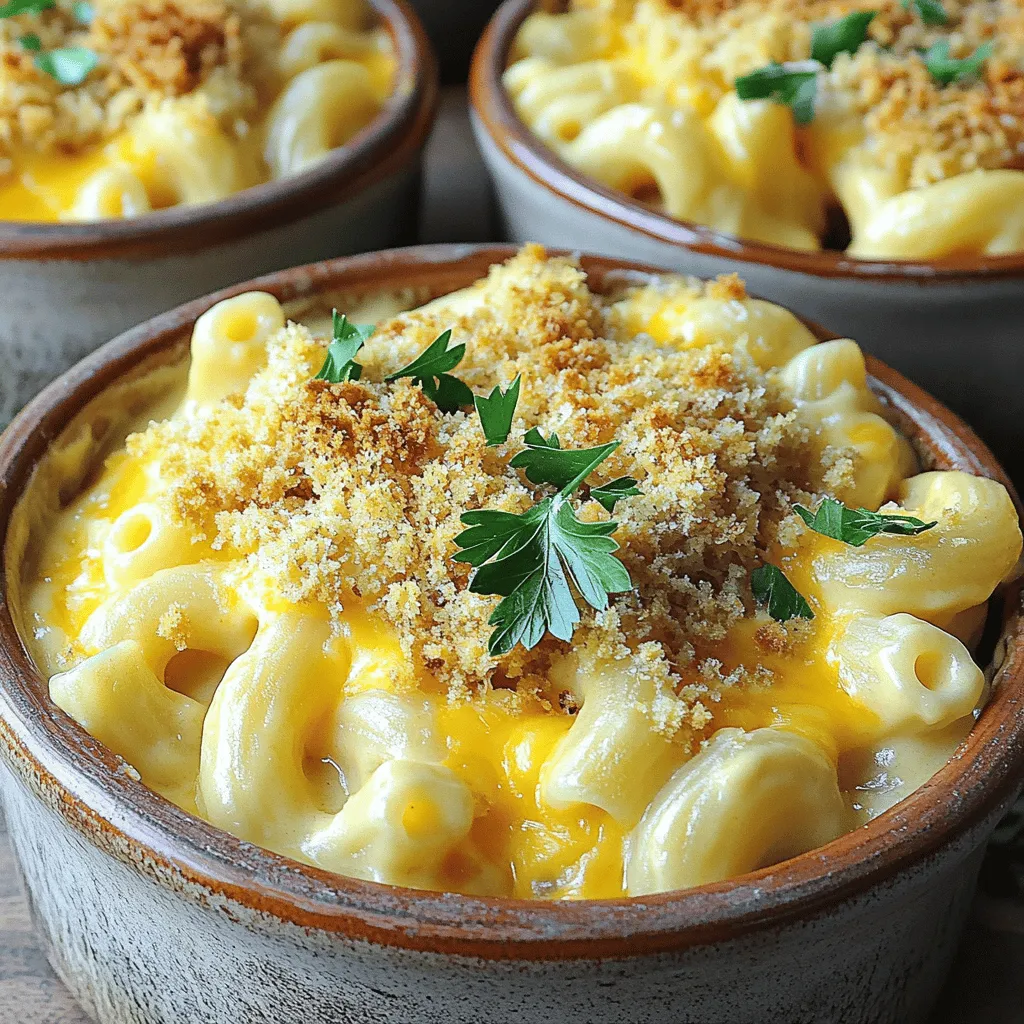
Creamy Baked Mac and Cheese is the ultimate cozy comfort food! Imagine a dish filled with soft macaroni coated in
![- 1 package (20 oz) cheese tortellini - 1 jar (24 oz) marinara sauce - 4 cups vegetable or chicken broth - 1 cup sliced bell peppers (red, yellow, green) - 1 small onion, diced - 2 cloves garlic, minced - 1 teaspoon Italian seasoning - 1/2 teaspoon red pepper flakes (optional) - 1 cup frozen peas - 1 cup shredded mozzarella cheese - Fresh basil leaves for garnish - Salt and pepper to taste To make this dish, gather the main ingredients first. You need cheese tortellini, marinara sauce, and broth. These create a rich base. Then, add colorful bell peppers, onion, and garlic for flavor. Next, season the dish with Italian seasoning. If you like heat, toss in red pepper flakes. Frozen peas add a pop of color and sweetness. Finally, top it all with mozzarella cheese and fresh basil. These simple ingredients blend to create a comforting meal. It's perfect for busy weeknights. For a detailed guide, check the full recipe. In a slow cooker, I start by combining the marinara sauce and broth. I add the diced onion, minced garlic, and sliced bell peppers next. Then, I sprinkle in the Italian seasoning and red pepper flakes, if I want some heat. I stir everything well to mix the flavors together. Next, I add the cheese tortellini to the slow cooker. It’s important they get fully submerged in the sauce. After that, I season with salt and pepper to taste. I cover the slow cooker and set it to cook. I choose low for 4 hours or high for 2 hours, depending on my schedule. About 15 minutes before serving, I stir in the frozen peas. I also sprinkle the shredded mozzarella cheese on top. I cover the slow cooker again and let it cook until the cheese is melted and bubbly. Once it's done, I give everything a good stir to mix all the flavors. I like to serve it hot, garnished with fresh basil leaves for a nice finish. This makes for a delightful meal that everyone will love. You can find the Full Recipe [here]. - Opt for fresh tortellini for added flavor. Fresh tortellini has a rich taste and soft texture. It cooks quicker and absorbs the sauce well. - Adjust cook times based on your slow cooker model. Each slow cooker is unique, so check for doneness. If your slow cooker runs hot, reduce the cooking time slightly. - Pair with garlic bread or a side salad for a complete meal. Garlic bread offers a crunchy contrast, while a fresh salad balances the dish. This combo makes your dinner feel special and satisfying. - Experiment with additional herbs or vegetables. Adding spinach can boost nutrition and flavor. You can try fresh oregano or thyme for a fragrant twist. Feel free to mix in your favorite veggies, like zucchini or mushrooms. This customizes the dish to your taste. {{image_2}} You can add cooked chicken or Italian sausage to your slow cooker. This makes the dish heartier. Simply cook the protein ahead of time, then mix it in with the other ingredients. The flavors from the meat blend well with the sauce. It also adds extra protein to your meal, making it more filling. For a vegetarian dish, use vegetable broth instead of chicken broth. You can also add more vegetables for extra taste and nutrients. Think about adding zucchini, spinach, or mushrooms. These veggies will make your meal colorful and healthy. It's a great way to enjoy all the flavors while keeping it meat-free. Different cheeses can change the flavor of your tortellini dish. Try using Parmesan or provolone for a unique twist. Each cheese brings its own taste. For a creamy texture, you can mix in ricotta as well. Feel free to experiment with your favorite cheeses to see what you like best. You can find the full recipe for this delicious meal in the earlier sections. Store any leftovers in an airtight container. You can keep them in the refrigerator for up to 3 days. This way, you’ll have a quick meal ready for lunch or dinner. Just remember to let it cool down before sealing. If you want to save some for later, freeze portions in freezer-safe containers. They will stay fresh for up to 2 months. Make sure to label your containers with the date. This helps you remember when you made it. When you’re ready to eat, reheat on the stove or in the microwave. If it looks a bit dry, just add a splash of broth or water. Stir well to mix everything together. Enjoy your warm, tasty meal! Yes, frozen tortellini can be used, just adjust cooking time accordingly. When using frozen tortellini, they may take a little longer to cook. I recommend checking them around the end of the cooking time. This way, you get perfectly cooked tortellini without overcooking them. You can use alfredo sauce or pesto for different flavor profiles. Each sauce brings its own taste to the dish. Alfredo gives it a creamy texture, while pesto adds a fresh, herby flavor. Feel free to get creative and mix different sauces! Tortellini should be tender and heated through; follow package instructions for cooking times. Most tortellini cook in about 2 to 5 minutes once added to simmering sauce. Keep an eye on them to avoid mushiness. Taste one to check if it's just right! This recipe lets you create a cheesy, comforting meal with ease. We covered all the key ingredients, from tortellini to fresh veggies, to make a delicious dish. You can customize it with proteins or different cheeses, ensuring it fits your taste. Remember, storage options help you enjoy leftovers. By following these simple steps and tips, you’ll impress your family and friends. Cooking should be fun, so don't hesitate to get creative. Enjoy your tasty tortellini dish!](https://flavorsprint.com/wp-content/uploads/2025/06/7cb26736-5542-49c6-91e1-931ab58fbd5f.webp)
Looking for an easy weeknight dinner? Let me introduce you to Slow Cooker Italian Tortellini! This comforting dish combines creamy
![To make a delightful strawberry cake, gather these fresh ingredients: - 2 cups all-purpose flour - 1 ½ cups sugar - ½ cup unsalted butter, softened - 1 cup whole milk - 3 large eggs - 1 tablespoon baking powder - 1 teaspoon vanilla extract - 1 cup fresh strawberries, pureed (plus extra for decoration) - ½ teaspoon salt - 1 cup heavy whipping cream - 2 tablespoons powdered sugar (for whipped cream) - Fresh strawberries, halved, for garnish You can substitute some ingredients if needed. Here are a few ideas: - Use almond milk instead of whole milk for a dairy-free option. - Coconut cream can replace heavy cream for a lighter touch. - Try using brown sugar instead of white sugar for a richer flavor. - If you have no fresh strawberries, use frozen ones but thaw and drain them first. Before you start baking, make sure you have the right tools: - Two 9-inch round cake pans - Mixing bowls (large and small) - Electric mixer or whisk - Measuring cups and spoons - Rubber spatula - Wire rack for cooling - Blender or food processor for pureeing strawberries These ingredients and tools will help you create a beautiful and tasty homemade strawberry cake. Enjoy the process, and let your creativity shine! First, preheat your oven to 350°F (175°C). Greasing and flouring the cake pans helps prevent sticking. Use two 9-inch round cake pans for this recipe. Coat the pans well to ensure a clean release. Take fresh strawberries and wash them. Remove the green stems and blend them until smooth. You need about 1 cup of strawberry puree for the cake. Save a few small slices for decoration later. In a bowl, whisk together the flour, baking powder, and salt. This is your dry mix. In a large mixing bowl, cream the softened butter and sugar until fluffy. This takes about 3-4 minutes. Next, add in the eggs one at a time and mix in the vanilla extract. Then, combine the dry mix with the butter mix. Alternate adding the milk and the flour mix. Finally, fold in the strawberry puree gently. Divide the batter evenly between the two prepared pans. Bake for 25-30 minutes. Check if they are done by inserting a toothpick into the center. If it comes out clean, they are ready! Let the cakes cool in the pans for about 10 minutes. After that, transfer them to a wire rack to cool completely. While they cool, whip the heavy cream until soft peaks form. Gradually add powdered sugar until stiff peaks form. When the cakes are cool, place one layer on a serving plate. Spread whipped cream on top and add some fresh strawberry slices. Then, place the second layer on top. Frost the cake with the remaining whipped cream and decorate with halved strawberries. For the full recipe, check out the earlier section. - Use fresh strawberries: Fresh berries give the best flavor. They make your cake taste bright and sweet. - Room temperature ingredients: Let your butter, eggs, and milk sit out before mixing. This helps create a light, fluffy cake. - Measure flour correctly: Spoon the flour into your measuring cup, then level it off. Too much flour can make your cake dry. - Don’t overmix: Mix until just combined. Overmixing can lead to a dense cake. - Skipping the oven preheat: Always preheat your oven. Baking in a cold oven can ruin the cake's rise. - Not greasing pans: Make sure to grease and flour your pans. This keeps the cake from sticking. - Using stale ingredients: Check the dates on your baking powder and flour. Old ingredients can affect your cake's rise. - Ignoring baking times: Every oven is different. Check your cake a few minutes before the time is up. - Cool completely: Frost only when the cake is cool. Warm cake can melt the frosting. - Whip cream to stiff peaks: This gives your frosting the right texture. It holds up well on the cake. - Use a turntable: If you have one, a turntable helps you frost evenly. It makes the process easier. - Decorate with fresh fruit: Use halved strawberries to add color and freshness. It makes your cake look beautiful and inviting. These tips will help you create a delightful homemade strawberry cake that impresses everyone. For the complete recipe, check out the [Full Recipe]. {{image_2}} You can easily make this cake gluten-free. Use a 1:1 gluten-free flour blend. This mix should replace the all-purpose flour in the recipe. Make sure it contains xanthan gum for the best texture. Your cake will still be soft and moist. For a vegan version, swap the eggs and milk. Use flax eggs instead of regular eggs. Mix one tablespoon of ground flaxseed with three tablespoons of water for each egg. For milk, use almond or oat milk. You can also use coconut oil instead of butter. Your cake will still taste great. While whipped cream is delicious, you can try other frostings. Cream cheese frosting adds a tangy touch. To make it, mix cream cheese with powdered sugar and vanilla. For a fruity twist, add more strawberry puree. Another option is a simple glaze made of powdered sugar and lemon juice. This adds a nice shine and sweetness. You can find the Full Recipe to explore these variations and enjoy your homemade strawberry cake even more! To store leftover cake, wrap it tightly in plastic wrap. This keeps it moist and fresh. You can also place it in an airtight container. Store it at room temperature for one day. For longer storage, put it in the fridge. Just be sure to let it come to room temperature before serving. You can freeze this cake if you have leftovers. First, let the cake cool completely. Then, wrap it in plastic wrap and foil. This prevents freezer burn. Freeze the cake for up to three months. When you want to eat it, thaw it in the fridge overnight. Let it sit at room temperature for an hour before serving. The shelf life of homemade strawberry cake is about three days at room temperature. In the fridge, it lasts about a week. Always check for any signs of spoilage before eating. To keep your cake fresh, avoid cutting it until you serve it. This helps to maintain its moisture and flavor. For the best taste, enjoy your cake within a few days. Yes, you can use frozen strawberries. Just thaw them first and drain excess water. This helps keep the cake moist without adding too much liquid. Puree the thawed strawberries just like fresh ones. The flavor will still be great! To boost the strawberry flavor, add more pureed strawberries. You could use about 1 ½ cups instead of 1 cup. You can also mix in strawberry extract for an extra kick. Fresh strawberry slices on top or in the batter add nice texture too. I love to serve strawberry cake with whipped cream. You can also drizzle extra strawberry puree on each slice. Adding fresh mint leaves makes it look fancy. It pairs well with a scoop of vanilla ice cream too! Yes, this recipe is perfect for a layered cake. Just bake the batter in two 9-inch round pans. Once cooled, stack the layers with whipped cream and strawberries between them. It looks beautiful and tastes amazing! For the full recipe, check out the detailed steps above. This blog post covered everything you need for a delicious strawberry cake. We explored key ingredients, optional substitutes, and the tools you'll need. I provided a clear step-by-step guide to baking, cooling, and assembling the cake. I shared tips to avoid common mistakes and ways to make variations, like gluten-free or vegan options. We wrapped up with storage tips and FAQs. Enjoy making this cake with confidence. Remember, baking is fun, and your friends will love your creation!](https://flavorsprint.com/wp-content/uploads/2025/06/22c38a15-f5e4-439b-a152-64844673d620.webp)
If you love fresh strawberries and simple desserts, you’re in for a treat! This Homemade Strawberry Cake recipe is easy
![- 2 cups ramps (wild leeks), trimmed and cleaned - 1 cup fresh basil leaves - 1/2 cup nuts (walnuts or pine nuts) - 1/2 cup grated pecorino or parmesan cheese - 1/2 cup extra virgin olive oil - 1 tablespoon lemon juice - 12 oz spaghetti or your preferred pasta - Cherry tomatoes - Grated cheese for garnish To make ramp pesto pasta, start with fresh ramps. These wild leeks add a unique flavor. They taste like a mix of garlic and onion. You can find ramps in spring. They are a seasonal treat, so grab them when you can! Next, I like to add fresh basil. This herb brings a bright taste to the pesto. Nuts, like walnuts or pine nuts, give the pesto a nice crunch. They also add healthy fats. Grated pecorino or parmesan cheese adds a salty kick. Extra virgin olive oil makes the pesto smooth and rich. Lastly, a splash of lemon juice brightens the flavor. It cuts through the richness and adds freshness. For the pasta, I prefer spaghetti. It holds the pesto well, but you can use any pasta you like. If you want to dress it up, add cherry tomatoes and more cheese as a garnish. These extras not only look good but also add flavor. This combination of ingredients makes a quick, delicious meal. You can find the full recipe for ramp pesto pasta above. To start, you need to prepare salted water. Fill a large pot with water and add a good pinch of salt. Bring the water to a boil over high heat. This salt helps add flavor to your pasta. Next, cook the spaghetti. Add the spaghetti to the boiling water. Follow the package instructions until the pasta is al dente. Al dente means it should be firm but not hard. Before draining, reserve 1 cup of that starchy pasta water. You will use it later for the pesto. While the pasta cooks, it’s time to make the ramp pesto. Grab your food processor and combine the ramps, fresh basil, and nuts. You can use walnuts or pine nuts. Pulse these ingredients until they are finely chopped. Now, drizzle in the olive oil while the food processor runs. This helps blend everything into a smooth paste. Add the lemon juice for brightness. Finally, season with salt and pepper to taste. If the pesto seems too thick, add a bit of reserved pasta water to reach your desired consistency. Once your pasta is cooked and drained, return it to the pot. Add in the ramp pesto. Toss everything together to coat the pasta evenly. If the pesto is too thick, gradually add more reserved pasta water until it looks just right. Your Ramp Pesto Pasta is ready to eat! Enjoy the fresh flavors and vibrant colors. For the full recipe, check out [Full Recipe]. Adjusting flavors with lemon juice Lemon juice brightens your pesto. It adds a fresh, zesty note. Start with a tablespoon. Taste and add more if desired. Balance the flavors to your liking. Choosing the right nuts Nuts give your pesto texture and flavor. I love using walnuts or pine nuts. Walnuts bring a rich taste, while pine nuts add a sweet touch. Toasting them enhances their flavor. Importance of reserving pasta water Reserve pasta water before draining your pasta. This water is starchy and helps thicken the sauce. It also helps the pesto cling to the pasta better. Just keep a cup handy. Timing your pasta and sauce Cook the pasta and pesto at the same time. This way, the pasta is hot when you mix in the pesto. Toss them together quickly for the best flavor. Ideal presentation ideas Serve your pasta in a large bowl or plate. Top with halved cherry tomatoes for color. A sprinkle of grated cheese adds a nice touch. Pairing with wine or sides A light white wine pairs well with ramp pesto pasta. Try a crisp Sauvignon Blanc. For sides, a simple green salad works great. Enjoy the fresh flavors! You can find the full recipe for Ramp Pesto Pasta to make this a delightful weeknight meal! {{image_2}} You can easily change the herbs or greens in your ramp pesto. Try using arugula or spinach for a new taste. You can also swap the nuts. Pine nuts add a buttery flavor, while walnuts give a nice crunch. Each choice brings a unique twist to the dish. Want to make your meal heartier? Add grilled chicken or shrimp. Both pair well with the ramp pesto. For a vegetarian option, use chickpeas or tofu. They absorb flavors well and add protein without meat. You can serve this dish in different ways. For a cold pasta salad, let the pasta cool before mixing with the pesto. Add chopped veggies for more color and flavor. Another fun style is to make it creamy. Stir in some cream cheese or sour cream for a rich texture. Each method makes for a delightful meal. To keep your ramp pesto pasta fresh, store it in an airtight container. Place it in the fridge for the best results. This method keeps flavors intact. Ramp pesto can last about 3 to 5 days. If you plan to eat it later, this is a simple way to keep it tasty. You can freeze ramp pesto and cooked pasta. For pesto, use a freezer-safe container. Leave some space for expansion. It can last up to 3 months in the freezer. For cooked pasta, freeze in single portions. When ready to eat, thaw overnight in the fridge. To reheat, warm the pasta in a pan with a splash of water. This keeps it moist. For pesto, stir it into hot pasta directly. If it seems too thick, add a bit of water or olive oil for a smooth consistency. Leftover pesto can add flavor to many dishes. Use it on sandwiches or as a dip for veggies. You can also mix it with scrambled eggs for a tasty breakfast. If you have extra pasta, create a pasta salad. Toss it with fresh veggies and a bit of olive oil. This brings new life to your leftovers. You can also bake it with cheese for a comforting dish. Exploring these ideas keeps your meals fun and exciting. For the full recipe, check the Ramp Pesto Pasta section. Ramps are wild leeks that grow in spring. They have a unique taste. Ramps taste like a mix of garlic and onion. Their flavor is strong yet fresh. You can use ramps in many dishes. I love them in salads, soups, or as a simple side. They add a nice twist to any meal. Yes, you can make ramp pesto ahead of time. To keep it fresh, store it in the fridge. Use an airtight container for best results. You can also drizzle olive oil on top to seal it. This helps prevent browning. Ramp pesto will last about a week in the fridge. If you want to keep it longer, freeze it. Just thaw it in the fridge when you're ready to use it. Ramp pesto pasta goes well with many sides. I suggest serving it with roasted vegetables. Grilled asparagus or zucchini complements the flavors nicely. A simple green salad also works great. You can even serve it with crusty bread. This adds a nice texture to your meal. Absolutely! Ramp pesto is very versatile. You can spread it on sandwiches or wraps. It also makes a great dip for veggies. Try using it on pizza for a twist. You can mix it into scrambled eggs for breakfast. Its bold flavor can enhance many dishes beyond pasta. You will find many ways to enjoy ramp pesto. For a full recipe, check out the Ramp Pesto Pasta recipe above. In this post, I detailed how to make delicious ramp pesto pasta. We covered key ingredients like ramps, fresh basil, nuts, and cheese, plus how to cook the pasta. I shared tricks to perfect your pesto and offered tips on serving and storage. Ramp pesto pasta is a fun dish to make and enjoy. Experiment with flavors, ingredients, and servings. Try new variations and pairings that excite your taste buds. Enjoy your culinary adventure with ramp pesto pasta!](https://flavorsprint.com/wp-content/uploads/2025/06/2284636f-d14b-4d17-9df5-38d52409b443.webp)
If you’re looking for a quick, tasty dinner, you’ve found it! Ramp pesto pasta is both simple and packed with
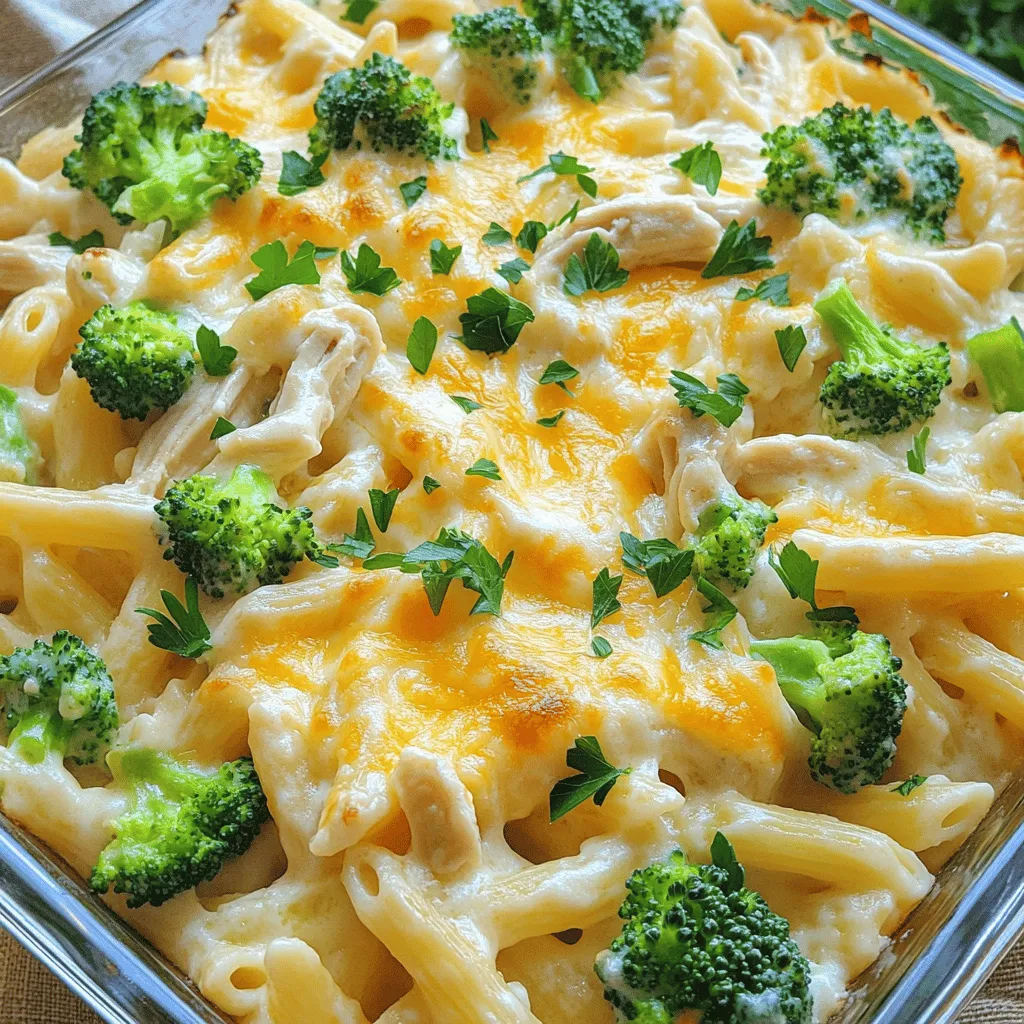
Are you ready to bring comfort to the dinner table? My Chicken Alfredo Bake is packed with creamy goodness, tender
