Skip to content
DisclaimerTerms Of UseGDPR PolicyCookie Policy

flavorsprint

  • Home
  • Drinks
  • Appetizers
  • Dinner
  • Dessert
  • About
  • Contact
  • Privacy Policy
DisclaimerTerms Of UseGDPR PolicyCookie Policy

Lillian

- Fresh Pineapple - Brown Sugar - Butter - Fresh Mint Leaves - Lime Juice - Optional Sweetener - Sparkling Water - Ice Cubes - Garnish Ideas When making a Caramelized Pineapple Mojito Mocktail, you need fresh ingredients for the best taste. Start with fresh pineapple. You will need about one cup, cut into chunks. This adds sweetness and a lovely tropical flavor. Next, grab some brown sugar. Two tablespoons will help caramelize the pineapple. You also need one tablespoon of butter. This will help the sugar melt and coat the pineapple. Fresh mint leaves are a must. You’ll need about ten leaves to create that refreshing taste. Squeeze the juice from one lime into the mix. This brightens the drink and adds a zesty kick. If you like it sweeter, use one teaspoon of honey as an optional sweetener. To finish, you will need one cup of sparkling water to add fizz. Don’t forget the ice cubes to keep it cool. For garnish, think about fresh mint sprigs or pineapple wedges. They make your drink look pretty and inviting. - Skillet - Muddler - Glass You will need a skillet for cooking the pineapple. Choose one that heats evenly. A muddler is key for crushing the mint leaves. It helps release the mint oils for great flavor. Lastly, have a glass ready to mix and serve your mocktail. A tall glass works best to show off the layers of your drink. For the complete recipe, check out the Full Recipe. These ingredients and tools set the stage for a delightful mocktail experience. - Melting the Butter Start by placing a skillet over medium heat. Add one tablespoon of butter. Watch it melt until it bubbles. This step adds a rich taste to the pineapple. - Cooking the Pineapple with Sugar Once the butter melts, add one cup of fresh pineapple chunks and two tablespoons of brown sugar. Stir these together. Cook for about 5-7 minutes. You want the pineapple to get soft and turn golden brown. Stir it often to coat every piece. - Cooling the Caramelized Pineapple After cooking, remove the skillet from the heat. Let the pineapple cool for a few minutes. This cooling step helps to keep the mocktail fresh and tasty. - Muddling the Mint Take ten fresh mint leaves and place them in a glass. Use a muddler to crush the leaves gently. This action releases the mint oils, making your drink fragrant and refreshing. - Combining Ingredients Now, add the caramelized pineapple to the glass. Squeeze in the juice of one lime. If you like it sweeter, add one teaspoon of honey. Muddle these ingredients together for about 30 seconds. This step blends all the great flavors. - Adding Ice and Sparkling Water Fill the glass with ice cubes. Pour in one cup of sparkling water. Stir gently to mix everything together. This adds a fun fizz to your mocktail. - Garnishing Your Mocktail Take the reserved caramelized pineapple pieces and place them on top. Add fresh mint sprigs and pineapple wedges for a beautiful look. - Serving Suggestions Serve your Caramelized Pineapple Mojito Mocktail with a straw. Enjoy it on a warm day or at a party. This drink is sure to impress your friends! For the complete recipe, check out the full recipe section. Controlling Heat Levels Use medium heat for the best caramelization. Too high a heat can burn the sugar. Stir the pineapple often to ensure even cooking. This keeps the fruit soft and sweet. Achieving the Right Color You want a golden brown hue. This shows the pineapple is caramelized well. If it is too light, cook it a bit longer. The right color adds to the dish's appeal. Mint Variations Try different mint types for fun flavors. Spearmint gives a sweet taste, while peppermint adds a stronger kick. You can even mix mints for a unique twist. Adjusting Sweetness Taste your mocktail before serving. If it is not sweet enough, add more honey or sugar. If it is too sweet, add more lime juice. Balance is key to a perfect drink. Creative Glassware Choices Use fun glasses to make your mocktail pop. Clear glasses show off the drink's colors. You can also use mason jars for a casual feel. Garnish Ideas Beyond Mint Get creative with garnishes! Use fresh pineapple wedges or edible flowers. These add color and a personal touch. A great presentation makes the drink even more special. For the Full Recipe, check the details above to create this tasty drink at home. {{image_2}} You can easily switch things up with different fruits. Try adding mango or papaya. Both fruits bring a sweet, tropical twist. Their juicy flavors blend nicely with caramelized pineapple. If you want a creamy texture, use coconut milk. This gives your drink a rich taste and keeps it refreshing. Experimenting with herbs can change your mocktail. Instead of mint, use basil or thyme. These herbs add a unique touch. Each herb brings its own flavor notes that change the drink's profile. You can also mix in citrus flavors like lemon or orange. This adds brightness and balance to the sweetness. If you want an adult version, add some rum. Rum pairs well with pineapple and mint. It enhances the overall flavor of the drink. You can also try different cocktail mixers. For example, a splash of ginger beer or tonic can add spice. Each variation gives you a new way to enjoy this drink. Check the Full Recipe to see how to make it perfectly! Storing Caramelized Pineapple You can keep leftover caramelized pineapple in an airtight container. It stays fresh for about three days in the fridge. Make sure it cools down first. This way, it won’t steam and get mushy. When you are ready to use it again, just reheat it in a skillet for a few minutes. This brings back its sweet, rich flavor. Fresh Mint Storage Tips Fresh mint can be tricky to store. Place the stems in a glass of water, like a bouquet. Cover the leaves loosely with a plastic bag. This helps keep the mint fresh for a week. If you have more mint than you need, you can also freeze it. Chop it up and place it in ice cube trays with water. Later, you can use these cubes in drinks or dishes. Make-Ahead Mocktail Tips You can prepare parts of this mocktail ahead of time. Caramelize your pineapple in advance. Store it in the fridge until you are ready to mix your drink. You can also muddle the mint and lime juice together before serving. Just keep them separate to maintain their fresh taste. How Long It Lasts in the Fridge Once mixed, the mocktail is best enjoyed right away. If you must store it, keep it in the fridge for up to 24 hours. The sparkling water will lose its fizz, so the drink may not taste as good. For the best flavor, make your drink fresh each time. For the full recipe, check out the Caramelized Pineapple Mojito Mocktail. Yes, you can use canned pineapple. However, fresh pineapple tastes better. Canned pineapple is softer and may not caramelize well. If using canned pineapple, drain it well. You can skip the butter and sugar, as canned pineapple is often sweet. To make this mocktail more refreshing, add extra mint leaves. You can also use chilled sparkling water. Try adding cucumber slices for a cool twist. If you want more zing, add lime zest or a splash of soda. Yes, you can make this mocktail sugar-free. Use a sugar substitute like stevia or erythritol. You can also skip the brown sugar when caramelizing the pineapple. The natural sweetness of pineapple will still shine through. To make more servings, multiply each ingredient by the number of drinks you want. For example, if you want to serve four, use four cups of pineapple, eight tablespoons of brown sugar, and so on. Prepare the caramelized pineapple in batches if needed. For a party, serve the mocktail in a large pitcher. You can make it ahead of time, just keep the sparkling water separate. Add ice and the sparkling water just before serving. Garnish each glass with mint sprigs and pineapple wedges for a fun look. For the full recipe, check out the earlier section. This blog post showed you how to make a tasty pineapple mocktail. You learned the ingredients needed, the steps to caramelize pineapple, and how to mix everything. I shared tips to make your mocktail shine and ideas for fun variations. Remember, your creativity can make each drink unique. Use fresh ingredients for the best taste. Enjoy making this refreshing treat at home or for your next gathering!

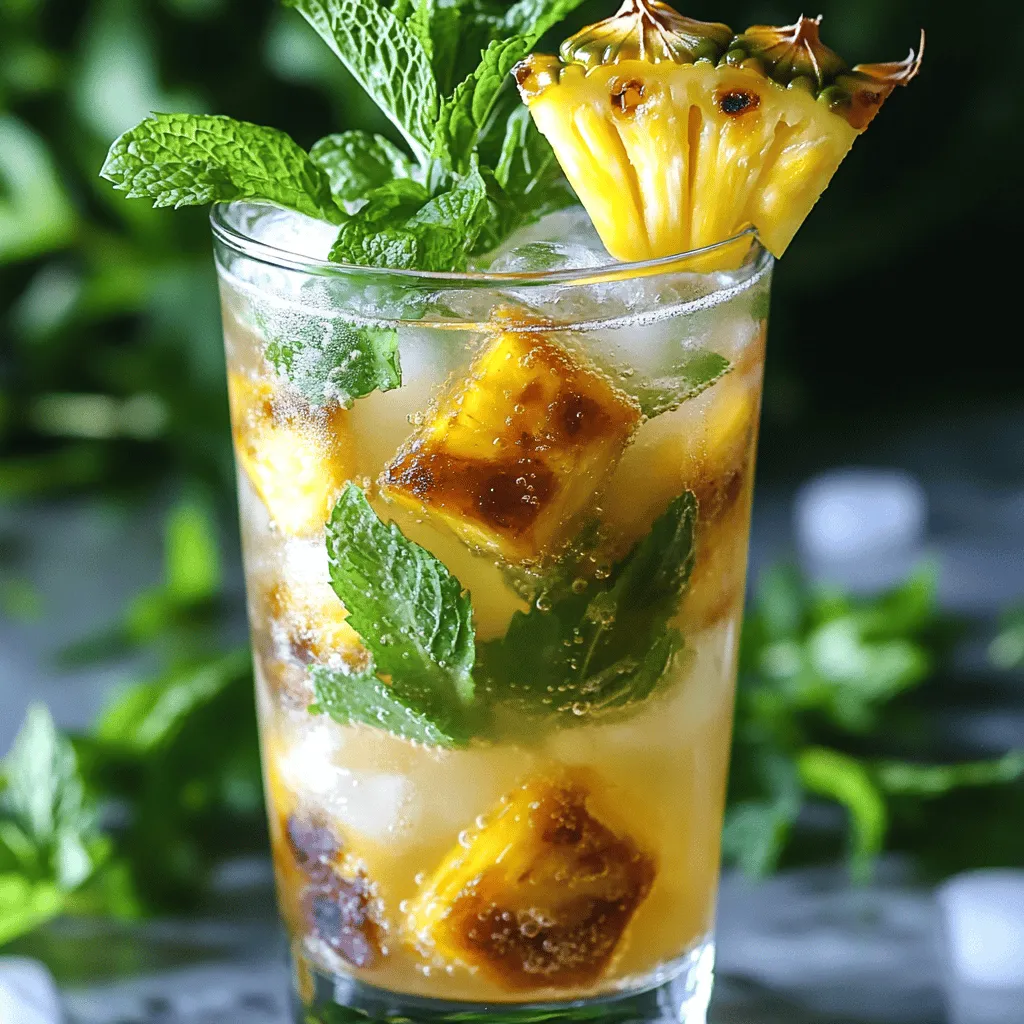
Caramelized Pineapple Mojito Mocktail Delight

Looking for a refreshing drink that dazzles your taste buds? The Caramelized Pineapple Mojito Mocktail is just the treat you

- 1 ripe mango, peeled and diced - 1 cup coconut yogurt (or regular yogurt if preferred) - 1 cup coconut water - Ice cubes (optional) - 2 tablespoons honey or maple syrup (adjust for sweetness) - 1/2 teaspoon ground cardamom - A pinch of salt Mango Coconut Lassi is a simple and tasty drink. You only need fresh ingredients and a few easy steps. The main star is the ripe mango. Pick one that feels soft but not mushy. This ensures your lassi has a sweet and rich flavor. Coconut yogurt adds creaminess. If you cannot find it, regular yogurt works too. It still gives you a nice texture. Next, we have the liquid components. Coconut water adds a light sweetness and hydration. You can add ice cubes if you want a cold drink. For sweeteners, honey or maple syrup works great. Taste it after blending. Adjust as needed to match your sweetness level. Ground cardamom gives a warm spice note. It pairs well with mango. Finally, a pinch of salt enhances all the flavors. With the right ingredients, you create a refreshing treat. For the full recipe, check out the instructions. Enjoy the creamy goodness of Mango Coconut Lassi! Start by gathering your ingredients. In a blender, combine the diced mango, coconut yogurt, coconut water, honey, ground cardamom, and a pinch of salt. Make sure you measure everything accurately for the best flavor. If you want it sweeter, you can always add more honey or maple syrup later. Now, blend the mixture on high speed until it is smooth and creamy. This should take about 30 seconds. If you like your drink cold, toss in a few ice cubes. Blend again until the ice is fully mixed in. This will give your lassi a nice chill. Once blended, pour the lassi into tall glasses. Take a moment to enjoy the color; it should be a lovely golden hue. For a nice touch, garnish each glass with fresh mint leaves. This adds a burst of color and a hint of freshness to your drink. Enjoy your Mango Coconut Lassi as a refreshing treat! For complete details, check the Full Recipe. To make a great mango coconut lassi, start with the right mango. Choose a ripe mango that feels soft when you press it gently. Look for a mango with a sweet smell. The color can vary, but it should have a nice yellow or orange hue. If you can’t find ripe mangoes, frozen mangoes are a good option. They are often picked at peak ripeness and frozen right away, keeping their sweet flavor. Next, think about yogurt. Coconut yogurt gives a creamy, tropical taste. It pairs well with mango. If you prefer regular yogurt, that works too! For a dairy-free option, look for non-dairy yogurts made from almonds, soy, or cashews. These can add nice flavors and textures to your lassi too. To make your lassi even better, consider adding spices. Ground cardamom is a great choice; it adds warmth and depth. You might also try a dash of cinnamon or nutmeg for a twist. When it comes to sweetness, taste your lassi after blending. If it’s not sweet enough, add more honey or maple syrup. Adjust it to your liking to create a perfect balance. {{image_2}} You can make your mango coconut lassi even better! Try adding other fruits. Pineapple brings a bright, sweet twist. Just chop some ripe pineapple and blend it in. Banana also adds creaminess and sweetness. Just slice a banana and toss it into the mix. For a fun twist, experiment with passion fruit. Its tartness pairs well with the mango. Scoop out the pulp and blend it for an extra zing. If you want a dairy-free lassi, it's easy. Use vegan yogurt instead of regular yogurt. Look for brands made from coconut, almond, or cashew. They taste great and keep it creamy. You can also swap coconut water for almond milk or any lactose-free option. This will still give you that refreshing taste without the dairy. Want to switch up the flavor? Add a splash of vanilla extract. This simple addition makes the lassi taste even richer. You can also try using flavored coconut water. It adds a new layer of taste. Look for options like pineapple or mango coconut water for added fun. These small changes can really elevate your drink! After making your mango coconut lassi, you may have some left. I recommend storing it in a sealed container. This helps keep it fresh. Place it in the fridge right away. The lassi stays good for about two days. Make sure to give it a stir before enjoying it again. Separation may occur, but that's normal. If you want to keep your lassi longer, freezing is a great choice. Pour the mixture into an ice cube tray or freezer-safe container. Leave some space at the top, as liquids expand when frozen. To serve after freezing, take it out and let it thaw in the fridge overnight. You can also blend it back into a creamy drink. This makes it smooth again. Pair your lassi with tasty snacks. It goes well with spicy dishes or light salads. You can also enjoy it as a refreshing drink on its own. For a fun twist, use colorful glassware. Tall glasses or mason jars look great for serving. Add a fresh mint sprig on top for a pop of color. This makes your drink even more inviting. For the full recipe, check out the earlier section. Mango coconut lassi is a tasty drink. It mixes ripe mango with coconut yogurt and coconut water. This drink is cool and creamy. The sweet mango blends with the rich yogurt. A hint of cardamom adds a special flavor. You enjoy it chilled, making it perfect for warm days. Yes, you can make this lassi ahead of time. Mix the ingredients and store it in the fridge. It stays fresh for up to two days. Just remember to stir it before serving. If it thickens, add a little coconut water to thin it out. To make this lassi vegan, use coconut yogurt and maple syrup. Coconut yogurt is a great dairy-free option. Maple syrup is a perfect sweetener instead of honey. This way, you enjoy the same yummy taste without any animal products. Check out the Full Recipe for more details on how to make this delicious drink! This blog post shared how to make a refreshing mango coconut lassi. We covered the essential ingredients, step-by-step instructions, and helpful tips. You learned how to choose ripe mangoes, select yogurt types, and explore fun variations. This drink is both delicious and simple to make. Enjoy blending your unique lassi creation, and don’t forget to share it with friends!

Mango Coconut Lassi Refreshing and Creamy Treat

Craving a delicious and refreshing drink? Look no further than Mango Coconut Lassi! This creamy treat combines ripe mango and

- Juicing Grapefruits Juicing grapefruits is your first step. You need two large grapefruits. Choose ones that feel heavy for their size. Their skin should be smooth and firm. Cut the grapefruits in half. Use a citrus juicer or squeeze them by hand. Aim for about one cup of juice. If you like it smoother, strain the juice to remove pulp. - Choosing Sweeteners: Honey vs. Agave Sweeteners play a big role in flavor. You can choose between honey or agave syrup. Honey has a floral taste and thick texture. Agave is lighter and less distinct. I usually prefer honey for its rich flavor, but both work well. Use one-quarter cup of your choice. Mix it into the grapefruit juice until it fully dissolves. - Essential Garnishes Garnishes make your drink pop. Fresh thyme sprigs add a lovely aroma. They also enhance the drink’s look. You can also add a sprinkle of grapefruit zest. This gives extra flavor and color. Don't skip the ice cubes! They keep your drink cold and refreshing. Remember, you can find the full recipe at the end of this section. Enjoy crafting your Grapefruit Thyme Sparkler! To start, grab your citrus juicer. Cut the grapefruits in half. Press each half down firmly. Juice them until you have about one cup. If you want a smoother drink, strain the juice through a fine mesh sieve. This removes the pulp and seeds, making it silky. Next, take a mixing bowl. Pour the freshly juiced grapefruit juice into it. Add a quarter cup of honey or agave syrup. Stir the mixture well until the sweetener dissolves completely. This step makes the drink sweet and tasty. Now, fill your serving glasses halfway with ice cubes. Pour the sweetened grapefruit juice over the ice. Fill each glass about two-thirds full. Then, top each glass with sparkling water. Mix gently to keep the fizz alive. For the final touch, add a sprig of fresh thyme and a sprinkle of grapefruit zest on top. This enhances the drink’s flavor and looks great. Serve immediately and enjoy the refreshing taste! For the full recipe, check out the details above. How to Choose the Best Grapefruit When picking grapefruits, look for ones that feel heavy for their size. The skin should be smooth and firm. Bright color is a good sign, too. Avoid grapefruits with soft spots or wrinkles. These signs mean the fruit may be overripe. Ripeness Indicators To check ripeness, gently press the skin. It should give slightly but still feel firm. A ripe grapefruit has a sweet aroma. If it smells fresh and citrusy, it’s ready to enjoy. Customizing Sweetness to Preference Sweetness can make or break your drink. Taste your grapefruit juice before adding sweetener. You might find it’s sweet enough on its own. If you like it sweeter, add honey or agave syrup gradually. Stir, then taste again until it’s just right. Alternative Sweetening Options If you want to try something new, use maple syrup or stevia. Both options can give a different flavor. If you prefer a sugar-free option, stevia is a great choice. Adjust the amount based on your taste. Glassware Choices for Presentation Presentation matters! Use tall glasses to show off the bubbles. Clear glass lets you see the lovely pink juice. A fun straw can make it more festive. Choose glassware that matches your occasion for added flair. Pairing with Snacks or Appetizers This drink pairs well with light snacks. Try it with fresh fruit, cheese, or crackers. For a more filling option, serve it with shrimp cocktail or bruschetta. The bright flavors of the drink enhance the taste of the food. For the full recipe, check out the details above! {{image_2}} You can transform your Grapefruit Thyme Sparkler into a delightful cocktail. To do this, switch the sparkling water for sparkling wine. The bubbles add a festive touch. This change brings a new depth to your drink. You may want to adjust the sweetener, too. Since sparkling wine is sweeter, try using less honey or agave. Start with a tablespoon less than the recipe calls for. Taste, then adjust to match your preference. Want to get creative? Add other herbs like mint or basil to your drink. These herbs can change the flavor and make it even more refreshing. Mint gives a cool taste, while basil adds a warm herbal note. Try different combinations to find your favorite mix. You might even create a grapefruit-mint or grapefruit-basil twist that's perfect for summer. Seasonal fruits can take your Grapefruit Thyme Sparkler to the next level. In spring, try adding strawberries or raspberries. In fall, consider using pears or apples. Each fruit brings its own charm and flavor. You can also create holiday-themed variations. During the winter, add a splash of cranberry juice for a festive touch. You can make a bright drink that suits any occasion. For the full recipe, check out the section above. To keep your leftover grapefruit juice fresh, follow these steps: - Use an airtight container. This helps prevent air from spoiling the juice. - Store in the fridge. Refrigeration slows down spoilage. - Consume within 3 days. Fresh juice tastes best when used quickly. You can make your drink ahead of time. Here’s how: - Pre-juicing grapefruit. Juice your grapefruits and store the juice in the fridge. - Mixing ingredients ahead of time. Combine juice with sweetener but wait to add sparkling water until serving. Freezing your grapefruit juice is also a great choice. Here’s what to do: - Freezing grapefruit juice for future use. Pour the juice into ice cube trays for easy use later. - Making popsicles with leftover mixture. Mix the juice with some water, pour into molds, and freeze for a refreshing treat. These storage tips will help you enjoy your Grapefruit Thyme Sparkler longer. For the full recipe, check out the earlier sections! A Grapefruit Thyme Sparkler tastes best when fresh. It can stay fresh for a few hours at room temperature. If you keep it in the fridge, it may last up to one day. After that, the fizz can fade. The drink may still taste okay, but it won't have the same sparkle. Yes, you can easily make a non-alcoholic version of the Grapefruit Thyme Sparkler. Just follow the Full Recipe and skip any alcohol. Stick to the grapefruit juice and sparkling water. You can add a splash of soda for extra sweetness. This drink is great for everyone, even if they don’t drink alcohol. You can get creative with garnishes for your Grapefruit Thyme Sparkler. Here are some options: - Fresh mint leaves - Basil sprigs - Lemon or lime slices - Berries like raspberries or blueberries These choices add color and flavor, making your drink even more fun. The Grapefruit Thyme Sparkler is a refreshing drink that combines juicy grapefruit and sweeteners like honey. You learned how to juice grapefruits, mix the drink, and garnish for flair. Tips on choosing quality fruit and adjusting sweetness help create your perfect version. You can also explore fun variations like adding vodka or herbs. Store leftover juice properly or prepare in advance to enjoy later. This drink is versatile, making it great for any occasion. Embrace your creativity, and enjoy this sparkler with friends and family!

Grapefruit Thyme Sparkler Refreshing Sparkling Drink

Looking for a refreshing drink that’s easy to make and bursting with flavor? The Grapefruit Thyme Sparkler is just what

- 2 cups apple cider - 2 chai tea bags - 1 teaspoon ground cinnamon - 1/2 teaspoon ground ginger - 1/4 teaspoon ground cloves - 1 tablespoon honey (adjust to taste) - 1 cup sparkling water - Apple slices, for garnish - Cinnamon sticks, for garnish This Spiced Apple Chai Refresher uses warm apple cider and fragrant chai tea. The spices in this drink lift your spirits. You get a cozy, sweet taste from the honey. - Fresh herbs (mint or basil) - Lemon juice for a citrus twist - Additional sweeteners (maple syrup, agave) Add fresh herbs to bring a new layer of flavor. A splash of lemon juice adds a zesty kick. You can also use maple syrup if you want a different sweetener. - Alternatives for apple cider - Non-caffeinated chai tea options - Sugar-free sweetener suggestions If you can't find apple cider, try pear juice or a mix of apple and cranberry juice. For a caffeine-free drink, look for herbal chai blends. You can swap honey for a sugar-free sweetener for a lower-calorie option. For the complete recipe, check [Full Recipe]. 1. Heat the apple cider: Pour 2 cups of apple cider into a saucepan. Place it over medium heat. Warm the cider until it feels hot but do not let it boil. This step builds the drink's base flavor. 2. Steep the chai tea bags: Once the cider is warm, add 2 chai tea bags. Let them steep for about 5 minutes. Remove the tea bags after steeping. This allows the chai flavors to blend into the cider. 3. Combine spices and sweeteners: Stir in 1 teaspoon of ground cinnamon, 1/2 teaspoon of ground ginger, and 1/4 teaspoon of ground cloves. Add 1 tablespoon of honey to sweeten it. Mix well until the spices dissolve into the cider completely. This creates a warm, spiced flavor. 1. Cool the spiced apple chai: Let the mixture cool for a few minutes. Then, place it in the fridge to chill. This step is key for a refreshing drink. 2. Prepare glasses for serving: While the chai cools, get your glasses ready. Use clear glasses to show off the beautiful color of the drink. Fill each glass about two-thirds full when serving. 1. Add sparkling water: Once the spiced apple chai is chilled, pour sparkling water into each glass. This adds a fizzy twist. Stir gently to mix without losing bubbles. 2. Garnish for presentation: Finish by adding fresh apple slices and a cinnamon stick to each glass. This not only looks great but also enhances the drink's aroma. Enjoy your Spiced Apple Chai Refresher! For the complete recipe, check out the Full Recipe section above. To optimize spice infusion, steep the chai tea bags in warm apple cider. This method helps the spices release their best flavors. Keep the steeping time at about five minutes. If you want a stronger taste, you can steep longer, but be careful not to overdo it. Balancing sweetness and spice is key. Start with one tablespoon of honey, then taste and adjust. You may want it sweeter or spicier based on your preference. Remember, the spices will get stronger as the drink cools. You can personalize the flavor easily. Try adding fresh herbs like mint or basil for a twist. A splash of lemon juice adds a bright touch, too. If you prefer a warm drink instead of chilled, simply skip the refrigeration step. Pour the spiced apple chai into a mug and enjoy it hot. This is perfect for cozy days or chilly nights. Spiced Apple Chai Refresher pairs well with snacks like cheese and crackers or a light salad. The warm spices complement savory flavors nicely. Choose clear glasses for serving to highlight the drink's vibrant colors. For added flair, sprinkle some ground cinnamon on top. It not only looks nice but also boosts the aroma. For the best experience, serve with apple slices and a cinnamon stick for a lovely presentation. For the full recipe, refer to the section above. {{image_2}} You can easily tweak the Spiced Apple Chai Refresher for different seasons. In the fall, add nutmeg or pumpkin spice to bring warmth and depth. These spices enhance the cozy vibe of autumn. You can also mix in a splash of cranberry juice for a festive twist during the holidays. This addition makes it bright and tangy, perfect for gatherings. You can serve this drink hot or cold. For a warm treat, simply skip the chilling step. Heat the spiced apple chai and enjoy it in a cozy mug. If you prefer something refreshing, stick with the cold version. You can even blend it with ice for a smoothie-like drink. This gives it a fun, frosty texture and makes it extra special on warm days. There are great options for different diets. If you want a vegan drink, replace honey with maple syrup or agave. These are natural sweeteners that fit into a plant-based diet. You can also make it low-calorie by using a sugar-free sweetener instead of honey. This way, you can enjoy a flavorful drink without the extra calories. For the full recipe, check out the details on how to make this tasty treat! To keep your Spiced Apple Chai Refresher fresh, cool it down quickly. After making the drink, let it sit at room temperature for about 30 minutes. Then, pour it into a clean glass jar or pitcher. Seal it tightly and place it in the fridge. This method helps maintain its bright flavors. For the best taste, consume it within 3 days. If you notice the flavors fading, try adding a splash of fresh apple cider or honey to boost it back up. If you want to save some for later, consider freezing the spiced apple chai. Pour it into ice cube trays or freezer-safe bags. Leave some space for expansion as it freezes. This option lets you enjoy it any time. To thaw, place the cubes in the fridge overnight or run warm water over the bag. Once thawed, give it a good stir and taste. You may wish to add a bit of honey or sparkling water before serving for extra flavor. In the fridge, your Spiced Apple Chai Refresher will last about 3 to 5 days. After this time, the flavors may change. Look for signs of spoilage, like off smells or a change in color. If it looks cloudy or has an unusual taste, it’s best to toss it out. For optimal enjoyment, always check your drink before serving. Enjoy your refreshing treat! What is the best way to sweeten this drink? I suggest using honey for sweetening. It blends well with the spices. You can adjust the amount to suit your taste. Other options include maple syrup or agave. Can I make this drink in advance? Yes, you can prepare it ahead of time. Just chill it in the fridge. When ready to serve, add sparkling water for the fizz. Is it possible to infuse this recipe with alcohol? Absolutely! A splash of spiced rum or bourbon works nicely. Just mix it in before serving. Can I use store-bought chai instead of tea bags? Yes, you can. Store-bought chai saves time and still adds great flavor. Choose a brand you love. What types of apple cider work best for this recipe? Use fresh apple cider for the best taste. It brings out the sweet and tangy notes. Avoid cider with added sugars. Are there caffeine-free chai options available? Yes, many brands offer caffeine-free chai. Look for herbal versions that mimic the flavor profile. How do I adjust the recipe for more or fewer servings? To adjust servings, simply scale the ingredients up or down. Keep the same ratios to ensure flavor stays balanced. Can I use fresh spices instead of ground spices? Yes, you can use fresh spices. Just remember that fresh spices are stronger. Use a bit less than the ground versions. This blog post covered how to make a Spiced Apple Chai Refresher. You learned the key ingredients, step-by-step instructions, and tips for custom flavors. You can try seasonal twists or make it vegan. Remember to store it properly to keep it fresh. Enjoy your drink on any occasion! With these ideas, this recipe can fit your taste and needs. Dive in and share this refreshing treat with friends!

Spiced Apple Chai Refresher Invigorating Flavor Boost

Looking for a drink that packs a flavor punch? Meet the Spiced Apple Chai Refresher! This invigorating beverage combines the

To make street corn chicken tacos, you need a few key ingredients. Here’s what you will gather: - 2 boneless, skinless chicken breasts - 2 cups fresh corn kernels (or frozen corn) - 1 tablespoon olive oil - 1 teaspoon cumin - 1 teaspoon smoked paprika - Salt and pepper to taste These ingredients form the base of your dish. The chicken gets flavorful from spices, while the corn adds sweetness. Next, we’ll add some tasty toppings to elevate our tacos. Here are the extras you'll want: - 1 cup shredded cabbage - 1/2 cup crumbled feta cheese - 1/4 cup fresh cilantro, chopped - Juice of 1 lime - Optional: Sriracha or hot sauce for serving The shredded cabbage adds crunch, and the feta gives a nice creaminess. Lime juice brightens the flavors. If you like heat, drizzle some hot sauce on top. For the full recipe, check the details above. Enjoy crafting these tasty tacos! To cook the chicken, first heat a skillet over medium heat. Add one tablespoon of olive oil. Season two boneless, skinless chicken breasts with cumin, smoked paprika, salt, and pepper. Cook each side for about six to seven minutes. The chicken is ready when it is no longer pink inside. To check, cut into the thickest part. If the juices run clear, it is done. After cooking, let the chicken rest for a few minutes before slicing it into thin strips. Use the same skillet to prepare the corn. Add two cups of corn kernels to the skillet. Sauté them for about five to six minutes. You want them to be tender and slightly charred. This adds great flavor. Season with a pinch of salt and pepper. Once cooked, set the corn aside to cool slightly. In a bowl, combine one cup of shredded cabbage, half a cup of crumbled feta cheese, and a quarter cup of freshly chopped cilantro. Squeeze the juice of one lime into the bowl. Mix everything well to blend the flavors. If you want more brightness, add a little more lime juice. Taste it and adjust the seasoning if needed. To assemble the tacos, warm eight small corn tortillas. Heat them in a dry skillet for about one minute on each side. This makes them soft and pliable. On each tortilla, place sliced chicken first. Then add the sautéed corn. Top it with the cabbage and feta mixture. Layering like this gives the best texture and flavor. For serving, consider garnishing the tacos with extra cilantro or lime wedges. You can also drizzle Sriracha or your favorite hot sauce for a spicy kick. Present the tacos on a colorful platter to make them eye-catching. Enjoy your meal with a side of chips or a fresh salad. To avoid dryness, start with fresh chicken breasts. Cook them on medium heat for even results. Make sure you season well with salt and pepper. Always check the center of the chicken. It should be white and juices should run clear. If you want something different, try grilling the chicken. Grilling adds a smoky flavor that is very nice. For extra flavor, add spices. A dash of chili powder or paprika works great. You can also try mixing in lime juice or garlic. These will brighten up the corn’s taste. If you want a different texture, roast the corn in the oven. Roasting gives it a nice crunch and sweetness. If you plan to make these tacos ahead of time, prep your chicken and corn first. You can make the filling a day before. Just keep it in the fridge. Store the chicken and corn separately. This way, they will stay fresh longer. When you are ready, warm them up and assemble your tacos. {{image_2}} You can switch up the protein in these tacos. Shrimp works great with the same spices. Just cook them until they turn pink. If you prefer a plant-based option, try tofu. Press and cube it, then marinate it like the chicken. Adjust the seasoning to fit your taste. You can use the same spices or add a splash of soy sauce for extra flavor. Corn is key to this recipe. You can use grilled or sautéed corn. Grilling gives a nice smoky flavor. Simply toss the corn on the grill until it’s charred. Sautéing is quicker. Just cook the corn in a skillet for a few minutes. If fresh corn is not available, you can use canned or frozen corn. Drain canned corn and sauté it for a few minutes. Frozen corn can go right into the skillet. Just cook it until warm. Want a gluten-free option? Use gluten-free tortillas instead of corn tortillas. They work just as well and still taste great. If you need a vegan choice, skip the chicken and feta. Instead, use a plant-based chicken substitute and vegan cheese. You can also add avocado for creaminess. It keeps the dish fresh and tasty while making it suitable for various diets. To store your street corn chicken tacos, let them cool first. Place the tacos in an airtight container. You can also store the filling separately. This helps keep the tortillas from getting soggy. They will last in the fridge for about 3 to 4 days. If you want to enjoy them later, make sure to check for any signs of spoilage. You can freeze the taco filling easily. The chicken and corn freeze well together. Just place them in a freezer-safe bag or container. They can last up to 3 months in the freezer. Remember to label the bag with the date! When you're ready to eat, thaw the filling overnight in the fridge. You can reheat it on the stove or in the microwave. For the tortillas, it's best to warm them fresh. This makes your tacos taste great, just like when they were first made. To make street corn chicken tacos from scratch, you need to follow a few steps. First, cook the chicken with spices until it is juicy. Next, sauté fresh corn until it gets a bit charred. Then, mix cabbage, feta, cilantro, and lime juice in a bowl. Warm your corn tortillas in a skillet. Finally, layer the chicken, corn, and the cabbage mixture in the tortillas. This will create a tasty taco. Yes, you can use frozen corn! It is a great time-saver. Just make sure to thaw it before cooking. Sauté the corn in the skillet until it is warm and slightly charred. This gives it a nice flavor. Frozen corn can be just as good as fresh corn when cooked well. For sauces, you can try a few tasty options. A drizzle of lime crema adds creaminess. Hot sauce, like Sriracha, gives a nice kick. You can also use avocado sauce for a smooth flavor. These sauces enhance the tacos and bring out the flavors. You can customize your toppings easily! Try adding diced tomatoes or jalapeños for extra flavor. Avocado slices or guacamole can make it creamy. You might also like pickled onions for a tangy touch. The options are endless, so feel free to experiment with your favorites. Street corn chicken tacos can be mild or spicy, based on your choice. The spices used for the chicken are not hot. If you want more heat, add hot sauce or jalapeños. You can adjust the spice level to suit your taste. Enjoy them as you like! In this blog post, we explored making street corn chicken tacos step by step. You learned about key ingredients like chicken, corn, and toppings. We covered cooking techniques for the chicken and corn, plus tips for assembling your tacos perfectly. Don’t forget the fun toppings to boost flavor! Remember, you can customize this dish to fit your taste. Whether using shrimp or tofu, there’s an option for everyone. Try different preparations and make it your own. Enjoy creating your delicious tacos!

Street Corn Chicken Tacos Flavorful and Easy Recipe

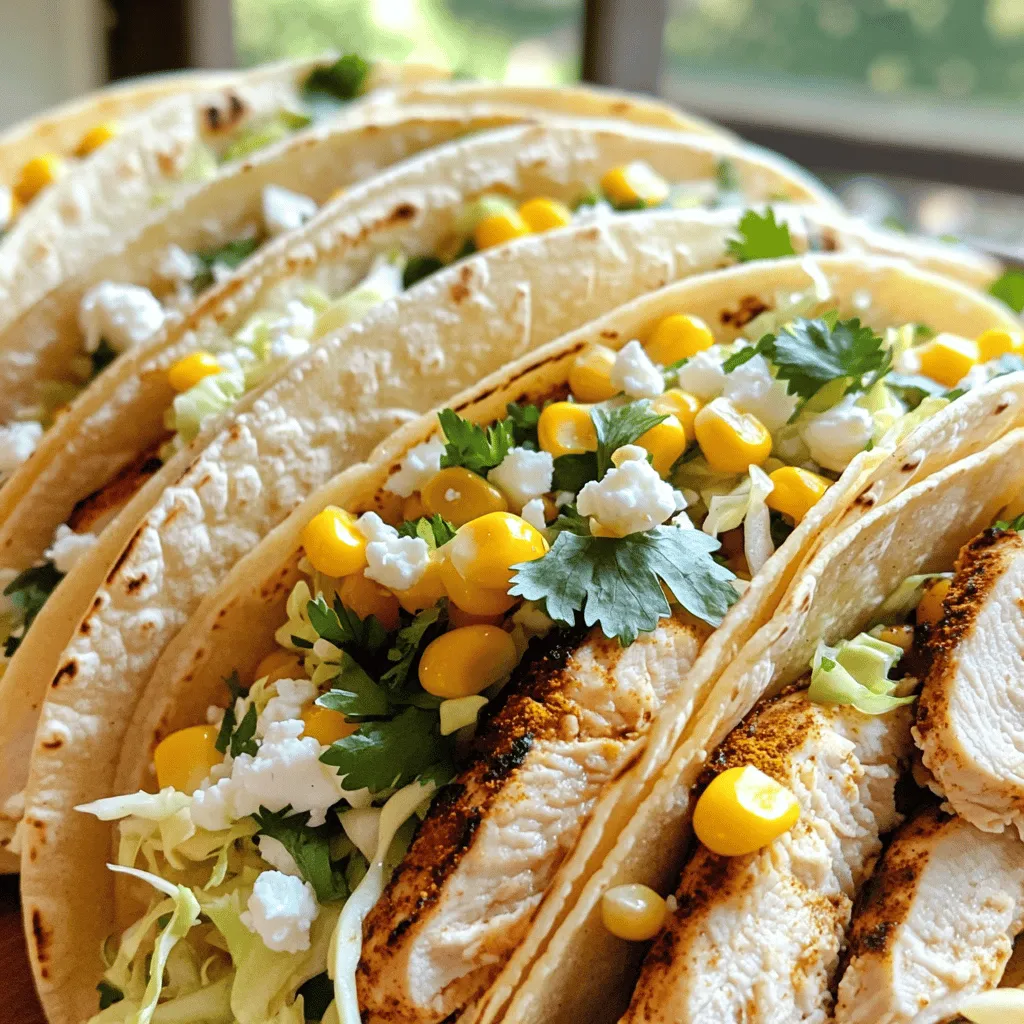
Craving a burst of flavor in a simple meal? Let me introduce you to Street Corn Chicken Tacos! These tasty

To make raspberry chocolate chip cookies, you need the following ingredients: - 1 cup unsalted butter, softened - 1 cup brown sugar, packed - 1/2 cup granulated sugar - 2 large eggs - 2 teaspoons vanilla extract - 3 cups all-purpose flour - 1 teaspoon baking soda - 1/2 teaspoon salt - 1 cup semi-sweet chocolate chips - 1 cup fresh raspberries (lightly mashed) Choosing good ingredients makes a big difference in your cookies. Use fresh raspberries for the best flavor. Look for butter that is creamy and soft, not hard. For sugar, choose brown sugar that is moist. This helps your cookies stay chewy. Also, pick good chocolate chips. High-quality chocolate adds more taste to each bite. If you have allergies or follow special diets, there are great swaps. For butter, use coconut oil or vegan butter. Instead of eggs, try using flaxseed meal mixed with water. Use 1 tablespoon of flaxseed meal with 2.5 tablespoons of water for each egg. For those avoiding gluten, you can use a gluten-free flour blend. This way, everyone can enjoy these tasty cookies! For the complete recipe, check out the Full Recipe. To make raspberry chocolate chip cookies, first gather your ingredients. Preheat the oven to 350°F (175°C). Line two baking sheets with parchment paper. This keeps cookies from sticking. In a large bowl, cream together softened butter, brown sugar, and granulated sugar. Mix until light and fluffy. This step is key for a soft cookie. Next, add the eggs one at a time. Mix well after each addition. Then stir in the vanilla extract. In a different bowl, whisk together flour, baking soda, and salt. Gradually add this dry mix to the wet mixture. Stir until just combined. Overmixing can lead to tough cookies, so be gentle. Now, gently fold in the semi-sweet chocolate chips and lightly mashed fresh raspberries. Make sure they are evenly spread in the dough. Use a cookie scoop or tablespoon to drop mounds of dough onto the baking sheets. Space them about 2 inches apart for even baking. Mixing is crucial for the right cookie texture. Creaming butter and sugar well adds air. This gives the cookies a lighter feel. Use a hand mixer or stand mixer for best results. When adding the eggs, mix briefly just to combine. When adding dry ingredients, stir slowly. Use a spatula or wooden spoon. This prevents overmixing. Folding in chocolate chips and raspberries should be done with care. This keeps the berries intact and adds a nice look. Bake your cookies in the preheated oven for 10-12 minutes. Look for golden-brown edges and slightly underbaked centers. They will continue to cook after you remove them. Let them cool on the baking sheets for 5 minutes. This helps them set. Then, transfer the cookies to a wire rack to cool completely. This keeps them from getting soggy. For a fun presentation, arrange the cookies on a decorative plate. Dust with powdered sugar and add whole raspberries for a colorful touch. Enjoy your delicious treats! For the full recipe, refer to the details above. When making raspberry chocolate chip cookies, some common mistakes can ruin your batch. First, be careful not to overmix the dough. Mixing too much makes cookies tough. Second, do not skip the resting time for the dough. Letting it rest for 30 minutes helps flavors blend. Lastly, avoid using too many raspberries. Too many can make the dough too wet. To get the right texture, use room-temperature butter. Softened butter mixes better and gives a nice lift. Also, don’t forget to measure your flour correctly. Too much flour makes cookies dry. Use the spoon-and-level method. Spoon flour into the cup and level it off. This method gives you a soft, chewy cookie that you will love. You can boost flavor by adding a pinch of cinnamon or salt. This small tweak brings out the sweetness. If you want a twist, try using different chocolate types. Dark chocolate or white chocolate chips can change the taste. You can also add chopped nuts for crunch. Each addition makes your cookies unique, fun, and delicious. For the full recipe, check the above section. Enjoy baking! {{image_2}} You can easily switch the chocolate chips in this recipe. Dark chocolate adds a rich, bold flavor. Milk chocolate gives a sweet and creamy taste. White chocolate brings a sweet, smooth touch. Each type will change the flavor and make your cookies unique. Feel free to mix and match. You can even use a blend for extra fun! Want to add more texture and flavor? Consider nuts or coconut. Chopped walnuts or pecans add crunch. Toasted coconut flakes give a tropical twist. Just fold in about half a cup of your choice when mixing in the chocolate and raspberries. This change will make your cookies even more delicious and exciting! If you need a vegan or gluten-free option, you can adapt this recipe. For vegan cookies, swap the butter for coconut oil or vegan butter. Replace eggs with flaxseed meal or applesauce. For a gluten-free version, use a gluten-free flour blend instead of all-purpose flour. Both options keep the cookies tasty and moist. Enjoy these fun twists on raspberry chocolate chip cookies! Check out the Full Recipe for more details on how to make these yummy treats. Store your raspberry chocolate chip cookies in an airtight container. This helps keep them soft and fresh. Layer parchment paper between the cookies to prevent sticking. Keep them at room temperature for up to a week. If you want to store them longer, consider freezing. Freezing cookies is easy! First, let them cool completely. Then, place them in a single layer on a baking sheet. Freeze for about two hours. Once they are hard, transfer them to a freezer bag. Remove any air before sealing. Cookies can last for up to three months in the freezer. To reheat your cookies, preheat the oven to 350°F. Place cookies on a baking sheet. Heat for about 5-7 minutes. This warms them up and revives the soft texture. You can also use the microwave. Heat each cookie for 10-15 seconds. Enjoy your warm, tasty treat again! To store raspberry chocolate chip cookies, place them in an airtight container. This keeps them fresh. You can also add a slice of bread in the container. The bread helps keep cookies soft. Store them at room temperature for up to one week. If you want them to last longer, freeze them. Yes, you can use frozen raspberries in this recipe. Just make sure to thaw them first. Pat them dry to remove extra moisture. This prevents the dough from getting too wet. The flavor will still be great, and your cookies will taste delicious. To soften butter quickly, cut it into small cubes. Place the cubes in a bowl. Let them sit at room temperature for about 10-15 minutes. You can also microwave it for a few seconds. Just be careful not to melt it. Soft butter mixes better with sugar in the recipe. You can tell the cookies are done by looking at the edges. They should be golden brown. The centers may look slightly underbaked. This is okay, as they will continue to bake on the sheet. Let them cool on the baking sheet for a few minutes. Then transfer them to a wire rack. Enjoy your cookies from the full recipe! This article covered all key aspects of baking raspberry chocolate chip cookies. You learned about ingredient choices and how to store your cookies properly. I also shared tips to avoid common mistakes and enhance flavors. The step-by-step guide helps ensure your baking success. Remember, experimenting with variations can make your cookies even more exciting. With the right techniques, you’ll enjoy perfect cookies every time. Happy baking!

Raspberry Chocolate Chip Cookies Easy and Tasty Treat

If you love cookies that burst with flavor, you’re in for a treat! My Raspberry Chocolate Chip Cookies are both

- 1 pound large shrimp, peeled and deveined - 2 tablespoons olive oil - 2 teaspoons smoked paprika - 1 teaspoon garlic powder - Salt and pepper to taste The main stars of the dish are the large shrimp. They are meaty and take on flavor well. You want to peel and devein them to make eating easy. Olive oil is key for keeping the shrimp moist and adds a nice flavor. For spices, smoked paprika gives a great depth. Garlic powder brings in a tasty kick. Don’t forget to add salt and pepper to round out the flavors. - 1 avocado, diced - 1 cup fresh corn kernels (or canned, drained) - 1 small red onion, finely chopped - 1 medium tomato, diced - 1 lime, juiced Next, we have the salsa. The avocado adds a creamy texture. You can use fresh corn for a sweet crunch or canned corn if that's what you have. Red onion gives a nice bite, while the tomato adds freshness. A squeeze of lime juice brightens everything up. This salsa is not just tasty; it also adds color and texture. - 1 cup cooked quinoa - Fresh cilantro, chopped (for garnish) For the base, cooked quinoa gives a nutty flavor and is full of protein. It holds the bowl together and makes it filling. You can top your dish with fresh cilantro. It adds a burst of flavor and makes the bowl look amazing. This dish is perfect for a healthy meal that feels special. If you want the full recipe, check out the details above. Prepping the grill Start by preheating your grill to medium-high heat. If you use wooden skewers, soak them in water for thirty minutes. This step helps stop them from burning on the grill. Marinating the shrimp In a big bowl, mix the shrimp with olive oil, smoked paprika, garlic powder, salt, and pepper. Toss the shrimp well so they get coated evenly. This marinade adds flavor and keeps the shrimp juicy. Grilling shrimp perfectly Once your grill is hot, it's time to grill the shrimp. If you want, thread the shrimp onto skewers. Grill each side for about two to three minutes. The shrimp will turn pink and opaque when done. Take them off the grill and set them aside. Making the avocado and corn salsa In a separate bowl, mix diced avocado, corn, red onion, tomato, and lime juice. Stir well and season with salt and pepper. This salsa adds a fresh and tasty crunch to your bowl. Layering ingredients for the bowl To build your bowl, start with a scoop of cooked quinoa at the bottom. Next, add the grilled shrimp on top. Finally, load it with a generous scoop of the avocado and corn salsa. Garnishing suggestions For the final touch, sprinkle freshly chopped cilantro on top. This adds a pop of color and flavor to your dish. Enjoy your Grilled Shrimp Bowl with Avocado and Corn Salsa! For the complete recipe, check [Full Recipe]. Grilling shrimp is easy, but a few tips help. First, make sure your grill is hot. The heat helps create a nice sear. Use a bit of oil on the grill grates to prevent sticking. Avoid overcooking shrimp. They cook fast, usually in 2-3 minutes per side. When they turn pink and opaque, they’re done. If you cook them too long, they get tough and rubbery. To enhance the flavor of your salsa, use fresh ingredients. Fresh lime juice adds a bright taste. You can also add a pinch of cumin for warmth. If you don’t have fresh corn, canned corn works well. If you want a twist, add diced mango or jalapeño for sweetness or heat. Make your dish pop with color. Start with a bed of quinoa in a bowl. Arrange the grilled shrimp on top. Add the avocado and corn salsa generously. For a final touch, sprinkle fresh cilantro on top. You can also serve with lime wedges on the side. This adds a fresh look and extra flavor. For the full recipe, check out the recipe section. {{image_2}} You can switch the shrimp for chicken or tofu. Chicken thighs work great. Just cut them into bite-sized pieces. Marinate them the same way as the shrimp. Grill until they reach 165°F. For tofu, choose firm tofu. Press it to remove excess water, then cut it into cubes. Toss with the same oil and spices. Grill until golden brown. Both options offer tasty and satisfying protein. Want to change the flavor? You can add spices like cumin or chili powder. These spices give the dish a nice kick. You can also use fresh herbs like basil or parsley for a twist. Adding different veggies can make it special. Try bell peppers, zucchini, or snap peas. Chop them small and mix them into the salsa for a colorful touch. Instead of quinoa, you can use rice or lettuce wraps. Brown rice adds a nutty flavor, while white rice keeps it light. For lettuce wraps, use large leaves, like romaine. Fill them with the shrimp and salsa for fun finger food. You can also serve the bowl with sides like black beans or a simple green salad for extra nutrition. For the full recipe, check out the instructions above to get started on your own grilled shrimp bowl with avocado and corn salsa! To keep your grilled shrimp fresh, store it in an airtight container. Place it in the fridge. Use it within 2 days for the best taste. Make sure the shrimp cools before you store it. For the salsa, transfer it to a separate airtight container. The salsa will stay fresh for up to 3 days. To prevent browning, add a little extra lime juice on top. To reheat shrimp, the best method is using the stovetop. Heat a skillet over medium heat. Add a splash of olive oil and warm the shrimp for about 2-3 minutes. Stir gently to avoid overcooking. For salsa, do not heat it. Serve it cold for the best flavor. If it sits too long, the flavors may change. Just mix it up before serving. You can prep ingredients a day ahead. Clean and devein shrimp then store it with seasoning in the fridge. It will save time during cooking. For the salsa, chop the veggies and mix them in a bowl. Store the salsa mix in the fridge. Keep the avocado separate until serving to keep it fresh. You should grill shrimp for about 2-3 minutes on each side. They cook quickly and will turn pink and opaque when done. Overcooking shrimp makes them tough. Keep an eye on them while grilling for the best texture. Yes, you can make the avocado and corn salsa in advance. However, it’s best to add the avocado right before serving. This keeps it fresh and green. Prepare the corn, onion, tomato, and lime juice ahead. Mix them, then add avocado later. If you want a substitute for quinoa, try brown rice or farro. Both work well and add great texture. You can also use cauliflower rice for a low-carb option. Each of these choices gives a nice base for your grilled shrimp bowl. For the full recipe, check out the Grilled Shrimp Bowl with Avocado and Corn Salsa ! This blog post outlined a delicious shrimp bowl you can easily make. You learned about the main ingredients, including shrimp and fresh salsa with avocado and corn. I shared step-by-step instructions to grill the shrimp and assemble the bowl. Helpful tips showed how to avoid common mistakes and make your dish shine. You can even switch proteins or bases for variety. With these guiding points, you'll create a tasty and vibrant meal. Enjoy experimenting and making this bowl your own!

Grilled Shrimp Bowl with Avocado and Corn Salsa Delight

If you’re craving a fresh and tasty meal, this Grilled Shrimp Bowl with Avocado and Corn Salsa is a must-try.

- 2 ripe mangoes, diced - 1 cup cherry tomatoes, halved - 1 cucumber, diced - 1/2 red onion, finely chopped - 1/4 cup fresh cilantro, chopped - 1 jalapeño, minced (optional, for spice) - 1/4 cup toasted peanuts, roughly chopped - 3 tablespoons lime juice - 2 tablespoons olive oil - Salt and pepper to taste To pick ripe mangoes, look for ones that feel slightly soft. They should have a sweet smell near the stem. Avoid mangoes with dark spots or wrinkled skin. If you want to switch things up, try adding avocado, bell peppers, or even some feta cheese. These can add new flavors and textures to your salad. For the Full Recipe, you will find precise steps to make this fresh dish. You can adjust the spice level by adding more or less jalapeño. Enjoy your cooking! To make a fresh mango salad, follow these simple steps. First, gather your ingredients. You need ripe mangoes, cherry tomatoes, cucumber, red onion, cilantro, jalapeño, peanuts, lime juice, olive oil, salt, and pepper. 1. Chop the Fruits and Veggies Start by dicing the mangoes into small pieces. Use a sharp knife for clean cuts. Next, halve the cherry tomatoes and dice the cucumber. Finely chop the red onion and cilantro. If you want some heat, mince the jalapeño. 2. Mix the Ingredients In a large bowl, combine the diced mangoes, halved cherry tomatoes, diced cucumber, and chopped red onion. This mix brings a burst of color. Gently fold in the chopped cilantro and peanuts. These add flavor and crunch. 3. Make the Dressing In a small bowl, whisk together lime juice, olive oil, salt, and pepper. This dressing adds a bright and tangy taste to the salad. 4. Combine Everything Pour the dressing over the salad mixture. Toss everything gently until well coated. This step ensures each bite is flavorful. 5. Let It Rest Allow the salad to sit for 10 minutes. This time lets the flavors meld together. 6. Serve it Up Serve the salad chilled or at room temperature. It pairs well with grilled meats or can be a stand-alone dish. This Tropical Mango Bliss Salad is not just tasty; it is healthy too! For the full recipe, check the section above. Enjoy your fresh and vibrant salad! To make the best mango salad, start with ripe mangoes. Look for mangoes that feel soft when you gently press them. This means they are ready to eat. Flavor combinations are key. The sweet mango pairs well with the tangy lime juice. Cherry tomatoes add a burst of flavor, while red onion gives a nice crunch. Mixing these flavors creates a delightful taste. Enhancing texture is easy. Add toasted peanuts for a satisfying crunch. You can also include diced cucumber for a refreshing bite. Fresh cilantro brings a burst of color and flavor. Common mistakes to avoid include using unripe mangoes. They will taste bland and hard. Don't skip the dressing; it ties all the flavors together. Lastly, be gentle when mixing. You want to keep the mango chunks intact. For a complete guide, check out the Full Recipe. {{image_2}} You can enjoy mango salad in different ways. Each version brings unique flavors. Here are a few ideas: - Spicy Mango Salad: To make it spicy, add minced jalapeño. This gives a nice kick. You can also toss in some red pepper flakes for extra heat. Adjust the spice to your taste. - Thai-style Mango Salad: For a Thai twist, use fish sauce instead of salt. Add some chopped peanuts for crunch. You can also mix in shredded carrots and bell peppers for more color and flavor. Fresh mint or basil can brighten it up. - Creative Add-ins: Consider adding fruits like avocado or pineapple for a tropical feel. You can also use nuts like cashews or almonds for crunch. If you want a protein boost, grilled shrimp or chicken works well too. These variations keep the salad fresh and exciting. Feel free to mix and match. Make it your own! If you want to try a full recipe, check out the Tropical Mango Bliss Salad. To keep your mango salad fresh, store it in an airtight container. This helps keep moisture in and air out. Place it in the fridge right after serving. Look for signs of spoilage before eating. If the salad smells sour or the mango becomes mushy, it’s best to toss it. Wilting cilantro or browning peanuts are also signs of age. If you want to revive leftover salad, try adding a splash of lime juice. This brings back some freshness. You can also mix in a little new cilantro or peanuts for extra crunch. For more details, check the Full Recipe. Enjoy your mango salad! What are the health benefits of mango salad? Mango salad offers many health benefits. Mangoes are rich in vitamins A and C. They boost your immune system and promote healthy skin. The fresh veggies add fiber, which helps digestion. Olive oil provides healthy fats that support heart health. Together, these ingredients make a tasty and nutritious dish. Can I make mango salad in advance? Yes, you can make mango salad in advance. However, I recommend adding the dressing just before serving. This keeps the salad fresh and crisp. You can prepare the chopped ingredients a few hours ahead. Store them in the fridge until you’re ready to mix. Is mango salad suitable for meal prep? Mango salad is great for meal prep. It stores well and stays fresh for a couple of days. Just remember to keep the dressing separate until serving. This way, your salad remains crunchy and full of flavor. For a full recipe, check out the Tropical Mango Bliss Salad. Mango salad is a tasty, refreshing dish that is easy to make. We explored its ingredients, prep steps, and best practices. You learned how to make it your own with fun variations. Remember to store leftovers well to keep them fresh. This salad offers health perks and fits into meal prep. Try different takes to keep things exciting. Enjoy this flavorful treat as a healthy addition to your meals. Your mango salad journey starts now!

Mango Salad Fresh and Flavorful Healthy Dish

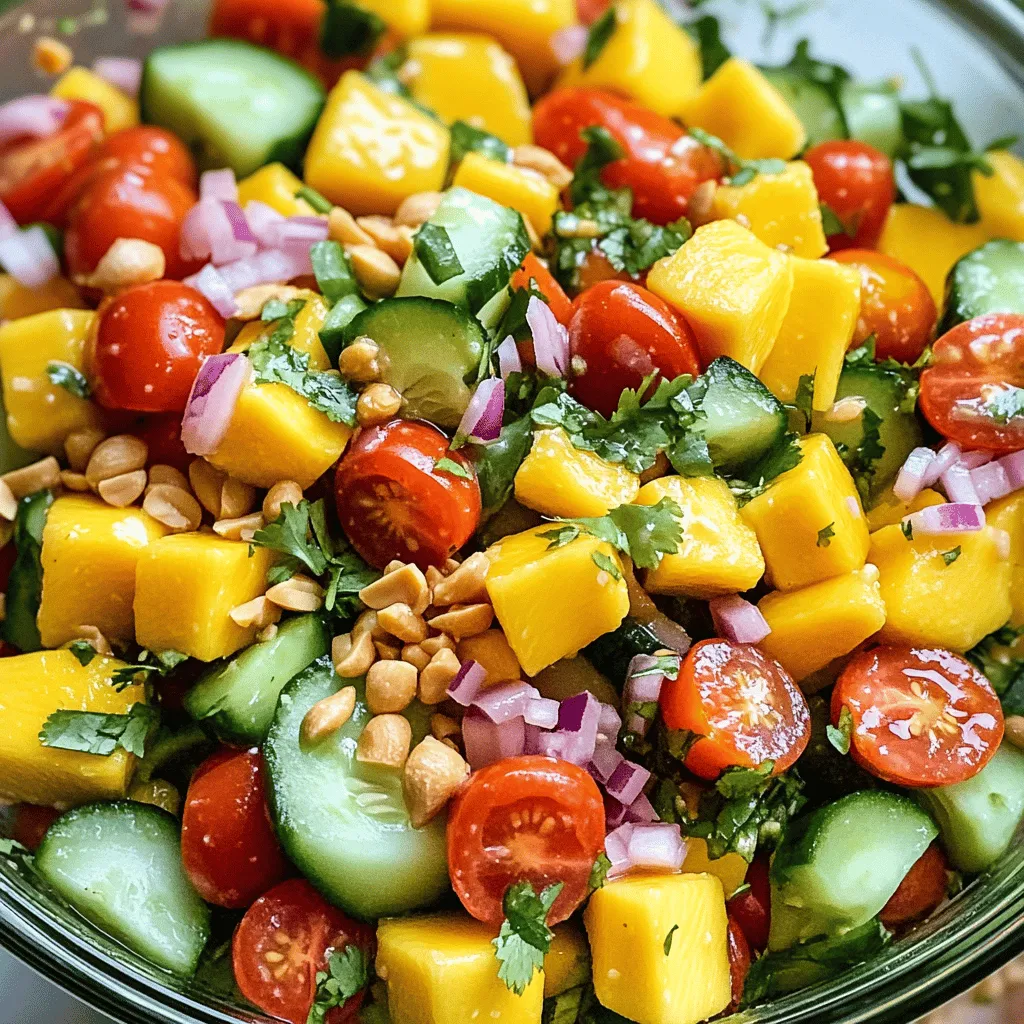
If you’re craving a dish that’s both fresh and packed with flavor, mango salad is the answer. In this blog,

To make a delicious cinnamon roll mug cake, gather these simple ingredients: - 1/4 cup all-purpose flour - 2 tablespoons granulated sugar - 1/4 teaspoon baking powder - 1/4 teaspoon cinnamon - Pinch of salt - 3 tablespoons milk - 2 tablespoons vegetable oil - 1/4 teaspoon vanilla extract - 1 tablespoon brown sugar (for cinnamon swirl) - 1/2 teaspoon ground cinnamon (for cinnamon swirl) - Optional: Cream cheese frosting for topping Having the right ingredients is key for the best flavor and texture. The all-purpose flour gives the cake its structure. The granulated sugar adds sweetness, while baking powder makes it rise. Cinnamon is what makes this cake taste like a warm cinnamon roll. A pinch of salt balances the sweetness. For the wet ingredients, milk, vegetable oil, and vanilla extract create a moist and tasty cake. The brown sugar and ground cinnamon make the swirl that gives a rich flavor. If you like, you can add cream cheese frosting on top for extra sweetness. Now that you have your ingredients ready, you're all set to create this quick and tasty dessert delight! For the full recipe, check out the instructions section. 1. Start with a microwave-safe mug. 2. Mix these dry ingredients in the mug: - 1/4 cup all-purpose flour - 2 tablespoons granulated sugar - 1/4 teaspoon baking powder - 1/4 teaspoon cinnamon - Pinch of salt 3. Stir well. Ensure the dry ingredients blend nicely. 4. Next, add these wet ingredients: - 3 tablespoons milk - 2 tablespoons vegetable oil - 1/4 teaspoon vanilla extract 5. Mix until the batter is smooth and fully combined. 1. In a small bowl, mix: - 1 tablespoon brown sugar - 1/2 teaspoon ground cinnamon 2. This is your cinnamon swirl mix. 3. Now, layer in the mug. Pour half of the batter first. 4. Sprinkle half of the cinnamon sugar mix over the batter. 5. Add the rest of the batter, then top with the remaining cinnamon sugar. 6. Use a toothpick or fork. Swirl gently to mix it in. 1. Microwave the mug on high for about 1 minute and 30 seconds. 2. Check the cake. If it’s wet in the center, microwave more. 3. Add 10 seconds at a time until it’s fully cooked. 4. Let the mug cake cool for a minute. 5. If you want, add a drizzle of cream cheese frosting on top. Now you have a warm, tasty cinnamon roll mug cake! Follow the full recipe for more details. To make a great mug cake, you must ensure even cooking in the microwave. Start by mixing your dry ingredients well. This helps them blend and cook evenly. When you add the wet ingredients, stir gently but thoroughly. If you don’t mix well, some parts may cook faster than others. For the swirling technique, I recommend using a toothpick or fork. After layering your batter and cinnamon sugar, gently swirl it. This creates the best cinnamon distribution. Don’t overdo it; a few swirls will work wonders. You want to see those lovely cinnamon ribbons without blending everything together. Adding vanilla extract can really boost the flavor of your cinnamon roll mug cake. Just a little goes a long way. It brings warmth and richness to your treat. If you want to explore more, try adding a pinch of nutmeg or even almond extract for a twist. For toppings, I suggest using cream cheese frosting for that classic cinnamon roll taste. If you want something lighter, consider whipped cream or a drizzle of caramel sauce. Fresh fruit like berries can also add a nice touch. Feel free to get creative with your toppings! Remember, this is your dessert, so make it how you love it. Enjoy the process and have fun! For the full recipe, check out the details above. {{image_2}} You can change your cinnamon roll mug cake to fit your taste. Here are two fun ideas: - Chocolate chip cinnamon roll mug cake: Add a handful of chocolate chips to the batter for a sweet twist. The chocolate melts and adds richness. It pairs well with the warm cinnamon flavor. - Nutty cinnamon roll mug cake with pecans: Fold in some chopped pecans for a crunchy texture. The nuts give a nice contrast to the soft cake. Plus, they bring a rich, nutty flavor that enhances the overall taste. You can also adjust this recipe for different diets. Here’s how: - Gluten-free options for the recipe: Use a gluten-free all-purpose flour blend in place of regular flour. This keeps the cake tasty while making it safe for those with gluten issues. - Vegan substitutions for key ingredients: Replace milk with almond or oat milk for a vegan option. Use a plant-based oil instead of vegetable oil. You can even skip the cream cheese frosting or use a vegan version to keep it fully plant-based. These variations and modifications let you enjoy your cinnamon roll mug cake in many ways! For the full recipe, check out the earlier section. If you have leftover batter, store it in the fridge. Use an airtight container. This way, the batter stays fresh for up to two days. When you are ready to enjoy it, just give it a good stir before cooking. To reheat your mug cake, microwave it for 10 to 15 seconds. Check if it’s warm enough. If not, add a few more seconds. Be careful not to overheat, or it may become dry. The finished mug cake lasts about one day at room temperature. If you keep it in the fridge, it can last up to three days. I suggest not storing it for too long, as the flavors may fade. Enjoy your cinnamon roll mug cake fresh for the best taste! For the full recipe, click [Full Recipe]. Can I make this recipe without a microwave? Yes, you can! Use your oven instead. Preheat the oven to 350°F (175°C). Pour the batter into a small oven-safe dish. Bake for about 15 to 20 minutes. Check for doneness with a toothpick. How do I adjust the recipe for a larger serving? To make more servings, simply multiply each ingredient by the number of servings you want. Use a larger mug or a bowl. Just make sure to adjust the cooking time. Bake or microwave longer to ensure it cooks well. What if my mug cake is too dry or too wet? If your mug cake is dry, you may have overcooked it. Try reducing the cooking time by 10 seconds. If it’s too wet, you might need to cook it longer. Add 10-second increments until it’s just right. Can I use a different mug or container to cook it? Yes, you can! Just make sure the mug or container is microwave-safe. Avoid using metal. Glass or ceramic works great. If the container is larger, adjust the cooking time as needed. This post detailed how to make a delicious cinnamon roll mug cake. We covered simple ingredients and easy steps. You learned how to add a cinnamon swirl and some tasty toppings. We also explored fun flavor variations and health-friendly options. In short, this recipe is quick and fun. You can enjoy a warm treat in minutes. Now grab your mug, get cooking, and enjoy every bite!

Cinnamon Roll Mug Cake Quick and Tasty Dessert Delight

Feeling a sweet craving but short on time? You’re in luck! This Cinnamon Roll Mug Cake is the quick and

For this delightful cheesecake, you will need: - 1 and 1/2 cups graham cracker crumbs - 1/4 cup granulated sugar - 1/2 cup unsalted butter, melted - 16 oz cream cheese, softened - 1 cup powdered sugar - 1 teaspoon vanilla extract - 3 large eggs - 1 cup fresh peaches, pureed - 1 cup mixed fresh berries (strawberries, blueberries, raspberries) - 1 tablespoon lemon juice - 1/4 cup sour cream (optional for extra creaminess) These ingredients create a rich and creamy cheesecake with a tasty fruit topping. The cream cheese gives a smooth texture. The fresh peaches add sweetness, while the mixed berries provide a bold flavor. You can enhance the taste of your cheesecake with: - Sour cream for creaminess - Variations on sweeteners Using sour cream makes the cheesecake even richer. You can also try honey or maple syrup instead of granulated sugar for a different flavor profile. These options let you customize the cheesecake to your taste. If you want to try something new, I recommend experimenting with these additions. They can make your dessert even more special! For the full recipe, visit the [Full Recipe]. To start, preheat your oven to 325°F (160°C). This temperature is perfect for baking cheesecake. Make sure your oven is fully warmed before you bake. A good tip is to use an oven thermometer for accuracy. This prevents any surprises during baking. Next, prepare your baking environment. Line the bottom of your springform pan with parchment paper. This helps the cheesecake come out easier. Also, place a baking sheet on the rack below to catch any drips. To make the crust, grab a medium bowl. Mix together 1 and 1/2 cups of graham cracker crumbs, 1/4 cup of granulated sugar, and 1/2 cup of melted unsalted butter. Stir until the mixture is well combined. Now, press this mixture into the bottom of your 9-inch springform pan. Use the back of a measuring cup for an even layer. Bake the crust for 10 minutes. It should look golden brown. Let it cool before adding the filling. In a large mixing bowl, beat 16 oz of softened cream cheese with an electric mixer. Aim for a smooth texture. Gradually add in 1 cup of powdered sugar. Continue mixing until well combined. Next, add 1 teaspoon of vanilla extract. Then, crack in 3 large eggs one by one. Make sure to blend well after each egg. Now, stir in 1 cup of pureed peaches and 1 tablespoon of lemon juice. If you want extra creaminess, add 1/4 cup of sour cream. Mix until smooth and creamy. Gently fold in 1 cup of mixed fresh berries. Use a spatula to keep the berries whole. This adds nice texture to your cheesecake. Pour the cheesecake filling into your cooled crust. Bake in your preheated oven for 55-60 minutes. The edges should be set, but the center will still jiggle a bit. This is normal! After baking, turn off the oven and crack the door open slowly. Let the cheesecake cool in the oven for one hour. This helps to avoid cracks on the top. Once cooled, place the cheesecake in the fridge. Chill for at least 4 hours, or overnight for the best flavor. The longer it chills, the better it tastes. To keep your cheesecake smooth, avoid sudden temperature changes. A water bath helps with this. Place your springform pan in a larger pan filled with hot water. This step creates steam that helps cook the cheesecake evenly. Also, make sure to bake at the right temperature. Too high can cause cracks as it cooks too fast. For humidity, avoid baking on humid days. High humidity can affect the texture. To get that creamy cheesecake texture, it’s key to use room temperature ingredients. Cold ingredients can lead to lumps. So, let your cream cheese and eggs sit out for about 30 minutes before mixing. When you mix, do it slowly. Overmixing can add too much air, causing cracks. A smooth, gentle blend keeps that nice, creamy feel. Garnishing your cheesecake makes it even more appealing. Top it with fresh berries right before serving. You can also drizzle honey or a berry sauce over the top. For drinks, a sweet white wine pairs well. If you want something lighter, serve with whipped cream. This adds a nice touch and enhances flavors. For more ideas, check out the [Full Recipe]. {{image_2}} You can change up the fruit for your cheesecake. Summer is great for fresh berries. I love using strawberries, blueberries, and raspberries. You can also try seasonal fruits like cherries or plums. If fresh fruit is not an option, frozen berries work well too. Just make sure to thaw and drain them first. This keeps the filling from being too watery. The crust can change the whole cheesecake experience. Try using a nut crust made from almonds or pecans. It adds a nice crunch. You can also use cookie crumbs, like Oreos or Nilla wafers, for a sweet twist. For those who need gluten-free options, crushed gluten-free cookies work great. Just look for ones that have a similar texture to graham crackers. You can boost the flavor of your cheesecake easily. For a chocolate kick, add cocoa powder or chocolate chips. Mix in spices like cinnamon or nutmeg for a warm touch. Unique toppings can also elevate your dessert. Consider adding whipped cream, caramel sauce, or even a sprinkle of toasted coconut. These little extras make each slice special. For the full recipe, check the details above! To keep your Summer Berry Peach Cheesecake fresh, store it in the fridge. Wrap it tightly in plastic wrap or place it in an airtight container. This helps to keep out air and moisture. If you have slices, use a cake dome or a sealed container. This prevents drying out and keeps the flavors intact. Yes, you can freeze Summer Berry Peach Cheesecake! To freeze, wrap the whole cheesecake or slices in plastic wrap, then in aluminum foil. This double-layering helps prevent freezer burn. For best results, freeze it for up to three months. When ready to eat, thaw it in the fridge overnight. This keeps the texture smooth and creamy. In the fridge, your cheesecake will last about five days. After that, it might start to lose flavor and texture. Look for signs of spoilage like an off smell or a change in color. If it feels slimy or has mold, it’s best to throw it away. Enjoy your cheesecake fresh for the best taste! Yes, you can make this cheesecake ahead of time. It actually tastes better after chilling. I suggest making it a day or two in advance. Just store it in the fridge after it cools. Cover it well to keep it fresh. This way, you save time on the day you want to serve it. If you don't have fresh peaches, don't worry! You can use canned peaches instead. Just drain them well and puree them. Frozen peaches work too; thaw and blend them before adding. You can also try peach preserves for a sweet flavor boost. These options keep the peach taste in your cheesecake. You can use low-fat cream cheese if you prefer. It will change the texture a bit, making it lighter. Neufchâtel cheese can work as well. It has a similar taste but is lower in fat. Just remember, any change may affect the cheesecake’s creaminess. To check if your cheesecake is done, look for the edges. They should be set and firm. The center should still jiggle slightly when you shake the pan. You can also insert a toothpick. If it comes out clean or with a few crumbs, it’s ready. Cracking can happen for a few reasons. One common cause is baking at too high a temperature. Always bake at 325°F (160°C) for this recipe. Another reason may be sudden temperature changes. Let the cheesecake cool in the oven with the door ajar. This helps prevent cracks. This blog offers a step-by-step guide to making a Summer Berry Peach Cheesecake. I covered the required ingredients, baking techniques, and tips to prevent cracks. You learned about variations, storage, and how to enhance flavors. In making this cheesecake, you can impress your family and friends. With practice, you'll perfect your technique. Enjoy the fun of baking and creating tasty treats!

Summer Berry Peach Cheesecake Delightful and Easy Recipe

Are you ready to impress your friends and family with a delightful dessert? This Summer Berry Peach Cheesecake is not

Older posts
Newer posts
← Previous Page1 … Page13 Page14 Page15 … Page41 Next →

dsad

© 2025 flavorsprint • Built with GeneratePress

Our Policies

  • Copyright Policy
  • Cookie Policy
  • GDPR Policy
  • Privacy Policy
  • Disclaimer
  • Terms Of Use

More Information

  • Home
  • About
  • Contact
  • Appetizers
  • Dessert
  • Dinner
  • Drinks
©2025, flavorsprint About Back To Top