Skip to content
DisclaimerTerms Of UseGDPR PolicyCookie Policy

flavorsprint

  • Home
  • Drinks
  • Appetizers
  • Dinner
  • Dessert
  • About
  • Contact
  • Privacy Policy
DisclaimerTerms Of UseGDPR PolicyCookie Policy

Lillian

- 1 cup brewed coffee or espresso - 1 cup milk (dairy or non-dairy) - 2 tablespoons pure maple syrup - 1 teaspoon roasted pecan extract (or flavoring) To make the perfect Roasted Pecan Maple Latte, start with fresh brewed coffee or rich espresso. The coffee serves as the base for this drink. Choose your milk wisely. You can use whole milk for creaminess or almond milk for a lighter option. The milk will blend with the coffee, creating a smooth texture. Next, add sweetness with pure maple syrup. It brings warmth and a hint of nature's sweetness. Roasted pecan extract adds that nutty aroma. If you can't find the extract, other nut flavors work well too. - Whipped cream - Crushed roasted pecans - Ground cinnamon for garnish For an extra treat, top your latte with whipped cream. It's rich and makes your drink feel special. The crushed roasted pecans add a nice crunch and enhance the nutty flavor. A sprinkle of ground cinnamon gives a warm, spicy kick. These add-ins make your latte even more delightful. - Coffee maker or espresso machine - Small saucepan - Frother or whisk You need a good coffee maker or espresso machine to brew your coffee. A small saucepan is perfect for heating milk. It helps you control the temperature and avoid boiling. A frother or whisk is key to achieving that lovely frothy milk. These tools make your latte-making experience easier and more enjoyable. For the complete Roasted Pecan Maple Latte recipe, check the Full Recipe section. To make the perfect Roasted Pecan Maple Latte, start with good coffee. You can brew coffee using a drip maker, French press, or pour-over method. If you want a stronger taste, use espresso. Espresso gives a rich base while brewed coffee offers a milder flavor. Here’s a tip: If you use espresso, you need less milk. The strong taste shines through better. If you prefer brewed coffee, use a medium roast for balance. Next, it’s time to heat the milk. Pour one cup of milk into a small saucepan. Heat it on medium, but don’t let it boil. The ideal milk temperature is around 150°F to 160°F. This makes your latte creamy and smooth. Watch closely! Boiling can change the milk’s taste and texture. Now, let’s froth the milk. You can use a frother or a whisk. Froth until the milk is fluffy and has a creamy texture. This step is key to a great latte. It adds air and makes the drink feel special. In a large mug, mix your coffee or espresso with the warm milk. Stir gently to blend flavors. If you like, top your latte with whipped cream. This adds sweetness and richness. Finish it off by sprinkling crushed roasted pecans and a dash of ground cinnamon. This adds flavor and a nice crunch. Now you have a delightful Roasted Pecan Maple Latte to enjoy! To make your Roasted Pecan Maple Latte shine, think about sweetness. You can add more or less maple syrup based on your taste. If you like it sweeter, try adding a bit more maple syrup. If you prefer a light touch, stick to the recipe. For the nutty flavor, roasted pecan extract will give you a bold taste. But you can also swap in hazelnut or almond extract if you want something different. Each option brings a unique twist to your drink. Frothing milk properly is key to a great latte. Heat your milk but don’t let it boil. Use a frother to create a creamy texture. If you want a lighter drink, froth less. This balance is important for your latte’s mouthfeel. Think about creaminess versus lightness. If you like rich drinks, go for whole milk. For a lighter choice, try almond or oat milk. Both options make the drink feel different without losing flavor. Garnishing your latte can make it look fancy. Sprinkle crushed roasted pecans on top for crunch. A dash of ground cinnamon adds warmth and spice. If you love whipped cream, add a dollop on top for extra richness. When serving, choose a nice mug. A clear glass can show off the drink's layers. Serve it hot to enjoy the nutty aroma right away. This attention to detail makes every sip a treat. {{image_2}} You can switch up the flavor of your Roasted Pecan Maple Latte in fun ways. Try using different nut extracts like hazelnut or almond. Each nut brings a unique taste. You can also add seasonal spices. For fall, pumpkin spice fits well. A touch of vanilla can brighten the flavor, too. Experiment with your favorites! If you want a vegan option, swap dairy milk for almond or oat milk. These milks foam nicely and enhance the nutty flavor. For a low-calorie drink, use a sugar-free maple syrup. This change keeps the sweetness without the extra calories. You can also use unsweetened non-dairy milk for fewer calories. Hot lattes warm you up, but iced versions are refreshing on hot days. To make an iced latte, brew your coffee strong and chill it. Pour over ice and add the nutty milk mixture. You can also enjoy this latte as a frappé. Blend the ingredients with ice for a frosty treat. It’s a fun twist on a classic drink! For the full recipe, check out the Roasted Pecan Maple Latte section above! To keep your latte fresh, store any leftovers in an airtight container. This helps prevent odors and keeps it tasty. You can refrigerate the latte mix for up to three days. Just remember, the milk might separate. Give it a good shake before enjoying it again. You can make some parts of the latte in advance. Brew your coffee or espresso and let it cool. You can also heat and mix the milk, maple syrup, and pecan extract. Store these in the fridge. When you're ready, just reheat the milk mixture on the stove. Heat it gently until warm, but do not boil. Mix it with your brewed coffee, and you’re all set! Can you freeze lattes? While I don't recommend freezing the entire latte, you can freeze coffee and milk separately. Pour leftover coffee into ice cube trays for later use. You can use these cubes in smoothies or to chill your next iced latte. This way, you won't water down your drink! A Roasted Pecan Maple Latte is a warm drink full of cozy flavors. It mixes brewed coffee or espresso with creamy milk, pure maple syrup, and roasted pecan extract. You get a sweet, nutty taste that warms your heart. The crushed roasted pecans on top add a nice crunch, while a sprinkle of cinnamon gives it a lovely finish. You can make your Roasted Pecan Maple Latte your own. Here are some ideas: - Sweetness: Add more maple syrup if you like it sweeter. - Milk Choices: Use almond, oat, or soy milk for a different taste. - Extras: Try a dash of vanilla or chocolate syrup for added flavor. - Toppings: Experiment with different nuts or whipped cream. Many coffee shops offer similar drinks. Look for local cafes or chains known for gourmet lattes. If you want to make it at home, brewing is easy! Follow the steps from the Full Recipe to craft your own latte any time. For the full recipe, you can check out the step-by-step instructions above. This will guide you to create the perfect Roasted Pecan Maple Latte at home. Enjoy! You can create your perfect Roasted Pecan Maple Latte at home. Start with fresh coffee or espresso and the milk of your choice. Mix in your favorite sweeteners and flavorings to make it yours. Consider trying different flavors and toppings to keep things exciting. Remember to follow the right steps for frothing milk and combining your ingredients. You can even store leftovers or prepare components ahead of time. With these tips, enjoy your cozy drink any time. Happy brewing!

Roasted Pecan Maple Latte Irresistible Flavor Guide

Welcome to your coffee adventure! Today, I’m excited to share the joy of making a Roasted Pecan Maple Latte. This

To make Hibiscus Plum Punch, you need a few simple ingredients. Here’s what you will need: - 2 cups dried hibiscus flowers - 4 ripe plums, pitted and sliced - 4 cups water - 1/4 cup agave syrup or honey (adjust to taste) - 1/2 teaspoon vanilla extract - Juice of 2 limes - Fresh mint leaves for garnish - Lime slices for garnish When choosing dried hibiscus flowers, look for high-quality, deep red petals. These flowers should be free from additives. You can find them in health food stores or online. The quality of the flowers greatly affects the punch's flavor. I always prefer organic hibiscus flowers for the best taste and health benefits. I recommend using fresh plums for this punch. Fresh plums add a juicy burst of flavor. They also blend well with the hibiscus. Dried plums, or prunes, can work but won't provide the same freshness. Fresh plums make the punch vibrant and tasty. Choose ripe plums for the best results. They should be firm yet slightly soft to the touch. Start by boiling 4 cups of water in a pot. As the water heats, grab 2 cups of dried hibiscus flowers. These flowers give our punch its beautiful color and tangy taste. Once the water boils, add the hibiscus flowers. Let them simmer for about 15 minutes. This step helps release all the flavors. After 15 minutes, remove the pot from heat. Strain the liquid into a large pitcher. Discard the hibiscus flowers. You now have a fragrant hibiscus tea. While the hibiscus tea is still warm, add 1/4 cup of agave syrup or honey. Stir until it dissolves completely. You can adjust the sweetness later if you want. Next, slice 4 ripe plums. Make sure to pit the plums before slicing. Add the plum slices to the pitcher. Then, pour in 1/2 teaspoon of vanilla extract and the juice of 2 limes. Stir everything gently to mix. This combination brings out a depth of flavor in our punch. Let the punch cool to room temperature. Once cooled, refrigerate it for at least one hour. Chilling enhances the flavors and makes the drink refreshing. Serve the punch over ice in tall glasses. For a pretty touch, garnish with fresh mint leaves and lime slices. This not only looks great but adds extra flavor. Enjoy your Hibiscus Plum Punch! For the complete recipe, check the Full Recipe section. To get the best flavor, balance is key. Start with the dried hibiscus flowers. They bring a tart, floral taste. When you add plums, they add sweetness and depth. The lime juice brightens the punch. Adjust the sweetness with agave or honey. Taste as you go. This way, you can make it just right for you. One mistake is using too much sugar. It can overpower the tartness of hibiscus. Another error is not straining the flowers well. You want a clear punch, not a gritty one. Don’t skip chilling the punch. Serving it warm can mask the fresh flavors. Lastly, be careful with the lime juice. Too much can make it sour instead of refreshing. If you want to try different sweeteners, consider maple syrup or coconut sugar. These options add unique flavors. You can also use stevia for a lower-calorie choice. Just remember, each sweetener has its own taste. Start with a small amount and adjust until it suits your palate. For the full recipe, check out the complete instructions. {{image_2}} You can change this punch by adding other fruits. Try berries, cherries, or peaches. Each fruit gives a new flavor. For example, berries add a sweet-tart taste. Cherries bring a rich depth. Peaches lend a soft, fragrant note. Mix and match to find your favorite blend. This makes your punch special and fun! Want a fizzy version? You can easily make this punch sparkling. Just add soda water or sparkling wine. Pour the hibiscus plum mix into glasses filled with ice. Then top it with your choice of bubbles. The fizz will lighten the drink and make it festive. This is perfect for parties or celebrations! You can enjoy hibiscus plum punch with or without alcohol. For a non-alcoholic drink, stick to the recipe. Just focus on the fruity and floral flavors. To make it alcoholic, add rum or vodka. A light spirit works best, so it doesn’t overpower. Either way, this punch is refreshing and delicious. Check out the Full Recipe for all the details! After you make your hibiscus plum punch, you may have some left over. Store it in a clean, airtight container. This helps keep it fresh and tasty. You can also use a glass pitcher with a lid. Always place it in the fridge. Avoid letting it sit out at room temperature for too long. Hibiscus plum punch lasts about 3 to 5 days in the fridge. Make sure to check for any changes in smell or color before drinking. If it smells off or looks strange, it’s best to discard it. Always refrigerate it promptly after serving to keep it fresh. If you want to save your punch for later, freezing is a great option. Pour the punch into ice cube trays or freezer-safe containers. Leave some space at the top since liquids expand when they freeze. When you're ready to use it, just thaw it in the fridge overnight. You can also blend the frozen punch into a slushy drink! This method keeps the flavors as bright as the day you made it. For the complete recipe, check the Full Recipe section. Hibiscus is rich in antioxidants. Antioxidants help fight free radicals in your body. This can lead to better overall health. Hibiscus may also lower blood pressure. Some studies suggest it can help with heart health too. Plus, hibiscus can aid digestion and support liver health. It has a tart flavor, making it perfect for drinks like our Hibiscus Plum Punch. Yes, you can make Hibiscus Plum Punch ahead of time. In fact, it often tastes better after chilling. Make the punch and store it in the fridge. Just remember to add ice and garnishes when you’re ready to serve. You can find dried hibiscus flowers at health food stores or online. Look for them in bulk sections too. Ripe plums are often in grocery stores during summer. Check local farmers' markets for the freshest options. Yes, you can use other sweeteners. Maple syrup or simple syrup works well. You can even use stevia if you prefer a low-calorie option. Adjust the amount to suit your taste, but keep the flavor balance in mind. In this article, we explored the vibrant world of Hibiscus Plum Punch. We covered essential ingredients, including types of hibiscus flowers and the choice between fresh and dried plums. I shared step-by-step instructions to make it easy for you. Tips and tricks will help you perfect your punch, while variations let you get creative. Lastly, I provided storage tips to keep your punch fresh for longer. Hibiscus Plum Punch is a fun drink to make and enjoy. Use these insights to impress your friends and family with a delicious twist!

Hibiscus Plum Punch Refreshing and Flavorful Drink

Looking for a drink that bursts with flavor and refreshment? Hibiscus Plum Punch is just what you need! This vibrant

To make the Almond Butter Date Smoothie, you need a few key ingredients. Each one adds flavor and nutrition. Here’s what you will need: - 1 cup unsweetened almond milk - 2 tablespoons almond butter - 4 Medjool dates, pitted - 1 frozen banana - 1 tablespoon chia seeds - 1/2 teaspoon vanilla extract - A pinch of cinnamon - Ice cubes (optional) This combination creates a rich and creamy drink. The almond milk serves as the base. It is low in calories and full of nutrients. Almond butter adds healthy fats and protein. Medjool dates give natural sweetness. The frozen banana makes the smoothie thick and cold. Chia seeds pack in fiber and omega-3s. Vanilla and cinnamon bring warmth and depth to the flavor. Using ice cubes is optional, but they can make your smoothie even thicker. If you want a colder drink, add a few cubes. For the full recipe, follow the instructions carefully to blend these ingredients into a delicious smoothie. Enjoy the taste and health benefits! - Step 1: Combine all ingredients in the blender. Start with 1 cup of unsweetened almond milk. Add 2 tablespoons of almond butter. Then, toss in 4 pitted Medjool dates. Next, add 1 frozen banana, 1 tablespoon of chia seeds, 1/2 teaspoon of vanilla extract, and a pinch of cinnamon. If you like it chilled, add a few ice cubes. - Step 2: Blend until smooth and creamy. Turn on your blender to high speed. Blend for about 30 seconds. You want a nice, creamy texture. Make sure all the pieces mix well. If needed, stop and scrape down the sides. - Step 3: Adjust consistency and sweetness as needed. After blending, check the texture. If you want it thicker, add more ice cubes and blend again. Taste the smoothie. If it's not sweet enough, add another date and blend again. - Step 4: Serve and garnish. Pour your smoothie into a tall glass. For a pretty touch, sprinkle some chia seeds on top. You can also add a few slices of banana for extra flair. Enjoy your delicious Almond Butter Date Smoothie! This quick recipe takes just five minutes from start to finish. You can find the full recipe in the earlier section. To make your Almond Butter Date Smoothie just right, focus on sweetness and thickness. Start with the recipe's base and taste it before serving. If it’s too sweet, add more almond milk. If you want it sweeter, toss in one or two extra dates. Adjusting the flavors can make a big difference. For thickness, blending time matters. If your smoothie is too thin, add ice cubes and blend again. This will give you a creamy texture. If it’s too thick, simply add a splash of almond milk. Blending tips are key to a great smoothie. Use a high-speed blender for the best results. Blend until everything is smooth and creamy. Stop to scrape down the sides if needed. This ensures all ingredients mix well. Presentation can elevate your drink. Pour the smoothie into a tall glass and consider some fun toppings. A sprinkle of chia seeds or banana slices on top looks great. You can also add a fresh mint leaf for a pop of color. Enjoy it with a reusable straw for a touch of style. For the full recipe, check out the details above. Enjoy your delicious Almond Butter Date Smoothie! {{image_2}} You can change this smoothie to fit your taste and needs. Here are some easy swaps and ideas. - Substituting different nut butters: If you want to try another flavor, use peanut or cashew butter. Each nut butter adds its unique taste and nutrition. Peanut butter gives a rich flavor, while cashew butter is creamy and mild. - Adding greens for a nutritional boost: Adding a handful of spinach or kale can make your smoothie even healthier. These greens blend well and add vitamins without changing the taste much. Just make sure to blend long enough for a smooth texture. - Making it dairy-free or vegan: This smoothie is already dairy-free with almond milk. If you want to make it vegan, ensure your almond butter is pure and has no added honey. You can also use other plant-based milk like oat or coconut milk for a different flavor. These variations help you create the perfect Almond Butter Date Smoothie to fit your taste. Feel free to explore and enjoy! For the full recipe, check the earlier sections. To keep your Almond Butter Date Smoothie fresh, start by refrigerating leftovers. Pour any unused smoothie into a sealed jar. It will stay good for up to two days. Before drinking, shake well to mix the ingredients again. If you want to save it for longer, freezing is a great option. Pour the smoothie into ice cube trays or freezer-safe bags. You can freeze it for up to three months. When you are ready to enjoy it, thaw in the fridge overnight. Blend again for a smooth texture. For fresh ingredients, always choose ripe bananas and soft dates. Store these in a cool, dark place. If you buy almond milk, check the expiration date. Keep it in the fridge after opening. This way, you ensure the best taste in your smoothie. For the full recipe, check the earlier section. Almond butter is packed with healthy fats, protein, and fiber. It helps keep you full longer. It also has vitamin E, which is good for your skin. Dates provide natural sweetness and are high in fiber, too. They help with digestion and provide quick energy. Together, they make a great pair in this smoothie. Yes, you can use other types of milk! Try oat milk, soy milk, or cow's milk. Each type will change the flavor a bit. Choose what you like best or what you have at home. Just make sure it's unsweetened for a healthier option. You can prep this smoothie ahead of time! Simply freeze the banana and dates. Measure out the almond butter and chia seeds. In the morning, toss everything in the blender with the milk. Blend and enjoy! You can also store it in the fridge for one day if you want to make it the night before. For the full recipe, check out the instructions above. This blog post covers how to make a delicious almond butter smoothie. You learned about key ingredients, step-by-step blending, and enhancing your drink with tips. Variations let you customize flavors to suit your taste. We also discussed storage tips for leftovers and answered common questions. Now you can enjoy a healthy, tasty smoothie any time. Remember, small changes can make a big difference!

Almond Butter Date Smoothie Healthy and Creamy Drink

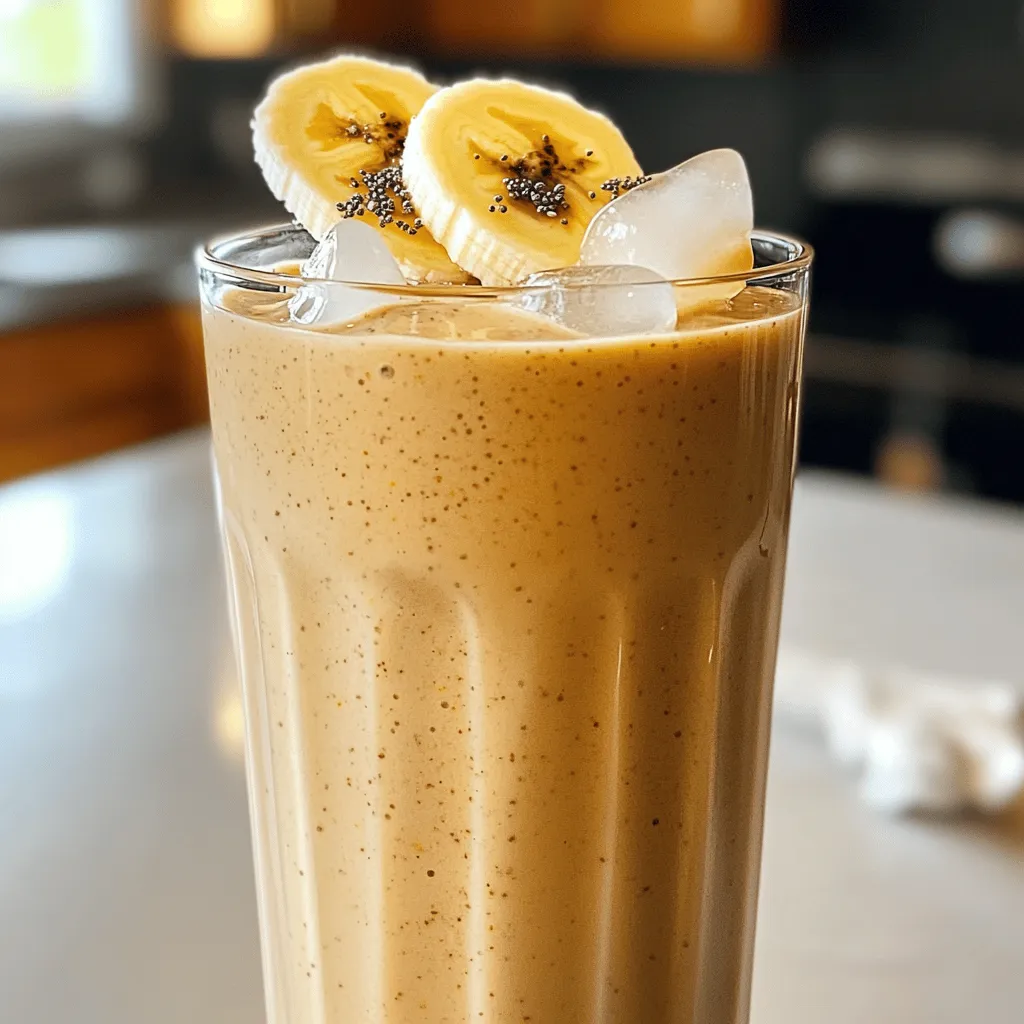
If you’re craving a delicious, healthy treat, look no further than the Almond Butter Date Smoothie! This creamy drink is

- 2 cups watermelon, cubed and seeded - 1 medium cucumber, thinly sliced - 1/4 cup fresh mint leaves - 4 cups sparkling water The main stars of the Cucumber Watermelon Sparkler are watermelon and cucumber. Watermelon brings a sweet and juicy flavor, perfect for hot days. Cucumber adds a crisp and refreshing taste, making the drink even cooler. Together, they create a harmonious blend that is hard to resist. Fresh mint leaves add a hint of brightness and aroma, elevating the drink’s charm. Finally, sparkling water gives it that fizzy kick that makes it feel special. - 1 tablespoon honey - Ice cubes - Lime wedges for garnish You can use honey if you want a sweeter drink. It helps balance the flavors of the fruit. Ice cubes are a must for that chilling effect. They keep your drink cold and refreshing. Lime wedges add a zesty touch, enhancing the overall taste. These optional ingredients make your Cucumber Watermelon Sparkler even more delightful. For the full recipe, don’t forget to check the detailed instructions! To make the watermelon juice, start by cubing two cups of watermelon. Place the cubes in a blender. Blend until the mixture is smooth. This step is key to getting a nice juice. Next, you will need to strain the juice. Use a fine-mesh sieve and place it over a large pitcher. Pour the blended watermelon through the sieve. This removes any pulp and ensures a smooth juice. If you want extra smoothness, press the pulp with a spoon to extract more juice. Now, it’s time to add more flavor. Take your thinly sliced cucumber and fresh mint leaves. Add them to the pitcher with the watermelon juice. The cucumber adds a nice crunch, while the mint brings freshness. If you like a sweeter drink, add one tablespoon of honey. Stir until it dissolves completely. This step is optional, but it can enhance the drink's taste. Let’s get ready to serve! Start by filling glasses with ice cubes. This will keep the drink cold and refreshing. Pour the watermelon-cucumber mixture into the glasses, filling them halfway. Now, top each glass with sparkling water. This adds fizz and makes the drink lively. Gently stir to mix everything. For a lovely touch, garnish with lime wedges and a sprig of mint. This makes your Cucumber Watermelon Sparkler look beautiful and inviting. For the full recipe, check out the link above. Enjoy your refreshing summer drink! Selecting ripe watermelon is key. Look for a uniform shape, a yellow spot, and a deep sound when you tap it. These signs show the fruit is sweet and ready. When picking fresh cucumbers, choose ones that are firm and smooth. They should feel heavy for their size. Fresh mint should be vibrant and fragrant. Avoid any wilting or browning. If you want to skip honey, try using agave syrup or maple syrup. Both add sweetness without overpowering the drink. Taste as you mix. You want a balance between the sweet watermelon and the fresh cucumber. Adjust the sweetness to your liking. You can prepare the components in advance. Make the watermelon juice and slice the cucumber and mint a few hours before serving. Mix everything together just before you serve. This keeps the drink bubbly and fresh. Enjoy the bright flavors at their best! {{image_2}} You can try your Cucumber Watermelon Sparkler with other fruits. Strawberries, pineapple, or peaches can add a fun twist. Each fruit brings its own flavor and color. This way, you can enjoy different tastes each time. Seasonal variations also work well. In summer, use fresh berries. In fall, try apples or pears. The key is to keep it fresh and fun. Each season offers unique fruits to explore. If you want a cocktail version, add some spirits. Vodka works perfectly with the light flavors of cucumber and watermelon. Gin is another great choice, as it adds depth with its herbal notes. You can also try rum for a tropical vibe. Each spirit will change the drink's taste. Experiment to find your favorite mix. Remember to sip responsibly, even in the summer sun! Don't limit yourself to mint. Try basil or rosemary for a new flavor. Basil adds a sweet, peppery note. It pairs well with watermelon, creating a fresh taste. Rosemary brings a woodsy, aromatic flavor. Just use a small amount, as it is strong. Each herb offers unique benefits, from freshening your breath to adding antioxidants. Enjoy the creative process, and let your taste buds guide you! To store leftover Cucumber Watermelon Sparkler, put it in a sealed container. This helps keep it fresh in the refrigerator. Try to drink it within two days for the best taste. If you want to keep the fizz, do not mix in all the sparkling water at once. Pour the sparkling water in just before serving. This way, you maintain that refreshing sparkle. To keep your watermelon fresh, store it in the fridge. Wrap it tightly in plastic wrap after cutting. This keeps the moisture in and slows down spoilage. For cucumbers, keep them in a crisper drawer. Placing them in a plastic bag helps keep them crisp and cool. When it comes to herbs like mint, you want to keep them fresh too. Store mint in a glass of water, just like flowers. Cover the leaves loosely with a plastic bag. This keeps them bright and tasty for longer. Yes, you can use frozen watermelon. It will change the drink’s texture. The drink may be thicker and colder. The flavor will still taste great, but it may be less fresh. If you want a slushy drink, frozen watermelon works well. Absolutely! This drink is perfect for kids. It has no added sugars, just natural sweetness. Watermelon is hydrating and low in calories. Cucumber adds vitamins and minerals. Mint gives it a fun flavor twist. Kids will love the bright color and fizzy bubbles. Yes, you can make this drink vegan. Simply skip the honey or replace it with agave syrup. Maple syrup is another good choice. This way, you keep the drink sweet without using animal products. Enjoy the refreshing taste without any worries! This blog post showed how to make a refreshing drink with simple ingredients. You learned to blend watermelon, cucumber, and mint. Adding sparkling water gives it a nice fizz. You can adjust sweetness and even try different fruits and herbs. Preparing ahead keeps flavors fresh. The drink is easy, healthy, and great for anyone. Enjoy testing the recipe and making it your own!

Cucumber Watermelon Sparkler Refreshing Summer Drink

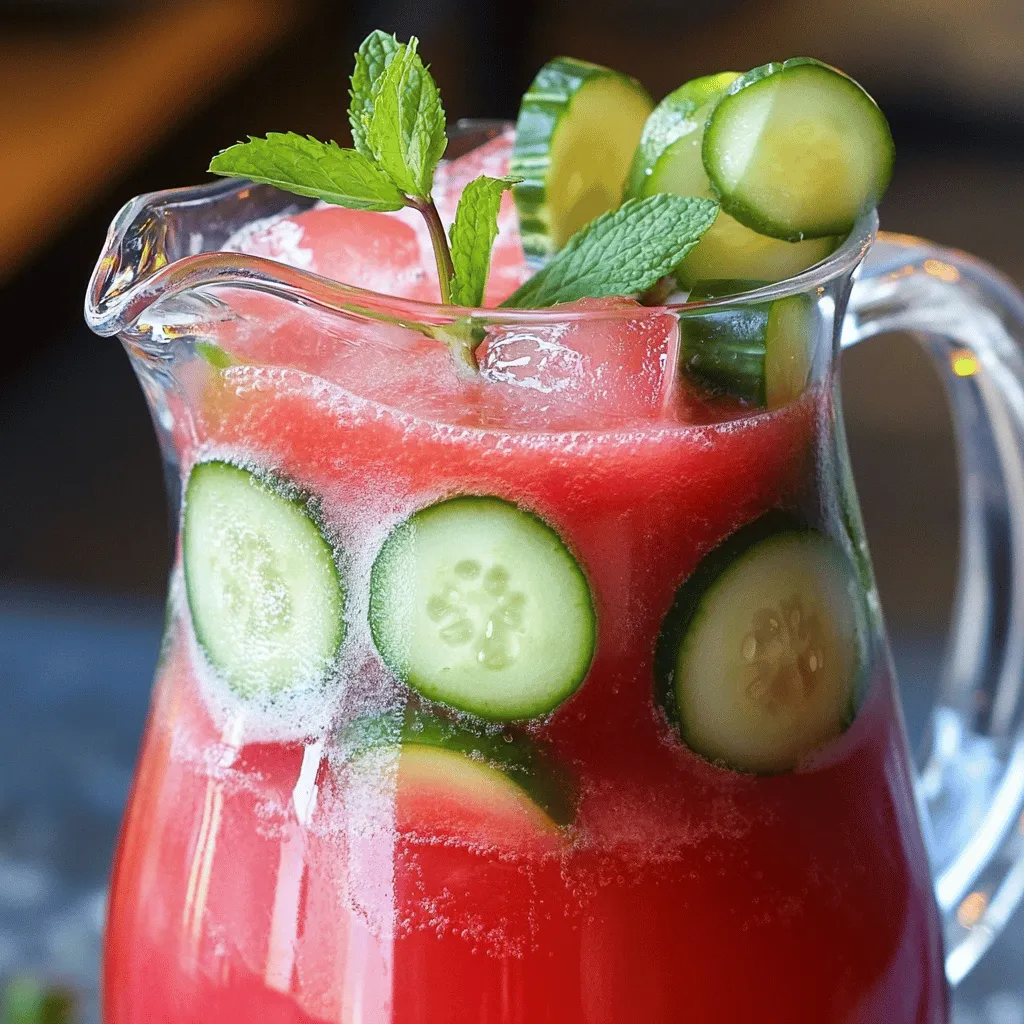
Looking for a drink that screams summer? The Cucumber Watermelon Sparkler is your perfect refreshment! Bursting with juicy watermelon, crisp

- 1 cup cold brew coffee - 1/2 cup heavy cream - 2 tablespoons fig jam - 1 teaspoon vanilla extract - 1 tablespoon maple syrup - Ice cubes - Fresh figs and mint leaves for garnish Use fresh, high-quality ingredients for the best taste. Look for rich cold brew coffee. For the cream, choose heavy cream with no additives. This keeps the flavors pure. Use real fig jam for a natural sweetness. If you can, find local figs for garnish. They add a nice touch. If you want a lighter drink, swap heavy cream for half-and-half. For a vegan option, use coconut cream instead. You can also replace maple syrup with agave syrup. Want less sweetness? Cut back on the fig jam or syrup. Use flavored cold brew for a fun twist. To make the Fig Vanilla Sweet Cream Cold Brew, follow these simple steps. First, gather your ingredients. You need: - 1 cup cold brew coffee - 1/2 cup heavy cream - 2 tablespoons fig jam - 1 teaspoon vanilla extract - 1 tablespoon maple syrup - Ice cubes - Fresh figs and mint leaves for garnish Start by whisking the heavy cream. In a medium bowl, mix the cream, fig jam, vanilla extract, and maple syrup. Keep whisking until the mix is smooth. This part makes your sweet cream flavorful and thick. Next, take a glass and fill it with ice cubes. Pour the cold brew coffee over the ice. This keeps your drink cold and refreshing. Now, pour the fig vanilla cream mixture over the cold brew. Pour it slowly to create nice layers. This is where the drink gets its pretty look. You can stir it gently if you want to mix the flavors. But, leaving it layered makes for a stunning drink. Finally, slice the fresh figs. Place them on top for a pretty garnish. Add a few mint leaves for color and freshness. Creating layers in your drink adds visual appeal. To do this, pour the cream slowly. This helps it float on top of the cold brew. If it sinks, you may be pouring too fast. Use a spoon to help guide the cream. Hold the spoon just above the cold brew. Let the cream slide off the spoon gently. This trick makes the drink look elegant. Serve your Fig Vanilla Sweet Cream Cold Brew in a tall glass. This way, you can see the beautiful layers. Pair it with a light snack, like biscotti or cookies. These treats balance well with the creamy drink. You can also enjoy it during brunch or a sunny afternoon. It’s a delightful choice for a special treat. For more details, check out the Full Recipe. When making Fig Vanilla Sweet Cream Cold Brew, some mistakes can ruin your drink. Here are a few to watch for: - Using hot coffee. Cold brew needs to be cold, not hot. - Overmixing the cream. Whisk just enough to combine the ingredients. - Skipping the garnish. Fresh figs and mint add flavor and fun. To make your drink even better, you can try these tips: - Add a pinch of sea salt. It brings out the sweetness of the figs. - Use flavored cold brew. Vanilla or caramel cold brew can boost the flavor. - Experiment with spices. A dash of cinnamon or nutmeg can add warmth. If you want your drink sweeter, here are some easy fixes: - Add more maple syrup. Just a little can make a big difference. - Try honey or agave. They are great natural sweeteners. - Use sweeter fig jam. Some brands have a richer flavor than others. For the complete recipe, check out the Full Recipe section. {{image_2}} You can make this drink dairy-free with a few simple swaps. Use coconut cream or almond milk instead of heavy cream. Both options will give a creamy texture. Coconut cream adds a lovely tropical note, while almond milk keeps it light. Just whisk them with the fig jam, vanilla, and maple syrup like before. If you want to change up the sweetness, try different sweeteners. Honey or agave syrup can replace maple syrup. For a low-calorie option, use stevia or monk fruit sweetener. These alternatives can bring unique flavors and sweetness levels to your drink. Adjust the amount to fit your taste. You can also play with seasonal flavors. In fall, add a pinch of cinnamon or nutmeg for warmth. During summer, try fresh berries or a splash of citrus juice. These flavors bring a fun twist and keep your drink exciting all year round. Get creative and mix in what you love! To keep your ingredients fresh, store them in a cool, dry place. Keep your cold brew coffee in the fridge. Use an airtight container for the heavy cream to avoid spoilage. For fig jam, make sure the lid is tight to keep it from drying out. Fresh figs should go in the fridge, too. Use them within a few days for the best flavor. Once made, the Fig Vanilla Sweet Cream Cold Brew is best enjoyed right away. If you must store it, keep it in the fridge for up to 24 hours. The longer it sits, the less fresh it tastes. The cream may also separate, so give it a good stir before drinking again. This drink is best served cold. If you want to enjoy it warm, gently heat the cold brew on low. Avoid boiling, as it can change the flavor. When serving, add fresh ice to keep it cool and refreshing. Garnish with mint leaves and more fresh figs for a beautiful touch. For a more personal twist, share your favorite way to enjoy this drink. Fig Vanilla Sweet Cream Cold Brew is a refreshing drink made with smooth cold brew coffee. It combines rich flavors of figs and vanilla with creamy elements. The drink features cold brew coffee topped with a sweet cream mix of heavy cream, fig jam, and vanilla extract. This layered drink not only looks beautiful but also tastes amazing. You can enjoy it as a morning treat or an afternoon pick-me-up. You can find Fig Vanilla Sweet Cream Cold Brew at specialty coffee shops. Some larger coffee chains may also offer it, especially during seasonal menus. If you want to make your own, you can easily follow the Full Recipe at home. This way, you can enjoy it whenever you like without heading out. This recipe includes cold brew coffee, which has lower acidity than regular coffee. This makes it easier on your stomach. The heavy cream adds healthy fats that can give you energy. Fig jam provides natural sweetness and fiber. Figs are rich in vitamins and minerals, promoting good digestion. The maple syrup adds a touch of sweetness without being overly processed. Overall, this drink can be a tasty treat that offers some nutritional benefits too. This post gives you all the details for making Fig Vanilla Sweet Cream Cold Brew. You learned about the right ingredients, quality tips, and optional swaps. The step-by-step guide helps you prepare it easily, layer flavors, and serve it well. We discussed common mistakes and ways to boost the taste too. You also found great variations and smart storage tips. Remember, with a few key changes, this drink can suit any taste. Enjoy your new drink, and share these ideas with friends!

Fig Vanilla Sweet Cream Cold Brew Delight Recipe

Are you ready to treat yourself to a delicious Fig Vanilla Sweet Cream Cold Brew? This delightful drink offers a

To make this drink, you need some key ingredients. Here’s what you will use: - 1 cup uncooked long-grain white rice - 4 cups water (divided) - 1 cup milk (or almond milk for a dairy-free option) - 1/2 cup honey (adjust to taste) - 1 teaspoon ground cinnamon (plus extra for garnish) - 1 teaspoon vanilla extract - Pinch of salt - Ice cubes (optional) Each ingredient plays a role. The rice adds a creamy base. Water helps blend everything together. Milk makes it rich, while honey adds sweetness. Cinnamon gives that warm spice flavor, and vanilla adds depth. You can make this drink your own with some easy swaps. If you don't have rice, try using oat flour. It gives a nice texture. For the milk, use coconut milk for a tropical twist. If you need a vegan option, maple syrup works well instead of honey. You can also use different spices like nutmeg or cardamom for a unique taste. This drink is not only tasty but also has some health benefits. One serving (about 1 cup) has: - Calories: 150-200 (depending on milk and sweetener used) - Protein: 3-5g - Carbohydrates: 30-35g - Sugars: 10-15g (mostly from honey) - Fat: 4-7g (depending on milk used) The rice provides energy, while honey offers quick fuel. The cinnamon can help regulate blood sugar, making this drink a fun treat you can enjoy. For the full recipe, check the earlier section. Start by rinsing 1 cup of uncooked long-grain white rice. Use a fine mesh strainer. Rinse under cold water until the water runs clear. This step removes excess starch, making your drink smoother. Next, add the rinsed rice to a blender with 2 cups of water. Blend on high for 1-2 minutes. You want the rice to be coarsely ground, not finely powdered. Pour the mixture into a large bowl through cheesecloth or a fine sieve. This helps separate the liquid from the solid bits. Press down to get as much liquid as you can. Discard the solids or save them for another dish. Now, take the rice water and add the remaining 2 cups of water, 1 cup of milk (or almond milk), 1/2 cup of honey, 1 teaspoon of ground cinnamon, 1 teaspoon of vanilla extract, and a pinch of salt. Stir well. Make sure the honey dissolves completely. Chill your horchata in the fridge for at least 1 hour. This lets the flavors blend nicely. Before serving, give it a good stir. You can serve it over ice if you like. Sprinkle some extra ground cinnamon on top for a tasty touch. For the complete recipe, check out the Full Recipe section. When making cinnamon honey horchata, avoid using too much water. If you add too much, your drink will be thin. Rinsing the rice is key. Skipping this step leaves excess starch, which makes the horchata gritty. Lastly, do not skip chilling the drink. Chilling it helps the flavors mix well. To boost flavor, try using fresh cinnamon sticks instead of ground cinnamon. This adds depth and warmth. You can also experiment by adding a splash of vanilla extract. If you love nutty flavors, try almond milk instead of regular milk. It pairs well with the honey and cinnamon. For smooth horchata, make sure to blend the rice thoroughly. Blend it for one to two minutes. Strain the mixture well to remove solids. If you want a creamier texture, add more milk or a bit of cream. Remember to stir the final mixture before serving to ensure even texture. Check out the Full Recipe for detailed steps. Enjoy your delicious drink! {{image_2}} You can easily make cinnamon honey horchata dairy-free. Simply swap regular milk for almond milk or coconut milk. Both options keep the drink creamy and rich. You can also try oat milk for a different flavor. Use the same amount as in the recipe, so it fits right in. Want to spice things up? Add a pinch of nutmeg for warmth. You can also stir in toasted coconut to bring a tropical twist. For a hint of chocolate, mix in cocoa powder. Each addition gives the drink a unique taste. Feel free to experiment and find your favorite flavor! Serve your horchata chilled over ice for a refreshing treat. You can also garnish it with a sprinkle of cinnamon on top. For a fun twist, try adding whipped cream. Serve it in a fancy glass to impress guests. Pair it with churros or a slice of cake for a delightful snack. Use the Full Recipe to make this drink your own! To store leftover horchata, pour it into a clean, airtight container. Glass jars work well. Make sure to seal the container tightly to keep the drink fresh. Store the horchata in the fridge. It helps keep the flavors bright and tasty. Horchata can last about 3 to 5 days in the fridge. After that, it may start to spoil. Look for changes in smell, taste, or appearance. If it smells sour or has a strange color, it's best to toss it. Always trust your senses to know if it's still good. You can reuse leftover horchata in many fun ways. Try using it in smoothies for extra flavor. You can also pour it over cereal instead of milk. Another idea is to make popsicles. Just blend the horchata with some fruit, pour it into molds, and freeze. These ideas make your drink even more fun! For the full recipe, check out the Cinnamon Honey Horchata. Horchata is a tasty drink made from rice, nuts, or seeds. It is popular in many cultures, especially in Mexico and Spain. Traditionally, horchata is made by soaking rice in water. After soaking, you blend it to get a smooth texture. Then, you strain the mixture to separate the liquid from the rice. You sweeten it with sugar and often add cinnamon. Cinnamon honey horchata takes the classic recipe and adds honey for sweetness and flavor. Yes, you can use other sweeteners. Maple syrup or agave nectar works well. If you prefer low-calorie options, try stevia or monk fruit. Just make sure to adjust the amount based on how sweet you want it. Each sweetener has a unique taste, so pick one that you enjoy. Making horchata ahead is easy! Follow the recipe and store it in the fridge. You can make it up to two days in advance. Just remember to stir it well before serving. The flavors blend better when it sits for a while. If you want it cold, serve it over ice. Cinnamon honey horchata can be a healthy drink choice. It has natural ingredients like rice, milk, and honey. Rice provides carbs for energy. Milk adds protein and calcium. Honey gives a natural sweetness. However, it is still best to enjoy it in moderation. If you are watching sugar intake, use less honey or a sugar substitute. This blog post covered everything you need for making cinnamon honey horchata. We explored key ingredients, tasty variations, and storage tips. You learned how to prepare, blend, and chill your drink for the best taste. Remember to avoid common mistakes for a smoother texture and richer flavor. Whether you choose dairy-free options or try new flavors, the joy of horchata awaits you. Enjoy this simple, refreshing drink with friends or family!

Cinnamon Honey Horchata Delicious Refreshing Drink

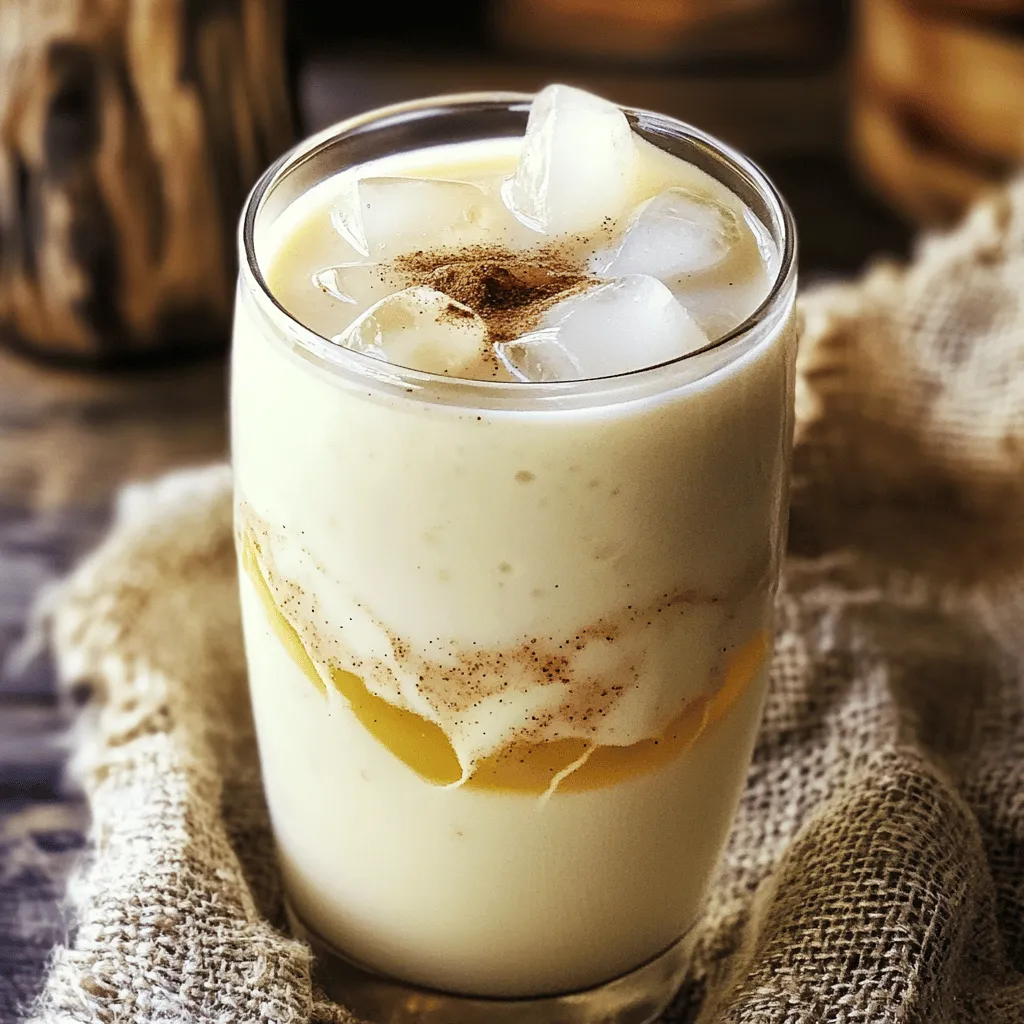
Looking for a cool drink that’s both tasty and easy to make? Cinnamon Honey Horchata is just what you need!

- 1 cup fresh blood orange juice - 2 tablespoons dried hibiscus flowers - Fresh mint leaves for garnish - 2 cups water - 1 tablespoon honey or agave syrup - 1 cup sparkling water or club soda - Ice cubes To make a great Blood Orange Hibiscus Fizz, you need a mix of fresh and pantry ingredients. First, for the fresh ingredients, I love using blood oranges. They give a rich, sweet flavor and a vibrant color to the drink. You need about four or five blood oranges to get one cup of juice. The dried hibiscus flowers add a floral note that balances the sweetness. Finally, fresh mint leaves add a burst of freshness on top. Now, let’s talk about pantry items. You start with two cups of water to brew the hibiscus flowers. Honey or agave syrup sweetens the drink. You can adjust the amount based on your taste. For the fizz, you need one cup of sparkling water or club soda. Don’t forget the ice cubes! They keep your drink cold and refreshing. For the full recipe, check the section above. First, I take a small pot and add 2 tablespoons of dried hibiscus flowers. I pour in 2 cups of water. I bring the mixture to a boil over medium heat. As it heats, I stir occasionally to mix the flowers. Once it boils, I reduce the heat and let it steep for about 10 minutes. This step deepens the color and flavor. After 10 minutes, I remove it from heat and strain the liquid into a bowl. This removes the hibiscus flowers. While the syrup is still warm, I add 1 tablespoon of honey or agave syrup and stir well. Then, I let it cool to room temperature. Next, I grab a large pitcher. I mix the cooled hibiscus syrup with 1 cup of fresh blood orange juice. This juice usually comes from about 4-5 blood oranges. I stir the mixture well to combine the flavors. Now, I prepare glasses with ice cubes. I fill each glass about two-thirds full with the hibiscus and blood orange mixture. To finish, I top each drink with sparkling water or club soda. This adds a fizzy and refreshing twist. I stir gently to mix the bubbles in. Finally, I garnish each drink with a few fresh mint leaves. This adds a nice touch and a pop of color. Now, my Blood Orange Hibiscus Fizz is ready to enjoy! For the complete recipe, check out the Full Recipe. When you pick blood oranges, look for a bright color and firmness. The skin should be smooth and free of blemishes. A good blood orange feels heavy for its size. This means it has lots of juice inside. The more vibrant the color, the sweeter the juice will likely be. Always choose organic if you can. You want the best flavor without harmful sprays. You can change the sweetness to fit your taste. If you like it sweet, add more honey or agave syrup. Start with one tablespoon and taste as you go. It’s easy to add more, but hard to take it out. If you prefer less sweetness, use less honey. This drink can still taste great with less sugar. You can also try maple syrup for a new flavor twist. This drink pairs wonderfully with light snacks. Think of fresh fruits, cheese platters, or simple crackers. It also goes great with spicy foods. The fizz and tartness balance out spicy flavors well. Serve it at a summer gathering or a cozy brunch. You can even make it a fun party drink with some fruit slices on top. Check out the Full Recipe for ideas on how to make this drink shine at your next event. {{image_2}} You can easily make this drink with a kick. Just add a shot of vodka or gin to your glass. The spirit blends well with the tartness of the blood orange and hibiscus. This twist adds depth to the flavors, making it a fun choice for parties or gatherings. Want to mix things up? Try adding other fruits. Fresh berries, like strawberries or raspberries, work great. You can also use sliced peaches or mango. These fruits add sweetness and color. Just muddle them in your glass before adding the hibiscus mixture for a fruity explosion. For a fresh twist, add herbs like basil or rosemary. Muddle a few leaves at the bottom of your glass. This will release their oils and enhance the drink's aroma. Basil gives a sweet, savory note, while rosemary adds an earthy flavor. Both pair well with the citrusy notes in the drink. These fun variations make your Blood Orange Hibiscus Fizz even more exciting. You can explore different flavors and find your favorite mix. For the full recipe, check out the complete guide. To store hibiscus syrup, pour it into a clean jar. Make sure to seal it tightly. Keep it in the fridge. This helps keep the syrup fresh and tasty. Use it within a week for the best flavor. If you have leftover Blood Orange Hibiscus Fizz, store it in the fridge. Just remember, the fizz may go flat over time. Hibiscus syrup lasts about one week in the fridge. Fresh blood orange juice should also be used within a few days. After that, it may lose its bright taste and color. Sparkling water or club soda lasts for months if unopened. Once opened, use it within a few days for the best fizz. You can use leftover blood orange juice in many ways. Try mixing it into smoothies or salad dressings. The hibiscus syrup can add a sweet twist to yogurt or pancakes. You can even make a simple tea by mixing it with hot water. Creativity is key when repurposing these ingredients! A blood orange is a sweet citrus fruit. It has a dark red or purple flesh. This color comes from antioxidants called anthocyanins. Blood oranges taste sweeter and less acidic than regular oranges. They add a unique twist to drinks and dishes. You can find them in winter and early spring. Their juice gives vibrant color and flavor to your Blood Orange Hibiscus Fizz. To make hibiscus tea, follow these simple steps: 1. Take 2 tablespoons of dried hibiscus flowers. 2. Boil 2 cups of water in a small pot. 3. Add the dried hibiscus flowers to the boiling water. 4. Let the mix steep for about 10 minutes. 5. Strain the liquid into a bowl to remove flowers. This tea has a tart flavor and a deep red color. You can sweeten it with honey or agave syrup. Use it in your Blood Orange Hibiscus Fizz for a refreshing taste. Yes, you can use fresh hibiscus flowers! They provide a lovely flavor. However, they can be harder to find than dried flowers. If you use fresh hibiscus, you will need more flowers for the same flavor. You can use about 1 cup of fresh flowers. Just boil them in water like you would dried flowers. Make sure to strain them well. Both fresh and dried hibiscus work great in drinks! This drink recipe combines fresh blood orange juice and fragrant hibiscus. You learned how to prepare a tasty hibiscus syrup and mix it with sparkling water. I shared tips on making the drink sweeter and serving it with snacks. You can also try fun variations with fruits or spirits. Enjoy this refreshing drink and share it with friends. Experiment with the recipe, and make it your own!

Blood Orange Hibiscus Fizz Refreshing and Tasty Drink

Looking for a refreshing drink that bursts with flavor? The Blood Orange Hibiscus Fizz is your answer! This vibrant beverage

To make Cherry Almond Cold Brew, you'll need some key ingredients. Here’s what you will gather: - 1 cup coarsely ground coffee - 4 cups cold water - 1 cup cherries, pitted and halved - 1/4 cup almond milk (or more to taste) - 1 tablespoon almond extract - 2 tablespoons honey or agave syrup (optional) These ingredients work together to create a refreshing drink. The coarsely ground coffee gives a smooth base. Cold water helps in brewing the coffee without heat. The cherries add a burst of flavor, while almond milk gives creaminess. Almond extract enhances the nutty notes. You can sweeten the drink with honey or agave syrup if you like. Gather these items before you start. This will make the process easier. Enjoy the vibrant flavors of this cold brew! For the full recipe, check the details above. To start, combine the coarsely ground coffee and cold water. Use a large jar or pitcher for this. Stir well to ensure all the coffee grounds get wet. This step is key for a rich flavor. Next, steep the coffee in the refrigerator. Let it sit for 12 to 24 hours. The longer it sits, the stronger it becomes. After steeping, strain the coffee using a fine mesh sieve or coffee filter. This step removes the grounds, leaving you with nice, smooth cold brew. Now, let’s prepare the cherry mixture. Take your pitted cherries and mash them slightly in a bowl. This helps release their sweet juices. If you like, mix in honey or agave syrup to sweeten the cherries. This adds a nice touch of flavor. For the final assembly, fill a glass with ice. Pour about 1/2 cup of your cold brew over the ice. Next, add the cherry mixture and stir gently. This helps combine the flavors without losing the pretty cherry swirls. Now it’s time for the almond milk. Drizzle it over the top, along with the almond extract. Adjust the almond milk to suit your taste. Finally, garnish your drink with sliced almonds and a few whole cherries. This adds a nice crunch and a pop of color. For the complete recipe, check out the [Full Recipe]. Enjoy your Cherry Almond Cold Brew! - Adjusting sweetness levels: You can customize the sweetness based on your taste. I like to start with one tablespoon of honey or agave syrup. Taste it, and then add more if you like it sweeter. Remember, the cherries also add some natural sweetness. - Choosing the right coffee roast: A medium roast works best. It has a nice balance of flavor that pairs well with cherries and almond. Avoid dark roasts, as they may overpower the fruity notes. - Recommended ratios of almond milk and almond extract: I suggest using 1/4 cup of almond milk for a creamy texture. For almond extract, one tablespoon gives a nice hint without being too strong. Adjust these amounts to suit your taste. - Over-steeping the coffee: If you let your coffee steep too long, it can get bitter. Stick to the 12- to 24-hour range. I find 16 hours gives the best balance. - Improperly straining the brew: Use a fine mesh sieve or coffee filter. This step is key to getting smooth cold brew. If you skip it, you’ll end up with gritty coffee. - Skipping the garnish: Garnishes add a lovely touch. Sliced almonds and fresh cherries on top make the drink pop. They also add a nice crunch and extra flavor. Don't skip this step! For more detailed steps and the full recipe, check out the Cherry Almond Cold Brew recipe. {{image_2}} You can easily make this drink dairy-free. Simply swap almond milk for other non-dairy milks. Oat milk offers a creamy taste. Coconut milk brings a tropical twist. Soy milk is another popular choice. Each milk adds its own flavor, so try them all! When you use different milks, you might want to adjust the flavors. If the milk is sweet, cut back on honey. If it’s plain, add a bit more almond extract. Play with flavors until it’s just right for you. Want to enhance the taste even more? Try adding vanilla extract or coconut flakes. Vanilla adds warmth and depth. Coconut gives a fun, sweet touch. You can mix both for a unique flavor. Don’t stop at regular cherries! Use different types like Bing or Rainier. They each have unique tastes and sweetness levels. Mixing cherry types can create a fun, layered flavor. Always feel free to get creative and make this drink yours! To keep your cherry almond cold brew fresh, use a sealed glass jar. Store it in the fridge. This will help keep the flavors bright. Cold brew can last up to two weeks in the fridge. After that, the taste may start to fade. Always check for any off smells before you drink it. If you want to save some cold brew for later, freezing is a great option. Pour the cold brew into ice cube trays. This way, you can make coffee ice cubes. These cubes are perfect for chilling drinks without watering them down. When you're ready to use them, just pop them in your drink. You can also blend the cubes into smoothies for a tasty kick. For cold brew, I recommend using coarsely ground coffee. This grind helps create a smooth flavor. Some great brands include: - Death Wish Coffee: Known for its bold taste. - Peet's Coffee: Offers a rich, smooth flavor. - Stumptown Coffee Roasters: Great for a balanced cup. These brands provide a nice kick and blend well with the cherry and almond flavors. Yes, you can use frozen cherries! They work well for this drink. Frozen cherries can add a nice chill to your cold brew. They also bring a sweeter flavor. Just remember to thaw them a bit before mashing. This helps release their juices. To enhance the flavor and strength of your cold brew, try these tips: - Use more coffee grounds. A 1:3 coffee-to-water ratio can boost the flavor. - Extend the steeping time. Letting it steep for 24 hours gives a richer taste. - Add a touch more almond extract. It can deepen the almond flavor. These steps will make your drink more robust and satisfying. You can find Cherry Almond Cold Brew at various coffee shops and stores. Some suggested brands to look out for include: - Starbucks: Often has seasonal flavors. - Dunkin': Check for special blends. - Local coffee roasters: Many offer unique flavors. You can also make your own at home using the Full Recipe. This way, you control the flavors and ingredients! You have learned how to make Cherry Almond Cold Brew step by step. We covered key ingredients like coffee, cherries, and almond milk. You now know how to brew, prepare, and assemble the drink perfectly. Remember to avoid common mistakes like over-steeping. You can even play with flavors and storage options. Enjoy experimenting with this fun drink! Cheers to your new favorite cold brew!

Cherry Almond Cold Brew Refreshing Coffee Experience

If you love coffee and crave something new, get ready for a treat! The Cherry Almond Cold Brew offers a

- 4 cups brewed peach kombucha - 1 medium ripe peach - 2 tablespoons fresh ginger - 2 tablespoons honey or agave syrup - Juice of 1 lime - Fresh mint leaves for garnish - Ice cubes For a great Ginger Peach Kombucha Cooler, you need fresh and simple ingredients. I like using brewed peach kombucha as the base. You can buy it or make your own. The peach flavor makes this drink fruity and sweet. Next, pick a medium ripe peach. The riper the peach, the better the taste. Slice it thinly for easy mixing. Fresh ginger adds a nice kick. Grate it to release its strong flavor. To sweeten it up, use honey or agave syrup. You can adjust the amount to your liking. A bit of lime juice gives the drink a zesty twist. Don’t forget the fresh mint leaves! They add a pop of color and a refreshing aroma. Finally, ice cubes are a must. They keep your drink cold and refreshing. You can find all these ingredients at your local grocery store. Ready to mix? Check out the Full Recipe. - Step 1: Combine main ingredients Start by taking a large pitcher. Pour in 4 cups of peach kombucha. Add 2 tablespoons of grated ginger, 2 tablespoons of honey or agave syrup, and the juice of 1 lime. Stir the mixture well until the honey dissolves completely. This step is key to blending the flavors. - Step 2: Prepare peach slices Next, take your medium ripe peach and slice it. Add the peach slices to the pitcher. Gently mash a few slices with a spoon. This releases their juices, boosting the drink's flavor. - Step 3: Assemble drink with ice Grab some tall glasses and fill each with ice cubes. Carefully pour the ginger peach kombucha mixture over the ice. Make sure each glass gets a nice amount of the fruity mix. - Step 4: Chill and serve Stir the drink gently to mix the flavors. Let it chill for a few minutes. Serve immediately and top each glass with fresh mint leaves. These add a nice touch to your drink. Enjoy your refreshing Ginger Peach Kombucha Cooler! For the full recipe, check the earlier section. - Use ripe peaches for sweetness: Ripe peaches taste better. Look for fruit that is soft and fragrant. They add natural sweetness to your drink. - Fresh ginger vs. powdered ginger: Fresh ginger gives a stronger flavor. It has a bright and spicy kick that powdered ginger lacks. Use fresh ginger for the best taste. - Adjusting sweetness with honey or agave: Honey and agave add sweetness. Start with two tablespoons, then taste. Add more if you like it sweeter. - Ideal glassware for serving: Use clear glasses. They show off the pretty colors of the drink. A tall glass works great for this cooler. - Pairing with snacks or appetizers: This drink pairs well with light snacks. Try it with fresh fruit, cheese, or crackers. These snacks enhance the drink's flavors. {{image_2}} You can switch up the fruits in this drink. Try adding strawberries, mangoes, or even blueberries. Each fruit gives a unique taste. You can also use frozen fruit for extra chill. When it comes to options, you can make this drink non-alcoholic or alcoholic. If you want an alcoholic version, add a splash of vodka or rum to your glass. It gives your drink a fun twist for summer parties. Herbs and spices can really boost flavor. Fresh mint or basil adds a nice touch. Just muddle them gently before adding the kombucha for the best flavor. You can also try adding a pinch of cinnamon or a dash of cayenne for some heat. Infusing with different flavors is another fun way to mix it up. You can add a slice of jalapeño for a spicy kick or some lavender for a floral note. Get creative! This drink can match your mood or the season with just a few simple changes. To keep your ginger peach kombucha cooler fresh, use a tight lid. Pour any leftovers into a clean glass jar. This way, you avoid extra air exposure. Store it in the fridge for up to three days. The longer it sits, the more sour it may taste. I recommend drinking it within two days for the best flavor. If you have leftover peaches, use them in smoothies or oatmeal. You can also chop them for fruit salads. For extra ginger, it works well in stir-fries or teas. If you want to save time, make a double batch of the kombucha drink. This way, you can enjoy it later. Just remember to store it properly. Check out the Full Recipe for more details on making this delicious drink! How is kombucha made? Kombucha is made by fermenting sweet tea. You need tea, sugar, and a SCOBY. The SCOBY is a culture of bacteria and yeast. It eats the sugar and makes the tea fizzy and tangy. You can find kombucha at stores or make it at home. What are the health benefits of kombucha? Kombucha has many health benefits. It may aid digestion because of probiotics. It can boost your immune system too. Some people say it gives them more energy. Kombucha also contains antioxidants that help fight free radicals. Can this recipe be made in advance? Yes, you can make this drink in advance. Just mix the kombucha, ginger, honey, and lime juice. Store it in the fridge. Add peach slices and ice just before serving. This keeps it fresh and tasty. What to do if it tastes too sour/sweet? If your drink is too sour, add more honey or agave syrup. This will balance the flavors. If it’s too sweet, add more lime juice or kombucha. Taste as you go to find the right mix. Fixing separation or muddling issues If your drink separates, give it a gentle stir before serving. This helps mix the flavors. If muddling occurs, try using a fine strainer. This will remove any large pieces of fruit or ginger. Calories per serving Each serving of the Ginger Peach Kombucha Cooler has about 80 calories. This can vary based on the honey or agave you use. Breakdown of ingredients' health benefits - Kombucha: Provides probiotics for gut health. - Peach: Offers vitamins A and C, which boost skin health. - Ginger: Aids digestion and may reduce inflammation. - Honey or agave: Adds natural sweetness and energy. - Lime: High in vitamin C and helps with hydration. - Mint leaves: Freshen breath and add flavor without calories. Enjoy making your Ginger Peach Kombucha Cooler with the Full Recipe! In this blog post, we explored a refreshing peach kombucha drink. We listed key ingredients, detailed steps, and shared helpful tips for optimal flavor. You learned how to customize the recipe and store leftovers effectively. Remember, fresh ingredients can make all the difference. Enjoy experimenting with flavors and variations that suit your taste. This drink is not just tasty but also packed with health benefits. Dive in and enjoy your delicious creation!

Ginger Peach Kombucha Cooler Refreshing Summer Drink

Looking for a refreshing drink to beat the summer heat? Try my Ginger Peach Kombucha Cooler! This easy-to-make beverage combines

- 1 cup fresh strawberries, hulled and sliced - 5-6 fresh basil leaves - 2 black tea bags (or 2 tablespoons loose black tea) - 1 cup milk (dairy or plant-based) - 2 tablespoons honey or sweetener of choice (adjust to taste) When I make Strawberry Basil Milk Tea, fresh ingredients are key. The strawberries bring a sweet and juicy flavor. Fresh basil adds a nice herbal note. Black tea gives it a solid base. You can use any milk you prefer. I often choose almond or oat milk for a twist. The sweetener balances the flavors well. You can switch up some ingredients based on what you have. For milk, you can use dairy or plant-based options. Almond, soy, or coconut milk all work great. Different sweeteners can change the taste too. Try honey, agave nectar, or maple syrup. You may also add other fruits like peaches or mangoes for fun flavors. Each choice can change the drink's vibe. You will need a few simple tools to whip up this drink: - saucepan - blender - pitcher - glasses for serving A saucepan helps to boil water for the tea. A blender is needed to make the strawberry-basil puree. After mixing, a pitcher is best for serving. Finally, use nice glasses to show off your drink. This setup makes the process easy and fun. For the full recipe, check out the detailed steps to create this refreshing drink! 1. Boiling water and steeping tea Start by bringing 2 cups of water to a gentle boil in a saucepan. Once it boils, add 2 black tea bags or 2 tablespoons of loose black tea. Let it steep for 5 minutes. This gives the tea a strong flavor. After steeping, remove the tea bags and set the brewed tea aside to cool. 2. Creating strawberry-basil puree In a blender, add 1 cup of hulled and sliced fresh strawberries along with 5-6 fresh basil leaves. Blend them together until you have a smooth puree. This mix will add a fresh taste to your drink. 3. Combining ingredients In a large pitcher, pour in the cooled tea and the strawberry-basil puree. Stir them together well to mix all the flavors. Add 2 tablespoons of honey or your choice of sweetener, stirring until it dissolves. Adjust the sweetness to suit your taste. Finally, gradually add 1 cup of milk while stirring to combine everything evenly. - Stirring vs. blending Stirring is great for mixing drinks like this one. Blending works well for purees. For this recipe, a good stir is key after you combine the tea and puree. - Tips for achieving the perfect consistency Make sure to stir gently when adding milk. This helps keep the drink smooth. If you want a thicker drink, blend the strawberry-basil mixture longer. - Ice vs. no ice You can serve this drink chilled or warm. If you like it cold, fill your glasses with ice cubes before pouring in the drink. If you prefer it warm, skip the ice and serve straight from the pitcher. - Creative garnishing ideas Garnish each glass with a fresh basil leaf. This adds a lovely aroma and a pop of green. You can also slice strawberries and place them on the rim of the glass for a fun touch. For the full recipe, check out the [Full Recipe]. Adjusting the sweetness can make your drink just right. Start with two tablespoons of honey. Taste and add more if needed. Some people love a sweeter drink, while others prefer it less sweet. You can also add spices like cinnamon or nutmeg. Just a pinch will add warmth and depth to your drink. Steeping time can change the strength of your tea. For a mild flavor, steep for just three minutes. For a stronger taste, five minutes works best. Always choose high-quality tea. Loose leaf tea often has better flavor than bags. Look for fresh black tea to get the best results. Keeping your ingredients fresh is key. Store strawberries in the fridge, and they will last longer. Basil should be in a glass of water, like a flower. If you have leftover milk tea, store it in the fridge. Use an airtight container to keep it fresh. When ready to drink, stir or shake well before serving. {{image_2}} To make your Strawberry Basil Milk Tea even more exciting, try adding other fruits. Mango adds a sweet, tropical twist. Peach brings a juicy, fragrant note. Both fruits blend well with strawberries and basil. You can also play with herbal tea alternatives. Chamomile or peppermint can give a soothing flavor. Experimenting with these fruits and herbs can create a drink that feels new each time. If you need vegan options, swap dairy milk for a plant-based milk. Almond, oat, or coconut milk works great here. You can also make a sugar-free version. Use a sugar substitute like stevia or erythritol. They add sweetness without the calories. These adjustments make the drink fit your diet while keeping it delicious. In summer, serve your Strawberry Basil Milk Tea chilled. Pour it over ice to keep it refreshing. For winter, warm the tea instead. Heat the milk and mix it in gently. This warm version can be cozy on cold days. Both options let you enjoy the flavors all year long. For the full recipe, check the instructions above and start creating your drink today! To keep your Strawberry Basil Milk Tea fresh, store it in an airtight container. This helps the flavors stay strong. If you have leftovers, refrigerate them right away. Always let the tea cool first before sealing it up. The shelf life of your Strawberry Basil Milk Tea is about 3 to 5 days in the fridge. After that, the flavors may fade, and the drink could spoil. Always check for any off smells or changes in color before drinking. When you want to serve chilled tea again, pour it into a glass. You can add fresh ice to make it cold again. Just stir gently to mix. If you need to heat the tea, do it slowly. Use a saucepan over low heat. Do not let it boil, as boiling can change the taste of the milk. Avoid microwaving, as it can heat unevenly and curdle the milk. Always taste before serving to ensure it’s still delicious! You can freeze Strawberry Basil Milk Tea, but it may change in texture. To freeze, pour it into ice cube trays. This makes it easy to use later in smoothies or as ice for drinks. When you want to enjoy it again, thaw the cubes in the fridge overnight. Once thawed, stir well. If the texture seems off, consider blending it again for a smoother drink. What is Strawberry Basil Milk Tea made of? Strawberry Basil Milk Tea is made of simple ingredients. You need: - 2 cups water - 1 cup fresh strawberries, hulled and sliced - 5-6 fresh basil leaves - 2 black tea bags (or 2 tablespoons loose black tea) - 1 cup milk (dairy or plant-based) - 2 tablespoons honey or sweetener of choice - Ice cubes (optional) - Fresh basil leaves for garnish Each ingredient plays a role in creating a refreshing drink. The strawberries add sweetness and color. The basil gives it a unique herbal twist. The tea adds depth, while the milk makes the drink smooth. Can I make this drink without dairy? Yes, you can easily make this drink without dairy. Use plant-based milk like almond, oat, or coconut. Each type brings its own flavor. This way, you still enjoy a creamy texture. Just follow the [Full Recipe] to swap it out. Where can I buy Strawberry Basil Milk Tea? You can find Strawberry Basil Milk Tea at specialty cafes and tea shops. Some restaurants may offer it too. If you prefer to make it at home, the recipe is simple and quick. What are the health benefits of strawberries and basil? Strawberries are packed with vitamins. They are high in vitamin C and antioxidants. Basil is also a super herb. It has anti-inflammatory properties and can help with stress. Together, they make a tasty and healthy drink. Is Strawberry Basil Milk Tea good for digestion? Yes, this tea may aid digestion. Basil can help soothe your stomach. Strawberries provide fiber, which is good for gut health. Enjoying this drink can be a delicious way to support your digestion. How can I make it less sweet? To make Strawberry Basil Milk Tea less sweet, use less honey or sweetener. You can also skip the sweetener entirely. If you find the strawberries sweet enough, that’s great too. Just adjust it to fit your taste. Can I use dried basil instead of fresh? You can use dried basil, but fresh is better. Dried basil has a stronger flavor. If you use it, add less than what the recipe calls for. Start with a small amount, then taste and adjust as needed. This blog outlined how to make Strawberry Basil Milk Tea. We covered fresh and alternative ingredients, essential equipment, and step-by-step instructions. You learned mixing techniques and tips for perfecting flavor. We also explored variations, storage tips, and answered common questions. In summary, this drink offers bright flavors and simple customization. Experiment with ingredients and enjoy your refreshing creation anytime. Make it your way, and have fun with it!

Strawberry Basil Milk Tea Refreshing and Flavorful Drink

Looking for a drink that’s as refreshing as it is delicious? Strawberry Basil Milk Tea is a unique blend that

Older posts
Newer posts
← Previous Page1 … Page12 Page13 Page14 … Page41 Next →

dsad

© 2025 flavorsprint • Built with GeneratePress

Our Policies

  • Copyright Policy
  • Cookie Policy
  • GDPR Policy
  • Privacy Policy
  • Disclaimer
  • Terms Of Use

More Information

  • Home
  • About
  • Contact
  • Appetizers
  • Dessert
  • Dinner
  • Drinks
©2025, flavorsprint About Back To Top