Skip to content
DisclaimerTerms Of UseGDPR PolicyCookie Policy

flavorsprint

  • Home
  • Drinks
  • Appetizers
  • Dinner
  • Dessert
  • About
  • Contact
  • Privacy Policy
DisclaimerTerms Of UseGDPR PolicyCookie Policy

Lillian

- 2 cups sushi rice - 2 ½ cups water - 1 tablespoon rice vinegar - 1 tablespoon sugar - ½ teaspoon salt - 1 pound cooked salmon, flaked - ½ cup mayonnaise - 2 tablespoons sriracha - 1 avocado, sliced - ¼ cup green onions, chopped - 1 sheet nori, cut into strips - Sesame seeds for garnish If you don't have sushi rice, you can use short-grain rice. It will give a similar texture. For the salmon, canned salmon works great if you want to save time. If you dislike mayonnaise, try Greek yogurt for a tangy twist. You can skip sriracha if you prefer a milder taste. Instead, add a dash of soy sauce for flavor. If you need a vegan option, substitute the salmon with marinated tofu or chickpeas. Fresh ingredients make a big difference. Use high-quality sushi rice for the best results. Rinse it well to remove excess starch. Choose fresh salmon or good-quality canned salmon for flavor. The avocado should be ripe but not mushy. Check green onions for crispness. Fresh nori adds a nice crunch. Finally, sesame seeds should be fresh for the best taste. {{ingredient_image_1}} First, we need to preheat the oven. Set it to 375°F (190°C). While that heats up, let’s make the sushi rice. Rinse 2 cups of sushi rice under cold water until the water runs clear. This step helps remove excess starch. Next, combine the rinsed rice with 2 ½ cups of water in a pot. Bring it to a boil. After boiling, cover the pot and lower the heat. Cook the rice on low for 20 minutes. Once done, remove it from heat and keep it covered for another 10 minutes. This helps the rice get fluffy. Now, let’s season the rice. In a small bowl, mix 1 tablespoon of rice vinegar, 1 tablespoon of sugar, and ½ teaspoon of salt. Stir until everything dissolves. After the rice has rested, fluff it with a fork. Gently fold in the vinegar mixture. This gives the rice its classic sushi flavor. Next, we prepare the salmon. In a bowl, combine 1 pound of flaked cooked salmon, ½ cup of mayonnaise, and 2 tablespoons of sriracha. Mix well until it’s all combined. Adjust the sriracha to your spice level. Now it's time to layer. In a baking dish, spread half of the seasoned sushi rice evenly on the bottom. Then, top it with the salmon mixture, spreading it gently. Finally, add the remaining rice on top, smoothing it out. Once layered, place the dish in the preheated oven. Bake for about 15 minutes. You want it heated through and a bit golden on top. When done, take it out and let it cool for a few minutes. Top with sliced avocado, chopped green onions, and sprinkle sesame seeds for that perfect crunch. Enjoy your sushi bake! To make the best sushi rice, rinse it well. Wash the rice until the water runs clear. This removes excess starch. Next, use the right water ratio. For 2 cups of sushi rice, use 2 ½ cups of water. This helps the rice cook evenly. After cooking, let it rest for ten minutes. This step makes the rice fluffier. You can boost the flavor of your sushi bake. Try adding more sriracha for heat. If you like a creamy texture, mix in more mayonnaise. You can also add diced cucumbers for a fresh crunch. Consider using fresh herbs like cilantro or basil for unique tastes. They add freshness that brightens your dish. Presentation matters! After baking, let your dish cool slightly. Then, top it with sliced avocado and chopped green onions. Sprinkle sesame seeds for a nice finish. Use nori strips as scoops. This makes eating fun and easy. Arrange everything on a colorful plate to impress your guests. A visually appealing dish makes every bite more enjoyable. Pro Tips Use Short Grain Sushi Rice: This type of rice is stickier and will hold together better, giving your sushi bake that authentic texture. Adjust Sriracha for Spice Level: If you prefer a milder flavor, start with less sriracha and add more to taste after baking. Let the Bake Rest: After baking, allow the dish to cool for a few minutes to help the layers set, making it easier to scoop. Garnish Just Before Serving: For the freshest taste and texture, add avocado and green onions right before serving. {{image_2}} To make a gluten-free version of this dish, choose gluten-free soy sauce instead of regular soy sauce. You can also use coconut aminos as a soy sauce substitute. For the sushi rice, just ensure it is labeled gluten-free. The other ingredients in the recipe are naturally gluten-free, making it easy to enjoy. While salmon is the star of this dish, you can switch up the protein. Try canned tuna or cooked shrimp for a new flavor. You can even use crab meat or tofu for a vegetarian option. Just keep the ratios similar to the salmon for the best taste. Want to boost the nutrition? Add vegetables like diced cucumber, shredded carrots, or bell peppers. These add crunch and color. You could also top your bake with pickled ginger or wasabi for an extra kick. Feel free to get creative with your favorite toppings to make it your own! Store leftovers in an airtight container. Let the dish cool down first. Place it in the fridge. It should stay fresh for up to three days. If you want to keep it longer, consider freezing it. To reheat, take the sushi bake out of the fridge. Preheat your oven to 350°F (175°C). Place the sushi bake in the oven for about 10 to 15 minutes. Cover it with foil to keep it moist. You can also use the microwave for quick reheating. Just heat it in short bursts, checking often. If you freeze the sushi bake, wrap it tightly in plastic wrap. Then, cover it with aluminum foil to prevent freezer burn. It can last for about three months in the freezer. To thaw, move it to the fridge overnight. Once thawed, reheat it in the oven or microwave. Enjoy your tasty leftovers! You can use Greek yogurt instead of mayonnaise. It adds creaminess and a tangy flavor. Another option is avocado. Mash it up and spread it over the salmon. You can also try vegan mayo for a plant-based choice. Just pick what you like best! Yes, you can prepare it ahead of time! Cook the rice and mix the salmon. Layer everything in the dish, then cover it tightly. Store it in the fridge for up to a day. When you're ready, just bake it. This saves time and makes serving easier. Check for a golden top. The edges should be bubbling, and it should feel warm in the center. If it's heated through and has a slight crisp, it's ready! Let it cool for a few minutes before serving. Enjoy the tasty meal! In this article, we covered key ingredients, step-by-step instructions, and useful tips for making sushi bake. We explored ingredient alternatives and how to enhance flavor. You learned about different variations and how to store leftovers. As you dive into this fun dish, remember to experiment and make it your own. Each step adds to the tasty experience. Enjoy the process and share the joy of sushi bake with others!

Minute Salmon Sushi Bake Quick and Tasty Recipe

Looking for a quick and tasty meal? This Minute Salmon Sushi Bake is your answer! You’ll love how easy it

- 1 pound ground beef or ground chicken - 1/4 cup panko breadcrumbs - 1/4 cup green onions, finely chopped - 2 cloves garlic, minced - 1 tablespoon ginger, grated - 2 tablespoons soy sauce - 1 tablespoon sesame oil - 1 tablespoon brown sugar - 1 teaspoon gochujang - 1/2 teaspoon black pepper - Sesame seeds - Fresh cilantro or additional green onions When making Korean BBQ meatballs, pick the right meat. Ground beef gives a rich taste, while ground chicken offers a lighter option. I love using panko breadcrumbs for added crunch. They help the meatballs stay moist and tender. Green onions add a fresh kick, while garlic and ginger bring warmth and depth. Now, let's talk about the seasoning. Soy sauce gives the meatballs their savory flavor. The sesame oil adds a nutty aroma that you will love. Brown sugar balances the saltiness. Gochujang brings a unique heat that makes these meatballs special. Black pepper gives a little extra spice. For garnishing, sprinkle sesame seeds for crunch. Fresh cilantro or more green onions adds color and freshness. These simple touches make your dish pop. Enjoy exploring the wonderful flavors of these Korean BBQ meatballs! {{ingredient_image_1}} - In a large bowl, combine: - 1 pound ground beef (or ground chicken) - 1/4 cup panko breadcrumbs - 1/4 cup green onions, finely chopped - 2 cloves garlic, minced - 1 tablespoon ginger, grated - 2 tablespoons soy sauce - 1 tablespoon sesame oil - 1 tablespoon brown sugar - 1 teaspoon gochujang - 1/2 teaspoon black pepper Mix these until everything blends. Keep it light; do not overmix. Overmixing makes meatballs tough. - Preheat your oven to 400°F (200°C). - Line a baking sheet with parchment paper. - Scoop the mixture and shape it into balls, about 1 to 1.5 inches wide. - Place the meatballs on the prepared baking sheet. - To make the glaze: mix more soy sauce, gochujang, and sesame oil in a bowl. - Once the meatballs are baked for 15-20 minutes, take them out. - Drizzle the glaze over the meatballs and toss them gently. - Return the meatballs to the oven for 5 more minutes. This helps the glaze caramelize. - Take them out and let them cool for a bit before serving. To make these meatballs shine, use fresh ingredients. They give the best taste and texture. For a lighter version, swap ground beef for ground chicken. This change keeps the dish healthy and still packed with flavor. Panko breadcrumbs add crunch, but you can use crushed crackers or bread crumbs in a pinch. Fresh green onions and garlic enhance the flavor. Always choose the freshest options for the best outcome. While baking is simple, grilling adds a nice smoky flavor. If you grill, ensure even cooking by turning the meatballs often. This helps them brown nicely and cook through. Use a meat thermometer to check for doneness. Aim for an internal temp of 160°F for beef or 165°F for chicken. This way, you guarantee juicy meatballs every time. Korean BBQ meatballs pair well with rice or noodles. Serve them with a side of steamed veggies for a balanced meal. You can also offer dipping sauces like extra soy sauce or sweet chili sauce. These sauces enhance the flavor and let guests customize their meal. Garnish with sesame seeds and fresh herbs for a pop of color and taste. Pro Tips Use Cold Ingredients: For the best texture, ensure your ground meat and other ingredients are cold before mixing. This helps keep the meatballs tender and prevents them from becoming tough. Don't Overmix: When combining the ingredients, mix just until combined. Overmixing can lead to dense meatballs rather than light and fluffy ones. Adjust Spice Level: Feel free to adjust the amount of gochujang in the glaze or the meatball mix to suit your taste. You can also add red pepper flakes for extra heat. Garnish for Flavor: Enhance the dish by garnishing your meatballs with freshly chopped cilantro or green onions. This adds a burst of freshness and color. {{image_2}} You can use different types of meat for your meatballs. Ground beef gives a rich flavor. Ground chicken is a lighter choice. Both are tasty in this recipe. For a vegetarian option, try using lentils or chickpeas. You can mash them up for a similar texture. Tofu is another good choice. It absorbs flavors well and adds protein. The gochujang gives the meatballs a nice kick. You can adjust this for your spice level. Add more gochujang if you like it hot. If you want extra heat, sprinkle in some chili flakes or a dash of hot sauce. This way, you can make your meatballs as spicy as you like. You can add vegetables to the meatball mix. Grated carrots or chopped bell peppers add color and nutrition. They also make the meatballs moist. Fresh herbs can enhance the flavor too. Try adding cilantro or basil for a unique twist. These small changes can make your dish stand out. To keep your Korean BBQ meatballs fresh, store them properly. First, let them cool completely. Next, place the meatballs in an airtight container. This helps keep moisture in and air out. You can refrigerate them for up to four days. For longer storage, consider freezing. - Best practices for refrigeration: - Use an airtight container. - Separate layers with parchment paper. - Label the container with the date. - Tips for freezing meatballs: - Freeze meatballs in a single layer first. - Once frozen, transfer to a freezer bag. - Remove as much air as possible to prevent freezer burn. When you're ready to enjoy your meatballs again, reheating is key. You want them warm and juicy, not dry. Here are three easy methods: - Methods for reheating meatballs: - Microwave: Place meatballs on a microwave-safe plate. Cover them with a damp paper towel. Heat in short bursts, checking every 30 seconds. - Oven: Preheat the oven to 350°F (175°C). Place meatballs on a baking sheet. Heat for about 10-15 minutes, or until warm. - Stovetop: Heat a pan over medium heat. Add a splash of water or broth. Place meatballs in the pan, cover, and heat for 5-7 minutes. - Ensuring they remain juicy and flavorful: - Use a lid when reheating to trap steam. - Add a splash of soy sauce for extra flavor. - Do not overheat, as this can dry them out. To add spice, use more gochujang. You can also mix in red pepper flakes. Another option is to add sliced jalapeños or chili paste. Start with a small amount. Taste as you go. Adjust to your liking. This way, you control the heat. Yes, you can! Try teriyaki sauce for a sweeter flavor. You could also use a spicy chili sauce for kick. If you want a tangy taste, go for hoisin sauce. Each sauce gives a unique twist to the meatballs. Be creative and mix different sauces to find your favorite! Korean BBQ meatballs can last about three to four days in the fridge. Store them in an airtight container. This keeps them fresh and safe to eat. If they smell or look off, throw them away. Always check for signs of spoilage before enjoying. Absolutely, you can double it! Just keep the same cooking times. Make sure you have enough space on your baking sheet. If your oven is full, cook in batches. This way, you can serve more people without losing flavor. Enjoy sharing these tasty meatballs! You now have all the tools to make delicious Korean BBQ meatballs. We covered key ingredients, from ground meat to flavorful sauces. You learned how to mix, shape, and bake your meatballs for the best taste. We also explored tips for seasoning and serving, along with storage advice. Remember, feel free to tweak flavors to your liking. Enjoy experimenting with ingredients and techniques to create your perfect dish. Happy cooking!

Korean BBQ Meatballs Juicy and Flavorful Dish

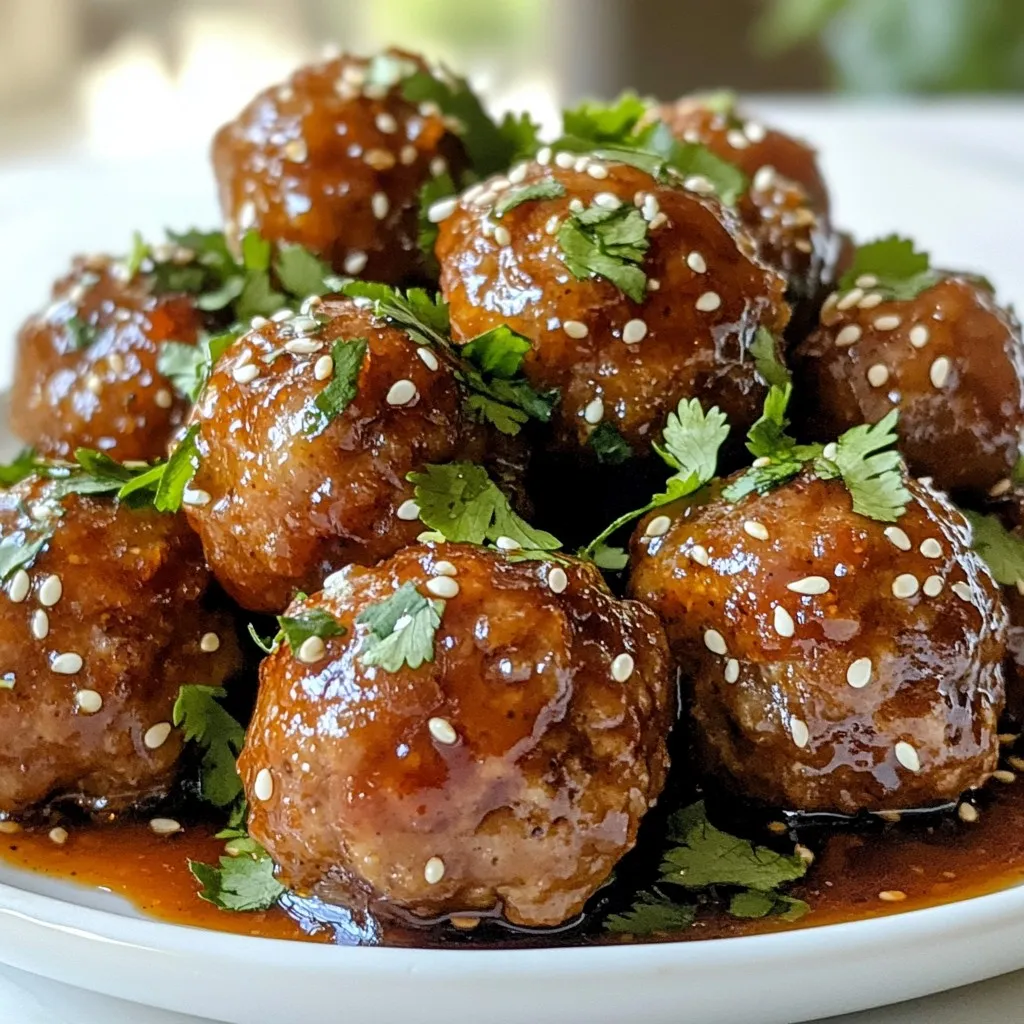
If you’re craving a dish that bursts with flavor, Korean BBQ meatballs are the answer! This juicy creation combines ground

To make Cabbage Fat Burning Soup, you will need: - 1 small head of green cabbage, chopped - 1 large onion, diced - 3 cloves garlic, minced - 2 carrots, sliced - 2 celery stalks, chopped - 1 bell pepper (any color), diced - 1 can (15 oz) diced tomatoes (with juice) - 6 cups vegetable broth - 1-2 teaspoons ginger, grated - 1 teaspoon turmeric powder - 1 tablespoon olive oil - Salt and pepper to taste - Fresh parsley for garnish (optional) - A pinch of red chili flakes for added heat (optional) When picking vegetables for this soup, look for bright colors. Choose a cabbage that feels heavy for its size. It should have tight leaves. For onions, select ones that are firm and dry. Carrots should be crisp and smooth. Avoid any that are soft or wrinkled. Celery should have vibrant green stalks. For bell peppers, pick ones that are shiny and firm. Each ingredient in this soup offers unique benefits: - Cabbage: Low in calories, high in fiber. It aids digestion and helps with weight loss. - Onion: Contains antioxidants. It supports the immune system and adds flavor. - Garlic: Great for heart health. It has anti-inflammatory properties and boosts immunity. - Carrots: Full of vitamin A. They promote good vision and skin health. - Celery: Low in calories and high in water. It helps keep you hydrated. - Bell pepper: Rich in vitamin C. It supports the immune system and improves skin health. - Diced tomatoes: Full of lycopene. They help protect against heart disease. - Vegetable broth: Adds flavor without many calories. It's hydrating and low in fat. - Ginger: Aids digestion and helps reduce nausea. It adds a warm flavor. - Turmeric: Has anti-inflammatory effects. It may help with joint pain and overall health. - Olive oil: A healthy fat. It supports heart health and adds richness. - Salt and pepper: Enhance flavor. Use them in moderation for health. - Fresh parsley: Adds vitamins and minerals. It also provides a fresh taste. - Red chili flakes: Boost metabolism. They add a spicy kick to the soup. Each ingredient plays a role in making this soup tasty and nutritious. Enjoy cooking! {{ingredient_image_1}} Start by gathering all your ingredients. You will need cabbage, onion, garlic, carrots, celery, bell pepper, diced tomatoes, vegetable broth, ginger, turmeric, olive oil, salt, and pepper. 1. In a large pot, heat the olive oil over medium heat. 2. Add the diced onion and minced garlic. Cook until the onions become soft, about 5-7 minutes. 3. Stir in the sliced carrots, chopped celery, and diced bell pepper. Cook for another 5 minutes. 4. Next, add the chopped cabbage, diced tomatoes (with juice), and vegetable broth to the pot. 5. Add the grated ginger, turmeric, salt, and pepper. If you like it spicy, add red chili flakes. 6. Bring everything to a boil. Then, reduce heat to low and let it simmer for about 30 minutes. 7. Check the soup. The cabbage and veggies should be tender. 8. Taste the soup and adjust the seasoning if you want. 9. Serve hot, and garnish with fresh parsley if you like. Always wash your hands before you cook. Use a cutting board to chop vegetables. Keep knives away from children. If you use a stove, stay nearby. Never leave the pot unattended. Use oven mitts when handling hot pots. Cook the onions and garlic for 5-7 minutes on medium heat. The soup should simmer on low heat for about 30 minutes. This time allows the flavors to blend well. Make sure the heat is low enough to avoid burning. The soup is ready when the cabbage is tender. To boost flavor in your cabbage soup, try herbs and spices. Use fresh herbs like basil or thyme. Adding lemon juice or zest brightens the taste. For more warmth, sprinkle in some cumin or coriander. These will add depth without adding calories. Many people skip cooking the onions and garlic long enough. This step builds a strong flavor base. Don’t forget to season in layers. Add salt and pepper at each stage, not just at the end. Lastly, avoid overcooking the veggies. They should stay tender, not mushy. Serve the soup hot for the best flavor. Top it with fresh parsley for a pop of color. If you like spice, add a pinch of red chili flakes. Pair it with whole-grain bread for a filling meal. Enjoy your soup in a nice bowl to make it special. Pro Tips Fresh Ingredients: Using fresh, seasonal vegetables will enhance the flavor and nutritional value of your soup. Flavor Boost: For a deeper flavor, consider adding a splash of soy sauce or a dash of balsamic vinegar just before serving. Spice It Up: Experiment with different spices like cumin or coriander to add unique flavors to your soup. Make It Ahead: This soup tastes even better the next day, so feel free to make it ahead and store it in the fridge. {{image_2}} You can swap out some ingredients to change the flavor of the soup. Here are some ideas: - Use leeks instead of onion for a milder taste. - Replace carrots with sweet potatoes for a hint of sweetness. - Add zucchini for extra texture and a light flavor. - Use canned beans for added protein and creaminess. These changes keep the soup tasty while still being healthy. This soup is already mostly plant-based. To make it fully vegan or vegetarian, follow these tips: - Use vegetable broth instead of chicken broth. - Check that your canned tomatoes do not have any animal products. - Add more vegetables like spinach or kale for added nutrients. These simple swaps make the soup fit any dietary need. Want to heat things up? Here’s how to tweak the spice levels: - Add more red chili flakes for a spicy kick. - Stir in some cayenne pepper for a bolder flavor. - For a milder soup, skip the chili flakes entirely. Adjusting the spice lets you create the perfect bowl for your taste buds. After making cabbage fat burning soup, store any leftovers in airtight containers. This keeps the soup fresh and tasty. Let the soup cool first. Once cool, seal the containers tightly. Label them with the date. This helps you know when to use them. To reheat the soup, pour it into a pot. Heat it on low to medium heat. Stir it often to avoid burning. If the soup seems too thick, add a splash of vegetable broth or water. This keeps the soup flavorful and prevents it from drying out. If you want to save the soup for later, freezing is a great option. Pour the cooled soup into freezer-safe bags or containers. Leave some space at the top for expansion. Label each container with the date. When you're ready to eat, thaw it in the fridge overnight. Reheat on the stove to enjoy a warm and healthy meal. Yes, this soup can aid weight loss. Cabbage is low in calories yet high in fiber. This means it can fill you up without adding too many calories. The soup's ingredients, like ginger and turmeric, also help boost metabolism. Eating this soup as part of a balanced diet may help you shed pounds. Cabbage Fat Burning Soup lasts about 4 to 5 days in the fridge. Store it in an airtight container to keep it fresh. If you notice any changes in smell or color, it’s best to throw it out. Reheat only what you plan to eat to avoid spoilage. Absolutely! You can use both methods for making this soup. For a slow cooker, combine all the ingredients, then cook on low for 6 to 8 hours. For an Instant Pot, set it to high pressure for about 15 minutes. Both methods will yield a tasty soup. You learned about the best ingredients, cooking steps, and storage tips for Cabbage Fat Burning Soup. Fresh veggies boost flavor and nutrition. I shared ways to enhance taste without extra calories. You also found helpful cooking times and safety tips. Remember, every choice matters, from ingredient selection to storage. Enjoy your healthy soup, and don't hesitate to explore variations that suit your taste. With these tips, you're ready to dive in and create a delicious dish that’s good for you!

Cabbage Fat Burning Soup for Rapid Weight Loss

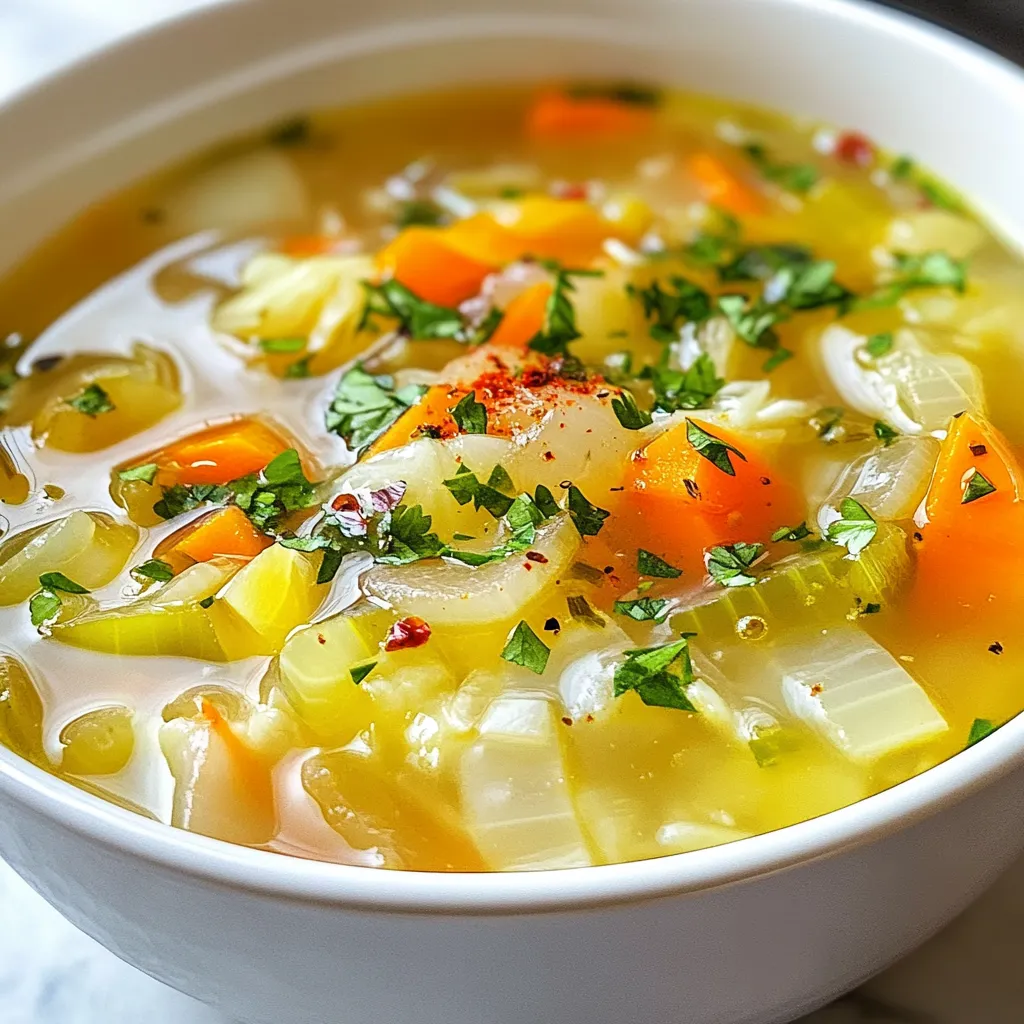
Looking to shed pounds quickly? Cabbage fat burning soup might be your new best friend! This soup is not just

To make Garlic Parmesan Chicken Meatloaf, gather these items: - 1 lb ground chicken - 1 cup breadcrumbs - 1/2 cup grated Parmesan cheese - 1/4 cup fresh parsley, chopped - 4 cloves garlic, minced - 1/2 cup onion, finely chopped - 1/4 cup milk - 1 large egg - 2 tablespoons Worcestershire sauce - 1 teaspoon Italian seasoning - Salt and pepper to taste - 1/4 cup ketchup (for topping) These ingredients blend well to create a tasty meatloaf. The ground chicken keeps it light, while the Parmesan adds a rich flavor. You can make this recipe your own by swapping some ingredients: - Use ground turkey instead of chicken for a leaner option. - Substitute whole wheat breadcrumbs for a healthier choice. - Try nutritional yeast if you want a dairy-free version. - Fresh herbs like basil or thyme can replace parsley. - For a kick, add some red pepper flakes to the mix. These swaps keep the dish flavorful while catering to different diets. You will need a few simple tools to make this meatloaf: - A large mixing bowl for combining ingredients. - A whisk for blending wet ingredients. - A loaf pan to shape the meatloaf. - A spatula or your hands for mixing. - An oven thermometer to check the heat. Having these tools ready makes the process smooth and easy. This way, you can focus on creating a delicious meal! {{ingredient_image_1}} To start, preheat your oven to 350°F (175°C). Grease a loaf pan lightly. In a large bowl, mix 1 pound of ground chicken with 1 cup of breadcrumbs. Add in 1/2 cup of grated Parmesan cheese and 1/4 cup of chopped fresh parsley. Mince 4 cloves of garlic and finely chop 1/2 cup of onion. Toss them into the bowl. Now, in a separate bowl, whisk together 1/4 cup of milk, 1 large egg, 2 tablespoons of Worcestershire sauce, and 1 teaspoon of Italian seasoning. Don't forget to add salt and pepper to taste. Pour this wet mix into the meat mixture. Combine everything well using your hands or a spatula until it's all mixed together. Next, transfer the meat mixture into your greased loaf pan. Shape it into a loaf. Spread 1/4 cup of ketchup evenly over the top for a tasty glaze. Bake it in the preheated oven for about 60 minutes. You want the internal temperature to reach 165°F (75°C). To keep your meatloaf moist, do not overmix the meat. Just combine until it's well mixed. Letting the meatloaf rest for 10 minutes after baking also helps it hold together. This step is key for a delicious slice. Enjoy your flavorful meal! To make your Garlic Parmesan Chicken Meatloaf burst with taste, focus on fresh ingredients. Use fresh garlic rather than powdered garlic for a strong flavor. Fresh parsley adds a nice green pop and taste. Feel free to mix in some spices, like paprika or crushed red pepper, for extra heat. A splash of lemon juice can brighten the flavors, too. Many people overmix their meatloaf, which can make it tough. Mix just until all ingredients come together. Using too much salt can overpower the dish. Taste your mixture before baking and adjust seasoning as needed. Lastly, don’t skip the resting time after baking. This step helps keep the meatloaf moist and easy to slice. Adding breadcrumbs helps keep the meatloaf from drying out. You can use soaked breadcrumbs for even more moisture. Mixing in grated cheese not only adds flavor but also enhances the texture. You might consider adding a small amount of finely grated zucchini or carrots. These veggies add moisture without changing the taste much. Pro Tips Use Fresh Ingredients: Fresh garlic and parsley will enhance the flavor of your meatloaf significantly. Avoid pre-minced garlic or dried herbs when possible. Let It Rest: Allowing the meatloaf to rest for 10 minutes after baking will help it hold its shape and make slicing easier. Customize Your Toppings: Feel free to experiment with different toppings such as barbecue sauce or a cheese layer for added flavor and texture. Check for Doneness: Always use a meat thermometer to check that the internal temperature reaches 165°F (75°C) for safe consumption. {{image_2}} You can easily switch the ground chicken for other meats. Ground turkey works well and keeps it light. If you want a richer flavor, try ground beef or pork. For a plant-based option, use lentils or chickpeas. You can also add extras to boost flavor. Consider mixing in chopped spinach or bell peppers. These add color and nutrients to your meatloaf. While ketchup is great, you can get creative with toppings. Try barbecue sauce for a smoky taste. A blend of mustard and honey adds a sweet zing. You can also top it with a mix of cheese and herbs. This gives a nice crust as it bakes. Feel free to experiment with your favorite sauces! Serve your meatloaf with side dishes that complement it. Mashed potatoes are a classic choice. You can also pair it with roasted veggies or a fresh salad. For a fun twist, slice the meatloaf and put it in a sandwich. Add some lettuce and tomato for a tasty meal. This dish is versatile and fits many dining styles! To keep your meatloaf fresh, store it in an airtight container. Place it in the fridge within two hours of cooking. This helps keep the flavors and moisture intact. Leftovers can last up to three days in the fridge. If you want to save some for later, freezing works well. Wrap the cooled meatloaf tightly in plastic wrap. Then, place it in a freezer-safe bag or container. It can last up to three months in the freezer. To avoid freezer burn, try to remove as much air as possible. When you’re ready to enjoy the meatloaf again, reheating is easy. You can slice it and heat in the microwave for about 2-3 minutes. For a crispier texture, place slices in the oven at 350°F for about 15 minutes. This keeps the meatloaf nice and juicy. Yes, you can use turkey in this recipe. Turkey has a milder flavor. It can also be a healthier option. Just keep the same amount as chicken. Use ground turkey that is lean for best results. Garlic Parmesan Chicken Meatloaf lasts about 3 to 4 days in the fridge. Make sure to store it in an airtight container. This keeps it fresh and tasty. If you want to keep it longer, consider freezing it. Absolutely! You can mix the meatloaf ahead of time. Store it in the fridge for up to 24 hours. Just cover it well before baking. This can save you time on busy days. You can also bake it and reheat later for quick meals. This blog post covered all you need for a delicious meatloaf. We explored ingredients, tools, and preparation steps. I shared tips to keep your meatloaf moist and full of flavor. You learned about tasty variations and how to store leftovers properly. Remember, cooking is about trying new things and enjoying the process. Experiment with flavors and make it your own! Happy cooking!

Garlic Parmesan Chicken Meatloaf Flavorful and Easy

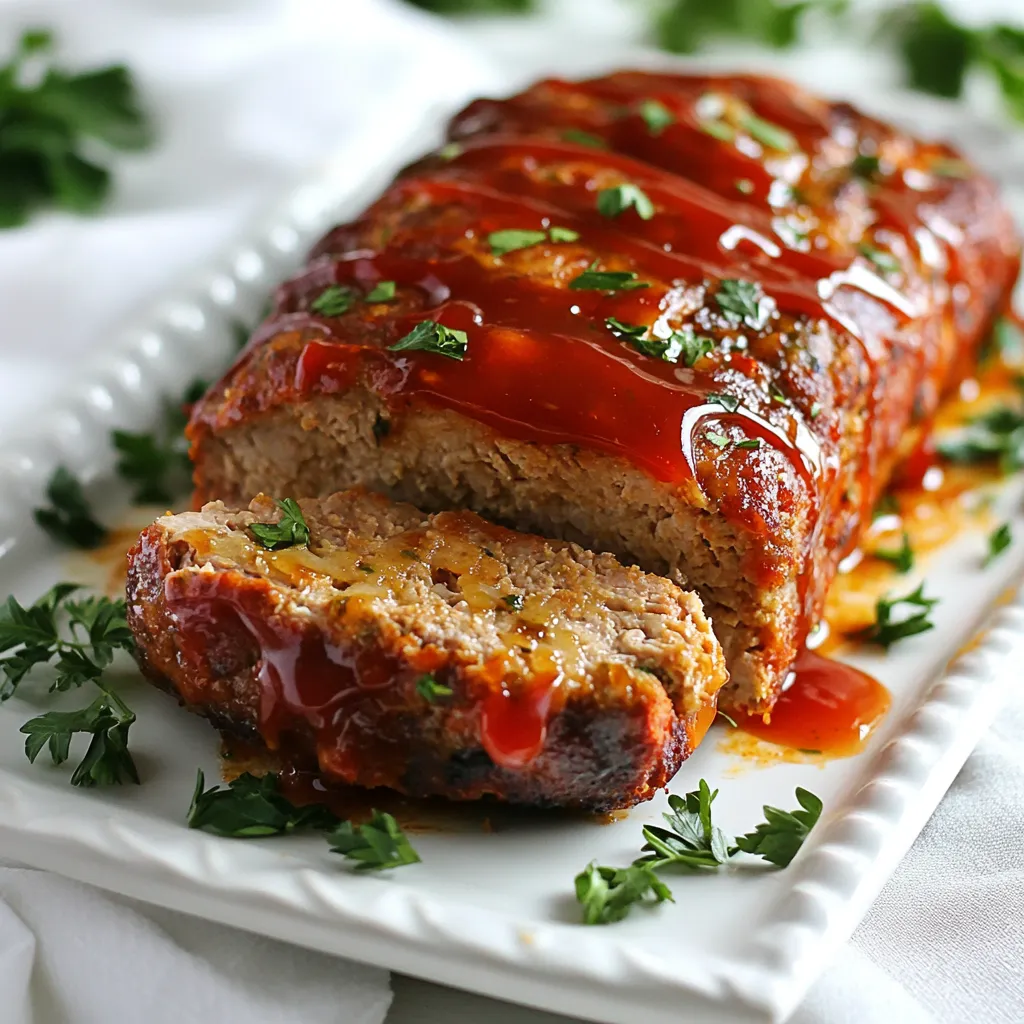
Looking for an easy and tasty meal? Garlic Parmesan Chicken Meatloaf is a winner! This dish is packed with flavor

- 1 cup couscous - 1 1/4 cups vegetable broth (or water) - 1 tablespoon olive oil - Zest of 1 lemon - 1/4 cup freshly grated Parmesan cheese - 2 tablespoons fresh parsley, chopped - Salt and pepper to taste - 1/2 teaspoon garlic powder - A pinch of red pepper flakes (optional) To make Lemon Parmesan Couscous, gather these simple ingredients. Couscous is a quick-cooking grain that absorbs flavors well. The vegetable broth adds depth, while olive oil keeps everything moist. The lemon zest brings a bright, fresh taste. Parmesan cheese adds a savory touch. Fresh parsley gives a nice color and flavor. You can also add other herbs like thyme or basil for more flavor. Chopped vegetables such as bell peppers or spinach can make it heartier. Feel free to get creative! - Other herbs (like thyme or basil) - Vegetables (e.g., bell peppers or spinach) - Gluten-Free Options: Use quinoa or rice instead of couscous. - Vegan Substitutions: Replace Parmesan with nutritional yeast or a vegan cheese. This recipe is flexible! You can easily adjust it to fit your needs. Whether you want to go vegan or gluten-free, you can still enjoy this tasty dish. Check the [Full Recipe] for more details! - Gather all ingredients: You need couscous, broth, olive oil, lemon zest, Parmesan, parsley, salt, pepper, garlic powder, and red pepper flakes. - Prepare your cooking space: Clear a counter area and get your tools ready, like measuring cups and a mixing bowl. - Heat the Broth: In a saucepan, bring the vegetable broth to a boil over medium heat. - Prepare the Couscous: In a large mixing bowl, mix the couscous with garlic powder. When the broth is boiling, pour it over the couscous. Cover the bowl tightly and let it sit for about five minutes. - Fluff and Add Ingredients: After five minutes, uncover the bowl. Use a fork to fluff the couscous. Stir in the olive oil, lemon zest, grated Parmesan cheese, and chopped parsley until well mixed. - Serving Suggestions: Transfer the couscous to a vibrant serving dish. Add extra parsley and a sprinkle of Parmesan on top. - Presentation Tips: Garnish with fresh lemon slices for a burst of color. Serve warm for the best taste. Enjoy this easy dish with your favorite protein or as a light meal. For the full recipe, check out the details above. - How to properly fluff couscous To fluff couscous, use a fork. Gently stir the grains after they absorb the liquid. This method helps separate the grains and adds a light texture. Avoid using a spoon, as it can mash the couscous. - Adjusting the consistency of couscous If your couscous is too dry, add a splash of warm water or broth. Stir well and let it sit for a few minutes. For a moister dish, add slightly more liquid when you first cook it. - Recommended herbs and spices Fresh herbs like parsley or basil brighten the dish. You can also add thyme for an earthy taste or dill for a unique flavor twist. Garlic powder adds depth, while red pepper flakes give it a hint of heat. - Ideas for other add-ins Try adding diced vegetables like bell peppers or spinach for more color and nutrition. Nuts like pine nuts or almonds add crunch. You can also mix in beans for extra protein. - Overcooking couscous Be careful not to overcook couscous. Follow the recommended cooking time, usually around five minutes. Overcooked couscous becomes mushy and loses its fluffy texture. - Using incorrect liquid ratios The right liquid ratio is key. For every cup of couscous, use 1 1/4 cups of broth or water. Too much liquid will make it soggy, while too little will leave it dry. Stick to this ratio for the best results. For detailed steps on making this dish, check out the Full Recipe. {{image_2}} You can change your Lemon Parmesan Couscous based on the seasons. In spring, add fresh asparagus and peas. This makes the dish bright and colorful. The crunch of the peas and the tender asparagus mix well with the couscous. In fall, try adding roasted butternut squash. The sweet flavor of the squash gives a warm touch. It adds a lovely texture that pairs well with the lemon and cheese. You can also change the style of your dish. For a Mediterranean twist, add olives and sun-dried tomatoes. This gives your couscous a salty and tangy flavor. The olives add a nice briny taste, while the tomatoes bring in sweetness. If you want an Asian fusion, add soy sauce and sesame oil. This adds a savory depth that is both unique and tasty. The sesame oil brings a nutty aroma that elevates the dish. This couscous works great as a side dish. It pairs well with grilled chicken or fish. The bright lemon taste cuts through rich proteins nicely. You can also make it a hearty salad. Just mix in some greens, like spinach or arugula, and protein. This makes it a full meal. You can enjoy it warm or cold, making it perfect for any time of year. For the full recipe, check out the complete guide to making this delightful dish! To store leftovers, place the couscous in an airtight container. This keeps it fresh and prevents it from drying out. You can enjoy your Lemon Parmesan Couscous for up to three days in the fridge. After that, it may lose flavor and texture. You can freeze couscous for longer storage. First, let it cool completely. Then, place it in a freezer-safe bag or container. Squeeze out excess air to avoid freezer burn. When you want to eat it, thaw it overnight in the fridge. For quick use, you can also microwave it directly from the freezer. To reheat, you can use a microwave or stovetop. If microwaving, add a splash of water to keep it moist. Heat it in short bursts, stirring in between. On the stovetop, warm it gently in a pan over low heat. This helps maintain the flavor and texture. Enjoy your delicious couscous as if it were freshly made! Cooked couscous can last about 3 to 5 days in the fridge. Make sure to store it in an airtight container. This will help keep it fresh and prevent it from drying out. Yes, you can make Lemon Parmesan Couscous ahead of time. Prepare it and let it cool before storing. You can easily reheat it later for a quick meal. Couscous is not gluten-free. It is made from wheat, so those with gluten sensitivities should avoid it. If you need gluten-free options, consider using quinoa or rice instead. Absolutely! You can use nutritional yeast or a vegan cheese. These options will give you a similar flavor without animal products. Serve Lemon Parmesan Couscous warm or at room temperature. You can garnish it with extra lemon zest, parsley, or even toasted nuts. This adds a nice touch of color and crunch. For the full recipe, check out the detailed instructions above. You learned about making Lemon Parmesan Couscous using simple steps and tasty ingredients. We covered cooking techniques, seasonal twists, and even storage tips. Couscous is fun to customize, so don’t be afraid to try new flavors. Remember, the key is to keep it fluffy and avoid overcooking. With these tips, you can create a dish that’s not just easy, but also delicious and versatile. Enjoy experimenting with couscous in your kitchen!

Lemon Parmesan Couscous Tasty and Simple Recipe

Looking for a quick and tasty dish? My Lemon Parmesan Couscous recipe is just what you need. With simple ingredients

- 2 boneless, skinless chicken breasts - 3 cups fresh broccoli florets - 2 cups fresh spinach leaves - 4 cloves garlic, minced - 2 tablespoons olive oil - 1 tablespoon soy sauce - 1 teaspoon lemon juice - 1 teaspoon paprika - Salt and pepper to taste I use chicken breasts for this dish because they are lean and cook quickly. Broccoli and spinach add color and nutrition. Garlic gives a strong flavor that everyone loves. You can season with salt, pepper, and paprika for a nice kick. - Red pepper flakes for heat - Fresh parsley, chopped, for garnish If you like heat, add red pepper flakes. They give a nice kick to the meal. Fresh parsley brightens up the dish and adds a pop of color. For a bit of depth, you can add soy sauce and lemon juice, too. These flavors blend well with the chicken and veggies. For the full recipe, check out the detailed instructions. Cutting and seasoning chicken First, cut the chicken breasts into small, bite-sized pieces. This helps them cook quickly and evenly. Next, sprinkle salt, pepper, and paprika on the chicken. This adds flavor and color. Let the chicken sit for a few minutes to absorb the seasoning. Preparing broccoli and spinach While the chicken rests, wash the broccoli and cut it into florets. Make sure the pieces are not too big. Then, rinse the spinach leaves and shake off excess water. Both greens add nutrients and color to our dish. Sautéing chicken Heat one tablespoon of olive oil in a large skillet over medium heat. Once the oil is hot, add the seasoned chicken pieces. Cook for about 5-7 minutes, stirring often. You want the chicken to turn golden brown and be fully cooked. Once done, remove it from the skillet and set it aside. Stir-frying garlic, broccoli, and spinach In the same skillet, add another tablespoon of olive oil. Then, toss in the minced garlic. Sauté it for about 30 seconds until it smells great. Be careful not to burn it! Next, add the broccoli florets and stir-fry for 3-4 minutes. They should be bright green and just tender. After that, add the spinach and stir for 2 more minutes until it wilts. Adding cooked chicken back to the skillet Now, return the cooked chicken to the skillet. Pour in the soy sauce and lemon juice. Mix everything well to combine the flavors. Let it cook for another 2-3 minutes to heat through. Final seasoning adjustments Taste the dish and adjust the seasoning. You can add more salt, pepper, or even red pepper flakes for some heat. Once it’s just right, remove it from heat. For a touch of freshness, sprinkle chopped parsley on top before serving. This beautiful Garlic Chicken with Broccoli and Spinach is now ready to enjoy! For more details, check out the Full Recipe. To ensure your chicken is cooked perfectly, use a meat thermometer. The chicken should reach 165°F. This way, you avoid undercooking or overcooking. Cut the chicken into small pieces. Smaller pieces cook faster and more evenly. To keep broccoli bright green, do not overcook it. Stir-fry for only 3-4 minutes. A splash of cold water at the end can help. This stops the cooking process and preserves color. For plating ideas, serve the Garlic Chicken with Broccoli and Spinach on a large platter. This makes it look inviting. Drizzle some extra olive oil for shine. Add lemon wedges for a fresh touch. Complementary side dishes include rice or quinoa. They soak up the sauce well. A simple salad also pairs nicely. It adds a refreshing crunch to your meal. For the full recipe, check out the Garlic Chicken with Broccoli and Spinach Delight. {{image_2}} You can easily change the protein in this dish. Try using tofu or shrimp instead of chicken. Tofu gives a nice texture. Shrimp cooks quickly and adds great flavor. For veggies, feel free to swap in bell peppers or carrots. Bell peppers add sweetness and color. Carrots give a nice crunch and sweetness too. To make this dish even better, add fresh herbs like basil or thyme. These herbs bring a bright taste. You can also try spices like cumin or coriander for a new twist. Boosting umami flavor is simple. Add a splash of fish sauce or a sprinkle of nutritional yeast. These ingredients deepen the taste and make it richer. Enjoy experimenting with these swaps and enhancements! For the full recipe, check out the Garlic Chicken with Broccoli and Spinach Delight. To store leftovers, let your garlic chicken cool down first. This step keeps the moisture locked in. Once cooled, place it in an airtight container. You can keep it in the fridge for up to four days. If you want to store it longer, consider freezing it. It keeps well in the freezer for about three months. Just make sure to use a freezer-safe container. Label it with the date to track freshness. When it’s time to enjoy your leftovers, reheating is key. The best method is to use the stove. Simply place the chicken and veggies in a skillet over low heat. Add a splash of water or broth to help steam it. Stir occasionally until heated through. This keeps your dish juicy and tasty. You can also use the microwave, but be careful not to overcook it. Heat in short bursts, stirring in between, for the best results. Enjoy your meal just as much as the first time! Can I use frozen chicken or vegetables? Yes, you can use frozen chicken and vegetables. Just remember to thaw them first. Frozen veggies may cook faster, so keep an eye on them. What is the best way to make this dish spicy? To add spice, use red pepper flakes or a dash of hot sauce. You can adjust the amount to suit your taste. How do I make Garlic Chicken with Broccoli and Spinach gluten-free? To make it gluten-free, swap soy sauce for a gluten-free version. Check labels to ensure all ingredients are safe. What is the best way to prevent the chicken from drying out? Cook the chicken over medium heat. Don't overcook it; aim for 5-7 minutes until it's just done. This keeps it juicy. How can I easily prep this dish ahead of time? You can chop the chicken and veggies a day before. Store them in the fridge. This saves time when you're ready to cook. For the full recipe, follow the steps carefully to create a tasty meal. This blog post covered how to make a tasty Garlic Chicken with Broccoli and Spinach dish. We discussed key ingredients like chicken, veggies, and garlic. We shared step-by-step instructions on cooking and combining these ingredients. I also offered helpful tips for perfect cooking and tasty serving ideas. In the end, you can easily enjoy this dish in many ways. With a few ingredient swaps or extra spices, the flavors can shine. This meal is both healthy and satisfying. Happy cooking!

Garlic Chicken with Broccoli and Spinach Simple Recipe

Are you looking for a quick and healthy meal? This Garlic Chicken with Broccoli and Spinach recipe is your answer!

- 3 cups cooked jasmine rice (preferably chilled) - 6 cloves garlic, minced - 2 tablespoons vegetable oil - 1 tablespoon sesame oil - 2 green chilies, chopped (adjust for spice level) - 1 small onion, finely chopped - 1 cup mixed vegetables (peas, carrots, corn) - 3 tablespoons soy sauce - 1 tablespoon oyster sauce (or mushroom sauce for vegetarian) - 2 green onions, chopped (for garnish) - Salt and pepper, to taste To make Hot Garlic Fried Rice, you need the right ingredients. Start with jasmine rice. It gives a great texture. I recommend using chilled rice. It helps keep the grains separate. Garlic is key in this dish. Use fresh garlic for the best flavor. You’ll need minced garlic, which adds a strong taste and aroma. Next, you'll need oils for frying. Vegetable oil works best, but sesame oil adds a nice touch. For heat, use green chilies. Adjust the amount based on your spice level. One small onion brings sweetness and depth. Mixed vegetables add color and nutrition. You can use peas, carrots, and corn. Soy sauce and oyster sauce (or mushroom sauce for vegetarians) bring umami. Finish with green onions for a fresh taste. Season with salt and pepper to balance the flavors. You can find all these ingredients and the full recipe above to create this simple and flavorful dish. - Heat 2 tablespoons of vegetable oil and 1 tablespoon of sesame oil in a large wok. - Add 6 minced garlic cloves and 2 chopped green chilies to the hot oil. Stir-fry them for about 30 seconds. You want them to smell good but not brown. - Toss in 1 small chopped onion and sauté until it turns clear, about 2-3 minutes. - Add 1 cup of mixed vegetables, like peas, carrots, and corn. Stir-fry for 2 minutes until they look bright and tender. - Push the veggies to one side of the wok. Increase the heat. - Add 3 cups of chilled jasmine rice to the other side. Break any clumps with a spatula. Stir-fry the rice for 3-4 minutes until it heats up. - Pour in 3 tablespoons of soy sauce and 1 tablespoon of oyster sauce. Mix everything well. Make sure the rice is fully coated with the sauces. - Season with salt and pepper to taste. Stir-fry for another minute to blend the flavors. - Remove from heat. Garnish with 2 chopped green onions before serving. Enjoy your Hot Garlic Fried Rice! For the complete process, check the Full Recipe. For hot garlic fried rice, jasmine rice is the best choice. It has a light, fluffy texture that you want. Other rice types, like basmati or long-grain rice, can work but may be too dry. Jasmine rice sticks together well, making it easy to stir-fry. Always use chilled rice. Freshly cooked rice is too sticky and clumps together. Chill your rice in the fridge for a few hours or overnight for the best results. To make the garlic flavor shine, use fresh garlic. Mince it finely for a strong taste. You can also let the garlic cook until golden brown. This adds a nutty flavor. For more heat, add more green chilies or even a dash of chili flakes. Experiment with soy sauce and oyster sauce amounts for depth. Tasting as you cook helps balance these flavors perfectly. Heat is key when stir-frying rice. Start with medium-high heat to warm your oils. When you add garlic and chilies, they need high heat to release their aroma. Once you add the rice, increase the heat to high. This helps fry the rice quickly, giving it a nice texture. Stir constantly to avoid burning. A good wok or large skillet will help distribute the heat evenly. {{image_2}} For a vegetarian twist, swap the oyster sauce with mushroom sauce. It gives a rich umami flavor. You can also use soy sauce alone, but the mushroom sauce really shines. Adding tofu is a great way to boost protein. Firm tofu works best. Cut it into small cubes, then sauté until golden brown. Mix it in with your rice. You can also try tempeh or seitan for more texture and taste. If you crave more heat, consider these spicy additions. Add more green chilies or use bird’s eye chilies for a real kick. You can also mix in some chili flakes or a drizzle of sriracha. For a unique flavor, try adding gochujang, a Korean chili paste. It adds depth and a nice sweetness. Balance the heat with a touch of sugar if needed. This dish pairs well with many sides. Serve it alongside grilled chicken or shrimp for a complete meal. You can also enjoy it with a fresh salad to balance the richness. If you love soup, a light miso soup is a great match. It enhances the meal without overpowering the flavors. Consider a side of pickled vegetables for a tangy contrast. For the full recipe, check out the spicy hot garlic fried rice section. Enjoy your cooking! To keep your hot garlic fried rice fresh, store it in an airtight container. Place the container in the fridge. It can last up to three days. Make sure to cool the rice before sealing it. This helps to prevent moisture buildup. When it's time to eat the leftovers, reheat the rice in a non-stick pan. Add a splash of water or oil to keep it moist. Heat it over medium heat for about five minutes. Stir often to ensure even warming. This helps maintain the flavor and texture. If you want to save some for later, you can freeze the fried rice. Allow it to cool completely first. Then, transfer it to a freezer-safe bag. Squeeze out as much air as possible, then seal it. It can last up to three months. To thaw, place it in the fridge overnight before reheating. The best rice for fried rice is jasmine rice. It's fluffy and has a great texture. Other good options are basmati and long-grain rice. Avoid using sticky rice or short-grain rice. These types can turn mushy when cooked. Cold, day-old rice works best. It helps keep the grains separate. Yes, you can make Hot Garlic Fried Rice ahead of time. Cook the rice and let it cool. Store it in the fridge for up to three days. You can also prep the garlic and veggies in advance. Just stir-fry everything fresh when you're ready to eat. This way, your dish stays tasty and warm. You can add many things to enhance Hot Garlic Fried Rice. Here are some popular choices: - Cooked chicken or shrimp for protein - Tofu for a vegetarian option - Bell peppers for crunch - Peas or corn for sweetness - Fresh herbs like cilantro or basil for freshness Mix and match these to suit your taste! You can easily adjust the spice level in Hot Garlic Fried Rice. If you want it milder, use fewer green chilies. You can also remove the seeds from the chilies. For more heat, add extra chilies or some chili sauce. Taste as you go to find the right balance for you. Hot garlic fried rice is a simple yet tasty dish. You learned about its key ingredients and step-by-step cooking. From choosing the right rice to flavor tips, there's so much to explore. You can even add your favorite proteins or spices to make it your own. Remember, this dish is easy to store and reheat, making it perfect for meal prep. Enjoy experimenting with this recipe, and make it a staple in your kitchen. Happy cooking!

Hot Garlic Fried Rice Simple and Flavorful Dish

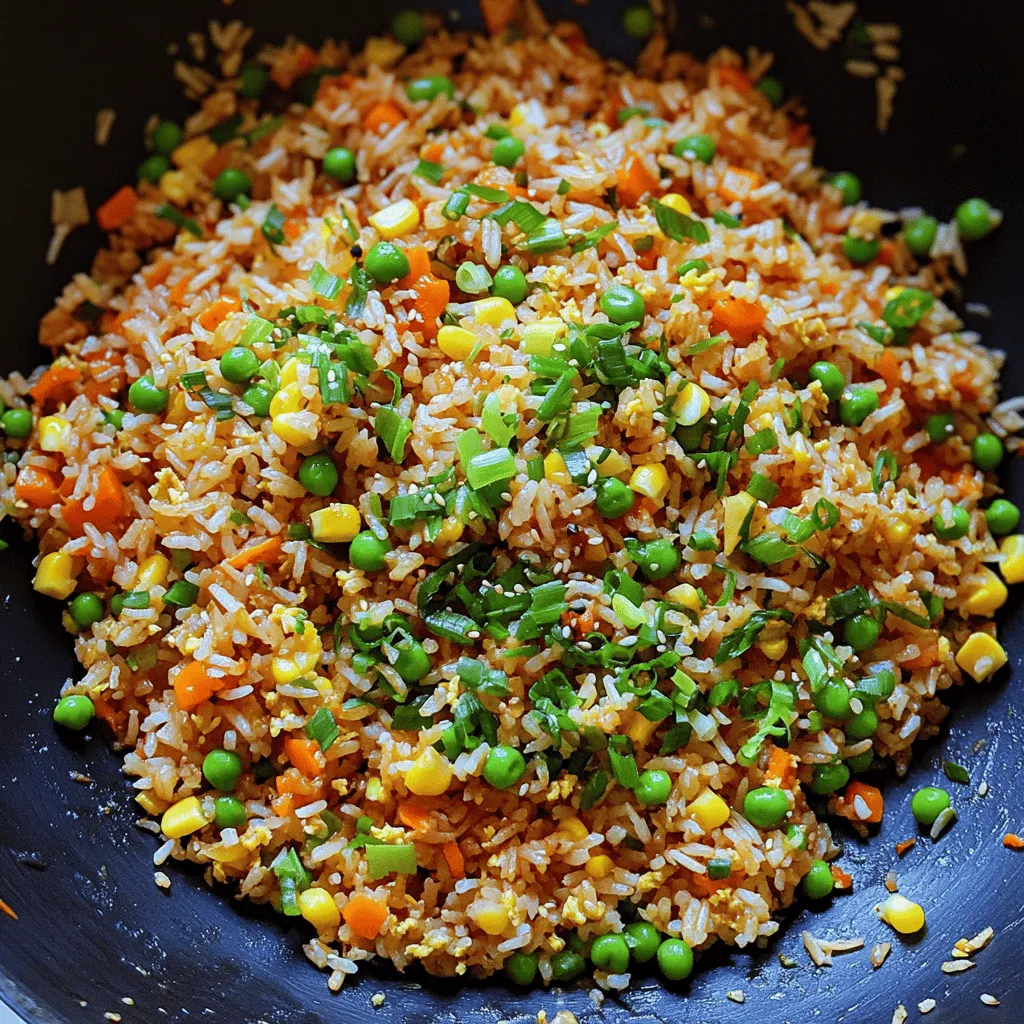
If you’re craving a quick and tasty meal, Hot Garlic Fried Rice is your answer. This simple dish bursts with

To make Easy Italian Pasta Salad, gather these key ingredients: - 8 ounces fusilli or rotini pasta - 1 cup cherry tomatoes, halved - 1 cup cucumber, diced - 1/2 cup bell pepper, diced (any color) - 1/3 cup red onion, finely chopped - 1 cup mozzarella balls or cubed mozzarella cheese - 1/2 cup black olives, sliced - 1/4 cup fresh basil leaves, chopped - 3 tablespoons olive oil - 2 tablespoons red wine vinegar (or lemon juice) - 1 teaspoon dried oregano - Salt and pepper to taste You can also add these optional ingredients for extra flavor: - Artichoke hearts - Sun-dried tomatoes - Pepperoncini - Parmesan cheese If you need alternatives, here are some great swaps: - Use penne or elbow macaroni instead of fusilli or rotini. - Swap mozzarella for feta cheese or goat cheese for a tangy twist. For vegetarian and vegan adjustments: - Use a plant-based cheese for a vegan option. - Replace the pasta with zucchini noodles for a low-carb dish. By making these simple changes, you can tailor the salad to fit your taste and dietary needs. To start, bring a large pot of salted water to a boil. Use about one tablespoon of salt for every 4 quarts of water. This helps flavor the pasta. Add 8 ounces of fusilli or rotini pasta. Cook it according to the package instructions, usually around 8-10 minutes. I suggest checking it a minute early for that perfect al dente texture. Al dente means the pasta is tender but still has a slight bite. Once cooked, drain the pasta in a colander. Rinse it under cold water to stop the cooking. This also helps to cool the pasta quickly. While the pasta cooks, chop your vegetables. Use a sharp knife for quick cuts. Slice 1 cup of cherry tomatoes in half and dice 1 cup of cucumber. For some crunch, chop 1/2 cup of bell pepper, any color you like. A red onion adds a nice kick, so finely chop 1/3 cup of it. Don’t forget the olives! Slice 1/2 cup of black olives for a salty bite. This mix of colors and textures will make your salad pop. Now, it’s time to mix everything. In a large bowl, combine the cooked pasta, chopped vegetables, and 1 cup of mozzarella balls. Make sure the pasta is cool to avoid cooking the veggies. In a small bowl, whisk together 3 tablespoons of olive oil, 2 tablespoons of red wine vinegar, 1 teaspoon of dried oregano, and salt and pepper. Drizzle the dressing over the salad. Toss gently to combine. This keeps the pasta from getting mushy. Finally, add 1/4 cup of fresh basil leaves and give it one last toss. For the best flavor, let it sit for about 10 minutes before serving. For the full recipe, check out the earlier section. To boost flavor in your pasta salad, try using fresh herbs. Fresh basil, parsley, or even dill can make your dish pop. You can also add a pinch of red pepper flakes for a little heat. For extra flavor, consider adding garlic powder or a squeeze of lemon juice. These simple tweaks turn a good salad into a great one. Prep your ingredients ahead of time. Chop the veggies the night before. This makes assembly quick. You can also cook your pasta in advance. Store it in the fridge with a bit of oil to prevent sticking. If you’re in a hurry, use store-bought items like pre-chopped veggies or rotisserie chicken to save even more time. Serve your salad in a large, bright bowl for a colorful display. For a fun twist, layer the salad in clear cups to show off the colors. Garnish with extra basil leaves or a sprinkle of cheese on top. This gives the dish a fresh look. You can also drizzle some olive oil on top for a shiny finish. These small touches make your dish look as good as it tastes. {{image_2}} You can easily change the protein in your pasta salad. Adding grilled chicken makes it hearty. Salami adds a nice spice. Shrimp gives a fresh taste. You can even use chickpeas for a plant-based option. The choice is yours based on what you love! For seasonal vegetables, think about what’s fresh. In spring, add asparagus or peas. In summer, use zucchini or bell peppers. Fall brings in roasted squash. You can swap out veggies based on what you find at the market. You can choose between homemade or store-bought dressings. Homemade dressings taste fresh and bright. A simple mix of olive oil, vinegar, and spices is quick to whip up. Store-bought options save time but check ingredients for quality. For a twist, try citrus-based dressings. Lemon or lime juice brightens the salad. Creamy dressings add a rich touch. You can make a yogurt-based dressing for a lighter option. Each dressing brings its own unique flavor to the salad. Check the full recipe to create your perfect Easy Italian Pasta Salad. To keep your Easy Italian Pasta Salad fresh, use an airtight container. This helps prevent moisture loss and keeps flavors intact. Store the salad in the fridge right after serving. It stays good for up to three days. After that, the veggies may start to get mushy. You can serve this salad cold, which is great for hot days. If you want to warm it up, do so gently in a pan. Keep the heat low to avoid overcooking the pasta. Adding a splash of olive oil can help keep the flavors fresh. If you’d like, you can also toss in fresh herbs after warming. This adds brightness back to the dish. Enjoy your pasta salad, whether hot or cold! Yes, you can make this pasta salad ahead. To keep it fresh, store it in an airtight container. Place it in the fridge. It tastes great for up to three days. If you make it the night before, the flavors blend better. Just remember to add fresh basil right before serving for the best taste. I recommend using short pasta shapes. Fusilli, rotini, or penne work great. They hold the dressing well and mix easily with veggies. You can also try farfalle for a fun look. Just ensure you cook it al dente for the best texture. To make this salad gluten-free, use gluten-free pasta. Many brands offer options that taste great. You can also check for gluten-free olives and cheese. Fresh veggies are naturally gluten-free, so feel free to use them as you like. Absolutely! Adding protein makes the salad more filling. You can use grilled chicken, diced salami, or canned tuna. Chickpeas are also a great option for a vegetarian boost. Just mix in your choice after combining the veggies and pasta. To sum up, this article covered how to make an Easy Italian Pasta Salad. We explored the key ingredients, including both required and optional options, to add more flavor. I shared tips for cooking pasta perfectly and preparing vegetables efficiently. Remember, mixing well and avoiding mushy pasta makes a big difference. You can enhance taste with herbs and use shortcuts for easier prep. Lastly, feel free to mix things up with different pasta styles and dressings. This dish is great for sharing and perfect for any occasion. Enjoy your salad!

Easy Italian Pasta Salad in 20 Minutes Delight

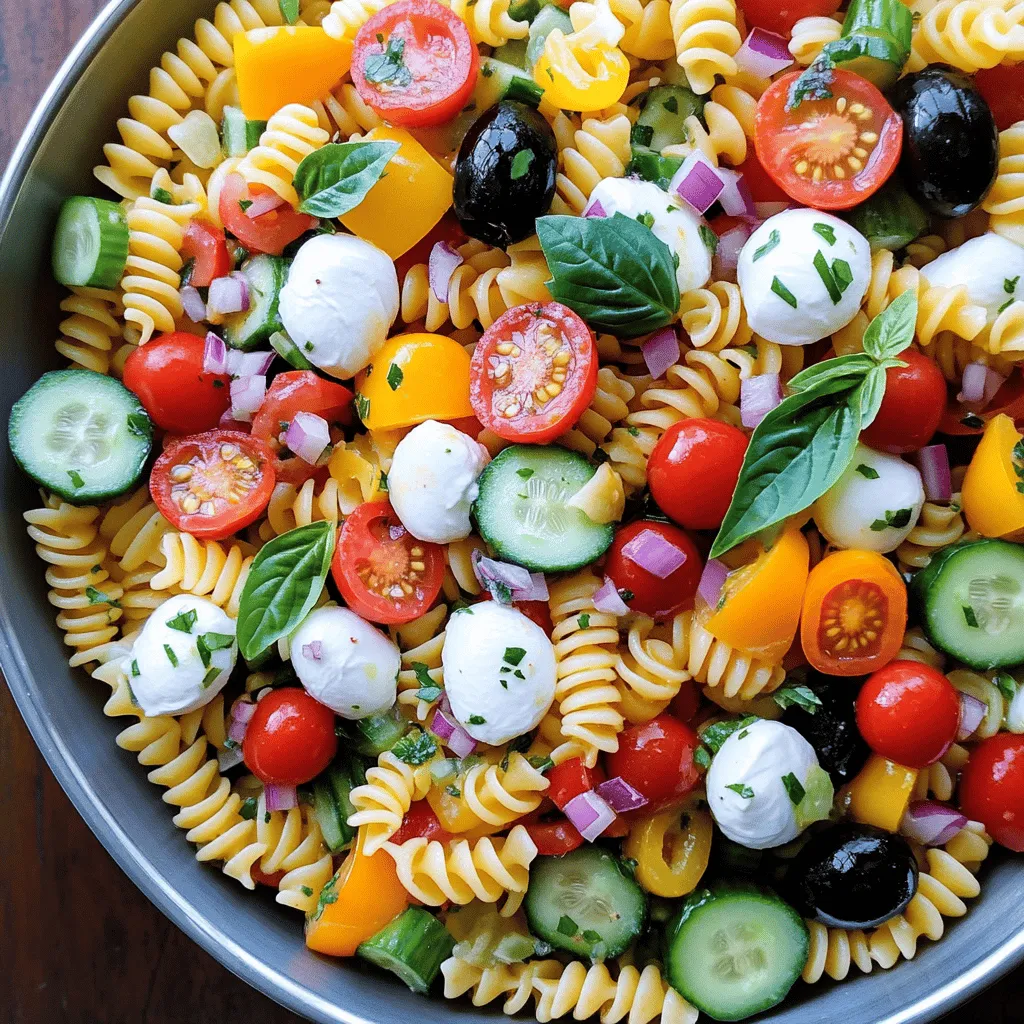
Looking for a tasty dish that’s quick and easy? Let me show you how to make an Easy Italian Pasta

To make Southern-Style Honey Butter Cornbread Poppers, you need some simple ingredients. Each one plays a key role in making these poppers taste amazing. Here’s what you will need: - 1 cup cornmeal - 1 cup flour - 1 tablespoon baking powder - 1/2 teaspoon salt - 1/4 cup granulated sugar - 1 cup buttermilk - 2 large eggs - 1/4 cup unsalted butter, melted - 1/2 cup sweet corn kernels - 1/4 cup honey - 1/4 cup additional butter for honey butter These ingredients come together to create a warm, fluffy, and sweet treat. The cornmeal gives your poppers that classic cornbread flavor. The sweet corn kernels add a lovely burst of sweetness. Buttermilk makes the texture soft and moist. For the honey butter, mixing honey with softened butter creates a rich topping that pairs perfectly with the poppers. You can find the full recipe to guide you through the steps to combine these ingredients and bake your delicious cornbread poppers. - Preheat your oven to 400°F (200°C). - Grease a mini muffin tin well. This helps the poppers come out easily. - In a large bowl, whisk together the cornmeal, flour, baking powder, salt, and sugar. - Make sure there are no lumps. This mix is the base of your poppers. - In another bowl, combine the buttermilk, eggs, and melted butter. - Stir until smooth. This makes your batter rich and tasty. - Slowly add the wet mix to the dry mix. - Fold in the sweet corn gently. - Spoon the batter into the greased muffin tin, filling each cup about 3/4 full. - Bake for 12-15 minutes. Check doneness by inserting a toothpick. It should come out clean. - In a small bowl, mix the softened butter with honey. - Stir until smooth. This sweet spread adds a great finish to your poppers. For the full recipe, check out the detailed steps above. Enjoy the process and savor the flavors! To get the best texture in your cornbread poppers, avoid overmixing the batter. Mix until you see no dry spots, but leave some lumps. This keeps them light and fluffy. Aim for a golden top by checking your oven temperature. If you notice uneven browning, rotate the pan halfway through baking. Serve your cornbread poppers warm for the best taste. They pair well with chili or soups. For a sweet touch, drizzle more honey on top. You can also serve them with butter or jam for added flavor. Try them as a side at barbecues or family dinners. To avoid dryness, do not bake the poppers too long. Check for doneness with a toothpick. If it comes out clean, they are ready. If you find them undercooked, bake for a few more minutes. Always keep an eye on them, as ovens vary in heat. {{image_2}} You can make your Southern-Style Honey Butter Cornbread Poppers even more exciting. Try adding cheddar cheese and jalapeño. This mix gives a nice kick and a rich flavor. Just fold in 1 cup of shredded cheddar and 1 diced jalapeño into the batter. You can also create herb-infused versions. Use fresh herbs like chives or thyme for a fresh taste. Add about 2 tablespoons of chopped herbs to the batter. These simple tweaks can make your poppers stand out. If you want a gluten-free option, it’s easy to substitute the flour. Use gluten-free all-purpose flour instead of regular flour. This swap keeps the taste and texture close to the original. Just make sure your baking powder is also gluten-free. This ensures everyone can enjoy these tasty poppers without worry. Do you like your cornbread poppers sweeter or less sweet? You can easily modify honey levels in the recipe. If you want them sweeter, add up to 1/2 cup of honey. For a less sweet treat, cut the honey to 2 tablespoons. This way, you can tailor the taste to fit your preference. Remember, the right amount of sweetness can make all the difference in your cornbread poppers. Check out the Full Recipe for more details! To keep your Southern-Style Honey Butter Cornbread Poppers fresh, store them properly. I recommend placing them in an airtight container. This keeps them moist and tasty. You can store them at room temperature for up to two days. If you want them to last longer, refrigerate them. They can stay in the fridge for about a week. Reheating is key to enjoying these poppers again. You can use the oven or microwave. For the oven, preheat it to 350°F (175°C). Place the poppers on a baking sheet and heat for about 5-7 minutes. This keeps them crispy on the outside. For the microwave, place a popper on a plate and heat for about 15-20 seconds. This method works well if you want a quick snack. Yes, you can freeze cornbread poppers! They freeze well and are easy to store. Place them in a freezer-safe bag or container. They can last up to three months in the freezer. When you want to eat them, move them to the fridge to thaw overnight. After thawing, reheat them using the methods mentioned above. You’ll have fresh-tasting poppers ready to enjoy! For the full recipe, check out the earlier section. Southern-Style Honey Butter Cornbread Poppers stay fresh for about three days. Store them in an airtight container. This keeps them moist and tasty. If you want them to last longer, consider freezing them. Yes, you can use regular milk instead of buttermilk. If you want to mimic buttermilk, add a tablespoon of vinegar or lemon juice to the milk. Let it sit for five minutes before using. This creates a similar tangy flavor. You can replace honey with maple syrup or agave nectar. Both options bring sweetness to the poppers. Choose what you like best. You can also try brown sugar for a different taste. Yes, these cornbread poppers freeze well. Allow them to cool completely. Then, place them in a freezer bag or container. They can last up to three months in the freezer. To enjoy, thaw them overnight in the fridge. You can check if the poppers are done by inserting a toothpick in the center. If it comes out clean, they are ready. The tops should also look golden brown and firm. Yes, you can make these cornbread poppers ahead of time. Bake them, then store in an airtight container. Reheat them before serving. This way, you can enjoy fresh poppers without last-minute stress. For the full recipe, check out the detailed steps above. You now know how to make delicious Southern-Style Honey Butter Cornbread Poppers. We looked at the key ingredients, step-by-step instructions, and tips for perfecting your poppers. Remember to avoid overmixing for the best texture. Feel free to experiment with flavors to fit your taste. Store leftovers properly and enjoy them later. With these tips, you’ll impress everyone with your cornbread poppers. Enjoy every bite!

Southern-Style Honey Butter Cornbread Poppers Delight

Welcome to a treat that will make your taste buds dance: Southern-Style Honey Butter Cornbread Poppers! These fluffy, sweet bites

To bake these delightful cookies, gather the following ingredients: - 2 cups all-purpose flour - 1 teaspoon baking powder - 1/2 teaspoon baking soda - 1/4 teaspoon salt - 1/2 cup unsalted butter, softened - 1 cup granulated sugar - 1 large egg - 1 tablespoon grated orange zest - 1/4 cup fresh orange juice - 1 teaspoon vanilla extract - 1/2 cup powdered sugar (for glaze) - 1-2 tablespoons fresh orange juice (for glaze) Each ingredient plays a key role. The flour gives structure, while the butter adds richness. The egg helps bind the mix. Orange zest and juice bring a bright, zesty flavor that makes these cookies stand out. You will need a few tools to make your baking easier: - Mixing bowls (medium and large) - Whisk or electric mixer - Cookie scoop or tablespoon - Baking sheet - Parchment paper - Wire rack These tools help you mix, scoop, and bake your cookies with ease. A good mixer makes it simple to beat butter and sugar. Parchment paper helps cookies bake evenly and prevents sticking. Choosing the right oranges is key to great flavor. Here are some tips for picking fresh oranges: - Look for firm oranges with smooth skin. - Choose oranges that feel heavy for their size. - Check for a sweet scent; it means they are ripe. - Avoid any with soft spots or blemishes. Fresh oranges give the best juice and zest. They add a burst of flavor to the cookies, making them even more enjoyable. When using fresh oranges, your cookies will taste bright and delicious! Start by preheating your oven to 350°F (175°C). This helps the cookies bake evenly. Next, line a baking sheet with parchment paper. This step makes it easy to lift your cookies off the sheet later. Use a large baking sheet for about 24 cookies. If you have more, bake in batches. In a medium bowl, mix together the dry ingredients. Combine 2 cups of all-purpose flour, 1 teaspoon of baking powder, 1/2 teaspoon of baking soda, and 1/4 teaspoon of salt. Set this bowl aside. In another large bowl, beat 1/2 cup of softened unsalted butter and 1 cup of granulated sugar. Mix until it’s light and fluffy. Then, add 1 large egg to the butter mix. Blend until smooth. Next, mix in 1 tablespoon of grated orange zest, 1/4 cup of fresh orange juice, and 1 teaspoon of vanilla extract. Stir well to combine. Finally, fold in the dry mixture. Do this gently to avoid over-mixing. Use a tablespoon or cookie scoop to drop dough onto the prepared baking sheet. Leave space between each cookie. Bake them in the preheated oven for about 10-12 minutes. The edges should look golden, while the centers may seem soft. As they cool, they will firm up. Once baked, remove the cookies from the oven. Let them cool for a few minutes on the baking sheet. After that, transfer them to a wire rack for complete cooling. While they cool, prepare the glaze by mixing 1/2 cup of powdered sugar with 1-2 tablespoons of fresh orange juice. Drizzle this glaze over the cooled cookies for a touch of sweetness. For the full recipe, check out the detailed instructions. To get the best texture in your cookies, start with room-temperature butter. This makes it easier to cream with sugar. Creaming adds air, making your cookies light and fluffy. Use fresh orange juice and zest for a bright flavor. Mix dry and wet ingredients gently. Over-mixing can make cookies tough. Stop mixing as soon as you see no dry flour. Let your cookies cool on a wire rack. This helps keep them soft and moist. One common mistake is not measuring ingredients correctly. Use dry measuring cups for flour and sugar. Always level off the top with a knife for accuracy. Another mistake is baking at the wrong temperature. An oven thermometer can help you check if it's accurate. Don’t skip the parchment paper. It prevents sticking and helps cookies bake evenly. Lastly, resist the urge to open the oven door too soon. This can cause cookies to collapse. To tell if your cookies are ready, look for golden edges. The centers will be soft but not wet. They will firm up as they cool. If you want to be sure, use a toothpick. It should come out clean or with a few moist crumbs. For the best results, follow the baking time in the Full Recipe. Remember, every oven is different. Adjust your time if needed for perfect cookies. {{image_2}} You can easily change the taste of your moist orange cookies. Adding chocolate chips or nuts gives a fun twist. I often use semi-sweet chocolate chips for a nice contrast to the citrus. Just fold in 1 cup of chocolate chips after mixing your dough. If you prefer nuts, chopped walnuts or pecans work well. They add crunch and flavor. Use about 1/2 cup of your chosen nuts. This choice makes a great cookie even better. If you have dietary needs, you can adjust the recipe. For a gluten-free option, use a gluten-free flour blend instead of all-purpose flour. Make sure it has xanthan gum for better texture. If you want a dairy-free treat, swap the butter for coconut oil or vegan butter. You can also use a flax egg in place of the regular egg. Simply mix 1 tablespoon of ground flaxseed with 2.5 tablespoons of water. Let it sit for a few minutes to thicken. Get creative with flavors! You can mix different zests into your dough. Lemon or lime zest pairs well with orange. For a spiced version, add a pinch of cinnamon or nutmeg. You can also try adding a splash of almond extract for a unique taste. If you want a tropical twist, mix in shredded coconut. These ideas let you explore new flavors while keeping that moist orange cookie base. Check out the Full Recipe for more inspiration! To keep your moist orange cookies fresh, store them in an airtight container. You can use a cookie jar, a plastic container, or a resealable bag. Make sure to place parchment paper between layers of cookies. This helps to prevent sticking and keeps your cookies intact. Store them at room temperature for the best taste. Freezing your cookies is easy! First, let them cool completely. Then, place them in a single layer on a baking sheet. Freeze them for about an hour. Once frozen, transfer the cookies to a freezer bag. Make sure to remove as much air as possible before sealing. These cookies can last up to three months in the freezer. When you're ready to enjoy them, just thaw at room temperature for a quick treat. Moist orange cookies can last up to a week at room temperature. After that, they may start to lose their freshness. If you want to keep them longer, freezing is your best option. Always check for signs of spoilage, like a change in smell or texture. To maintain their quality, avoid storing them in direct sunlight or near heat sources. For more details on the recipe, you can find the Full Recipe linked here. To make cookies more moist, add more fat. Use butter or oil. You can also add extra egg yolks. They help keep cookies soft. Another way is to use brown sugar instead of white sugar. Brown sugar has more moisture. Lastly, don’t overbake your cookies. Take them out when they are just set. Yes, you can use bottled orange juice. Just make sure it’s 100% pure juice. Fresh juice has a brighter taste. However, bottled juice can work in a pinch. Keep in mind that fresh juice has more flavor. If you use bottled juice, add a bit more grated orange zest. This will boost the flavor. If your cookie dough is too sticky, add more flour. Start with one tablespoon at a time. Mix it in until the dough feels better. You can chill the dough for 30 minutes too. This helps firm it up. If it’s still sticky, dust your hands with flour while shaping. These moist orange cookies are fun to make and share. Remember to start with fresh ingredients for the best taste. Use the right tools and follow the steps carefully. Keep these tips in mind to avoid common mistakes and achieve the perfect texture. Feel free to add your twists with chocolate or nuts. Store them well for lasting freshness. Enjoy baking and indulging in these tasty treats!

Moist Orange Cookies Delightful and Easy to Bake

If you’re craving a sweet treat that bursts with citrus flavor, Moist Orange Cookies are the answer. These delightful cookies

Older posts
Newer posts
← Previous Page1 … Page96 Page97 Page98 … Page115 Next →

dsad

© 2025 flavorsprint • Built with GeneratePress

Our Policies

  • Copyright Policy
  • Cookie Policy
  • GDPR Policy
  • Privacy Policy
  • Disclaimer
  • Terms Of Use

More Information

  • Home
  • About
  • Contact
  • Appetizers
  • Dessert
  • Dinner
  • Drinks
©2025, flavorsprint About Back To Top