Skip to content
DisclaimerTerms Of UseGDPR PolicyCookie Policy

flavorsprint

  • Home
  • Drinks
  • Appetizers
  • Dinner
  • Dessert
  • About
  • Contact
  • Privacy Policy
DisclaimerTerms Of UseGDPR PolicyCookie Policy

Lillian

- 4 slices of thick bread (Brioche or Challah) - 2 large eggs - 1 cup milk (dairy or non-dairy) - 1 teaspoon vanilla extract - 1 teaspoon ground cinnamon - 1 tablespoon sugar (optional) - Pinch of salt - Butter or cooking spray for the waffle iron - Maple syrup, fresh berries, or whipped cream for serving For French toast waffles, you want quality ingredients. I love using thick slices of Brioche or Challah bread. They soak up the egg mixture well, giving you a rich and tasty bite. You can use any milk you like, whether dairy or non-dairy. Each option adds its own flavor. Eggs are key for a soft texture. I recommend using two large eggs. The vanilla extract adds a sweet aroma, while cinnamon brings warmth. If you want a little extra sweetness, add sugar. A pinch of salt balances all the flavors. Don’t forget about the butter or cooking spray for your waffle iron. This step helps the waffles not stick. Finally, choose your toppings wisely! Maple syrup, fresh berries, and whipped cream make for a delightful finish. Check out the Full Recipe for all the steps! - Preheat your waffle iron and prepare cooking spray. This helps prevent sticking. - In a large bowl, whisk together the eggs, milk, vanilla, cinnamon, sugar, and salt. Mix until smooth. - Dip each slice of bread into the egg mixture. Make sure both sides get coated. Let excess liquid drip back into the bowl. - Place the soaked bread slices in the waffle iron. You can fit 2-4 slices, depending on size. - Close the waffle iron and cook for 4-5 minutes. You want them golden brown and crispy. - Once cooked, carefully remove the French toast waffles. Keep them warm in an oven on low heat. Repeat with remaining slices. - Serve the waffles warm. Top with maple syrup, fresh berries, or whipped cream. Enjoy your tasty breakfast delight! Choosing the best bread is key to great flavor. I recommend thick slices of Brioche or Challah. They soak up the egg mix well and give a soft center. To keep your French toast waffles crispy, don’t skip the preheating step. A hot waffle iron seals in moisture and gives a nice crunch. Also, use a light coat of butter or cooking spray. To avoid soggy waffles, dip the bread quickly in the egg mix. Let the excess drip off before placing it in the iron. This helps keep the texture just right. A good waffle iron makes a big difference. I suggest a non-stick model with adjustable heat settings. It lets you control how crispy your waffles get. Other kitchen tools can help too. Use a whisk for mixing the egg mixture. A spatula is great for safely lifting waffles out of the iron. A measuring cup ensures you use the right amount of milk. For the full recipe, check out Sunny French Toast Waffles. Enjoy your cooking! {{image_2}} You can easily make your French toast waffles unique. Adding chocolate chips to the batter brings a sweet twist. I love using dark chocolate chips for a rich taste. You can also add fresh fruit like blueberries or sliced bananas. They not only taste great but also add a pop of color. Flavored syrups are another fun way to change things up. Try using maple syrup infused with vanilla or cinnamon. You can even make your own fruit syrup by cooking down berries with a bit of sugar. This adds a fresh, fruity note to your breakfast. Making French toast waffles gluten-free is simple. You can use gluten-free bread instead of regular bread. Many stores offer great options that taste amazing. Just check the ingredients to ensure they suit your diet. For vegan alternatives, swap the eggs with flaxseed meal or chia seeds mixed with water. Use plant-based milk like almond or oat milk instead of dairy. These changes keep your waffles tasty and suitable for everyone, even if they follow a vegan diet. For the full recipe, check out the Sunny French Toast Waffles. To keep your French toast waffles fresh, store them in the fridge. Use an airtight container. Make sure they cool down before sealing the container. This helps keep them from getting soggy. You can store them for up to three days. For freezing, lay the waffles on a baking sheet. Freeze them for about an hour. Then, transfer the frozen waffles to a freezer bag. Remove as much air as possible. These can last up to two months in the freezer. When it’s time to eat your leftovers, you have options. The best way is to use a toaster or an oven. This keeps them crispy. Heat them at 350°F for about 5 to 10 minutes. You can also use a microwave, but this may make them soft. If you choose this method, place a paper towel under the waffles. This helps absorb moisture. For serving, try adding fresh fruit, syrup, or whipped cream. These toppings can make leftovers feel fresh and fun again. How do I make sure my French toast waffles are crispy? To get crispy French toast waffles, use thick bread. Brioche or Challah works best. Make sure your waffle iron is hot. Cook the waffles until they turn golden brown. Avoid adding too much batter. Too much egg mix can make them soggy. Can I prepare the batter in advance? Yes, you can prepare the batter ahead of time. Just mix the eggs, milk, vanilla, cinnamon, and other ingredients. Store the mix in the fridge. Use it within 24 hours for the best taste. Give it a quick stir before using. What's the difference between French toast and French toast waffles? The main difference lies in the cooking method. French toast cooks on a skillet. It’s flat and often softer. French toast waffles use a waffle iron. This makes them crispy and fluffy. The shape differs too, giving you those delightful pockets for syrup! For the full recipe, check out Sunny French Toast Waffles 🥞. You learned how to make delicious French toast waffles using simple ingredients. I shared steps for preparation and cooking. I also provided tips to enhance flavor and avoid soggy waffles. You can even customize these waffles to fit your diet. Remember to store any leftovers properly for best taste. Enjoy your cooking journey and have fun creating your own flavor combos. Try different toppings and variations to make it uniquely yours!

French Toast Waffles Tasty Breakfast Delight

Are you ready to take your breakfast game to the next level? French Toast Waffles offer a delightful twist on

- 1 can of refrigerated biscuit dough - 1 pound breakfast sausage - 1/4 cup all-purpose flour - 2 cups milk - 1/2 teaspoon garlic powder - 1/2 teaspoon onion powder - 1/4 teaspoon black pepper - 1 1/2 cups shredded cheddar cheese - Fresh parsley, chopped (for garnish) - Salt to taste When I craft this dish, I start with the main ingredients. The refrigerated biscuit dough forms the base. It brings a soft texture that pairs well with savory toppings. I love using breakfast sausage for its rich flavor. It gives the dish a hearty feel. Next, I add flour to the sausage. This step helps thicken the gravy. The milk then adds creaminess. Mixing these helps create a smooth sauce. The secret is to stir often, so you avoid lumps. For seasoning, garlic and onion powders bring warmth. A touch of black pepper gives it a nice kick. The shredded cheddar cheese melts beautifully on top, making it irresistible. Lastly, fresh parsley brightens the dish. I sprinkle it on just before serving. Each bite combines the savory sausage gravy and cheesy goodness. This recipe truly delights the senses. If you want to dive deeper into the full process, check out the Full Recipe. First, preheat your oven to 425°F (220°C). This step is key to getting a nice, golden crust. Next, take your can of refrigerated biscuit dough. On a clean, lightly floured surface, roll it out into a large circle. Make sure it fits your pizza stone or baking sheet. This dough will form the base of your pizza. Once rolled out, place it on your stone or sheet. Bake it for about 8 to 10 minutes. Look for a golden color and a puffed-up crust. This will create a perfect canvas for your toppings. While the crust bakes, it’s time to make the sausage gravy. Heat a skillet over medium heat. Add the pound of breakfast sausage. Cook it until it turns brown, breaking it apart with a wooden spoon. This ensures even cooking. After the sausage is browned, sprinkle in the 1/4 cup of all-purpose flour. Stir it in for about a minute. This step will help thicken your gravy. Next, slowly pour in the 2 cups of milk. Stir constantly to avoid lumps. Bring this mixture to a gentle simmer. Add the garlic powder, onion powder, black pepper, and salt. Keep stirring until the gravy thickens, about 5 to 7 minutes. Once it reaches your desired thickness, take it off the heat. Now it’s time to put everything together. Carefully take the biscuit crust out of the oven. Spread the sausage gravy evenly over the crust, leaving a small border around the edges. Then, crack two large eggs onto the gravy. Space them evenly across the pizza. Sprinkle 1 1/2 cups of shredded cheddar cheese over the eggs and gravy. This will melt beautifully in the oven. Place the pizza back in the oven and bake for another 8 to 10 minutes. Look for melted cheese and cooked eggs. When it’s done, let it cool for a minute. Finally, garnish with fresh, chopped parsley before slicing and serving. Enjoy this breakfast delight! For the full recipe, check out the earlier sections. To avoid lumps in the gravy, whisk the flour into the sausage well. This helps mix it smoothly. When you pour in the milk, do it slowly. Stir constantly as you add it. If you want thicker gravy, let it simmer longer. For a thinner gravy, add more milk. Adjust until it feels just right. For perfectly cooked eggs, crack them onto the gravy with care. Space them out well so they cook evenly. Keep an eye on the oven. You want the whites to be set but the yolks to stay runny. If you like firm yolks, let them bake longer. Rolling the dough correctly is key. Roll it evenly to avoid thick spots. This helps the crust cook evenly. To keep the crust from getting soggy, spread the gravy gently. Don't overload it with gravy. The biscuit needs some air to stay crisp. For the full recipe, check out the Breakfast Bliss: Biscuits & Sausage Gravy Pizza. {{image_2}} You can make this pizza even better by adding fun ingredients. Toss in some fresh spinach or bright bell peppers. They add color and taste. You can also switch up the cheese. Try using pepper jack for heat or mozzarella for a milder flavor. Each choice brings a new twist to this yummy dish. If you need a gluten-free option, swap all-purpose flour with a gluten-free blend. This keeps the pizza tasty and safe for everyone. For a vegan twist, use plant-based sausage and dairy-free cheese. You won’t lose flavor, and it’s a great way to enjoy breakfast pizza without meat or dairy. Pair your pizza with fresh fruit or a light salad. These sides balance the hearty pizza. A glass of fresh juice or a cup of coffee works great as a drink. They add a refreshing touch to your meal. This way, you have a complete breakfast that tastes amazing. To keep your leftover pizza fresh, wrap it tightly in plastic wrap. You can also place it in an airtight container. Store it in the fridge. The pizza stays good for about 3 days. After that, the crust may get soggy. When reheating, I recommend using the oven. Preheat the oven to 350°F (175°C). Place the pizza on a baking sheet and cover with foil. Heat for about 10-15 minutes. This method keeps the crust crisp. If you use a microwave, the crust might become chewy. Heat in 30-second bursts until warm. You can freeze this pizza if you have extra. Wrap it tightly in foil and place it in a freezer bag. It will stay good for about 2 months. To thaw, move it to the fridge overnight. Then, reheat in the oven as mentioned above for the best texture. Yes, you can make this pizza ahead of time. I often prepare the sausage gravy and biscuit crust in advance. Just store each component in the fridge. You can bake the pizza fresh when you are ready to eat. This saves time in the morning. If you want a meat-free option, you can use plant-based sausage. There are many great brands that mimic the taste of sausage. You can also use mushrooms or cooked lentils for a hearty flavor. Both options work well in the gravy. To check if the eggs are done, look for a firm white and a slightly runny yolk. You can also gently press the yolk with a spoon. If it feels soft but not liquid, it is ready. Cooking time will vary based on your oven. Absolutely! Homemade biscuit dough adds a personal touch. Just roll it out to fit your pizza pan. It may take a bit longer to bake, so keep an eye on it. You want a nice golden color for the crust. This pizza pairs well with fresh fruit or a light salad. You can also enjoy it with a hot cup of coffee or fresh juice. A sweet treat like pancakes can round out the meal nicely. In this blog post, I shared a simple recipe for Biscuits and Sausage Gravy Breakfast Pizza. We explored key ingredients like biscuit dough, sausage, and cheese. I also covered step-by-step instructions for preparing each part. Tips helped ensure perfect gravy and crust texture. Variations offered ideas for different diets and tastes. Finally, I explained how to store and reheat leftovers. Enjoy making this dish that is sure to impress. The joy of cooking is just a recipe away!

Biscuits and Sausage Gravy Breakfast Pizza Delight

Imagine starting your day with a breakfast so good, it feels like a treat. Biscuits and sausage gravy meet pizza

To make loaded steak quesadillas, you need these key ingredients: - 1 lb flank steak, thinly sliced - 2 tablespoons olive oil - 1 tablespoon taco seasoning - 1 bell pepper, sliced (any color) - 1 small red onion, thinly sliced - 1 cup shredded cheese (cheddar and Monterey Jack blend) - 4 large flour tortillas - 1 cup mushrooms, sliced - ½ cup corn (canned or frozen) - Salt and pepper to taste - Fresh cilantro, for garnish - Sour cream and salsa, for serving You will need some basic tools to make these quesadillas: - A large skillet or frying pan - A sharp knife for slicing - A cutting board - A spatula for flipping - Measuring spoons for accuracy Choosing the right ingredients makes a big difference. Here are some tips: - Flank steak: Look for bright red color and firm texture. - Vegetables: Pick fresh bell peppers and onions. They should feel firm and have no soft spots. - Cheese: Choose a blend of cheddar and Monterey Jack for great melting quality. - Corn: If using canned corn, check the label for low sodium options. If using frozen, pick a brand with no added ingredients. These tips help ensure you get the best flavors in your loaded steak quesadillas. For the complete cooking process, check out the Full Recipe. To start, heat a skillet over medium-high heat. Add two tablespoons of olive oil. Once hot, place one pound of thinly sliced flank steak in the skillet. Sprinkle on one tablespoon of taco seasoning, salt, and pepper. Cook for about 3-4 minutes. You want the meat browned and fully cooked. Remove the steak and set it aside. Next, in the same skillet, add one sliced bell pepper, one small thinly sliced red onion, one cup of sliced mushrooms, and half a cup of corn. Sauté these for about 5-6 minutes. You want the veggies to be tender and flavorful. Now, grab a large flour tortilla. Lay it in the skillet over medium heat. On one half of the tortilla, add half of the shredded cheese. Follow this with half of the cooked steak and half of the sautéed veggies. Then, add another layer of cheese. Fold the tortilla in half over the fillings. Cook this quesadilla for 2-3 minutes on each side. The goal is a golden-brown tortilla and melted cheese. Remove it from the skillet and let it cool a minute before slicing it into wedges. Repeat this process with the remaining ingredients to make a second quesadilla. When cooking steak, aim for a high temperature to get a nice sear. This locks in the juices and flavors. For vegetables, a medium heat works best. This allows them to soften without burning. Always check that your vegetables are tender but not mushy. For visual guidance, I recommend checking out video tutorials on loaded steak quesadillas. These can be helpful in showing you how to achieve the perfect cook on both the meat and the tortillas. You can find many great examples on cooking platforms like YouTube. To make great quesadillas, you need to focus on a few key steps: - Use a hot skillet: Preheat your skillet on medium-high heat. A hot skillet helps the tortillas get crispy. - Don't overfill: Fill your quesadilla but don’t overdo it. Too much filling can make it hard to flip. - Press down gently: When cooking, press the quesadilla lightly with a spatula. This helps the cheese melt well. Flavor is key in loaded steak quesadillas. Here are some tips to boost it: - Season your steak well: Use taco seasoning, salt, and pepper. Let the meat marinate for a few minutes for better taste. - Sauté vegetables: Sautéing bell peppers, onions, and mushrooms adds depth. It also brings out their natural sweetness. - Mix cheese types: The blend of cheddar and Monterey Jack gives a nice creamy texture. Combine different cheeses for a unique flavor. Sometimes issues pop up while cooking. Here’s how to fix them: - Quesadilla is soggy: If it feels wet, use less filling or cook longer. Make sure the skillet is hot before adding the quesadilla. - Cheese won’t melt: Use shredded cheese as it melts better. If it’s still not melting, try cooking on low heat a bit longer. - Tortilla tears: If your tortillas tear, they may be too cold. Warm them slightly before filling to make them more pliable. For a delicious adventure, check the Full Recipe for loaded steak quesadillas! {{image_2}} You can mix things up with different meats in your loaded quesadillas. Chicken is a great choice. Use grilled or shredded chicken for extra flavor. Pulled pork also works well, adding a smoky taste. For a spicy kick, try chorizo. This sausage brings bold flavors to the dish. You can also use shrimp for a seafood twist. Just cook them quickly and add them to your quesadilla. You can easily make a vegetarian version. Swap the steak for black beans or refried beans. These add protein and texture. You could also use lentils for a hearty option. For a vegan dish, skip the cheese and use a plant-based alternative. Nutritional yeast can give you a cheesy flavor without dairy. Add extra veggies like zucchini or spinach for more nutrition. Be creative with your ingredients! Instead of tortillas, try using lettuce wraps for a low-carb option. You can also switch out the cheese for guacamole or avocado slices. For a different flavor, add jalapeños or pickled onions. These ingredients bring a nice zing to your quesadillas. You can mix in different grains, like quinoa or rice, for added texture. The possibilities are endless! For the full recipe, check out the Loaded Steak Quesadillas section. After making loaded steak quesadillas, let them cool down. Place any leftovers in an airtight container. You can store them in the fridge for up to three days. If you want to keep them longer, freezing is a great option. When you are ready to enjoy the leftovers, use a skillet for reheating. Heat it over medium heat. Place the quesadilla in the skillet for about 3-5 minutes on each side. This method helps keep the tortilla crispy and the cheese melty. You can also use a microwave, but the texture may not be as good. To freeze your quesadillas, wrap each one in plastic wrap. Then, place them in a freezer-safe bag. They can last for up to two months in the freezer. When you want to eat them, thaw them overnight in the fridge. Then, reheat as mentioned above. This way, you can enjoy a tasty meal anytime! You can serve many tasty sides with loaded steak quesadillas. Some great options include: - Fresh guacamole - Mexican rice - Refried beans - Chopped salad with lime dressing - Nachos with cheese and jalapeños These sides add flavor and texture. They also make the meal more filling. Loaded steak quesadillas last about 3 to 4 days in the fridge. Make sure to store them in an airtight container. This helps keep them fresh and safe to eat. Yes, you can make loaded steak quesadillas ahead of time. Prepare the filling and tortillas separately. Then, store them in the fridge. When you're ready to eat, just cook them in a skillet. This way, you enjoy warm, crispy quesadillas without much hassle. To customize the full recipe, try these ideas: - Use different meats like chicken or shrimp. - Swap in veggies like spinach or zucchini. - Add spices like cumin or smoked paprika for extra flavor. - Try different cheeses like pepper jack or feta. These tweaks let you create your perfect quesadilla. Get creative and enjoy! Loaded steak quesadillas are filling and fun to make. We covered essential ingredients, cooking tips, and ways to customize them. You can choose your protein or make them vegan. Storing leftovers is easy, and reheating keeps them tasty. Use the techniques and advice to impress your family and friends. Enjoy your cooking journey and create delicious moments that bring everyone together!

Loaded Steak Quesadillas Tasty and Satisfying Treat

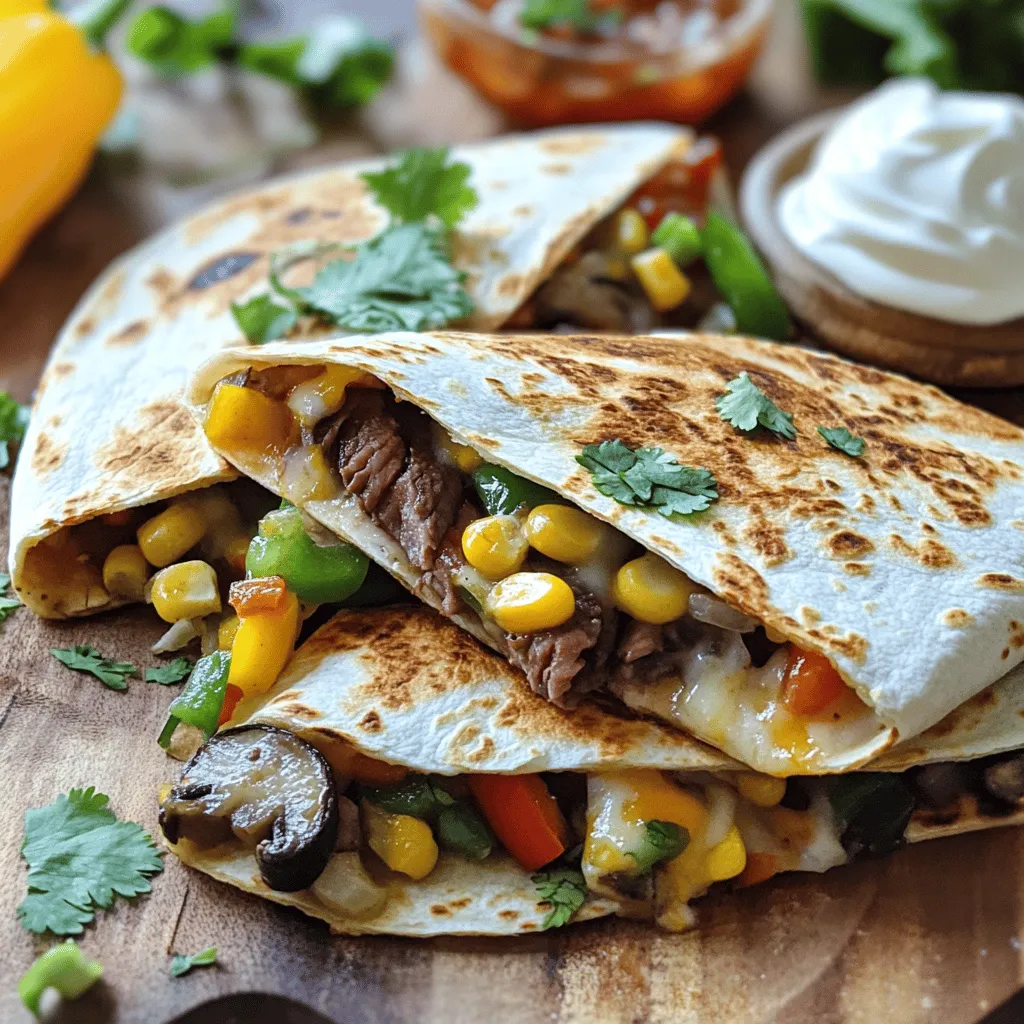
Are you ready to elevate your snack game? These Loaded Steak Quesadillas are a tasty and satisfying treat that will

- 8 oz. rotini pasta - 1 cup cherry tomatoes, halved - 1 cup cucumbers, diced - 1/2 cup red bell pepper, chopped - 1/2 cup black olives, sliced - 1/2 cup corn kernels California Pasta Salad shines with its fresh and colorful ingredients. The rotini pasta gives a fun twist with its spiral shape. The cherry tomatoes add a burst of sweetness, while the cucumbers bring a crisp texture. Red bell peppers offer a slight crunch and a sweet flavor. Black olives introduce a savory touch, and corn kernels add a hint of sweetness. Together, these ingredients create a delightful and vibrant salad. - 1/4 cup olive oil - 2 tablespoons apple cider vinegar - 1 teaspoon garlic powder - Salt and pepper to taste The dressing for California Pasta Salad is simple yet full of flavor. Olive oil provides a rich base, while apple cider vinegar adds a tangy kick. Garlic powder gives depth without overpowering the other flavors. Salt and pepper help balance everything. This dressing brings all the salad's ingredients together in harmony. - Additional fresh herbs - Slice of avocado - Paprika For extra flair, you can add garnishes. Fresh herbs like cilantro or parsley enhance flavor and color. A slice of avocado adds creaminess and a rich taste. A sprinkle of paprika gives a pop of color and a hint of spice. These optional garnishes make your salad even more attractive and tasty. For the full recipe, check out the California Dreamin' Pasta Salad . To start, cook the rotini pasta. Boil it in a pot of water. Make sure to cook it al dente. This means it should be firm when bitten. After cooking, drain the pasta. Rinse it under cold water to stop the cooking process. This will help keep the pasta from getting mushy. Next, grab a large bowl. In this bowl, mix the cooled rotini pasta with fresh vegetables. Add in cherry tomatoes, diced cucumbers, and chopped red bell pepper. Don't forget the sliced black olives, corn, and diced avocado. Finally, toss in some finely chopped red onion and fresh herbs like cilantro or parsley. This mix will bring great color and flavor to your salad. Now it’s time to make the dressing. In a small bowl, whisk together the olive oil, apple cider vinegar, and garlic powder. Season with salt and pepper to taste. This dressing will tie all the flavors together. Once it's well mixed, pour it over your salad mixture. Gently toss everything until it is evenly coated. After tossing the salad, let it chill in the refrigerator. This step is key for the flavors to blend well. Chill it for at least 30 minutes. Before serving, taste the salad. Adjust the seasoning if needed. You can add more salt or pepper to suit your taste. Feel free to explore the [Full Recipe] for more details! - Use plenty of water and salt. This helps the pasta cook evenly. - Rinse pasta thoroughly after cooking. This keeps it from sticking together. - Allow the salad to chill for maximum flavor. Cold temperatures help blend the tastes. - Adjust the acidity with vinegar or lemon juice. This can brighten up the dish. - Serve in a large bowl with garnishes. This makes your salad inviting and pretty. - Consider using a colorful serving dish. A pop of color catches the eye and adds fun. For the complete instructions and ingredients, check the Full Recipe. {{image_2}} You can make your California Pasta Salad even better with protein. Add cooked chicken or shrimp for a heartier meal. Both options taste great and boost the salad's protein. If you want a vegetarian option, incorporate beans like black beans or chickpeas. They add texture and flavor while keeping it plant-based. Feel free to get creative with your ingredients. Substitute different pasta shapes to switch things up. Fusilli or farfalle work well too. You can also use seasonal vegetables based on what you like. Try adding roasted zucchini in summer or butternut squash in fall. This keeps the salad fresh and exciting. The dressing can change the whole vibe of your salad. Try a creamy dressing option, like ranch or a yogurt-based dressing, if you want a richer taste. You can also use fresh lemon juice instead of apple cider vinegar. This adds a nice zing and brightness to the dish. Check out the Full Recipe to get started on your delicious California Pasta Salad! To keep your California Pasta Salad fresh, use an airtight container. This method protects the salad from air and moisture. Store it in the fridge for up to 3 days. After a few days, it may lose its crispness and flavor. If you want to freeze this salad, separate the components first. Freeze the pasta and veggies in one bag. Keep the dressing in another. This way, the pasta won't get mushy. When you're ready to eat, thaw the pasta and veggies in the fridge overnight. Add the dressing just before serving for the best taste. California Pasta Salad tastes best when served chilled. If leftovers seem dry, add a splash of olive oil or vinegar. This will refresh the salad and enhance the flavor. Enjoy it as a side dish or a light meal! California Pasta Salad features vibrant and fresh ingredients. The main base is rotini pasta. It holds the dressing and pairs well with other flavors. Cherry tomatoes add a burst of sweetness. Cucumbers give a nice crunch. Red bell pepper brings a hint of sweetness and color. Black olives provide a salty bite, while corn adds a bit of sweetness. Avocado contributes creaminess. Red onion adds a sharp taste that balances the salad. Fresh herbs like cilantro or parsley enhance the flavor. You can find the full recipe [here](#). Yes, you can make California Pasta Salad ahead of time. It actually tastes better after chilling. Make it one day in advance for the best flavor. Store it in an airtight container in the fridge. This keeps it fresh and safe to eat. Just remember to toss it again before serving. If you notice the pasta has absorbed too much dressing, add a splash of olive oil. This helps restore moisture. You can get creative with your California Pasta Salad. Many people love adding protein. Cooked chicken or shrimp can make it a meal. For a vegetarian option, try chickpeas or black beans. You can also swap in seasonal veggies. Try adding roasted zucchini, bell peppers, or artichokes. Cheese is another great addition. Feta or mozzarella can bring a tasty twist. For extra flavor, sprinkle in some spices or nuts. In this blog post, I covered how to make a tasty California Pasta Salad. We went through the fresh ingredients, the easy steps to prepare it, and useful tips. Remember, chilling enhances the flavors, so don’t skip that step. With simple swaps and protein options, you can make this salad your own. Enjoy your colorful dish and share it with friends. It’s fresh, fun, and perfect for any gathering!

California Pasta Salad Flavorful and Simple Recipe

Are you ready to make a delicious California Pasta Salad? This simple recipe packs vibrant veggies and bold flavors into

For a tasty Cowboy Casserole with Cornbread, you need these main ingredients: - 1 pound ground beef - 1 can (15 oz) kidney beans, drained and rinsed - 1 can (15 oz) black beans, drained and rinsed - 1 can (15 oz) corn, drained - 1 can (10.5 oz) diced tomatoes with green chilies - 1 medium onion, chopped - 2 cloves garlic, minced - 1 packet taco seasoning - 1 cup shredded cheddar cheese - 1 cup cornbread mix - 1 egg - 1 cup milk - Salt and pepper to taste - 2 tablespoons olive oil You might have some of these pantry staples at home. They help make the dish complete: - Taco seasoning - Olive oil - Salt - Pepper If you run out of an ingredient, don’t worry. Here are some swaps: - Ground beef can be replaced with turkey or chicken. - You can use canned chickpeas instead of kidney or black beans. - Try frozen corn if you lack canned corn. - Use any cheese you like instead of cheddar. - For a vegetarian option, skip the meat and add more beans. These options keep the dish tasty while fitting your needs. Check out the Full Recipe for more details on cooking this delicious meal! To make your Cowboy Casserole with Cornbread, start by gathering your ingredients. You will need ground beef, beans, corn, diced tomatoes, onion, garlic, and more. First, preheat your oven to 375°F (190°C). In a large skillet, heat two tablespoons of olive oil over medium heat. Add one chopped onion and cook it until it turns soft, about five minutes. Next, add two minced garlic cloves and one pound of ground beef. Cook the beef until it turns brown. Drain any fat from the skillet if needed. Now, mix in one drained can of kidney beans, one drained can of black beans, one drained can of corn, one can of diced tomatoes with green chilies, and one packet of taco seasoning. Stir everything well and let it simmer for about five minutes. Add salt and pepper to taste. Transfer this beef mixture into a greased 9x13 inch baking dish evenly. To save time, chop all your ingredients before starting. This way, you can cook without interruption. Use a food processor for the onion and garlic if you have one. Clean as you go to keep your workspace neat. When cooking the beef, make sure to break it into small pieces. This helps it cook evenly. If you need to, you can use a spatula or wooden spoon to break it up as it cooks. This way, you avoid large chunks in your casserole. After preparing the beef layer, it’s time to make the cornbread topping. In a bowl, mix the cornbread mix with one egg and one cup of milk. Stir until just combined; don’t overmix. Pour this cornbread batter over the beef mixture, spreading it evenly. Sprinkle one cup of shredded cheddar cheese on top of the cornbread layer. Then, place the baking dish in the oven. Bake for 25-30 minutes. Check if it’s done by inserting a toothpick into the center. If it comes out clean, it’s ready. Once baked, take it out and let it cool for about five minutes. This waiting time helps the layers set. Enjoy your delicious Cowboy Casserole with Cornbread! For a full recipe, check the details provided above. To boost the taste of your Cowboy Casserole, try these tips: - Use fresh herbs: Adding cilantro or parsley at the end brightens the flavor. - Sauté veggies: Cook onions and garlic until golden. This adds depth. - Add jalapeños: If you like heat, toss in diced jalapeños for a spicy kick. - Experiment with cheese: Mix different cheeses, like pepper jack, for a creamy twist. These small changes can make a big difference in taste. Here are some common pitfalls to watch for: - Overcooking the beef: If you cook it too long, it can get tough. Aim for just browned. - Not draining canned beans and corn: This can make your dish too watery. Always drain well. - Skipping the seasoning: Don’t forget salt and pepper. They are key to flavor. - Not checking cornbread doneness: Insert a toothpick to check. If it comes out clean, it’s done. Avoid these mistakes for a perfect casserole every time. Using the right tools makes cooking easier: - Large skillet: Ideal for browning meat and sautéing veggies. - 9x13 inch baking dish: Perfect for layering your casserole. - Mixing bowls: Useful for preparing the cornbread mix. - Spatula: Great for spreading the cornbread batter evenly. Having the right tools helps create a smooth cooking experience. For the full recipe, check out the Cowboy Casserole with Cornbread. {{image_2}} You can easily make a vegetarian cowboy casserole. Replace the ground beef with 1 pound of lentils. Lentils give you protein and a nice texture. Use extra beans, like pinto or chickpeas, for a hearty dish. Keep the rest of the ingredients like corn, tomatoes, and seasoning. This way, you still get that rich flavor without meat. To make this dish gluten-free, switch to a gluten-free cornbread mix. Ensure your canned goods are certified gluten-free. You can use quinoa instead of beef for more protein. Quinoa cooks fast and adds a nice crunch. Always check your ingredients to avoid gluten sneaking in. Want to spice things up? Add jalapeños or chili powder for heat. A dash of smoked paprika can give a nice BBQ flavor. You can also mix in BBQ sauce into the beef mixture. It adds a sweet and smoky taste that everyone will love. Don't be shy to experiment; try adding other veggies like bell peppers or zucchini for new flavors. Storing your leftover cowboy casserole is easy. Let it cool completely first. Then, place it in an airtight container. Store it in the fridge for up to four days. Make sure to cover it well. This keeps the casserole moist and fresh. You can also wrap it tightly in aluminum foil. Just be sure to store any leftover cornbread separately, if possible. If you want to keep the casserole longer, freezing is a great option. First, let the casserole cool down. Cut it into individual portions for easier thawing. Wrap each piece in plastic wrap. Then, place them in a freezer-safe bag. Label the bag with the date. This way, you can enjoy it for up to three months. When you are ready to eat, thaw it in the fridge overnight. Reheating your cowboy casserole can be simple. For the best taste, use the oven. Preheat it to 350°F (175°C). Place the casserole in a baking dish. Cover it with foil to keep moisture in. Heat for about 20-30 minutes. You can also use a microwave for quicker results. Just heat it in short bursts. Stir it between intervals to avoid cold spots. Enjoy your tasty leftovers just like the first time! For more detailed instructions, check out the Full Recipe. Yes, you can prepare Cowboy Casserole ahead of time. Cook the beef and mix it with the beans, corn, and spices. Place it in the baking dish and cover it tightly. You can store it in the fridge for up to two days. When ready to eat, just add the cornbread mix on top and bake as directed. Cowboy Casserole pairs well with many sides. Consider serving it with: - Fresh salsa - Guacamole - A simple green salad - Jalapeño cornbread for extra flavor - Sour cream or Greek yogurt for creaminess These options will enhance your meal and add freshness. To adjust the spice level, you can: - Add more taco seasoning for heat. - Mix in diced jalapeños or green chiles for a kick. - Use spicy diced tomatoes instead of regular ones. - Serve with hot sauce on the side for those who like it hot. You can easily tailor the spice to fit your taste. Just remember to start small; you can always add more! In this article, we covered key ingredients for Cowboy Casserole, cooking steps, and useful tips. You learned how to store leftovers and add your own twist. Remember, you can make this dish your own by choosing veggies or spices to suit your taste. Cooking should be fun, so try new ideas and enjoy the process. Whether it's a family meal or a gathering, this casserole works well for any occasion. Happy cooking!

Savory Cowboy Casserole with Cornbread Delight

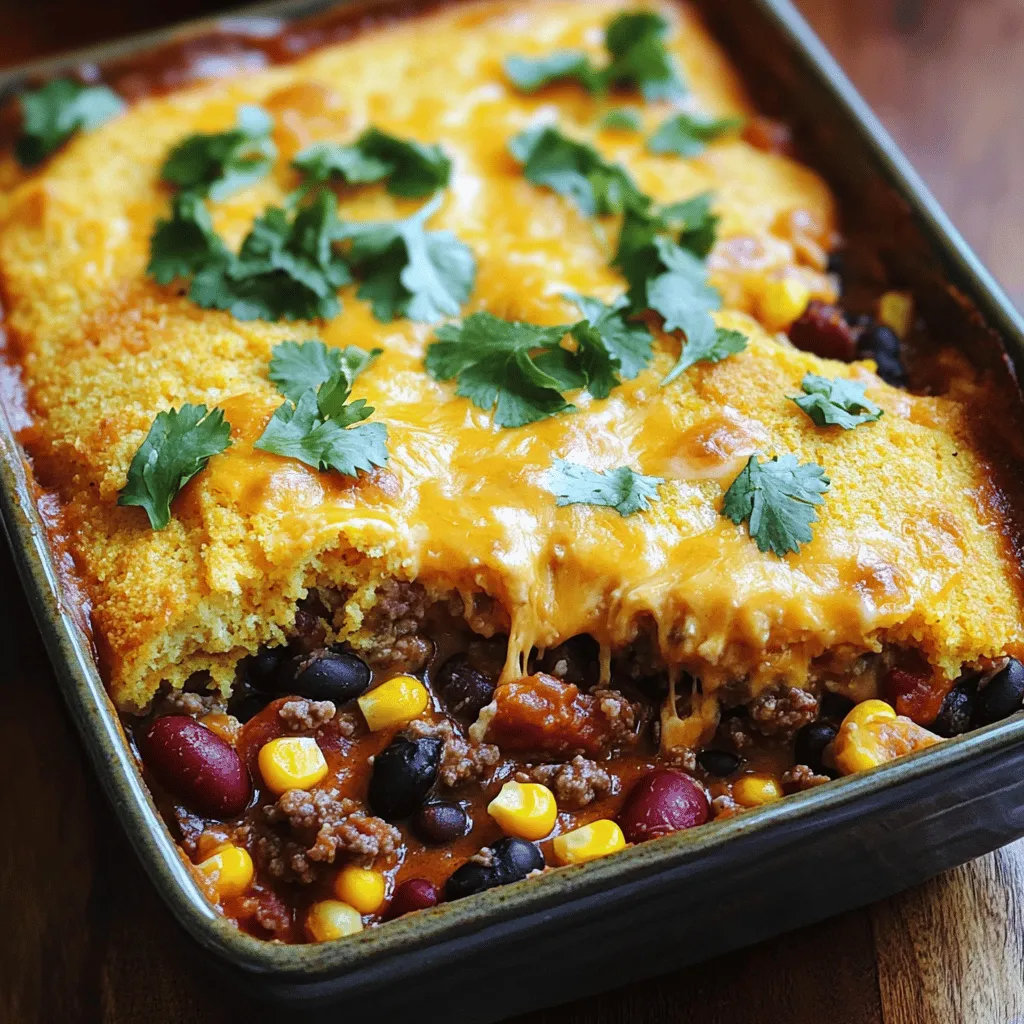
Looking for a hearty dinner that’s easy to make and packed with flavor? You’re in the right place with my

To make Healthy Chicken Zucchini Burgers, you need a few simple items: - 1 pound ground chicken - 1 medium zucchini, grated and excess moisture squeezed out - 1/4 cup breadcrumbs (or almond flour for a gluten-free option) - 1/4 cup grated Parmesan cheese - 1/4 cup finely chopped fresh parsley - 1 garlic clove, minced - 1 teaspoon onion powder - 1 teaspoon paprika - Salt and pepper to taste - 1 tablespoon olive oil (for cooking) - Whole wheat or lettuce leaves (for serving) - Optional toppings: sliced tomatoes, lettuce, avocado, or your favorite sauce The ingredients in these burgers pack a healthy punch. Let’s break down some of their benefits: - Ground Chicken: This is lean meat. It has less fat than beef. It gives you protein for strong muscles. - Zucchini: This veggie is low in calories. It adds fiber, which helps your digestion. - Parmesan Cheese: This cheese adds flavor. It also gives you calcium for strong bones. - Olive Oil: This oil is healthy fat. It can help keep your heart healthy. - Parsley: This herb is full of vitamins. It adds freshness and a nice taste to the burgers. If you have food allergies or follow a special diet, here are some swaps to try: - Ground Chicken: You can use ground turkey or even plant-based meat if you prefer. - Breadcrumbs: For gluten-free options, use almond flour or gluten-free breadcrumbs. - Parmesan Cheese: Nutritional yeast can replace cheese for a dairy-free option. - Olive Oil: You can swap this with avocado oil or coconut oil if needed. These substitutes keep the flavor while meeting your needs. Enjoy making these tasty burgers! First, grab a large bowl. Add the ground chicken and grated zucchini. Make sure to squeeze out the extra moisture from the zucchini; this helps the burger stay firm. Next, mix in the breadcrumbs or almond flour, grated Parmesan, and fresh parsley. I love adding minced garlic, onion powder, and paprika for extra flavor. Don't forget to add salt and pepper to taste. Use your hands to combine everything well. You want each bite to be full of flavor! Now, divide the mixture into four equal parts. Each part will become a patty. Wet your hands slightly to prevent sticking. Form each portion into a round shape, about an inch thick. Make a small indent in the center of each patty. This helps them cook evenly. It’s important to handle the patties gently, so they don’t fall apart when cooking. Heat some olive oil in a large skillet over medium heat. Once hot, carefully place the patties in the skillet. Cook them for about 5-6 minutes on each side. You want them golden brown and fully cooked. To check, the internal temperature should reach 165°F or 74°C. After cooking, let the patties rest for a couple of minutes. This keeps them juicy. Finally, serve them on whole wheat buns or lettuce leaves with your favorite toppings. Enjoy your delicious creation! For more details, check the Full Recipe. To keep your chicken zucchini burgers moist, add grated zucchini. The moisture from the zucchini helps. Also, do not overcook your patties. Aim for an internal temperature of 165°F. Resting the burgers for a few minutes after cooking is key. This allows the juices to spread evenly. You can cook these burgers on a skillet or a grill. A skillet gives you a nice crust. Use medium heat and add olive oil to prevent sticking. If you prefer grilling, preheat your grill well. A clean grill ensures better flavor and grill marks. Both methods work well, so choose what you like best. Always use ground chicken that is fresh. Look for meat with some fat for better flavor. Mix the ingredients gently to avoid tough patties. Shape the patties evenly for uniform cooking. Keep them about one inch thick for best results. Cook until golden brown on both sides for that great taste. For the full recipe, check the detailed instructions. {{image_2}} If you're looking to cut carbs, try lettuce wraps. Instead of buns, use large lettuce leaves. They hold the burger well and add a nice crunch. You can use romaine or iceberg lettuce. Just place your cooked chicken zucchini patty inside and add toppings. This keeps your meal light and fresh. To boost flavor, add spices and herbs. You can mix in cumin or chili powder for a kick. Fresh herbs like basil or cilantro also work great. Just chop them finely and add them to the mix. This simple change can make your burgers unique and exciting. Want to switch things up? Use turkey or lean beef instead of chicken. If you prefer plant-based options, try using black beans or chickpeas. Mash them well and mix with zucchini and spices. This way, you can enjoy the same great taste while fitting your diet. After you enjoy your healthy chicken zucchini burgers, let them cool. Place the burgers in an airtight container. They stay fresh for about three days in the fridge. Make sure to separate layers with parchment paper. This keeps them from sticking together. To reheat, use a skillet for the best texture. Heat the skillet over medium heat. Add a little olive oil, then place the burgers in the pan. Cook each side for about three to four minutes. This method keeps them juicy and prevents dryness. You can also use a microwave, but this may make them softer. Freezing is a great option for meal prep. First, let the burgers cool completely. Wrap each burger tightly in plastic wrap. Place them in a freezer-safe bag or container. They will stay good for up to three months. When ready to eat, thaw in the fridge overnight and reheat as mentioned above. This way, you always have a tasty meal ready to go! You can serve these burgers with a side salad or sweet potato fries. A simple cucumber salad pairs well, too. Chips made from kale or zucchini are also tasty choices. You might enjoy serving them on whole wheat buns or lettuce leaves. To check if your chicken burgers are done, use a meat thermometer. The internal temperature should reach 165°F (74°C). You can also cut one burger in half to see if the meat is no longer pink. This ensures safe and delicious results. Yes, you can make these burgers ahead of time! Prepare the patties and store them in the fridge for up to one day. You can also freeze them for later. Just remember to wrap them well to keep them fresh. Absolutely! They are perfect for meal prep. Cook a batch and store them in the fridge. You can heat them up for quick lunches or dinners. They stay flavorful and moist when stored properly. Top your burgers with fresh ingredients like sliced tomatoes, lettuce, or avocado. You can also try adding pickles or onion slices. For a creamy touch, consider using a yogurt sauce or your favorite dressing. Get creative and use what you love! For the complete recipe and detailed instructions, check the Full Recipe. In this blog post, we explored how to make healthy chicken zucchini burgers. We covered key ingredients and their benefits, plus substitutes for allergies. I shared step-by-step instructions and tips to keep your burgers moist and tasty. We also looked at fun variations and how to store leftovers. These burgers are not only nutritious but also easy to adapt. Try different flavors to match your taste. Enjoy making and sharing these delicious burgers with family and friends. They will love them!

Healthy Chicken Zucchini Burgers Flavorful and Simple Dish

Are you ready for a delicious and healthy twist on a classic burger? These Healthy Chicken Zucchini Burgers combine tender

To make French onion burgers, you need a few key ingredients: - 1 lb ground beef (80/20): This fat content keeps the burgers juicy. - 1 large yellow onion, thinly sliced: Sweet and savory, it adds flavor. - 2 tablespoons unsalted butter: For cooking the onions to golden perfection. - 1 tablespoon olive oil: Helps brown the onions nicely. - 1 teaspoon sugar: Enhances the sweetness of the onions. - 1 teaspoon garlic powder: Adds depth to the beef. - Salt and pepper to taste: Essential for seasoning. - 4 slices of Swiss cheese: Melts perfectly on the burgers. - 4 burger buns (preferably brioche): Soft and buttery for a great bite. - Fresh thyme leaves, for garnish: Adds a fresh touch. You can customize your French onion burgers with these: - Suggested toppings: Consider adding lettuce, tomatoes, or pickles for crunch. - Best side dishes: Crispy fries or a light salad pair well. Feel free to explore different combinations to make your meal unique! Start by cooking the onions slowly. Use a skillet on medium heat. Melt two tablespoons of butter with one tablespoon of olive oil. Add the thinly sliced onions, one teaspoon of sugar, and a pinch of salt. Stir them every few minutes. Cook for about 25 minutes. You want them golden brown and soft. Tips for perfect caramelization: - Use yellow onions for sweetness. - Keep the heat steady; too high can burn them. - Be patient; good things take time. Next, grab one pound of ground beef. I like an 80/20 blend for juiciness. In a bowl, mix the beef with one teaspoon of garlic powder, salt, and pepper. Divide the mixture into four equal parts. Tips on patty size and seasoning: - Make the patties a bit larger than the buns. - Press a small dent in the center to avoid puffing while cooking. Heat your grill or skillet on medium-high. Cook the patties for about 4-5 minutes on each side. For medium doneness, add a slice of Swiss cheese on top during the last minute. Cover the pan to help the cheese melt. Cooking times and methods: - Grill gives a nice char. - Skillet keeps them juicy. Now, assemble your burgers. Start with a toasted bun. Place a cheesy patty on top. Add the caramelized onions generously. Finish with fresh thyme leaves for a pop of flavor. Layering ingredients properly: - Bun, patty, onions, thyme, and then the top bun. Presentation tips: - Use a wooden board for serving. - Pair with crispy fries or a fresh salad. This method creates a juicy and flavorful delight. Enjoy every bite of your French onion burger! To ensure a juicy burger, cook at the right temperature. Aim for medium heat. This keeps the meat tender and prevents it from drying out. Use a meat thermometer for best results. The center should reach 160°F for medium doneness. Let your burgers rest for five minutes after cooking. This helps keep the juices inside and makes each bite flavorful. You can switch up the cheese for different tastes. Try sharp cheddar or creamy brie. Each cheese brings its own unique flavor. You can also add spices like smoked paprika or cayenne for a kick. For homemade sauces, mix mayo with garlic or BBQ sauce with mustard. These small changes can make your burger stand out. Use a cast-iron skillet for a perfect sear. It retains heat well and cooks evenly. A grill works great too, giving a nice smoky flavor. Make sure to have a good spatula for flipping burgers. A meat thermometer is also key to checking doneness. Lastly, keep a basting brush handy for adding sauces while cooking. {{image_2}} To make French onion burgers healthier, consider these options: - Use lean meats like turkey or chicken. - Try plant-based options like black bean patties. - Choose gluten-free buns made from almond flour or rice flour. These choices reduce calories and cater to various diets. Lean meats cut fat, while plant-based patties offer fiber and protein. Gluten-free buns let everyone enjoy this dish. You can enhance your French onion burgers with different flavors. Here are some ideas: - Use sweet onions like Vidalia for a milder taste. - Red onions add a sharp bite to your burger. - Try adding spices like smoked paprika or cayenne for heat. - Fresh herbs like basil or oregano can give your burger a fresh twist. Experimenting with onions and spices can make each burger unique. French onion burgers can take on flavors from around the world. Here’s how: - Add some Asian flair with soy sauce and ginger in the beef. - For a Mexican twist, mix taco seasoning into the patties. - Top with jalapeños and guacamole for a spicy kick. These twists will surprise your guests and keep things exciting. Explore different cuisines and let your taste buds guide you! After enjoying your French onion burgers, you might have some left. To store uneaten burgers, first, let them cool down. Place the patties and toppings in separate containers. This keeps flavors fresh. Use airtight containers to keep moisture in. If you have burger buns, store them in a bag or container too. Keep everything in the fridge for up to three days. To reheat your burgers, keep them moist. Use the oven to warm them up. Set the oven to 350°F (175°C). Place the burgers on a baking tray for about 10 minutes. Cover them with foil to keep moisture in. For buns, wrap them in foil too. Heat them in the oven for about 5 minutes until warm. If you want to save burgers for later, freezing is a great option. To freeze patties, place them on a baking sheet. Freeze them for an hour, then transfer to a freezer bag. This prevents them from sticking together. For onions, let them cool and then freeze in a separate bag. When ready to eat, thaw everything in the fridge overnight for the best taste. French onion burgers are a special twist on the classic burger. They blend juicy beef patties with sweet, caramelized onions and melted Swiss cheese. This dish captures the essence of French onion soup in burger form. The layers of flavor create a taste that is both rich and satisfying. The toasted brioche bun adds a nice crunch and sweetness to each bite. If you want a meat-free option, try using ground turkey or chicken. These lean meats still work well with caramelized onions and cheese. You can also use plant-based burger patties made from beans or lentils. These alternatives keep the same great flavor while catering to different diets. Yes, you can prepare French onion burgers ahead of time. Cook the patties and caramelized onions in advance. Store them in airtight containers in the fridge. You can keep them for up to three days. When you’re ready to eat, just reheat the patties and onions. This saves time and makes meal prep easy. You can find the full recipe for French onion burgers in the section above. This recipe provides all the steps you need to create these delicious burgers at home. In this blog post, we explored how to make delicious French onion burgers. We covered key ingredients like ground beef, onions, and seasoning. You learned how to caramelize onions, form patties, and cook burgers perfectly. We highlighted tips for achieving great flavor and suggested fun variations. Now, with these steps and tips, you can create mouth-watering burgers at home. Experiment with flavors, enjoy the process, and impress your friends and family with your cooking skills!

French Onion Burgers Juicy and Flavorful Delight

Do you crave a burger that bursts with flavor? Look no further than French Onion Burgers! This tasty blend of

To make a Caramel Banana Cream Trifle, gather these simple ingredients: - 3 ripe bananas, sliced - 1 cup heavy cream - ½ cup caramel sauce (store-bought or homemade) - 1 cup vanilla pudding - 1 cup ladyfinger cookies or sponge cake, crumbled - 1 teaspoon vanilla extract - ¼ cup toasted walnuts or pecans, chopped - A pinch of sea salt You can swap some ingredients for a twist. Use whipped topping instead of heavy cream. This shortcut saves time but still tastes great. If you don’t have ladyfinger cookies, use graham crackers or crumbled cake instead. For a nut-free option, leave out the walnuts or pecans. You can also use almond or coconut milk for a dairy-free pudding. Fresh ingredients make a big difference in taste. When choosing bananas, pick ones that are ripe but not too soft. Look for heavy cream that is cold and fresh. Check the pudding mix for quality; instant pudding works well. For nuts, choose toasted ones for extra flavor. A good caramel sauce can be found at most grocery stores, or you can make your own for a richer taste. Always buy in small amounts to ensure freshness. For the full recipe, check out the Caramel Banana Cream Trifle section. To start, grab a mixing bowl. Add 1 cup of heavy cream to it. Use an electric mixer to whip the cream until you see soft peaks. This takes a few minutes. Next, add 1 teaspoon of vanilla extract. Keep whipping until you get stiff peaks. This means the cream holds its shape well. You can set the whipped cream aside for now. Now, let's build our trifle. Take a large trifle dish or clear cups for individual servings. Start with a layer of crumbled ladyfinger cookies or sponge cake at the bottom. This will give our trifle a nice base. Next, spoon in a layer of vanilla pudding. Smooth it out with a spatula to make it even. Then, add a layer of sliced bananas. Drizzle some caramel sauce over the bananas. Finally, spread the whipped cream over the bananas gently. You will repeat these layers until the dish is full. Make sure to end with a big layer of whipped cream on top. Once your trifle is layered, it’s time to chill. Cover the dish with plastic wrap and place it in the fridge. Let it chill for at least 2 hours. This helps the flavors mix well. When it's time to serve, drizzle more caramel sauce on top. Sprinkle chopped walnuts or pecans for extra crunch. A pinch of sea salt adds a nice contrast too. Serve the trifle cold and enjoy this delightful treat! For the full recipe, check the details above. To make great whipped cream, start with chilled tools. Use a cold bowl and beaters. This keeps the cream from warming up too fast. Whip the heavy cream until soft peaks form. Then, add vanilla extract. Continue whipping until you see stiff peaks. This means your cream will hold its shape well. For the best trifle, layer your ingredients carefully. Start with crumbled cookies at the bottom. This gives a nice texture. Follow with a smooth layer of pudding. Make sure to spread it evenly. Add the bananas next, then drizzle caramel sauce on top. Finally, add whipped cream. Repeat the layers until you reach the top. Finish with whipped cream and a sprinkle of nuts. To make your trifle stand out, add a pinch of sea salt to the whipped cream. This enhances the sweetness. You can also mix a bit of caramel sauce into the pudding for extra flavor. If you like, add a splash of rum or banana liqueur to the layer of bananas. This will give a fun twist to your trifle. For the full recipe, check out the details mentioned earlier. {{image_2}} You can change the fruit in your trifle for fun flavors. Try using strawberries, blueberries, or peaches. Each fruit adds its own taste and color. For a tropical twist, add mango or pineapple. Mix and match to find your favorite combo. Just remember to keep the bananas for that classic flavor. While caramel sauce shines in this recipe, you can switch it up. Use chocolate sauce for a rich, sweet layer. A berry sauce can add a fresh and tangy taste. You can also try a butterscotch sauce for a sweet twist. Each sauce makes the dessert unique and tasty. You can easily adapt this recipe for different diets. For a dairy-free version, use coconut cream and dairy-free pudding. If you want a lower-sugar treat, choose sugar-free pudding and a lighter sauce. Gluten-free options are available, too; just use gluten-free cookies or cake. These changes keep the trifle delicious while meeting your needs. To keep your Caramel Banana Cream Trifle fresh, cover it tightly with plastic wrap. Place it in the fridge. It will stay good for up to three days. The bananas may brown a bit, but the flavor will still be great. If you want to avoid browning, add a bit of lemon juice to the bananas before layering. Freezing the trifle is not ideal due to the cream and bananas. The texture changes when frozen. If you want to freeze it, consider only freezing the pudding and cream. Store them in an airtight container. The cookies will become soggy when defrosted. You do not need to reheat the trifle since it is served cold. When serving, give it a gentle stir to mix the layers if they have settled. Use a large spoon or spatula to scoop out portions. Always serve it chilled for the best taste. You can add fresh toppings, like whipped cream or extra caramel, for a fun touch. Yes, you can use whipped topping. It saves time and is easy to find. However, using heavy cream gives a richer taste. The texture will also be different, but it still works. You can let the trifle sit for up to 4 hours. This time allows the layers to blend. If you let it sit too long, the cookies or cake may get soggy. Yes, you can make the trifle a day in advance. Just cover it well and chill in the fridge. This helps the flavors mix beautifully. Absolutely! Strawberries, blueberries, or peaches work great. Just slice them and layer them like bananas. This adds color and different flavors to your trifle. Serve the trifle chilled, in clear glass dishes. This shows off the pretty layers. A small sprig of mint on top makes it look fancy. Yes, store-bought pudding is a quick option. Just choose vanilla or banana flavor for best results. This can save you some time in the kitchen. You can use crumbled sponge cake or even graham crackers. Both options work well in layering. Just make sure they soak up some of the pudding and cream. In this post, we discussed how to make a delicious trifle. We covered the best ingredients and some fun ways to switch them up. You learned step-by-step how to prepare, layer, and chill your trifle. I shared tips for perfect whipped cream and ways to enhance flavors. We also explored different variations and how to store leftovers. Remember, a great trifle brings joy to any occasion. Now, you can impress your friends and family with your new trifle skills! Enjoy your tasty creation and keep experimenting!

Caramel Banana Cream Trifle Delightful and Easy Dessert

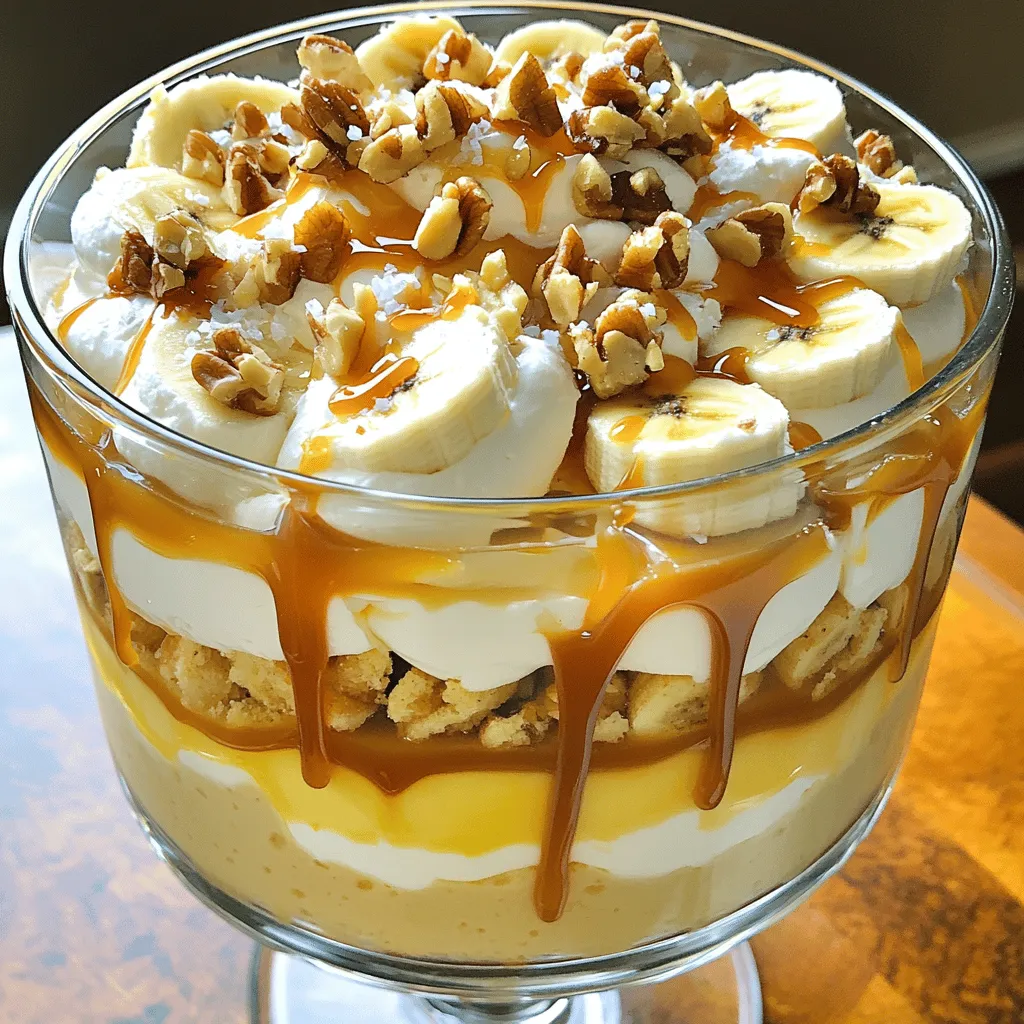
Are you ready for a dessert that impresses without the fuss? The Caramel Banana Cream Trifle combines creamy layers of

To make delicious Crock Pot Beef Tips and Gravy, you need a few key ingredients: - Beef sirloin: 2 pounds, cut into 1-inch cubes - Olive oil: 1 tablespoon for searing - Onion: 1 large, finely chopped - Garlic: 3 cloves, minced - Beef broth: 2 cups for a rich flavor - Mushrooms: 1 cup, sliced (optional, but adds depth) - Worcestershire sauce: 2 tablespoons for umami - Dried thyme: 1 teaspoon for herb flavor - Paprika: 1 teaspoon for a hint of spice - Black pepper: 1 teaspoon to enhance taste - Salt: 1 teaspoon for seasoning - Cornstarch: 2 tablespoons mixed with 2 tablespoons cold water (for thickening) - Fresh parsley: chopped, for garnish These ingredients work together to create a comforting dish. Each one plays a role in building flavor and texture. You can also add mushrooms for extra richness. Serve this dish over mashed potatoes or rice, and don’t forget to garnish with parsley. It adds a nice touch. For the full recipe, check out the complete instructions in the section above. Searing the beef for flavor First, heat olive oil in a large skillet. Add 2 pounds of beef sirloin cut into 1-inch cubes. Sear the beef for about 5-7 minutes, turning to brown all sides. This step adds deep flavor to your beef tips. Once the beef is browned, transfer it to the slow cooker. Adding vegetables to the slow cooker Next, in the same skillet, add 1 large chopped onion and 3 minced garlic cloves. Sauté until the onion is soft and clear, which takes about 3-4 minutes. This step adds sweetness and depth. Then, pour this mixture into the slow cooker with the beef. Combining ingredients in the slow cooker Pour 2 cups of beef broth over the beef and onion mix. Add 1 cup of sliced mushrooms if you like. Then, stir in 2 tablespoons of Worcestershire sauce, 1 teaspoon of dried thyme, 1 teaspoon of paprika, and 1 teaspoon each of black pepper and salt. Mix well to ensure every piece is coated. Adjusting cooking time and settings Cover the slow cooker and set it to cook. You can choose low for 6-8 hours or high for 3-4 hours. The beef should be tender when done. This slow cooking helps all flavors blend beautifully. Creating a cornstarch slurry Once the beef is cooked, it’s time to thicken the gravy. In a small bowl, mix 2 tablespoons of cornstarch with 2 tablespoons of cold water. Stir until smooth; this is your slurry. Final cooking for perfect consistency Add the slurry to the slow cooker and stir it into the beef mix. Cook on high for another 15-30 minutes. This will give you that rich, thick gravy we all love, making the dish perfect for serving. For the full recipe, check the link. Enjoy your delicious meal! When picking beef, choose sirloin for the best taste and tenderness. Look for bright red meat with a bit of marbling. This marbling adds flavor and keeps the beef juicy during cooking. To enhance flavor profiles, sear the beef first. This adds a deep, rich taste that blends well with the gravy. Don’t skip the garlic and onion; they bring a sweet and savory base. Adding Worcestershire sauce also boosts the umami flavor, making each bite delightful. One common mistake is not browning the beef. If you skip this step, your dish may lack depth. Also, don’t overload the slow cooker. This can lead to uneven cooking. Stick to the ingredient amounts in the Full Recipe for the best results. If your gravy is too thin, mix cornstarch with cold water to create a slurry. Stir this into the slow cooker. Cook on high for 15-30 minutes to thicken it up. If the beef isn’t tender, it may need more time. Always check the texture before serving. Serve your beef tips over mashed potatoes or rice. This helps soak up the tasty gravy. You can also add steamed vegetables for color and nutrition. For a lovely touch, sprinkle fresh parsley on top for presentation. For a cozy meal, pair it with crusty bread on the side. This allows you to scoop up every last bit of gravy. Enjoy your delicious dinner! {{image_2}} You can switch the beef for other meats. Chicken or pork works well. Just adjust the cooking time. You can also use plant-based options. Tofu or tempeh can add protein and flavor. For vegetables, feel free to get creative. Carrots, bell peppers, and green beans are great choices. You can add them in the last hour of cooking for a fresh taste. Potatoes can also be cooked with the beef. They absorb the gravy and become soft and tasty. Seasonings can change the whole dish. If you want something spicy, add cayenne pepper or chili powder. For a sweeter touch, use a bit of brown sugar. You can also try herbs like rosemary or basil for a fresh flavor. If you want a taste from another culture, consider adding soy sauce for Asian flair. Or, use taco seasoning for a fun twist. Each change can take you to a new culinary adventure. You can also make this dish on the stovetop. Just sear the beef in a pot, then add the other ingredients. Simmer on low heat for about two hours. This method gives you the same rich flavors in less time. For those with an Instant Pot, it’s simple too. Sear the beef first, then add all the ingredients. Cook on high pressure for about 30 minutes. This way, you get tender beef and thick gravy fast. For the full recipe, check the details above. Enjoy making your own variations! To store your leftover beef tips and gravy, let them cool first. This step keeps the food safe. Once cool, put them in airtight containers. Glass or plastic containers work well. Make sure to seal them tightly. This keeps out air and moisture. For freezing, use freezer-safe containers. These help keep the beef tips fresh. You can also use heavy-duty freezer bags. Squeeze out the air before sealing. To thaw, place the container in the fridge overnight. Reheat gently on the stove or in the microwave. Stir well to ensure even heating. In the fridge, your beef tips last about 3 to 4 days. If you freeze them, they can stay good for up to 3 months. Always check for signs of spoilage. If you see any mold or strange smells, toss it out. Keeping food safe is key to enjoying your meals. Yes, you can make this dish without mushrooms. If you want a similar taste, use chopped bell peppers or zucchini. Both add great flavor and texture. You could also skip the mushrooms entirely and increase the onion. This will give you a nice base for the gravy. If your gravy isn't thickening, don't worry! Here are a few quick tips: - Mix more cornstarch with water and add it to the slow cooker. - Let it cook longer on high, which can help it thicken. - Try mashing some of the beef or vegetables to add body to the gravy. - If all else fails, you can simmer it on the stove until it thickens. To serve fewer people, simply cut the ingredients in half. Use 1 pound of beef and reduce the broth and seasonings accordingly. You can also adjust cooking time slightly. Check for doneness around the same time as the full recipe, but be sure to taste for tenderness. This way, you still enjoy all the flavors without wasting food. For the full recipe, refer to the section above. In this blog post, we covered how to make delicious beef tips from start to finish. We discussed choosing the best ingredients, cooking steps, and tips for a great dish. Remember to avoid common mistakes and explore different variations for unique flavors. Storing leftovers properly keeps them fresh for future meals. Keep this guide handy as you create your tasty beef tips. Cooking can be simple and fun, and experimenting can lead to great new favorites! Enjoy every bite you create!

Crock Pot Beef Tips and Gravy Delicious Dinner Meal

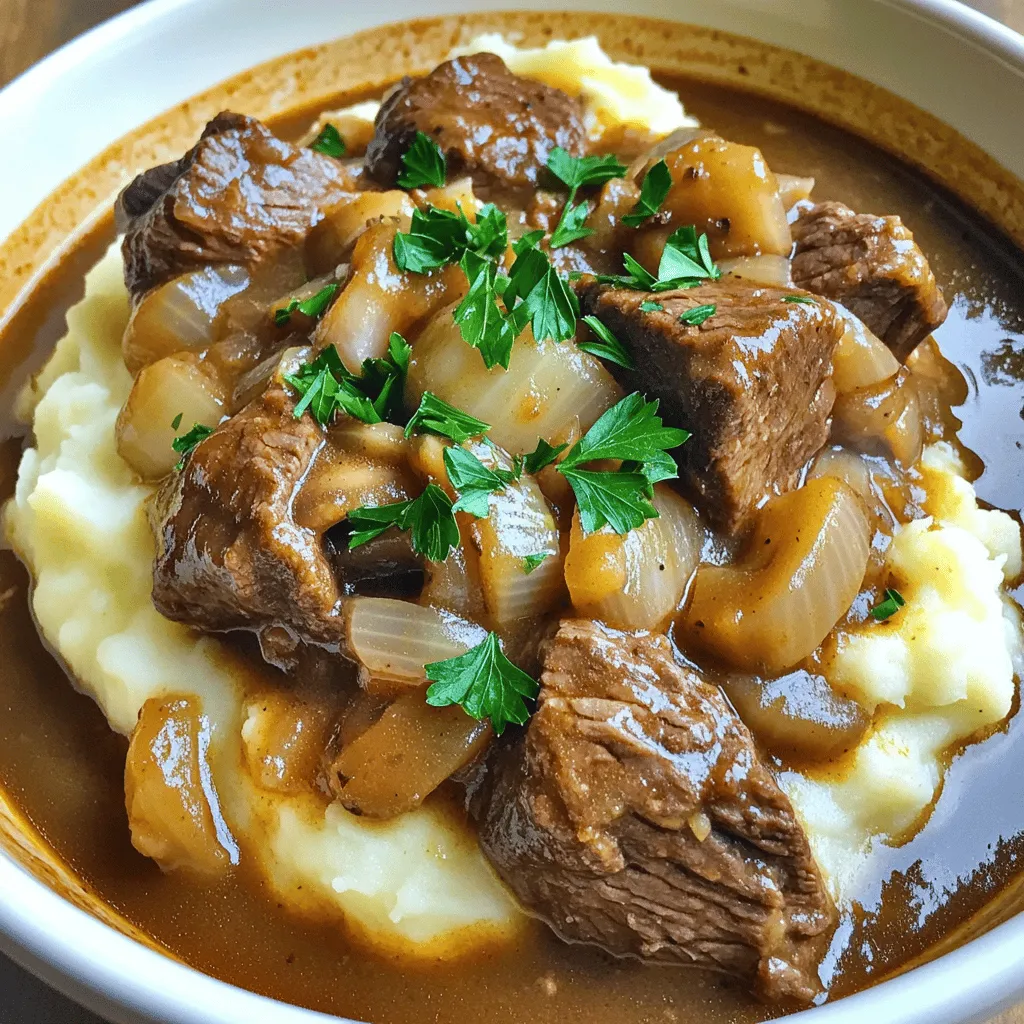
Are you ready to savor a meal that melts in your mouth? This Crock Pot Beef Tips and Gravy recipe

- 12 oz (340g) pasta of your choice - 1 cup ricotta cheese - 1 cup cherry tomatoes, halved - 1 small onion, finely chopped - 3 cloves garlic, minced - 1/4 cup fresh basil, chopped - 1/4 cup grated Parmesan cheese - 2 tablespoons olive oil - Salt and pepper to taste - Crushed red pepper flakes (optional) When I make Creamy Ricotta and Tomato Pasta, I love to choose pasta that suits my mood. You can pick spaghetti, fettuccine, or penne. Each type gives a unique touch to the dish. Ricotta cheese adds creaminess that melts in your mouth. The cherry tomatoes burst with flavor as they cook, making every bite special. - Alternative pasta options: You can use whole wheat or gluten-free pasta for a healthier option. - Vegan ricotta alternatives: Try using cashew cream or tofu blended with lemon juice for a vegan version. - Low-sodium seasoning options: Use herbs like oregano and thyme instead of salt for flavor without the sodium. These swaps keep the dish delicious and cater to different diets. You can still enjoy the creamy texture and rich flavors, no matter your preferences. Start by boiling water in a big pot. Make sure to add a good amount of salt. This salt helps flavor the pasta. Cook the pasta until it is al dente. This means it should be firm but not hard. Usually, this takes about 8 to 10 minutes. Always check the package for exact timing. Before you drain the pasta, save one cup of the pasta water. This water will help make your sauce creamy later. Use olive oil to sauté the onions. It adds a nice flavor. Heat the oil in a large skillet over medium heat. Add the finely chopped onions first. Sauté them for about 3 to 4 minutes. You want them soft and see-through. Then, add the minced garlic. Cook it for one more minute. Make sure to stir so the garlic does not burn. Now, it's time to add the halved cherry tomatoes. Sprinkle in some salt and pepper. If you like heat, add crushed red pepper flakes. Cook the tomatoes for about 5 to 7 minutes. They should soften and burst open. Once that happens, lower the heat. Add the ricotta cheese into the skillet. Stir gently to mix it in. If the mixture feels too thick, add some of the reserved pasta water. This will help you get the creamy consistency you want. Once the ricotta is mixed in, add the cooked pasta to the skillet. Toss it gently. You want the pasta to be coated evenly in the creamy sauce. Cook everything together for another 2 to 3 minutes to heat through. For a nice touch, stir in the chopped basil and grated Parmesan cheese. Adjust the flavor with extra salt and pepper if needed. Serve your pasta in shallow bowls. Garnish with more basil, a sprinkle of Parmesan, and a drizzle of olive oil. This makes it look and taste even better. Enjoy your creamy ricotta and tomato pasta! To avoid a lumpy ricotta mixture, start with room temperature ricotta. This helps it blend smoothly. When you add the ricotta to the skillet, stir gently. If it feels too thick, add pasta water. This water helps to thin the mixture and gives it a silky feel. To lift the flavors, add fresh herbs like basil or parsley. You can also use spices like black pepper or garlic powder for extra kick. If you want more color on your plate, serve with a side salad. A simple green salad pairs well and adds crunch. One common mistake is overcooking the pasta. Cook it just until al dente. This keeps the pasta firm and helps it hold sauce better. Another mistake is skipping the seasoning. Always taste your dish before serving. A little salt and pepper can make a big difference. {{image_2}} You can easily change this dish to suit your taste. Adding protein like chicken or shrimp is a great option. Just cook the protein in the skillet before adding the tomatoes. This adds flavor and texture. You can also incorporate other vegetables. Think about adding spinach, zucchini, or bell peppers. These will boost nutrients and color. Cook them along with the onions for the best results. Choosing the right pasta shape is key for this dish. Spaghetti, fettuccine, or penne work well. Each shape holds the sauce differently. If you need gluten-free options, you have choices too. Look for pasta made from rice or chickpeas. These will not only fit your diet but also taste great. Switching up the cheese can change the whole dish. Instead of ricotta, try goat cheese or cream cheese. Each brings a unique flavor and creaminess. You can also modify the spice level. Want it mild? Skip the crushed red pepper flakes. Prefer heat? Add more flakes or even some chili oil. This lets you control the flavor to match your mood. For the full recipe, check out the earlier section. Keep your creamy ricotta and tomato pasta fresh by using airtight containers. Glass or plastic containers with tight lids work best. Store the leftovers in the fridge for up to three days. After that, the pasta may lose its flavor and texture. To reheat pasta, use a skillet over low heat. Add a splash of water or some olive oil. This keeps the pasta moist and helps it heat evenly. You can also use a microwave. Cover the dish with a lid or a damp paper towel to avoid a dried-out texture. If you want to freeze creamy pasta dishes, make sure to cool it first. Place it in freezer-safe bags or containers, removing as much air as possible. It can stay frozen for up to three months. When you're ready to eat, thaw it overnight in the fridge. Reheat it gently on the stove, adding a little water or olive oil for creaminess. You can serve this pasta with a variety of sides. Here are some ideas: - Garlic bread: It adds crunch and flavor. - Roasted vegetables: They bring a nice balance. - Steamed broccoli: A healthy green option. For salad pairings, consider: - Caesar salad: The creamy dressing complements the pasta. - Caprese salad: Fresh tomatoes and basil match well. - Mixed greens: A simple salad brightens the meal. Yes, you can prepare this dish in advance. Here’s how to get ready: - Cook the pasta and let it cool. - Make the sauce and store it separately in the fridge. For best reheating, follow these tips: - Use a skillet to warm the pasta over low heat. - Add a splash of pasta water to keep it creamy. Absolutely! This recipe is great for kids. Here are some adjustments for picky eaters: - Use less garlic and spice for a milder taste. - Try adding veggies they like, like peas or bell peppers. Nutritional benefits for children include: - Protein from ricotta for growth. - Vitamins from tomatoes for health. You can find the full recipe for Creamy Ricotta and Tomato Pasta in the recipe section above. This pasta dish combines tasty ingredients like ricotta, cherry tomatoes, and herbs. You learned how to cook pasta, sauté aromatic veggies, and mix in flavors. Remember to avoid common mistakes, like overcooking or skipping seasoning. Try different pasta types and protein to keep it fresh. Store leftovers properly to enjoy later. With these tips, you can create a delicious meal your family will love. Enjoy cooking and make this dish your own for everyone to savor.

Creamy Ricotta and Tomato Pasta Rich and Flavorful Dish

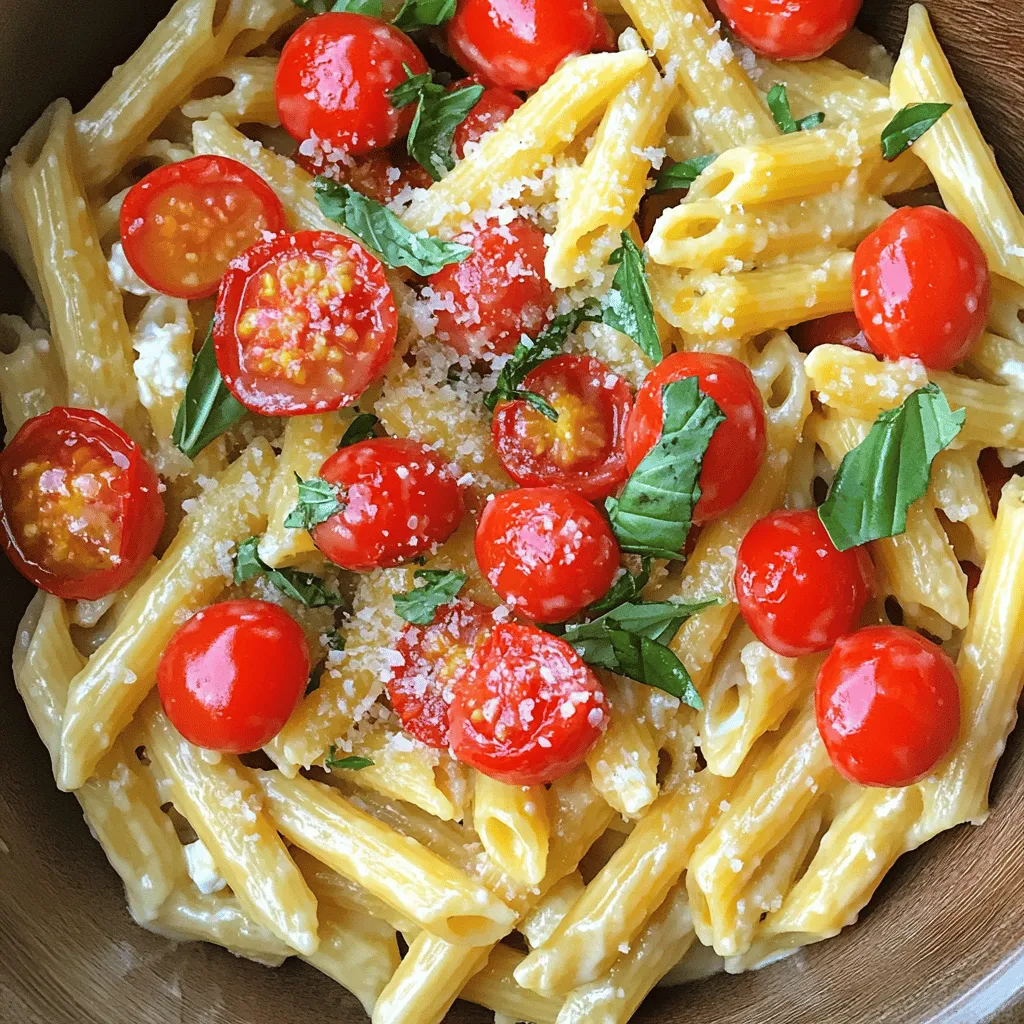
Are you ready to elevate your pasta game? This Creamy Ricotta and Tomato Pasta is rich, flavorful, and oh-so-easy to

Older posts
Newer posts
← Previous Page1 … Page83 Page84 Page85 … Page93 Next →

dsad

© 2025 flavorsprint • Built with GeneratePress

Our Policies

  • Copyright Policy
  • Cookie Policy
  • GDPR Policy
  • Privacy Policy
  • Disclaimer
  • Terms Of Use

More Information

  • Home
  • About
  • Contact
  • Appetizers
  • Dessert
  • Dinner
  • Drinks
©2025, flavorsprint About Back To Top