Skip to content
DisclaimerTerms Of UseGDPR PolicyCookie Policy

flavorsprint

  • Home
  • Drinks
  • Appetizers
  • Dinner
  • Dessert
  • About
  • Contact
  • Privacy Policy
DisclaimerTerms Of UseGDPR PolicyCookie Policy

Lillian

- 4 boneless chicken thighs - 1/4 cup honey - 1/4 cup low sodium soy sauce - 4 cloves minced garlic - 1 teaspoon grated fresh ginger - 1 tablespoon sesame oil - 1 tablespoon olive oil - Salt and pepper to taste - 2 green onions, sliced - Sesame seeds When I make Honey Garlic Chicken, I always focus on the right ingredients. The chicken thighs should be boneless for easy cooking. I love using honey for sweetness and low sodium soy sauce for flavor without too much salt. Minced garlic adds a nice kick, while fresh ginger gives a warm spice. For cooking, I use sesame oil and olive oil. Sesame oil adds a nutty taste that pairs well with the dish. I season the chicken with salt and pepper to bring out the flavors. To finish, I like to garnish with sliced green onions and sesame seeds. They add color and a crunchy texture. This simple recipe brings together fresh ingredients for a delightful meal. You can find the full recipe in the earlier section. Start by making the marinade. In a bowl, whisk together honey, soy sauce, minced garlic, and grated ginger. This mix combines sweet and savory flavors. The garlic adds depth, and ginger gives a hint of warmth. Make sure to blend it well so all the flavors mix. Next, grab your chicken thighs. Season them with salt and pepper on both sides. Place the chicken in a zip-top bag or a shallow dish. Pour the marinade over the chicken, coating it completely. Seal the bag or cover the dish. Refrigerate the chicken for at least 30 minutes. For a stronger flavor, let it marinate for up to 2 hours. This step is key to getting juicy, flavorful chicken. Now, it’s time to cook! Heat sesame oil and olive oil in a large skillet over medium-high heat. Once the oil is hot, take the chicken out of the marinade. Reserve that marinade for later. Cook the chicken for about 5-7 minutes on each side. You want a nice golden-brown color. Make sure the chicken is cooked through. After cooking, remove the chicken from the skillet and let it rest on a plate. Now, pour the reserved marinade into the same skillet. Bring it to a simmer over medium heat. Cook for about 3-4 minutes until it thickens slightly. This will enhance the flavor even more. Finally, return the chicken to the skillet, coating it in the sauce until it’s well-glazed. This step makes your dish shine! Serve your Honey Garlic Chicken hot, garnished with sliced green onions and sesame seeds. Enjoy the sweet and savory goodness of this dish! To start, make sure your chicken is at room temperature. This helps it cook evenly. If you take it straight from the fridge, the outside cooks faster than the inside. Room temperature chicken will give you juicy, tender bites. Want a richer flavor? Marinate the chicken for longer. I recommend at least one hour, but two hours is better. If you like spice, add chili flakes to the marinade. This will give your dish a nice kick. Just a pinch will do! Serving Honey Garlic Chicken is simple. Pair it with rice or steamed vegetables. The rice will soak up the sweet sauce. Steamed veggies add color and crunch. This combination makes a complete meal that everyone will love. For the full recipe, check out the previous sections! {{image_2}} You can easily swap the chicken thighs for other proteins. Chicken breasts work well if you want a leaner option. Tofu provides a great plant-based choice. You can also try shrimp for a seafood twist. Each option changes the flavor but keeps the dish delicious. Feel free to adjust the sauce to your taste. If you like it sweeter, add more honey. For a tangy kick, try adding a splash of vinegar. These simple changes can make the sauce taste unique and exciting. Adding extras can really enhance the dish. Consider mixing in some orange zest for a citrusy twist. Sesame seeds add a nice crunch and nuttiness. These small changes can deepen the flavor and make your Honey Garlic Chicken special. For the complete recipe, check out the Full Recipe section. Store leftovers in an airtight container for up to 3 days. This keeps the chicken fresh and tasty. Make sure the container seals well. You can enjoy the sweet and savory flavors even after a few days. Just remember to check for any signs of spoilage before digging in. Freeze cooked chicken in a freezer-safe container for up to 3 months. This is perfect for meal prep. Just let the chicken cool down before you freeze it. Label the container with the date. This way, you know how long it has been in the freezer. When you're ready to eat, it will be a quick and easy meal option. Reheat in a skillet or microwave until heated through to maintain flavor. If using a skillet, add a splash of water or broth. This helps keep the chicken moist. Stir occasionally for even heating. If using a microwave, cover the chicken to prevent it from drying out. Enjoy your Honey Garlic Chicken just like it was freshly made! To ensure your Honey Garlic Chicken is tender, marinate it for at least 30 minutes. Marinating helps break down the meat fibers, making it softer. Use a mix of honey and soy sauce, which adds flavor and moisture. Cooking times matter too. Cook the chicken until it reaches an internal temperature of 165°F. This ensures it's fully cooked but not dry. Yes, you can make Honey Garlic Chicken in advance. Simply marinate the chicken and place it in the fridge. You can marinate it for up to 2 hours. When you are ready to eat, take it out and cook it. This makes it easy for busy days or meal prep. You get to enjoy a tasty dish without a lot of work. For sides, rice pairs perfectly with Honey Garlic Chicken. You can use white rice or brown rice, both are great choices. Stir-fried veggies also add color and nutrients. A fresh salad can lighten the meal and add crunch. Mixing different sides makes the meal balanced and enjoyable. You now have a clear guide to making delicious Honey Garlic Chicken. Start with simple ingredients like chicken, honey, and soy sauce. Follow the steps to marinate, cook, and serve. Remember tips on enhancing flavors and storing leftovers. You can also try variations with different proteins or sauces. This dish is easy to prepare and sure to please. Enjoy your cooking adventure!

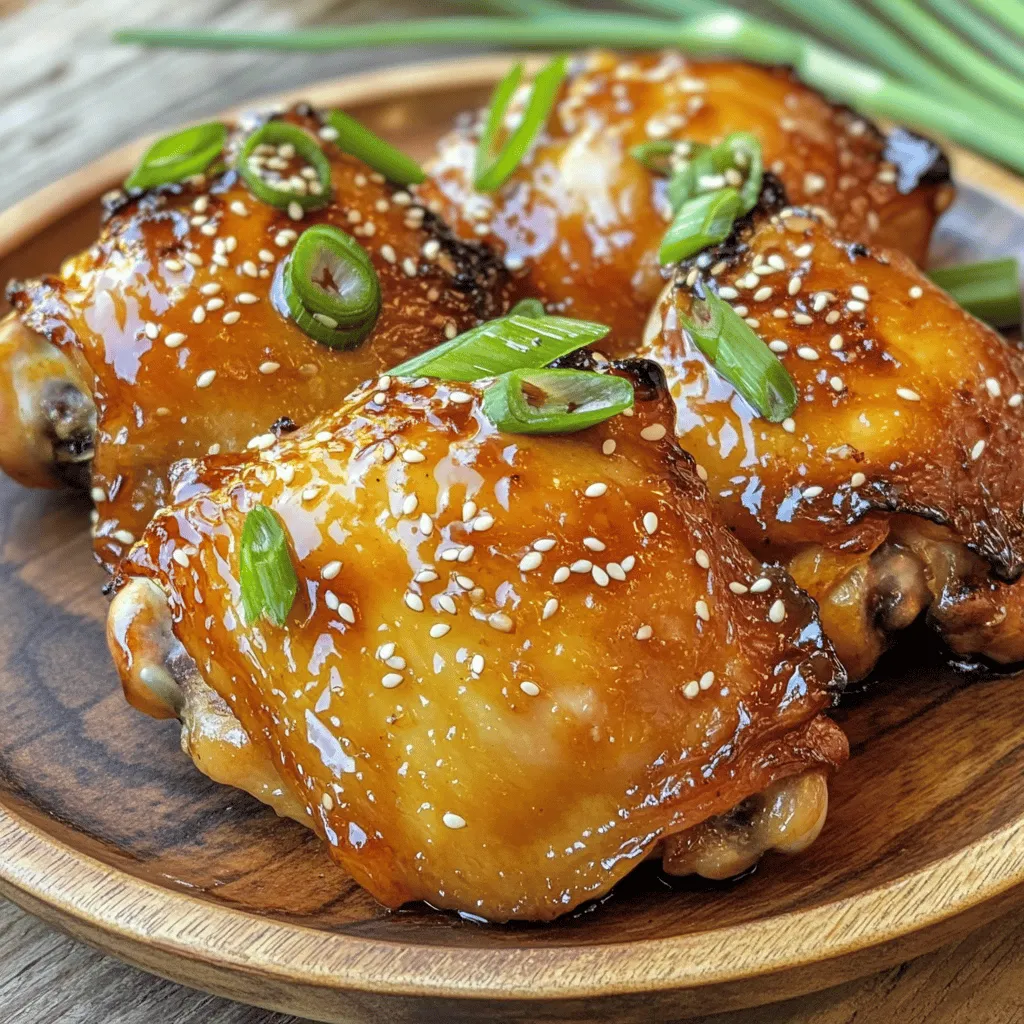
Honey Garlic Chicken Delicious and Simple Recipe

Looking for a quick and tasty meal? Honey Garlic Chicken is your answer! This dish combines sweet honey, savory soy

- 4 medium-sized Yukon Gold potatoes, diced - 1 cup cherry tomatoes, halved - 1 cucumber, diced - 1/2 cup red onion, finely chopped - 1/3 cup Greek yogurt - 2 tablespoons Dijon mustard - 2 tablespoons apple cider vinegar - 1 tablespoon olive oil - 1 teaspoon garlic powder - Salt and pepper to taste - Fresh parsley, chopped (for garnish) Each ingredient in this salad brings great health benefits. Yukon Gold potatoes provide potassium and fiber, which are good for heart health. Cherry tomatoes are rich in vitamins A and C. They help boost your immune system. Cucumbers keep you hydrated and low in calories. Red onions add antioxidants and have anti-inflammatory properties. Greek yogurt gives you protein and calcium, supporting strong bones. Dijon mustard adds flavor without extra calories, and apple cider vinegar may help with digestion. Olive oil is healthy fat that supports heart health. Garlic powder adds flavor while providing immune support. Fresh parsley is packed with vitamins and adds freshness. When buying produce, look for firm potatoes without bruises. Choose cherry tomatoes that are bright and plump, with no wrinkling. For cucumbers, pick ones that are dark green and firm. Red onions should feel heavy for their size and have dry skin. Always smell the herbs to ensure they are fresh. If they smell strong and aromatic, they are good to use. Choosing fresh produce makes your salad taste better and healthier. For more details, check the Full Recipe. Start by washing the potatoes. I like using Yukon Gold because they are creamy and sweet. Cut them into small cubes. In a large pot, add salted water and bring it to a boil. Once boiling, add the diced potatoes. Cook them for about 10-15 minutes until they are fork-tender. Be careful not to overcook them, or they will get mushy. After cooking, drain the potatoes and let them cool in a bowl. While the potatoes cool, it’s time to make the dressing. In a large mixing bowl, add Greek yogurt, Dijon mustard, apple cider vinegar, olive oil, and garlic powder. Season with salt and pepper to taste. Whisk all these ingredients together until smooth. This dressing is tangy and creamy without the need for mayo. Once the potatoes have cooled, add them to the bowl with the dressing. Toss in the cherry tomatoes, cucumber, and red onion. Gently fold all the ingredients together. Make sure the potatoes are coated well with the dressing. Taste and adjust the seasoning if needed. If you want, you can add a little more salt and pepper. For the best results, refrigerate the salad for at least 30 minutes. This helps the flavors blend. Before serving, garnish with fresh parsley for a pop of color. Enjoy your Healthy No Mayo Potato Salad! For the full recipe, check out the detailed instructions above. To make great potato salad, start with the right potatoes. Yukon Golds work best for their creamy texture. Cut them into equal-sized pieces. This helps them cook evenly. Boil them in salted water until fork-tender, about 10 to 15 minutes. Drain and let them cool before mixing. This keeps your salad fresh and tasty. You can boost flavor without using mayo. Greek yogurt adds creaminess and tang. Dijon mustard gives a nice kick. Apple cider vinegar adds brightness. Garlic powder brings a warm spice. Mix these ingredients well to create a smooth dressing. Feel free to adjust the amounts to fit your taste. Fresh herbs like parsley also add flavor and color. Serve your Healthy No Mayo Potato Salad cold for a refreshing dish. It works great as a side for grilled meats or sandwiches. You can also serve it on a bed of greens for a light lunch. For a fun twist, try adding slices of avocado on top. Your guests will love the fresh and vibrant flavors! {{image_2}} You can easily boost the Healthy No Mayo Potato Salad by adding protein. Grilled chicken works great. Just dice it and mix it in. Chickpeas are another good choice. They add texture and fiber. A cup of cooked chickpeas will give your salad a hearty feel. This helps make your meal more filling. Don’t be afraid to swap ingredients for new flavors. Try using red potatoes instead of Yukon Gold for a sweeter taste. You can also replace Greek yogurt with a dairy-free option like cashew cream. For a zesty twist, add capers or pickles. These small changes can make a big difference in flavor. Make your potato salad fit the season. In summer, toss in fresh corn or bell peppers. In fall, apples or roasted squash add a nice touch. In winter, try using roasted Brussels sprouts. Each season brings new ingredients that can add flavor and color. This keeps your dish fresh and exciting throughout the year. To keep your Healthy No Mayo Potato Salad fresh, store it in an airtight container. This will help prevent oxidation and keep it tasty. Place the container in the fridge right after serving. Make sure to cover it well to avoid any strong odors from other foods. If you have leftovers, it’s best to consume them within a few days. Your potato salad will last about 3 to 5 days in the fridge. After that, the flavors may fade, and the texture might change. Always check for any signs of spoilage, like an off smell or odd colors. If it looks or smells different, it’s safer to throw it away. If you want to enjoy your potato salad warm, you can reheat it gently. Place it in a microwave-safe dish and heat it in short bursts of 30 seconds. Stir between each burst to ensure even heating. However, remember, potato salad is best served cold. So, consider eating it as is for a refreshing bite! You can check out the [Full Recipe] for more details. Yes, you can make this salad ahead of time. It tastes even better after chilling. The flavors blend well when it sits in the fridge. I suggest making it a day before serving. Just cover it tightly to keep it fresh. If you do not have Greek yogurt, you can use plain yogurt. Sour cream also works well. For a dairy-free option, try using almond or coconut yogurt. Each alternative will change the taste slightly but still keep it tasty. Absolutely! This potato salad is great for meal prep. It stores well and keeps its flavor. You can pack it for lunch or enjoy it for dinner. Just remember to keep it in an airtight container. You can keep this salad in the fridge for about three days. After that, the potatoes may start to lose their texture. Always check for any signs of spoilage before eating. Yes, you can easily customize this recipe. If you follow a vegan diet, use plant-based yogurt. For gluten-free options, check your mustard and vinegar. You can add or remove veggies based on your personal taste. This recipe is flexible and can cater to many needs. This blog post shared how to make a Healthy No Mayo Potato Salad. We covered the best ingredients, their health benefits, and tips for picking fresh produce. Each step, from cooking the potatoes to combining flavors, enhances your salad’s taste. You can also try different proteins and flavors while storing leftovers is easy. Remember, this salad is fun to make and perfect for any meal. Enjoy the fresh, tasty options that fit your needs. You can create a dish that everyone loves!

Healthy No Mayo Potato Salad Fresh and Flavorful Dish

Looking for a fresh twist on a classic dish? This Healthy No Mayo Potato Salad is your answer! Packed with

For the Baked Potato Chicken Broccoli Casserole, you will need: - 4 medium-sized potatoes, peeled and diced - 2 cups cooked chicken, shredded - 2 cups fresh broccoli florets - 1 cup shredded cheddar cheese - 1 cup sour cream - 1/2 cup milk - 1 teaspoon garlic powder - 1 teaspoon onion powder - Salt and pepper to taste - 1/2 cup breadcrumbs - 2 tablespoons olive oil - 1/4 cup grated Parmesan cheese You can swap some ingredients if needed. For a lighter option, use Greek yogurt instead of sour cream. If you want a dairy-free version, try using almond milk and dairy-free cheese. For a healthier twist, you can use sweet potatoes instead of regular potatoes. If you have leftover turkey, it works great as a chicken substitute. This casserole serves six people. Each serving has about: - Calories: 400 - Protein: 25g - Carbohydrates: 45g - Fat: 15g - Fiber: 4g These numbers may vary based on your specific ingredient choices. This dish is filling and offers a good balance of protein and carbs, perfect for a hearty meal. You can find the full recipe for more detailed steps. Before we start cooking, gather all your ingredients. Make sure you have: - 4 medium-sized potatoes, peeled and diced - 2 cups cooked chicken, shredded - 2 cups fresh broccoli florets - 1 cup shredded cheddar cheese - 1 cup sour cream - 1/2 cup milk - 1 teaspoon garlic powder - 1 teaspoon onion powder - Salt and pepper to taste - 1/2 cup breadcrumbs - 2 tablespoons olive oil - 1/4 cup grated Parmesan cheese You will also need a large pot, a mixing bowl, and a greased 9x13 inch casserole dish. 1. Preheat your oven to 375°F (190°C). This makes sure the oven is hot when you bake the casserole. 2. Boil the diced potatoes in a large pot of salted water. Cook them for about 10-15 minutes. They should be tender but not mushy. Drain the potatoes and set them aside. 3. In a large mixing bowl, combine the shredded chicken, boiled potatoes, broccoli florets, cheddar cheese, sour cream, milk, garlic powder, onion powder, salt, and pepper. Mix everything together well so that each piece is coated. 4. Drizzle the olive oil over this mixture. Stir it until the oil is evenly mixed in. 5. Transfer the mixture into the greased casserole dish. Spread it out evenly. 6. In a small bowl, mix the breadcrumbs with the grated Parmesan cheese. Sprinkle this mix evenly over the top of the casserole. 7. Bake the casserole in your preheated oven for 25-30 minutes. It is ready when the top is golden brown and bubbly. Once you take the casserole out of the oven, let it cool for about 5 minutes. This helps it set a little and makes it easier to serve. You can serve the casserole in individual portions. For a nice touch, garnish each plate with fresh parsley. This adds color and flavor. You can also add a side salad to make a complete meal. Enjoy your Baked Potato Chicken Broccoli Casserole Delight! For the full recipe, check out the recipe section. To make great potatoes, start by choosing medium-sized ones. Peel and dice them evenly. This helps them cook at the same rate. Boil them in salted water for about 10 to 15 minutes. You want them tender but not mushy. Always test with a fork. If it goes in easily, they are ready. After boiling, drain the water right away to stop cooking. Let them cool for a bit before adding to your casserole. Cheese adds creaminess and flavor to your casserole. I recommend using sharp cheddar for a bold taste. It melts nicely and gives a lovely golden color. You can also mix in mozzarella for a stretchier texture. If you want something different, try pepper jack for a spicy kick. Adding some grated Parmesan on top brings a nice crunch. Just remember to choose cheeses that melt well for the best results. Cooking time can change based on your oven and dish size. Always check your casserole after 25 minutes. Look for a golden top and bubbling edges. If it’s not ready, give it another 5 minutes. If your potatoes are larger, they may need a bit more time to bake. Keep an eye on it to avoid overcooking. Remember, every oven is different. Use your best judgment when timing your bake. For the full recipe, check the details above. {{image_2}} You can easily make this dish gluten-free. Instead of regular breadcrumbs, use gluten-free breadcrumbs. You could also try crushed gluten-free crackers. These options still give a nice crunch. Always check labels to ensure no hidden gluten is in your ingredients. This way, everyone can enjoy the casserole. If you prefer a vegetarian version, skip the chicken. Use extra broccoli or add other veggies like bell peppers and mushrooms. You can replace chicken with canned chickpeas for protein. This will keep it hearty and filling. Use the same creamy sauce and cheese for flavor. Feel free to add more veggies. Carrots, peas, or spinach work well. Just make sure they are chopped small for even cooking. If you want more protein, try adding cooked sausage or turkey. This enhances the flavor and nutrition. Mix and match as you like for a custom dish. Check out the Full Recipe for more details! After you enjoy your baked potato chicken broccoli casserole, store the leftovers. Place them in an airtight container. Make sure to cool the casserole to room temperature first. In the fridge, it will last for about three to four days. Label the container with the date so you remember when you made it. If you want to save some for later, freezing works well. Cut the casserole into portions, and wrap each piece tightly in plastic wrap. Then, place the wrapped portions in a freezer-safe bag. Squeeze out the air to prevent freezer burn. You can freeze it for up to three months. Label the bags with the date, so you know when to use them. To reheat, first, take it out of the fridge or freezer. If frozen, let it thaw in the fridge overnight. When ready, preheat your oven to 350°F (175°C). Place the casserole in a baking dish. Cover it with foil to keep it moist. Bake for about 20-30 minutes until it is heated through. If you like a crispy top, remove the foil for the last 10 minutes of baking. Enjoy your meal! For the full recipe, check out the earlier section. Yes, you can use leftover rotisserie chicken. It saves time and adds great flavor. Just shred the chicken and mix it into the casserole. This method makes the dish quick and easy. Plus, it helps you reduce food waste. Using rotisserie chicken is a smart choice for busy nights. You can serve the casserole with a side salad or steamed veggies. A fresh green salad adds crunch and color. You can also pair it with garlic bread for a filling meal. If you want something hearty, try serving with roasted carrots or green beans. These sides balance the flavors and make a complete dinner. Baking the casserole takes about 25 to 30 minutes. Preheat your oven to 375°F (190°C) first. Make sure the top is golden brown before taking it out. You want the casserole heated through and bubbly. Let it cool for about five minutes before serving. This helps the flavors settle and makes it easier to serve. This article covered all you need to know about making a Baked Potato Chicken Broccoli Casserole. We explored key ingredients and tasty substitutions, detailed cooking steps, and helpful tips. You learned about variations like gluten-free options and how to store leftovers. Now, you have the tools to make a delicious casserole that fits your needs. Enjoy cooking this simple yet satisfying dish, and don't hesitate to get creative in the kitchen!

Baked Potato Chicken Broccoli Casserole Delight

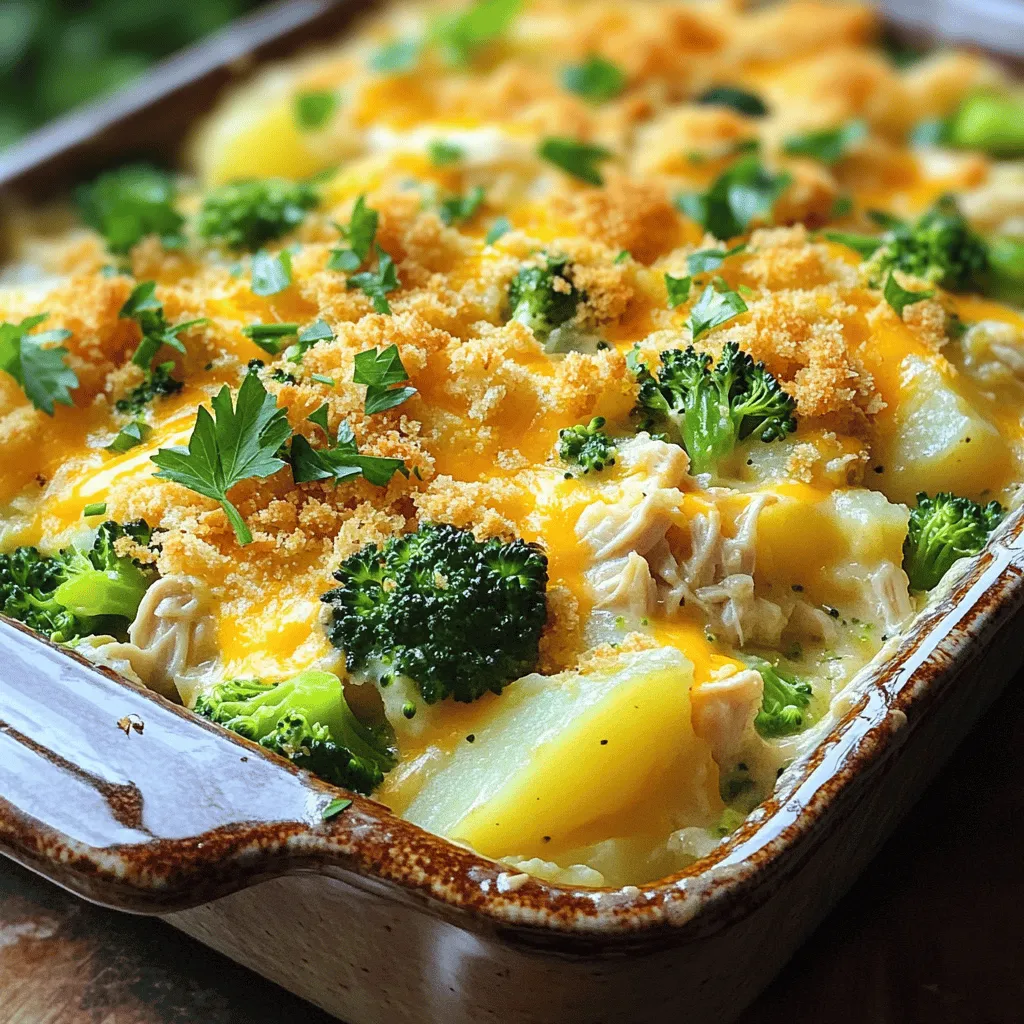
Are you ready for a meal that brings comfort and flavor together? In this blog post, I’ll show you how

- 1 ½ cups graham cracker crumbs - ½ cup unsalted butter, melted - 1 cup sugar, divided - 1 teaspoon ground cinnamon - 3 (8 oz) packages cream cheese, softened - 1 teaspoon vanilla extract - 3 large eggs - 2 cups cherry pie filling (store-bought or homemade) - ½ cup all-purpose flour - 1 tablespoon cornstarch - 1 teaspoon lemon juice - Whipped cream for topping (optional) To start your Cherry Cobbler Cheesecake, gather all these ingredients. The graham cracker crumbs will form a tasty crust. Melt the unsalted butter to mix with the crumbs. This helps bind them together. You will use sugar in two parts: one for the crust and one for the filling. Ground cinnamon adds warmth and flavor to the crust. Next, you need cream cheese. It gives the cheesecake its rich and creamy texture. Make sure it is softened for easy mixing. The vanilla extract adds a lovely flavor. Eggs help set the cheesecake, so don’t skip them. Cherry pie filling is the star here. You can use store-bought or make your own. It adds sweetness and a fruity touch. The all-purpose flour and cornstarch help firm up the filling. Finally, lemon juice gives a bright note and balances the sweetness. If you like, you can top the cheesecake with whipped cream. It makes a lovely finish. These ingredients will help you create a delightful Cherry Cobbler Cheesecake. For the full recipe, check the details above! 1. Preheat your oven to 325°F (160°C). This is the first step to getting your cheesecake just right. 2. Prepare the springform pan. Grease a 9-inch springform pan with butter or non-stick spray. This helps the cheesecake come out easily. 3. Make the graham cracker crust. In a mixing bowl, combine 1 ½ cups graham cracker crumbs, ½ cup melted unsalted butter, ½ cup sugar, and 1 teaspoon ground cinnamon. Stir until the crumbs are moist. 4. Bake the crust. Press the crumb mixture into the bottom of the prepared pan. Bake for 10 minutes, then remove it from the oven. Let it cool. 1. Beat the cream cheese. In a large bowl, beat 3 packages of softened cream cheese until smooth. 2. Add sugar, vanilla, and eggs. Gradually mix in the remaining ½ cup sugar and 1 teaspoon vanilla extract. Then, add 3 large eggs one at a time. Mix well after each egg. 3. Combine dry ingredients. In a separate bowl, whisk together ½ cup all-purpose flour and 1 tablespoon cornstarch. Add in 1 teaspoon lemon juice. Gradually add this to the cream cheese mixture and mix until just combined. 1. Layer the cheesecake and cherry filling. Pour half of the cheesecake mixture over the cooled crust. Spoon half of the 2 cups cherry pie filling on top. Repeat with the remaining cheesecake and cherry filling. 2. Bake the cheesecake. Place your layered cheesecake in the oven. Bake for 50 to 60 minutes. The center should be set but still slightly jiggly. 3. Cool the cheesecake. Turn off the oven and crack the door open. Let the cheesecake cool in the oven for 1 hour. After that, refrigerate it for at least 4 hours or overnight for best results. Now, you have a delicious Cherry Cobbler Cheesecake waiting for you! For more detail, check the Full Recipe. To achieve the perfect cheesecake texture, start with room-temperature cream cheese. Cold cream cheese can lead to lumps. Mix it until smooth before adding other ingredients. This process creates a creamy base. To prevent cracks, avoid overmixing the batter. Mix just until combined. Overmixing adds too much air. This air can cause the cheesecake to rise and crack as it bakes. Also, bake the cheesecake in a water bath. This method helps regulate the temperature. The best way to serve Cherry Cobbler Cheesecake is chilled. Slice it into even pieces for a beautiful presentation. You can add whipped cream on top for extra creaminess. A dollop of cherry pie filling on each slice adds a pop of color. Garnishing ideas include fresh cherries or a sprinkle of cinnamon. You can even add chocolate shavings for a twist. These simple touches can elevate your dessert and make it look stunning. For this recipe, you will need essential baking tools. A 9-inch springform pan is a must. It allows for easy release of the cheesecake once it cools. You will also need a mixing bowl and a hand mixer or stand mixer. A rubber spatula helps in getting every bit of batter from the bowl. A whisk is useful for mixing dry ingredients. These tools ensure your cheesecake turns out just right. {{image_2}} You can add a twist to your cherry cobbler cheesecake. One fun idea is a chocolate cherry cheesecake. Mix in cocoa powder with the cream cheese for a rich flavor. You can also swirl in some melted chocolate before baking. This adds a lovely depth to the dessert. Another option is to use different fruits. Try peach or blueberry instead of cherries. You could even mix fruits for a unique taste. Each fruit brings its own flavor and charm, making this cheesecake fun and creative. If you need a gluten-free crust, use almond flour or gluten-free graham crackers. Just mix them with melted butter, and you are good to go. This way, everyone can enjoy the cheesecake without worry. For those who want a dairy-free option, use vegan cream cheese. Brands like Tofutti or Kite Hill work well. They create a creamy filling without the dairy. You can still enjoy a delicious cheesecake without the lactose. You can make this cheesecake fit any season. In summer, use fresh berries in the filling. Strawberries or raspberries can brighten your dessert. In fall, try adding pumpkin spice to the mix. This gives a warm, cozy flavor perfect for chilly nights. For holidays, think about adding flavors like eggnog or peppermint. These festive touches can make your cheesecake a seasonal treat. You might find that each season brings a new favorite version of this delightful dessert. To keep your Cherry Cobbler Cheesecake fresh, store it in the fridge. Cover it with plastic wrap or foil. This keeps the cheesecake moist and prevents it from absorbing odors. Use an airtight container for the best results. A glass container works well and looks nice too. If you have leftovers, reheat the cheesecake gently. Place a slice on a microwave-safe plate. Heat it for about 10 to 15 seconds. Check it often to avoid overheating. You want the cheesecake warm but not hot. To keep it from getting soggy, don't cover it while reheating. You can freeze your Cherry Cobbler Cheesecake for longer storage. Wrap it tightly in plastic wrap. Then, place it in a freezer-safe container. It can last for up to three months in the freezer. When ready to enjoy, thaw it in the fridge overnight. This helps it stay creamy and delicious. For the complete recipe, including all the steps and ingredients, check the Full Recipe. How long does Cherry Cobbler Cheesecake last in the refrigerator? Cherry Cobbler Cheesecake lasts about 5 to 7 days in the fridge. Store it in an airtight container to keep it fresh. If you love cheesecake, you’ll want to eat it quickly! Can I use fresh cherries instead of pie filling? Yes, you can use fresh cherries! Just pit and slice them. Mix with some sugar and lemon juice to create a sweet topping. Fresh cherries bring a nice burst of flavor. What can I substitute for cream cheese in this recipe? You can use Greek yogurt or ricotta cheese as a swap for cream cheese. Both give a creamy texture but with different flavors. Choose what fits your taste and diet. What to do if the cheesecake is too runny? If your cheesecake is too runny, it may need more time in the oven. Bake it until the center is slightly jiggly but not liquid. You can also add more cornstarch next time to help it set. How can I fix a cracked surface? To fix a cracked surface, top it with whipped cream or more cherry filling. This hides the cracks and adds flavor. Next time, bake it at a lower temperature to avoid cracking. Best practices for a foolproof cheesecake Always use room-temperature ingredients for a smoother mix. Avoid opening the oven frequently while baking. This helps keep the heat consistent. Common mistakes to avoid while making cheesecake Don’t overmix your batter; this adds air and can cause cracks. Also, be careful not to skip the cooling step in the oven. This lets the cheesecake set properly. For more tips, check the Full Recipe. This blog post guides you through making a delicious Cherry Cobbler Cheesecake. We covered the key ingredients, detailed steps, and tips for perfecting your cheesecake. You learned about variations and storage options to keep it fresh. Remember, practice is key for the best results. Enjoy sharing this treat with friends and family. Your cheesecake will surely impress! Use these tips and have fun in the kitchen. You can create your own delicious version, no matter your skill level. Enjoy every bite!

Cherry Cobbler Cheesecake Delightfully Creamy Treat

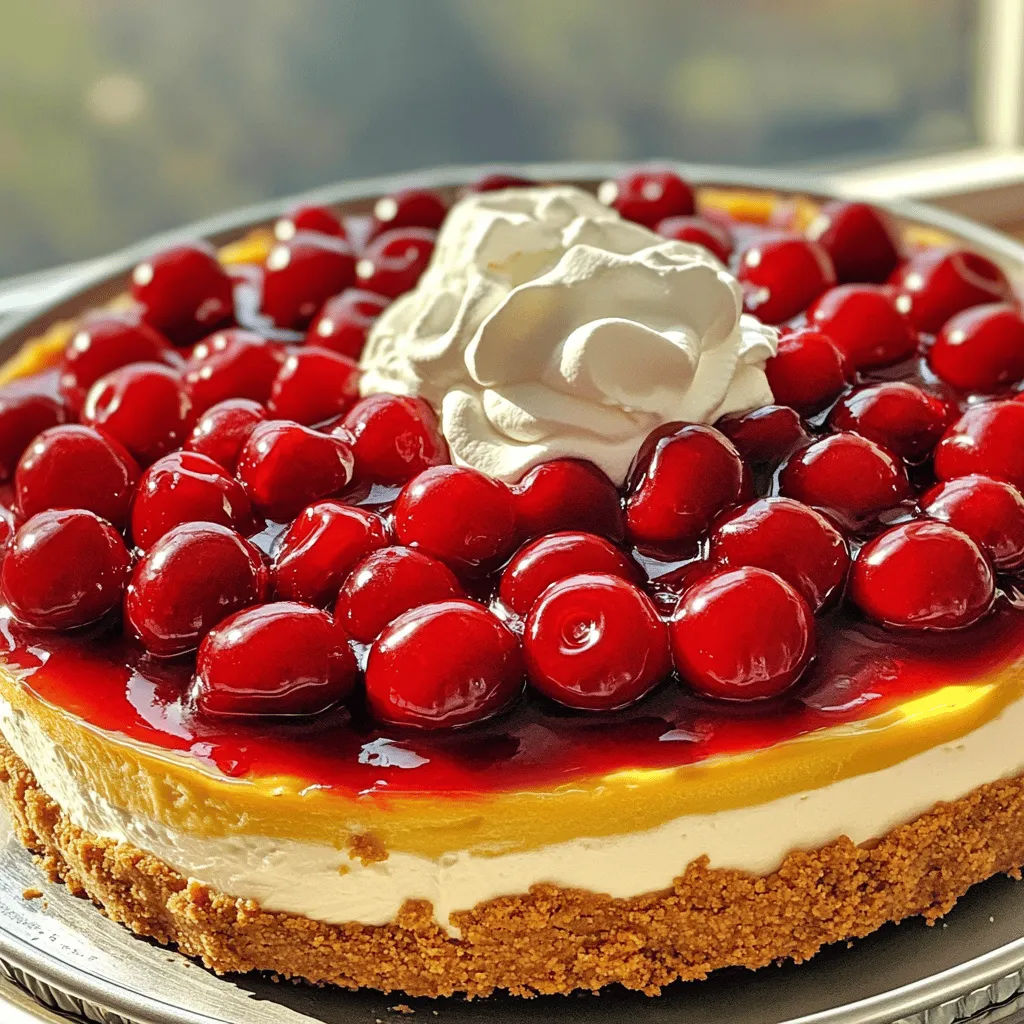
Indulge in a sweet twist on traditional dessert with my Cherry Cobbler Cheesecake! This delightfully creamy treat combines the rich

- 1 cup ripe bananas, mashed (about 2 large bananas) - 1/2 cup unsalted butter, softened - 1/2 cup brown sugar, packed - 1/4 cup granulated sugar - 1 large egg - 1 teaspoon vanilla extract - 1 1/2 cups all-purpose flour - 1/2 teaspoon baking soda - 1/2 teaspoon salt - 1 cup vanilla pudding mix (instant) - 1/2 cup chopped walnuts (optional) - 1/2 cup mini chocolate chips You need ripe bananas to give the best flavor. The butter adds moisture and richness. Brown sugar brings a deep taste, while granulated sugar adds sweetness. The egg acts as a binder, holding everything together. Vanilla extract enhances the aroma and flavor. The flour gives structure and firmness to the cookies. Baking soda helps them rise. Salt balances the sweetness. Instant vanilla pudding mix gives a creamy, rich filling. Walnuts add a nice crunch if you choose to use them. Mini chocolate chips make the cookies extra special. Gather all these ingredients before you start. It makes the process smooth and fun. For the best results, use fresh ingredients. This ensures every bite of your stuffed banana pudding cookies is delightful! If you want the full recipe, check the section above. Start by creaming the butter and sugars. Use a large bowl and mix the softened butter, brown sugar, and granulated sugar together. Beat them until fluffy, about 2-3 minutes. This step adds air and helps the cookies rise. Next, add ripe bananas and vanilla extract. Mash the bananas well before mixing them into the creamy butter. Then, add the egg and mix until all is combined. This mixture will give your cookies a moist and sweet base. Now it's time to integrate the dry ingredients. In another bowl, whisk together the flour, baking soda, and salt. This step ensures that the baking soda is evenly distributed. Combine the wet and dry mixtures. Gradually add the dry mix to the banana mixture. Stir gently until just combined. Avoid overmixing, as it can make the cookies tough. Form cookie balls and fill them. Scoop out tablespoon-sized amounts of dough and roll them into balls. Place half of them on a lined baking sheet, leaving space between each ball. Create a small indentation in each cookie ball with your finger. Fill each with a teaspoon of banana pudding. Top each filled ball with another ball of dough and press the edges to seal the filling inside. Finally, bake at 350°F (175°C) for 10-12 minutes. The cookies should be golden brown on the edges but still soft in the center. Let them cool for 5 minutes on the baking sheet before moving them to a wire rack. Enjoy your delicious stuffed banana pudding cookies! To keep your cookies soft, use ripe bananas. They add moisture and flavor. Bake them just until golden brown around the edges. This helps them stay chewy in the center. When placing the cookies on the baking sheet, give them space. Aim for about two inches apart. This allows the cookies to spread without sticking together. One common mistake is overmixing the dough. Mix just until the flour disappears. Overmixing can make the cookies tough. Another mistake is not sealing the filling properly. Make sure to press the edges well. This keeps the delicious banana pudding inside as they bake. For a fun presentation, use a colorful platter. A dusting of powdered sugar adds a nice touch. You can also garnish with banana slices. This highlights the banana flavor and looks great. Pair these cookies with a glass of milk. The creaminess of the milk balances the sweetness. You can also try them with coffee or tea for a delightful treat. For the full recipe, check out the detailed instructions. Enjoy your baking! {{image_2}} You can make stuffed banana pudding cookies even more fun by adding flavors. Try mixing in a pinch of cinnamon or nutmeg. These spices bring warmth and depth. They can enhance the banana flavor. You won't need much—just a quarter teaspoon will do. Using different types of chocolate is another tasty idea. You can swap mini chocolate chips for dark, white, or even peanut butter chips. Each type will change the cookie's taste and texture. Experimenting with flavors can surprise your taste buds! If you need gluten-free cookies, you can use a gluten-free flour blend. Many brands have great options that work well. Just make sure the blend has xanthan gum for good texture. For vegan modifications, replace the egg with a flaxseed meal or applesauce. Use vegan butter instead of regular butter. You can also choose a plant-based pudding mix to keep it dairy-free. These swaps can help you enjoy this dessert while meeting dietary needs. You can easily adapt these cookies for holidays. Adding spices like ginger or allspice gives a festive touch. You can also decorate with colorful sprinkles for special events or birthdays. For seasonal themes, think about using pumpkin spice in the fall or peppermint in winter. Each change can make your cookies fit the mood of the season. Themed cookie variations can add fun to any gathering or celebration. Remember, these stuffed banana pudding cookies are a canvas. You can get creative and make them your own! For the full recipe, check the details above. To keep your stuffed banana pudding cookies fresh, store them in an airtight container. This will help maintain their soft texture. You can place parchment paper between layers to avoid sticking. At room temperature, these cookies last about four to five days. To freeze cookies, first, cool them completely. Then, wrap each cookie in plastic wrap. Place them in a freezer bag or a container. They can stay fresh for up to three months. When you want to enjoy a frozen cookie, simply take one out and let it thaw at room temperature. To restore softness, warm cookies in the microwave for about ten seconds. This method keeps them gooey and delightful. You can also use an oven. Preheat it to 350°F (175°C) and heat for five minutes. Enjoy them warm for the best taste! For the full recipe, refer to the section above. Yes, you can use regular pudding mix, but the texture will change. Regular pudding needs cooking to thicken. This adds time to your process. Instant pudding works well because it combines easily and thickens quickly without heat. Instant pudding also keeps the cookies soft, which is what we want. To make these cookies healthier, you can try a few swaps: - Use whole wheat flour instead of all-purpose flour. - Replace some butter with unsweetened applesauce. - Reduce the sugar by half and add more mashed bananas for sweetness. - Consider using dark chocolate chips for added nutrients. These changes help cut calories while still keeping the cookies tasty. If you want to skip bananas, there are tasty options: - Applesauce gives a similar moisture and sweetness. - Pureed pumpkin adds flavor and keeps the cookie soft. - Mashed avocados can also work, adding healthy fats. Each option alters the flavor, so choose what you like best for your cookies. This blog post covered a delicious cookie recipe using ripe bananas. You learned the ingredients, equipment, and step-by-step baking instructions. I shared tips to ensure your cookies stay soft and suggested fun variations. Storing and reheating cookies properly keeps them fresh for longer. Baking can be simple and rewarding, so don’t hesitate to experiment with this recipe. Enjoy every bite and share the joy of baking with others!

Stuffed Banana Pudding Cookies Delightful Dessert Treat

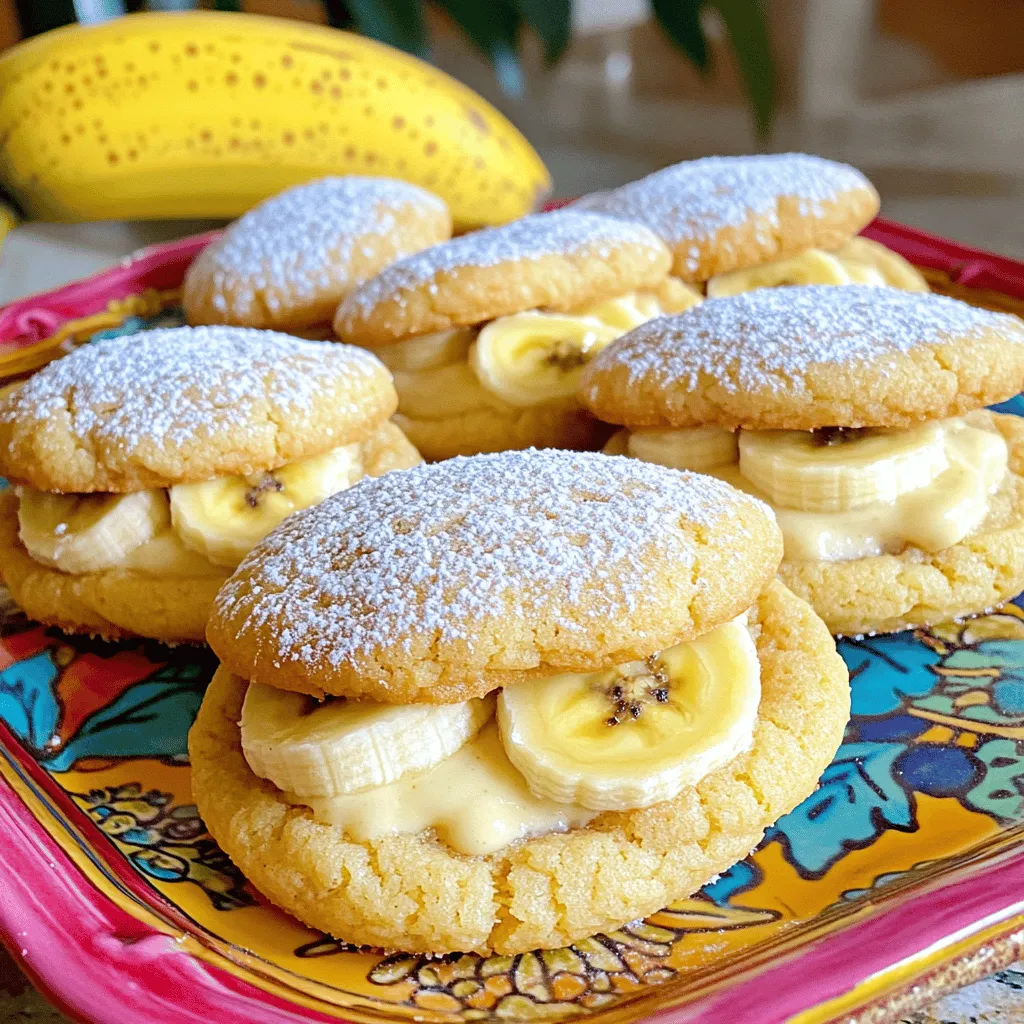
Imagine indulging in a cookie that combines the creaminess of banana pudding with the charm of homemade treats. These Stuffed

To make a delicious sweet potato casserole with pecan topping, you need to gather a few key ingredients. Each component plays a vital role in creating that comforting and sweet flavor we all love. - Sweet Potatoes: 4 large, peeled and cubed - Sweeteners and Dairy: - 1/2 cup brown sugar - 1/4 cup butter, melted - 1/2 cup whole milk - Eggs and Spices: - 2 large eggs - 1 teaspoon vanilla extract - 1/2 teaspoon ground cinnamon - 1/4 teaspoon nutmeg - 1/4 teaspoon salt - Pecan Topping Ingredients: - 1 cup pecans, chopped - 1/4 cup all-purpose flour - 1/4 cup granulated sugar These ingredients blend together to create the perfect sweet potato casserole. The sweet potatoes give it a creamy base, while the pecans add crunch and flavor. You can find the full recipe to help you through the cooking steps. Boiling and mashing sweet potatoes First, fill a large pot with water and bring it to a boil. Add the cubed sweet potatoes to the water. Cook them for about 15 to 20 minutes. They should be tender when you poke them with a fork. After cooking, drain the sweet potatoes and let them cool for a few minutes. Mixing ingredients for the casserole Next, mash the sweet potatoes in a large mixing bowl. Aim for a smooth texture. Once mashed, add in the brown sugar, melted butter, whole milk, and vanilla extract. Crack the eggs into the bowl, and sprinkle in the ground cinnamon, nutmeg, and salt. Mix everything well until combined. This mixture is the base of your casserole. Making the pecan topping In another bowl, combine the chopped pecans, all-purpose flour, granulated sugar, and a pinch of salt. Mix these ingredients together to create a crumbly texture. This topping adds a crunchy and sweet layer to your casserole. Preheating the oven Before you bake, preheat your oven to 375°F (190°C). This step is crucial to ensure even cooking. Combining casserole and topping After mixing the casserole, transfer it into a greased 9x13 inch baking dish. Spread the sweet potato mixture evenly in the dish. Then, take the pecan topping and sprinkle it over the sweet potato layer. Make sure to cover it well for the best flavor. Baking time and temperature Place the dish in the preheated oven. Bake for 25 to 30 minutes. Look for a golden brown topping and ensure the casserole is heated through. Once done, let it cool for a few minutes before serving. For the full recipe with all the details, check out the [Full Recipe]. How do you tell when sweet potatoes are tender? You can check by poking them with a fork. If the fork slides in easily, they are done. Remember, overcooking can make them too soft. To achieve the perfect consistency, mash the sweet potatoes well. Use a potato masher or a fork. Mix in your other ingredients slowly. This helps to blend everything smoothly. For presentation, serve the casserole warm. Add a sprinkle of cinnamon on top. A few whole pecans make it look fancy. You can also use a pretty dish to serve it. What dishes go well with sweet potato casserole? It pairs nicely with roasted turkey or ham. You can also serve it with green beans or a fresh salad. This adds color and balance to your meal. For the full recipe, check out the [Full Recipe]. {{image_2}} You can easily adapt this sweet potato casserole for different diets. If you want a dairy-free option, consider using almond milk or coconut milk. These choices keep the dish creamy while avoiding dairy. For a vegan version, swap the eggs with flax eggs. Just mix one tablespoon of ground flaxseed with two and a half tablespoons of water and let it sit for five minutes. If you want to change the nuts, you have options too. Walnuts or almonds can replace pecans. Both add a nice crunch and unique flavor. Just chop them to the same size as pecans for even baking. Spices can really enhance your casserole. Try adding a pinch of cayenne pepper for a touch of heat. You can also mix in some ginger for warmth. These small changes can transform the flavor profile. Fruits can add natural sweetness and variety. Chopped apples or pears work well mixed in with the sweet potatoes. If you like a tropical twist, try adding crushed pineapple. This will make your casserole more vibrant and bursting with flavor. Feel free to explore these variations to make your sweet potato casserole uniquely yours. For the complete recipe, check out the Full Recipe. To keep your sweet potato casserole fresh, store it in the fridge. Use an airtight container or cover it tightly with plastic wrap. This will help keep the flavors great for up to four days. If you want to freeze it, let the casserole cool first. Then, place it in a freezer-safe container. You can also wrap it tightly with foil. This will keep it good for up to three months. When you’re ready, just thaw it in the fridge overnight before reheating. To reheat your sweet potato casserole, use the oven. Preheat it to 350°F (175°C). Place the casserole in a baking dish. Add a few drops of milk to keep it moist. Cover with foil to avoid drying out. Heat for about 20 minutes or until it’s warm all the way through. This method keeps the topping nice and crisp. Enjoy the deliciousness of your sweet potato casserole again! For the full recipe, check out the Sweet Potato Casserole with Pecan Topping. Yes, you can prepare this casserole the day before. Just follow the steps in the Full Recipe, but stop before baking. Cover the dish with plastic wrap and place it in the fridge. When you're ready to bake, let it sit at room temperature for 30 minutes. Then, bake it as directed. This saves you time on busy days and lets the flavors blend. The casserole is done when the topping turns golden brown. You can also insert a toothpick into the center. If it comes out clean, the casserole is ready. Keep an eye on it in the last few minutes of baking. This way, you won't overcook it. I often check it a few minutes early just to be safe. Serve the casserole warm for the best taste. You can add a sprinkle of cinnamon or a few whole pecans on top for a nice look. This adds a touch of elegance to your dish. It pairs well with roasted meats or a fresh salad. Enjoy it as a side at holiday dinners or casual gatherings. You now have a complete guide to making sweet potato casserole. We covered all the ingredients, from sweet potatoes to pecans. I shared each step, from boiling to baking, to ensure perfect results. I also included tips for serving and storing your dish. In conclusion, this recipe is easy and fun. With your creativity, you can make it your own. Enjoy making this dish for friends and family. It’s sure to be a crowd-pleaser at any meal!

Sweet Potato Casserole with Pecan Topping Delight

Nothing says comfort like a warm Sweet Potato Casserole with Pecan Topping. This dish combines creamy sweet potatoes with a

To make a vibrant tricolored pasta salad, gather these main ingredients: - 2 cups tricolored rotini pasta - 1 cup cherry tomatoes, halved - 1 cup cucumber, diced - 1/2 cup black olives, sliced - 1/2 cup feta cheese, crumbled - 1/4 cup red onion, finely chopped - 1/4 cup fresh basil, chopped These ingredients give the salad its bright colors and fresh flavors. For the dressing, use these components: - 1/4 cup olive oil - 2 tablespoons red wine vinegar (or apple cider vinegar) - 1 teaspoon garlic powder - Salt and pepper to taste This dressing adds a zesty kick to the salad. The prep time for this dish is about 15 minutes. The total time is around 45 minutes. You can serve this salad for 4 to 6 people. This makes it perfect for gatherings or a family meal. For the full recipe, check the section above. To make tricolored pasta salad, first, boil the water. Use a large pot and add salt. Bring the water to a rolling boil. Next, add 2 cups of tricolored rotini pasta. Cook it according to the package directions until it is al dente. This usually takes around 8 to 10 minutes. Once cooked, drain the pasta in a colander. Rinsing the pasta under cold water is very important. This stops the cooking and cools the pasta quickly. While the pasta cooks, you can prep the vegetables. Start with 1 cup of cherry tomatoes. Cut them in half. Next, take 1 cup of cucumber and dice it into small pieces. Use a sharp knife for clean cuts. For the red onion, finely chop 1/4 cup. The smaller the pieces, the better the flavor. Don’t forget the black olives! Slice 1/2 cup. Lastly, chop 1/4 cup of fresh basil. Fresh herbs add a nice touch to the dish. Always use fresh vegetables for the best taste and look. After prepping, it’s time to mix everything. In a large bowl, combine the cooled pasta, cherry tomatoes, cucumber, black olives, feta cheese, red onion, and basil. For the dressing, whisk together 1/4 cup of olive oil, 2 tablespoons of red wine vinegar, and 1 teaspoon of garlic powder in a small bowl. Pour this dressing over the mixed ingredients. When tossing, do it gently to avoid mushiness. You want all ingredients to stay intact. Once mixed, cover the salad and chill it for at least 30 minutes. This helps the flavors blend well. For the full recipe, check the earlier section. To make your tricolored pasta salad great, cook your pasta al dente. This means the pasta should be firm when you bite it. If you cook it too long, it will turn mushy in the salad. After cooking, rinse the pasta under cold water. This stops the cooking process and cools it down quickly. When adding vegetables, use fresh ones to keep the crunch. If you want to avoid soggy veggies, do not add them too early. Wait until just before serving to mix them in. This helps maintain their crispness. To boost the taste of your salad, try adding fresh herbs like parsley or dill. You can also use spices like oregano or thyme for a kick. For a hint of sweetness, consider natural sweeteners like honey or agave syrup in your dressing. They balance the tang of the vinegar well. Make your salad look stunning by serving it in a large, clear bowl. This lets the colors shine through. You can also layer the veggies and pasta for an eye-catching look. For a final touch, use colorful garnishes like extra basil leaves or sliced olives. These not only add beauty but also enhance the flavor. When you serve your tricolored pasta salad, remember to keep it cool. A chilled dish is more refreshing, especially on warm days. For the complete recipe, check out the [Full Recipe]. {{image_2}} You can change the pasta type to suit your taste. Try penne or farfalle instead of tricolored rotini. Both work great and add texture. For veggies, add bell peppers or spinach for color and crunch. You can also mix in proteins. Grilled chicken, shrimp, or chickpeas add a nice boost. Red wine vinegar is tasty, but apple cider vinegar works too. It gives a bit of sweetness. You can also try balsamic vinegar for a rich flavor. If you want creamy, use ranch or yogurt-based dressings. They add a smooth touch that pairs well with the pasta. Think about seasonal flavors. In summer, add fresh corn or zucchini. Fall calls for roasted butternut squash and cranberries. You can even mix in flavors from other cuisines. A taco-themed salad can have black beans, corn, and a zesty lime dressing. The options are endless! To store your tricolored pasta salad, use airtight containers. Glass or plastic containers work well. These containers keep air out and help maintain freshness. Before storing, let the salad cool down to room temperature. This step prevents moisture buildup inside the container. You can keep the salad separate from the dressing for best results. Mix the dressing in just before serving. Refrigerate your pasta salad for up to three days. After three days, the salad may lose flavor and texture. Look for signs before eating. If the salad smells sour or changes color, it’s time to toss it. If the veggies appear slimy or mushy, do not consume the salad. If you have leftover pasta salad, serve it cold or at room temperature. You can remix it by adding fresh herbs or more veggies. This helps revive the flavors. For a new twist, try adding grilled chicken or shrimp. This adds protein and makes a filling meal. You can also blend in some pesto or a different dressing to change the taste. Enjoy your culinary creativity! You can make tricolored pasta salad a day in advance. Cook the pasta and chop the veggies. Store them in separate containers in the fridge. Just mix them together when you’re ready to serve. This keeps the pasta firm and the veggies fresh. For maximum flavor, let the salad chill for at least 30 minutes. This helps the ingredients blend well. If you make it the night before, the taste will deepen. Just remember to stir it before serving. Yes, you can easily make this salad vegan. Swap out feta cheese for a plant-based cheese. You can also use a vegan dressing. The olive oil and vinegar work well without any dairy. Try adding more veggies like bell peppers or avocados for creaminess. You can even toss in some chickpeas for protein. This way, you keep the salad filling and tasty. A simple olive oil and vinegar dressing works best. Use red wine vinegar or apple cider vinegar for tang. Garlic powder adds a nice kick. You can also try creamy dressings. A tahini or cashew cream dressing could be great. Just pick what you like best. Don’t forget to season the dressing with salt and pepper. This makes all the flavors pop! For the full recipe, check out the details above. In this blog post, we explored the essentials for a tasty tricolored pasta salad. You learned about key ingredients, from fresh veggies to zesty dressings. We walked through each preparation step, ensuring your pasta is perfectly cooked and your vegetables crisp. Tips on texture and flavor kept the dish exciting, while storage methods ensured freshness. In summary, pasta salad is versatile and can cater to different tastes. Enjoy experimenting with your own twists and savor the flavors!

Tricolored Pasta Salad Colorful and Fresh Delight

Looking for a colorful dish that bursts with flavor? My Tricolored Pasta Salad is your answer! This vibrant salad showcases

To make a tasty Creamy Crab Pasta Salad, you will need these main ingredients: - 8 oz pasta (pennette or fusilli work well) - 1 cup crab meat (fresh or canned, drained) - 1/2 cup mayonnaise - 1/4 cup Greek yogurt - 1 tablespoon Dijon mustard - 1 tablespoon lemon juice - 1/2 cup celery, finely chopped - 1/4 cup red bell pepper, finely chopped - 1/4 cup green onions, sliced - 1 teaspoon Old Bay seasoning - Salt and pepper to taste - Fresh parsley, chopped (for garnish) These ingredients create a creamy, savory mix that brings out the crab's flavor. The pasta gives it a nice base, while the veggies add crunch. You can change the salad to fit your taste. Consider adding: - Diced cucumber for extra crunch - Chopped dill pickles for a tangy kick - Avocado for creaminess - Cherry tomatoes for sweetness - A splash of hot sauce for heat Feel free to mix and match. This salad allows for your creativity. To prepare this salad, gather these tools: - Large pot for cooking pasta - Mixing bowls (one large, one medium) - Whisk for making the dressing - Colander for draining pasta - Knife and cutting board for chopping veggies Having these tools ready will make your cooking process smooth and easy. Enjoy making this delightful dish! Don’t forget to check the Full Recipe for more details. To start, fill a large pot with salted water and bring it to a boil. Add 8 oz of pasta. Pennette or fusilli works best for this salad. Cook the pasta until it's al dente, about 8-10 minutes. Drain it well and rinse under cold water. This cools the pasta down and stops the cooking. Grab a medium bowl. In it, mix together 1/2 cup mayonnaise, 1/4 cup Greek yogurt, 1 tablespoon Dijon mustard, and 1 tablespoon lemon juice. Add 1 teaspoon of Old Bay seasoning for that classic crab flavor. Whisk until everything is smooth and well blended. Taste and adjust with salt and pepper if needed. In a large mixing bowl, combine the cooled pasta, 1 cup of crab meat, 1/2 cup finely chopped celery, 1/4 cup finely chopped red bell pepper, and 1/4 cup sliced green onions. Pour the dressing over the ingredients. Gently fold them together until all is coated. Cover the bowl with plastic wrap and refrigerate it for at least 30 minutes. This chilling time lets the flavors meld and intensify. You can find the full recipe for extra details. For a great dressing, mix mayonnaise and Greek yogurt. This mix gives a creamy feel. Add Dijon mustard for a slight bite. Lemon juice adds brightness to balance the creaminess. Use Old Bay seasoning for that classic crab flavor. Taste the dressing and adjust the salt and pepper. A perfect dressing enhances the pasta salad. Serve the salad in a big bowl or in smaller dishes. Top with extra chopped parsley for color. You can add lemon wedges on the side. This adds a fresh touch. For a fun twist, serve with crispy breadsticks. This makes your meal feel special. Remember, presentation matters for a dish like this! After enjoying your salad, store it in an airtight container. This keeps it fresh in the fridge. It can last for about three days. If the salad seems dry later, add a bit of dressing. Stir well before serving again. This helps keep the flavors strong. Enjoy every bite of your creamy crab pasta salad! For the full recipe, check the earlier section. {{image_2}} You can easily boost the nutrition of your creamy crab pasta salad. Try adding extra vegetables. Some great options include: - Cherry tomatoes: Halve them for a sweet burst. - Cucumber: Dice it for a crunchy texture. - Carrots: Shred them for a pop of color. Each adds its own flavor and crunch. Mix and match based on what you enjoy and have on hand. If crab is not your first choice, you can swap proteins. Here are some great alternatives: - Shrimp: Cooked shrimp adds a fresh taste. - Chicken: Shredded rotisserie chicken makes it hearty. - Tuna: Canned tuna is a quick and easy option. These proteins can change the dish while keeping it delicious. Choose what suits your taste. You can adjust the flavors to make the salad your own. Here are some tips: - Herbs: Fresh dill or basil can enhance the taste. - Spices: A dash of cayenne pepper adds heat. - Zest: Lemon or lime zest brightens the dressing. Experiment with these ideas until you find your perfect blend. For the full recipe, check out the original details. This creamy crab pasta salad features simple, fresh ingredients. Here’s what you need: - 8 oz pasta (pennette or fusilli work well) - 1 cup crab meat (fresh or canned, drained) - 1/2 cup mayonnaise - 1/4 cup Greek yogurt - 1 tablespoon Dijon mustard - 1 tablespoon lemon juice - 1/2 cup celery, finely chopped - 1/4 cup red bell pepper, finely chopped - 1/4 cup green onions, sliced - 1 teaspoon Old Bay seasoning - Salt and pepper to taste - Fresh parsley, chopped (for garnish) Each of these ingredients brings its own flavor and nutrition. The pasta serves as a filling base. The crab adds protein and a sweet taste. Mayonnaise and yogurt create a creamy texture. Vegetables add crunch and color. A serving of this creamy crab pasta salad contains about 300-350 calories. This can vary based on the exact amount of ingredients you use. The pasta and crab are the main sources of calories. The dressing with mayonnaise and yogurt also contributes. If you want to lower the calories, you can reduce the mayonnaise or use a lighter version. However, keep in mind that it may change the creaminess of the dish. This recipe offers several health benefits: - Crab Meat: It is low in fat and high in protein. It also contains essential minerals, like zinc and selenium. - Greek Yogurt: This ingredient adds probiotics, which help gut health. It is also lower in fat than sour cream. - Vegetables: Celery and bell peppers provide vitamins A and C. They also add fiber, which is great for digestion. - Lemon Juice: This adds a fresh flavor while providing vitamin C, which boosts the immune system. Incorporating these ingredients creates a balanced dish that is both tasty and nutritious. To find the complete recipe, refer to the Full Recipe. Yes, you can use frozen crab meat. Just make sure to thaw it first. Drain any extra water after thawing. This ensures your salad remains creamy and not watery. Frozen crab meat tastes great and is easy to find. It adds the same delicious flavor as fresh crab. Creamy crab pasta salad lasts about three to four days in the fridge. Store it in an airtight container to keep it fresh. If you see any signs of spoilage, like a bad smell or change in color, throw it away. It’s best to eat it within those days for the best flavor and texture. Pasta shapes like pennette or fusilli work best for this salad. Their shapes hold the dressing and add texture. You can also try rotini or shells for variety. Just avoid long pasta types like spaghetti, as they don't mix well in salads. Choose a pasta that you love, and enjoy! For the full recipe, check out the [Full Recipe]. You learned how to make a creamy crab pasta salad. We discussed key ingredients and tools you need. Cooking steps provided clear guidance, ensuring you can create a tasty dish. You also received tips on perfecting the dressing and storing leftovers. Remember, this salad is versatile. Feel free to add veggies or try different proteins. Consider the nutritional value for a healthier meal. Enjoy this delightful dish at your next gathering!

Creamy Crab Pasta Salad Delightful and Easy Recipe

Are you ready to dive into a creamy crab pasta salad that’s both delightful and easy to make? This dish

- 2 cups all-purpose flour - 1 tablespoon baking powder - 1 teaspoon garlic powder - ½ teaspoon salt - 1 cup shredded mozzarella cheese - ½ cup pepperoni, diced - ½ cup green bell pepper, finely chopped - ½ cup marinara sauce (plus extra for serving) - 1 cup milk - ⅓ cup olive oil - 1 large egg - Italian seasoning, for garnish To make these deep-dish pizza muffins, gather your ingredients first. Start with the dry ingredients. Flour, baking powder, garlic powder, and salt create the base. Next, add your cheese and toppings. Mozzarella is key for that gooey texture. Diced pepperoni and green bell pepper bring flavor and fun. Now, for the wet ingredients. Milk, olive oil, and egg bind everything together. The combination of these ingredients makes a rich batter. - Standard muffin tin - Mixing bowls - Whisk - Cooking spray or olive oil You will need a standard muffin tin for baking. Mixing bowls help separate the dry and wet ingredients. A whisk makes mixing easy. Don't forget cooking spray or olive oil to grease the muffin tin. This step helps your muffins pop out easily after baking. These simple ingredients and equipment create a delicious snack. For the full recipe, follow the steps I will outline next. - Preheat your oven to 375°F (190°C). - Grease a standard muffin tin with cooking spray or olive oil. - In a large bowl, whisk together the flour, baking powder, garlic powder, and salt. - Fold in the shredded mozzarella cheese, diced pepperoni, and chopped green bell pepper. - In another bowl, mix the milk, olive oil, and egg until smooth. - Gradually pour the wet mixture into the dry ingredients. - Stir gently until just combined; a few lumps are okay. - Spoon the batter into the prepared muffin tins, filling each cup about ¾ full. - Top each muffin with a small dollop of marinara sauce. - Sprinkle Italian seasoning on top. - Bake for 20-25 minutes until golden brown. - A toothpick should come out clean when inserted into the center. - Let the muffins cool for a few minutes before moving them to a wire rack. For the Full Recipe, check the ingredients and cooking steps above. To get the best texture in your Deep-Dish Pizza Muffins, focus on moisture. A good tip is to use fresh ingredients. For instance, fresh cheese melts better and adds more flavor. Mixing too much can ruin your muffins. When you combine the wet and dry ingredients, stir gently. A few lumps are okay. This helps keep your muffins light and fluffy. Serve your muffins warm for the best taste. They should come out of the oven hot. This way, the cheese stays gooey, and the flavors shine. To make your muffins even more special, add fresh basil on top. Not only does it look nice, but it also adds a fresh taste. You can serve them with extra marinara sauce for dipping. This makes each bite even more fun! Check the [Full Recipe] for more details on making these tasty treats. {{image_2}} You can easily change ingredients to fit your taste. For a vegetarian option, swap the pepperoni for your favorite veggies. Try mushrooms, spinach, or olives for a tasty twist. This keeps the muffins hearty while adding color and nutrients. If you need a gluten-free option, simply use gluten-free flour. Many brands work well in this recipe. You might need to adjust liquid amounts slightly, so keep an eye on the batter's texture. To make your Deep-Dish Pizza Muffins even better, think about different cheeses. Cheddar, provolone, or even feta can add unique flavors. Mix and match to find your favorite combination. You can also play with herbs and spices. Adding oregano, basil, or crushed red pepper can boost the flavor. Experiment with what you have on hand. This is a fun way to create your own signature muffin! For the full recipe, check out the details above. To keep your deep-dish pizza muffins fresh, store them in an airtight container. Let the muffins cool down before sealing them. This helps prevent moisture buildup, which can make them soggy. If you have leftovers, they will stay good for about three days. For longer storage, consider freezing them. Use a freezer-safe bag or container to avoid freezer burn. When it’s time to enjoy your muffins again, reheating is easy. The oven method gives the best results. Preheat the oven to 350°F (175°C). Place the muffins on a baking sheet for about 10 minutes. This warms them evenly and keeps them crisp. If you’re in a hurry, you can use the microwave. Heat each muffin for about 30 seconds. Check if it's warm enough, then add more time if needed. The microwave is faster but can make the muffins a bit soft. For the best taste, I recommend the oven! For the full recipe, you can refer to the original cooking guide. Yes, you can freeze Deep-Dish Pizza Muffins. To do this, allow them to cool completely. Wrap each muffin in plastic wrap, then place them in a freezer bag. This keeps them fresh for up to three months. When you’re ready to eat them, just thaw in the fridge overnight. You can reheat them in an oven or microwave. Deep-Dish Pizza Muffins last about five days in the fridge. Store them in an airtight container. This keeps them soft and tasty. If you notice any mold, throw them out immediately. Each muffin has around 200-250 calories. They contain about 10 grams of fat, 25 grams of carbs, and 8 grams of protein. The actual values depend on the specific ingredients you use. They provide a fun and filling snack option. You can find Deep-Dish Pizza Muffins at local bakeries or pizza restaurants. Some cafes may also offer them as part of their menu. If you want to make them at home, check out the Full Recipe for detailed instructions. You’ve learned how to make delicious Deep-Dish Pizza Muffins. We covered key ingredients like flour, cheese, and toppings. I shared tips to keep them moist and tasty. You can customize these muffins to fit your diet, whether vegetarian or gluten-free. Proper storage and reheating can keep them fresh longer. These muffins are fun to make and enjoy. Try them with your favorite toppings or serve them warm. You’ll impress friends and family with this easy recipe. Enjoy every bite!

Deep-Dish Pizza Muffins Tasty and Fun Snack Idea

Looking for a fun and tasty snack? Deep-Dish Pizza Muffins bring the flavors you love to a portable treat! Imagine

The base of your vegetarian pot pie starts with simple, fresh ingredients. Here’s what you need: - 1 prepared pie crust (store-bought or homemade) - 2 tablespoons olive oil - 1 medium onion, diced - 2 cloves garlic, minced - 2 medium carrots, diced - 1 cup green beans, chopped - 1 cup mushrooms, sliced - 1 cup corn (fresh or frozen) - 1 medium potato, peeled and cubed - 1 cup vegetable broth - 1 tablespoon soy sauce - 1 teaspoon dried thyme - 1 teaspoon fresh rosemary, chopped - ½ teaspoon black pepper - ½ cup heavy cream or coconut cream (for a vegan option) - Salt to taste - 1 tablespoon cornstarch (optional, for thickening) When picking veggies, think about color and taste. Fresh vegetables add flavor and texture. Here are some top picks: - Carrots: They bring sweetness and crunch. - Green beans: They add a nice snap and freshness. - Mushrooms: They give a rich, earthy flavor. - Corn: It adds a hint of sweetness for balance. - Potatoes: They create heartiness and absorb flavors well. Feel free to mix in other vegetables like peas, zucchini, or bell peppers. Each choice can make your pot pie even better. Adding protein makes your pot pie filling more satisfying. Here are some great options: - Lentils: They cook quickly and add a nice texture. - Chickpeas: They are filling and have a nutty flavor. - Tofu: It absorbs flavors well and adds creaminess. - Seitan: This meat substitute has a chewy texture for heartiness. You can use one or a combination of these for a power-packed meal. Each option brings its own special taste to the dish. Now that you know what to include, you can check out the Full Recipe for a step-by-step guide on making your savory vegetarian pot pie. Start by gathering all your ingredients. This makes cooking easier. You will need: - 1 prepared pie crust (store-bought or homemade) - 2 tablespoons olive oil - 1 medium onion, diced - 2 cloves garlic, minced - 2 medium carrots, diced - 1 cup green beans, chopped - 1 cup mushrooms, sliced - 1 cup corn (fresh or frozen) - 1 medium potato, peeled and cubed - 1 cup vegetable broth - 1 tablespoon soy sauce - 1 teaspoon dried thyme - 1 teaspoon fresh rosemary, chopped - ½ teaspoon black pepper - ½ cup heavy cream or coconut cream (for a vegan option) - Salt to taste - 1 tablespoon cornstarch (optional, for thickening) Make sure to wash and chop all vegetables first. This helps them cook evenly. Now, let’s cook the filling. Heat the olive oil in a large skillet over medium heat. Add the diced onion and garlic. Cook them until the onion looks clear, about 3-4 minutes. Next, stir in the carrots, green beans, and mushrooms. Cook for another 5 minutes, or until they get tender. Then, add the corn and cubed potato. Pour in the vegetable broth and soy sauce. Mix everything well. Bring it to a gentle simmer. Season this mix with thyme, rosemary, black pepper, and salt. If you want a thicker filling, add cornstarch and stir. Once the potatoes are nearly done, pour in the heavy cream. Stir and cook for another 2-3 minutes. Remove the skillet from heat and let it cool for a bit. Next, roll out your pie crust. Place it in a deep-dish pie pan. Pour the cooled vegetable filling into the crust. Spread it out evenly. Cover the filling with another layer of pie crust. Crimp the edges to seal it well. Cut a few slits in the top crust for steam to escape. Preheat your oven to 425°F (220°C). Bake the pie for 25-30 minutes, or until the crust turns golden brown and the filling bubbles. Let the pot pie cool for about 10 minutes before slicing. Serve it hot and enjoy this comforting dish! You can find the full recipe for more details. When making your vegetarian pot pie, watch out for a few common issues. One big mistake is overcooking the vegetables. You want them tender but not mushy. Another mistake is skipping the seasoning. Salt and herbs elevate the flavors. Lastly, don’t forget to let your pie cool a bit before serving. This helps the filling set up nicely. Using herbs and spices can elevate your pot pie. I love adding fresh rosemary and thyme for depth. Dried herbs work too, but fresh ones bring a bright taste. Try adding a pinch of nutmeg for warmth. You can also mix in a dash of paprika for a subtle kick. Experiment with flavors to find what you enjoy. A great crust makes your pot pie shine. Start with a cold pie crust. This keeps it flaky. If using store-bought crust, don’t forget to thaw it properly. Roll it out gently on a floured surface. For a golden crust, brush it with egg wash or milk before baking. Be sure to cut slits in the top to let steam escape. This helps prevent a soggy bottom. For the complete recipe, check out the Full Recipe section. {{image_2}} To make this dish vegan, swap out the heavy cream. You can use coconut cream instead. It adds a rich texture and a hint of sweetness. If you want a lighter option, try almond milk or cashew cream. These options keep the flavors bright. For the pie crust, most store-bought varieties are vegan. Just check the label for dairy. You can also make your own crust using plant-based butter. This keeps it simple and delicious! For those needing gluten-free options, you can use a gluten-free pie crust. These are available at many stores. You can also make your own by mixing gluten-free flour blends. Add a bit of almond flour for nutty flavor. When making the filling, ensure your vegetable broth is gluten-free. Some brands contain gluten, so read the labels carefully. This small step makes your pot pie safe and tasty. If you want to cut calories, consider these swaps. Use less cream or opt for a lighter plant-based option. You can also skip the pie crust and use veggies as a topping. This makes a comforting stew that’s still hearty. Adding extra vegetables boosts nutrition without adding many calories. Consider using zucchini, spinach, or bell peppers. These add color and flavor while keeping it light. Try these variations to suit your needs. Each option still brings comfort and joy to your table. For the full recipe, check the section above. To keep your leftover vegetarian pot pie fresh, let it cool. Then, cover it tightly with plastic wrap or foil. You can also place it in an airtight container. Store it in the fridge for up to three days. This helps maintain the crust's texture and keeps the filling flavorful. When you’re ready to enjoy your pot pie again, preheat your oven to 350°F (175°C). Remove the pie from its storage. Place it on a baking sheet to catch any drips. Bake it for about 20-25 minutes. This method keeps the crust crispy and warms the filling evenly. You can also microwave individual slices, but the crust may become soft. If you want to store your vegetarian pot pie for longer, freezing is a great option. First, let the pie cool completely. Wrap it tightly in plastic wrap, then cover it with aluminum foil. This prevents freezer burn. You can freeze it for up to three months. When you’re ready to eat it, thaw it overnight in the fridge. Then, reheat it in the oven for the best results. Enjoy your delicious, comforting meal any time! For the full recipe, check out the Garden Delight Vegetarian Pot Pie. Yes, you can make Vegetarian Pot Pie ahead of time. Prepare the filling and let it cool. You can store it in the fridge for up to two days. If you want to freeze it, do so before baking. Use a freezer-safe dish for best results. When ready to bake, thaw the filling overnight in the fridge and assemble it with the crust. This helps save time on busy days. You can use many vegetables in your pot pie. Some great choices include: - Carrots - Green beans - Mushrooms - Potatoes - Corn - Peas - Spinach Use what you like or what you have on hand. Mix colors and textures for a hearty dish. You can even add some roasted vegetables for a smoky flavor. If you want to thicken your filling without cornstarch, use a few different methods. Here are some options: - Mashed potatoes: Add some cooked and mashed potatoes to the mix for a creamy texture. - Flour: You can sprinkle some all-purpose flour into the filling while it simmers. This works well to thicken the sauce. - Pureed veggies: Blend some of the cooked vegetables into a puree. Stir this back into the filling for a thick consistency. These methods give you the same comforting feel as cornstarch without the need for it. For the full recipe, check back with the main section. You now have a complete guide to making a delicious vegetarian pot pie. We explored essential ingredients, tasty vegetable options, and healthy protein sources. The step-by-step instructions make preparation easy, and the tips help prevent common mistakes. You can try different variations to fit your diet and storage tips to keep leftovers fresh. Remember, this dish is flexible and allows for creativity. Enjoy making your pot pie, and don't be afraid to experiment with flavors!

Savory Vegetarian Pot Pie Comfort Food Delight

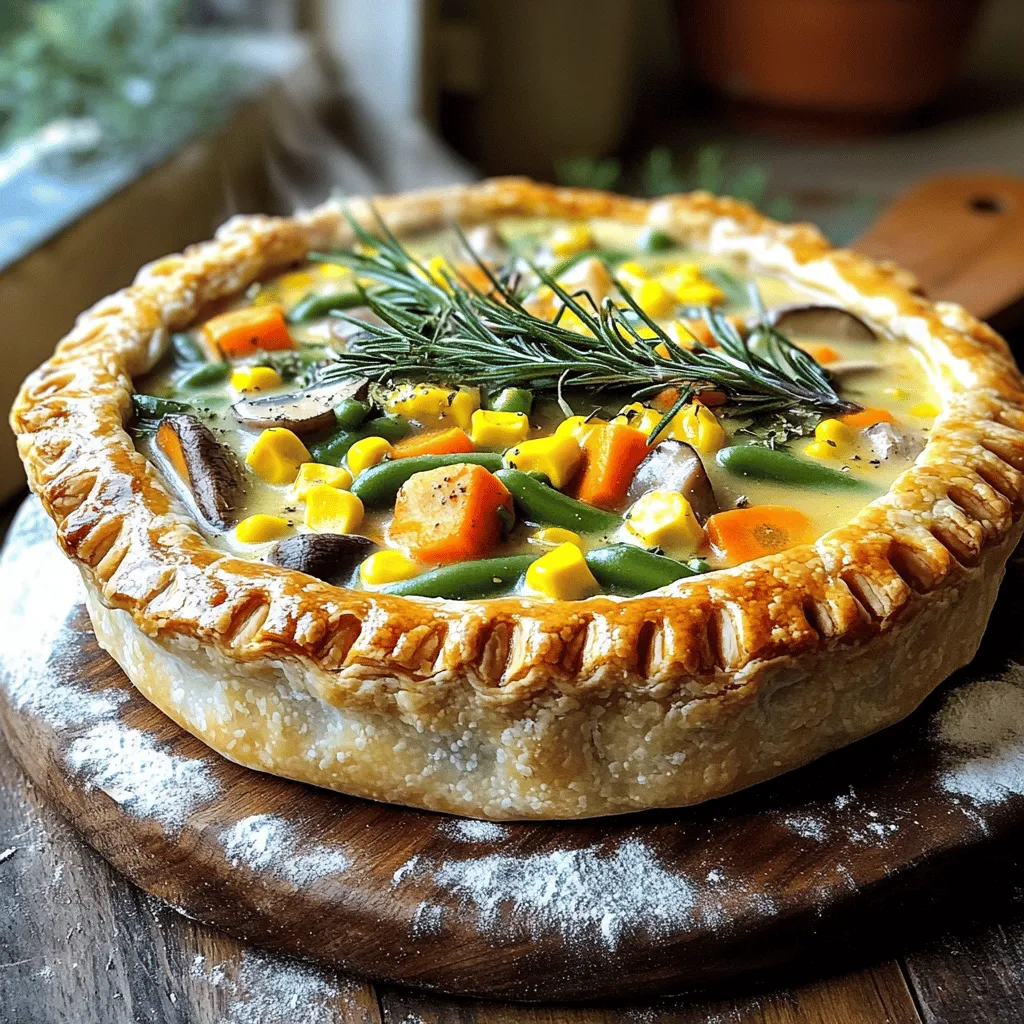
Craving a warm, hearty meal that warms your soul? You’re in the right place! My Savory Vegetarian Pot Pie Comfort

Older posts
Newer posts
← Previous Page1 … Page49 Page50 Page51 … Page60 Next →

dsad

© 2025 flavorsprint • Built with GeneratePress

Our Policies

  • Copyright Policy
  • Cookie Policy
  • GDPR Policy
  • Privacy Policy
  • Disclaimer
  • Terms Of Use

More Information

  • Home
  • About
  • Contact
  • Appetizers
  • Dessert
  • Dinner
  • Drinks
©2025, flavorsprint About Back To Top