Skip to content
DisclaimerTerms Of UseGDPR PolicyCookie Policy

flavorsprint

  • Home
  • Drinks
  • Appetizers
  • Dinner
  • Dessert
  • About
  • Contact
  • Privacy Policy
DisclaimerTerms Of UseGDPR PolicyCookie Policy

Lillian

- 500g chicken breast, sliced into strips - 250g mushrooms, sliced - 1 medium onion, finely chopped - 2 cloves garlic, minced - 1 cup chicken broth - 1 cup sour cream - 2 tablespoons flour - 2 tablespoons butter - 1 tablespoon olive oil - 1 teaspoon paprika - Salt and pepper to taste - Fresh parsley, chopped for garnish - Cooked egg noodles or rice for serving Gather these items before you start cooking. The chicken is the star here. Use fresh chicken breast for the best taste. Mushrooms add a nice earthy flavor. Slice them thin for even cooking. Onions bring sweetness and aroma. Chop them finely to blend well in the dish. Garlic gives a punch of flavor. Mince it to release its oils. The chicken broth adds depth. Sour cream makes the sauce creamy and rich. Flour thickens the sauce. Butter and olive oil add richness. Paprika gives a hint of spice and color. Don’t forget salt and pepper! They enhance all the flavors. Fresh parsley is great for a pop of color. Serve your Stroganoff over egg noodles or rice. This makes a filling meal. For the full recipe and detailed steps, check out the Full Recipe section. To start, slice the chicken breast into thin strips. Use a sharp knife for clean cuts. This helps the chicken cook evenly. Next, slice the mushrooms into even pieces. This way, they will cook at the same rate. Chop the onion finely. A small dice ensures it cooks quickly and blends well. Mincing garlic is equally important. This releases flavor faster, making your dish taste better. Heat olive oil and butter in a large skillet over medium heat. Once it melts, add the chopped onion. Sauté for 2-3 minutes until it looks clear. Then stir in the minced garlic and sliced mushrooms. Cook this mixture for 5-7 minutes until the mushrooms are soft. Push the mushroom mix to one side of the skillet. Add the chicken strips to the open space. Cook for 5-6 minutes until the chicken turns golden. Now, sprinkle flour and paprika over the chicken. Stir everything together for about a minute. Gradually pour in the chicken broth. Keep stirring to avoid lumps. Bring this mixture to a gentle simmer. Turn the heat to low. Add the sour cream, mixing until everything blends well. Do not boil this sauce. Taste and add salt and pepper as needed. Serve your Chicken Mushroom Stroganoff over cooked egg noodles or rice. Both options soak up the sauce well. For a nice touch, sprinkle fresh parsley on top before serving. This adds a pop of color and flavor. For a bit of crunch, consider adding crispy fried onions. They make a delightful contrast to the creamy sauce. Enjoy your delicious meal! To get that perfect creamy texture, you should add the sour cream at the end. Stir it in gently. This helps maintain a rich and smooth sauce. Avoid boiling after adding it, as it can curdle. A common mistake is overcooking the chicken. Make sure to cook it just until golden and cooked through. This keeps it tender. You can kick up the flavor by adding herbs like thyme or rosemary. They blend well with the mushrooms. Try adding a splash of white wine for depth. Different mushrooms can also change the taste. Use shiitake for a rich flavor or portobello for a meaty texture. Mixing several types can create a complex dish. If your sauce is too thick, add a bit more chicken broth or water to loosen it. Stir well to blend. If it’s too thin, sprinkle in a little more flour and stir until thickened. For reheating, use low heat to keep the sauce creamy. Adding a splash of broth can help restore the texture if it dries out. For the full recipe, check out the detailed instructions above. {{image_2}} You can easily swap chicken for turkey or tofu. Turkey gives a similar taste but with a lighter feel. Tofu offers a great plant-based option. For a vegetarian version, use mushrooms as the main protein. This adds depth and keeps the dish hearty. To change the flavor, add herbs and spices. Try thyme, rosemary, or even a dash of cayenne for heat. You can also toss in veggies like peas or bell peppers. These add color and nutrition, making your meal more vibrant. Get creative with how you serve Chicken Mushroom Stroganoff. Consider using a bread bowl for a fun twist. You can also pair it with different sides. Try garlic bread, a fresh salad, or steamed veggies for a balanced meal. For the full recipe, check out my guide. To store leftover Chicken Mushroom Stroganoff, cool it to room temperature first. Then, place it in an airtight container. This keeps it fresh and tasty. Properly stored, it lasts for about 3 to 4 days in the fridge. Always check for any off smells before eating. Freezing Chicken Mushroom Stroganoff is easy. First, let it cool completely. Next, scoop it into a freezer-safe container or bag. Label it with the date. It can stay frozen for up to 2 months. When you’re ready to eat, thaw it in the fridge overnight for best results. When reheating, use a skillet over low heat. This helps keep the sauce smooth. Stir often to avoid sticking. If it looks dry, add a splash of chicken broth or water. This adds moisture back and makes it creamy again. You could also use the microwave, but do so in short bursts. Stir between each round for even heating. You can serve Chicken Mushroom Stroganoff with: - Cooked egg noodles - Steamed rice - Mashed potatoes - Fresh green salad - Roasted vegetables - Garlic bread These sides add texture and flavor to your dish. Egg noodles soak up the sauce great, while rice offers a nice base. A fresh salad brings a crisp bite, and roasted veggies add color and nutrients. Yes, you can make Chicken Mushroom Stroganoff ahead of time. Prepare it, cool it, and store it in the fridge. You can reheat it on the stove over low heat. Add a splash of broth or water to keep it creamy. Yes, Chicken Mushroom Stroganoff works well for meal prep. - Cook a large batch on the weekend. - Portion it into containers for easy meals. - It will stay fresh in the fridge for about 3 days. This makes it perfect for busy weekdays. You can also freeze portions for longer storage. Chicken Mushroom Stroganoff is a twist on the classic Beef Stroganoff. The dish likely started in Russia in the 19th century. It was named after a Russian family. Over time, cooks adapted it using different meats like chicken. To make Chicken Mushroom Stroganoff gluten-free: - Use gluten-free flour instead of regular flour. - Ensure your chicken broth is gluten-free. - Serve it over gluten-free pasta or rice. These swaps keep the dish tasty without gluten. Chicken Mushroom Stroganoff is rich in protein and flavor. A typical serving contains: - Approximately 400 calories - 15g fat - 30g carbohydrates - 2g fiber - 30g protein This dish is hearty and satisfying, making it a great meal choice. For more details, refer to the Full Recipe for precise values based on your ingredients. In this blog post, you learned about making Chicken Mushroom Stroganoff, from ingredients to preparation. We covered the main components, cooking tips, and variations to suit your taste. Don’t forget the importance of proper storage and reheating. This dish is not just tasty but also flexible. You can switch ingredients or adapt it for meal prep. Enjoy creating this comforting meal, and share it with friends and family. Now, it’s your turn to try it out and make it your own!

Savory Chicken Mushroom Stroganoff Easy Meal Guide

Craving a warm and hearty meal? This Savory Chicken Mushroom Stroganoff is easy to make and packed with flavor! You’ll

To make this Quick Lemon Garlic Shrimp Pasta Salad, you need: - 8 oz. pasta (fusilli or penne works well) - 1 lb. shrimp, peeled and deveined - 3 tablespoons olive oil - 4 cloves garlic, minced - Juice and zest of 1 lemon - 1 cup cherry tomatoes, halved - ½ cup cucumber, diced - ½ cup red bell pepper, diced - ¼ cup fresh parsley, chopped - Salt and pepper to taste - ¼ teaspoon red pepper flakes (optional) These ingredients mix to create a fresh, bright, and tasty salad. The shrimp adds protein, while the pasta makes it filling. The lemon and garlic give it a nice zing. You can add these for extra flavor: - Avocado, diced - Fresh basil, chopped - Feta cheese, crumbled - Olives, sliced These options let you customize your salad. They also add more color and taste. Don't have something? Here are some swaps: - Pasta: Use whole wheat or gluten-free pasta. - Shrimp: Try chicken or firm tofu instead. - Olive oil: Avocado oil or canola oil will work. - Cherry tomatoes: Use regular tomatoes, diced small. - Red bell pepper: Any bell pepper color is fine. These substitutes keep the dish tasty and fun. You can still enjoy this salad even if you’re low on some ingredients. Start by boiling a large pot of salted water. This adds flavor to your pasta. Once the water is boiling, add 8 oz. of pasta. I like fusilli or penne for this salad. Cook it according to the package instructions, usually around 8-10 minutes. You want it al dente, so check it a minute early. When done, drain the pasta and let it cool for a bit. Next, grab a large skillet and heat 2 tablespoons of olive oil over medium heat. Once hot, toss in 4 minced garlic cloves. Sauté them for about 1 minute until they smell amazing. Then, add 1 lb. of peeled and deveined shrimp. Cook the shrimp for 2-3 minutes on each side. They should turn pink and opaque. After that, squeeze in the juice of 1 lemon and add the zest. Stir everything well, then take the skillet off the heat. In a large mixing bowl, combine the cooked pasta and sautéed shrimp. Add 1 cup of halved cherry tomatoes, ½ cup of diced cucumber, ½ cup of diced red bell pepper, and ¼ cup of chopped fresh parsley. Drizzle the remaining tablespoon of olive oil over this mix. Season with salt, pepper, and optional red pepper flakes. Toss everything together until it's well mixed. For the best taste, let the salad chill in the fridge for about 30 minutes. This helps all the flavors blend together nicely. For the full recipe, check out the details above! To sauté shrimp well, start with a hot pan. Use two tablespoons of olive oil for flavor. Add minced garlic to the oil and stir for about one minute. This brings out the garlic's sweet taste. Then, add the shrimp in a single layer. Cook them for two to three minutes on each side. They should turn pink and opaque. Overcooking makes them tough, so watch closely. Squeeze fresh lemon juice over them at the end for a bright flavor. When preparing pasta salad, cooking the pasta correctly is key. Use salted boiling water for the best flavor. Cook it until just al dente. Drain the pasta and let it cool slightly. This helps the salad stay fresh and not soggy. Once cooled, toss it in a large bowl with the other ingredients. Mixing right after cooking keeps everything from clumping. Herbs and spices can elevate your pasta salad. Fresh parsley adds a burst of color and taste. For a little heat, sprinkle in red pepper flakes. If you love more flavor, consider fresh basil or dill. These herbs work well with shrimp and lemon. Don't be afraid to experiment! Each herb brings a unique twist to the dish. For the full recipe, check out the details above. {{image_2}} You can boost your Quick Lemon Garlic Shrimp Pasta Salad by adding more veggies. Fresh spinach adds a nice crunch and color. Zucchini slices also work well, giving a mild taste. Roasted bell peppers bring a smoky flavor. You can even toss in olives for a salty bite. Make it your own by choosing what you love! If shrimp isn’t your thing, don’t worry! You can use chicken instead. Simply grill or sauté it until it’s cooked through. Tofu is a great plant-based option for a veggie delight. You can also try canned tuna for a quick protein boost. Each choice brings its own flavor to the dish. For a gluten-free version, swap regular pasta for rice noodles or zucchini noodles. These options keep the dish light and fresh. If you want a low-carb meal, cauliflower rice is a fantastic choice. It absorbs the flavors well and keeps the salad filling. You’ll enjoy a tasty dish while sticking to your dietary goals. For the complete recipe, check out the Full Recipe section! To store your leftover Quick Lemon Garlic Shrimp Pasta Salad, place it in an airtight container. Make sure the salad is cool before sealing it. This helps keep it fresh. You can store it in the fridge for up to three days. If you want to keep it longer, you can freeze it, but the texture may change once thawed. When you are ready to eat your salad again, you may want to reheat it. I suggest taking out the shrimp pasta salad and letting it sit at room temperature for about 15 minutes. This helps it warm up evenly. If you prefer it warm, heat it in the microwave for 30 seconds. Stir it well and check the temperature. The shelf life of the ingredients varies. Here are some key points: - Pasta: Cooked pasta lasts about 3 to 5 days in the fridge. - Shrimp: Cooked shrimp can stay fresh for 3 to 4 days in the fridge. - Vegetables: Fresh cherry tomatoes and cucumbers last about 3 to 5 days. - Olive Oil: It can last for months when stored in a cool, dark place. I recommend keeping track of dates. Always check for any signs of spoilage before eating leftovers. Enjoy your tasty dish any day! If you want to make it again, check the Full Recipe. Yes, you can use frozen shrimp. Just thaw them first. Place them in cold water for about 15 minutes. Once thawed, peel and devein them if needed. This saves time and works well in the dish. The pasta salad will last about 3 days in the fridge. Make sure to store it in an airtight container. This helps keep it fresh and safe to eat later. If you don’t have cherry tomatoes, use regular tomatoes instead. Dice them into small pieces. You can also use bell peppers or even diced avocado. These options add color and flavor to your salad. For the full recipe, check the complete instructions above. Enjoy your cooking! In this post, we explored making a tasty pasta salad with shrimp. We covered key ingredients, cooking steps, and helpful tips to get it just right. We also talked about fun variations and how to store leftovers. Keep these ideas in mind to create your perfect dish. Enjoy experimenting with flavors and ingredients. You’ll impress your family and friends with your skills. Happy cooking!

Quick Lemon Garlic Shrimp Pasta Salad Flavorful Delight

Craving a bright and tasty dish that’s easy to whip up? I’ve got just the thing! My Quick Lemon Garlic

- 1 pound ground beef - 1 small onion, diced - 2 cloves garlic, minced - 1 teaspoon chili powder - 1 teaspoon cumin - ½ teaspoon paprika - Salt and pepper to taste - 1 cup shredded cheddar cheese - 1 cup fresh spinach, chopped - 4 large flour tortillas - ½ cup sour cream - ½ cup salsa - Fresh cilantro for garnish To make Cheesy Beef Taco-Stuffed Tortilla Pockets, you’ll need a few key tools. A large skillet is essential for cooking the beef mixture. A spatula will help you mix and flip the pockets easily. You might also want a cutting board and knife for chopping the onion and garlic. For the best flavor, I recommend using freshly grated cheddar cheese. It melts better than pre-shredded cheese. If you want to try different flavors, consider using pepper jack cheese for a spicy kick. These simple ingredients and tools make it easy to create a tasty meal. You can find the full recipe above for detailed steps and tips. First, gather your ingredients. You need ground beef, onion, garlic, and spices. I start by heating a large skillet over medium heat. Add the ground beef, diced onion, and minced garlic. Cook this mix until the beef is browned, about 5-7 minutes. Stir often to avoid burning the garlic. Next, add chili powder, cumin, paprika, salt, and pepper. Cook for 2 more minutes. This helps the spices release their flavors. Now, remove the skillet from heat. Stir in shredded cheddar cheese and chopped spinach. The cheese should melt while the spinach wilts. This creamy mix is the heart of your taco pockets. Now, it's time to fold the tortillas. Lay one tortilla flat on your work surface. Spoon a generous amount of the beef mixture into the center. Fold the bottom of the tortilla up over the filling. Next, fold in the sides. Carefully roll it up to create a pocket. Make sure it is tight to hold the filling inside. Repeat this for all tortillas. Check each pocket for any open sides. Press the edges to seal them well. This step is important to keep the delicious filling from spilling out during cooking. For cooking, I recommend pan-frying. Heat a little oil in the same skillet over medium heat. Place each filled tortilla pocket seam-side down in the skillet. Cook for about 2-3 minutes on each side. You want them golden brown and crispy. This gives the pockets a nice texture. To ensure even browning, avoid overcrowding the pan. Cook in batches if needed. This way, each pocket gets the attention it deserves. For the full recipe, check out the complete guide. To make your taco-stuffed tortilla pockets shine, adjust the spice levels. If you like heat, add more chili powder or some diced jalapeños. For a milder taste, cut back on the spices. You can also add other ingredients for depth. Beans, black or pinto, add protein and texture. Fresh jalapeños give a nice crunch and spice. Try adding corn for a sweet bite. These small changes can really transform your dish. For the perfect melt of cheese, watch your heat. Too high, and you risk burning the tortilla. Keep it medium to low. This helps the cheese melt evenly without overcooking. If you find it hard to get a good melt, cover the pan for a minute. It traps the heat and speeds up the melting. Always check your heat settings. Finding the right balance is key for golden, crispy pockets. Pair your cheesy beef taco-stuffed tortilla pockets with sour cream and salsa. These add creaminess and a fresh kick. You can also serve them with a side of guacamole for a rich flavor. For a colorful plate, use fresh cilantro as a garnish. When serving, cut each pocket in half to show off the cheesy filling. Lay them on a wooden platter for a rustic feel. Drizzle salsa and sour cream on top for a vibrant look. These simple touches make your meal more appealing and fun. {{image_2}} You can easily make these taco pockets vegetarian. Try using black beans or lentils instead of beef. They add protein and flavor. For cheese lovers, switch up the cheese! Use pepper jack for a spicy kick or mozzarella for a milder taste. Experimenting with different cheeses makes the dish fun and unique. Baking is a great option if you want a healthier meal. Preheat your oven to 400°F (200°C). Place the filled pockets on a baking sheet. Bake for about 15-20 minutes until golden brown. If you prefer frying, just follow the original steps. For a quick, healthy version, use an air fryer. Set it to 375°F (190°C) and cook for about 10 minutes, flipping halfway through. Want to spice things up? Try adding different seasonings. A bit of taco seasoning or cayenne pepper gives a bold flavor. You can also mix in sauces like hot sauce or barbecue sauce for new tastes. Top your taco pockets with fresh toppings like diced tomatoes, jalapeños, or guacamole to enhance the flavor even more. Each change brings a new twist to the cheesy beef taco-stuffed tortilla pockets delight! To keep your leftover cheesy beef taco-stuffed tortilla pockets fresh, refrigerate them right away. Place them in airtight containers. This helps prevent moisture loss. You can also wrap them in plastic wrap or foil. Use them within three days for the best taste. You can freeze the stuffed pockets for future meals. First, let them cool completely. Then, wrap each pocket in plastic wrap. Place the wrapped pockets in a freezer bag. Squeeze out as much air as you can before sealing. They can last in the freezer for up to three months. When you're ready to eat, thaw them in the fridge overnight. To reheat your tortilla pockets, the oven is best. Preheat your oven to 350°F. Place the pockets on a baking sheet. Heat them for about 15-20 minutes. This keeps the outside crispy. If you're in a hurry, you can use the microwave. Heat on high for about 1-2 minutes. This method may make them slightly softer. Enjoy your cheesy beef taco-stuffed tortilla pockets from the [Full Recipe]! Yes, you can make these tasty pockets ahead of time. Prepare the beef filling and let it cool. Store it in an airtight container in the fridge for up to three days. You can also assemble the tortilla pockets and wrap them tightly in plastic wrap. Place them in the fridge for up to two days. When you're ready to eat, just cook them as directed. This way, you save time and still enjoy a warm meal. To make these pockets dairy-free, swap the cheese with a plant-based alternative. Look for dairy-free cheddar or mozzarella. For sour cream, use a non-dairy yogurt or cashew cream. You can also make your own cashew cream by blending soaked cashews with lemon juice and a bit of water. This gives you a creamy texture without dairy. These tortilla pockets go great with many sides. Consider serving them with: - Fresh guacamole - Crunchy tortilla chips - A colorful salad with lime dressing - Spicy salsa or pico de gallo - Creamy ranch or yogurt dip These sides add flavor and fun to your meal. Enjoy mixing and matching! For the full recipe, check out the complete guide. This blog post covered how to make Cheesy Beef Taco-Stuffed Tortilla Pockets. We discussed ingredients, cooking steps, and tips for the best flavor. You learned how to assemble and cook these pockets for crispy edges. Try different flavors and cooking methods to find your favorite. These tasty pockets are easy to make and perfect for sharing or enjoying alone. Keep leftovers in the fridge or freezer for quick meals later. Enjoy your cooking journey!

Cheesy Beef Taco-Stuffed Tortilla Pockets Delight

Get ready to treat your taste buds! In this article, we’ll dive into my Cheesy Beef Taco-Stuffed Tortilla Pockets Delight.

To make a great seafood lasagna, you need fresh and tasty ingredients. Here’s a list of what I use: - Seafood Options: - 200g shrimp, peeled and deveined - 200g scallops, sliced - 200g white fish (like cod or haddock), cut into bite-sized pieces These seafood options give a rich flavor. You can mix and match based on what you like or what is fresh. - Dairy Products and Herbs: - 1 cup ricotta cheese - 2 cups mozzarella cheese, shredded - 1 cup Parmesan cheese, grated - 1 teaspoon dried oregano - 1 teaspoon dried basil - Salt and pepper to taste The blend of cheeses makes the dish creamy. The herbs add a nice taste that really brings everything together. - Lasagna Noodles and Sauces: - 9 lasagna noodles - 2 cups marinara sauce I use regular lasagna noodles, but you can choose whole wheat or gluten-free if you need. The marinara sauce is key; it ties the layers together and adds depth. For the full recipe, check out Ocean's Delight Seafood Lasagna. It will guide you through making this delicious dish step by step. To start, heat olive oil in a large skillet over medium heat. Add the finely chopped onion and minced garlic. Sauté them until they become soft, which takes about 3-4 minutes. This step builds a strong flavor base for your dish. Next, toss in the shrimp and scallops. Cook them until they are opaque, around 4-5 minutes. This step is key for keeping your seafood tender. After that, stir in the white fish and spinach. Cook until the spinach wilts down. Don’t forget to season the mixture with oregano, basil, salt, and pepper. This adds depth to your seafood mix. Once done, remove it from heat and let it cool slightly. Now it's time to assemble your lasagna! Start by spreading a thin layer of marinara sauce at the bottom of a 9x13 inch baking dish. Place three lasagna noodles over this sauce. Make sure the noodles are not touching each other. Spoon half of the seafood mixture over the noodles. Then, add half of the ricotta cheese mixture on top. Next, layer more marinara sauce over this. Sprinkle a mix of mozzarella and Parmesan cheese. Repeat these layers: noodles, remaining seafood, remaining ricotta, and more marinara sauce. Finish with a final layer of noodles topped with the rest of the marinara and a generous amount of mozzarella and Parmesan cheese. Preheat your oven to 180°C (350°F). Cover your lasagna with foil, but remember to spray the foil with cooking spray to prevent sticking. Bake it in the oven for 25 minutes. After that, remove the foil and bake for an additional 15-20 minutes. You want the cheese to be bubbly and golden. Once it's done, let it sit for about 10 minutes. This helps the layers set. Before serving, garnish with fresh parsley for a pop of color. Enjoy a slice of your savory seafood lasagna made with love! For the complete recipe, check out the Full Recipe. How to ensure seafood doesn’t overcook Seafood cooks fast. To avoid rubbery texture, cook it just until opaque. For shrimp, that’s about 4-5 minutes. Scallops need about the same time. White fish cooks quickly too, about 3-4 minutes. Always remove seafood from heat once it turns opaque. Flavor pairings that complement seafood Lemon, garlic, and fresh herbs work magic with seafood. Consider using parsley, basil, or dill. These bright flavors balance the richness of cheese and sauce. Pairing seafood with spinach adds color and nutrients. The sweetness of shrimp and scallops pairs well with marinara sauce. Tips on ingredient substitutions You can swap seafood types based on what you like. Try crab or lobster for a luxurious touch. For a lighter dish, substitute with zucchini or mushrooms. If you need a dairy-free option, use nut-based cheeses. Just keep the flavor balance in mind. Pairing with side dishes like salads and bread Serve seafood lasagna with a crisp salad. A simple mixed greens salad works great. Add a light vinaigrette to enhance the meal. Garlic bread or a crusty baguette is perfect for soaking up sauce. These sides make your meal feel complete. Ideal wine pairings for seafood lasagna White wine is a classic choice with seafood. A chilled Sauvignon Blanc or Pinot Grigio pairs nicely. If you prefer red, choose a light one like Pinot Noir. The right wine enhances the flavors and adds to your dining experience. Creative presentation ideas for special occasions Make your dish pop with color. Serve on white plates to highlight the lasagna’s layers. Garnish with fresh parsley for a bright touch. Drizzle extra marinara sauce around the plate for flair. These small touches impress guests at any gathering. For more details, check out the Full Recipe. {{image_2}} You can change up seafood lasagna with different ingredients. If you do not want seafood, try vegetables or meat. Zucchini, mushrooms, or spinach make great veggie swaps. For a meaty option, ground chicken or turkey works well. You can also play with sauces. Instead of marinara, consider a creamy Alfredo or a zesty pesto. Each sauce brings its own taste. Mix and match to find your favorite. For a vegetarian seafood lasagna, skip the seafood entirely. Use extra cheese and add more veggies. This keeps the dish rich and filling. You can even add artichoke hearts or sun-dried tomatoes for a unique flavor. Seafood lasagna has many regional spins. In Italy, you might find a version with clams and squid. Meanwhile, in Greece, they may add feta cheese and fresh herbs. Incorporating spices from around the world can change the dish’s flavor. For example, adding curry powder gives it a warm kick. Fresh dill or cilantro can brighten the taste, making it fresh and exciting. Experiment with these variations and spices. Doing so keeps seafood lasagna fun and new each time. This dish can become a canvas for your culinary creativity. To keep your seafood lasagna fresh, store it in the fridge. Place it in an airtight container. Seafood lasagna lasts for about three to four days in the fridge. If you want to keep it longer, freezing is a great option. Wrap it tightly in plastic wrap and then in aluminum foil. This way, it can last up to three months in the freezer. When you're ready to enjoy your leftover lasagna, reheating it properly is key. The best method is to use the oven. Preheat your oven to 180°C (350°F). Place the lasagna in an oven-safe dish and cover it with foil. Bake for about 25 minutes. This keeps the texture nice and moist. If you need a quicker option, you can use the microwave. Place a slice on a microwave-safe plate. Cover it with a damp paper towel to keep it from drying out. Heat it for one to two minutes. Check to see if it's hot all the way through. These methods help your seafood lasagna taste just as good as the first time you made it. Enjoy the rich flavors again! What type of seafood is best for seafood lasagna? I love using shrimp, scallops, and white fish like cod. These seafood types add great taste. You can mix in other seafood too. Just make sure they are fresh and flavorful. Can I prepare seafood lasagna in advance? Yes, you can prepare it up to one day ahead. Just assemble the layers and cover it well. Store it in the fridge. Bake it when you are ready to serve. How long does seafood lasagna last in the fridge? Seafood lasagna stays good for about three days in the fridge. Make sure to store it in an airtight container. This keeps it fresh and tasty. Can I use whole wheat lasagna noodles? Absolutely! Whole wheat noodles work well and add more fiber. They give a nice nutty flavor to the dish. Just cook them a bit longer than regular noodles. Should I thaw frozen seafood before cooking? Yes, thawing frozen seafood is best. It helps seafood cook evenly. You can defrost it in the fridge overnight for best results. What can I serve with seafood lasagna? A fresh salad pairs perfectly with seafood lasagna. Garlic bread is another great choice. Both add flavor and balance to your meal. Caloric content per serving Each serving of seafood lasagna has about 450 calories. This can vary based on the seafood and cheese used. It's a hearty meal but check the ingredients for your specific count. Health benefits of the ingredients used Seafood like shrimp and fish are rich in protein and omega-3 fatty acids. Spinach adds vitamins and minerals. This dish is not only delicious but also healthy for you! Seafood lasagna is a fantastic dish you can make with various seafood and ingredients. Choosing fresh seafood and seasoning well is key to great flavor. Follow the steps to prepare your seafood mixture, layer your lasagna, and bake it perfectly. Remember, you can customize recipes to fit your taste. Try different ingredients or serving ideas. Enjoy hearty seafood lasagna with family and friends, knowing you’ve made a delicious meal that’s sure to impress. Now, get ready to dig in and share your tasty creation!

Savory Seafood Lasagna Flavorful and Rich Dish

Are you ready to dive into a rich culinary experience? My savory seafood lasagna is a delicious way to enjoy
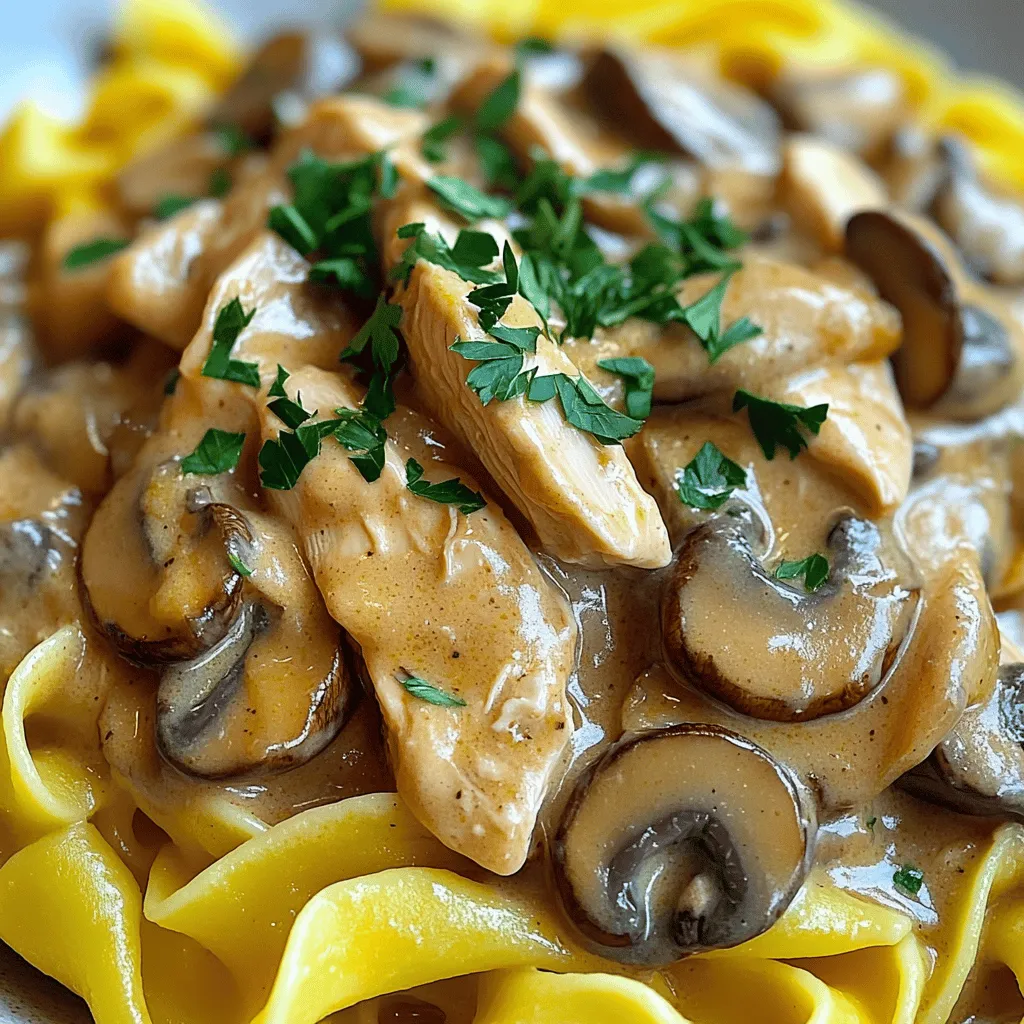
To make a tasty creamy chicken mushroom stroganoff, you need fresh and simple ingredients. Here’s what you need: - Chicken: 1 pound chicken breast, sliced into strips - Mushrooms: 8 ounces, sliced - Aromatics: 1 medium onion, finely chopped; 2 cloves garlic, minced - Liquids: 1 cup chicken broth, 1 cup sour cream - Dry Ingredients: 2 tablespoons all-purpose flour, 1 teaspoon paprika - Seasoning: Salt and pepper to taste - Oil: 1 tablespoon olive oil - Garnish: Fresh parsley, chopped - Noodles: 8 ounces egg noodles These ingredients blend well together to make a rich and creamy sauce. The chicken provides protein and texture, while the mushrooms add a deep, earthy flavor. Aromatics like onion and garlic give the dish a wonderful base, enhancing the overall taste. The combination of chicken broth and sour cream creates that creamy sauce we all love. When using these ingredients, always aim for freshness. Fresh mushrooms will have a better taste, and using high-quality chicken makes a big difference. You can find the full recipe in the link provided. Enjoy cooking! First, bring a pot of water to a boil. Add your egg noodles and cook them according to the package instructions. Once they are al dente, drain the noodles well. Set them aside for later. In a large skillet, heat olive oil over medium heat. Add the finely chopped onion and sauté for about 3-4 minutes until it turns soft and clear. Then, add the sliced mushrooms. Cook them for 5-7 minutes until they are tender and golden brown. Next, stir in the minced garlic and cook for another minute. This adds a lovely aroma. Next, push the mushroom mixture to one side of the skillet. Place the sliced chicken breast on the other side. Season the chicken with paprika, salt, and pepper. Cook the chicken for 5-6 minutes until it gets a nice brown color and is fully cooked. Now, sprinkle the flour over the chicken and mushroom mixture. This helps thicken your sauce. Stir well to coat everything evenly. Gradually pour in the chicken broth while stirring constantly. Bring this mixture to a gentle simmer. Once it’s simmering, lower the heat and stir in the sour cream. This will make your sauce creamy. Let it simmer for a couple of minutes until it thickens. If you want a thinner sauce, just add more chicken broth. Take a moment to taste your stroganoff. You may want to adjust the seasoning with more salt or pepper. If the sauce is too thick, add a splash of chicken broth to reach your desired consistency. To serve, place the cooked egg noodles on each plate. Spoon the creamy chicken mushroom mixture over the noodles. For a lovely finish, garnish with freshly chopped parsley. Serve in shallow bowls for a nice touch. You can also add a sprinkle of paprika for extra color and flavor. Enjoy this flavorful delight! If you want more details, check the Full Recipe. To thicken the stroganoff sauce, sprinkle flour over the chicken and mushrooms. Stir well to coat everything. This helps create a rich texture. If your sauce is too thick, add chicken broth slowly. Keep stirring until it reaches your desired consistency. To elevate taste, fresh herbs work wonders. Try adding thyme or dill. They add a fresh layer of flavor. Spice it up with a touch of garlic powder or onion powder. You can also use smoked paprika for a unique twist. For optimal flavor, sear the chicken well. Let it brown before stirring. This adds depth to the dish. Keep an eye on the heat. Too high can burn your ingredients, while too low can make them soggy. Cooking at medium heat allows for even cooking and great results. For the full recipe, check out the Creamy Chicken Mushroom Stroganoff . {{image_2}} If you want to switch things up, try beef or pork instead of chicken. Both meat options bring unique flavors to the dish. For beef, use tender cuts like sirloin or tenderloin. For pork, pork loin works well. Cook them in the same way as the chicken. Adjust cooking times to ensure they are fully cooked but still juicy. Want a meat-free meal? Substitute tofu or mushrooms as your main ingredient. Firm tofu holds up well in this dish. Cut it into cubes and sauté it until golden. Mushrooms also shine in this version. Use a mix of your favorites like cremini and shiitake for a richer taste. Both options create a hearty dish without meat. To make a gluten-free creamy chicken mushroom stroganoff, swap regular flour for gluten-free flour or cornstarch. You can also use gluten-free noodles instead of egg noodles. Always check labels for hidden gluten in sauces and broths. This way, everyone can enjoy this creamy delight without worry. For the full recipe, check the recipe section. To store your creamy chicken mushroom stroganoff, let it cool first. Place it in an airtight container. It stays fresh in the fridge for 3 to 4 days. Make sure to label the container with the date. This helps you keep track of freshness. To reheat, use a skillet over low heat. Stir often to keep it creamy. Add a splash of chicken broth if the sauce is too thick. You can also use a microwave. Heat in short bursts, stirring in between. This method warms it up gently without losing flavor. Yes, you can freeze creamy chicken mushroom stroganoff! Use a freezer-safe container. It lasts for up to 2 months in the freezer. When you’re ready to eat, thaw it overnight in the fridge. Reheat it on the stove or in the microwave. For best results, add a bit of broth to restore creaminess. Enjoy this dish later with no loss of taste! For the full recipe, check out the earlier section. To make your stroganoff creamier, you can add more sour cream. You can also mix in cream cheese or heavy cream. Each option boosts the richness of the sauce. I often choose sour cream for its tangy taste. It balances well with the savory chicken and mushrooms. Yes, you can use frozen chicken. Just make sure to thaw it first. Thawing helps it cook evenly. If you drop frozen chicken into a hot pan, it can steam instead of brown, which affects flavor. Always cook chicken to an internal temperature of 165°F. Stroganoff pairs well with many sides. You can serve it with egg noodles, rice, or mashed potatoes. For a fresh touch, add steamed vegetables or a side salad. These sides bring color and balance to the meal. Cooking creamy chicken mushroom stroganoff takes about 30 minutes. You need about 10 minutes to prep and 20 to cook. This quick time makes it perfect for busy weeknights. You can enjoy a hearty meal without spending hours in the kitchen. Yes, stroganoff is traditionally served with noodles. Egg noodles are the most common choice. They soak up the sauce well and add a nice texture. However, you can get creative and try other pasta or grains. Absolutely! Adding vegetables enhances the flavor and nutrition of the dish. You can mix in peas, spinach, or bell peppers. Sauté them along with the onions and mushrooms. This adds color and makes your stroganoff even more delicious. For the full recipe, click [Full Recipe]. This blog post covered all the key steps to make creamy chicken mushroom stroganoff. You learned about the ingredients, cooking techniques, and tips for better flavor. We also explored variations for different diets and how to store leftovers. Remember, cooking is all about experimenting. Don’t hesitate to adjust flavors and try new ingredients. With practice, your stroganoff will impress everyone. Now, grab your ingredients and start cooking!

Creamy Chicken Mushroom Stroganoff Flavorful Delight

Are you ready to savor a dish that will warm your heart and please your taste buds? My Creamy Chicken

- 1 lb ground beef - 1/2 cup breadcrumbs - 1/4 cup grated Parmesan cheese - 1/4 cup onion, finely diced - 2 cloves garlic, minced - 1 egg - 1 tsp Worcestershire sauce - Salt and pepper to taste - 1 tbsp fresh parsley, chopped (plus more for garnish) - 1 cup mushrooms, sliced - 1 cup beef broth - 2 tbsp all-purpose flour - 1 tbsp unsalted butter - 1 tbsp olive oil - You can use ground turkey or chicken if you prefer lighter meat. - For gluten-free options, try gluten-free breadcrumbs. - If you need dairy-free, look for dairy-free cheese alternatives. - When choosing ground beef, look for lean cuts. This helps keep the meatballs moist. - Select mushrooms that are firm and dry. Fresh mushrooms add great flavor. - Always use fresh herbs. They make a big difference in taste and aroma. First, grab a large bowl. Add the ground beef, breadcrumbs, grated Parmesan cheese, diced onion, minced garlic, egg, Worcestershire sauce, salt, pepper, and chopped parsley. Mix everything well with your hands. This step is very important. A good mix helps the meatballs hold together. You want each bite to be flavorful, with bits of onion and garlic throughout. Now, roll the meat mixture into balls. Aim for about 1.5 inches each. Place them on a baking sheet lined with parchment paper. You should make around 12 to 15 meatballs. Next, heat olive oil in a large skillet over medium heat. Add the meatballs in batches. Cook them for 5 to 7 minutes until they are brown on all sides. This browning adds great flavor to the meatballs. In the same skillet, melt butter over medium heat. Add sliced mushrooms and sauté for about 5 minutes. Stir them until they turn golden brown. To thicken the gravy, sprinkle flour over the mushrooms. Stir for 1 to 2 minutes. Gradually whisk in the beef broth. Make sure there are no lumps. Bring it to a simmer and cook for about 3 to 4 minutes until it thickens. Now, return the meatballs to the skillet. Cover them with the gravy and let them simmer for 10 to 15 minutes. This will ensure they are cooked through. Enjoy making this dish with the full recipe! To keep your meatballs moist, use a mix of beef and breadcrumbs. The breadcrumbs soak up moisture. This helps them stay juicy during cooking. You can also add a splash of milk for extra moisture. For even cooking, roll your meatballs to a uniform size, about 1.5 inches. Cook them in batches. This prevents crowding in the pan. Crowding can lead to steaming instead of browning. Always ensure your skillet is hot before adding the meatballs. This gives a nice crust. To boost the gravy flavor, add herbs like thyme and rosemary. A pinch of garlic powder also deepens the taste. You can even try a dash of soy sauce for umami. If your gravy is too thick, whisk in a little more beef broth. If it's too thin, let it simmer longer. The heat will help it thicken up nicely. Stir often to prevent sticking. Salisbury steak meatballs pair well with mashed potatoes or rice. Green beans or a simple salad make great sides, too. For a restaurant-style look, place the meatballs on a bed of creamy mashed potatoes. Drizzle the gravy over the top and sprinkle fresh parsley for color. It makes a lovely presentation that will impress your guests. You can find the full recipe for this delightful dish, so you can enjoy it tonight! {{image_2}} You can switch up the meat in this dish. Ground turkey offers a lighter feel. It keeps the flavors while being lower in fat. Ground pork adds a sweet touch and keeps meatballs juicy. For a vegetarian twist, use plant-based meat. These options can taste just as good as beef. Want to change the flavor? Try an Asian twist! Use soy sauce and sesame oil for a unique taste. You can add ginger for warmth. If you like heat, toss in some red pepper flakes. This adds a nice kick without being too spicy. How you serve these meatballs can change the meal. Serve them over rice for a hearty dish. The rice soaks up the gravy well. Mashed potatoes are another great choice. They pair perfectly with the rich mushroom gravy. You can also mix them into a casserole. Layer them with veggies and cheese for a warm bake. For the full recipe, check out the link! You can store leftover Salisbury steak meatballs for up to four days in the fridge. Make sure to place them in an airtight container. When reheating, use low heat to keep them moist. You can add a splash of beef broth to help with this. Stir occasionally to heat evenly and avoid burning. You can freeze these meatballs either before or after cooking. If freezing raw, form the meatballs, then place them on a baking sheet. Once frozen solid, transfer them to a freezer bag. When freezing cooked meatballs, let them cool first before packing. To thaw, place them in the fridge overnight. You can reheat them in a skillet or microwave. If reheating from frozen, add extra time to ensure they heat through. To prevent gravy separation, avoid overheating the gravy. Heat it gently and stir often. Use glass or BPA-free plastic containers for storage. These will help keep the meatballs fresh and tasty. If you want to keep the texture, store the gravy separately from the meatballs. To help meatballs stick, you need the right mix of binders. Use breadcrumbs and an egg. These ingredients add moisture and help hold everything together. - Combine 1/2 cup of breadcrumbs with 1 egg. - Use finely chopped onions to add moisture. - Mix well to ensure even distribution and binding. Yes, you can prepare these meatballs in advance. Make the meatballs and store them in the fridge for up to 24 hours. You can also freeze them for longer storage. - To freeze, place uncooked meatballs on a baking sheet. - Freeze until solid, then transfer to a bag. - Thaw in the fridge overnight before cooking. Salisbury steak meatballs pair well with many sides. Mashed potatoes bring comfort and soak up the gravy. Rice is another great option. - Try serving with steamed green beans or roasted broccoli for color. - A simple salad with mixed greens adds freshness. - Garlic bread is perfect for mopping up extra gravy. You can find the full recipe for Savory Salisbury Steak Meatballs with Mushroom Gravy [here](#). In this blog post, we explored the art of making Salisbury steak meatballs, from selecting fresh ingredients to crafting the perfect mushroom gravy. You learned about ingredient substitutes and handy tips for achieving great flavors and textures. Remember, choosing the right meat and herbs can make all the difference. Whether serving them over rice or mashed potatoes, these meatballs can impress anyone. With the right care in storage, you can enjoy them later too. Dive into this recipe and bring a warm, hearty meal to your table.

Salisbury Steak Meatballs with Mushroom Gravy Recipe

Are you craving comfort food that’s both tasty and easy to make? Look no further! My Salisbury Steak Meatballs with

To make a Baked Coffee Cheesecake, you need the right ingredients. Here’s a breakdown: - 1 ½ cups graham cracker crumbs - ½ cup unsalted butter, melted - 2 tablespoons sugar - 3 (8 oz) packages cream cheese, softened - 1 cup sugar - 3 large eggs - 1 tablespoon vanilla extract - ½ cup strong brewed coffee, cooled - 1 tablespoon instant coffee granules - 1 cup sour cream - 2 tablespoons all-purpose flour - Pinch of salt Each ingredient plays a key role. The graham cracker crumbs give a nice base. The cream cheese makes it rich and creamy. The coffee adds that perfect flavor. If you want to make swaps, you can use Greek yogurt instead of cream cheese. It still gives a creamy texture. You can also swap sour cream for plain yogurt. For sweeteners, you can use brown sugar or maple syrup. These give a different flavor and depth. If you want a crust with a twist, try using crushed nuts or cookies instead of graham crackers. These options let you customize your cheesecake to match your taste. You can find the full recipe [Full Recipe]. Enjoy making your own creamy coffee delight! First, preheat your oven to 325°F (160°C). This step is key for even baking. Next, grab a 9-inch springform pan. Grease it with butter or cooking spray. Now, let’s make the graham cracker crust. In a medium bowl, combine 1 ½ cups of graham cracker crumbs, ½ cup of melted unsalted butter, and 2 tablespoons of sugar. Mix it well until the crumbs are coated. Press this mixture into the bottom of your pan. Make sure it forms an even layer. Bake the crust for 10 minutes, then take it out of the oven and let it cool. Next, we will mix the cheesecake filling. In a large bowl, beat 3 packages of softened cream cheese until it’s smooth. Gradually mix in 1 cup of sugar until it’s fully combined. Add 3 large eggs one at a time. Mix well after each egg. Then, stir in 1 tablespoon of vanilla extract, ½ cup of cooled brewed coffee, and 1 tablespoon of instant coffee granules. Blend until it’s smooth. In another bowl, mix 1 cup of sour cream, 2 tablespoons of flour, and a pinch of salt. Once combined, slowly fold this into your cream cheese mixture. Make sure there are no lumps left. Pour this filling over your cooled crust. Smooth the top with a spatula. Now it’s time to bake! Place your cheesecake in the preheated oven for 50-60 minutes. You want the edges to be set but the center should still jiggle slightly. To ensure a smooth texture, avoid over-mixing the filling. This helps prevent air bubbles, which can cause cracks. Cooling matters a lot for your cheesecake. After baking, turn off the oven and leave the cheesecake inside with the door slightly ajar. Let it cool for about 1 hour. This gradual cooling helps prevent cracks. Once it cools, take it out and let it reach room temperature. Then, chill it in the refrigerator for at least 4 hours. For the best flavor, chill it overnight before serving. Enjoy your baked coffee cheesecake! To prevent cracks in your cheesecake, follow these simple steps: - Mix slowly: Be gentle when mixing the cream cheese. Avoid overmixing. - Room temperature ingredients: Use cream cheese and eggs at room temperature. This helps them blend smoothly. - Cool slowly: After baking, turn off the oven and leave the cheesecake inside. This lets it cool gradually. Using a water bath also helps create a creamy texture. Here’s how: - Wrap the pan: Use aluminum foil to wrap the bottom of your springform pan. This stops water from leaking in. - Add water: Place the wrapped pan in a larger pan filled with hot water. Bake as usual. The steam keeps the cheesecake moist. For garnishing your coffee cheesecake, consider these tasty options: - Whipped cream: A dollop of fresh whipped cream adds lightness. - Cocoa powder: Dust cocoa powder on top for a rich touch. - Chocolate shavings: Sprinkle chocolate shavings for extra flair. When it comes to drinks, pair your cheesecake with: - Coffee: A nice cup of coffee enhances the coffee flavor. - Espresso: Serve with a shot of espresso for a bold taste. - Dessert wine: A sweet wine can balance the cheesecake's richness. Explore the full recipe for more details on making this delightful dessert! {{image_2}} You can make your baked coffee cheesecake even better. Try adding chocolate or caramel to the filling. These flavors mix well with coffee. Use melted chocolate or caramel sauce and swirl it into the batter just before baking. This adds a rich taste and fun texture. You can also use different types of coffee grounds. Dark roast gives a bold flavor. Light roast adds a soft, fruity note. Experiment with flavored coffee, like hazelnut or vanilla, to give your cheesecake a twist. Want to make it gluten-free? Use gluten-free graham cracker crumbs for the crust. You can also replace cream cheese with cashew cream or a vegan cream cheese. This way, everyone can enjoy this treat. If you're looking for low-calorie or sugar-free options, use a sugar substitute like stevia or monk fruit. You can use Greek yogurt instead of sour cream to cut calories. These swaps keep the cheesecake tasty while fitting your diet. For the full recipe, check out the details provided earlier. To keep your baked coffee cheesecake fresh, follow these steps: - Refrigerate: After it cools, cover it tightly with plastic wrap or foil. This keeps moisture in and prevents odors from affecting the flavor. - Use an airtight container: If you have extra slices, store them in an airtight container. This helps maintain the texture and flavor for longer. For longer storage, you can freeze your baked coffee cheesecake: - Wrap well: Use plastic wrap to cover the cheesecake, then wrap it in aluminum foil. This helps prevent freezer burn. - Freeze: Place it in the freezer for up to three months. When you're ready to enjoy it, thaw it in the fridge overnight. Your cheesecake can last in the fridge for about five to seven days. Make sure to check for freshness before enjoying. Look for these signs that it has gone bad: - Odor: A sour or off smell indicates spoilage. - Texture: If it feels slimy or excessively dry, discard it. - Mold: Any visible mold means it’s time to throw it away. Storing your baked coffee cheesecake properly ensures you enjoy every delicious bite! How can I tell when the cheesecake is done? You can tell the cheesecake is done by looking at the edges. They should be set, while the center remains slightly jiggly. The cheesecake will firm up as it cools. Can I make this cheesecake ahead of time? Yes, you can make this cheesecake a day or two ahead. It tastes even better after chilling in the fridge. Just keep it covered to maintain its freshness. What can I serve with my baked coffee cheesecake? I love serving my cheesecake with whipped cream and a sprinkle of cocoa powder. You can also add chocolate shavings or coffee beans for a nice touch. What to do if the cheesecake cracks? If your cheesecake cracks, don’t worry! It happens to many. You can cover it with whipped cream or chocolate sauce. This hides any cracks and adds flavor. How to fix a runny cheesecake filling? A runny filling can happen if the batter is not mixed well. To fix this, add a bit more flour and mix gently. Bake it a bit longer, but keep an eye on it. In this article, we explored the ingredients for a delicious baked coffee cheesecake. We broke down each element, including helpful substitutions and variations. The step-by-step guide covered preparation, baking, and cooling, ensuring a smooth texture. I shared tips for perfecting your cheesecake and creative serving ideas. Additionally, we looked at variations, storage, and answered common questions. With these insights, you're set to impress with your cheesecake. Enjoy baking and sharing it with others!

Baked Coffee Cheesecake Delightful and Creamy Treat

If you love coffee and cheesecake, you’re in for a treat! This Baked Coffee Cheesecake is a delightful mix of

To make the best California Pasta Salad, you need a few key items: - 8 oz (about 2 cups) tri-color rotini pasta - 1 cup cherry tomatoes, halved - 1 cup cucumber, diced - 1 cup bell peppers (mixed colors), diced - 1/2 cup red onion, finely chopped - 1/2 cup black olives, sliced - 1/4 cup fresh parsley, chopped - 1/4 cup feta cheese, crumbled - 1/4 cup sunflower seeds - 1/4 cup olive oil - 3 tablespoons apple cider vinegar - 1 teaspoon garlic powder - 1 teaspoon dried oregano - Salt and pepper to taste These ingredients create a colorful and tasty salad. You can customize your salad with these fun add-ins: - Cheese options like mozzarella or goat cheese - Seeds like pumpkin or sesame for crunch - Protein options such as grilled chicken or canned tuna Adding these can make the salad more filling and flavorful. You will need some basic kitchen tools: - A cooking pot for boiling the pasta - Mixing bowls for combining ingredients - A whisk for making the dressing These items make the process easy and fun. For the full recipe, check out the details above. Enjoy making your California Pasta Salad! To start, boil a pot of water. Add a pinch of salt to the water. This helps flavor the pasta. Once the water is boiling, add 8 oz of tri-color rotini pasta. Cook it per the package instructions, usually about 8 to 10 minutes. Stir occasionally to keep it from sticking. After cooking, drain the pasta in a colander. Rinse it under cold water. This stops the cooking process and cools the pasta down. Make sure to rinse well to remove excess starch. This helps the pasta stay firm in the salad. Now, let’s prep the salad ingredients. Grab a large mixing bowl. Add the cooled pasta first. Next, slice 1 cup of cherry tomatoes in half and toss them in. Dice 1 cup of cucumber and add that too. Then, chop mixed bell peppers and finely chop 1/2 cup of red onion. Toss all these into the bowl. Next, slice 1/2 cup of black olives. Add them along with 1/4 cup of chopped fresh parsley. Mix all the ingredients gently. You want everything to be evenly distributed for great flavor in every bite. In a small bowl, whisk together the dressing. Combine 1/4 cup of olive oil and 3 tablespoons of apple cider vinegar. Then, add 1 teaspoon of garlic powder and 1 teaspoon of dried oregano. Season with salt and pepper to taste. Whisk until the dressing is well mixed. Pour the dressing over the pasta and vegetable mix. Gently toss everything together. Ensure the pasta and veggies are well coated. Lastly, fold in 1/4 cup of crumbled feta cheese and 1/4 cup of sunflower seeds. This adds a nice crunch. Let the salad chill in the refrigerator for at least 30 minutes. This helps the flavors blend better. For the full recipe, check out the instructions again. To boost the flavor of your California Pasta Salad, think about your seasonings. Start with salt and pepper. They help bring out the fresh taste of your veggies. You can also add garlic powder for a nice kick. If you want, sprinkle in a bit of red pepper flakes for heat. For a zesty twist, try a squeeze of lemon juice. This adds brightness that pairs well with the salad. Fresh herbs can take your salad to the next level. I love using parsley, but you can try basil or cilantro too. Just chop them finely and mix them in. They add a burst of flavor that makes each bite special. Prep work helps save time when making this salad. You can chop your veggies ahead of time. Store them in the fridge until you’re ready to mix. This way, you can whip up the salad quickly when you need it. You can also make the salad a day ahead. Just keep it in the fridge. The flavors will blend nicely overnight. Just remember to add the feta cheese and sunflower seeds right before serving to keep them fresh. California Pasta Salad pairs well with many sides. Grilled chicken or shrimp complements the flavors perfectly. You can also serve it with fresh bread or garlic bread for a hearty meal. For a great presentation, use a large, colorful bowl. Layer the salad to show off the vibrant colors of the veggies. Add some extra parsley on top for a pop of green. This makes the dish look inviting and appetizing. For the full recipe, check out the California Dreamin' Pasta Salad. {{image_2}} To give California pasta salad a Mediterranean twist, you can add different vegetables. Try artichoke hearts, sun-dried tomatoes, or zucchini for extra flavor. These veggies can change the taste and texture. You can also use alternative proteins. Chickpeas or grilled shrimp can boost the protein content. Both options add a unique taste and make the salad more filling. If you want a vegan or vegetarian version, simply remove dairy products. Skip the feta cheese and replace it with diced avocado for creaminess. You can also use nutritional yeast for a cheesy flavor without dairy. For plant-based protein suggestions, consider adding lentils or tofu. Both options add protein and fiber while keeping the salad light. California pasta salad can change with the seasons. In spring, add fresh peas or asparagus. In summer, use ripe tomatoes and sweet corn. Fall brings options like roasted butternut squash or Brussels sprouts. Winter can include hearty greens like kale. Make adjustments based on availability. Use what you have on hand. This makes the salad fresh and exciting each time you make it, and it helps you avoid waste. For the full recipe, check out California Dreamin' Pasta Salad. To keep your pasta salad fresh, use airtight containers. Glass or plastic containers work well. Make sure the lid fits tightly. This helps keep moisture in and air out. Store the salad in the fridge right after serving. This way, you preserve its great taste and crunch. Can you freeze pasta salad? Yes, you can freeze it, but it may change texture. Freezing can make the vegetables mushy. If you still want to freeze it, place the salad in a freezer-safe container. Make sure to leave some space at the top for expansion. To thaw, move the container to the fridge for several hours. If you want it quick, use the microwave on low power. After thawing, stir the salad and check the taste. You may need to add more dressing or seasoning. How long does pasta salad last in the fridge? It stays fresh for about 3 to 5 days. Keep an eye on it to ensure it stays tasty. Look for signs that it has spoiled. If the salad smells sour or looks slimy, it’s best to throw it away. Always trust your senses when it comes to food safety. For the full recipe, check out California Dreamin' Pasta Salad. Yes, you can make California Pasta Salad ahead of time. This dish tastes even better after sitting in the fridge. I suggest making it a few hours before serving. If you want the best flavor, chill it overnight. Just remember to keep it in a sealed container. California Pasta Salad stands out due to its bright colors and fresh flavors. The key ingredients that define it include: - Tri-color rotini pasta - Cherry tomatoes - Crunchy cucumbers - Mixed bell peppers - Black olives - Feta cheese - Fresh parsley These ingredients give it a fun, vibrant look and a tasty mix of textures. To make California Pasta Salad gluten-free, you can use gluten-free pasta. Many brands offer options like brown rice or quinoa pasta. Both work well and keep the same great taste. Just cook them according to the package instructions. This way, everyone can enjoy your salad! This blog post covered all you need for a tasty California pasta salad. We explored the essential ingredients and possible add-ins, along with clear instructions for cooking and mixing. I shared tips for flavor, time-saving, and serving ideas. You also learned about variations and how to store your salad. With these easy steps, you can create a fresh and delicious salad any time. Enjoy making it your own and share it with friends and family!

California Pasta Salad Flavorful and Fresh Recipe

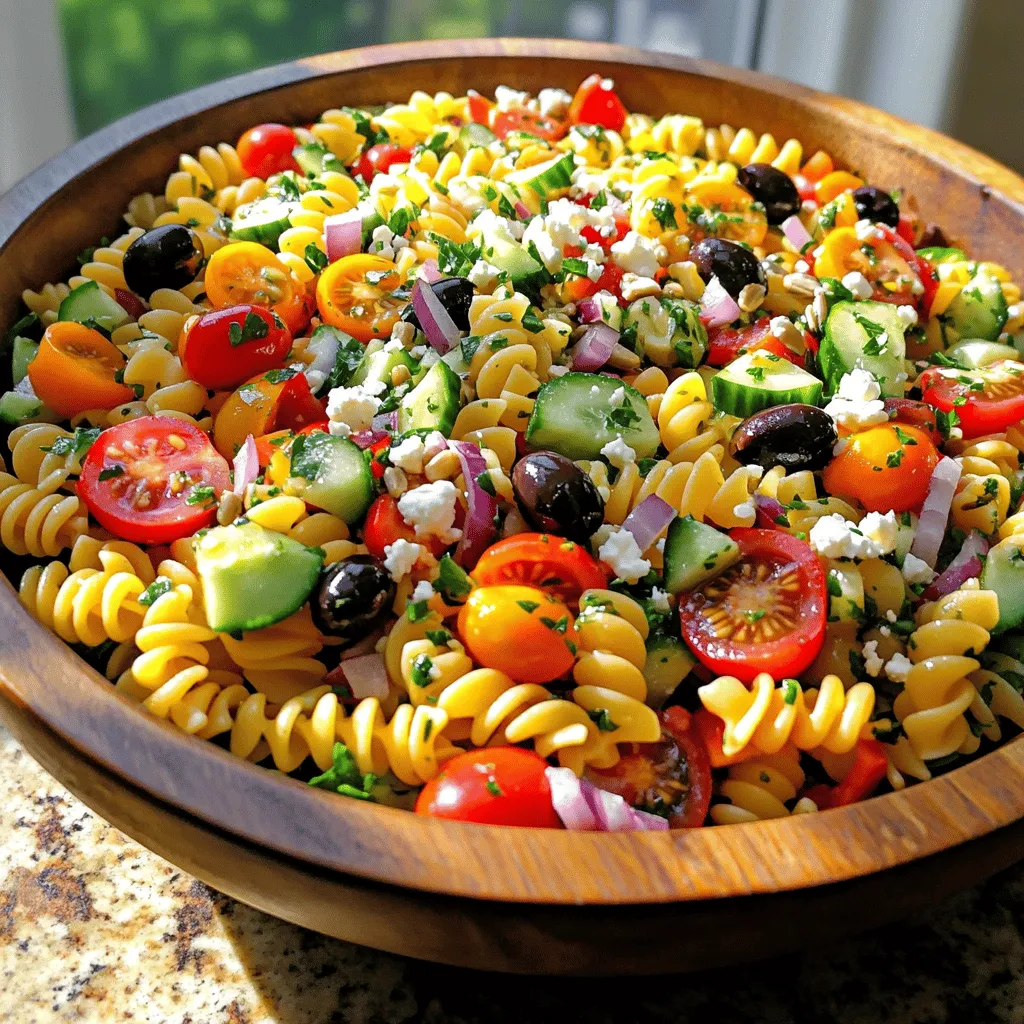
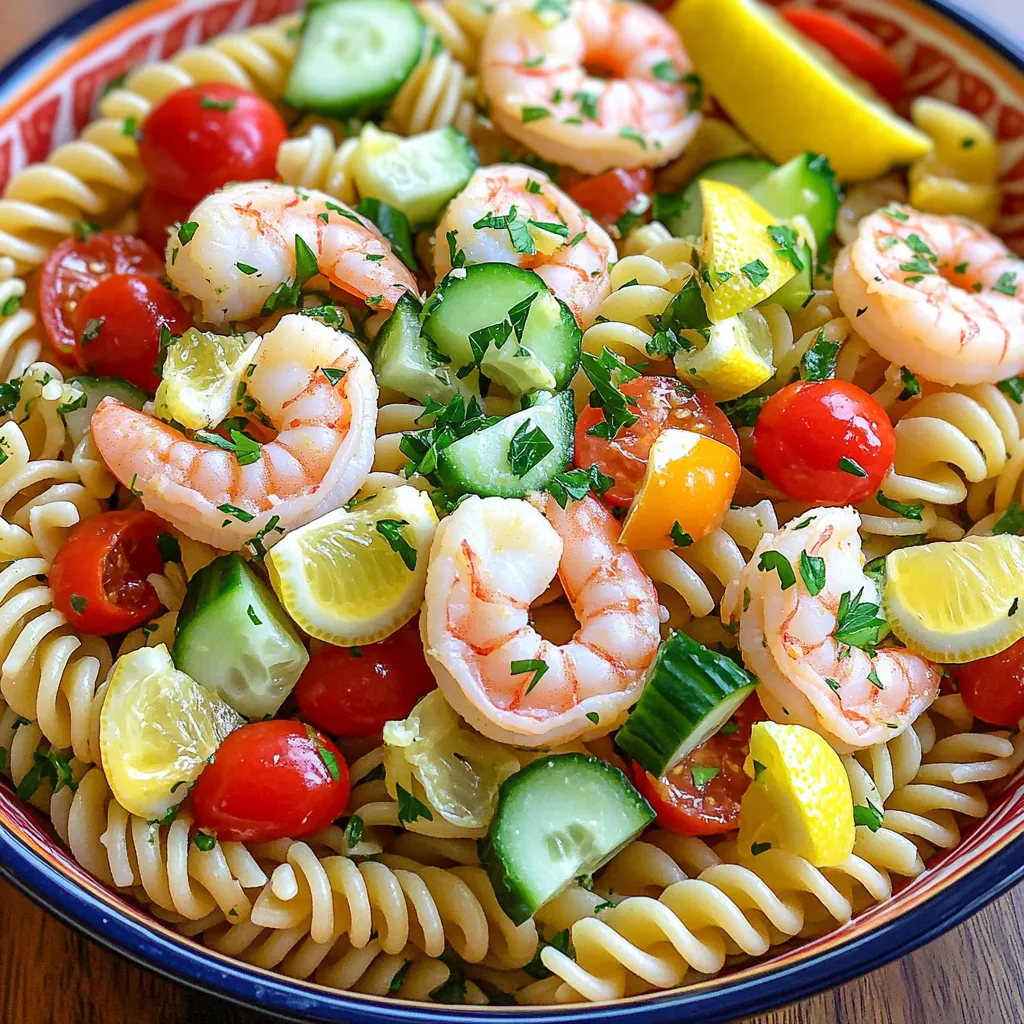
Are you ready to whip up a dish that is colorful, fresh, and packed with flavor? California Pasta Salad is

- 2 cups all-purpose flour - 1/4 cup cocoa powder - 1 teaspoon baking powder - 1/2 teaspoon baking soda - 1/2 teaspoon salt - 1/2 cup unsalted butter, softened - 1 cup granulated sugar - 1 large egg - 1 tablespoon milk - 1 teaspoon vanilla extract - 1 tablespoon red food coloring - 1/2 cup powdered sugar (for dusting) When it comes to making Red Velvet Crinkle Cookies, the right ingredients make all the difference. I love using high-quality all-purpose flour for a light texture. Cocoa powder adds a rich flavor. Baking powder and baking soda help the cookies rise, while salt enhances the sweetness. Using unsalted butter gives you control over the salt level. I prefer granulated sugar for the right sweetness and texture. The egg binds everything together, and milk adds moisture. Vanilla extract lends a warm flavor, and red food coloring gives these cookies their signature hue. Finally, powdered sugar is a must for that beautiful crinkle effect. For gluten-free options, you can use almond flour or a gluten-free blend. Just be sure to check the package for the right measurements. When choosing cocoa powder, natural cocoa gives a lighter color and taste. Dutch-processed cocoa has a deeper flavor and darker color. Use whichever you prefer, but note that it can change the look and taste of your cookies. If you want the full recipe, check the section above for all the details! 1. Preheat your oven to 350°F (175°C). Line your baking sheet with parchment paper. This step helps cookies bake evenly. 2. In a medium bowl, whisk together: - 2 cups all-purpose flour - 1/4 cup cocoa powder - 1 teaspoon baking powder - 1/2 teaspoon baking soda - 1/2 teaspoon salt Set these dry ingredients aside. 3. In a large mixing bowl, cream together: - 1/2 cup unsalted butter, softened - 1 cup granulated sugar Mix until light and fluffy, about 2-3 minutes. 4. Next, add: - 1 large egg - 1 tablespoon milk - 1 teaspoon vanilla extract - 1 tablespoon red food coloring Mix until everything is combined. 5. Gradually stir in the dry ingredients. Mix just until combined. Be careful not to overmix. The dough should feel thick. 6. Chilling the dough is key! Place it in the refrigerator for 30 minutes to 1 hour. This helps the cookies keep their shape while baking. 7. Once chilled, scoop out portions of dough using a tablespoon. Roll each portion into a ball. Roll the balls in powdered sugar until fully coated. 8. Place the dough balls on the prepared baking sheet, spaced about 2 inches apart. 9. Bake for 10-12 minutes. The edges should be firm, but the middles must remain soft. 10. Let the cookies cool on the baking sheet for 5 minutes. Then, transfer them to a wire rack to cool completely. For the full recipe, check out the detailed breakdown of ingredients and steps. To get that beautiful crinkle on your cookies, chilling the dough is key. After mixing, place the dough in the fridge for 30 minutes to 1 hour. This step keeps the cookies from spreading too much while baking. Try to scoop and roll the dough right after chilling. The baking time also plays a big role in texture. Bake the cookies for 10 to 12 minutes. You want the edges to be firm, but the middle should still feel soft. They will firm up as they cool. Red Velvet Crinkle Cookies pair nicely with milk or coffee. The sweetness of the cookies balances well with the warmth of these drinks. You can also serve them with a scoop of vanilla ice cream for a fun dessert. For presentation, stack the cookies on a nice plate. Dust them with powdered sugar for a festive look. You can even add a few chocolate chips on top before baking for extra flavor. To keep your cookies fresh, store them in an airtight container. This will help them stay soft for days. You can also layer them with parchment paper to avoid sticking. If you want to save some for later, freezing is a great option. Just place the cooled cookies in a freezer bag. When you want to enjoy them, thaw them at room temperature for about 30 minutes. They will taste just as good as fresh! {{image_2}} You can add more to your Red Velvet Crinkle Cookies. Use chocolate chips or nuts for extra flavor. Just mix them into the dough before chilling. This adds a nice crunch and richness. You can also try spices like cinnamon. A pinch of cinnamon can give your cookies a warm, cozy taste. It’s a fun twist that makes them special. Don’t be afraid to get creative with colors! You can make different colored crinkle cookies for any occasion. For example, use green food coloring for St. Patrick’s Day. This makes your treats festive and fun. You can even try purple for a whimsical touch. The key is to balance the color with the flavor. If you want gluten-free cookies, use almond flour or coconut flour. These flours give a nice texture. For vegan options, replace the egg with a flax egg or applesauce. Use coconut oil instead of butter for a dairy-free choice. Always remember to check your baking powder for hidden dairy. These swaps help keep the cookies tasty and enjoyable for everyone. Ingredients: - 2 cups all-purpose flour - 1/4 cup cocoa powder - 1 teaspoon baking powder - 1/2 teaspoon baking soda - 1/2 teaspoon salt - 1/2 cup unsalted butter, softened - 1 cup granulated sugar - 1 large egg - 1 tablespoon milk - 1 teaspoon vanilla extract - 1 tablespoon red food coloring - 1/2 cup powdered sugar (for dusting) Instructions: 1. Preheat your oven to 350°F (175°C). Line a baking sheet with parchment paper. 2. In a medium bowl, mix the flour, cocoa powder, baking powder, baking soda, and salt. Set this aside. 3. In a large bowl, cream the softened butter and granulated sugar until light and fluffy, about 2-3 minutes. 4. Add the egg, milk, vanilla extract, and red food coloring to the butter mixture. Mix until fully combined. 5. Gradually add the dry mix to the wet mix. Stir just until combined. The dough will be thick. 6. Chill the dough in the fridge for 30 minutes to 1 hour. This helps the cookies hold their shape. 7. Once chilled, scoop out dough with a tablespoon. Roll each piece into a ball and coat it in powdered sugar. 8. Place the dough balls on the baking sheet. Leave about 2 inches between each ball. 9. Bake for 10-12 minutes. The edges should be firm, but the centers will be soft. 10. Let the cookies cool on the sheet for 5 minutes, then transfer them to a wire rack. Prep Time: 30 mins | Total Time: 1 hour 45 mins | Servings: 24 cookies Each cookie has about 120 calories. It includes: - 5g fat - 18g carbs - 1g protein - 10g sugar Consider taking photos at each step. You can also create a video showing how to roll the dough and dust it with sugar. This makes the process fun and easy to follow! Store leftover cookies in an airtight container. Use a container that is not too large. This helps keep them soft and fresh. You can keep them at room temperature for up to five days. If you want to keep them longer, place them in the fridge. The cold will help maintain their taste. Just make sure to let them warm up to room temp before enjoying. Yes, you can freeze the cookie dough! First, scoop the dough into balls. Then, place the balls on a baking sheet. Freeze them for about one hour. After they are firm, transfer the balls to a freezer bag. Make sure to remove as much air as possible. When you want to bake, preheat your oven and bake them straight from the freezer. Just add a minute or two to the baking time. If you want to skip red food coloring, try beet juice. It gives a lovely red hue. You can also use pomegranate juice or pureed raspberries. These options add a natural touch. Just note that they may change the flavor slightly. You may need to adjust the sugar in the recipe to balance the taste. You now have the tools to make delicious Red Velvet Crinkle Cookies. From choosing the right ingredients to mastering the baking process, each step is important. Remember to chill your dough for the best texture. Don’t shy away from trying variations like chocolate chips or gluten-free options. Enjoy sharing these treats with friends and family. Happy baking and enjoy every bite!

Red Velvet Crinkle Cookies Delightful Treat Recipe

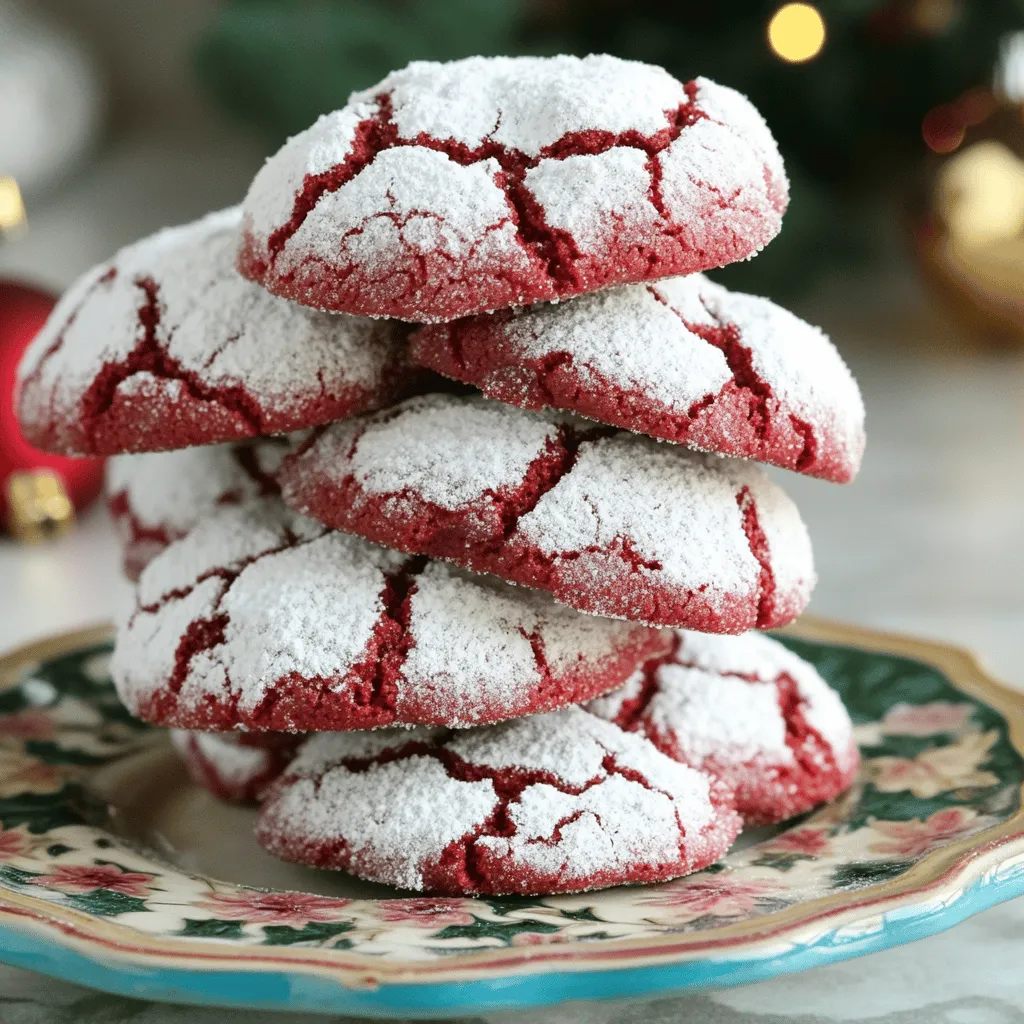
Welcome to the delightful world of Red Velvet Crinkle Cookies! If you’re craving a sweet treat that’s soft, chewy, and

- Cream Cheese - Sugar - Sour Cream - Vanilla Extract - Heavy Cream - Crushed Cookies - Unsalted Butter - Fresh Berries - Mint Leaves Each ingredient plays a key role in making your cheesecake smooth and tasty. - Cream Cheese: This gives the cheesecake its rich and creamy base. Use softened cream cheese for easy mixing. - Sugar: This sweetens the cheesecake. Adjust it to match your taste. - Sour Cream: This adds a nice tang to balance the sweetness. - Vanilla Extract: This adds flavor depth. Use pure vanilla for the best taste. - Heavy Cream: This helps make the cheesecake light and fluffy. Whip it well. - Crushed Cookies: These form the crust. Graham crackers are a great choice. - Unsalted Butter: This binds the cookie crust together. Melt it before mixing. - Fresh Berries: These make a perfect topping. Use strawberries, blueberries, or raspberries. - Mint Leaves: These add a fresh touch to your dish. - Calories per serving: About 300 calories. - Macros breakdown: Approximately 22g fat, 30g carbs, and 4g protein. - Dietary considerations: This recipe is not gluten-free due to the cookies used. Substitute with gluten-free cookies if needed. You can find the full recipe [here](#). Enjoy making your delightful single-serve cheesecake! To start, gather your crushed cookies and melted butter. You can use any cookies you like, but I love Graham crackers for their classic taste. In a medium bowl, mix the crushed cookies and melted butter. Stir until the crumbs are coated and feel like wet sand. Next, grab a small serving glass or ramekin. Press the cookie mixture firmly into the bottom of the glass. Make sure it’s even and compact. For the best results, chill this in the freezer for about 10 minutes. This step helps the crust to set nicely. Now, let’s move on to the filling. Take your softened cream cheese and place it in a bowl. Beat it until it’s smooth and creamy. This step is key for a nice texture. Next, add in the granulated sugar, sour cream, and vanilla extract. Mix these together until they are well combined. In another small bowl, whip the heavy cream until it forms soft peaks. Gently fold this whipped cream into the cheesecake mixture. This helps to keep the filling light and fluffy. It’s time to put it all together! Spoon the cheesecake filling over the chilled crust in your glass. Use a spatula to smooth the top. After that, cover the glass with plastic wrap. Place it in the fridge for at least 2 hours. This chilling time is important for the cheesecake to set properly. When you’re ready to serve, add some fresh berries on top. Garnish with a sprig of mint for a pop of color and flavor. You can find the Full Recipe online for more details and tips! To make a smooth cheesecake, soften your cream cheese first. Cold cream cheese can make lumps. Let it sit at room temperature for about 30 minutes. This simple step makes a big difference. When adding whipped cream, use a gentle folding technique. Start by adding a small amount of whipped cream to the cheesecake mix. Stir just enough to combine. Then, fold in the rest slowly. This helps keep the mixture light and fluffy. One common mistake is overmixing the filling. Mixing too much can add air and change the texture. Mix just until everything blends well. Another mistake is not chilling the cheesecake long enough. You need to let it set for at least 2 hours. This helps the flavors develop and the cheesecake firm up. For a lovely look, serve the cheesecake in the glass. It gives a rustic vibe that is fun and easy. If you want something fancier, transfer it to a plate. Drizzle with berry compote for a touch of elegance. Garnish your cheesecake with fresh berries and a mint leaf. Berries add color and a burst of flavor. Mint brings a fresh note that complements the creaminess. {{image_2}} You can easily change the flavor of your cheesecake. Adding lemon zest brings a fresh, citrus twist. Just mix a teaspoon of lemon zest into the filling. It brightens the taste and adds a zing! You might also like to add chocolate or peanut butter. For chocolate, mix in two tablespoons of cocoa powder. For peanut butter, use two tablespoons of creamy peanut butter. Both options create a rich and delightful dessert. Try using different cookies for the crust. Oreos or vanilla wafers work great! Simply crush them the same way as Graham crackers. You can also make a no-bake crust using oats and melted coconut oil. This option gives a chewy texture. Just mix one cup of oats with two tablespoons of melted coconut oil. It’s simple and tasty! Seasonal fruits make great toppings. In spring, use fresh strawberries or blueberries. In summer, consider peaches or raspberries. In fall, try sliced apples or pumpkin puree. In winter, warm berry sauces add a cozy touch. You can also drizzle flavored syrups like caramel or chocolate over the top. These toppings not only look pretty but also enhance the flavor of your cheesecake. To keep your cheesecake fresh, store it in the fridge. Place it in an airtight container. If you used a glass, cover it with plastic wrap. This keeps the cheesecake from drying out and absorbing other smells. If you want to save some for later, you can freeze it. Wrap the cheesecake tightly in plastic wrap, then place it in a freezer bag. This helps prevent freezer burn. You can freeze it for up to two months. When you're ready to eat it, thaw it in the fridge overnight. In the fridge, your single serve cheesecake will stay fresh for about 3 to 5 days. After that, it may start to lose its taste and texture. To know if it’s no longer good, look for changes. If it smells off or has a strange texture, it’s best to throw it out. Always trust your senses! Enjoy your cheesecake while it’s fresh for the best taste. Yes, you can use low-fat cream cheese or sour cream. However, the texture may change. Low-fat options can make the cheesecake less creamy. The taste might also be less rich. If you want a lighter cheesecake, this is a good choice. Just expect some differences in flavor and feel. The ideal setting time is at least 2 hours. This allows the cheesecake to firm up perfectly. If you want a firmer texture, let it set longer, up to 4 hours. Remember to keep it in the fridge while it sets. This keeps it cool and tasty. Yes, you can make this cheesecake ahead of time. It stays fresh for about 2-3 days in the fridge. Cover it well to keep it from drying out. For the best taste, add toppings just before serving. This keeps the berries fresh and bright. You can find pre-made options at many grocery stores. Look for brands like Cheesecake Factory or individual bakery shops. These often come in fun flavors, like strawberry or chocolate. Check the frozen section too for more choices. Enjoying a store-bought cheesecake is great for quick treats! This cheesecake blog post covered the key ingredients, step-by-step instructions, and helpful tips to create a tasty treat. You saw how to prepare the crust, make the filling, and assemble everything perfectly. With variations and storage tips, you can customize this dessert for any occasion. Remember, the right texture and chilling time matter. You can enjoy this dessert with confidence, knowing it will impress your guests. So go ahead and make your own delicious single-serve cheesecake!

Single Serve Cheesecake Delightful and Easy Recipe

If you crave a sweet treat that’s quick to whip up and oh-so-delicious, this Single Serve Cheesecake is for you!

Older posts
Newer posts
← Previous Page1 … Page47 Page48 Page49 … Page61 Next →

dsad

© 2025 flavorsprint • Built with GeneratePress

Our Policies

  • Copyright Policy
  • Cookie Policy
  • GDPR Policy
  • Privacy Policy
  • Disclaimer
  • Terms Of Use

More Information

  • Home
  • About
  • Contact
  • Appetizers
  • Dessert
  • Dinner
  • Drinks
©2025, flavorsprint About Back To Top