Skip to content
DisclaimerTerms Of UseGDPR PolicyCookie Policy

flavorsprint

  • Home
  • Drinks
  • Appetizers
  • Dinner
  • Dessert
  • About
  • Contact
  • Privacy Policy
DisclaimerTerms Of UseGDPR PolicyCookie Policy

Lillian

- 4 ripe peaches, pitted and chopped - 1 cup fresh lemon juice (about 4-6 lemons) - 1 cup granulated sugar (adjust to taste) - 4 cups cold water - 1 teaspoon vanilla extract - Optional: Fresh mint leaves To create a refreshing peach lemonade, start with ripe peaches. These fruits add natural sweetness and a lovely color to your drink. When choosing peaches, look for ones that yield slightly to pressure. They should smell fragrant and feel soft. Next, you will need fresh lemons. They provide the tangy flavor that balances the sweetness from the peaches. A good rule is to pick lemons that feel heavy for their size. Granulated sugar comes next. You can adjust the amount based on your taste. This recipe calls for one cup, but feel free to add more or less. Cold water is essential to dilute the mixture and create a refreshing drink. Lastly, a teaspoon of vanilla extract adds depth to the flavor. For a touch of brightness, consider adding fresh mint leaves as a garnish. - Blender - Fine mesh sieve - Large pitcher - Ice cube tray Using the right tools helps make the process easier. A blender is your best friend for pureeing the peaches. It turns them into a smooth mixture. Next, a fine mesh sieve ensures you get a silky texture by removing any pulp. This step is key for a refreshing drink. You will also need a large pitcher to mix everything together. It gives you enough space to add all the ingredients. An ice cube tray is useful for chilling your lemonade. You can make ice cubes from the peach lemonade to keep it cold without watering it down. These ingredients and tools set the stage for a delightful summer drink. For the full recipe, check out the detailed steps in the next section. To start, take your ripe peaches and chop them into small pieces. Place the chopped peaches in a blender with half of the cold water. Blend until the mixture is smooth. Next, strain the peach puree through a fine mesh sieve. This step removes any pulp and gives you a smooth texture. Press down on the puree with a spoon to get every drop of juice. Now it’s time to mix your lemonade. In a large pitcher, combine the strained peach juice with fresh lemon juice and granulated sugar. Stir well until the sugar dissolves completely. Then, pour in the remaining cold water and add the vanilla extract. Mix gently to combine all the flavors. If you like it sweeter, you can adjust the sugar to your taste. After mixing, chill your peach lemonade in the refrigerator. Let it sit for at least 30 minutes. This allows the flavors to meld and become even more delicious. When you’re ready to serve, fill tall glasses with ice cubes. Pour the chilled peach lemonade over the ice and garnish with fresh mint leaves. Enjoy this refreshing drink on a hot summer day! For the full recipe, check out the details provided. How to choose ripe peaches Look for peaches that feel slightly soft when you gently press them. Their skin should have a warm color, often yellow or orange. Avoid peaches that are green or too hard, as they won’t be sweet. Picking the right lemons for juicing Choose lemons that are heavy for their size and firm. Bright yellow skin often means they are juicy. If you find a lemon with some slight blemishes, don’t worry; they can still be great for juicing! Adjusting sugar levels Start with the amount of sugar in the recipe. Taste your peach lemonade and decide if it needs more. Just add a little at a time, so it does not get too sweet. Natural sweetener alternatives If you want a healthier option, try using honey or agave syrup. Both dissolve well and add a nice flavor. You can also use stevia or erythritol if you want to cut down on calories. Optional ingredients to enhance taste Add a splash of sparkling water for a fun twist. You can also mix in other fruits like strawberries or raspberries for added flavor. A bit of ginger can give it a zing, too. Tips for adding herbs or spices Fresh mint leaves are perfect for a refreshing touch. You can muddle them in the pitcher before adding lemonade. For a unique flavor, try some basil or even a pinch of cinnamon. {{image_2}} You can make your peach lemonade a bit more fun by adding vodka or rum. A good rule is to add 1-2 ounces of alcohol per glass. This gives a nice kick without overpowering the peach flavor. For parties, serve it in a big pitcher. Add slices of fresh peaches and lemons for a pretty look. Guests will love this refreshing drink! Want some fizz? Making your peach lemonade sparkling is easy! Just mix in some soda water or lemon-lime soda. The bubbles add a fun twist. For the best flavor, try using a citrus soda. You can also add a splash of ginger ale for a spicy hint. Serve it over ice for a bubbly summer treat! Combining strawberries with peaches makes a beautiful blend. To do this, use about 2 cups of fresh strawberries. Blend them with the peaches for a fruity mix. The sweet and tart flavors pair well. Adjust the blending ratio to your taste. More strawberries will make it sweeter, while more peaches keep it classic. This combo will surely impress! For full details on making this delightful drink, check the Full Recipe. Store leftover peach lemonade in a pitcher. Make sure to cover it tightly. This keeps it fresh and prevents smells from mixing in your fridge. For the best taste, drink it within three days. After that, it may lose some flavor. You can freeze peach lemonade for later use. Pour the lemonade into an ice cube tray. This makes perfect peach lemonade cubes. Once frozen, pop them out and store them in a bag. When you want a refreshing drink, just thaw the cubes in a glass of water. You can also blend them for a slushy treat! Homemade peach lemonade can last up to one week in the fridge. To keep it fresh, store it in a sealed pitcher or jar. This helps prevent it from absorbing other smells. If it starts to taste off, it's best to toss it out. Always check for changes in color or smell before serving. Yes, you can use frozen peaches! They work well in this recipe. Just thaw them before blending. Frozen fruit often has great flavor and can save prep time. However, it may make your lemonade a bit more watery. You might need to adjust the sugar to balance the flavors. If you want to cut down on sugar, try using honey or agave syrup. Both of these options will add sweetness without the granules. You can also use stevia or monk fruit sweetener for a low-calorie choice. Keep in mind that each sweetener has a different level of sweetness. Start with a small amount and adjust to taste. Absolutely! This recipe is great for kids. To make it more kid-friendly, you can cut back on the sugar. You might even try swapping out some of the lemonade with sparkling water for a fun twist. Just ensure the lemonade is not too tart. Kids love the fruity flavor and the bright color! This blog post covers how to make refreshing peach lemonade. You learned about fresh ingredients like ripe peaches and lemons, and tools like a blender and pitcher. We went through key steps for preparing the peach puree and mixing the lemonade. You also discovered tips to choose fruits and customize sweetness. Variations like alcoholic and sparkling lemonade add fun twists. For storage, know how to keep it fresh and freeze leftovers. This drink is great for hot days, parties, or family fun. Enjoy your homemade peach lemonade!

Refreshing Peach Lemonade Simple Summer Delight

When summer heat hits, nothing cools you down like a glass of Refreshing Peach Lemonade. This simple recipe bursts with

To make this delightful Southern Peach Bread, you will need a few simple ingredients. Here’s the list: - 2 cups all-purpose flour - 1 teaspoon baking powder - 1/2 teaspoon baking soda - 1/2 teaspoon salt - 1 teaspoon ground cinnamon - 1/2 cup unsalted butter, softened - 1 cup granulated sugar - 2 large eggs - 1 teaspoon vanilla extract - 1 cup buttermilk - 2 cups fresh peaches, peeled and diced - 1/2 cup chopped pecans (optional) - 1/4 cup brown sugar (for topping) - 1 teaspoon cinnamon (for topping) Each of these items brings flavor and texture to the bread. Fresh peaches add sweetness and moisture, making the bread soft. The butter and sugar create a rich base, while the buttermilk keeps it fluffy. If you like nuts, adding pecans gives a nice crunch. This recipe is easy, yet it creates a warm, inviting aroma as it bakes. You can find the full recipe with all the steps and instructions to make this tasty treat. Enjoy making this Southern Peach Bread with great ingredients that come together perfectly! 1. Preheat your oven to 350°F (175°C). 2. Grease and flour a 9x5 inch loaf pan. 3. In a medium bowl, mix the dry ingredients: - 2 cups all-purpose flour - 1 teaspoon baking powder - 1/2 teaspoon baking soda - 1/2 teaspoon salt - 1 teaspoon ground cinnamon 4. Set this bowl aside for later. 1. In a large bowl, cream together: - 1/2 cup unsalted butter, softened - 1 cup granulated sugar Use an electric mixer, blend until light and fluffy. This takes about 3-4 minutes. 2. Add 2 large eggs to the butter mix, one at a time. 3. Mix in 1 teaspoon vanilla extract next. 4. Gradually pour in 1 cup buttermilk. Stir until well combined. 1. Slowly add the dry ingredient mixture to the wet mix. Stir just until combined. Be careful not to overmix! 2. Gently fold in: - 2 cups fresh peaches, peeled and diced - 1/2 cup chopped pecans (optional) 1. Pour the batter into the prepared loaf pan. Smooth the top with a spatula. 2. In a small bowl, mix: - 1/4 cup brown sugar - 1 teaspoon cinnamon Sprinkle this topping over the batter. 3. Bake for 55-60 minutes. Check if done by inserting a toothpick in the center. If it comes out clean, it’s ready. 4. Allow the bread to cool in the pan for about 10 minutes. 5. Then, transfer to a wire rack to cool completely. For the full recipe, refer back to the ingredients listed above. Enjoy each slice of this delightful Southern Peach Bread! To make the best Southern Peach Bread, you must avoid overmixing. This keeps the bread light and fluffy. Mix just until you see no dry flour. It is also important to check for doneness. Insert a toothpick into the center. If it comes out clean, your bread is ready! Serve the bread warm with a pat of butter. Fresh peach slices on top add a nice touch. This makes it look great and taste even better. If you want to store it, keep it in an airtight container. This way, it stays soft and tasty. You can add a little cinnamon or nutmeg for extra flavor. Vanilla extract also boosts the taste. When using peaches, ripe ones work best for this recipe. Canned peaches can also work if fresh ones are not available. Just drain them well before adding to the batter. For the full recipe, check out the original source. {{image_2}} You can change the flavor of Southern Peach Bread by using other fruits. Cherries, blueberries, or apples work well. Each fruit brings its own taste and texture. For cherries, pit and chop them before use. If you choose blueberries, toss them in flour to prevent sinking. Apples should be peeled and diced for easy mixing. When using different fruits, you may need to adjust the sugar. Some fruits are sweeter, so you can cut back on sugar. Always taste the fruit first to decide how much sugar to add. If you need gluten-free options, substitute all-purpose flour with a gluten-free blend. Make sure the blend is suitable for baking. This swap will keep the bread light and tasty. For those avoiding dairy, try using almond milk or oat milk instead of buttermilk. You can use dairy-free butter to replace the regular butter. These changes maintain flavor while fitting your diet. Southern Peach Bread pairs well with breakfast or brunch items. Serve it warm with butter or cream cheese. It also goes great with coffee or tea. This bread is perfect for holidays or gatherings. Slice it and arrange it on a platter. Add fresh peach slices for a colorful touch. Guests will enjoy this sweet treat at any event. For more ideas, check out the Full Recipe for serving tips! To keep your Southern Peach Bread fresh, follow these simple steps. First, let the bread cool completely before storing. This prevents moisture build-up, which can make the bread soggy. Wrap the bread tightly in plastic wrap. You can also use aluminum foil for extra protection. - Store at room temperature for up to 3 days. - For longer storage, place it in the fridge. This will keep it fresh for up to a week. Refrigeration can change the texture, making it a bit denser. If you prefer that fluffy bite, keep it at room temperature. Freezing Southern Peach Bread is easy and keeps it tasty. Once cooled, slice the bread if you want individual pieces. Wrap each slice in plastic wrap. Then, place the slices in a freezer bag or airtight container. - For whole loaves, wrap it tightly in plastic then foil. - Label with the date for easy tracking. To thaw, take out a slice or loaf from the freezer. Leave it at room temperature for an hour or so. You can also heat it in the microwave for about 15 seconds. This way, you enjoy warm, delicious bread anytime! For the complete recipe, check out the Full Recipe section. How long does Southern Peach Bread last? Southern Peach Bread lasts about 3 to 5 days at room temperature. Store it in an airtight container to keep it fresh. If you want it to last longer, you can freeze it. Can I use frozen peaches for this recipe? Yes, you can use frozen peaches. Just make sure to thaw and drain them first. This step helps reduce excess moisture in the bread. What is the best way to slice the bread? To slice the bread, use a serrated knife. This knife helps you get clean cuts without squishing the bread. Slice it when it cools, but warm slices are extra tasty. What to do if the bread is too dense? If your bread turns out dense, it could be due to overmixing. Mix just until combined. Also, ensure your baking powder and baking soda are fresh. Old leavening agents can lead to dense bread. Issues with overbaking or underbaking If you overbake, the bread can dry out. Keep an eye on it and test with a toothpick. For underbaking, the center may stay gooey. Bake a bit longer, but check often to avoid overbaking. Alternatives for all-purpose flour You can use whole wheat flour or a gluten-free blend. If using whole wheat, the bread may be denser. Adjust liquid ingredients to keep the right texture. Substituting sweeteners and toppings Instead of granulated sugar, try honey or maple syrup. For a topping, you can use oats or crushed nuts instead of brown sugar. This will give a nice crunch to the bread. For the full recipe, be sure to check the specific ingredient list and instructions. In this article, I shared how to make delicious Southern Peach Bread. We covered the ingredients you need, step-by-step instructions, and tips for perfecting your loaf. You learned about variations, storage tips, and answers to common questions. Baking can be fun and rewarding. Use fresh peaches for the best flavor. Enjoy sharing this treat with family and friends. Your kitchen will smell wonderful, and you'll have a tasty treat to enjoy. Happy baking!

Southern Peach Bread Irresistible Homemade Delight

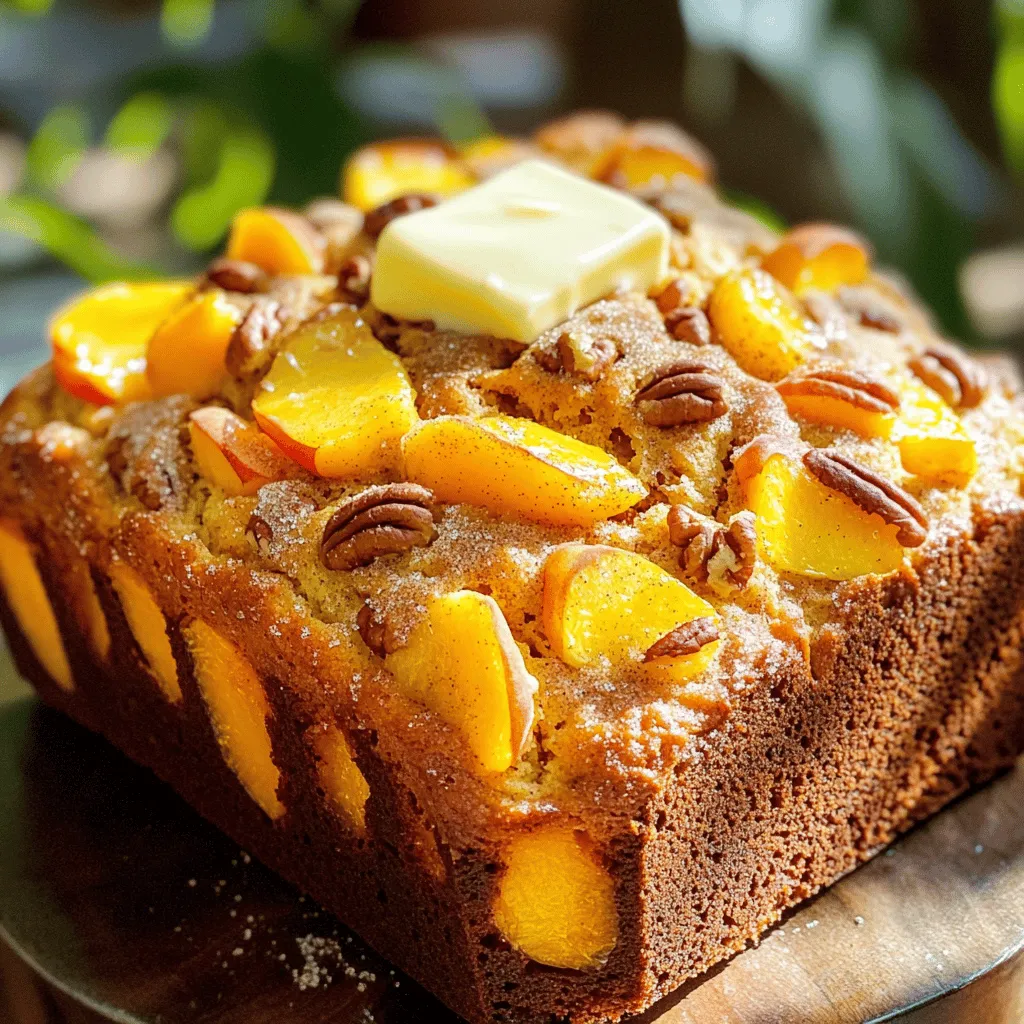
Welcome to a delightful journey of flavor with my Southern Peach Bread! This homemade treat is perfect for summer gatherings

- 1 pound fresh okra, sliced into ½ inch rounds - 1 cup buttermilk - 1 cup cornmeal - ½ cup all-purpose flour - 1 teaspoon garlic powder - 1 teaspoon onion powder - ½ teaspoon cayenne pepper - 1 teaspoon salt - ½ teaspoon black pepper - Oil for frying (canola or vegetable oil) I love using fresh ingredients for this crispy fried okra. The okra should be firm and green. You will slice it into ½ inch rounds. This size cooks well and gives a nice crunch. Soaking the sliced okra in buttermilk is key. It adds flavor and helps the coating stick. For the dry mix, cornmeal is perfect for that crunchy texture. The all-purpose flour adds a lightness to the coating. Garlic and onion powder bring out the flavors. Cayenne pepper adds just a hint of heat, but feel free to adjust it to your taste. Salt and black pepper are must-haves for seasoning. You will need oil for frying. Canola or vegetable oil works best. It should be hot enough to fry the okra until golden brown. Make sure you have enough oil in your pan to cover the okra while frying. This combination of fresh and dry ingredients creates a delicious dish. You can find the full recipe in the previous sections for all the steps. Happy cooking! - Soaking the okra in buttermilk: Start by slicing your fresh okra into ½-inch rounds. Place these slices in a large bowl and cover them with buttermilk. Let them soak for about 30 minutes. This soaking adds flavor and helps the coating stick well to the okra. - Mixing dry ingredients: In another bowl, combine the cornmeal, all-purpose flour, garlic powder, onion powder, cayenne pepper, salt, and black pepper. Mix these together well. This blend gives the okra its great crunch and flavor. - Heating oil to the right temperature: Pour about 2 inches of oil into a deep skillet or frying pan. Heat the oil over medium-high heat until it reaches 350°F (175°C). Use a thermometer to check the temperature. This step is key to getting crispy okra. - Coating the okra: After soaking, take the okra out of the buttermilk. Let the excess buttermilk drip off. Now, take each piece and dredge it in the cornmeal mixture. Be sure each piece is fully coated. Shake off any extra coating. - Frying in batches until golden brown: Carefully place the coated okra into the hot oil. Fry in batches to avoid crowding the pan. Cook for about 3-4 minutes or until the okra is golden brown and crispy. Turn the pieces occasionally for even cooking. - Draining excess oil: Once cooked, remove the fried okra and place it on a paper towel-lined plate. This helps drain off any extra oil. - Presentation tips for serving: Serve the crispy fried okra in a rustic basket lined with parchment paper. Pair it with your favorite dipping sauce, like ranch or a spicy remoulade. For a touch of color, garnish with fresh parsley. Enjoy this delightful dish! For the full recipe, refer to the earlier section. To make crispy fried okra, start by soaking the slices in buttermilk. This step helps the cornmeal coating stick and adds flavor. The buttermilk also tenderizes the okra, making every bite juicy. Soak the okra for at least 30 minutes. Next, get the oil temperature right. Heat oil in a deep pan to 350°F (175°C). Use a thermometer for accuracy. If the oil is too cool, the okra will absorb it and become soggy. If it's too hot, the coating will burn before the okra cooks. You can play with seasonings to make your okra unique. Try adding smoked paprika for a smoky taste or some lemon zest for brightness. You can even mix in Parmesan cheese for a cheesy twist. Dipping sauces also enhance the flavor. Classic ranch works well, but you can try spicy remoulade or even a homemade yogurt dip. These sauces add a creamy contrast to the crunchy okra. For the full recipe, check out the Crunchy Southern Fried Okra . {{image_2}} Southern-style crispy fried okra is a classic favorite. It shines with its crunchy texture and rich flavor. This dish often uses fresh okra, cornmeal, and spices. The method makes it popular in the southern United States. Many other cuisines add their twist to fried okra. In India, for example, they might use chickpea flour and spices. This gives it a different flavor and texture. You can try mixing spices from various regions to create your version of crispy fried okra. If you want to cook okra without frying, try air frying. An air fryer uses hot air to make food crispy without much oil. To air fry okra, just coat it with seasoning and place it in the fryer. Cook at 400°F for about 15 minutes. Shake the basket halfway through for even cooking. Baking is another healthier option. Preheat your oven to 425°F. Spread the coated okra on a baking sheet in a single layer. Bake for about 20-25 minutes, flipping halfway. This gives you crisp okra with less oil. Try these methods for a fun twist on your crispy fried okra. For the full recipe, check out the Crunchy Southern Fried Okra section. After you enjoy your crispy fried okra, store any leftovers in an airtight container. This keeps them fresh for up to three days. Place a paper towel in the container to absorb moisture. This way, they stay crispy longer. When you want to reheat the fried okra, avoid the microwave. Microwaves can make them soggy. Instead, heat them in a skillet over medium heat. This method helps regain their crunch. You can also use an air fryer. Set it to 350°F (175°C) and heat for about 5 minutes. If you want to save fried okra for later, freezing is a great option. First, let the okra cool completely. Then, spread them in a single layer on a baking sheet. Freeze them until solid, about 1-2 hours. Once frozen, transfer the okra to a freezer bag. Be sure to remove as much air as possible before sealing. Fried okra can last up to three months in the freezer. For the best taste and texture, try to use them within this time. When you're ready to eat, fry them directly from frozen. This keeps them crispy and tasty. For more details, check out the Full Recipe. How can I make crispy fried okra without buttermilk? You can use plain yogurt or milk instead. Both will help the coating stick. Just soak the okra for about 30 minutes to get a good flavor. What is the best way to avoid soggy okra? Ensure your oil is hot enough before frying. If it's not hot, the okra will absorb too much oil. Also, do not overcrowd the pan. Fry in small batches to keep them crispy. How long do I fry the okra for perfect crispiness? Fry the okra for about 3 to 4 minutes. Look for a golden brown color. Turn them occasionally to cook evenly and achieve that perfect crunch. Can I use frozen okra for this recipe? Yes, you can use frozen okra. Just thaw it first and pat dry. This helps to remove excess moisture, which can make the coating soggy. Is fried okra healthy? Fried okra can be part of a balanced diet when enjoyed in moderation. It is a good source of fiber and vitamins. Just be mindful of the oil used for frying. What are some nutritious sides to pair with crispy fried okra? Consider serving okra with a fresh salad, coleslaw, or grilled vegetables. These sides add nutrition and balance out the meal. You can also enjoy it with rice or cornbread for a hearty touch. For the full recipe, check out the Crunchy Southern Fried Okra. In this post, you learned how to make crispy fried okra. Fresh okra, buttermilk, and a mix of spices create great flavor. Proper soaking and frying techniques ensure a golden finish. You can try different cooking styles too, like air frying or baking. Remember to store leftovers correctly for the best taste. Fried okra can be both a treat and a side dish. Now, you have all the tools to enjoy this delicious dish. Enjoy your cooking!

Crispy Fried Okra Perfect for Your Next Meal

Are you ready to elevate your meals with a crunchy, flavorful treat? Crispy fried okra is a classic dish that

For a tasty Creamy Tuscan Chicken Pasta, you need fresh and simple ingredients. Here’s what you'll need: - 12 oz fettuccine or penne pasta - 2 boneless, skinless chicken breasts - Salt and pepper, to taste - 2 tablespoons olive oil - 4 cloves garlic, minced - 1 cup cherry tomatoes, halved - 1 cup fresh spinach - 1 cup heavy cream - ½ cup grated Parmesan cheese - 1 teaspoon dried Italian seasoning - Fresh basil, for garnish These ingredients blend together to create a rich, creamy dish that warms the heart. To make this dish, gather some basic kitchen tools. You will need: - A large pot for boiling pasta - A large skillet for cooking the chicken and sauce - A cutting board for chopping - A chef's knife for slicing - A measuring cup for liquids - A spatula or wooden spoon for mixing Having the right tools makes cooking easier and more fun. Get creative with your flavors! Here are some optional garnishes and add-ins you can try: - Crushed red pepper flakes for heat - Fresh parsley for a burst of color - Extra Parmesan cheese for richness - Sliced olives for a briny touch - Sun-dried tomatoes for added sweetness These extras can enhance the dish and make it your own. You can find the full recipe for this delightful meal in the complete article. Enjoy cooking! Start by boiling a large pot of salted water. Once it boils, add 12 oz of fettuccine or penne pasta. Cook it until it is al dente, as the package suggests. This usually takes about 8-10 minutes. When done, save 1 cup of the pasta water. Drain the pasta in a colander and set it aside. Season 2 boneless, skinless chicken breasts with salt and pepper on both sides. Heat 2 tablespoons of olive oil in a large skillet over medium heat. Carefully add the chicken breasts and let them cook for about 6-7 minutes on each side. You want them to be golden brown and fully cooked. Once done, remove the chicken from the skillet. Allow it to rest briefly before slicing it into strips. In the same skillet, lower the heat to medium. Add 4 cloves of minced garlic and sauté for 1-2 minutes. Watch closely to ensure the garlic does not burn. Next, add 1 cup of halved cherry tomatoes and cook for about 3-4 minutes, until they soften. Then, toss in 1 cup of fresh spinach and let it wilt. Pour in 1 cup of heavy cream and add ½ cup of grated Parmesan cheese. Stir until the cheese melts and the mixture is smooth. Sprinkle in 1 teaspoon of dried Italian seasoning. If the sauce gets too thick, add some of the reserved pasta water until it is just right. Finally, add the sliced chicken and cooked pasta into the skillet. Toss everything together so the pasta is covered in the creamy sauce. Adjust seasoning with salt and pepper if needed. To get the best texture for your creamy Tuscan chicken pasta, cook the pasta al dente. This means it should be firm to the bite. When you mix it with the sauce, the pasta will soak up flavor and remain perfect. Avoid overcooking the pasta. It will become mushy and lose its charm. Boost the flavor of your dish by adding more garlic or using fresh herbs. You can try adding red pepper flakes for some heat. If you want a tangy twist, a squeeze of lemon juice works wonders. For a richer taste, use more Parmesan cheese. Adjust the seasonings based on your taste preferences. One common mistake is skipping the pasta water. This starchy water helps to bind the sauce to the pasta. Another mistake is not letting the chicken rest after cooking. This keeps the juices inside, making the chicken delicious and tender. Lastly, be careful not to burn the garlic. It can turn bitter and ruin your sauce. For a full recipe, check out the complete guide for creamy Tuscan chicken pasta. {{image_2}} You can change the pasta to suit your taste. Fettuccine gives a nice, creamy feel. Penne works well too, as its shape holds sauce perfectly. You can try whole wheat pasta for a healthier option. Gluten-free pasta is great if you need to avoid gluten. Each pasta type brings a unique flavor and texture to the dish. Want to switch up the protein? Shrimp adds a lovely seafood twist. Just sauté them until they turn pink and firm. Tofu is a great option for a plant-based meal. Use firm tofu and sauté it until golden and crispy. You can even mix different proteins if you like. This way, you create your own version of this delightful dish. To make this dish vegetarian, simply skip the chicken. You can add more veggies like bell peppers or zucchini. Mushrooms also add a nice earthy flavor. Swap the heavy cream with a plant-based cream for a vegan option. Nutritional yeast can replace Parmesan cheese for a cheesy taste. These changes keep the dish rich and satisfying without meat. For the full recipe, check out the complete guide on Creamy Tuscan Chicken Pasta. To keep your creamy Tuscan chicken pasta fresh, place it in an airtight container. Let the pasta cool to room temperature before sealing. This helps prevent moisture build-up, which can make the dish soggy. Store it in the fridge for up to three days. When reheating, take care to maintain the creamy texture. I recommend using a stovetop instead of a microwave. Heat a skillet over low heat and add a splash of water or broth. This helps loosen the sauce. Stir gently until heated through. If it seems too thick, add a little reserved pasta water. If you want to save it for later, freezing works well. Place the cooled pasta in a freezer-safe container. Make sure to leave some space at the top, as it will expand when frozen. You can store it for up to three months. To thaw, move it to the fridge overnight before reheating. For the full recipe, check out the Creamy Tuscan Chicken Pasta section. Yes, you can use different cheeses for this dish. Mozzarella or goat cheese works well. They add a creamy texture and unique flavor. Just remember to adjust the amount. Parmesan gives a sharp taste, but others can add mildness. Experiment with your favorites to find what you like best! If you want a lighter option, try using half-and-half. It gives creaminess but with less fat. You can also use milk, but the sauce will be thinner. For a dairy-free choice, coconut milk is a great option. It adds a nice flavor, too. Just keep in mind, the taste will change slightly. Yes, you can make this dish ahead of time. Cook the pasta and sauce, then store them separately. When ready to serve, combine them in a pan. Heat gently, adding a splash of pasta water if needed. This keeps your pasta from getting too dry. Enjoy a warm meal without the last-minute rush! This blog post covered all you need for delicious Creamy Tuscan Chicken Pasta. We explored the best ingredients, cooking steps, and handy tips. You learned how to cook pasta perfectly, sear chicken, and make a rich cream sauce. Remember, you can swap pasta types and proteins to fit your taste. Storing leftovers is easy, too! With these instructions, you can enjoy this meal anytime. Embrace your kitchen creativity and make this dish your own!

Creamy Tuscan Chicken Pasta Flavorful Dinner Delight

Love a tasty dinner that’s easy to make? Creamy Tuscan Chicken Pasta is just what you need! I’ll guide you

For these tasty chicken tenders, you will need: - 1 lb chicken breast, cut into strips - 1 cup buttermilk (or milk with 1 tbsp lemon juice) - 1 cup all-purpose flour - 1 cup breadcrumbs (Panko for extra crunch) - 1 tsp garlic powder - 1 tsp onion powder - 1 tsp paprika - 1/2 tsp black pepper - 1/2 tsp salt - 1/2 tsp cayenne pepper (optional) - Cooking spray or olive oil spray These ingredients work together to create a crispy and juicy meal that everyone loves. The chicken breast is the star here, offering a lean protein that cooks well in the air fryer. The buttermilk tenderizes the chicken, making it moist. You can mix in your favorite seasonings to change the flavor. Some ideas include: - Italian herbs like oregano and basil - A dash of lemon zest for brightness - Parmesan cheese in the breadcrumb mix for added flavor These additions can elevate your chicken tenders. Feel free to experiment to find your perfect blend! If you have dietary needs, there are simple swaps: - Use gluten-free flour and breadcrumbs for a gluten-free option. - Swap buttermilk for a dairy-free milk alternative, like almond or oat milk. - For a lower-carb option, use crushed pork rinds in place of breadcrumbs. These alternatives still let you enjoy crispy chicken tenders while fitting your diet. You can find options that suit everyone at the table! Start by cutting the chicken breast into strips. Place the strips in a bowl and cover them with buttermilk. Buttermilk helps to keep the chicken tender and juicy. Let the chicken marinate for at least 30 minutes in the refrigerator. This step is key for great flavor and texture. Next, gather your breading supplies. In one shallow dish, mix flour, garlic powder, onion powder, paprika, salt, black pepper, and cayenne pepper. In a second dish, place the breadcrumbs. Using Panko breadcrumbs gives extra crunch. Set this up near your chicken for easy access. Once the chicken has marinated, take it out of the buttermilk. Let the excess buttermilk drip off. First, dip each chicken strip into the flour mixture. Make sure it gets fully coated. Shake off any extra flour. Then, dip it back into the buttermilk and finally coat it in the breadcrumbs. Press gently to help the crumbs stick. Repeat this for all chicken strips. Now it's time to preheat the air fryer. Set the air fryer to 400°F (200°C) and let it heat for about 4-5 minutes. Preheating ensures that the chicken cooks evenly. Lightly spray the air fryer basket with cooking spray. Place the breaded chicken tenders in a single layer. Make sure they don’t touch each other. This helps them crisp up nicely. Lightly spray the tops of the chicken tenders with cooking spray for even more crunch. Cook them for 10-12 minutes, flipping halfway through. They should turn golden brown and reach an internal temperature of 165°F (75°C). After cooking, remove the tenders from the air fryer. Let them rest for a couple of minutes. This helps keep them juicy. Serve the crispy chicken tenders on a platter. Add dipping sauces like honey mustard, barbecue sauce, or ranch dressing. Garnish with fresh parsley for a nice touch. For the full recipe, refer to the earlier section. To get that extra crunch, follow these steps: - Use Panko breadcrumbs. They give a better texture. - Lightly spray the chicken with cooking spray before cooking. - Don’t crowd the air fryer basket. Space helps air circulate. - Flip the tenders halfway through cooking for even crisping. These tips make a big difference in texture and taste. Here are some mistakes to steer clear of: - Skipping the marinating step. It adds flavor and juiciness. - Not shaking off the excess flour. This helps the coating stick. - Overcrowding the air fryer. This leads to soggy chicken. - Forgetting to preheat the air fryer. This ensures even cooking. Avoiding these errors will help you make perfect tenders. Want to boost the flavor? Try these ideas: - Add herbs like thyme or oregano to the flour mix. - Mix in some grated Parmesan cheese with the breadcrumbs. - Use spicy sauces in the buttermilk for a kick. - Experiment with different spices to match your taste. These enhancements make your chicken tenders even more delicious. {{image_2}} If you want a lighter version, you can try using whole wheat flour instead of all-purpose flour. This swap adds fiber and nutrients. You can also use air-fried chickpeas instead of chicken for a plant-based option. They offer crunch and flavor. Another idea is to use skinless chicken thighs; they stay moist and tender. You can also bake the chicken tenders instead of air frying. Just be sure to adjust the cooking time to get them crispy. You can change up the flavor with different spices. For a zesty kick, add lemon zest to the breading mix. Want something spicy? Try adding chili powder or cayenne pepper. If you like a sweet taste, mix in some brown sugar with the spices. For a unique marinade, swap buttermilk with yogurt. This makes the chicken extra tender. You can also try a teriyaki marinade for an Asian twist. Just remember to adjust the cooking time and breading for best results. Dipping sauces can take your chicken tenders to the next level. Honey mustard is a classic choice, with its sweet and tangy balance. If you want something spicy, try sriracha mayo. Just mix sriracha with mayonnaise for a creamy kick. For a fresh taste, serve with a yogurt-based tzatziki sauce. This sauce pairs well with the crispy coating. You can also try a sweet chili sauce for an Asian flair. Get creative and mix different sauces to find your favorite combo! To keep your crispy air fryer chicken tenders fresh, store them in an airtight container. This helps maintain their crunch. Let the chicken cool completely before sealing. I recommend using parchment paper between layers to prevent sticking. To reheat leftover chicken tenders, use your air fryer. Set it to 350°F (175°C). Heat for about 5-7 minutes. This method keeps them crispy. You can also use a regular oven at the same temperature for about 10 minutes. Avoid using the microwave, as it can make them soggy. You can freeze chicken tenders for later use. First, let them cool completely. Then, place them on a baking sheet in a single layer. Freeze for about 1-2 hours until solid. After that, transfer them to a freezer bag. They can last up to three months. To cook from frozen, air fry at 400°F (200°C) for about 15-18 minutes. You should marinate chicken tenders for at least 30 minutes. This helps keep them juicy and flavorful. For best results, try marinating for up to 2 hours. You can easily substitute buttermilk with milk mixed with lemon juice. Just add 1 tablespoon of lemon juice to 1 cup of milk. Let it sit for 5-10 minutes to thicken. Yes, you can cook these tenders in a conventional oven. Preheat your oven to 400°F (200°C). Place the breaded chicken on a baking sheet and bake for about 15-20 minutes. Flip them halfway for even cooking. To check if the chicken tenders are fully cooked, use a meat thermometer. The internal temperature should reach 165°F (75°C). If you don’t have a thermometer, cut into a tender. It should be white and no longer pink. The best dipping sauces for chicken tenders include honey mustard, barbecue sauce, and ranch dressing. You can also try hot sauce or a spicy aioli for a kick. These sauces add great flavor to your crispy air fryer chicken tenders. You can make crispy air fryer chicken tenders with simple ingredients and steps. We covered marinating, breading, and cooking techniques to get perfect results. Remember, achieving extra crispiness requires attention to detail. Experiment with seasonings and variations for unique flavors. Proper storage lets you enjoy leftovers later. Whether it's for a weeknight meal or a gathering, these tenders are a hit. Enjoy this tasty dish and have fun with it!

Crispy Air Fryer Chicken Tenders Easy and Tasty Recipe

Looking for a quick and tasty meal? Look no further! My Crispy Air Fryer Chicken Tenders are simple to make

- 1 cup unsalted butter, softened - 1 1/2 cups granulated sugar - 4 large eggs - 1 teaspoon vanilla extract - Zest of 2 lemons - 3 cups all-purpose flour - 1 teaspoon baking powder - 1/2 teaspoon baking soda - 1/2 teaspoon salt - 1 cup buttermilk - 1 1/2 cups fresh blueberries (or frozen) - 2 tablespoons all-purpose flour (for tossing blueberries) When making lemon blueberry pound cake, these ingredients are key. The butter gives a rich base. Sugar adds sweetness and helps to create a tender crumb. Eggs bind the mixture and add moisture. Vanilla extract brings warmth and depth. Lemon zest gives a fresh, bright flavor. Flour is the backbone of our cake. Baking powder and baking soda help it rise. Salt balances the sweetness. Buttermilk keeps the cake moist and adds a slight tang. Fresh blueberries burst with juice, making each bite special. Tossing them with flour stops them from sinking to the bottom. - Alternatives for unsalted butter: You can use unsalted margarine or coconut oil. Both will work well, but the flavor may change slightly. - Options for gluten-free flour: Look for a gluten-free all-purpose blend. Brands that include xanthan gum often work best. - Buttermilk substitutes: You can make buttermilk by mixing milk with a splash of vinegar or lemon juice. Let it sit for five minutes to curdle. Each of these substitutions can help you adjust the recipe to fit your needs. Just keep in mind that the final taste or texture may vary. For the full recipe, check out the Lemon Blueberry Bliss Pound Cake section. 1. First, preheat your oven to 350°F (175°C). This helps bake the cake evenly. 2. Grease and flour a 9x5-inch loaf pan. This will keep the cake from sticking. 3. In a large bowl, cream together 1 cup of softened butter and 1 1/2 cups of sugar. Mix until it becomes light and fluffy, which takes about 3 to 5 minutes. 1. Add 4 large eggs one at a time. Mix well after each egg. 2. Next, stir in 1 teaspoon of vanilla extract and the zest of 2 lemons. This adds great flavor. 3. In another bowl, whisk together 3 cups of all-purpose flour, 1 teaspoon of baking powder, 1/2 teaspoon of baking soda, and 1/2 teaspoon of salt. 4. Gradually mix the dry ingredients into the butter mixture. Alternate with 1 cup of buttermilk. Start and end with the dry mix. Combine until just mixed; do not overmix. 1. Toss 1 1/2 cups of fresh blueberries with 2 tablespoons of flour. This helps them stay suspended in the batter. 2. Gently fold the blueberries into the batter using a spatula. Be careful not to crush them. 1. Pour the batter into the prepared loaf pan. Smooth the top with a spatula. 2. Bake for 55 to 65 minutes. Check with a toothpick in the center; it should come out clean. 3. If the top browns too quickly, cover it loosely with aluminum foil for the last 15 minutes. 4. When done, remove the cake from the oven. Let it cool in the pan for 10 minutes. Then transfer it to a wire rack to cool completely. For the full recipe, check out the entire process! To make a great pound cake, use room temperature ingredients. This helps the butter mix well with the sugar. When you mix, do it gently. Overmixing can lead to a tough cake. Just mix until everything is blended. Want more tang? Add a splash of lemon juice to the batter. It gives a nice tartness that balances the sweetness. You can also try using other berries. Raspberries or blackberries can add fun flavors too. Mix and match to find your favorite. For a lovely display, slice the cake evenly. Place it on a nice platter. Garnish with fresh blueberries and a light dusting of powdered sugar. This makes it look fancy! Pair it with coffee or tea for a perfect treat. You can also serve it with whipped cream or ice cream for extra joy. For the complete recipe, check the Full Recipe section. {{image_2}} To make a Lemon Blueberry Bundt Cake, you need a few tweaks. First, use the same batter from the pound cake recipe. However, adjust the baking time. Bundt cakes need about 40-50 minutes at the same temperature. You should also grease the Bundt pan well. This helps the cake release easily. For extra flavor, add a teaspoon of lemon juice to the batter. You can also sprinkle more blueberries on top before baking. This makes for a beautiful presentation. If you want bite-sized treats, try Mini Lemon Blueberry Muffins. Use the same batter but adjust the baking time. Fill muffin tins about two-thirds full. Bake at 350°F for 15-20 minutes. Check for doneness with a toothpick. For a fun twist, add a crumb topping. Mix equal parts flour, sugar, and butter. Sprinkle it on top before baking for a crunchy finish. Enjoy these muffins warm or at room temperature. Adding icing to your Lemon Blueberry Pound Cake makes it extra special. For a simple icing, mix 1 cup of powdered sugar with 2 tablespoons of lemon juice. Stir until smooth. Once your cake has cooled, drizzle the icing on top. You can use a spoon or a piping bag for a nice look. This adds a sweet and tangy flavor that pairs well with the cake. Serve it at gatherings or as a treat for yourself. For the full recipe, check the earlier section. Enjoy these variations for a delightful twist on a classic! To keep your Lemon Blueberry Pound Cake moist, use an airtight container. This helps lock in moisture and flavor. You can also wrap the cake in plastic wrap before placing it in the container. If you want to store it for a longer time, consider freezing it. Slice the cake and wrap each piece in plastic wrap. Then, place the slices in a freezer bag. This way, you can enjoy a piece whenever you want. At room temperature, this cake stays fresh for about 3 to 4 days. Keep it in a cool, dry place away from direct sunlight. If you store it in the fridge, it can last about a week. Just remember that refrigeration can make the cake a bit drier. Always let the cake come to room temperature before serving for the best taste. For more details on making this cake, check the Full Recipe. Yes, you can use frozen blueberries. They work well in this cake. Just toss them in flour like fresh berries. This helps prevent them from sinking. They may add a bit more moisture, but the cake will still taste great. Check your cake at about 55 minutes. Insert a toothpick in the center. If it comes out clean, your cake is done. If it has batter on it, bake longer. You can cover the top with foil if it gets too brown. If your cake is too dense, it may be due to overmixing. Make sure to mix just until combined. You can also try using room temperature eggs and butter. This helps create a lighter texture. Yes, you can substitute eggs. Use 1/4 cup of applesauce per egg. You can also try flax eggs. Mix 1 tablespoon of ground flaxseed with 2.5 tablespoons of water for each egg. Let it sit for a few minutes to thicken. Yes, you can make this cake ahead of time. It keeps well for several days. Store it in an airtight container at room temperature. You can also freeze it for up to three months. Just be sure to wrap it tightly. For the full recipe, check the main section above. This blog post provided a clear guide to making a delicious lemon blueberry cake. We covered each ingredient, from butter to blueberries, and detailed the steps for preparation and baking. I shared tips to ensure the perfect texture and flavor. Finally, variations and storage tips help you enjoy the cake longer. Remember, baking is fun, and these recipes can inspire your creativity in the kitchen. Enjoy each slice of your homemade goodness!

Lemon Blueberry Pound Cake Flavorful and Moist Recipe

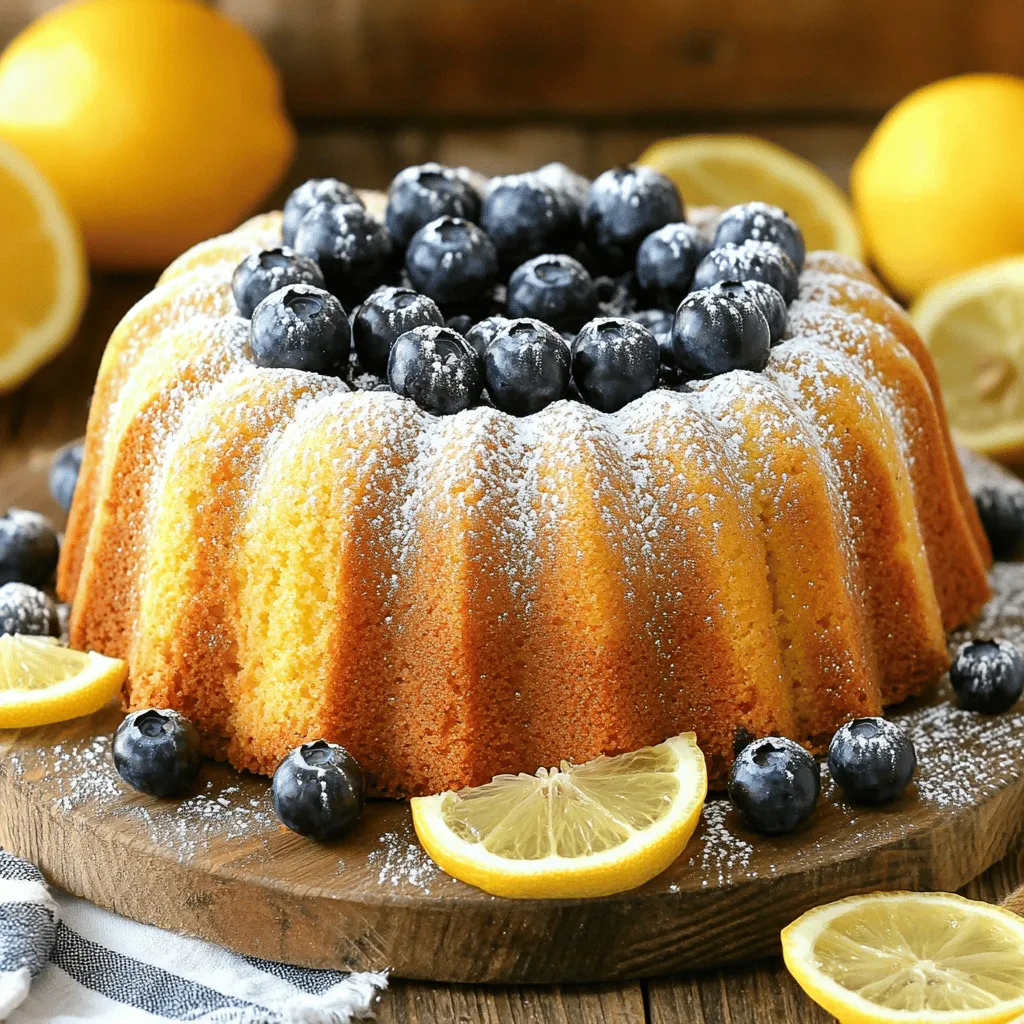
Welcome to your new favorite dessert! This Lemon Blueberry Pound Cake is not just moist; it bursts with bright flavor.

When making a No Bake Swiss Roll Cheesecake, you need simple ingredients that create a rich flavor. Here’s what you will need: - Swiss Roll Cake (chocolate or vanilla) - Cream Cheese - Powdered Sugar - Vanilla Extract - Heavy Whipping Cream - Cocoa Powder (optional) - Fresh Fruits for Garnish - Chocolate Shavings for Decoration These ingredients come together to create a delightful treat. The Swiss roll forms the base, while the cream cheese and whipped cream give it a creamy texture. You can use cocoa powder if you want a chocolate twist. Fresh fruits add color and taste, while chocolate shavings make it look fancy. To get the best results, ensure your cream cheese is softened. This step is key for smooth mixing. If you want to impress, choose colorful fruits like strawberries or raspberries. They add freshness and a pop of color. For the full recipe, look for more details on how to combine these ingredients effectively. Enjoy the process of creating this delicious dessert! - Line the springform pan with parchment paper. This helps with easy removal later. - Slice the Swiss roll into thin rounds. Aim for about half an inch thick for even layers. - Beat the cream cheese until smooth. This helps create a creamy texture. - Gradually add the powdered sugar and vanilla extract. Mix until well combined and creamy. - Whip the heavy cream until stiff peaks form. This gives the cheesecake its lightness. - Fold the whipped cream into the cream cheese mixture gently. Be careful not to deflate the whipped cream. - If desired, add cocoa powder for a rich chocolate flavor. Fold this in slowly to combine. - Pour the cheesecake mixture over the Swiss roll base. Spread it evenly with a spatula. - Refrigerate the cheesecake for at least four hours. Chilling helps it set. For the best taste, let it chill overnight. Enjoy this delightful treat! For the full recipe, check out the details above. To get a creamy and smooth cheesecake, start with room temperature cream cheese. This makes it easier to blend and prevents lumps. You can leave the cream cheese out for about an hour before mixing. For the whipped cream, you want stiff peaks. This means the cream should hold its shape. Chill your mixing bowl and beaters first. Pour in the heavy whipping cream and whip it on high speed. Stop when you see peaks that stay upright when you lift the whisk. Garnishing makes your cheesecake look special. Fresh fruits like strawberries or raspberries add color and flavor. You can also add chocolate shavings for a rich touch. When serving, add a dollop of whipped cream on top. A sprig of mint brings a nice pop of green. This makes your cheesecake not just tasty but also beautiful. For the full recipe, check the main section. {{image_2}} You can swap out the Swiss roll cake for different flavors. Try a strawberry or lemon Swiss roll for a fruity twist. Each flavor adds its own charm. You can also mix in flavors for the cheesecake. Consider coffee, caramel, or even a hint of almond extract. These choices give a fun spin to this dessert. If you need gluten-free options, look for gluten-free Swiss rolls. Many brands now offer these. You can also make the cheesecake lower in sugar. Use a sugar substitute like stevia or monk fruit. This keeps the dessert tasty while being kinder on your waistline. These simple swaps ensure everyone can enjoy this treat. To keep your No Bake Swiss Roll Cheesecake fresh, storage is key. Place the cheesecake in the fridge right after it sets. Cover the top with plastic wrap or use an airtight container. This helps it stay moist and keeps other odors out. If you have leftovers and want to freeze them, cut the cheesecake into slices. Wrap each slice in plastic wrap. Then, place the wrapped slices in a freezer bag. This way, you can enjoy a piece anytime! When stored properly, your cheesecake can last up to five days in the fridge. If frozen, it can last about two months. Just remember to thaw it in the fridge before serving. This keeps the texture nice and creamy. Enjoy your cheesecake! For the full recipe, refer to the section on ingredients and instructions. Yes, you can make this cheesecake ahead of time. It tastes even better after chilling. I suggest preparing it the night before your event. This allows the flavors to blend well. Just keep it covered in the fridge. It will stay fresh for up to three days. If you lack a springform pan, don’t worry! You can use a regular cake pan. Just line the bottom and sides with plastic wrap or parchment paper. This makes it easy to lift out the cheesecake. You can also use a pie dish if that’s what you have. The shape will change, but the taste stays the same! To avoid cracks, keep your cream cheese at room temperature. This helps it mix better. Make sure to fold the whipped cream gently. Overmixing can lead to cracks. Also, let the cheesecake chill slowly in the fridge. Rapid temperature changes may cause cracks too. Heavy cream gives the cheesecake a rich, smooth texture. If you want to skip it, you can use whipped topping. Another option is to use coconut cream for a dairy-free version. The cheesecake will still be tasty, but the texture may be different. For a lighter option, use half-and-half, but it won’t be as creamy. For the full recipe, check the main section above! This blog post showed you how to make a No Bake Swiss Roll Cheesecake. You learned about the ingredients, steps for mixing, and tips for perfect results. I offered variations to suit your taste and dietary needs. Now, you can store leftovers and keep your cheesecake fresh. Enjoy this easy dessert that impresses everyone. Happy baking!

No Bake Swiss Roll Cheesecake Delightfully Easy Treat

Are you ready to whip up a dessert that’s both easy and delicious? This No Bake Swiss Roll Cheesecake combines

- 8 oz (225g) dark chocolate (70% cocoa), chopped - ½ cup (115g) unsalted butter - ¾ cup (150g) granulated sugar - 3 large eggs - 1 teaspoon vanilla extract - 1/3 cup (40g) unsweetened cocoa powder - 1 cup fresh raspberries (plus extra for garnish) - 2 tablespoons honey To make a Flourless Chocolate Torte, you need quality ingredients. Dark chocolate gives the torte its rich taste. I love using chocolate with at least 70% cocoa. It adds depth to the flavor. Unsalted butter keeps the taste clean and fresh. Granulated sugar helps balance the bitterness of the chocolate. Eggs are key. They provide structure and moisture. Vanilla extract adds a hint of warmth. Unsweetened cocoa powder intensifies the chocolate flavor. Fresh raspberries offer a bright and tart swirl in the torte. Honey sweetens the raspberry mixture and brings it together. - Whipped cream - Extra raspberries - Cocoa powder for dusting Garnishes can elevate your torte. A dollop of whipped cream adds creaminess. Extra raspberries give a pop of color and freshness. Dusting cocoa powder on top looks elegant and adds flavor. Use these garnishes to impress your guests. They make each slice even more special and delicious. For the full recipe, check out the [Full Recipe]. Start by greasing an 8-inch round cake pan. Use unsalted butter for this. Make sure to cover the entire bottom and sides. Next, line the bottom with parchment paper. This helps the torte come out easily after baking. Use a medium saucepan for this step. Add the chopped dark chocolate and butter to the pan. Keep the heat low to avoid burning. Stir constantly until both are fully melted and smooth. Once melted, remove the pan from the heat. Let it cool slightly before using. In a large mixing bowl, whisk together the granulated sugar and eggs. Whisk until the mixture is light and frothy, which takes about 2-3 minutes. After that, stir in the melted chocolate mixture and vanilla extract. Mix until everything is well combined. Now, sift in the cocoa powder. Gently fold it into the chocolate mixture. Make sure there are no dry spots left. To make the raspberry sauce, mash fresh raspberries in a small bowl. Add honey to the raspberries and mix until chunky. Pour half of the chocolate batter into the prepared pan. Then, drop spoonfuls of raspberry sauce over the batter. Use a skewer or toothpick to swirl the sauce gently. Pour the rest of the chocolate batter on top and smooth it out. Bake the torte in a preheated oven at 350°F (175°C) for 25-30 minutes. The edges should be set, but the center can be slightly soft. Once baked, let the torte cool in the pan for 10 minutes. Use a knife to run along the edges, then carefully invert it onto a serving plate. Remove the parchment paper. Chill the torte in the refrigerator for at least an hour before serving. This helps it set completely. Enjoy your delicious Flourless Chocolate Torte with Raspberry Swirl! For the complete steps, check the Full Recipe. To make your flourless chocolate torte shine, avoid common mistakes. One mistake is overmixing the batter. Mix gently to keep it light and airy. Another mistake is not checking the baking time. The torte should be set at the edges but still soft in the center. This gives the best texture. To ensure the right texture, follow the recipe closely. Use high-quality dark chocolate for rich flavor. Melt the chocolate and butter carefully. Too much heat can cause them to seize. When mixing in the eggs, whisk until frothy. This adds air, making the torte light. Pair your torte with light drinks like tea or coffee. The bitterness balances the sweetness. For sides, serve with fresh fruits or a dollop of whipped cream. This adds creaminess and complements the rich chocolate. For special occasions, presentation matters. Dust the top with cocoa powder for a classy touch. Garnish with fresh raspberries for color. Use a nice plate to make it look even more inviting. Enjoy showing off your creation! {{image_2}} You can play with flavors in your flourless chocolate torte! One great idea is to add espresso or coffee. Just stir in a tablespoon of instant espresso powder into the melted chocolate. This small change brings a rich depth and a slight bitterness that balances the sweetness. You’ll love the coffee notes mingling with the chocolate. Another fun option is to infuse the torte with orange zest. Grate the zest of one orange and mix it into the chocolate batter. This adds a bright, citrusy twist that lifts the dessert. The orange flavor pairs beautifully with chocolate, creating a fresh taste experience. If you need a gluten-free option, you can use gluten-free chocolate. Look for brands that clearly label their chocolate as gluten-free. This ensures that your torte remains safe for those with gluten allergies. You can also add alternative gluten-free flour options. Almond flour is a popular choice that adds a nutty flavor and moistness. Just replace a small part of the cocoa powder with it. This adds a slight texture while keeping the torte rich and dense. For the full recipe, you can easily whip up this torte that everyone will adore! To keep your flourless chocolate torte fresh, refrigerate it. Wrap the torte in plastic wrap or store it in an airtight container. This keeps it moist and tasty. Make sure the torte cools completely before wrapping it. For best results, enjoy the torte within five days of making it. You can freeze the torte for longer storage. First, wrap the cooled torte in plastic wrap. Then, place it in a freezer-safe bag or container. This keeps out air and prevents freezer burn. The torte lasts up to three months in the freezer. To thaw, take the torte out and leave it in the fridge overnight. For a quicker method, you can let it sit at room temperature for a few hours. Once it’s thawed, it will taste just as good! Check the [Full Recipe] for more tips on making and enjoying this delicious dessert. To check for doneness, look at the edges. They should be set while the center looks slightly soft. A good test is to gently shake the pan; the middle should wobble a bit but not be liquid. A perfect bake has a shiny top and a slight crack around the edges. Yes! You can try strawberries, blueberries, or even peaches. Each fruit gives a fun twist. Just mash them like the raspberries. Keep the honey amount the same for sweetness. To make the torte dairy-free, use dairy-free butter and dark chocolate. Look for brands that specify they are dairy-free. You can also use coconut oil as a butter substitute. I love serving this torte with a scoop of vanilla or raspberry sherbet. Fresh fruits add a nice touch too. You can also add a dollop of whipped cream for extra creaminess. This flourless chocolate torte is a rich, indulgent delight. We covered key ingredients, like dark chocolate and fresh raspberries. The steps for making this dessert are easy to follow. You’ll avoid common pitfalls for the perfect texture. Time spent on presentation and garnishes makes your torte shine. Remember, you can customize it with flavors and fruits. With proper storage, it will last longer. Serve it right, and it becomes a hit at any gathering. Enjoy making this dessert that brings joy and satisfaction. You’ll impress everyone with your skills!

Flourless Chocolate Torte with Raspberry Swirl Delight

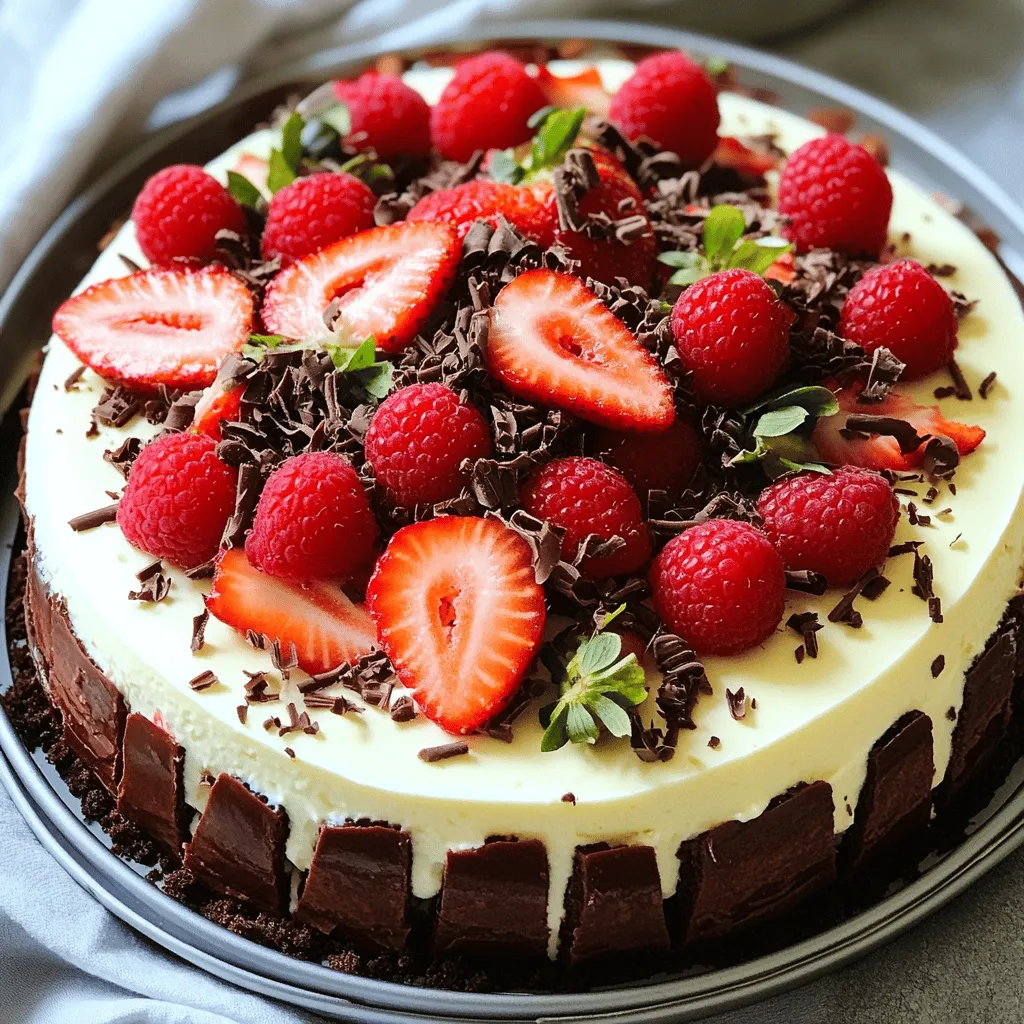
If you crave rich chocolate desserts that are also gluten-free, this Flourless Chocolate Torte with Raspberry Swirl is for you!

- 1 large round loaf of sourdough bread - 2 cups fresh spinach, roughly chopped - 1 cup canned artichoke hearts, drained and chopped - 1 cup cream cheese, softened - 1 cup shredded mozzarella cheese - ½ cup grated Parmesan cheese - 3 cloves garlic, minced - 2 tablespoons mayonnaise - 1 teaspoon lemon juice - ½ teaspoon red pepper flakes (optional) - Salt and pepper to taste - Fresh parsley, chopped (for garnish) You can customize this recipe to fit your taste. For instance, you can add extra garlic for a stronger flavor. You might also want to include sun-dried tomatoes or olives for a twist. If you want a dairy-free option, use vegan cream cheese and dairy-free mozzarella. These swaps keep the dish creamy and delicious. For a gluten-free alternative, use gluten-free bread. Just ensure it is sturdy enough to hold the filling. You won’t lose any of the fun or flavor with these changes. Check out the Full Recipe for more details. First, preheat your oven to 350°F (175°C). This step warms the oven for even cooking. Next, gather your baking tools. You will need a large piece of aluminum foil and a baking tray. Cutting the bread: Take your sourdough loaf and place it on a cutting board. Use a serrated knife to make cuts in a grid pattern. Be careful not to cut all the way through the bottom. This keeps the bread intact while you add the filling. Preparing the filling: In a large bowl, mix together the softened cream cheese, chopped spinach, drained artichoke hearts, shredded mozzarella, grated Parmesan, minced garlic, mayonnaise, lemon juice, and red pepper flakes. Stir well until everything is evenly mixed. Season with salt and pepper to taste. Stuffing the bread: Now, gently pull apart the cuts in the bread. Use a spoon to fill each opening with your prepared filling. Make sure every piece of bread gets some of that tasty mix. Wrapping and initial baking: Once the bread is filled, place it on a large piece of aluminum foil. Wrap the foil tightly around the bread to keep it moist. Bake in your preheated oven for 15-20 minutes. Crisping the top: After the initial baking, carefully unwrap the foil. This exposes the top of the bread. Return it to the oven and bake for another 10-15 minutes. You want the top to be golden brown and crispy. For the complete recipe, follow the [Full Recipe]. Enjoy making this delightful Spinach Artichoke Pull-Apart Bread! - Tips for cutting bread: Use a serrated knife. This helps make clean cuts. Cut the bread in a grid pattern. Avoid cutting all the way through. Leave the bottom intact. This keeps the bread together and makes stuffing easier. - Ensuring even cooking: Wrap the stuffed bread tightly in foil. This helps steam the bread. Bake it first covered, then uncover to crisp the top. This method cooks the filling well and gives a nice crust. - Adding spices and herbs: You can boost flavor with herbs like basil or thyme. Try adding garlic powder for more punch. A sprinkle of black pepper can add a nice kick. - Using different cheeses: Mix cheeses for a richer taste. Try adding cheddar or gouda for a twist. You can also use cream cheese and ricotta for a creamier filling. - Best dips to pair with bread: Serve with a rich marinara or a zesty ranch dip. A garlic butter dip also pairs well. These dips enhance the fun of pulling apart the bread. - Ideas for side dishes: Pair with a fresh salad or veggie platter. These sides balance the richness of the bread. Roasted vegetables also make a great match. Enjoy this meal with friends for a satisfying feast. {{image_2}} You can boost your pull-apart bread with more veggies. Try adding bell peppers, mushrooms, or sun-dried tomatoes. These options add flavor and texture. You can also use kale instead of spinach for a twist. Mixing cheeses can change the taste entirely. Use sharp cheddar for a stronger flavor or goat cheese for a creamy touch. You can also add feta for a tangy taste. For protein, consider adding diced cooked chicken or crumbled sausage. They will make the dish heartier and more filling. For holidays, think about flavors that match the season. In fall, add pumpkin puree and nutmeg. During winter, consider a mix of spinach and roasted red peppers. For summer, fresh herbs like basil and tomatoes can brighten the bread. Each change can give your pull-apart bread a unique flair. Check out the Full Recipe for more details! To keep your Spinach Artichoke Pull-Apart Bread fresh, store it in an airtight container. This will help retain moisture and flavor. If you have a large amount, wrap it tightly with plastic wrap or aluminum foil. Make sure it cools before storing. Leftovers can stay fresh in the fridge for up to three days. When you're ready to enjoy your leftovers, preheat your oven to 350°F (175°C). Place the bread on a baking sheet. To crisp up the edges, cover it loosely with foil. Bake for about 10-15 minutes. If you want extra crispiness, remove the foil for the last 5 minutes. This will give you that nice golden crust again. If you want to save some bread for later, freezing is a great option. First, let the bread cool completely. Then, wrap it tightly in plastic wrap and place it in a freezer bag. Remove as much air as you can. It can stay in the freezer for up to three months. When you're ready to eat, just thaw it in the fridge overnight and reheat it in the oven. Enjoy your tasty treat whenever you want! For the full recipe, check out the section above. You will know the bread is done when it turns golden brown on top. The bread should feel crispy to the touch. You can also poke a piece with a fork; it should feel warm and soft inside. The filling should be hot and gooey. Yes, you can make the filling ahead of time. Mix all the filling ingredients and store them in the fridge. This can be done up to a day before you bake the bread. Just remember to stuff the bread with the filling right before baking. Absolutely! You can use any round bread you like. Brioche, focaccia, or even ciabatta will work well. Just make sure the bread is sturdy enough to hold the filling. Avoid soft bread that may fall apart. This bread pairs well with dips like marinara or ranch. You can also serve it with a fresh salad for a full meal. For a fun twist, try serving it with a cheese platter or charcuterie board. For the full recipe, check out the details above. You learned about the key ingredients and how to customize your bread. We explored simple steps for making and baking delicious pull-apart bread. I shared tips to help you avoid common mistakes and enhance the flavors. You also discovered how to store, reheat, and freeze any extras for later. Remember, cooking should be fun! Experiment with different ingredients and flavors. Create your perfect pull-apart bread that everyone will love. Enjoy every bite!

Spinach Artichoke Pull-Apart Bread Delicious Recipe

Get ready to indulge in a cheesy, flavorful treat with my Spinach Artichoke Pull-Apart Bread recipe! This easy-to-follow guide will

You need ripe, fresh peaches for the best flavor. Look for peaches that feel soft and smell sweet. For this pie, I suggest using about six peaches. Peel them and slice them into thin pieces. This helps them cook evenly and blend well with the other flavors. This recipe uses two types of sugar. I use 3/4 cup of granulated sugar and 1/4 cup of brown sugar. The granulated sugar adds sweetness, while the brown sugar gives a slight caramel flavor. Together, they make the filling rich and tasty. To make your peach pie pop, add a few flavorings. I use one tablespoon of lemon juice for brightness. A teaspoon of vanilla extract adds depth. You can also sprinkle in a teaspoon of ground cinnamon and a dash of nutmeg (1/4 teaspoon). Lastly, two tablespoons of cornstarch help thicken the filling. For a golden crust, I recommend using one egg for an egg wash. These ingredients combine for a delicious pie. For the full recipe, check the details earlier. First, set your oven to 425°F (220°C). This hot start helps the crust get brown and crisp. A preheated oven is key for great pie. In a large bowl, mix the sliced peaches with the sugars, lemon juice, and spices. Use: - 6 fresh peaches, peeled and sliced - 3/4 cup granulated sugar - 1/4 cup brown sugar - 1 tablespoon lemon juice - 1 teaspoon vanilla extract - 1 teaspoon ground cinnamon - 1/4 teaspoon nutmeg - 2 tablespoons cornstarch Toss gently. This helps the peaches soak up the sweet mix. Let it sit for 15 minutes. This allows the flavors to blend and the mixture to thicken. Roll out your pie crust into a 9-inch pie dish. If you're using a pre-made crust, just lay it in. Pour the peach mixture into the crust. Spread it out evenly. Dot the top with small pieces of butter for extra richness. If you have a second crust, cover the filling with it. Trim and crimp the edges to seal. Beat an egg and brush it over the crust. This gives a shiny, golden look. Add a sprinkle of coarse sugar for a sweet touch. Bake for 15 minutes at 425°F, then lower the heat to 350°F (175°C). Bake for another 30 to 35 minutes. Look for a golden crust and bubbly filling. Cool the pie on a wire rack for at least 2 hours. This helps the filling set. Enjoy your peach pie with a scoop of vanilla ice cream. Check out the Full Recipe for more details! To make the best peach pie, choose ripe peaches. Look for peaches that are slightly soft and smell sweet. They should have a bright color, usually yellow or orange. Avoid peaches with bruises or wrinkled skin. If you can, buy local peaches in season. They taste better and are more flavorful. A flaky pie crust is key to a great peach pie. Use cold butter when making your crust. Cut it into small pieces and mix it with flour. Do not overwork the dough; mix just until it comes together. Chill the crust for at least 30 minutes before rolling it out. This helps keep it flaky when baking. An egg wash gives your pie a beautiful golden color. To make one, beat an egg in a small bowl. Use a pastry brush to apply it on the crust. This step is important before baking. For added sweetness, sprinkle coarse sugar on top after applying the egg wash. This gives your pie a lovely shine and texture. For the full recipe, check the Sweet Summer Bliss Peach Pie 🥧 section. {{image_2}} Want to add some zing to your peach pie? Spice it up! You can mix in warm spices like ginger or cloves. Just a pinch of each can change the flavor. You can also try adding a tablespoon of bourbon or rum for a fun twist. These options give your pie a new layer of taste. You can also add nuts for a crunchy surprise. Chopped walnuts or pecans work well in peach pie. They add texture and a nutty flavor. If you want to get creative, mix in berries like blueberries or raspberries. These fruits add color and a tartness that balances the sweetness of peaches. While a classic pie crust is great, you can try different crusts. A crumb crust made with crushed graham crackers or cookies offers a fun twist. You can also use phyllo dough for a flaky, light texture. Each crust brings a unique taste and feel to your peach pie. Check out the Full Recipe for more ideas. To keep your peach pie fresh, store it at room temperature. Cover it with plastic wrap or foil. Avoid refrigerating it unless your kitchen is very warm. The pie can last for about two days at room temperature. If you want to save it longer, consider freezing it. Freezing your peach pie is easy and keeps it tasty. Let the pie cool completely first. Wrap it tightly with plastic wrap and then with aluminum foil. This prevents freezer burn. You can freeze it for up to three months. When you're ready to eat it, thaw it in the fridge overnight. To reheat your peach pie, preheat your oven to 350°F (175°C). Remove any wrapping and place the pie on a baking sheet. Heat it for about 15-20 minutes. This keeps the crust crispy and warms the filling. If you want it warm faster, cover it loosely with foil. Enjoy your pie warm for the best taste! Yes, you can use frozen peaches. Just make sure to thaw them first. Drain any extra juice before mixing them with the sugars. This helps keep your pie from getting too soggy. Remember, fresh peaches taste best, but frozen ones work in a pinch! You can tell the pie is done by checking the crust and filling. The crust should look golden brown. You should see bubbles in the filling. If both look good, your pie is ready! Let it cool for a bit before slicing. This helps the filling set up nicely. Peach pie pairs well with many tasty treats. I love serving it warm with a scoop of vanilla ice cream. Whipped cream is another great option. You can also add a sprinkle of cinnamon or fresh mint for a nice touch. For a fun twist, try drizzling caramel sauce on top! Peach pie is a delightful treat, made with fresh peaches, sugars, and unique flavors. We explored how to make it, from prepping the oven to assembling your pie. I shared tips for choosing the best peaches and achieving a perfect crust. You can even play with variations like spices or different crusts. Remember to store it well so it stays fresh. With these steps, you can enjoy a delicious peach pie anytime. Happy baking!

Homemade Peach Pie Irresistible and Easy Recipe

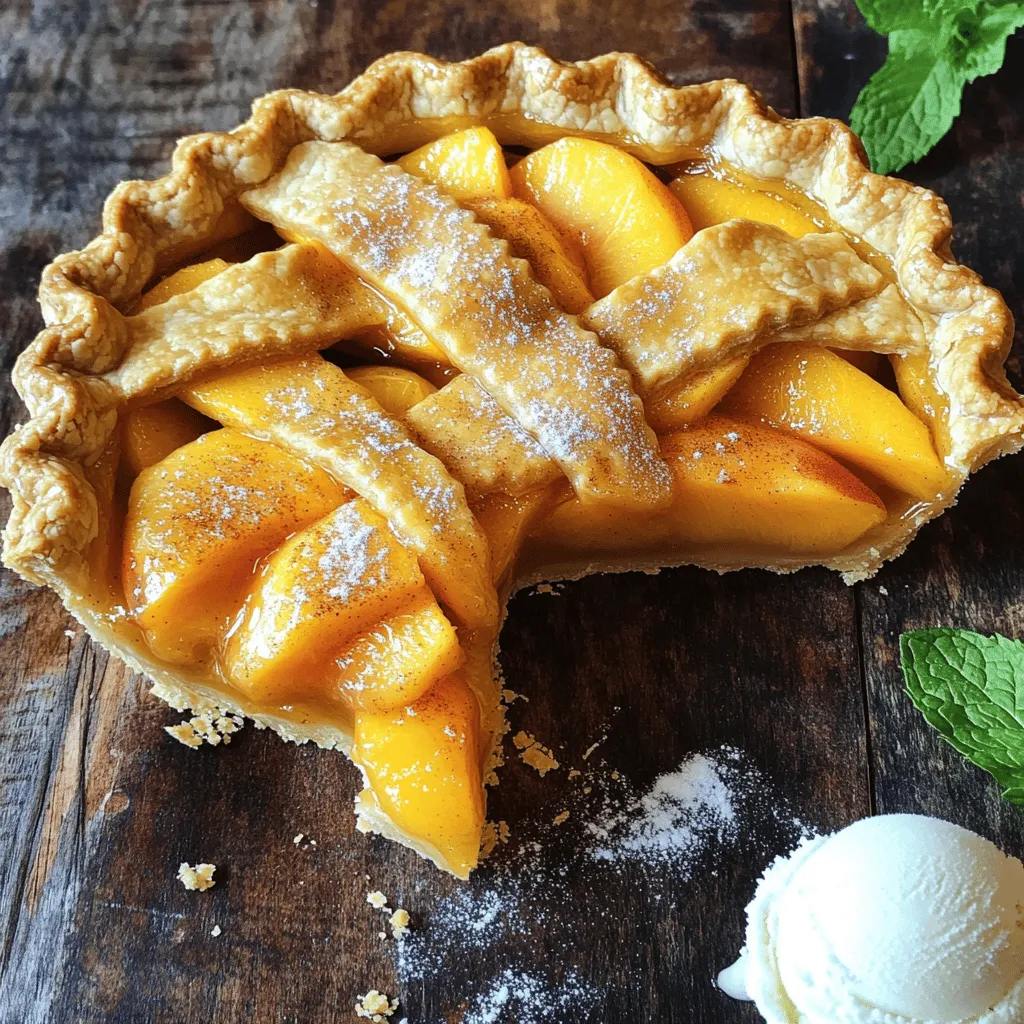
Are you ready to bake an amazing homemade peach pie? This easy recipe will show you how. With fresh peaches,

Older posts
Newer posts
← Previous Page1 … Page41 Page42 Page43 … Page63 Next →

dsad

© 2025 flavorsprint • Built with GeneratePress

Our Policies

  • Copyright Policy
  • Cookie Policy
  • GDPR Policy
  • Privacy Policy
  • Disclaimer
  • Terms Of Use

More Information

  • Home
  • About
  • Contact
  • Appetizers
  • Dessert
  • Dinner
  • Drinks
©2025, flavorsprint About Back To Top