Skip to content
DisclaimerTerms Of UseGDPR PolicyCookie Policy

flavorsprint

  • Home
  • Drinks
  • Appetizers
  • Dinner
  • Dessert
  • About
  • Contact
  • Privacy Policy
DisclaimerTerms Of UseGDPR PolicyCookie Policy

Lillian

- 4 ripe peaches, halved and pitted - 4 tablespoons honey - 1 teaspoon cinnamon - 1 tablespoon olive oil - Pinch of sea salt - Fresh basil or mint leaves for garnish - Vanilla ice cream or Greek yogurt for serving (optional) Using fresh ingredients makes a big difference in flavor. Ripe peaches are sweet and juicy. They bring out the best in this dish. Fresh honey adds rich sweetness. Good quality olive oil enhances the taste. Always pick the best ingredients for the best results. When you choose peaches, look for a few signs. First, they should feel slightly soft when you press them. This means they are ripe and ready to eat. Next, check for a golden yellow color. Avoid peaches that are overly green or have dark spots. Finally, smell the peaches. They should have a sweet aroma. This shows they’re ripe and full of flavor. When you select the right peaches, your honey roasted peaches will shine. For the full recipe, follow the steps I provided above. Start by preheating your oven to 400°F (200°C). This step is key for roasting. The hot air will cook the peaches evenly. A hot oven helps to caramelize the honey and cinnamon, making the dish sweet and tasty. Next, take your ripe peaches. Slice each peach in half and remove the pit. Place them cut-side up in a baking dish. This position helps the honey soak in well. Drizzle 4 tablespoons of honey over each peach half. Make sure every piece gets a nice layer of honey. Sprinkle 1 teaspoon of cinnamon and a pinch of sea salt on top. This mix adds great flavor. Lightly brush the cut sides with 1 tablespoon of olive oil. This step helps them caramelize and brown nicely. Now, place the baking dish in your preheated oven. Roast the peaches for 20-25 minutes. They should become tender and the edges will caramelize. When done, remove the dish from the oven. Let the peaches cool slightly before serving. For a special touch, serve the warm peaches with vanilla ice cream or Greek yogurt. Don’t forget to garnish with fresh basil or mint leaves. This extra step makes your dish look beautiful and taste even better. For the complete recipe, check the Full Recipe section. To get those lovely caramelized edges on your peaches, follow a few steps. Start with ripe peaches. They should feel slightly soft. Cut the peaches in half and remove the pits. Brush the cut sides with olive oil. This oil helps them brown nicely. Drizzle honey over each peach half. The honey will melt and mix with the juices. Sprinkle cinnamon and a pinch of sea salt on top. The salt enhances the sweetness. Roast them at 400°F (200°C) for 20-25 minutes. Look for a golden color and tender texture. This is your sign of perfect caramelization. If you like your peaches sweeter, add more honey. You can also try a mix of honey and brown sugar. This blend gives a deeper flavor. Taste the peaches after roasting. If they need more sweetness, drizzle extra honey on top. Remember, the ripeness of the peaches affects sweetness too. Ripe peaches are naturally sweet. If your peaches are not ripe enough, add a bit more honey. Always taste and adjust to your liking for the best result. Presentation is key to a great dish. After roasting, let the peaches cool slightly. Serve them warm on a nice plate. A scoop of vanilla ice cream or Greek yogurt pairs well. Add a sprig of fresh basil or mint leaves for color. This contrast makes the dish pop. You can also sprinkle some chopped nuts on top for crunch. Nuts add texture and flavor. Try different garnishes to find what you like best. These small touches make your dessert look and taste gourmet. For the full recipe, check out the complete section above. {{image_2}} You can add nuts or granola to your honey roasted peaches. Almonds, walnuts, or pecans add crunch and flavor. Simply sprinkle them on top before serving. Granola gives a nice texture and sweetness. It also makes your dessert look beautiful. While honey shines in this recipe, other sweeteners work too. Maple syrup is a great choice. It adds a rich, warm flavor. You can also try agave syrup for a lighter taste. Just adjust the amount to keep the sweetness right. I love pairing honey roasted peaches with ice cream. Vanilla ice cream is a classic choice. It offers a cool contrast to warm peaches. You can also serve them with Greek yogurt for a creamy touch. Top it all off with fresh basil or mint for a pop of color. For a fun twist, consider serving these peaches with pound cake or shortcake. You can create a lovely layered dessert that pleases everyone. For the complete details, check the Full Recipe. To store leftover roasted peaches, place them in an airtight container. Keep them in the fridge. They stay fresh for up to three days. Make sure to let them cool completely before sealing. This helps keep their sweet taste and soft texture. Reheating roasted peaches is simple. Preheat your oven to 350°F (175°C). Place the peaches on a baking sheet. Heat them for about 10 minutes. You can also microwave them for 30 seconds. This warms them up without losing flavor. Enjoy them warm, just like when they came out of the oven. Freezing roasted peaches is a great way to save them. First, let the peaches cool completely. Then, place them in a single layer on a baking sheet. Freeze them for about two hours. After they freeze, transfer them to a freezer bag. Press out any air and seal tightly. They can last up to six months in the freezer. When you're ready to use them, just thaw in the fridge overnight. Yes, you can use canned peaches. Choose peaches packed in juice, not syrup. Drain them well before using. Canned peaches may cook faster than fresh ones, so keep an eye on them. They will still taste sweet and delicious in this dish. To make this dish vegan, replace honey with maple syrup or agave nectar. Both options will add sweetness. You can also skip the ice cream and use dairy-free yogurt or coconut cream. This way, you can enjoy a tasty vegan treat. Honey roasted peaches are nutritious and tasty. Peaches are high in vitamins A and C. They support healthy skin and boost your immune system. Honey adds antioxidants and can help soothe a sore throat. This dessert is a tasty way to enjoy fruit while getting great health benefits. Roasting peaches is simple and rewarding. We discussed key ingredients, focusing on fresh peaches. Choosing ripe fruit is vital for flavor. I shared tips for roasting, achieving perfect caramelization, and options for variations. Store your leftovers wisely, and reheating is easy. You can even freeze for later use. Remember, this dish can suit many diets. Enjoy trying new twists that fit your taste! Happy cooking!

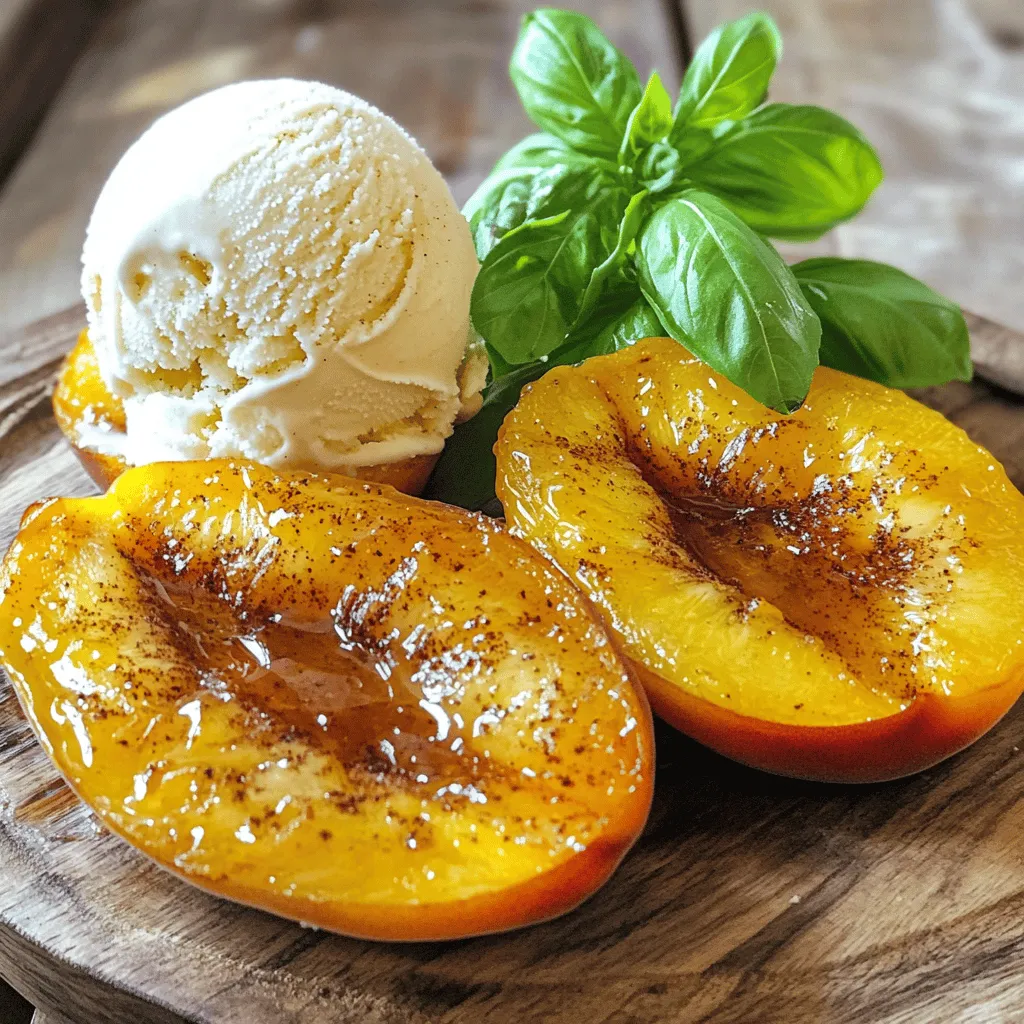
Honey Roasted Peaches Sweet and Juicy Dessert Recipe

Looking for a sweet and juicy dessert that’s simple to make? Honey roasted peaches are just the treat you need!

To make easy roasted yellow squash, you need these simple ingredients: - 4 medium yellow squash, sliced into 1/4 inch rounds - 2 tablespoons olive oil - 1 teaspoon garlic powder - 1 teaspoon dried oregano - 1/2 teaspoon smoked paprika - Salt and pepper to taste - Fresh parsley, chopped (for garnish) These ingredients create a vibrant dish. The yellow squash shines with flavor and color. You can change the flavor by trying these seasonings: - Add 1 teaspoon of Italian seasoning for a herby taste. - Use curry powder for a warm kick. - Try lemon zest for brightness. - Mix in red pepper flakes for heat. These options let you customize the dish to suit your taste. Feel free to experiment! Garnishing adds a fresh touch. Here are some great herbs to use: - Basil gives a sweet, aromatic flavor. - Thyme adds a subtle earthiness. - Chives bring a mild onion taste. Using fresh herbs makes your roasted yellow squash look and taste even better. You can find these herbs in most grocery stores or your garden. For the full recipe, check out Easy Roasted Yellow Squash Delight. Start by washing the yellow squash. Make sure to scrub off any dirt. Then, slice the squash into 1/4 inch rounds. This size helps them cook evenly. In a large bowl, mix the sliced squash with olive oil, garlic powder, oregano, smoked paprika, salt, and pepper. Toss everything well. You want the squash to be fully coated. This adds great flavor to each bite. Next, preheat your oven to 400°F (200°C). While it heats, arrange the squash in a single layer on a baking sheet. Avoid overlapping the slices. This step is key for even roasting. Once the oven is ready, place the baking sheet inside. Roast the squash for 20 to 25 minutes. Flip the slices halfway through. You want them tender and golden brown. To get the best texture, pay attention to these tips: - Cut the squash uniformly to ensure even cooking. - Avoid overcrowding the baking sheet. - Use a light hand with the oil, just enough to coat. - Keep an eye on the squash towards the end of roasting; they can brown quickly. For more detailed instructions, check out the Full Recipe. Roasting vegetables is simple. Here are some tips to get it right: - Cut Evenly: Make sure all pieces are the same size. This helps them cook evenly. - Use High Heat: A hot oven gives veggies a nice brown color. Aim for 400°F (200°C) for best results. - Don't Crowd the Pan: Give the squash space. If they touch, they may steam instead of roast. - Flip During Cooking: Turning the squash halfway helps them brown on all sides. Even the best cooks make mistakes. Here are some to watch for: - Skipping the Oil: Oil helps the squash brown. Without it, you may get mushy squash instead. - Not Preheating the Oven: Always preheat your oven. It ensures even cooking from the start. - Overcooking: Keep an eye on the squash. Overcooking makes them soft and less tasty. Seasoning can change everything. Here are some great ideas: - Herbs: Fresh herbs like thyme or rosemary add depth. - Spices: Try chili powder for a kick or cumin for warmth. - Cheese: A sprinkle of Parmesan or feta adds richness. - Citrus: A squeeze of lemon can brighten the flavor. For a full guide on how to make this dish, check the Full Recipe. {{image_2}} You can easily change the flavor of roasted yellow squash by adding cheese. Feta cheese adds a salty kick. Just sprinkle it on top right after baking. Another tasty option is parmesan cheese. It makes the squash rich and savory. You can also use shredded mozzarella for a melty top. Adding nuts like pine nuts or almonds gives a nice crunch. Try these toppings to make your dish even more special. Roasted yellow squash pairs well with many other veggies. You can mix in bell peppers for a sweet twist. Zucchini is another great choice, as it roasts nicely. Carrots can add a hint of sweetness and color, too. Just chop them into similar sizes as the squash. This way, they cook evenly. Mixing different vegetables creates a colorful, tasty side that everyone will enjoy. Want to add some heat? You can easily spice up your roasted yellow squash. Red pepper flakes give a nice kick. Start with a pinch and adjust to your taste. For a smoky flavor, try adding cayenne pepper. If you love curry, sprinkle in some curry powder. Each spice brings a new flavor profile. Feel free to experiment and find what you like best! After enjoying your Easy Roasted Yellow Squash, let the leftovers cool down. Place the squash in an airtight container. This keeps it fresh and tasty. You can store it in the fridge for up to three days. If you want to keep it longer, consider freezing it. When you’re ready to enjoy the leftovers, you can reheat them easily. Preheat your oven to 350°F (175°C). Spread the squash on a baking sheet in a single layer. Heat for about 10-15 minutes. This helps restore the crispiness. You can also use a microwave. Heat in 30-second bursts until warm. Freezing roasted squash is a great way to save it for later. First, let the squash cool completely. Then, spread it out on a baking sheet. Freeze for about two hours until solid. After that, transfer the squash to a freezer bag. Remove as much air as possible. It can last for up to three months in the freezer. When you're ready to eat, thaw it in the fridge overnight before reheating. For more details on making this dish, check the Full Recipe. Yes, you can use other types of squash. Zucchini, butternut, or acorn squash all work well. Each type brings a unique taste and texture. Just cut them to a similar size as yellow squash. This helps them roast evenly. To make this dish more filling, add grains or protein. Quinoa or brown rice pairs nicely. You can also mix in chickpeas or grilled chicken. These additions will turn your roasted squash into a main dish. Roasted yellow squash pairs well with many dishes. Try it with grilled chicken or fish for protein. A fresh salad adds crunch and color. Mashed potatoes or rice can round out your meal. You can also serve it with pasta for a hearty option. For the full recipe, check out the Easy Roasted Yellow Squash Delight section above. This blog post covered everything you need for roasted yellow squash. We discussed the key ingredients and optional seasonings. You learned the best steps for prepping and roasting the squash. I shared tips on texture and flavor to avoid common mistakes. Finally, we talked about how to store leftovers and answered common questions. Roasting yellow squash can be simple and fun. Experiment with flavors and toppings to make it your own. Enjoy your cooking!

Easy Roasted Yellow Squash Flavorful Side Dish Recipe

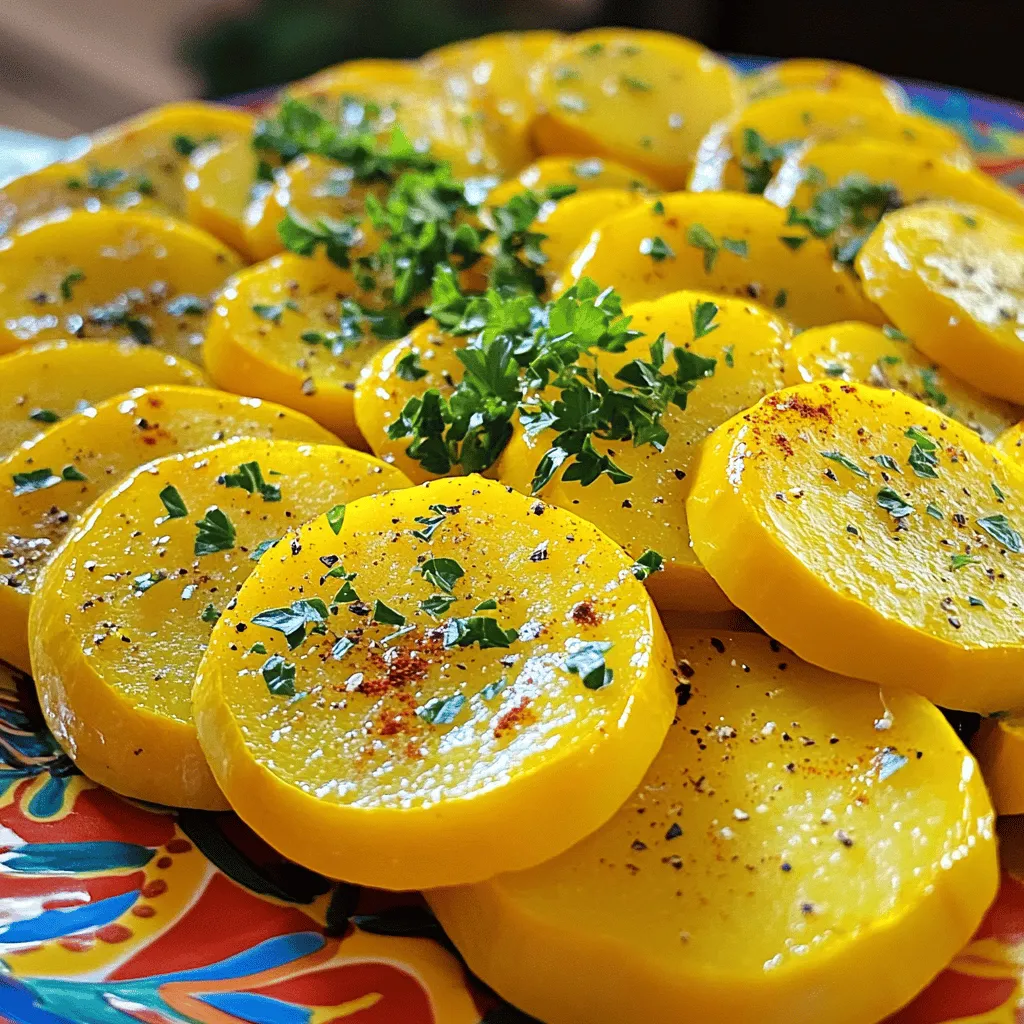
Looking for a simple and tasty side dish? Easy roasted yellow squash is the answer! This bright veggie not only

- 2 medium zucchinis, sliced - 1 pound Italian chicken sausage, casings removed - 1 cup cherry tomatoes, halved - 1 medium onion, diced - 3 cloves garlic, minced The main ingredients in this dish are fresh and full of flavor. Zucchini adds a nice texture and mild taste. The Italian chicken sausage packs a flavorful punch. Cherry tomatoes bring sweetness and color. Onions and garlic enhance the base of this meal, making it aromatic and hearty. - 1 cup shredded mozzarella cheese - 1 cup spinach, roughly chopped - 1 teaspoon dried oregano - 1 teaspoon dried basil - 2 tablespoons olive oil - Salt and pepper to taste The additional ingredients take this casserole to the next level. Mozzarella cheese melts beautifully on top, adding creaminess. Spinach gives a boost of nutrients and color. Dried oregano and basil add warmth and depth. Olive oil helps sauté the veggies and brings a rich flavor. Don't forget salt and pepper for seasoning! - 1/2 teaspoon red pepper flakes - Fresh basil for garnish For those who like a kick, add red pepper flakes. They spice things up without overpowering the dish. Fresh basil on top brings a lovely aroma and brightens the casserole. These simple enhancements make a big difference in taste. For the full recipe, check out the detailed instructions! 1. Preheat your oven to 375°F (190°C). This step ensures your casserole cooks evenly. 2. In a large skillet, heat 2 tablespoons of olive oil over medium heat. Once hot, add 1 medium diced onion. Sauté until it turns soft and clear, about 3-4 minutes. 3. Next, add 3 cloves of minced garlic. Stir for about 30 seconds until it smells great. 1. Now, add 1 pound of Italian chicken sausage to the skillet. Use a spatula to break it into small pieces. Cook until it turns brown and is fully cooked. 2. Stir in 2 medium sliced zucchinis, 1 cup of halved cherry tomatoes, and 1 cup of roughly chopped spinach. Add 1 teaspoon of dried oregano, 1 teaspoon of dried basil, and salt and pepper to taste. If you like it spicy, add 1/2 teaspoon of red pepper flakes. 3. Cook this mixture for about 5-7 minutes. You want the zucchinis to soften just a bit. 1. Transfer the sausage and vegetable mix into a greased 9x13 inch casserole dish. Make sure it spreads evenly. 2. Top the mixture with 1 cup of shredded mozzarella cheese. This will melt into a bubbly layer. 3. Bake in your preheated oven for 20-25 minutes. Look for the cheese to be golden brown and bubbly. 4. Once done, let it sit for about 5 minutes before serving. This helps the flavors settle. Garnish with fresh basil for added taste and color. For the complete recipe, check out the Full Recipe section. Enjoy your wholesome and savory meal! To cook sausage well, use medium heat. This helps it cook evenly. I like to break it into small pieces. This way, it browns nicely and adds flavor. For slicing zucchini evenly, use a sharp knife. Aim for slices about a quarter-inch thick. This helps them cook at the same time. If you have a mandoline, that works great too. Just be careful with your fingers! You can make a vegetarian version by using lentils or mushrooms instead of sausage. Both options add great texture and flavor. If you want alternative proteins, try turkey or pork sausage. Each gives a unique taste to the dish. For spices, I recommend using dried oregano and basil. They pair well with zucchini and sausage. If you like heat, add a pinch of red pepper flakes. Fresh herbs, like parsley or cilantro, can really brighten your casserole. Add them right before serving for the best flavor. {{image_2}} You can change the sausage to suit your taste. Try turkey or pork sausage for a different flavor. For a meat-free option, use plant-based sausage. Cheese is another area to explore. Swap mozzarella for cheddar or gouda. You can even try a vegan cheese for a dairy-free dish. Decide if you want a spicy or mild casserole. Add red pepper flakes if you like heat. You can also mix in fresh jalapeños for more spice. For a milder dish, skip the heat and focus on herbs. You can add more veggies too. Bell peppers, mushrooms, or squash make great additions. Let’s get creative with flavors! For Italian-style, add some diced bell peppers and fresh parsley. A sprinkle of Parmesan cheese on top will boost the Italian vibe. If you want Mediterranean flair, toss in olives or artichoke hearts. Use herbs like thyme or rosemary for an extra punch. Each twist makes the dish fun and new. For the complete cooking journey, check out the Full Recipe for Zucchini Sausage Casserole! For the best taste, cool your Zucchini Sausage Casserole before storing. Place it in an airtight container. This keeps it fresh and tasty. You can store leftovers in the fridge for up to four days. If you want to keep it longer, freezing is a great option. Wrap the casserole tightly in plastic wrap and then in aluminum foil to stop freezer burn. Reheating is easy! You can use the oven or microwave. For the oven, preheat it to 350°F (175°C). Place the casserole in a baking dish and cover it with foil. Heat for about 20 minutes. For the microwave, put your serving on a plate and heat for 1-2 minutes. Stir halfway through for even heating. Serve with a side salad for a full meal. In the fridge, your casserole lasts about four days. When frozen, it can last up to three months. After that, it may lose flavor and texture. Remember to label your containers with the date to keep track. Safe storage means more delicious meals! It takes about 45 minutes to cook Zucchini Sausage Casserole. You spend 15 minutes prepping and 25 minutes baking, plus a few minutes for cooling. This timing lets the flavors blend well. While it cooks, the cheese gets nice and bubbly. You can enjoy a warm, savory dish in no time. Yes, zucchini casserole is quite healthy. It contains fresh vegetables, lean protein, and good fats. Zucchini is low in calories and high in nutrients. Spinach adds vitamins and minerals. Using chicken sausage keeps the dish light but filling. This meal is a great choice for those looking to eat well. You can pair Zucchini Sausage Casserole with many sides. A simple green salad works well. You might also enjoy crusty bread or garlic bread. If you want something warm, serve it with a side of roasted veggies. Each option complements the casserole's flavors and adds variety to your meal. For the Full Recipe, check out the detailed instructions. To wrap up, we explored how to make a tasty Zucchini Sausage Casserole. We started with fresh ingredients like zucchini, sausage, and tomatoes. Then, we detailed the cooking steps and shared useful tips for flavor and storage. Remember, you can easily switch ingredients to match your taste. This dish is not just delicious; it’s also easy to prepare and customize. Enjoy your cooking adventure!

Zucchini Sausage Casserole Wholesome and Savory Meal

Looking for a hearty meal that’s easy to make and packed with flavor? Try my Zucchini Sausage Casserole! This dish

- 4 medium cucumbers - 4 cloves of garlic - 1 cup water - 1 cup distilled white vinegar - 1 tablespoon sugar - 1 tablespoon salt - 1 teaspoon mustard seeds - 1 teaspoon black peppercorns - 1 teaspoon dill seeds or fresh dill - Red pepper flakes for heat - Fresh herbs like thyme or cilantro for added flavor Garlic Dill Refrigerator Pickles are easy to make. Start with fresh cucumbers. You can slice them into spears or rounds. I like to use medium-sized cucumbers because they hold their crunch well. The garlic adds a strong flavor that pairs nicely with dill. Next, gather your spices. Mustard seeds and black peppercorns add depth. The sugar balances the tang from the vinegar. Using both white vinegar and water helps create the brine. It’s important to measure these ingredients for the best taste. If you like a kick, consider adding red pepper flakes. For a twist, try fresh herbs like thyme or cilantro. These add unique flavors that make your pickles stand out. For the full recipe, refer to the above details. Prepare to enjoy your homemade pickles as a great snack or side dish! Start by washing the cucumbers well under cold water. It is key to remove any dirt. After washing, slice the cucumbers into either spears or rounds. Spear cuts give a crunchy bite, while rounds offer a classic look. Choose the shape you like best. Grab a clean glass jar, at least one quart in size. Place the peeled and crushed garlic cloves at the bottom. Next, add the mustard seeds, black peppercorns, dill seeds, and salt. Layering these spices adds depth. Now, pack the cucumber slices tightly into the jar over the spices. This helps the flavors mix well. In a medium saucepan, mix water, distilled white vinegar, and sugar. Stir the mixture and bring it to a gentle boil. Keep stirring until the sugar dissolves fully. Once it boils, remove it from heat and let it cool for a few minutes. This step is crucial for the right brine. Carefully pour the cooled pickling brine over the cucumbers in the jar. Make sure they are fully submerged. Press down on the cucumbers gently if needed. Seal the jar tightly. Allow it to cool to room temperature before putting it in the fridge. For the best flavor, chill the pickles for at least 24 hours. You can find the full recipe at the beginning of this article. To get the best crunch from your pickles, choose the right cucumber. I like to use Kirby cucumbers. They are small and firm, which makes them perfect for pickling. If you can’t find Kirbys, look for pickling cucumbers. They hold their shape well and taste great. Fresh ingredients are key. Use cucumbers that are crisp and firm. Check for blemishes or soft spots. Fresh garlic also adds a punch to the flavor. The better the ingredients, the better the pickles. Let your pickles chill for at least 24 hours. This time allows the flavors to blend well. The longer they sit, the better they taste. I often wait two or three days for the best flavor. You can add more herbs and spices to change the taste. Try fresh dill, red pepper flakes, or even bay leaves. Experiment and find what you like best! One mistake is overpacking the jar. If you stuff too many cucumbers in, they won’t soak up the brine. Keep them snug but not forced. This way, they will absorb the flavors well. Another common error is skipping the cooling step before refrigeration. Always let the brine cool to room temp. This helps the pickles stay crisp and tasty. If you put hot brine on the cucumbers, they may become soft. {{image_2}} To make your pickles spicy, you can add fresh chili peppers or a splash of hot sauce. Slice the peppers and add them with the garlic. You can also toss in black peppercorns for an extra kick. This will give your pickles a delightful heat that pairs well with sandwiches. If you want a sweeter flavor, adjust the sugar in your brine. Try adding two tablespoons instead of one. You can also switch up the vinegar. Using apple cider vinegar can create a different taste. This sweetness balances well with the garlic and dill. For a fresh twist, use thyme, bay leaves, or cilantro. Simply add the herbs to the jar with the cucumbers. You can try different fresh herbs to see what you like best. This adds layers of flavor to your pickles and makes them unique. Using a clean glass jar is key for storing your pickles. It keeps the pickles safe and fresh. Always wash the jar with hot, soapy water. Rinse it well to remove any soap. After packing your pickles, seal the jar tightly. This helps keep air out and flavor in. Garlic dill refrigerator pickles taste best within two weeks. They can last up to a month in the fridge. Look for signs of spoilage, like bubbles or a strange smell. If you see mold, throw them away right away. Always trust your senses when it comes to food safety. Freezing pickles is an option, but it changes texture. Frozen pickles may become soft and mushy when thawed. Refrigerating keeps them crunchy and fresh. Choose refrigeration for the best taste and texture. Save freezing for when you have too many cucumbers to use at once. Garlic dill refrigerator pickles last about two months in the fridge. Store them in a clean jar with a tight lid. Keep an eye on the pickles for signs of spoilage, such as mold or off smells. If you notice any, it's best to discard them. The taste may also change over time. The brine should stay clear, and the cucumbers should remain crunchy. You can reuse pickling brine, but be cautious. If you choose to reuse it, make sure it is still clear and smells fresh. Using old brine can lead to off flavors or spoilage. You can also add fresh spices and garlic for a new batch. Just remember, the brine will be less potent than the first use. Garlic dill refrigerator pickles are great with many meals. Serve them as a crunchy side with sandwiches or burgers. They add a nice contrast to rich dishes. You can also enjoy them as a snack on their own. For a fun twist, try adding pickles to a charcuterie board. They pair well with cheese, meats, and olives. To make your pickles less salty, reduce the salt in the brine. Start with half the amount and taste as you go. You can also soak the cucumber slices in water for an hour before pickling. This helps draw out some saltiness. Another option is to add more sugar to balance the flavors. You can easily make delicious garlic dill pickles at home. We covered all the key steps, from choosing fresh ingredients to storing your pickles for the best taste. Don't forget to experiment with different flavors and spices to find your perfect mix. Follow the tips for crunchy pickles and avoid common mistakes for great results. Enjoy your tasty treats as snacks or with meals. Now, go make your first batch of pickles and savor the fresh, tangy flavors. Happy pickling!

Garlic Dill Refrigerator Pickles Simple and Flavorful Recipe

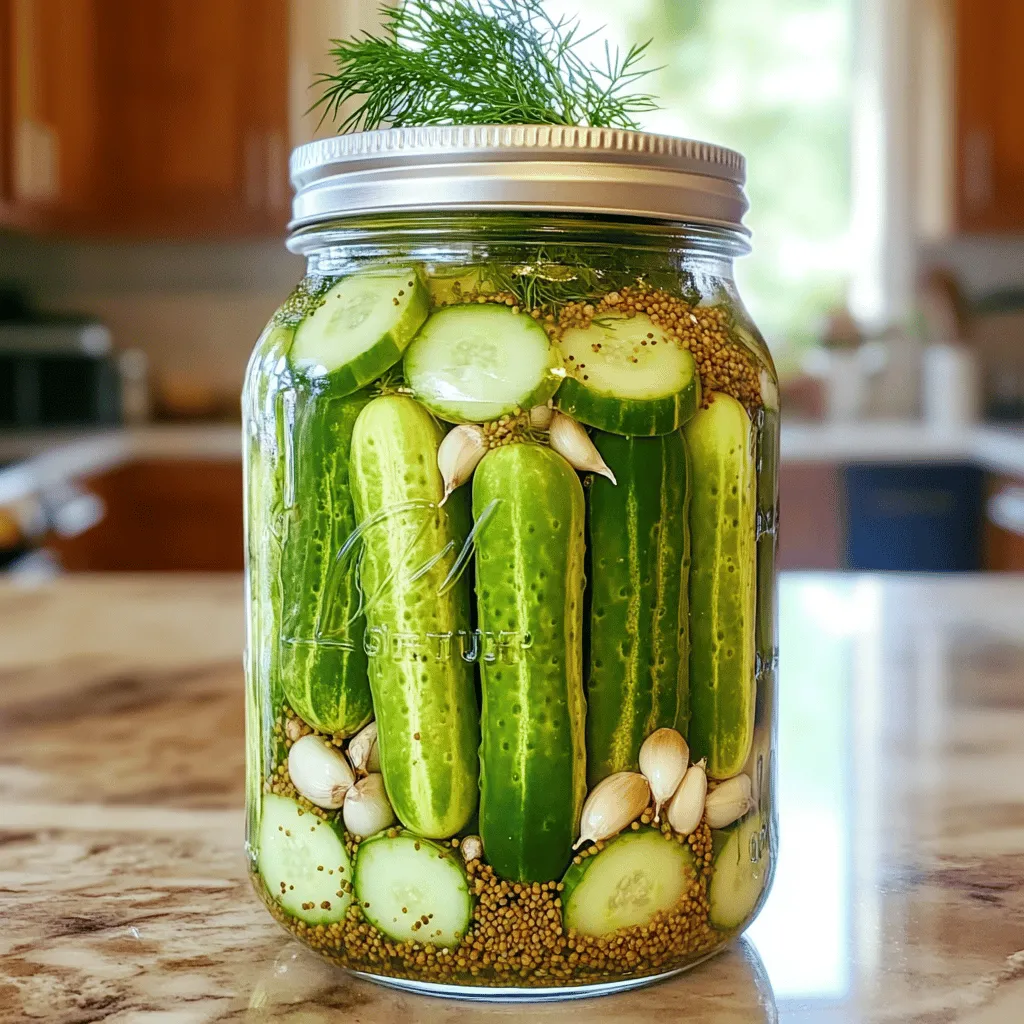
Looking to add a burst of flavor to your meals? Garlic dill refrigerator pickles are an easy and tasty solution!

To make a tasty yellow squash casserole, you need the following ingredients: - 4 medium yellow squashes, sliced - 1 cup onion, diced - 2 cloves garlic, minced - 2 cups sharp cheddar cheese, shredded - 1 cup sour cream - 1/2 cup mayonnaise - 1 cup breadcrumbs - 1 teaspoon thyme - 1/2 teaspoon paprika - Salt and pepper to taste - 2 tablespoons olive oil - Fresh parsley for garnish Gathering the right ingredients is key. Fresh yellow squash adds a sweet flavor and bright color. Onions and garlic provide a savory depth. The sharp cheddar cheese gives a rich creaminess that blends well with sour cream and mayonnaise. When you mix these ingredients, the thyme and paprika elevate the dish with herbal and smoky notes. Salt and pepper enhance all the flavors. The breadcrumbs on top create a delightful crunch. I always recommend using fresh herbs and spices. They add a vibrancy that dried versions can’t match. This dish is simple yet delicious, a perfect side for any meal. For the full recipe, check out the details on how to prepare this delightful casserole! - Slice the yellow squashes into thin rounds. - Dice the onion into small pieces and mince the garlic finely. Preparing your ingredients makes cooking easy and fun. As you slice the squashes, enjoy the bright color. The fresh smell of onion and garlic adds a nice touch. - Heat olive oil in a skillet over medium heat. - Sauté the onion, garlic, and squash together. In a large skillet, warm the olive oil. Add the diced onion first. Sauté for about 3-4 minutes until it's clear. Then, stir in the minced garlic. Cook for another minute. Next, add the sliced squash, salt, pepper, and thyme. Cook for 8-10 minutes until the squash is soft. - Combine the squash mixture with other ingredients. - Prepare the baking dish by greasing it. In a mixing bowl, combine the cooked squash blend. Add sour cream, mayonnaise, half of the cheddar cheese, and paprika. Mix well until everything is smooth. Transfer this mixture to a greased 9x13-inch baking dish, spreading it out evenly. - Transfer the mixture and prepare the cheese topping. - Bake and monitor for doneness. Sprinkle the remaining cheddar cheese and breadcrumbs on top of the casserole. Bake in your preheated oven for 25-30 minutes. Watch for the top to turn golden and bubbly. Once done, let it cool for a few minutes. Garnish with fresh parsley before serving. This dish is colorful and tasty! For a complete guide, check the Full Recipe. To make the best yellow squash casserole, use fresh ingredients. Fresh squashes taste great and add color. Fresh herbs also boost flavor. Try to adjust seasonings to fit your taste. Do you like it spicy? Add more pepper or paprika. If you love cheese, feel free to add more cheddar. This casserole pairs well with a side salad or some warm bread. A crisp green salad adds a nice crunch. For a pop of color, try garnishing with fresh parsley. It makes the dish look fancy and bright. You will need some essential kitchen tools for this dish. A sharp knife helps slice the squashes. Use a good cutting board for safety. A large skillet cooks the squash mixture evenly. A mixing bowl is perfect for combining all the ingredients. For baking, I recommend using a 9x13-inch dish. This size fits perfectly and helps the casserole cook well. For the Full Recipe, check out the detailed instructions and ingredient list to get started! {{image_2}} To kick up the flavor, try other cheese options. You can use mozzarella, feta, or even cream cheese. Each brings a unique taste to the dish. For those avoiding dairy, consider nut-based cheeses or tofu cream. These options mimic the creamy texture while keeping the dish delicious. If you want a change from breadcrumbs, crushed crackers work great. They add crunch and flavor. You can also use nuts, like almonds or walnuts, for a nutty twist. For gluten-free options, seek gluten-free breadcrumbs or crushed cornflakes. Both provide a nice topping without the gluten. Want to add some protein? Chicken, sausage, or even ground turkey can make this casserole heartier. Just cook the meat before mixing it in. For a flavor boost, try different herbs and spices. Basil, oregano, or even a pinch of chili powder can add depth to your dish. To store your yellow squash casserole, let it cool first. Place leftovers in an airtight container. Store them in the fridge. They will stay fresh for about three to five days. If you want to save more for later, freezing is a great option. For freezing, first, let it cool completely. Then, use a freezer-safe container. You can also use aluminum foil or plastic wrap to cover it tightly. It can last up to three months in the freezer. When you're ready to eat, just thaw it overnight in the fridge before reheating. Reheating your casserole can be easy. The best method is to use the oven. Preheat your oven to 350°F (175°C). Place the casserole in an oven-safe dish. Cover it with foil to keep moisture. Heat it for about 20-25 minutes. Check it to ensure it’s warm all the way through. If you're short on time, you can use the microwave. Place a portion in a microwave-safe bowl. Heat it for about 2-3 minutes. Stir halfway through for even warming. Keep an eye on it to avoid overcooking. This way, your casserole will stay soft and tasty. Yes, you can make Yellow Squash Casserole ahead of time. Prepare it, then store it in the fridge for up to 24 hours before baking. To keep it fresh, cover it tightly with plastic wrap or foil. When you are ready, just bake it without defrosting. It may take a few extra minutes to cook fully. This way, you can save time on busy days and still enjoy a delicious meal. Yellow Squash Casserole can be healthy. It includes fresh vegetables, dairy, and optional protein. Here’s a quick breakdown: - Yellow Squash: Low in calories and high in vitamins A and C. - Onions and Garlic: Great for flavor and health benefits. - Cheddar Cheese: Provides calcium but can be high in fat. - Sour Cream and Mayonnaise: Add creaminess but choose low-fat options for fewer calories. Overall, it can fit a balanced diet if you watch portions. If you need a substitute for sour cream, here are a few options: - Greek Yogurt: It is thicker and adds a nice tang. - Cottage Cheese: Blend it for a smooth texture. - Silken Tofu: Great for vegan diets, just blend it well. - Cream Cheese: Mix with a bit of milk for a creamy texture. These alternatives can help keep the dish tasty while catering to different diets. Yellow Squash Casserole lasts about 3 to 4 days in the fridge. Store it in an airtight container to keep it fresh. Always check for signs of spoilage, like an off smell or visible mold. If you know you won’t eat it in time, consider freezing it for up to 3 months. Just let it cool before freezing and wrap it tightly. Yes, you can use zucchini instead of yellow squash. The flavors are similar, and the texture works well. When using zucchini, consider these tips: - Cut them the same size as yellow squash for even cooking. - Squeeze out excess water before mixing to prevent a watery casserole. - Adjust cooking time slightly, as zucchini may cook faster. Feel free to mix both for added color and flavor! For the full recipe, check out the link provided. This blog post gave you a clear recipe for yellow squash casserole. We covered the ingredients, step-by-step instructions, and helpful tips. You learned ways to vary the dish and store leftovers. Remember, using fresh items makes a big difference in taste. Try out different cheeses or add protein for a twist. Enjoy your cooking journey and make it your own!

Yellow Squash Casserole Easy and Flavorful Dish

If you’re looking for a simple, tasty dish to impress your family, look no further! This Yellow Squash Casserole is

- 1 pound fresh okra, trimmed - 4 cloves garlic, smashed - Optional: Fresh dill sprigs - 1 cup distilled white vinegar - 1 cup water - 2 teaspoons salt - 1 tablespoon sugar - 1 tablespoon mustard seeds - 1 teaspoon black peppercorns - 1 teaspoon red pepper flakes (adjust for heat preference) - 1 bay leaf To make refrigerator pickled okra, start with fresh ingredients. Choose okra that is small and firm for the best crunch. Trim the ends, but keep the stems on. This helps the okra stay crisp during pickling. For the brine, mix vinegar, water, garlic, salt, sugar, mustard seeds, peppercorns, red pepper flakes, and a bay leaf. Each ingredient plays a key role. The vinegar gives a tangy flavor. Salt helps with preservation and adds taste. Sugar balances the tartness. Mustard seeds and peppercorns add spice and depth. Feel free to add fresh dill for an herby twist. This combination of fresh ingredients and flavorful brine makes the okra shine. Check out the Full Recipe for all the details you need to start your pickling journey! First, you need to wash the okra thoroughly. Rinse it under cold water to remove any dirt. After that, trim the ends carefully. It is important to leave the stems intact. This helps keep the okra crunchy and firm. Next, it's time to make the brine. In a medium saucepan, combine the following ingredients: - 1 cup distilled white vinegar - 1 cup water - 4 cloves garlic, smashed - 2 teaspoons salt - 1 tablespoon sugar - 1 tablespoon mustard seeds - 1 teaspoon black peppercorns - 1 teaspoon red pepper flakes (adjust for heat preference) - 1 bay leaf Bring this mixture to a simmer over medium heat. Stir it until the salt and sugar dissolve completely. This step is crucial for a balanced flavor. Now, you will pack the jars. Start by sterilizing glass jars, like pint-sized mason jars. Make sure they are clean and ready to hold your okra. Pack the okra vertically into the jars. Try to mix in garlic and any optional dill sprigs evenly. Once packed, pour the hot brine over the okra. Ensure all pieces are fully submerged. Seal the jars with lids while the brine is still hot. After sealing, allow the jars to cool at room temperature. Once cooled, transfer them to the refrigerator. For the best taste, let the okra pickle for at least 24 hours. However, they taste amazing after 3-5 days when the flavors meld together beautifully. You can find the full recipe for this delightful treat if you want to explore more about the process! To get that perfect crunch in your refrigerator pickled okra, here are my top tips: - Leave okra stems intact: Keeping the stems helps maintain the crispness of the okra. - Choose small, firm okra pods: Smaller pods are often crunchier. Look for ones that feel solid and fresh. Want to amp up the flavor? Try these simple adjustments: - Adjust red pepper flakes for desired spice level: If you like it hot, add more! For a milder taste, reduce the amount. - Experiment with additional herbs and spices: Fresh dill, thyme, or even garlic can add a new twist. Don’t be afraid to get creative! Proper jar sterilization is key to safe pickling. Here’s how to do it right: - Best practices for sterilizing jars: Wash jars in hot, soapy water. Rinse well and place them in a hot oven (about 225°F) for 10-15 minutes to sterilize. - Importance of hot packing: Always pour hot brine over your packed okra. This helps seal the jars and keeps your okra fresh longer. Follow these tips, and your refrigerator pickled okra will turn out delicious and crunchy! For the full recipe, check out the Crunchy Refrigerator Pickled Okra 🥒 section. {{image_2}} You can make refrigerator pickled okra even more fun with different flavors. Here are some tasty ideas: Want it hot? Add some extra red pepper flakes or sliced jalapeños to your brine. This gives your pickled okra a nice kick. Adjust the heat based on what you like. If you want it very spicy, add more peppers. The heat makes it exciting. Herbs can change the game. Consider adding fresh dill, thyme, or oregano in the jars. These herbs bring a fresh taste. They also enhance the overall flavor of your pickles. Just a few sprigs in each jar will do the trick. You can mix and match herbs to find your favorite blend. If you like a sweet twist, increase the sugar in your brine. This will give your okra a delightful sweetness. It balances out the vinegar perfectly. Start with a tablespoon more and taste. Adjust until you find the right level of sweet for your palate. These variations can make your refrigerator pickled okra even more special. Each one brings a unique flavor. Feel free to experiment and discover what you love most! For the full recipe, check out the Crunchy Refrigerator Pickled Okra 🥒 section. Refrigerator pickled okra lasts about 2 to 3 months in the fridge. To keep your okra crunchy, store it in a glass jar. Make sure the okra stays submerged in the brine. This helps it stay fresh and tasty. Also, avoid opening the jar too often. You can tell if pickled okra is bad by looking for a few signs. If the okra changes color, becomes slimy, or develops an off smell, it's time to discard it. Always trust your senses. If you’re unsure, it’s safer to throw it away. Pickled okra goes well with many meals. You can serve it as a side dish or snack. It adds a nice crunch to salads and wraps. Try adding it to your next charcuterie board for a fun twist. The pickled okra needs time to soak up the brine. I recommend letting it sit for at least 24 hours. However, for the best flavor, wait 3 to 5 days. This allows the garlic and spices to blend well with the okra. The longer you wait, the better the taste! Using frozen okra is not ideal for pickling. Freezing changes the okra's texture. It becomes softer and less crunchy when thawed. Fresh okra gives you that perfect crunch you want in pickles. For the best results, always use fresh okra. Refrigerator pickled okra pairs well with many dishes. You can serve it as a side with fried chicken or fish. It also works great in salads, adding a nice crunch. Try it on a charcuterie board for a tangy bite. You can even snack on it straight from the jar! In this blog post, you learned how to make pickled okra. We covered fresh ingredients and brine, plus simple steps to prepare and store the okra. I shared tips for crunchiness and flavor, and we explored fun variations. Remember to check for spoilage and to enjoy your pickles with various dishes. Pickled okra adds a unique touch to meals. Try it yourself for a tasty, crunchy snack or side. Enjoy experimenting with flavors that suit your taste.

Refrigerator Pickled Okra Easy Crunchy Recipe

Looking for an easy way to enjoy a crunchy, tangy snack? You’re in the right spot! This simple refrigerator pickled

Fresh okra is the star of this dish. Choose 1 pound of fresh okra. Look for bright green pods without blemishes. Trim the ends and slice them into 1/2 inch pieces. Fresh okra gives you the best flavor and texture. The coating makes your okra crispy. Use 1 cup of cornmeal for crunch. Add 1/2 cup of all-purpose flour for a light texture. This mix helps the okra stay crispy. Seasonings bring the flavor. Use 1 teaspoon of paprika for a mild kick. Add 1/2 teaspoon of cayenne pepper if you like heat. Mix in 1 teaspoon each of garlic powder and onion powder. Don’t forget salt and black pepper to taste. These seasonings make the okra pop with flavor. For the full recipe, check out the details above. Start by soaking the sliced okra in buttermilk for about 30 minutes. This step helps the okra stay tender. It also makes the coating stick better. If you don’t have buttermilk, you can mix regular milk with a splash of vinegar as a substitute. The acidity helps with the tenderizing process. While the okra soaks, prepare the coating. In a large bowl, mix together the following ingredients: - 1 cup cornmeal - 1/2 cup all-purpose flour - 1 teaspoon paprika - 1/2 teaspoon cayenne pepper (or to taste) - 1 teaspoon garlic powder - 1 teaspoon onion powder - Salt to taste - Black pepper to taste Stir everything well until it blends evenly. This mix gives the okra its crispy texture and flavorful kick. Next, heat about 1 inch of vegetable oil in a large skillet over medium heat until it reaches 350°F (175°C). To check if the oil is ready, drop a bit of the coating mix in the oil. It should sizzle right away. Once the oil is hot, remove the okra from the buttermilk, letting the excess drip off. Dredge each piece in the coating mix, making sure it is fully covered. Carefully place the coated okra into the hot oil. Be careful not to overcrowd the pan. Fry the okra for about 3-5 minutes, turning it occasionally. You want the pieces to be golden brown and crispy. Once done, use a slotted spoon to remove the okra from the oil. Drain them on paper towels and add extra salt while they are still hot. Repeat this process until all the okra is cooked. For the full recipe, check out the details above. To make your fried okra extra crispy, follow these steps. First, soak the okra in buttermilk. This adds flavor and helps the coating stick. Use a mix of cornmeal and flour for the coating. The cornmeal gives a nice crunch. You can add a little baking powder to the mix. This adds air and makes it puff up when fried. One common mistake is overcrowding the pan. If you add too many pieces, the oil cools down. This leads to soggy okra. Fry in small batches instead. Another mistake is not heating the oil enough. Test the oil before frying. If the oil does not sizzle, let it heat more. Also, remember to drain the okra on paper towels after frying to remove excess oil. Using the right tools can help you fry better. A heavy skillet works well for even heat. A cast-iron skillet is a great choice. You’ll also need a slotted spoon for removing the okra. This helps drain the oil quickly. Finally, use a thermometer to check the oil's temperature. This ensures your okra fries perfectly every time. {{image_2}} Spices can change the taste of fried okra. You can try adding different spices to your coating mix. For a smoky flavor, add smoked paprika. If you like heat, use more cayenne pepper. You can also mix in some cumin or chili powder for a twist. Experimenting with spices makes the dish more fun and tasty. You can change the coating for crispy fried okra too. Instead of cornmeal and flour, try crushed crackers or panko breadcrumbs. They add a nice crunch. For a gluten-free option, use almond flour or chickpea flour. These swaps create different textures and flavors. Don't be afraid to mix and match! Serving crispy fried okra can be creative. Serve it as a snack with dipping sauces like ranch or hot sauce. You can also add it as a side dish to grilled meats. For a fun twist, toss fried okra in a salad for crunch. It works well in tacos too! The key is to enjoy and share your crispy fried okra with friends. For the full recipe, check out the detailed instructions above. You can store leftover fried okra to enjoy later. First, let it cool down to room temperature. Then, place the okra in an airtight container. Make sure to separate layers with paper towels to absorb any moisture. This keeps the okra crispy. Store it in the fridge for up to three days. When you're ready to eat the leftovers, don't just microwave them. This will make them soggy. Instead, preheat your oven to 350°F (175°C). Spread the okra on a baking sheet and heat for about 10 minutes. This helps regain its crispy texture. You can also use an air fryer for a quicker option. Just heat it for about 5 minutes at 400°F (200°C). If you want to keep fried okra longer, freezing is a great option. First, let the okra cool completely. Then, place it in a single layer on a baking sheet and freeze for about an hour. This prevents the pieces from sticking together. After freezing, transfer the okra to a freezer-safe bag or container. It can last up to three months in the freezer. To reheat, follow the same oven method. Enjoy your crispy fried okra any time! You can skip buttermilk by using regular milk combined with a splash of vinegar. This creates a similar tangy effect. Soak the okra in this mix for about 30 minutes. The coating will still stick well. Yes, you can bake okra for a healthier option. Preheat your oven to 425°F (220°C). Coat the okra as usual, then spread it on a baking sheet. Bake for 20-25 minutes, flipping halfway. It won't be as crispy but still tastes great. Crispy fried okra goes well with many sauces. Here are a few ideas: - Ranch dressing - Zesty remoulade - Hot sauce - Garlic aioli - Honey mustard These dips add flavor and make each bite even better. - Full Recipe You learned how to make crispy fried okra from scratch. We explored fresh ingredients, tasty seasonings, and simple steps. I shared tips for extra crispiness and common mistakes to watch for. You now know different flavor variations, how to store leftovers, and easy reheating methods. Enjoy creating your own fried okra! With these skills, you can impress any guest.

Crispy Fried Okra Delightful and Flavorful Snack

Crispy Fried Okra is an easy, tasty snack you can make at home. With a golden crunch and rich flavor,

- 4 cups fresh peaches, peeled, pitted, and sliced - 1 cup granulated sugar (divided) - 1 cup all-purpose flour - 1 tablespoon baking powder - ½ teaspoon salt - 1 teaspoon ground cinnamon - 1 teaspoon vanilla extract - 1 tablespoon lemon juice - 1/2 cup unsalted butter, melted - 1 egg, beaten For this homemade peach cobbler, I love using fresh, juicy peaches. They bring the best flavor. Start by peeling, pitting, and slicing your peaches. Four cups make a great base for this dessert. You can use different peaches, like yellow or white, for variety. I divide the sugar into two parts. Half sweetens the peaches, and the other half goes in the batter. This balance helps to bring out the natural sweetness of the fruit. Next, we need pantry staples. All-purpose flour is key for a soft texture. Baking powder makes the batter rise, while salt enhances all the flavors. To make it even more delicious, I add flavor enhancers. Ground cinnamon gives warmth and depth. Vanilla extract adds a sweet aroma. Lemon juice brightens the flavors and keeps the peaches fresh. Finally, melted unsalted butter, a beaten egg, and milk come together to create a rich batter. These ingredients will make your cobbler fluffy and golden. For the full recipe, check the detailed steps to create this delightful dessert. To start, wash your fresh peaches. Then, peel and pit them. Slice the peaches into thin pieces. Aim for uniform slices to ensure even cooking. Next, place the sliced peaches in a large bowl. Add 1/2 cup of sugar, ground cinnamon, vanilla extract, and lemon juice. Stir well to combine. Let the mixture sit for about 10 minutes. This time allows the flavors to meld. You will notice the peaches release their juices, creating a sweet syrup. In a separate bowl, mix the dry ingredients. Combine 1 cup of all-purpose flour, 1/2 cup of granulated sugar, baking powder, and salt. Whisk them together until well blended. In another bowl, mix the wet ingredients. Combine 1 cup of milk, melted butter, and a beaten egg. Pour this wet mixture into the dry ingredients. Stir gently until just combined. Be careful not to overmix; a few lumps are okay. Now it's time to assemble your cobbler. First, pour the batter into a greased 9x13 inch baking dish. Spread it evenly across the bottom. Next, spoon the peach mixture over the batter. Make sure to distribute the peaches evenly without stirring. This layering helps create a delicious texture. Preheat your oven to 350°F (175°C) if you haven't already. Bake the cobbler for 40-45 minutes. Look for a golden brown top. A toothpick inserted in the center should come out clean. Once done, allow it to cool slightly before serving. Enjoy your homemade peach cobbler with a scoop of vanilla ice cream for a delightful treat. For the full recipe, check out the instructions above! To make the best peach cobbler, choose the right baking dish. A 9x13 inch dish works well. It gives the batter space to rise and the peaches room to bubble. Mixing is key, too. When you combine the wet and dry ingredients, don’t overmix. Stir until you see no dry bits. This helps keep your cobbler light and fluffy. When it comes to serving, pair your cobbler with vanilla ice cream. The cold ice cream melts into the warm cobbler, creating a yummy contrast. For presentation, serve it warm in individual bowls. Add a scoop of ice cream on top and a sprinkle of cinnamon. It makes your dish look like a restaurant treat. Watch out for overcooking. If you bake too long, the cobbler can dry out. Keep an eye on it. The top should be golden brown. Choosing the right peaches is also important. Use fresh, ripe peaches for the best flavor. Firm peaches work well, but avoid ones that are bruised or overripe. For the full recipe, check out the Peachy Paradise Cobbler. {{image_2}} You can switch up your peach cobbler with other fruits. Blueberries, apples, and blackberries all work well. For blueberries, use the same amount as peaches. For apples, slice them thinly so they cook well. Mix different fruits for a fun twist. A berry medley adds color and flavor. Just keep in mind the sweetness level of your fruit. You may want to adjust the sugar in your recipe. This way, you get a balance of flavors that tastes great. If you need a gluten-free option, you can use alternative flours. Almond flour or coconut flour are popular choices. These flours give your cobbler a nice texture. You may need to adjust the liquid in the recipe. Start with less milk and add more as needed. Another option is to use a gluten-free baking mix. This mix can replace regular flour easily. Always check the package for the right amounts. This way, you can enjoy a tasty cobbler without gluten. Add spices and extracts to enhance your cobbler's flavor. A pinch of nutmeg pairs well with cinnamon. Try adding ginger for a bit of warmth. Vanilla extract is a classic choice, but almond extract can also shine. You can even add a splash of bourbon for a unique touch. Mix and match these flavors to create your signature cobbler. Experimenting keeps the recipe fresh and exciting. Let your taste buds guide you as you create your perfect dish. You can find the full recipe for the classic peach cobbler above. To keep your peach cobbler fresh, let it cool first. Then, cover it tightly with plastic wrap or aluminum foil. This keeps moisture in and prevents it from drying out. Place the cobbler in the refrigerator. It can stay fresh for up to three days. If you want to enjoy it later, freezing is a great option. You can freeze peach cobbler before or after baking. If you freeze it before baking, wrap the dish well. Use plastic wrap and then foil to prevent freezer burn. When you're ready to bake, remove the wrap and bake it straight from the freezer. If you freeze it after baking, cool it first. Then, slice it into portions, wrap each piece well, and place them in a freezer bag. It can last up to three months in the freezer. To reheat your cobbler, the oven is the best choice. Preheat it to 350°F (175°C). Place the cobbler in an oven-safe dish. Cover it with foil to keep it moist. Warm it for about 15-20 minutes. If you like it warm and crispy, remove the foil for the last five minutes. You can also use the microwave, but it may not keep the crust as crisp. Heat it in short bursts, checking often. Enjoy your cobbler warm, and consider serving it with vanilla ice cream for a treat! Yes, you can use canned peaches. They are easy and quick. However, fresh peaches have a better taste and texture. Canned peaches often have added sugar and syrup, which can change the flavor. If you use canned peaches, rinse them to reduce some sugar. Fresh peaches give a brighter flavor. They also add a nice bite to the cobbler. To lower sugar, try using honey or maple syrup. These sweeteners bring a rich taste. You can also use stevia or erythritol for a low-calorie option. Start with half the amount of sugar in the recipe. Taste and add more if needed. Remember, sweeteners vary in strength, so adjust wisely. Peach cobbler has a soft, cake-like topping. It covers the peaches but stays moist. Peach crisp has a crunchy topping made with oats and butter. It gives a nice texture contrast with juicy peaches. Both are delicious, but they offer different bites and flavors. Cobblers are more cake-like, while crisps are crunchier. This blog post guides you through making a delicious peach cobbler. We explored fresh ingredients, pantry staples, and flavor enhancers that make this dish shine. I shared step-by-step instructions for preparing the peaches and making the batter, along with tips to avoid common mistakes. Embrace different fruit options and explore gluten-free adaptations to suit your taste. Remember, serving it warm with vanilla ice cream creates the perfect treat. Now, go ahead and enjoy crafting your own peach cobbler masterpiece!

Homemade Peach Cobbler Simple and Delicious Recipe

Are you craving a warm, comforting dessert that’s easy to make? Look no further! This Homemade Peach Cobbler is simple

- Fresh Okra: Choose small, firm okra. Look for bright green pods that feel tender. Avoid large or tough ones as they may not pickle well. - Vinegar Choices: I prefer white vinegar for its clean taste. It gives a bright flavor. You can also use apple cider vinegar for a fruity twist. Each vinegar adds a unique note to your pickled okra. - Common Spices and Seasonings for Flavor Enhancement: Use kosher salt for brining. It dissolves well and boosts flavor. Garlic adds depth, while dill seeds and black peppercorns bring warmth. I also like to add crushed red pepper flakes for a kick. - Sweeteners: If you want less sugar, consider honey or agave syrup. These natural options add sweetness without overpowering the taste. Adjust to your liking for the perfect balance. - Additional Seasonings and Spices to Consider: Add mustard seeds for a zesty touch. A pinch of coriander or cumin can enhance the flavor. Experiment with what you like best to make your pickled okra unique. For more details, check the full recipe and enjoy making this tangy treat! To start, you need clean jars. Sterilizing your jars is key. Place them in boiling water for 10 minutes. This kills germs and keeps your okra safe. After boiling, let the jars cool down. For easy handling, use a jar lifter. This tool helps you lift and move hot jars safely. Always work on a clean surface. This keeps your kitchen tidy and helps avoid spills. Next, let's make the brine. Combine vinegar, water, kosher salt, and sugar in a medium saucepan. Bring this mix to a simmer over medium heat. Stir often until the salt and sugar dissolve. Ensure the brine is clear and smooth. This is your pickling base. After that, remove it from the heat and let it cool down a bit. A warm brine works best for pouring over the okra. Now it’s time to pack the okra. Start with two cloves of garlic in each jar. Follow with dill seeds, black peppercorns, and a pinch of red pepper flakes. Then, pack the okra upright in the jars. Leave some space at the top. This is called headspace. It helps the brine cover the okra fully. Pour the cooled brine over the okra, ensuring all is submerged. Seal the jars tightly. Wipe the rims to remove any spills. This helps create a good seal. If you want the jars to last longer, process them in boiling water for 10-15 minutes. If not, just refrigerate them. For the best taste, let your pickled okra sit for at least 48 hours before eating. For the full recipe, check out the full recipe section. To make your pickled okra burst with flavor, pay attention to the soaking time. I recommend letting the okra soak in the brine for at least 48 hours. This time allows the spices and vinegar to penetrate the okra fully. If you can wait longer, the flavor gets even better! Adjusting spice levels is also key. If you like heat, add more crushed red pepper flakes. Start with a teaspoon and taste. You can always add more for that perfect kick. Remember, everyone's taste is different, so don’t be shy to experiment. One common mistake is overpacking jars. If you pack the okra too tightly, it won’t pickle well. The brine needs space to circulate. Leave enough room for the okra to move a bit. This will help each piece soak in the flavor. Using non-sterilized jars is another big no-no. Always sterilize your jars to avoid spoilage. Place them in boiling water for ten minutes. This simple step ensures that your pickled okra stays fresh and safe to eat. By following these tips, you can enjoy a tangy and flavorful delight that is sure to impress. {{image_2}} Spicy Pickled Okra: Adding Heat You can spice up pickled okra by adding more heat. To make it spicy, just add extra crushed red pepper flakes or fresh jalapeños. This gives your okra an exciting kick. Adjust the amount based on your taste. If you want less heat, keep the pepper flakes to a minimum. You can also try adding some hot sauce to the brine for a different flavor. This spicy twist makes pickled okra perfect for those who love bold flavors. Sweet and Sour Versions to Try For a sweet and sour taste, consider adding honey or maple syrup. This balance of flavors makes the pickled okra unique. You can mix in a little more sugar to the brine too. The sweetness pairs well with the vinegar. It creates a delightful contrast that many enjoy. Experiment with different sweeteners to find your perfect blend. You might even add a splash of fruit juice to the brine for extra flavor. Creative Ways to Incorporate Pickled Okra in Meals Pickled okra can brighten up many meals. You can serve it as a crunchy side dish or snack. It adds a zesty touch to salads and sandwiches. You can also chop it up and mix it into potato salad or coleslaw. This adds a fun twist to classic recipes. Pickled okra works great on a charcuterie board too. It makes a colorful and tasty addition. Pairing Ideas for Appetizers and Snacks When you serve pickled okra, think about what goes well with it. Pair it with cheese, meats, and crackers for an easy appetizer. You can also enjoy it with dips like hummus or ranch dressing. This adds more flavor and texture. Try placing pickled okra on skewers with cherry tomatoes and olives for a fun snack. The combination of flavors will impress your guests. To enjoy your pickled okra, you have two main options: refrigeration or canning. - How to Store in the Fridge: If you want quick access to your pickled okra, store it in the fridge. After making your pickled okra, let the jars cool down. Once they’re at room temperature, place them in the fridge. This method keeps the okra crisp and fresh for about 1 month. - Shelf Stability Through Proper Canning Techniques: For long-term storage, canning is the way to go. After packing your okra and pouring in the brine, seal the jars tightly. Then, process them in boiling water for 10-15 minutes. This step allows the jars to last up to a year on your pantry shelf. - How Long Does Pickled Okra Last?: Properly stored pickled okra can last quite a while. In the fridge, expect it to last about 1 month. If canned correctly, it can last up to a year. - Signs of Spoilage to Watch Out For: Always check for signs of spoilage. If you notice any off smells, mold, or gas bubbles in the jars, discard them. It’s better to be safe than sorry when it comes to food safety. Pickled okra needs at least 48 hours to develop good flavor. This time allows the spices to soak into the okra. The longer you wait, the better it tastes. If you can, wait a week. The flavors deepen and become more balanced. You can reuse the pickling brine, but with caution. Make sure the brine is clean and has no signs of spoilage. It’s best to reuse it only once. If you use it again, add fresh spices for better taste. If your pickled okra is too salty, try rinsing it under cold water. This can help reduce the saltiness. You can also balance it by adding a little sugar to your next batch. The sugar will tone down the salt flavor. You might wonder about other questions, like how to add spice or what to serve it with. Feel free to experiment with different spices. Dill, garlic, and even mustard seeds can add fun flavors to your pickled okra. Enjoy your pickling journey! Check out the Full Recipe for more details. Homemade pickled okra is simple and rewarding. We explored the key ingredients and preparation steps. Fresh okra, the right vinegar, and spices make all the difference. I shared tips for avoiding common mistakes, ensuring the best flavor, and creative variations. Remember, the right storage will keep your pickled okra fresh. With these insights, you can enjoy tasty pickled okra at home. Try different flavors, and make it your own! Enjoy your pickling journey!

Homemade Pickled Okra Tangy and Flavorful Delight

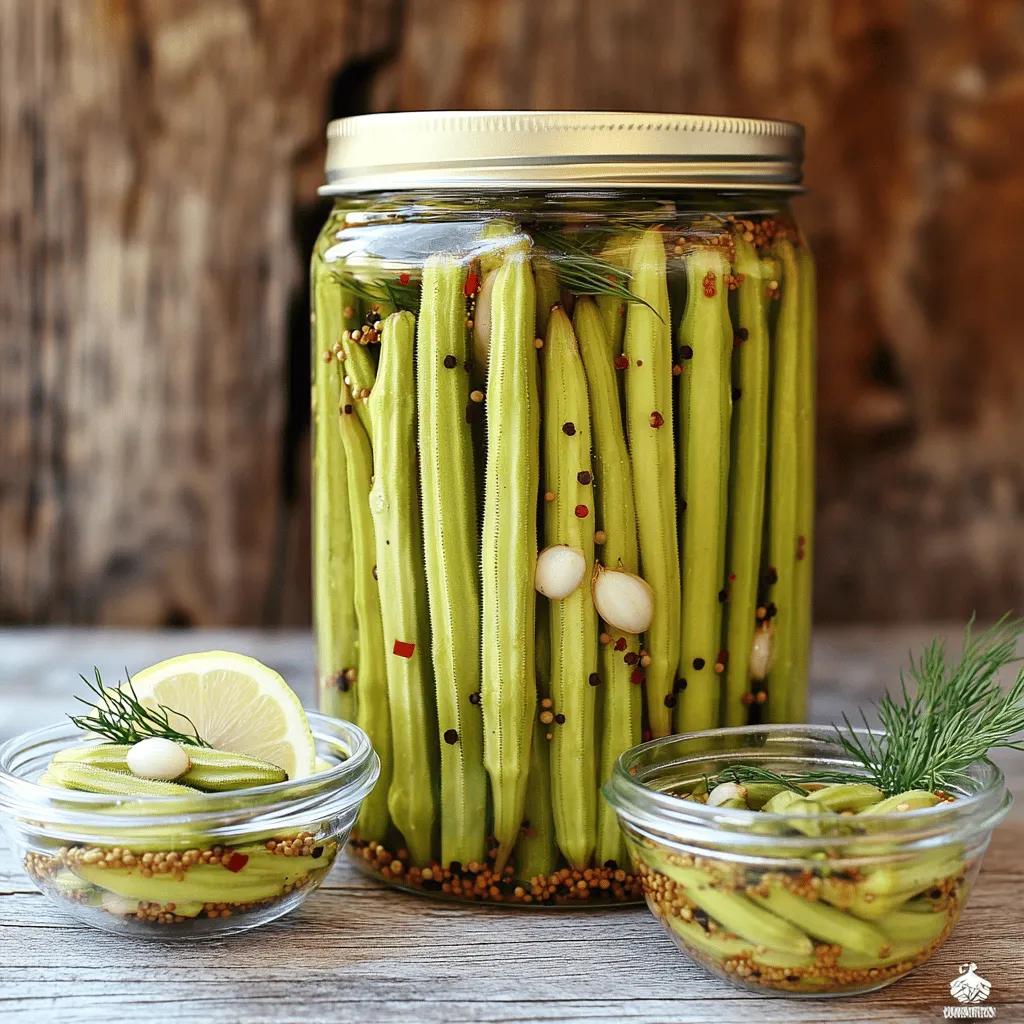
Are you ready to take your snacking to the next level? Homemade pickled okra is a tangy and flavorful delight

To make your zucchini and squash fritters, you will need the following ingredients: - 2 medium zucchinis, grated - 2 medium yellow squashes, grated - 1/2 cup all-purpose flour - 1/4 cup cornmeal - 1/4 cup grated Parmesan cheese - 2 large eggs - 2 green onions, finely chopped - 1 clove garlic, minced - 1 teaspoon baking powder - 1/2 teaspoon cumin powder - Salt and pepper to taste - Olive oil for frying - Optional: Fresh herbs like dill or parsley, for added flavor These ingredients come together to create a tasty dish. The zucchinis and squashes add moisture and flavor. The flour and cornmeal help bind everything, while the cheese adds a nice, salty kick. Eggs work to hold the fritters together. Green onions and garlic bring freshness and depth. Cumin adds warmth, and seasoning is key for taste. Don't forget the olive oil for frying, which gives the fritters their golden, crispy finish. For the full recipe, check out the details on how to perfectly mix and cook these delicious fritters. First, start by grating the zucchinis and yellow squashes. I find using a box grater works best. Grate them until you have a good pile. Next, place the grated veggies in a clean kitchen towel or cheesecloth. This step is key! Squeeze out the extra moisture. Too much water will make your fritters soggy. You want them nice and crispy. Now, grab a large mixing bowl. Combine the grated zucchini and squash with the flour, cornmeal, Parmesan cheese, chopped green onions, minced garlic, baking powder, cumin, salt, and pepper. Mix these dry ingredients well. In a separate bowl, beat the eggs. Then, add the eggs to the veggie mixture. Stir everything together. The mix should feel thick but easy to scoop. Heat a non-stick skillet over medium heat. Add a tablespoon of olive oil. Wait until the oil is hot. Take a spoonful of the fritter mix and drop it into the skillet. Flatten it slightly with a spatula. Cook each fritter for about 3-4 minutes on each side. Look for a golden brown color. If needed, add more oil while cooking. Once done, transfer the fritters to a paper towel-lined plate. This helps soak up any extra oil. Enjoy them warm with a dollop of Greek yogurt or sour cream. You can even sprinkle some fresh herbs on top for extra flavor. For the full recipe, check out the details above. To make crispy fritters, start by removing moisture. Grated zucchini and squash hold a lot of water. After grating, place them in a clean towel. Squeeze them tightly to get rid of excess liquid. This step is key to achieving that perfect crunch. Next, pay attention to cooking heat. If the skillet is too hot, the outside may burn while the inside stays raw. If it's too cool, the fritters will soak up oil and become soggy. A medium heat is best. Adjust as you cook, flipping the fritters when they turn golden brown. To elevate the taste, add herbs and spices. Dill and parsley work well with zucchini and squash. You can also try oregano or thyme for a different twist. For a kick, a pinch of red pepper flakes adds heat. Mix these into your batter before cooking. Dipping sauces can elevate your dish. Greek yogurt or sour cream pairs nicely with these fritters. You can add lemon juice or garlic to the yogurt for extra flavor. A simple homemade ranch dressing is also a great choice. When serving these fritters, think about accompaniments. A fresh salad with lemon vinaigrette complements the fritters well. You might also serve them with grilled vegetables for a colorful plate. For presentation, stack the fritters on a plate. Garnish with fresh herbs for a pop of color. Drizzle some sauce on top or serve it on the side for dipping. These small touches make your dish look as good as it tastes. For more details, check out the Full Recipe. {{image_2}} You can make easy swaps in this fritter recipe. If you want a gluten-free option, use almond flour or chickpea flour instead of all-purpose flour. Both work well and keep the fritters tasty. For a cheesy twist, try using feta or goat cheese instead of Parmesan. You can also mix in other veggies like grated carrots or bell peppers. This adds color and flavor to your fritters. Want to spice things up? Add chili flakes to your batter for a little kick. This gives the fritters a warm, zesty taste. You can also create Mediterranean flavors by adding olives or sun-dried tomatoes. Fresh herbs like basil or oregano can make your fritters even more fragrant and delicious. Kids love fun shapes! Make mini fritters for a perfect bite-sized snack. They are easier for little hands to hold. You can sneak in extra vegetables like finely chopped spinach or grated sweet potato. This not only boosts nutrition but also adds a fun twist to the classic recipe. To keep your zucchini and squash fritters fresh, store them in the fridge. Place the fritters in an airtight container. This helps to lock in flavor and moisture. They last about 3 to 4 days in the fridge. If you want to save them longer, freezing is a great option. To freeze, let the fritters cool completely. Then place them in a single layer on a baking sheet. Freeze them for about an hour. Once frozen, transfer them to a freezer bag. This method helps prevent them from sticking together. They can last up to 3 months in the freezer. When you're ready to enjoy your fritters again, reheating them right is key to keeping them crispy. The best way is to use an oven or air fryer. Preheat your oven to 375°F (190°C). Spread the fritters on a baking sheet in a single layer. Heat them for about 10 to 15 minutes. If using an air fryer, set it to 350°F (175°C) and cook for about 5 to 8 minutes. Avoid microwaving, as it can make the fritters soggy. Check them a few minutes before the time is up to ensure they are warm and crisp. Enjoy your delicious leftovers! To make zucchini and squash fritters, follow these steps: 1. Grate the Vegetables: Start with two medium zucchinis and two medium yellow squashes. Grate them using a box grater. 2. Remove Excess Moisture: Place the grated veggies in a clean kitchen towel. Squeeze out the water until they are dry. 3. Mix Ingredients: In a large bowl, mix the grated vegetables with 1/2 cup flour, 1/4 cup cornmeal, and 1/4 cup grated Parmesan cheese. Add 2 chopped green onions, 1 minced garlic clove, 1 teaspoon baking powder, 1/2 teaspoon cumin, and salt and pepper to taste. 4. Add Eggs: Beat 2 large eggs in a separate bowl, then mix them into the veggie mixture until well combined. 5. Heat and Cook: Heat olive oil in a skillet. Spoon the mixture into the hot oil, flattening each fritter slightly. Cook for 3-4 minutes on each side until golden brown. 6. Serve: Place the fritters on a paper towel to drain excess oil. Enjoy them warm. These steps create tasty fritters, perfect for any meal. Yes, you can make these fritters ahead of time. Here are some tips: - Prep Ahead: You can grate the zucchini and squash a few hours early. Just squeeze out the moisture and store them in the fridge. - Cook and Store: After cooking, let the fritters cool completely. Then, place them in an airtight container. - Refrigerate: Keep them in the fridge for up to three days. - Freeze for Later: You can also freeze the fritters. Use parchment paper between layers to prevent sticking. They’ll last for about three months in the freezer. Zucchini and squash fritters go well with many sides and dips. Here are some ideas: - Dips: Serve with Greek yogurt or sour cream for a creamy touch. You can also use tzatziki for a fresh taste. - Salads: Pair with a light salad, like a simple green salad or a cucumber salad. - Sauces: A drizzle of balsamic glaze or a squeeze of lemon adds brightness to the dish. - Vegetables: Enjoy with roasted or grilled vegetables for a healthy meal. These options will enhance your fritters and make your meal even more enjoyable! We explored how to make tasty zucchini and squash fritters. You learned about the key ingredients and step-by-step cooking instructions. I shared tips for achieving crispiness and ideas for serving. You also saw variations to keep meals exciting and how to store leftovers. In summary, these fritters are simple, fun, and flexible. You can customize them to fit your taste. With practice, they'll become a family favorite. Enjoy making this dish and sharing it with others!

Zucchini and Squash Fritters Tasty and Easy Recipe

Looking for a quick and tasty meal? Zucchini and squash fritters are the perfect treat! These simple bites are packed

Older posts
Newer posts
← Previous Page1 … Page37 Page38 Page39 … Page63 Next →

dsad

© 2025 flavorsprint • Built with GeneratePress

Our Policies

  • Copyright Policy
  • Cookie Policy
  • GDPR Policy
  • Privacy Policy
  • Disclaimer
  • Terms Of Use

More Information

  • Home
  • About
  • Contact
  • Appetizers
  • Dessert
  • Dinner
  • Drinks
©2025, flavorsprint About Back To Top