Skip to content
DisclaimerTerms Of UseGDPR PolicyCookie Policy

flavorsprint

  • Home
  • Drinks
  • Appetizers
  • Dinner
  • Dessert
  • About
  • Contact
  • Privacy Policy
DisclaimerTerms Of UseGDPR PolicyCookie Policy

Lillian

For a delicious antipasto frittata, gather these ingredients: - 6 large eggs - 1/4 cup milk - 1/2 cup mixed bell peppers, diced (red, yellow, green) - 1/4 cup red onion, finely chopped - 1/2 cup cherry tomatoes, halved - 1/3 cup black olives, pitted and sliced - 1/3 cup mozzarella cheese, shredded - 1/4 cup salami, diced - 1/4 cup fresh basil, chopped - Salt and pepper to taste - 1 tablespoon olive oil You can change some ingredients to suit your taste. Use spinach instead of bell peppers. You can swap salami for cooked bacon or ham. Try using goat cheese if you want a stronger flavor. For a lighter version, skip the cheese or use a low-fat option. If you want a vegetarian dish, just leave out the meat. This frittata is flexible! Using fresh ingredients makes a big difference. Fresh vegetables bring bright colors and flavors to the frittata. They add nutrients too. Fresh herbs, like basil, give a lovely aroma. They boost the taste and make your dish shine. Always choose the best quality you can find. This helps your frittata be tasty and healthy. Using fresh ingredients is key to a great breakfast! For the full recipe, check the recipe section above. Start by gathering your ingredients. You will need: - 6 large eggs - 1/4 cup milk - 1/2 cup mixed bell peppers, diced - 1/4 cup red onion, finely chopped - 1/2 cup cherry tomatoes, halved - 1/3 cup black olives, pitted and sliced - 1/3 cup mozzarella cheese, shredded - 1/4 cup salami, diced - 1/4 cup fresh basil, chopped - Salt and pepper to taste - 1 tablespoon olive oil Next, preheat your oven to 350°F (175°C). In a large bowl, whisk the eggs and milk together until mixed well. Add salt and pepper to taste, then set the bowl aside. Now, heat the olive oil in an oven-safe skillet over medium heat. Add the diced bell peppers and red onion. Sauté these for about 3-4 minutes until they soften. Then, mix in the halved cherry tomatoes, sliced olives, and diced salami. Cook for another 2-3 minutes until everything is tender. Pour your egg mixture over the sautéed veggies and meats, spreading it evenly. Now, gently sprinkle the shredded mozzarella and chopped basil on top. Cook the frittata on the stovetop for about 5 minutes. Don’t stir it! You want the edges to begin setting. After that, carefully transfer the skillet to your preheated oven. Bake for 15-20 minutes, or until the frittata is set and lightly golden on top. Keep an eye on it to avoid overcooking. Once done, take the frittata out and let it cool for a few minutes. Slice it into wedges and serve warm or at room temperature. This dish is great for breakfast, brunch, or even a light lunch. Ovens can vary in temperature and heat distribution. If your oven runs hot, check the frittata a few minutes early. You want it to be set, not dry. If your oven is cooler, it might need a few extra minutes. Always use a toothpick to test if it's done. Insert it in the center; if it comes out clean, your frittata is ready. This method ensures you get that perfect texture every time. For more details, refer to the Full Recipe. To make a fluffy frittata, start with fresh eggs. Use large eggs for the best volume. Whisk the eggs and milk well. This adds air, which makes it light. Cook on medium heat to avoid burning. Don't stir it too much; let it set before baking. Salt and pepper are a must. They enhance the taste of your frittata. Try adding fresh herbs like basil or parsley. They brighten up the dish. You can also use garlic powder or onion powder for more depth. One mistake is not using enough oil. This can cause sticking. Another is overcrowding the pan with fillings. Keep it balanced for even cooking. Lastly, don’t skip the oven time. This sets the frittata properly. For the full recipe, refer back to the main sections. {{image_2}} You can easily make a vegetarian antipasto frittata. Simply swap out the salami for more veggies. Try adding ingredients like artichokes or zucchini. You can also use more cheese, like feta or goat cheese, to add flavor. This way, you keep it tasty and packed with nutrients. The beauty of an antipasto frittata lies in its versatility. You can try different cheeses and meats. For cheese, consider sharp cheddar or creamy ricotta. If you prefer meat, think about prosciutto or pepperoni. Mix and match until you find your favorite combo. Each change brings a new twist to this dish. Seasonal vegetables can elevate your antipasto frittata. Use what is fresh and available. In spring, add asparagus or spinach. In summer, use ripe tomatoes or corn. Fall brings squash or kale. Winter can inspire with hearty root veggies like carrots or sweet potatoes. This not only adds flavor but also makes it colorful and healthy. For more details and tips, check the Full Recipe for Antipasto Frittata. Store leftover frittata in an airtight container. Let it cool completely first. Place it in the fridge for up to three days. If you want it to last longer, consider freezing it. To reheat, you can use your oven or microwave. For the oven, preheat it to 350°F (175°C). Place the frittata in an oven-safe dish. Cover it with foil to keep it moist. Heat for about 10-15 minutes until warm. In the microwave, place a slice on a plate. Heat for 30 seconds to 1 minute. Check that it’s warm all the way through. If you decide to freeze the frittata, slice it first. Wrap each slice in plastic wrap. Then, place the wrapped slices in a freezer-safe bag. It can stay in the freezer for up to two months. When ready to eat, thaw it overnight in the fridge. Then follow the reheating steps for the best taste. Enjoy your frittata anytime! For the full recipe, refer back to the beginning. The best pan for making a frittata is an oven-safe skillet. A non-stick skillet works well too. I prefer using a cast-iron skillet because it heats evenly. This helps cook the frittata perfectly. A 10 to 12-inch skillet is ideal for this dish. It allows enough space for the eggs to spread out. This size helps the frittata cook evenly from edge to center. Yes, you can use egg substitutes in this recipe. Common options include silken tofu or chickpea flour. You can mix 1/4 cup of silken tofu with 1 tablespoon of water. For chickpea flour, mix 3 tablespoons of flour with 3 tablespoons of water. Both choices will give you a similar texture. However, the taste may differ slightly from using eggs. Experiment to see which substitute you like best! You can tell when the frittata is fully cooked by checking the center. It should be set and not runny. A toothpick inserted in the center should come out clean. You can also look for a light golden color on top. If you gently shake the pan, the frittata should not jiggle. Baking time may vary, so keep an eye on it as it cooks. In this article, I covered the key steps to make a delicious Antipasto Frittata. We explored the essential ingredients, along with substitutions and the benefits of using fresh produce. I shared tips for preparing and cooking, plus ways to avoid common mistakes. You now know variations and storage tips to keep it fresh. Remember, a great frittata starts with quality ingredients and proper technique. With these insights, you can confidently create your own tasty dish. Enjoy making this simple and satisfying recipe!

Antipasto Frittata Tasty and Easy Breakfast Dish

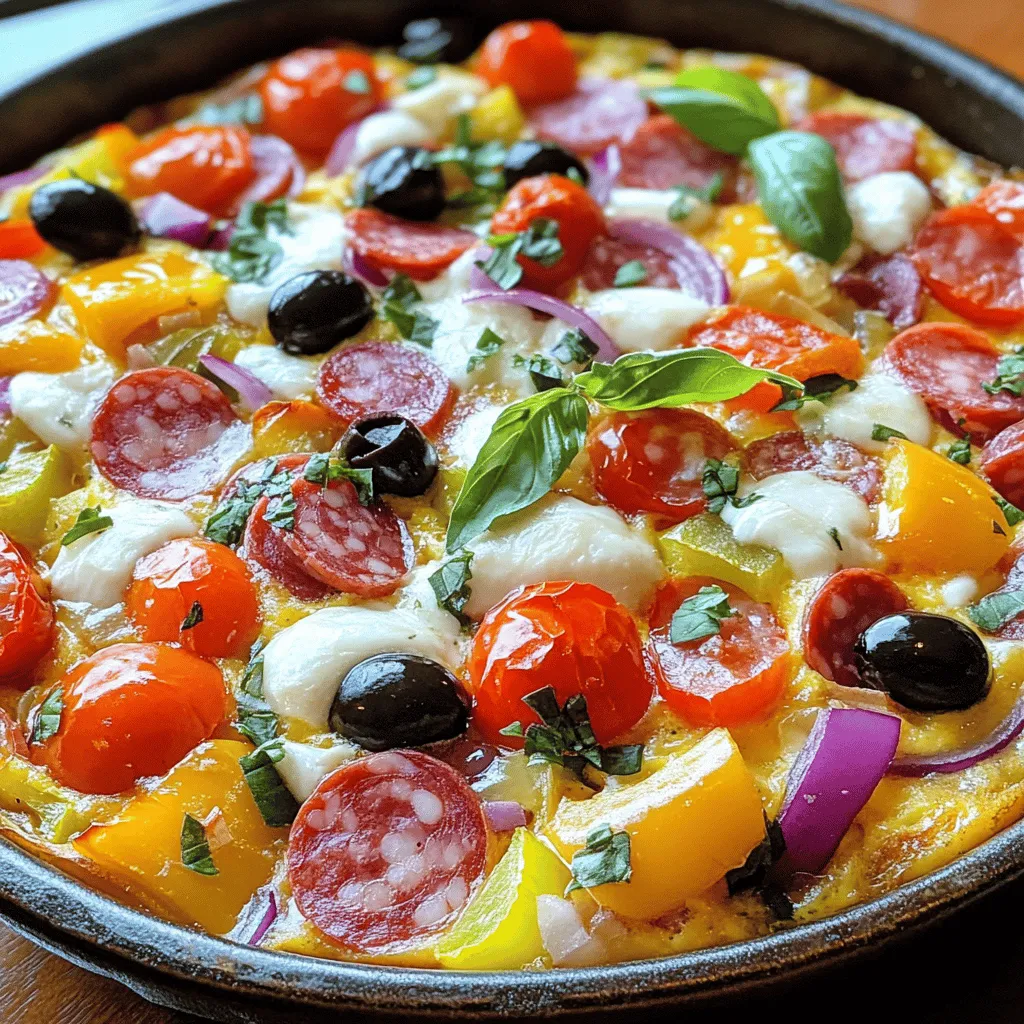
Looking for a quick and tasty breakfast? Meet the Antipasto Frittata! This dish combines fresh ingredients with rich flavors for

To make Southern Pickled Okra Bites, you will need these ingredients: - 1 pound fresh okra, trimmed - 1 cup vinegar (white or apple cider) - 1 cup water - 2 tablespoons salt - 1 tablespoon sugar - 1 teaspoon black peppercorns - 1 teaspoon mustard seeds - 1 teaspoon dill seeds - 2 cloves garlic, peeled and crushed - 1 teaspoon crushed red pepper flakes (optional for spiciness) I always recommend using fresh okra for the best flavor and texture. Fresh okra stays crisp and has a bright taste. You can find it at local markets or your grocery store. Frozen okra works in a pinch, but it may lose some crunch. Fresh okra gives your bites that perfect snap. You can customize your brine to fit your taste! Here are some fun ideas: - Add a tablespoon of lemon juice for a zesty kick. - Use fresh herbs like thyme or basil for an aromatic touch. - For a sweeter version, add an extra tablespoon of sugar or honey. - Experiment with spices like coriander or cumin for new flavors. These tweaks can make your Southern Pickled Okra Bites even more exciting! For the complete recipe, check out the Full Recipe. To start, gather your ingredients. You need vinegar, water, salt, and sugar. In a medium saucepan, combine 1 cup of vinegar and 1 cup of water. Add 2 tablespoons of salt and 1 tablespoon of sugar. Heat over medium heat. Stir until the salt and sugar dissolve. This will create a tangy brine for your okra. Once it boils, remove it from heat and let it cool slightly. It should be warm, not hot, when you pour it over the okra. Now it's time to pack the okra. Take 1 pound of fresh okra and trim the ends. Use sterilized glass jars for this step. Place the okra upright in the jars. Make sure they fit snugly but are not too tight. This helps the brine to reach every piece of okra. Next, add your flavorings. Distribute 1 teaspoon of black peppercorns, 1 teaspoon of mustard seeds, and 1 teaspoon of dill seeds among the jars. Don’t forget the 2 cloves of crushed garlic. If you like some heat, add 1 teaspoon of crushed red pepper flakes. Now, pour the warm brine over the packed okra. Ensure every piece is fully submerged. Leave about half an inch of space at the top of each jar. This space helps the brine to bubble. After that, clean the rim of each jar with a cloth. This step ensures a good seal. Place your sterilized lids and bands on the jars. Let the jars cool at room temperature. Once cool, put them in the fridge. Wait at least 24 hours before tasting. However, for the best flavor, wait 1 to 2 weeks. Enjoy your Southern Pickled Okra Bites as a tangy snack or a fun garnish. For the complete recipe, see the Full Recipe above. To keep your okra bites safe, you must sterilize your jars. Start by washing them with hot, soapy water. Rinse them well. Next, place them in a pot of boiling water for about 10 minutes. This kills germs. You can also use a dishwasher on the hot cycle. Ensure they dry completely before use. This simple step helps your pickled okra last longer. Flavor is key for tasty pickled okra. Use fresh okra for the best taste. Trim the ends and pack them tightly in jars. Adding spices like black peppercorns and dill seeds enhances the flavor. Use vinegar that suits your taste. Apple cider vinegar gives a fruity note, while white vinegar is sharper. Let your jars sit for 1-2 weeks for the best results. The longer they sit, the better they taste! You don’t need fancy tools to pickle okra. A medium saucepan is perfect for making brine. Use glass jars with tight lids for storage. A ladle helps pour the brine without spilling. A funnel can make filling jars easier. Also, have a clean cloth on hand to wipe jar rims. Each tool helps ensure your pickling process goes smoothly. For more details, check out the Full Recipe for Southern Pickled Okra Bites. {{image_2}} To make spicy Southern pickled okra bites, add crushed red pepper flakes. Adjust the amount based on your spice level. I suggest starting with one teaspoon. If you want more heat, feel free to add more! The spice infuses into the okra as it pickles, creating a zesty kick. These bites pair perfectly with cheese or crackers. For a sweet twist, try adding a bit more sugar to the brine. You can also include sliced jalapeños for a sweet and spicy mix. Another fun idea is to add some cinnamon sticks or cloves. These flavors will give your pickled okra a unique touch. Sweet pickled okra works great in salads or as a side dish. You can also pickle other vegetables with okra. Consider adding carrots, green beans, or cauliflower. These vegetables will soak up the brine and add more crunch to your bites. I love mixing colors for a vibrant jar. All these veggies will create a beautiful, tasty spread. They are great for parties or as snacks. Check out the Full Recipe for ideas on how to mix it up! Store your pickled okra in a cool, dark place. A pantry shelf works well. Once opened, move the jars to the fridge. Keep the jars tightly sealed to maintain freshness. This helps keep the flavors intact. Home-pickled okra lasts for about 1 to 2 months when stored properly. After opening, consume within 2 to 3 weeks. The flavor improves over time, so waiting is worth it. Always check for the best taste and crunch. Watch for changes in color or texture. If the okra becomes mushy, it’s time to toss it. A bad smell or bubbles are also signs of spoilage. If you see mold, do not eat it. Always prioritize safety in your kitchen. You should wait at least 24 hours before eating your pickled okra. This time allows the flavors to soak in. However, for the best taste, I suggest waiting 1 to 2 weeks. The longer you wait, the richer the flavor becomes. The spices and vinegar work together to create a tangy bite that makes it worth the wait. You can serve Southern Pickled Okra Bites in many fun ways. They make a great snack on their own. Pair them with cheese and crackers for a tasty platter. You can also use them as a garnish for cocktails, like Bloody Marys. They add a nice twist and a pop of color. Another option is to serve them alongside fried chicken or barbecue, enhancing the meal's flavor. Yes, you can reuse pickling brine for another batch of okra. However, make sure to strain it first to remove any bits of food. It’s best to use it soon after the first batch. If it smells off or looks cloudy, it’s safer to make a fresh batch. Reusing brine is a great way to save time and reduce waste, but always trust your senses! In this post, we explored how to make Southern Pickled Okra Bites. We discussed the key ingredients, and how fresh or frozen okra impacts taste. I shared tips for brining, packing, and sealing jars. You learned helpful tricks for flavor and jar sterilization. Pickled okra is fun and easy to make. Enjoy the different variations and share them with loved ones. Remember these tips to make your pickled okra tasty and safe. Happy pickling!

Southern Pickled Okra Bites Tangy and Tasty Treat

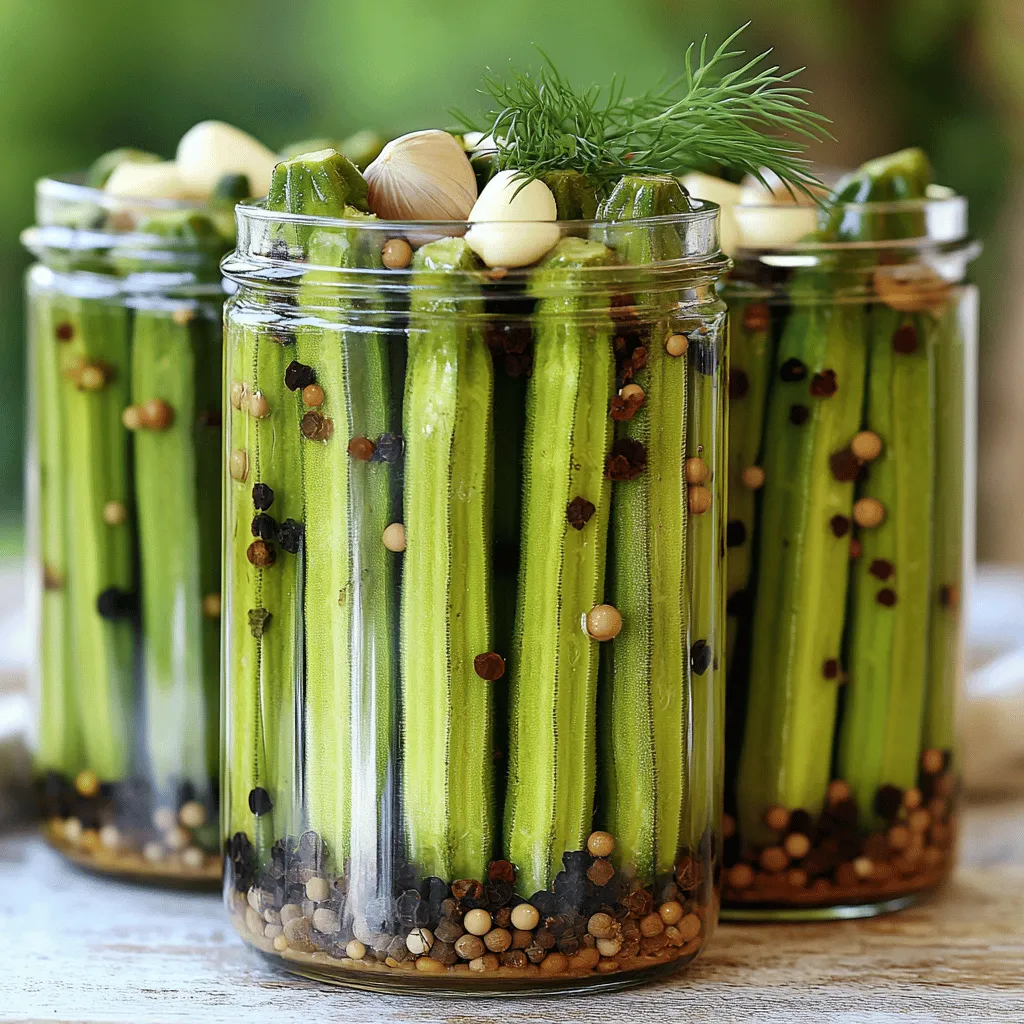
Looking for a crunchy, tangy snack? Southern Pickled Okra Bites are your answer! These tasty treats blend fresh ingredients and

- 2 cups grated zucchini (about 2 medium zucchinis) - 1 cup all-purpose flour - 1 cup whole wheat flour - 1 teaspoon baking powder - 1 teaspoon baking soda - 1 teaspoon ground cinnamon - ½ teaspoon nutmeg - ½ teaspoon salt The main ingredients in this recipe create a base for your moist zucchini bread. The grated zucchini adds moisture, while the mix of all-purpose and whole wheat flour gives it a nice texture. Baking powder and baking soda help the bread rise. The spices like cinnamon and nutmeg enhance the flavor, making each bite warm and inviting. - ¾ cup brown sugar, packed - ½ cup granulated sugar - ½ cup vegetable oil - 3 large eggs - 1 teaspoon vanilla extract We use both brown and granulated sugar for sweetness. Brown sugar gives a rich flavor, while granulated sugar keeps it light. The vegetable oil adds moisture, making the bread tender. Eggs help bind everything together and add richness. Don’t skip the vanilla extract; it adds a lovely aroma. - ½ cup chopped walnuts (optional) - ½ cup chocolate chips (optional) Adding nuts or chocolate chips can make your zucchini bread even better. Walnuts add a nice crunch and healthy fats, while chocolate chips bring sweetness and fun. You can mix and match these add-ins based on what you like. 1. Preheat your oven to 350°F (175°C). This step ensures your bread bakes evenly. 2. Prepare the loaf pan. Grease and flour a 9x5 inch loaf pan to prevent sticking. 3. Release moisture from zucchini. Mix grated zucchini with brown and granulated sugars. Let it sit for about 10 minutes. This helps the zucchini release excess moisture. 1. Combine wet and dry ingredients. In a large bowl, whisk together the dry ingredients: all-purpose flour, whole wheat flour, baking powder, baking soda, cinnamon, nutmeg, and salt. In another bowl, stir together the zucchini mixture, vegetable oil, eggs, and vanilla extract. 2. Avoid overmixing. Gradually add the dry ingredients to the wet mixture. Stir gently until just combined. Overmixing can make the bread dense. 1. Pour the batter into the pan. Use a spatula to smooth the top of the batter. 2. Baking time and toothpick test. Bake for 50-60 minutes. Check doneness by inserting a toothpick into the center. If it comes out clean, your bread is ready. For the full recipe, refer to the previous section. Enjoy the process! To make your zucchini bread moist, start by preparing the zucchini well. Grate the zucchini and squeeze it gently in a clean cloth. This removes excess water, which can make your bread soggy. Then, let it sit with the sugars for about 10 minutes. This step helps it release more moisture naturally. Mixing is also key. Combine wet ingredients first. Then, add your dry ingredients slowly. Stir gently until just combined. Overmixing can make the bread tough, so be careful here. Choose the right pan for baking. A metal loaf pan works best for even cooking. If you use glass, lower the oven temp by 25°F. This helps prevent burning the edges while the middle cooks. Oven temperatures can vary. An oven thermometer helps ensure your bread bakes perfectly. If your bread browns too fast, cover it with foil. This will keep the top from burning while the inside cooks. Presentation is important for zucchini bread. Slice it and serve on a wooden cutting board. Dust the top with powdered sugar for a nice touch. Pair your warm slices with spreads like cream cheese or butter. They add a creamy texture and rich flavor that complements the bread. For a fun twist, try it with honey or nut butter. Enjoy the delicious results! {{image_2}} You can change the taste of your zucchini bread in fun ways. Adding spices like ginger or cloves gives it a warm kick. You could also mix in fruits like chopped apples or raisins for added sweetness and texture. These little changes can make each loaf unique, depending on what you like best. If you want a lighter option, use applesauce instead of some oil. This keeps your bread moist while cutting down on fat. Also, you can try using gluten-free flour if you need to avoid gluten. This way, everyone can enjoy your tasty zucchini bread. As the seasons change, so can your zucchini bread. In the fall, add pumpkin puree for a cozy flavor. For the holidays, mix in chocolate chips or peppermint extract to celebrate the season. These seasonal twists make baking even more fun and festive. Check out the Full Recipe for the basics, then let your creativity shine! To keep your zucchini bread fresh at room temperature, wrap it in plastic wrap. Place it in a cool, dry place. This way, it stays soft and tasty for about three days. If you see any mold, throw it away immediately. For longer storage, use the fridge. Wrap the bread tightly in foil or plastic wrap. It will stay good for up to a week. You can also freeze zucchini bread. Slice it first for easy servings. Wrap each slice in plastic wrap, then place them in a freezer bag. This helps keep them fresh for about three months. To enjoy your leftovers, you can reheat them in a few ways. The best method is to use the oven. Preheat it to 350°F (175°C). Place the slices on a baking sheet and warm them for 10 minutes. You can also use a microwave. Heat each slice for about 15-20 seconds. Enjoy your moist zucchini bread warm with a spread of cream cheese or butter. For the full recipe, check out the steps above! You can check if your zucchini bread is done by using a toothpick. Stick it in the center of the bread. If it comes out clean, your bread is ready. Bake it for 50 to 60 minutes at 350°F. If the top looks golden and smells good, it’s a great sign too. Yes, you can use frozen zucchini! Just make sure to thaw it first. Drain any extra water after thawing. This keeps your bread from getting too soggy. Frozen zucchini works well in this recipe, just like fresh zucchini. If you need a gluten-free option, use almond flour or a gluten-free baking mix. Both options work great in this recipe. You can also try oat flour, though it may change the texture a bit. Always check that your ingredients are certified gluten-free. To keep your zucchini bread fresh, store it in an airtight container. You can keep it at room temperature for up to three days. If you want it to last longer, refrigerate it for up to a week. Just make sure it’s completely cool first! Absolutely! You can use mini loaf pans for this recipe. Just divide the batter evenly. Bake them for about 25 to 30 minutes. Keep an eye on them. Use the toothpick test to check for doneness. To boost flavor, consider adding spices like ginger or cloves. You can also mix in fruits like mashed bananas or applesauce. Nuts and chocolate chips are great choices too. For a fun twist, try adding citrus zest for a fresh kick! In this post, we explored how to make delicious zucchini bread. We covered key ingredients like zucchini, flour, and sugars. I shared step-by-step instructions for easy preparation and baking. Tips for keeping the bread moist and tasty were included too. Finally, we talked about storage and fun variations to try. Baking zucchini bread is simple and fun. With these tips, your bread will taste great and stay fresh. Enjoy the process and make it your own!

Moist Zucchini Bread Simple and Tasty Recipe

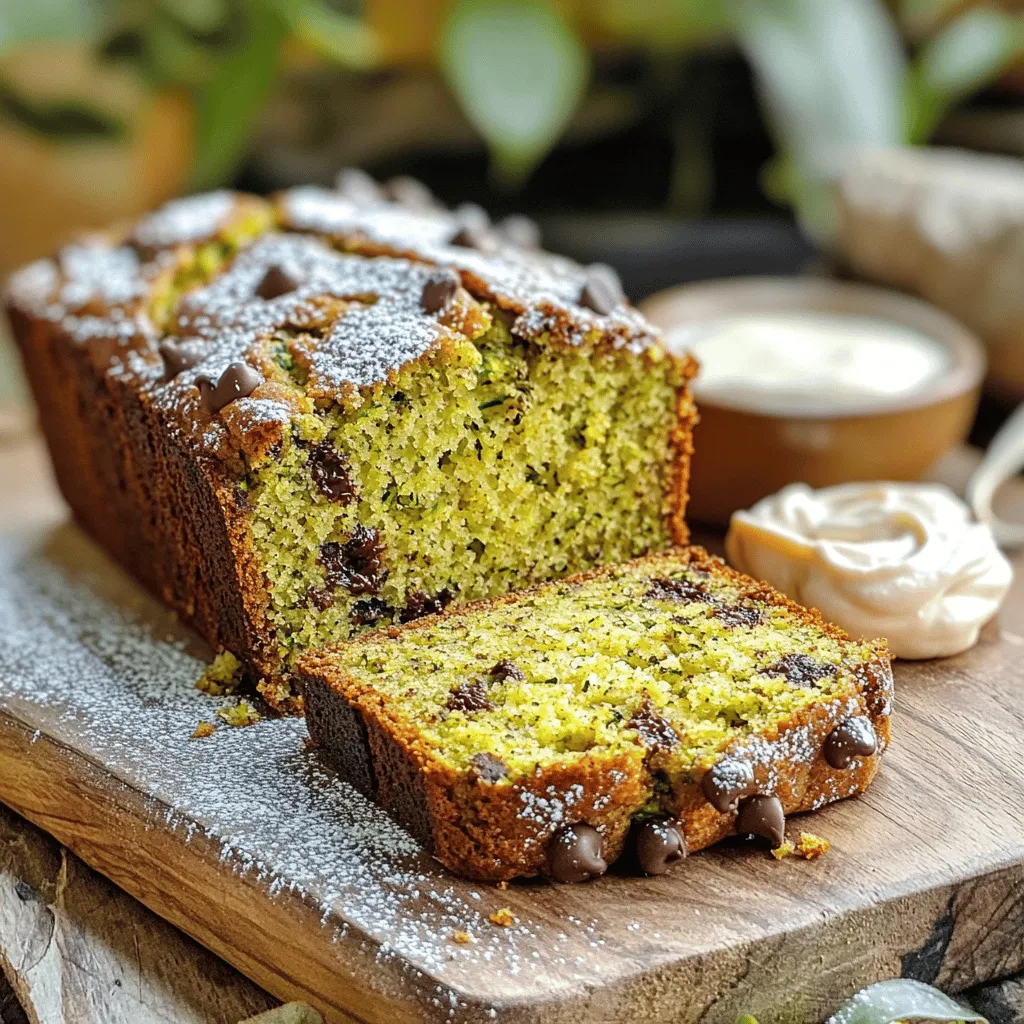
If you’re looking for a simple and tasty treat, you’ve found it! My moist zucchini bread recipe is easy to

Here’s what you need for a tasty cheesy squash and zucchini casserole: - 2 medium zucchinis, sliced - 2 medium yellow squashes, sliced - 1 cup shredded cheddar cheese - 1 cup mozzarella cheese - 1 small onion, finely chopped - 2 cloves garlic, minced - 1 cup heavy cream - 1 teaspoon dried Italian herbs - 1/2 teaspoon paprika - Salt and pepper to taste - 1 cup breadcrumbs (optional for topping) - 2 tablespoons olive oil - Fresh parsley, chopped (for garnish) Gather these ingredients before you start cooking. Fresh veggies make a big difference in taste. I love using ripe zucchinis and squashes for their natural sweetness. The cheese blend adds a rich, creamy texture. Don't skip the herbs; they give the dish amazing flavor. You can adjust the salt and pepper to your liking. If you want a crunchy topping, the breadcrumbs are a fun choice. This recipe is all about balance and flavor. For the full recipe, check out the details above. - Preheat your oven to 375°F (190°C). Grease a 9x13 inch baking dish with olive oil. - In a large skillet, heat 2 tablespoons of olive oil over medium heat. Sauté 1 small onion and 2 cloves of minced garlic until soft, about 3-4 minutes. - Add 2 sliced zucchinis and 2 sliced yellow squashes. Cook for about 5-7 minutes. They should soften but not be mushy. Season with salt, pepper, and 1 teaspoon of dried Italian herbs. - In a big bowl, mix the sautéed veggies with 1 cup of heavy cream. Add half of the cheddar cheese and half of the mozzarella cheese. Stir well to combine. - Pour this mix into your prepared baking dish. Spread it out evenly. - Top with the remaining cheddar and mozzarella cheeses. If you like, add 1 cup of breadcrumbs for a crunchy finish. Sprinkle with 1/2 teaspoon of paprika for extra flavor. - Bake in the preheated oven for 25-30 minutes. Look for bubbly and golden cheese as signs of doneness. - When it’s done, take it out of the oven. Let it cool for about 5 minutes. You can garnish with fresh chopped parsley if you want. Enjoy this creamy dish! For the full recipe, check the details above. Selecting fresh zucchini and squash makes all the difference. Look for firm, smooth skin. Avoid any that feel soft or have dark spots. Fresh veggies add flavor and texture. For the best cheese melt, use a mix of cheeses. Cheddar and mozzarella work great together. Shred your cheese at home for the best results. Pre-shredded cheese has additives that can affect melting. If you want a lighter option, swap heavy cream with half-and-half or whole milk. You can also use unsweetened almond milk for a dairy-free choice. This change keeps the dish creamy but cuts calories. Pair this casserole with a fresh salad. A simple green salad with vinaigrette works well. You can also serve it with crusty bread for a filling meal. Got leftovers? Reheat and serve them as a filling lunch. You can also turn them into a tasty wrap. Just add some greens and a drizzle of your favorite sauce. {{image_2}} You can switch up the cheese in your casserole. Try gouda for a smoky taste. Feta adds a nice tang. If you love blue cheese, mix it in for bold flavor. You can also add proteins to make it heartier. Cooked chicken or sausage works well. Just chop it up and mix it in with the veggies. Always feel free to get creative with your ingredients. Want a lighter version? You can use cauliflower instead of some squash. This swap cuts carbs and adds fiber. You can also use Greek yogurt instead of heavy cream. It gives a creamy texture with fewer calories. Don’t forget to load up on more veggies! Spinach, bell peppers, or mushrooms add great taste and nutrition. You can sneak in veggies without changing the flavor much. For the full recipe, check out the details above! To keep your cheesy squash and zucchini casserole fresh, use airtight containers. Glass containers work well, as they do not retain odors. You can also use plastic containers if you prefer. Make sure to let the casserole cool completely before sealing it. This helps prevent moisture buildup. Store the leftovers in the fridge for up to three days. If you need to keep it longer, freezing is a great option. When reheating, use the oven for the best taste. Preheat your oven to 350°F (175°C). Place your casserole in an oven-safe dish. Cover it with foil to keep it moist, and heat for about 20 minutes or until warmed through. If you want to freeze it, let the casserole cool completely. Wrap it tightly in plastic wrap and then in aluminum foil. This keeps out air and prevents freezer burn. You can freeze it for up to three months. When ready to eat, thaw it overnight in the fridge before reheating. Enjoy your tasty dish again! What can I substitute for heavy cream? You can use milk mixed with butter. For each cup of heavy cream, use 3/4 cup milk and 1/4 cup butter. This mix gives a rich taste. You can also try coconut cream for a dairy-free option. How long can the casserole be stored? The casserole can last in the fridge for about 3-5 days. Make sure to cover it well to keep it fresh. You can freeze it for longer storage, up to 3 months. Just ensure it is in an airtight container. Can I make the casserole ahead of time? Yes, you can prepare it a day in advance. Just follow all the steps and cover the dish tightly. When ready to bake, let it sit at room temp for about 30 minutes. This helps it cook evenly. Is there a vegetarian alternative for this recipe? This recipe is already vegetarian! It’s packed with zucchinis and squashes. If you want to add more veggies, consider bell peppers or spinach for extra flavor and nutrition. Approximate calorie count per serving Each serving has around 300 calories. This may vary based on the cheese and cream you use. Information on dietary restrictions or allergies This dish contains dairy and gluten if you use breadcrumbs. For gluten-free options, use gluten-free breadcrumbs or omit them. Always check cheese labels for allergens. This blog post shared a tasty casserole recipe with fresh zucchini and yellow squash. You learned simple steps to prepare and bake it, plus tips to make it great. I also included ways to customize your dish and store leftovers. Remember, cooking can be fun and creative. You can always make it your own! Now, gather your ingredients and enjoy making this delicious meal. Your family will love it.

Cheesy Squash and Zucchini Casserole Recipe Delight

Are you ready to whip up a side dish that steals the show? My Cheesy Squash and Zucchini Casserole hits

To make a tasty oven-baked frittata, you need the following items: - 6 large eggs - 1 cup milk (or plant-based milk) - 1 cup baby spinach, chopped - 1/2 cup bell peppers, diced (any color) - 1/2 cup cherry tomatoes, halved - 1/2 cup shredded cheese (cheddar, feta, or mozzarella) - 1/4 cup onion, diced - 2 cloves garlic, minced - 2 tablespoons fresh parsley, chopped - 1 tablespoon fresh basil, chopped - Salt and pepper to taste - Olive oil for greasing the baking dish These ingredients create a well-balanced frittata. The eggs act as the base, while the vegetables add flavor and nutrition. Cheese gives it a rich taste that makes it hard to resist. You can make your frittata unique by adding: - Additional vegetables like zucchini or mushrooms - Meats or proteins, such as cooked bacon or sausage - Fresh herbs and spices for extra flavor Feel free to mix and match these optional ingredients. This way, you can use what you have or what you like most. Before you start cooking, gather these tools: - Mixing bowls - Whisk or fork - Baking dish - Knife and cutting board Having the right tools makes cooking easy. You can focus on mixing and baking instead of searching for items. Now you're ready to create a delicious oven-baked frittata! Check out the Full Recipe for step-by-step instructions on how to cook this dish. 1. Preheating the oven: Start by preheating your oven to 375°F (190°C). This step is key for even cooking. 2. Greasing the baking dish: Next, grab a 9-inch round baking dish. Use olive oil or cooking spray to coat the dish. This helps the frittata slide out easily after baking. 1. Whisking eggs and milk: In a large mixing bowl, add 6 large eggs and 1 cup of milk. Whisk them together until they blend well. This mixture is the base of your frittata. 2. Incorporating vegetables and cheese: Now, add your chopped veggies and half a cup of cheese to the egg mix. I love using spinach, bell peppers, and cherry tomatoes. Stir everything together until well combined. This gives your frittata great flavor and texture. 1. Pouring mixture into the dish: Carefully pour the egg and vegetable mix into your greased baking dish. Spread it out evenly. Then, sprinkle the remaining cheese on top. 2. Baking time and temperature: Place the dish in the preheated oven. Bake the frittata for 25 to 30 minutes. You want it to be set and lightly golden around the edges. When you follow these steps, you create a tasty oven-baked frittata that is perfect for any meal. For the complete process, refer to the Full Recipe section. To get a great texture in your frittata, adjust the cooking time. If your frittata is too wet, bake it a bit longer. If it’s too dry, reduce the time next time. Fresh ingredients make a big difference. Use fresh eggs, vegetables, and herbs. They add flavor and help with texture. Seasoning is key. Use salt and pepper, but try adding herbs like thyme or oregano. You can also mix in spices like paprika for a hint of heat. Cheese can transform your frittata. Try using a blend of cheddar and feta for a tangy kick. Experiment with mozzarella for a milder taste. For the best experience, serve your frittata warm. It tastes great at room temperature too. It's perfect for brunch with a side of fresh fruit or a light salad. Pair it with crusty bread or toast for a full meal. Try serving it with your favorite hot sauce for an extra flavor pop. {{image_2}} For a spring vegetable frittata, use fresh, bright veggies. Think asparagus, peas, and zucchini. These ingredients brighten the dish and add great flavor. For a winter root vegetable frittata, choose hearty options like sweet potatoes, carrots, or beets. They add warmth and comfort during colder months. Both variations keep your meals fresh and exciting. If you need gluten-free options, this recipe works well without any bread products. Just focus on the eggs and veggies. For vegan adaptations, swap the eggs with a chickpea flour mixture and use plant-based milk. You can also add nutritional yeast for a cheesy flavor without dairy. These options let everyone enjoy the frittata. For an Italian-inspired frittata, add sun-dried tomatoes, olives, and Italian herbs like oregano and thyme. This gives a rich and savory taste. If you want Mediterranean variations, mix in feta cheese, artichokes, and spinach. This combo creates a fresh, tangy flavor that transports you to a sunny terrace. Feel free to explore these ideas and make the frittata your own. For the full recipe, check out the ingredients and instructions provided. To store leftovers, let the frittata cool first. Then, slice it into pieces. Place them in an airtight container. This keeps it fresh for up to four days. For best quality, cover the frittata with plastic wrap before sealing the container. You can freeze the frittata before or after baking. If you freeze it before baking, wrap it tightly in plastic wrap and then foil. This way, you can bake it straight from the freezer. If you freeze it after baking, let it cool completely. Then, slice it and store it in an airtight container. Reheat it by thawing in the fridge overnight. Warm it in the oven at 350°F (175°C) for about 20 minutes. The frittata stays tasty for about three to four days in the fridge. If you freeze it, the shelf life extends to about two to three months. For the best flavor, try to eat it within a month. Enjoy your Oven Baked Frittata straight from the oven or from the fridge. It's always a great choice! You can tell if the frittata is done by looking at its top. It should be set and slightly golden at the edges. The center should not jiggle when you shake the pan. If you're still unsure, use a toothpick test. Insert a toothpick in the center. If it comes out clean, your frittata is ready! Yes, you can make a frittata in advance. This dish is great for meal prep. Just bake it, let it cool, and slice it. Store the slices in an airtight container. Keep it in the fridge for up to four days. If you want to enjoy it later, you can also freeze it. Wrap each slice in plastic wrap and place them in a freezer bag. No worries! You can easily swap out ingredients in this recipe. If you lack bell peppers, try zucchini or mushrooms. For cheese, you can use any type you have on hand. If you don’t have fresh herbs, dried ones can work too. Just use less, as dried herbs are stronger. Adjust the recipe based on what you have available to create your perfect frittata! In this blog post, we covered how to make a delicious frittata. We listed essential and optional ingredients, explained the tools you'll need, and provided clear steps for preparation and baking. We shared tips for perfecting texture and boosting flavor, including variations for different tastes and dietary needs. Lastly, we discussed storage tips to keep your frittata fresh. Remember, this dish is flexible and fun to make. Experiment with your favorite ingredients and enjoy the process!

Oven Baked Frittata Flavorful and Easy Recipe

Looking for a quick, tasty meal? Try my easy oven-baked frittata! Packed with eggs, cheese, and your favorite veggies, it’s

To make this bourbon peach cobbler, gather these simple ingredients: - 4 cups fresh peaches, sliced (about 6-8 peaches) - 1 cup granulated sugar - 2 tablespoons lemon juice - 1 teaspoon vanilla extract - 1 teaspoon ground cinnamon - 1 ½ cups all-purpose flour - 1 cup milk - ½ cup unsalted butter, melted - 1 teaspoon baking powder - ½ teaspoon salt - 1 tablespoon brown sugar (for topping) - Vanilla ice cream (for serving, optional) Choosing the right peaches is key for this dessert. Look for peaches that are firm but slightly soft. The skin should have a rich color, often yellow or red. Smell the fruit; it should have a sweet aroma. Avoid peaches with bruises or dark spots. If they are hard, leave them out to ripen. Ripe peaches will have a more intense flavor, which makes a big difference in your cobbler. Each ingredient plays a special role in this dessert. Fresh peaches add sweetness and texture. Granulated sugar enhances the fruit's flavor and helps it caramelize. Lemon juice adds brightness, balancing the sweetness. Vanilla extract brings warmth, while cinnamon offers a hint of spice. The flour, milk, and butter create a soft, cake-like batter. Baking powder makes it rise, giving your cobbler a delightful texture. Finally, brown sugar on top creates a sweet crust as it bakes. These ingredients work together to make a tasty dish you’ll love. Start by washing your peaches. Use fresh, ripe peaches for the best taste. Slice about 6 to 8 peaches. You need 4 cups total. Remove the pits and cut them into thin slices. Place the slices in a large bowl. Add 1 cup of granulated sugar, 2 tablespoons of lemon juice, 1 teaspoon of vanilla extract, and 1 teaspoon of ground cinnamon. Toss the peaches gently. Let them sit for about 10 minutes. This helps the peaches release their sweet juices. While the peaches sit, you can make the batter. In another bowl, mix 1 ½ cups of all-purpose flour with 1 cup of milk. Add ½ cup of melted unsalted butter, 1 teaspoon of baking powder, and ½ teaspoon of salt. Whisk it all together until smooth. The batter should be a little thick. This will hold the peaches well when baked. Preheat your oven to 350°F (175°C). Grease a 9x13 inch baking dish with butter or non-stick spray. Pour the batter into the dish, spreading it evenly. Carefully spoon the peach mixture over the batter. Make sure to include all the juices. Do not stir; the batter will rise around the peaches. Sprinkle 1 tablespoon of brown sugar on top for a sweet crust. Bake for 45 to 50 minutes. The top should be golden brown. A toothpick should come out clean when inserted into the batter. Enjoy the warm dessert. For an extra treat, serve it with vanilla ice cream. For the full recipe, check the section above. To make the best bourbon peach cobbler, focus on balancing sweet and tart. Fresh peaches bring natural sweetness, so add lemon juice to brighten the flavor. Use just enough sugar to enhance the peaches, but not too much to mask their taste. This balance keeps your cobbler fresh and vibrant. Serve your cobbler warm for the best experience. It pairs well with vanilla ice cream; the cold ice cream melts into the warm cobbler. For a touch of flair, drizzle some extra peach juice on top. A sprig of mint adds a lovely color and freshness, making your dish look fancy. Avoid using overripe peaches, as they can turn mushy in the oven. Also, don’t stir the batter and peaches together. This keeps the batter light and fluffy while baking. Lastly, watch your baking time. Overbaking can dry out the cobbler, so check it a few minutes early. Follow these tips for a perfect dessert every time. For the full recipe, check the section above. {{image_2}} You can change the flavor by adding other fruits. Berries, like blueberries or raspberries, work great. Apples or pears can also add a sweet touch. Mix peaches with these fruits for a fun twist. You can combine two or more fruits for more depth and taste. Just keep the ratios similar to the peach amount in the full recipe. This way, you get a balance of flavors and sweetness. If you want a stronger bourbon taste, you can increase the amount. Instead of one tablespoon, try two. This will make the dessert richer and more aromatic. To lessen the bourbon taste, you can cut back to one teaspoon. You can also use bourbon-flavored extracts for a lighter touch. Experiment to find the right balance that suits your taste. To make this dessert vegan, swap the milk with almond or soy milk. Use vegan butter in place of regular butter. For gluten-free options, you can use gluten-free flour blends. Make sure to check the labels for baking powder that is gluten-free. These simple swaps keep the dessert delicious while meeting dietary needs. You don't lose any flavor, just gain more options! To store leftover bourbon peach cobbler, let it cool first. Cover it with plastic wrap or foil. Place it in the fridge. It will stay fresh for about three to four days. Make sure to keep it airtight. This helps maintain its flavor and texture. When you're ready to enjoy your cobbler again, preheat your oven to 350°F (175°C). Place the cobbler in an oven-safe dish. Cover it with foil to keep it moist. Heat for about 15-20 minutes. If you like a crispy top, remove the foil for the last five minutes. You can also microwave individual portions for quick servings. Just heat for about 30 seconds. You can freeze bourbon peach cobbler for later. First, let it cool completely. Cut it into portions for easier thawing. Wrap each piece in plastic wrap, then in foil. Place these in a freezer-safe bag. It will keep well for up to three months. When you're ready to eat, thaw it in the fridge overnight. Reheat it in the oven for the best taste. For the full recipe, check out the section above. I recommend using a smooth bourbon, like Maker's Mark or Buffalo Trace. These brands add a rich flavor without being too strong. You want a bourbon that enhances the sweetness of the peaches. A high-quality bourbon makes a more delicious cobbler. You don’t need to spend a lot, but good ingredients matter. Yes, you can use canned peaches if fresh ones are not available. Just make sure to drain them well to avoid too much liquid. Canned peaches work well, but fresh ones give a better flavor and texture. If you want the best taste, pick fresh peaches when they are in season. You can store leftover cobbler in the fridge for about 3-4 days. Make sure to cover it tightly with plastic wrap or foil. For longer storage, freeze it for up to 3 months. Just thaw it in the fridge before you reheat. Enjoy it warm for the best experience. Check out the Full Recipe for more details. Making Bourbon Peach Cobbler is simple and fun. You learned about key ingredients, step-by-step prep, and baking tips. I shared ways to switch things up with different fruits or dietary needs. Remember to store leftovers correctly for later. Stick to these tips to enjoy a tasty treat every time! Now, go ahead and impress your friends with your flavorful creation. Happy baking!

Bourbon Peach Cobbler Simple and Delicious Dessert

Craving a dessert that’s both simple and full of flavor? Look no further! This Bourbon Peach Cobbler is your new
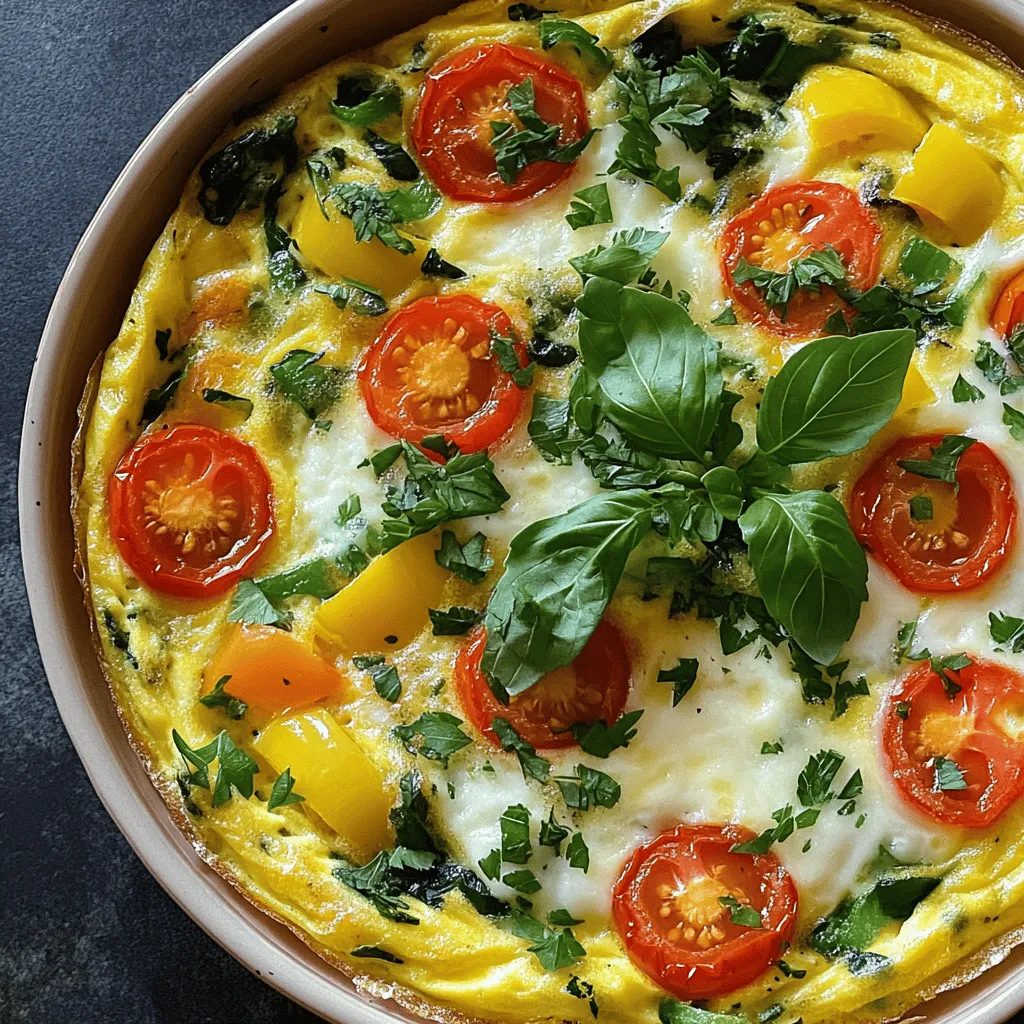
- 6 large eggs - 1 cup fresh spinach, chopped - 1/2 cup feta cheese, crumbled - 1/4 cup onion, finely chopped - 1/4 cup bell pepper, diced (any color) - 1 garlic clove, minced - 1/4 cup milk - 2 tablespoons olive oil - Salt and pepper to taste - Fresh dill or parsley for garnish (optional) I love using fresh ingredients for my Spinach and Feta Frittata. The eggs create a fluffy base, and the spinach adds a vibrant green color. Feta cheese gives it a creamy texture and salty flavor. For extra crunch and taste, I add onion and bell pepper. They soften nicely when sautéed and complement the eggs well. A touch of garlic brings warmth and depth. Don’t forget the milk! It makes the eggs rich and smooth. Seasoning with salt and pepper enhances all the flavors. You can also use fresh dill or parsley to make it look pretty on the plate. This recipe is easy and quick. You can find the full recipe for my Spinach and Feta Frittata above. Enjoy making this delicious breakfast! - Preheat your oven to 375°F (190°C). - Heat 2 tablespoons of olive oil in a large, oven-safe skillet over medium heat. - Sauté 1/4 cup of finely chopped onion and 1/4 cup of diced bell pepper until softened. - Add 1 minced garlic clove and 1 cup of chopped spinach; cook until wilted. - In a medium bowl, whisk 6 large eggs and 1/4 cup of milk; pour over the sautéed vegetables. - Sprinkle 1/2 cup of crumbled feta cheese on top, reduce heat, and cook for about 5 minutes before transferring to the oven. Follow the [Full Recipe] for more detailed steps and tips. To make your frittata fluffy, whisk the eggs well. This helps to trap air and adds lightness. After mixing, let the egg mix rest for a bit. Next, let the edges set before baking. This creates a perfect base. I love to serve my frittata with a side salad. The fresh greens add a nice crunch. You can also garnish with herbs like dill or parsley. This adds color and a burst of flavor. One mistake is overcooking the vegetables before adding the eggs. This can make them mushy and ruin the frittata's texture. Another mistake is not allowing the frittata to rest before slicing. Letting it sit for a few minutes helps the slices hold together. For the full recipe, check out the Spinach and Feta Frittata. {{image_2}} You can change up the cheese in your frittata. Try goat cheese for a tangy taste. Cheddar adds a nice sharpness. You can also include more veggies. Mushrooms, zucchini, or tomatoes work great. They add color and flavor. Want to enhance the flavor? Use fresh herbs like basil or oregano. They add a lovely aroma. You can also sprinkle in spices. Paprika gives a nice kick and depth. Experiment with different herbs and spices to find your favorite mix. If you need a gluten-free option, check your labels. Ensure all ingredients are certified gluten-free. For a dairy-free version, swap regular milk for non-dairy milk. Almond or oat milk works well. These swaps keep the dish tasty while meeting dietary needs. For the [Full Recipe], you can find all the key details. Storing your spinach and feta frittata properly keeps it fresh and tasty. Store in an airtight container in the refrigerator for up to 3 days. This keeps it safe to eat and maintains its great flavor. When ready to eat, just pull it out and enjoy! Want to save some for later? Freeze individual slices wrapped in plastic for up to 2 months. This is a smart way to have a quick breakfast ready. Just remember to label your slices with the date. Reheat in the oven or microwave until warmed through. If using the oven, set it to 350°F (175°C) and bake for about 10 minutes. For the microwave, heat for about 1-2 minutes on high. Enjoy your frittata just like when it was fresh! Yes, but it may affect the creaminess of the texture. Milk adds a smooth richness to the dish. If you want a lighter frittata, you can leave it out. However, using milk helps make the eggs fluffy and tender. It should be puffed and set in the middle; a toothpick should come out clean. This shows that the eggs are fully cooked. Keep an eye on the edges, too. They should be golden brown. Yes, the frittata can be prepared and baked in advance, then reheated before serving. You can slice it and store it in the fridge. Just warm it up in the oven for the best taste. For the full recipe, check the earlier section. This frittata recipe is simple and packed with flavor. You can mix in your favorite veggies and cheese for a personal twist. Remember to whisk the eggs well to get a fluffy result. Serve it warm and enjoy a healthy meal at any time. With proper storage, leftover frittata stays fresh for days. Now, you can create a delicious dish that adds joy to your table. Get cooking and share your tasty frittata with friends and family!

Spinach and Feta Frittata Flavorful Breakfast Delight

Start your day right with a Spinach and Feta Frittata! This flavorful breakfast delight packs a punch of nutrition and

To make the best peach sorbet, you need just a few simple ingredients: - 4 ripe peaches, pitted and diced - 1 cup granulated sugar - 1 cup water - 1 tablespoon lemon juice - 1/2 teaspoon vanilla extract (optional) - Pinch of salt These ingredients come together to create a refreshing and sweet treat. The ripe peaches give the sorbet its lovely flavor and color. If you cannot find fresh peaches, you can use frozen peaches. Just let them thaw a bit before blending. Canned peaches can work too, but choose those packed in juice, not syrup. This choice keeps the flavor bright and fresh. You can add fun flavors to your sorbet. Try using: - Fresh mint for a minty twist - A splash of orange juice for citrus notes - A dash of cinnamon for warmth These extra flavors can make your peach sorbet even more exciting. Each option enhances the natural sweetness of the peaches. For the full recipe, you can refer to the Peachy Dream Sorbet recipe. To make peach sorbet, start with ripe peaches. Choose peaches that smell sweet and feel soft. This makes a tasty sorbet. Begin by pitting and dicing four ripe peaches. Place them in a blender. Next, you will make simple syrup. Combine one cup of water and one cup of sugar in a medium saucepan. Heat it over medium heat. Stir until the sugar dissolves completely. After that, remove the saucepan from heat and let it cool. This syrup adds sweetness to the sorbet. While the syrup cools, blend the peaches until smooth. Add one tablespoon of lemon juice, a pinch of salt, and vanilla extract if you like. Blend until it is well mixed. Once the syrup is cool, add it to the peach mixture. Blend again to combine everything well. Making simple syrup is easy. Just remember these tips: - Use equal parts sugar and water for the best taste. - Heat the mixture on medium heat, not high. This helps avoid burning. - Stir often until the sugar fully dissolves. - Let it cool completely before adding it to your fruit. This syrup is a key part of your peach sorbet. It makes sure your sorbet is sweet and smooth. To get a smooth texture, follow these tips: - Blend the peaches in small batches if your blender is full. This helps it blend evenly. - Use a tamper if your blender has one. This helps push the peaches down for a better blend. - Blend until there are no lumps. A smooth mixture helps your sorbet freeze better. Once you have that smooth blend, it’s time to freeze it. Pour the mixture into a shallow dish and freeze. Stirring every 30 minutes helps break up ice crystals. This keeps your sorbet light and fluffy. You can find the full recipe detailed above for your perfect peach sorbet. To get the best texture in your peach sorbet, follow these tips. First, use ripe peaches. They add natural sweetness and a smooth taste. Blend the peaches until they are very smooth. This helps make the sorbet creamy. After blending, freeze your mixture in a shallow dish. This allows it to freeze evenly. Every 30 minutes, use a fork to scrape the mixture. This breaks up any ice crystals. Keep scraping until it looks fluffy. This process takes about 2-3 hours. Sometimes, sorbet can become too hard. If this happens, let it sit at room temperature for a few minutes. This makes scooping easier. If the sorbet is too icy, you may not have mixed it enough. Make sure to scrape the mixture every half hour. If your sorbet tastes too sweet, add a bit more lemon juice. This gives it a nice balance. Take notes for next time so you can adjust the flavors to your liking. When serving your peach sorbet, make it look pretty! Use chilled bowls for a nice touch. Garnish with a fresh peach slice or mint leaves. This adds color and a hint of flavor. You can also pair the sorbet with cookies or cake. It goes well with shortbread or pound cake. For a fun twist, serve it in a cone or a fruit cup. Enjoy your peach sorbet with friends and family for a refreshing treat! For the full recipe, check out the Peachy Dream Sorbet section above. {{image_2}} To make a vegan peach sorbet, simply replace the sugar with agave nectar. This swap keeps the sorbet plant-based. Use the same amount of agave as sugar. Blend ripe peaches with agave and lemon juice to keep the flavor bright. The texture remains smooth and creamy. You still follow the same steps in the full recipe. You can add herbs to your peach sorbet for a unique twist. Basil or mint works well with peach. Start by making a simple syrup with sugar and water. Add chopped herbs to the syrup while it heats. Let it steep for about 15 minutes. Strain the herbs out before mixing it with pureed peaches. This adds freshness and depth to your sorbet. Peach sorbet is delicious on its own, but you can mix it with other fruits. Try combining peaches with berries like strawberries or blueberries. The vibrant colors and flavors complement each other well. You can also mix peaches with mango for a tropical vibe. Just blend the fruits together in equal parts and follow the same steps as in the full recipe. This way, you create exciting new flavors that everyone will love! To keep your peach sorbet fresh, use a shallow dish. This helps it freeze evenly. Make sure your freezer is set to a low temperature. Avoid opening the door too often. Each time you open the door, warm air gets in. This can cause ice crystals to form on your sorbet. If you have leftover peach sorbet, cover it tightly. Use plastic wrap or a lid. Store it in the freezer. This keeps it from picking up other smells. When you want to eat some, take it out and let it sit at room temperature for a few minutes. This makes it easier to scoop. Homemade peach sorbet can last about two weeks in the freezer. After that, it may lose flavor and texture. To enjoy it at its best, eat it within that time. If you want to keep it longer, consider using an airtight container. For best results, make small batches. This way, you can enjoy fresh sorbet each time you crave it. For the full recipe, check out the Peachy Dream Sorbet. Yes, you can use frozen peaches. They work well in sorbet. Just make sure to thaw them a bit before blending. This helps achieve a smooth texture. Frozen peaches can also add a chill factor to your sorbet. If you use them, skip the ice scraping step. Your sorbet will still be creamy and tasty. Making peach sorbet without an ice cream maker is easy. First, prepare your peach mixture as usual. Then, pour it into a shallow dish and freeze. Every 30 minutes, take it out and scrape it with a fork. This helps break up ice crystals. Repeat this for about 2 to 3 hours. You will have a lovely, fluffy sorbet. Sorbet is fruit-based and dairy-free. It uses water and sugar, making it lighter. Ice cream has cream or milk, making it richer and creamier. Sorbet offers a refreshing taste, while ice cream gives a creamy feel. Both are delicious but serve different cravings. - Additional questions about Peach Sorbet: - Can I add other fruits to my peach sorbet? - What can I do if my sorbet is too hard? - How can I sweeten my peach sorbet without sugar? We covered everything you need to know about making peach sorbet. We reviewed ingredients, preparation, and tips for the best texture. You learned about substitutions and flavor options for your sorbet. We also shared variations like vegan recipes and fruit combinations. Finally, we discussed storage tips and answered common questions. Making peach sorbet is fun and rewarding. With the right methods, you can enjoy this refreshing treat anytime. So, gather your ingredients and start blending!

Peach Sorbet Delightful and Easy Frozen Treat

Are you ready to cool down with a refreshing treat? Peach sorbet is easy to make and perfect for hot

To make these tasty Zucchini Bread Breakfast Cookies, you will need: - 1 cup grated zucchini (about 1 medium zucchini, excess moisture squeezed out) - 1 cup rolled oats - 1 cup whole wheat flour - 1/2 teaspoon baking soda - 1/2 teaspoon baking powder - 1 teaspoon ground cinnamon - 1/4 teaspoon nutmeg - 1/2 cup brown sugar (packed) - 1/4 cup honey or maple syrup - 1/4 cup unsweetened applesauce - 1/4 cup vegetable oil or melted coconut oil - 1 egg (or flax egg for a vegan option) - 1/2 cup chopped nuts (walnuts or pecans) - 1/2 cup chocolate chips (optional) - Pinch of salt You can swap some ingredients if you need to. Here are a few ideas: - Flour: Use almond flour or gluten-free flour for a gluten-free option. - Sweeteners: Swap brown sugar for coconut sugar or use agave syrup. - Oil: Use applesauce instead of oil for a lighter cookie. - Nuts: Pecans can replace walnuts, or you can skip nuts entirely. - Egg: To make it vegan, a flax egg works great. Mix 1 tablespoon of ground flaxseed with 2.5 tablespoons of water. Let it sit for 5 minutes to thicken. Each cookie has about: - Calories: 150 - Protein: 2g - Fat: 6g - Carbohydrates: 23g - Fiber: 2g - Sugar: 5g This nutritional breakdown may vary based on the specific brands or substitutions you use. For a heartier breakfast, consider pairing these cookies with yogurt or fruit. You can find the Full Recipe to get started right away! First, gather all your ingredients. You need grated zucchini, oats, and whole wheat flour. Also, get baking soda, baking powder, cinnamon, nutmeg, brown sugar, honey or maple syrup, applesauce, oil, and an egg. Don’t forget nuts and chocolate chips if you like them! 1. Preheat your oven to 350°F (175°C). 2. Line a baking sheet with parchment paper. This makes cleanup easy. 3. In a big bowl, mix the grated zucchini, oats, flour, baking soda, and other dry items. Make sure to stir well to evenly combine. Now, let’s make the dough! In another bowl, whisk the wet ingredients together. Mix the brown sugar, honey, applesauce, oil, and egg until the mix is smooth. Next, pour the wet mix into the dry bowl. Stir just until they blend. Be careful not to overmix, or the cookies may be tough. Then, fold in the nuts and chocolate chips gently. Using a cookie scoop or spoon, drop spoonfuls of dough onto your baking sheet. Leave about 2 inches between each scoop. Flatten the dough slightly with the back of your spoon. This helps them bake evenly since they won’t spread much. Bake for 12-15 minutes. Keep an eye on them until the edges turn golden brown. To check if your cookies are ready, look for golden edges. You can also gently press the center. If it springs back, they are done. Let them cool on the baking sheet for a few minutes. Then, move them to a wire rack to cool completely. Enjoy your warm Zucchini Bread Breakfast Cookies! For the full recipe, refer to the earlier section. To get the best texture in your cookies, moisture control is key. Grate your zucchini finely and squeeze out extra water. This step keeps your cookies from being too wet. You want a slight chew, not a mushy bite. Use rolled oats for a hearty feel. They add a nice chewiness, which works well with the soft zucchini. If you want a crunch, add nuts or seeds. They create a lovely contrast in texture. Zucchini bread breakfast cookies are so flexible! You can change the flavor easily. Add spices like ginger or cardamom for a warm taste. If you love sweetness, mix in dried fruits like raisins or cranberries. For a nutty flavor, try almond extract instead of vanilla. You can also swap out half the sugar for mashed banana for a unique twist. Each change makes the cookies different yet delicious! One common mistake is overmixing the dough. This can make your cookies tough. Mix just until combined; lumps are okay! Another mistake is not using fresh spices. Old spices lose their punch, so always check freshness. Also, don’t skip the cooling step. Letting them cool on a rack helps keep them from becoming soggy. Finally, remember to space your cookies well on the baking sheet. They need room to spread slightly! For the full recipe, click here. {{image_2}} You can easily make these cookies vegan. Instead of using an egg, swap it for a flax egg. To make a flax egg, mix 1 tablespoon of ground flaxseed with 2.5 tablespoons of water. Let it sit for about 5 minutes until it thickens. This simple change keeps the texture and taste great! If you need a gluten-free option, you can use gluten-free flour. Substitute the whole wheat flour with a gluten-free blend. Make sure your oats are certified gluten-free, as some oats may contain gluten. This small change helps everyone enjoy these tasty cookies! Get creative with flavor! You can add different spices like ginger or cloves for a warm twist. Dried fruits like raisins or cranberries also work well. If you like nuts, try almonds or pistachios instead of walnuts. Want a chocolate boost? Use dark chocolate chips or cocoa powder. These fun swaps keep the recipe fresh and exciting! For a complete guide on how to make these cookies, check out the Full Recipe. Store your Zucchini Bread Breakfast Cookies in an airtight container. This keeps them fresh and moist. Place a piece of parchment paper between layers if you stack them. This helps to prevent sticking. Keep the container in a cool, dry place. They stay good for about 5 days at room temperature. Freezing these cookies is a great option for longer storage. Allow the cookies to cool completely before freezing. Place them in a single layer on a baking sheet. Freeze for about 1 hour until firm. Once frozen, transfer the cookies to a freezer-safe bag or container. Don't forget to label with the date! They can last up to 3 months in the freezer. To enjoy your frozen cookies, let them thaw at room temperature. This takes about 30 minutes. For a warm treat, preheat your oven to 350°F (175°C). Place the cookies on a baking sheet. Heat for about 5-10 minutes until warm. You can also use the microwave. Heat a cookie for about 15-20 seconds. Enjoy them fresh out of the oven or microwave! For the full recipe, check out the complete baking instructions. You can make these cookies healthier in a few simple ways. First, swap out the brown sugar for coconut sugar or use less sugar overall. You can also add more grated zucchini. This boosts nutrition and keeps them moist. Use whole grain flour instead of white flour for better fiber. Consider adding seeds like chia or flax for extra nutrients. You can replace the vegetable oil with unsweetened applesauce. This cut down on fat while keeping the cookies soft. Finally, use dark chocolate chips for added antioxidants. Yes, you can use yellow squash in place of zucchini. Both have similar textures and moisture levels. The flavor might be a bit different, but it will still taste great. Grate the yellow squash just like you would the zucchini. Make sure to squeeze out any extra moisture for the best results. These cookies are best served warm or at room temperature. I like to place them on a rustic wooden platter for a nice look. You can also sprinkle a little cinnamon on top for extra flavor. They pair well with coffee or tea. For a fun twist, serve them alongside yogurt or fresh fruit. For the full recipe, check out the details above. Enjoy! In this blog post, we explored the key ingredients for zucchini bread breakfast cookies and their substitutes. I shared easy, step-by-step instructions for making them, along with tips to perfect texture and flavor. We also discussed different variations, from vegan options to gluten-free recipes. Finally, I provided storage advice to keep your cookies fresh. These cookies are tasty and fun to make. With practice, you can create your own version! Enjoy baking!

Zucchini Bread Breakfast Cookies Perfect for Mornings

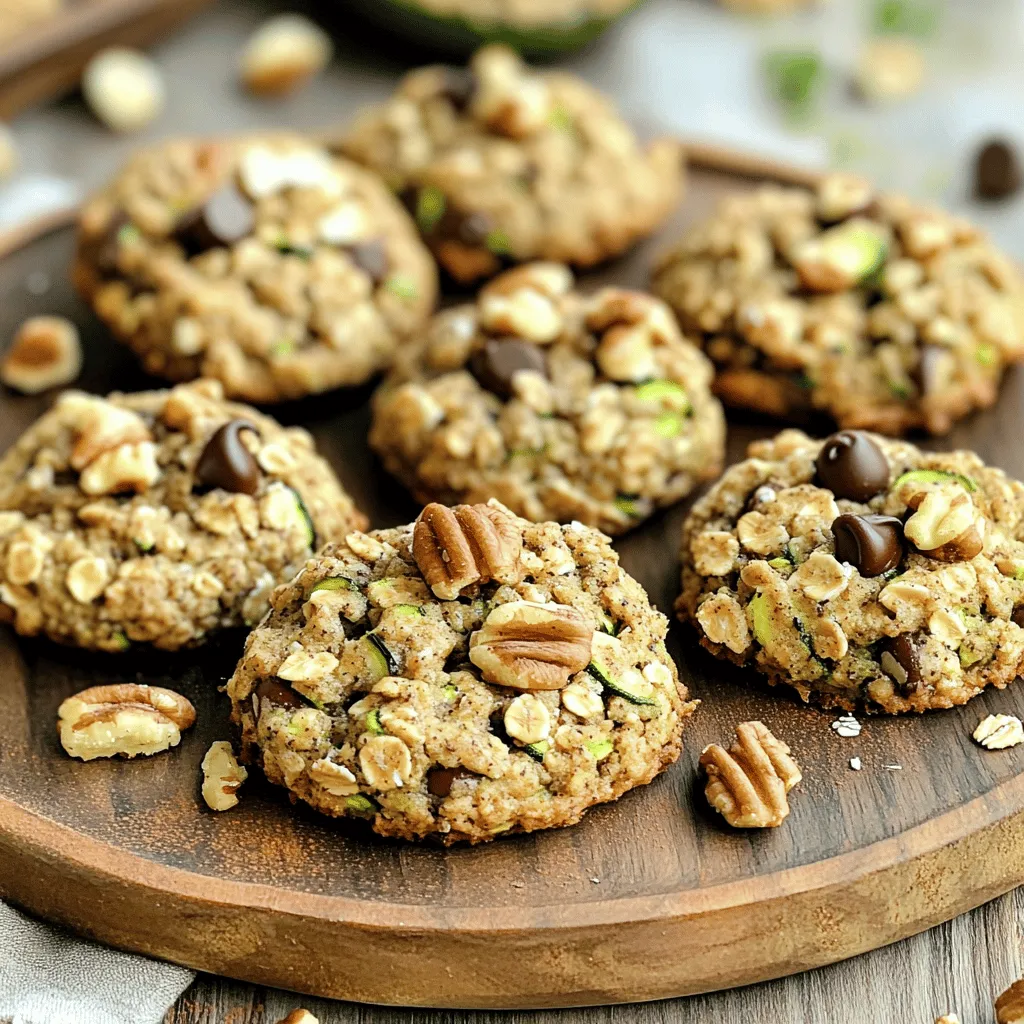
Are you ready to transform your mornings? Zucchini Bread Breakfast Cookies combine the comforting taste of zucchini bread with the

To make tasty zucchini fritters, you need fresh ingredients. Here’s what you will need: - 2 medium zucchinis, grated - 1 teaspoon salt - 1/2 cup all-purpose flour (or almond flour for gluten-free) - 1/4 cup grated Parmesan cheese (or nutritional yeast for vegan) - 1/4 cup fresh parsley, chopped - 2 green onions, finely sliced - 2 large eggs (or flax eggs for vegan) - 1/2 teaspoon garlic powder - 1/2 teaspoon black pepper - 1/4 teaspoon cayenne pepper (optional for heat) - 2 tablespoons olive oil (for frying) These ingredients come together to create a crispy delight! Grating the zucchini helps release moisture, making them easier to cook. Using fresh herbs adds flavor and makes the fritters pop. You can also swap the cheese for nutritional yeast if you prefer a vegan option. I love how you can adjust the spices to fit your taste. The cayenne pepper gives a nice kick, but you can skip it if you want mild fritters. For the full recipe, just check the recipe section! With these ingredients, you are ready to cook up some delicious zucchini fritters. To start, you need to prepare the zucchini. First, grate the zucchinis using a box grater. You want to get about two medium zucchinis. After grating, sprinkle salt over them. The salt helps draw out moisture. Let them sit for 10 to 15 minutes. Next, you will need to remove excess moisture. Take a clean kitchen towel and place the grated zucchini in it. Twist the towel to wring out as much liquid as you can. This step is key to keeping your fritters crispy. Now, let’s move on to mixing the ingredients. In a large mixing bowl, combine the dry ingredients. This includes ½ cup of flour, ¼ cup of Parmesan cheese, chopped parsley, green onions, garlic powder, black pepper, and cayenne pepper if you like heat. After mixing the dry stuff, add the grated zucchini and two large eggs to the bowl. Stir everything together until well combined. You want a nice, even mixture that holds together. It’s time to cook! First, heat a large skillet over medium heat. Add about two tablespoons of olive oil. This will help the fritters crisp up nicely. Using a tablespoon, drop dollops of the zucchini mixture into the skillet. Form and flatten each fritter slightly. Be careful not to overcrowd the pan. Cook for about 3 to 4 minutes on each side until they turn golden brown and crispy. Once cooked, remove the fritters from the skillet and place them on a paper towel. This absorbs any extra oil. Repeat this process until all the mixture is used. Enjoy your delicious Healthy Zucchini Fritters! For the full recipe, check out the instructions above. To make your zucchini fritters sing, use these spices: - 1 teaspoon garlic powder - 1/4 teaspoon cayenne pepper (for a touch of heat) - Fresh herbs like parsley or dill You can also add ingredients that boost nutrition. Try mixing in spinach or grated carrots. Both add color and extra vitamins. Perfect crispiness is key. Here’s how to get it right: - Always squeeze out excess moisture from the zucchini. This step keeps your fritters from getting soggy. - Use a hot skillet and enough olive oil. This helps fry them quickly and crisply. Cook them in small batches. Overcrowding the pan leads to steaming, not frying. For a tasty meal, serve your fritters warm with these dips: - Greek yogurt or a tangy yogurt sauce - A simple tomato salsa For garnishing, sprinkle chopped parsley on top. It adds a nice pop of color and flavor. You can find the full recipe above to enjoy these delicious fritters! {{image_2}} If you want to make gluten-free zucchini fritters, using almond flour works great. Almond flour has a nice texture and adds a subtle nutty flavor. Just replace the all-purpose flour with almond flour in the recipe. This change keeps your fritters crispy without gluten. You will still enjoy the same delicious taste. For a vegan version, you can swap eggs and cheese. Use flax eggs instead of regular eggs. To make one flax egg, mix one tablespoon of ground flaxseed with three tablespoons of water. Let it sit for a few minutes to thicken. For cheese, substitute grated Parmesan with nutritional yeast. This gives you a cheesy taste without dairy. These swaps maintain the fritters' flavor while fitting a vegan diet. You can also add different vegetables or herbs to change the flavor. Try mixing in grated carrots or bell peppers for extra color and taste. Fresh herbs like basil or dill can enhance the flavor too. You can even add spices like cumin or paprika for a kick. These variations let you customize the fritters to your liking. Each twist brings a new and exciting taste. For the full recipe, check out the instructions above. To keep your zucchini fritters fresh, let them cool completely. This step is key. Once cooled, place them in an airtight container. I like to use glass containers, as they keep the fritters crisp. If you stack them, put parchment paper between layers. This prevents them from sticking together. Store them in the fridge for up to three days. When it’s time to enjoy leftovers, you want them crispy again. The oven works best for this. Preheat your oven to 375°F (190°C). Place the fritters on a baking sheet lined with parchment paper. Bake for about 10-15 minutes, turning halfway through. This method helps regain their crunchy texture. You can also reheat them in a skillet over medium-low heat. Add a bit of oil to keep them crisp. If you want to keep fritters longer, freezing is a great option. Start by letting them cool completely. Then, place them on a baking sheet in a single layer. Freeze for about 1-2 hours until firm. After that, transfer them to a freezer-safe bag. Remove as much air as possible. They can last up to three months in the freezer. When ready to cook, thaw them in the fridge overnight. Then reheat using the oven or skillet method for the best results. Enjoy your healthy zucchini fritters any time! For the full recipe, check out the detailed instructions. To make your fritters crispy, focus on moisture removal. After grating the zucchini, sprinkle it with salt. This draws out water. Let it sit for 10 to 15 minutes. Then, wring it out in a kitchen towel. You want the zucchini as dry as possible. Use a hot skillet with enough oil. Fry each fritter until golden brown, about 3 to 4 minutes per side. Flip only once for a great crust. Yes! Many vegetables work well. Try carrots, sweet potatoes, or squash. You can mix them with zucchini for added flavor. Grate or finely chop any veggies you choose. Just remember to remove excess moisture, like with zucchini. Look for a golden brown color. The fritters should feel firm and crispy on the outside. You can also test by gently pressing them. If they hold their shape, they are done. If they feel soft, give them more time in the skillet. These fritters are healthy and packed with nutrients. Each serving has about 150 calories. They offer vitamins A and C from zucchini. The parmesan cheese adds protein and calcium. Using whole ingredients makes them a smart choice for snacks or meals. For the full recipe, check out the details above. In this post, we explored how to make delicious zucchini fritters. We covered each step, from preparing zucchini to frying. I shared tips for better flavor and perfect crispiness. You learned about variations for gluten-free and vegan diets. Storing tips ensure your fritters stay fresh. Remember, you can mix in your favorite veggies for fun twists. These fritters are tasty and healthy; they fit many diets. Enjoy making these fritters with family and friends!

Healthy Zucchini Fritters Tasty and Crispy Delight

Are you craving a delicious snack that’s both healthy and satisfying? Look no further! These Healthy Zucchini Fritters are a

Older posts
Newer posts
← Previous Page1 … Page24 Page25 Page26 … Page64 Next →

dsad

© 2025 flavorsprint • Built with GeneratePress

Our Policies

  • Copyright Policy
  • Cookie Policy
  • GDPR Policy
  • Privacy Policy
  • Disclaimer
  • Terms Of Use

More Information

  • Home
  • About
  • Contact
  • Appetizers
  • Dessert
  • Dinner
  • Drinks
©2025, flavorsprint About Back To Top