Skip to content
DisclaimerTerms Of UseGDPR PolicyCookie Policy

flavorsprint

  • Home
  • Drinks
  • Appetizers
  • Dinner
  • Dessert
  • About
  • Contact
  • Privacy Policy
DisclaimerTerms Of UseGDPR PolicyCookie Policy

Lillian

To make crispy pickled okra, you will need: - 1 pound fresh okra, trimmed - 1 cup apple cider vinegar - 1 cup water - 2 tablespoons sea salt - 1 tablespoon sugar - 1 teaspoon mustard seeds - 1 teaspoon black peppercorns - 1 teaspoon red pepper flakes (optional for spice) - 4 garlic cloves, peeled - 1 bay leaf When choosing okra, look for bright green pods. They should feel firm and not bend easily. Avoid pods that have dark spots or are soft. Fresh okra should have a smooth surface and be no longer than 4 inches. The smaller the okra, the more tender it will be. For this recipe, apple cider vinegar works best. I recommend brands like Bragg or Spectrum. These brands are known for their quality and flavor. You can also try white wine vinegar if you want a milder taste. Just ensure it is good quality for the best results. To make crispy pickled okra, start with fresh okra. Rinse one pound of okra under cold water. Make sure to wash each pod well. After rinsing, trim the stems from the okra. Pat them dry using a kitchen towel. Removing moisture helps keep the okra crunchy. Next, we’ll create the pickling brine. In a medium pot, mix one cup of apple cider vinegar, one cup of water, two tablespoons of sea salt, and one tablespoon of sugar. Add one teaspoon of mustard seeds, one teaspoon of black peppercorns, and one teaspoon of red pepper flakes if you like spice. Heat this mixture over medium heat. Stir it until the salt and sugar dissolve. Once it boils, remove the pot from heat and let it cool for about 10 minutes. While the brine cools, take sterilized glass jars and pack the dried okra tightly inside. Place one garlic clove and one bay leaf in each jar. After the brine has cooled, carefully pour it over the okra until it is fully submerged. Seal the jars with lids. Let them sit at room temperature for about 2 hours for initial pickling. After that, transfer the jars to the fridge. Allow them to pickle for at least 24 hours. For the best flavor, wait up to a week before enjoying. You can find the full recipe above for more details. To get crispy pickled okra, start with fresh okra. Look for firm, bright green pods. Less moisture helps keep them crunchy. Rinse the okra well and dry them completely. Use a kitchen towel to remove any water. The brine must cool before pouring over the okra. This step helps maintain their bite. For extra crunch, try adding a bit of calcium chloride. It acts as a crunch enhancer during pickling. Avoid using old or limp okra. They will not hold their shape or crunch. Don’t skip the drying step. Excess moisture can lead to soggy okra. Also, remember to let the brine cool down. Pouring hot brine on okra can make them soft. Lastly, don't rush the pickling time. For best flavor and texture, wait at least 24 hours. Using the right tools can make pickling easier. You'll need sterilized glass jars to keep your okra safe. A large pot is essential for boiling the brine. Use a ladle to pour the brine into the jars without spilling. A kitchen funnel can help too. It makes pouring mess-free. A pair of tongs can help you place the okra in jars. These tools will help you enjoy a smooth pickling process. For the full recipe, check the details above. {{image_2}} You can add fun spices to your pickled okra. Try using dill seeds for a fresh taste. If you like heat, add more red pepper flakes. For a unique twist, include coriander seeds or a pinch of turmeric. Each spice changes the flavor. Experiment to find your favorite! Crispy pickled okra is great on its own, but you can get creative! Serve it as a snack with dips like ranch or hummus. Chop it up and mix it into salads for a crunchy kick. You can also add it to tacos and sandwiches for more texture. Try using it as a garnish for soups or stews, too. The options are endless! While apple cider vinegar works well, you can try other vinegars. White vinegar gives a sharper taste, while rice vinegar offers a milder flavor. For a tangy twist, use red wine vinegar. Each type of vinegar creates a different taste. Feel free to mix and match to find what you love best. For the full recipe, check out the instructions above! To store your crispy pickled okra, keep it in glass jars. Make sure the jars are tightly sealed. Place them in the fridge to keep them fresh. The cold will help maintain their crunch and flavor. Always use clean utensils when serving. This prevents bacteria from spoiling your pickles. Homemade pickled okra will stay fresh for about 2 to 3 months in the fridge. If you notice any mold or bad smell, throw it away. Always check before eating. After opening, remember to keep the jars sealed. This helps keep them safe and tasty for longer. Freezing pickled okra is not the best idea. It can change the texture and make it mushy. Instead, refrigerate your pickles for the best taste. If you want to keep them longer, you can can them. This way, they can last up to a year. Always refer to the Full Recipe for more tips on storage. Pickled okra gets better with time. You should wait at least 24 hours before tasting. For the best flavor, let it pickle for up to a week. This waiting allows the spices to blend well. The longer it sits, the more flavor it packs in. After a week, it reaches peak taste. Using frozen okra is not the best choice for pickling. Frozen okra often becomes mushy when thawed. Pickling requires fresh okra to maintain that perfect crunch. Fresh okra holds its shape and texture better during pickling. So, stick with fresh okra for the best results. You can find crispy pickled okra at local grocery stores or farmers markets. Many specialty shops also carry this tasty treat. Check the canned goods aisle or the pickle section. You might also find it at health food stores. If you can't find it, making your own is easy! Follow the Full Recipe for your own batch. In this guide, we explored how to make pickled okra. We covered the key ingredients, tips for selecting okra, and recommended vinegar brands. I shared easy steps for preparing, brining, and packing the okra. Lastly, we looked at storage tips and answered common questions. Remember, perfect pickled okra comes from using fresh ingredients and avoiding simple mistakes. Try adding your favorite spices for new flavors. Enjoy your pickling journey!

Crispy Pickled Okra Perfect for Any Meal

If you love crunch and flavor, you’ll adore crispy pickled okra! This dish adds zing to any meal, with its

- Grated zucchini - All-purpose flour - Unsweetened cocoa powder - Baking soda and baking powder - Salt - Vanilla extract - Brown sugar - Eggs - Vegetable oil - Chocolate chips These ingredients make the best zucchini brownies. The grated zucchini adds moisture and a soft texture. You will not taste the zucchini, but it makes these brownies healthier. All-purpose flour gives structure, while cocoa powder brings rich chocolate flavor. Baking soda and baking powder help the brownies rise. Salt enhances the sweetness. Vanilla extract adds a lovely aroma. Brown sugar gives a deep sweetness and chewiness. Eggs bind everything together, and vegetable oil keeps the brownies moist. Chocolate chips add extra chocolate goodness. You can use semi-sweet or dark chocolate chips for a richer taste. - Extra chocolate chips for topping - Powdered sugar for dusting - Vanilla ice cream for serving Optional ingredients can make your brownies even better. Extra chocolate chips on top give a nice look and taste. Dusting with powdered sugar makes the brownies look fancy. Serving with vanilla ice cream is a delightful touch, especially when the brownies are warm. For the full recipe, check out the details above. - Preheat your oven to 350°F (175°C). - Grease a 9x9-inch baking pan or line it with parchment paper. - In a medium bowl, combine: - 1 cup all-purpose flour - ½ cup unsweetened cocoa powder - 1 teaspoon baking soda - ½ teaspoon baking powder - ½ teaspoon salt Whisk these dry ingredients together until mixed well. Set aside. - In a large bowl, mix: - 1 cup brown sugar, packed - ½ cup vegetable oil Whisk until smooth. Add 2 large eggs, one at a time, mixing well after each. Stir in 1 teaspoon vanilla extract. - Fold in 1 ½ cups grated zucchini until mixed. - Gradually add the dry mix to the wet mix. Stir gently until just combined. A few lumps are okay; don’t over mix. - Gently fold in ½ cup chocolate chips. - Pour the batter into the prepared pan. Smooth the top with a spatula. You can sprinkle extra chocolate chips on top if you like. - Bake for 25-30 minutes. Check with a toothpick; it should come out with a few moist crumbs, but not wet batter. - Let the brownies cool in the pan for about 10 minutes. Then, transfer them to a wire rack to cool fully. For the full recipe, see above. - Checking for doneness: Use a toothpick. Insert it in the center. If it comes out with a few moist crumbs, your brownies are ready. Don’t wait until it’s completely clean. - Avoiding overmixing: Mix just until combined. If you see a few lumps, that’s okay. Overmixing makes brownies tough. - Grating and squeezing out moisture: Grate the zucchini using a box grater. Use a clean kitchen towel to squeeze out extra water. This step helps keep your brownies from being too wet. - Presentation ideas and accompaniments: Cut the brownies into neat squares. Place them on a decorative plate. You can dust them with powdered sugar. For a tasty twist, serve with a scoop of vanilla ice cream. Enjoy the contrast of warm brownies and cold ice cream! {{image_2}} You can make these brownies even better for you. Try using whole wheat flour. Whole wheat adds fiber and nutrients. It makes the brownies a bit denser, but still tasty. You can also reduce the sugar. Cut it down by a third for less sweetness. The natural flavor of zucchini shines through, making it a great choice. Want to make your brownies pop? Add nuts or spices. Chopped walnuts or pecans add crunch. A pinch of cinnamon or nutmeg gives warmth and depth. You can also switch up the chocolate. Use dark chocolate for a richer taste. Or try white chocolate for a sweeter twist. Both options elevate the flavor. If you prefer a vegan recipe, I have you covered. Substitute eggs with flaxseed meal or applesauce. Mix one tablespoon of flaxseed with three tablespoons of water. Let it sit for a few minutes to thicken. You can also use vegan chocolate chips. They melt well and taste great. This option makes the brownies plant-based while keeping them rich and delicious. For the full recipe, check out the detailed steps. To keep your brownies fresh, store them in an airtight container. You can place a piece of wax paper between layers. This prevents them from sticking together. Keep them at room temperature for up to three days. If you want them to last longer, place them in the fridge. They will stay good for about a week. Freezing brownies is easy and great for later use. First, let them cool completely. Then, cut them into squares. Wrap each piece tightly in plastic wrap. Place the wrapped brownies in a freezer bag or container. They can stay frozen for up to three months. When you’re ready to eat, just thaw them in the fridge overnight. To enjoy warm brownies, you can reheat them. The best way is to use a microwave. Heat for about 10-15 seconds. Check if they are warm enough. You can also use an oven. Preheat it to 350°F (175°C). Place the brownies on a baking sheet and heat for 5-10 minutes. This will keep them soft and delicious. Can I use frozen zucchini? Yes, you can use frozen zucchini. Just thaw it first and squeeze out excess water. This helps keep your brownies from becoming too wet. Frozen zucchini works well if you do not have fresh on hand. How do I know when brownies are done? You can check for doneness by inserting a toothpick into the center. If it comes out with a few moist crumbs, your brownies are ready. If it has wet batter, bake for a few more minutes. Are zucchini brownies healthy? Zucchini brownies can be healthier than regular brownies. They have added fiber and moisture from the zucchini. You can also make them healthier by reducing sugar or using whole wheat flour. Can I substitute other ingredients? Yes, you can! You can use whole wheat flour instead of all-purpose flour. You can also swap brown sugar for coconut sugar. Each change can alter the taste a bit, so have fun trying different versions. How can I make them fudgier or cake-like? For fudgier brownies, use less flour and add an extra egg. For a cake-like texture, use a bit more flour and baking powder. You can adjust the baking time too; just keep an eye on them. What's the origin of brownies? Brownies first appeared in the United States in the late 1800s. They are a mix between cakes and cookies. The exact origin is unclear, but many believe they were created in a Boston hotel. Can I make these without eggs? Yes! You can replace eggs with mashed bananas or unsweetened applesauce. Use ¼ cup for each egg. This keeps the texture moist and adds a bit of flavor. This blog post shared how to make tasty zucchini brownies. You learned the ingredients, preparation steps, and baking tips. I shared ways to customize your brownies for different tastes and diets. Proper storage and reheating tips help keep your brownies fresh and delicious. Baking can be fun and rewarding. Remember, each batch is a chance to learn. Enjoy your zucchini brownies!

Easy Zucchini Brownies Deliciously Simple Recipe

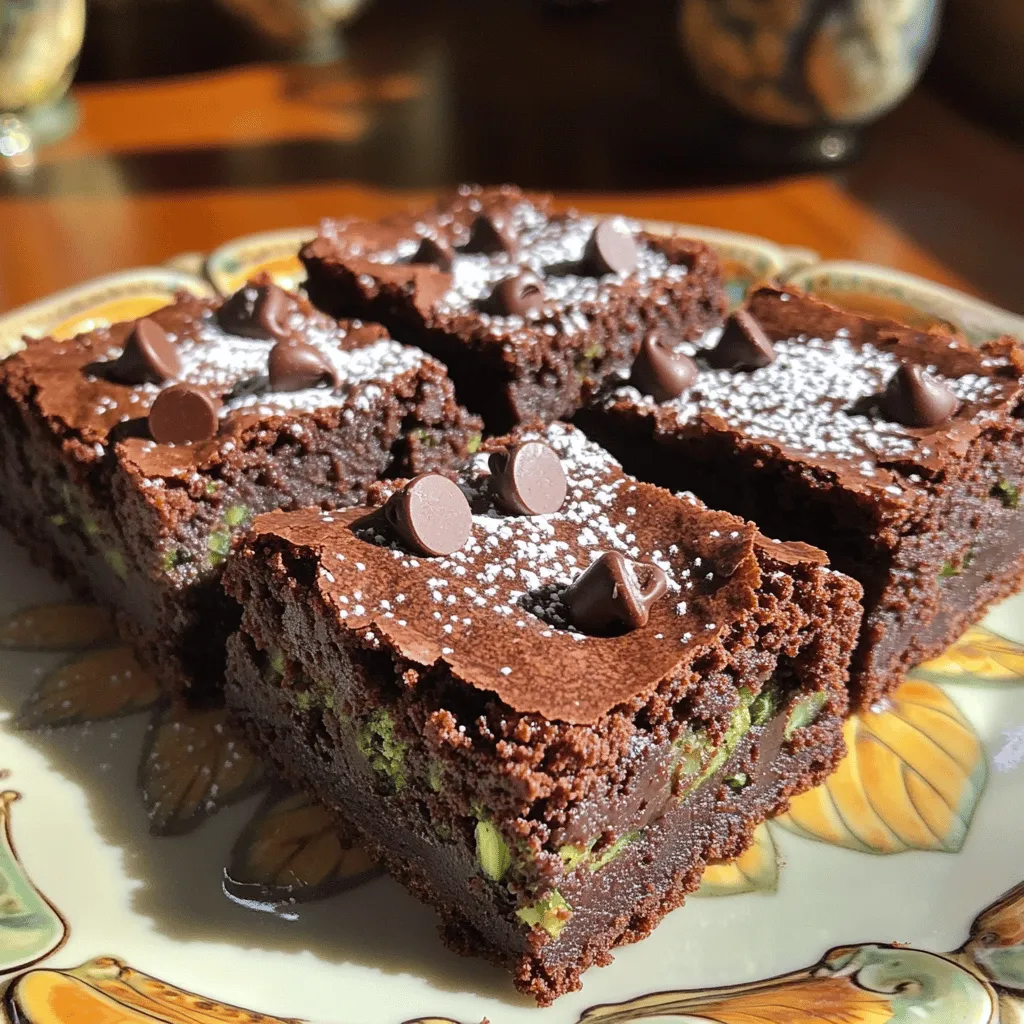
If you love brownies but want a healthier twist, you’re in for a treat! These Easy Zucchini Brownies are deliciously

To make your Family-Style Zucchini Casserole, gather these ingredients: - 4 medium zucchinis, sliced - 1 cup cherry tomatoes, halved - 1 onion, finely chopped - 3 cloves garlic, minced - 1 cup shredded mozzarella cheese - 1 cup ricotta cheese - 1/2 cup grated Parmesan cheese - 1 egg - 1 teaspoon dried oregano - 1 teaspoon dried basil - Salt and pepper to taste - 2 tablespoons olive oil - 1 cup breadcrumbs (preferably whole wheat) - Fresh basil leaves for garnish This list gives you the perfect mix for a tasty dish. When selecting zucchini, look for firm, shiny ones. Check for: - A vibrant green color - No soft spots or blemishes - A small size, as smaller zucchinis are sweeter Fresh zucchini will help make your casserole bright and flavorful. Want to spice things up? Consider adding: - Red pepper flakes for heat - Chopped bell peppers for sweetness - Spinach for a healthy boost - Mushrooms for an earthy taste These options can enhance your casserole and make it even more delicious. For the full recipe, check out the details above. Start by gathering all your ingredients. You’ll need zucchinis, tomatoes, onion, garlic, and cheeses. Slice the zucchinis into thin rounds. Cut the cherry tomatoes in half for even cooking. Finely chop the onion and mince the garlic. This step is important for flavor. Heat olive oil in a skillet over medium heat. Sauté the onion until it is soft and clear. Then, add garlic and cook for one more minute. Finally, stir in the sliced zucchinis. Cook until they soften, about five to seven minutes. Season with salt, pepper, dried oregano, and dried basil. Let this mixture cool slightly. Now, let’s build our casserole. Grease a 9x13-inch baking dish with olive oil. In a bowl, mix ricotta cheese, egg, and half of the mozzarella. This will be your creamy layer. Start by adding half of the sautéed zucchini to the dish. Spoon half of the ricotta mixture over the zucchini. Then, add half of the halved cherry tomatoes. Repeat this step with the remaining zucchini, ricotta, and tomatoes. Don’t forget to sprinkle the rest of the mozzarella and Parmesan on top. This will create a nice, cheesy crust. Preheat your oven to 375°F (190°C). Once your casserole is layered, it's time to bake it. In a small bowl, mix breadcrumbs with a drizzle of olive oil. Sprinkle this mixture evenly over the top. This adds a crispy texture. Bake the casserole for 30-35 minutes. It’s done when the top is golden and bubbly. When it’s ready, take it out and let it sit for five minutes. This rest time helps the layers set. Now, you can serve it family-style right in the baking dish. Enjoy this cheesy, delicious dish with your family! For the full recipe, check out the details above. To get the best texture, choose medium zucchinis. They have the right water content. Slice them evenly to ensure they cook at the same rate. Sauté the zucchini just enough to soften it. Overcooking will make it mushy. When mixing the cheeses, make sure they blend well. A smooth mixture will help hold the casserole together. Serve the casserole straight from the baking dish for a cozy feel. Garnish with fresh basil leaves for color and flavor. Pair it with a simple salad or crusty bread. This adds freshness and crunch to your meal. You can also serve it alongside grilled chicken or fish. This makes it a complete dinner that everyone will enjoy. One common mistake is not seasoning well. Zucchini needs a good amount of salt and pepper. Avoid overcrowding the pan when sautéing. This can lead to steaming instead of browning. Also, don’t skip the breadcrumbs on top. They give a nice crunch. Finally, let the casserole sit for a few minutes before serving. This helps it set, making it easier to cut. {{image_2}} You can easily make this dish vegetarian. Just skip the egg, and use a plant-based cheese. Vegan ricotta works well here. For added flavor, try nutritional yeast. It gives a cheesy taste without dairy. Also, you can add extra veggies like bell peppers or mushrooms. These add more texture and taste. To make this dish gluten-free, swap the breadcrumbs for gluten-free ones. You can also use crushed cornflakes or almond flour. These options give a nice crunch. Ensure that your cheeses are gluten-free, as some brands may add gluten. This way, everyone can enjoy the casserole. If you want more protein, add cooked chicken, turkey, or beans. Shredded chicken mixes well with the zucchini. You can also try black beans or chickpeas for a vegetarian option. Just layer them in with the zucchini for a hearty meal. These additions make the dish filling and satisfying. For the full recipe, check out the details above. To keep your zucchini casserole fresh, let it cool. Then, cover it tightly with plastic wrap or transfer it to an airtight container. Store it in the fridge for up to three days. This way, you can enjoy those tasty leftovers later! When you’re ready to eat your casserole again, preheat your oven to 350°F (175°C). Place the casserole in the oven for about 15-20 minutes. This warms it through and keeps the top crisp. You can also microwave individual portions for quicker reheating. Just cover them with a damp paper towel to retain moisture. If you want to prepare meals ahead, freezing works well. First, let the casserole cool completely. Cut it into individual portions and wrap each piece tightly in plastic wrap, then place them in a freezer-safe bag. You can freeze it for up to three months. When you’re ready to eat, thaw it overnight in the fridge before reheating. Enjoy your delicious family-style zucchini casserole anytime! For the full recipe, check the section above. Yes, you can use frozen zucchini. However, fresh zucchini gives the best taste. If you use frozen, thaw it first and drain any excess water. This keeps the casserole from becoming too watery. I love using mozzarella for its meltiness. It pairs well with ricotta, giving a creamy texture. Parmesan adds a nice flavor on top. Combining these cheeses creates a rich, cheesy goodness in every bite. You can prepare the casserole a day in advance. Just layer all the ingredients in the dish, cover it, and store it in the fridge. When you’re ready, bake it straight from the fridge. This saves time on busy days and allows the flavors to blend. - Full Recipe: Cheesy Family-Style Zucchini Casserole 🥒 This blog post covered all you need to make a cheesy zucchini casserole. I shared tips on choosing fresh zucchini and using optional flavors. You learned step-by-step instructions for prepping, layering, and baking. The tips helped avoid common mistakes for perfect texture and serving ideas. We explored fun variations like vegetarian and gluten-free options. Finally, I included storage info and answered common questions. Enjoy making this easy and tasty dish for your family!

Family-Style Zucchini Casserole Flavorful and Simple

Are you ready to make a dish that brings your family together? This Family-Style Zucchini Casserole is both flavorful and

For a Brown Sugar Peach Cake, you need the following ingredients: - Ripe peaches (2 cups, peeled and diced) - Brown sugar (1 cup, packed) - Granulated sugar (½ cup) - Unsalted butter (½ cup, softened) - Large eggs (2) - Vanilla extract (1 teaspoon) - All-purpose flour (2 cups) - Baking powder (1 teaspoon) - Baking soda (1 teaspoon) - Salt (½ teaspoon) - Buttermilk (1 cup) - Ground cinnamon (1 teaspoon) - Nutmeg (½ teaspoon) - Optional: powdered sugar for dusting These ingredients create a lovely flavor profile. The ripe peaches bring sweetness, while the brown sugar adds deep caramel notes. The buttermilk ensures the cake stays moist and tender. Each bite will remind you of summer! If you want the full details on how to put this all together, check out the Full Recipe. - Preheat oven to 350°F (175°C). - Grease and flour a 9x13-inch cake pan. Start by preheating your oven. A warm oven helps the cake rise well. Next, grease the pan. Use butter or cooking spray to coat it. Then, add flour to the pan. This helps the cake come out easily after baking. - Cream together butter and sugars. - Add eggs and vanilla extract. In a large bowl, mix the softened butter with brown sugar and granulated sugar. You want it to be light and fluffy. This step adds air to the batter. Next, add the eggs one by one. Mix well after each egg. Finally, stir in the vanilla extract for great flavor. - Whisk dry ingredients together. - Alternate adding dry ingredients with buttermilk. In a separate bowl, whisk together the flour, baking powder, baking soda, salt, cinnamon, and nutmeg. This helps evenly mix the dry ingredients. Gradually add this mixture to the butter mix. Alternate with the buttermilk. Start and end with the flour mix. Stir until just combined to keep it light. - Fold in the diced peaches. - Pour batter into the pan and bake. Now, gently fold in the diced peaches. This adds sweet bites throughout the cake. Pour the batter into your prepared pan. Smooth the top with a spatula. Bake in the oven for 40-45 minutes. A toothpick should come out clean when the cake is done. Enjoy the wonderful smell filling your kitchen! To keep your Brown Sugar Peach Cake moist, start with ripe peaches. They add natural sweetness and juiciness. When you measure flour, spoon it into your measuring cup. This helps avoid too much flour, which can make the cake dry. For extra flavor, add ground cinnamon and nutmeg to the batter. These spices bring warmth and depth to the cake. If you want a pretty finish, dust the cake with powdered sugar before serving. It makes the cake look fancy! Use a large mixing bowl for easy stirring. A sturdy spatula works best for mixing the batter. For baking, I suggest a 9x13-inch pan. This size helps the cake bake evenly. This equipment will make your baking experience smoother and more fun. You can find the Full Recipe above. {{image_2}} You can change the fruit in this cake. Swap the peaches for berries or apples. Both options bring a fresh taste. Berries add tartness, while apples give a cozy flavor. You can also mix in nuts, like walnuts or pecans. Nuts add a nice crunch and a rich taste. If you need a gluten-free cake, use almond flour or a gluten-free flour blend. Almond flour makes the cake moist and rich. A gluten-free blend can work well too. Just make sure it has a good mix of flours. This way, your cake stays fluffy. Want to make this cake vegan? You can replace the eggs with flaxseed meal or applesauce. Use one tablespoon of flaxseed meal mixed with three tablespoons of water for each egg. Let it sit for a few minutes to thicken. If using applesauce, replace each egg with ¼ cup of unsweetened applesauce. Both options keep the cake light and tasty. For the full recipe, check out the detailed steps and ingredients above. To keep your Brown Sugar Peach Cake fresh, start by letting it cool completely. Once cooled, slice the cake into pieces. Use an airtight container to store the slices. This helps keep moisture in and prevents the cake from drying out. If you have a whole cake left, cover it with plastic wrap or foil. Store it in the fridge for up to five days. Freezing your cake is easy! First, wrap each slice in plastic wrap tightly. Then, place the wrapped slices in a freezer-safe bag. Be sure to label the bag with the date. You can freeze the cake for up to three months. When you want to enjoy it, remove a slice from the freezer. Let it thaw in the fridge overnight. If you want it warm, reheat it in the oven at 350°F for about 10 minutes. Enjoy your delicious cake any time! To ripen peaches fast, place them in a brown paper bag. This bag traps the ethylene gas, which speeds up ripening. Make sure to close the bag loosely. Check the peaches daily. Once they feel soft, they are ready to use. You can tell the cake is done by checking a few things. First, use a toothpick. Insert it in the center; it should come out clean. The edges will also pull away from the pan slightly. The top should look golden brown and spring back when you touch it. Yes, you can make the batter ahead of time! Just mix it as usual and cover it tightly. Store it in the fridge for up to 24 hours. When you are ready to bake, let it warm up for about 30 minutes before pouring it into the pan. This helps it bake evenly. For the full recipe, check back to ensure you follow each step correctly! This blog post covered how to make a peach cake. We explored the ingredients, step-by-step instructions, and tips for a moist outcome. I shared variations to try, like using different fruits or making it gluten-free. Plus, I provided storage info to keep your cake fresh and tasty. With these details, you can bake a delicious peach cake that everyone will love. Enjoy the process and the sweet rewards!

Brown Sugar Peach Cake Delightfully Sweet Recipe

If you’re craving a delicious dessert, this Brown Sugar Peach Cake is a must-try! With ripe peaches and a hint

To make a tasty lemon blueberry zucchini bread, you need a few key items. Here is a list of the main ingredients: - 1 cup grated zucchini (about 1 medium zucchini) - 1 cup fresh blueberries (you can use frozen, just thaw and drain) - 1/2 cup granulated sugar - 1/2 cup brown sugar - 2 large eggs - 1/3 cup vegetable oil - 1/4 cup plain yogurt (or applesauce for a lighter option) - 1 teaspoon vanilla extract - 1 teaspoon lemon zest - 1 tablespoon lemon juice - 1 1/2 cups all-purpose flour - 1 teaspoon baking soda - 1/2 teaspoon baking powder - 1/2 teaspoon salt - 1 teaspoon ground cinnamon These ingredients blend well to create a sweet and moist bread. The zucchini adds moisture, while the blueberries bring bursts of flavor. You can change up the recipe with some fun add-ins. Try adding: - 1/2 cup chopped walnuts or pecans for added crunch - A sprinkle of poppy seeds for extra texture - A dash of nutmeg for a warm spice flavor If you want to make swaps, use coconut oil instead of vegetable oil. You can also use almond milk in place of yogurt for a dairy-free option. Accurate measuring is key to great baking. Here are some tips: - Use a kitchen scale for precise ingredient weights. - Spoon flour into your measuring cup, then level it off with a knife to avoid packing it down. - For brown sugar, pack it tightly into your measuring cup to get the right amount. By following these tips, you will ensure your lemon blueberry zucchini bread turns out perfectly every time. For the complete instructions, check out the Full Recipe. Start by gathering all your ingredients. You will need: - 1 cup grated zucchini - 1 cup fresh blueberries - 1/2 cup granulated sugar - 1/2 cup brown sugar - 2 large eggs - 1/3 cup vegetable oil - 1/4 cup plain yogurt - 1 teaspoon vanilla extract - 1 teaspoon lemon zest - 1 tablespoon lemon juice - 1 1/2 cups all-purpose flour - 1 teaspoon baking soda - 1/2 teaspoon baking powder - 1/2 teaspoon salt - 1 teaspoon ground cinnamon - Optional: 1/2 cup chopped walnuts or pecans Grate the zucchini first. This helps it mix well. Measure out all your dry and wet ingredients. In a large bowl, mix the grated zucchini, sugars, eggs, oil, yogurt, vanilla, lemon zest, and lemon juice. Whisk them well until smooth. In another bowl, combine your flour, baking soda, baking powder, salt, and cinnamon. Stir these dry ingredients together. Now, add the dry mix to the wet mix. Stir gently until they just combine. Be careful not to overmix; this keeps your bread light and fluffy. Finally, fold in the blueberries and nuts, if you’re using them. Pour the batter into a greased 9x5-inch loaf pan. Smooth the top with a spatula. Bake your bread at 350°F (175°C) for 55 to 65 minutes. You’ll know it’s done when a toothpick comes out clean. Once baked, let the bread cool in the pan for about 10 minutes. Then, move it to a wire rack to cool fully. For the full recipe, check the detailed instructions. To get the best moisture in your bread, start with the zucchini. Grate it finely and squeeze out excess water. This keeps the bread from getting soggy. Use plain yogurt or applesauce to add moistness without too much fat. These ingredients also help keep your bread light and fluffy. One mistake is overmixing the batter. Mix just until the dry ingredients are combined. Overmixing can make the bread tough. Also, don’t skip the baking soda and baking powder. They help the bread rise. Lastly, make sure to measure your ingredients correctly. Too much flour can dry out the bread. To bake evenly, always preheat your oven. This helps the bread cook through. Use a light-colored loaf pan for even heat distribution. If your pan is dark, it can burn the edges. Place the pan in the center of the oven, away from the walls. This ensures good airflow around the bread. For more details, check the Full Recipe. {{image_2}} You can easily make this bread gluten-free. Just swap the all-purpose flour for a gluten-free blend. Look for a mix that includes xanthan gum for structure. This change keeps the bread light and fluffy. The taste remains delicious! To make this recipe vegan, replace eggs with flax eggs. Mix one tablespoon of ground flaxseed with three tablespoons of water. Let it sit for five minutes until it thickens. You can also use almond milk instead of yogurt. This keeps the bread moist and tasty. Want to add a twist? Try adding nuts for a crunch. Chopped walnuts or pecans work great. You could also include a hint of ginger for a spicy kick. Another idea is to fold in some lemon zest for extra zing. You can explore endless flavor options with this recipe. Check out the Full Recipe for more ideas! To keep your lemon blueberry zucchini bread fresh, store it in an airtight container. Place it at room temperature for up to three days. If you live in a warm area, you can refrigerate it to extend its life. Just remember that refrigeration may change the bread's texture slightly. If you want to save some for later, freezing is a great option. First, let the bread cool completely. Then, wrap it tightly in plastic wrap. Place the wrapped bread in a freezer bag or container. This method can keep it fresh for up to three months. When you're ready to enjoy it, just thaw it in the fridge overnight. When you want to eat the bread again, reheating can help restore its lovely texture. Preheat your oven to 350°F (175°C). Unwrap the bread and place it on a baking sheet. Heat for about 10-15 minutes, or until warm. For a softer crust, you can wrap it in foil while reheating. This will help keep it moist and delicious. Yes, you can use frozen blueberries. Just thaw and drain them before adding. This step helps prevent extra moisture, which can make your bread soggy. Frozen blueberries might burst more during mixing, but they still taste great! To check if your bread is done, insert a toothpick into the center. If it comes out clean or with a few crumbs, your bread is ready. The top should be golden brown. If the toothpick has wet batter, bake for a few more minutes. If you don’t have zucchini, try grated carrots or apples. Both options add moisture and sweetness. You can even use mashed bananas for a fun twist. Just keep the same amount for a balanced texture. For more ideas, check the Full Recipe. This blog post covered how to make tasty lemon blueberry zucchini bread. We looked at the key ingredients, along with options and tips for baking success. Each step ensures your bread is moist and tasty. We also explored variations for gluten-free and vegan diets. Lastly, I shared storage tips for keeping your bread fresh. Baking can be fun and rewarding. Don’t be afraid to try new flavors. Happy baking!

Lemon Blueberry Zucchini Bread Delicious and Easy Recipe

Are you ready to enjoy a fresh twist on a classic treat? In this blog, I’ll share my easy recipe

- Whole Brie cheese - Fig jam - Fresh rosemary - Olive oil The star of this dish is whole Brie cheese. It has a creamy texture that melts beautifully. Fig jam adds a sweet touch. The blend of these two makes a perfect match. Fresh rosemary gives a nice herbal note. Olive oil helps the flavors shine through. - Sea salt - Black pepper - Fresh baguette - Assorted nuts Season with sea salt and black pepper to taste. These simple spices enhance the overall flavor. Fresh baguette is perfect for dipping into the melted cheese. It adds a crunchy contrast. You can also add assorted nuts like walnuts or pecans for some crunch. These nuts not only look nice but also add extra flavor. For the full recipe, check out the Decadent Baked Brie with Fig Jam. First, preheat your oven to 350°F (175°C). This step is key to getting the right melt on your Brie. Next, take the whole Brie cheese and place it on a parchment-lined baking sheet or an oven-safe dish. This will help with easy cleanup and make it look nice. Now it's time to add some flavor. In a small bowl, mix together 1 tablespoon of olive oil, 1 tablespoon of chopped fresh rosemary, 1/4 teaspoon of sea salt, and 1/4 teaspoon of black pepper. Brush this mixture evenly over the top of the Brie. This adds a lovely taste and aroma. After that, spoon 1/2 cup of fig jam generously over the Brie. Let some of it spill over the sides for a pretty presentation. Bake the Brie in the preheated oven for 15 to 20 minutes. Keep an eye on it. You want it to be soft and gooey but still hold its shape. If you bake it too long, it can lose that nice texture. Once it's done, carefully take it out and let it rest for about 5 minutes. This waiting time helps the cheese settle. Serve it warm with sliced fresh baguette and garnish with assorted nuts for that extra crunch. For the full recipe, check out the details above! To get the best baked Brie, use a temperature of 350°F (175°C). This heat allows the cheese to melt just right. Bake it for 15-20 minutes. Keep a close watch to catch it at its best. To avoid overbaking, check the Brie at the 15-minute mark. You want it soft and gooey but still firm. If it starts to bubble too much, take it out. Let it rest for 5 minutes before serving. This lets the cheese firm up slightly and makes it easier to slice. Pair your baked Brie with a fresh baguette. It adds a nice crunch and flavor contrast. You can also serve it with assorted nuts like walnuts or pecans. These give a lovely texture. For presentation, place the baked Brie on a wooden board. Add the baguette and nuts around it. This makes for a beautiful spread. You can even drizzle a bit of honey over the top for an extra touch. If you want to impress guests, serve it warm with a small spoon for the fig jam. For the full recipe, check the details above. {{image_2}} You can change the flavor of baked Brie by using different jams. Apricot jam offers a sweet and tangy taste. Raspberry jam brings a nice berry flavor. Both work great with the creamy Brie. You can also add toppings to enhance your baked Brie. Chopped nuts, like walnuts or pecans, add a crunchy texture. Dried fruits, such as cranberries or figs, bring a sweet bite. These toppings mix well with the cheese and jam. They create fun textures and flavors. For a unique twist, consider using different types of bread. Slices of sourdough or whole grain bread taste great with baked Brie. Crackers, like water crackers or rosemary crisps, also make excellent choices. You can get creative with your serving ideas, too. Arrange the baked Brie on a large platter with fruits and nuts. Add some olives or fresh herbs for color. This makes your dish look fancy and inviting. Consider serving it with a side of honey for extra sweetness. For the full recipe, check out the details above! To store leftover baked Brie with fig jam, let it cool first. Cooling helps keep the taste fresh. Wrap the Brie tightly in plastic wrap or foil. This keeps air out and prevents drying. Place it in an airtight container for extra protection. You can store your baked Brie in the fridge for up to three days. After that, it may lose its flavor and texture. Always check for any signs of spoilage before eating. When you want to enjoy the leftover baked Brie, reheating it properly is key. The best method is to use the oven. Preheat your oven to 350°F (175°C). Place the Brie on a baking sheet. Heat for about 10 minutes. You can also use a microwave. Just heat it for 15-20 seconds. Be careful not to overheat it, or it may become too soft. Enjoy your delicious baked Brie with fig jam warm again! For the complete dish, refer to the Full Recipe. Can I use a different type of cheese for this recipe? Yes, you can use other soft cheeses. Cream cheese or camembert work well. However, Brie has a unique flavor and texture that many love. How long does baked Brie stay fresh? Baked Brie tastes best fresh. You can keep leftovers in the fridge for 2-3 days. Store it in an airtight container to keep it fresh. Can I make this ahead of time? Yes, you can prepare the Brie, but bake it just before serving. This keeps the cheese creamy and warm. What to do if the Brie doesn't melt properly? If the Brie doesn't melt, it may be too cold. Always let it sit at room temperature for 30 minutes before baking. Why did the jam overflow? Jam may overflow if you add too much. Use about 1/2 cup of fig jam. Spoon it gently, letting some drip for a beautiful look. This blog post covered how to make delicious baked Brie. We explored key ingredients, step-by-step instructions, and tips for perfecting your dish. I shared variations to enhance flavors and creative serving ideas. We also discussed how to store leftovers and provided answers to common questions. Remember, baked Brie is easy and fun to make. Enjoy trying new flavors and impress your friends with your skills. Happy baking!

Irresistible Ingredient Baked Brie with Fig Jam Delight

Are you ready to impress your guests with a show-stopping appetizer? My Irresistible Ingredient Baked Brie with Fig Jam Delight

- 1 pound fresh okra, trimmed - 1 cup apple cider vinegar - 1 cup water - 1 cup granulated sugar - 3 cloves garlic, smashed - 1 tablespoon mustard seeds - 1 tablespoon coriander seeds - 1 teaspoon crushed red pepper flakes - 1 teaspoon salt - Fresh dill sprigs (for garnish, optional) To make sweet pickled okra, you need fresh okra. Look for bright green pods that are firm. This helps keep your pickles crunchy. You will also need apple cider vinegar. It gives a nice tangy flavor. Water is key for making the brine. Granulated sugar adds a sweet touch. Garlic adds depth to the flavor. You can smash the cloves to release more taste. Mustard seeds and coriander seeds give a nice spice mix. Crushed red pepper flakes add a hint of heat. Salt is crucial for balancing the flavors. Fresh dill sprigs are optional but add a lovely finish. They make the dish look pretty and add more flavor. For the full recipe, check out the section above. Enjoy your sweet pickled okra as a crunchy snack or a tasty side! 1. Wash and trim the okra: Start by rinsing the okra under cold water. This removes dirt and any chemicals. Trim the stems but leave the tips intact. This keeps the okra whole during pickling. 2. Prepare the brine mixture: In a medium saucepan, mix together 1 cup of apple cider vinegar, 1 cup of water, and 1 cup of granulated sugar. Add in 3 cloves of smashed garlic, 1 tablespoon of mustard seeds, 1 tablespoon of coriander seeds, 1 teaspoon of crushed red pepper flakes, and 1 teaspoon of salt. 3. Cool the brine: Bring the brine mixture to a gentle boil over medium heat. Stir until the sugar fully dissolves. Once it boils, remove it from heat. Let it cool for about 10-15 minutes. 1. Arrange the okra in jars: While the brine cools, prepare clean glass jars. If you have multiple jars, divide the okra evenly among them. Pack the okra upright to showcase their shape. 2. Add seasonings and dill: If you want extra flavor, add a sprig of fresh dill to each jar. This gives the pickled okra a wonderful taste and smell. 1. Pour brine over okra: Once the brine has cooled slightly, carefully pour it over the okra in the jars. Make sure the okra is fully submerged. Leave a little space at the top for expansion. 2. Storage instructions before refrigerating: Seal the jars with lids and let them cool to room temperature. After that, refrigerate for at least 24 hours. This waiting time lets the flavors meld together, resulting in a sweet and tangy treat. Enjoy your sweet pickled okra as a snack or a fun addition to meals! - Ensuring the perfect crunch: To keep your okra crunchy, do not overcook it in the brine. Boil the brine just until the sugar dissolves. After that, let it cool before pouring it over the okra. This keeps the texture firm and fresh. - Choosing the right okra: Select small, fresh okra pods. They should be bright green and firm. Avoid any that look bruised or wilted. Smaller pods tend to be more tender and less fibrous. - Flavor enhancements: You can add more flavor to your pickles. Try adding sliced jalapeños for spice, or fresh herbs like thyme or oregano to the brine. Experiment with different spices, like allspice or dill seeds, to make the recipe your own. - Creative ways to serve pickled okra: Enjoy pickled okra as a fun appetizer. Place them on a cheese board or serve with a tangy dip. They make a great garnish for cocktails, too. Imagine a spicy Bloody Mary with a delicious okra garnish! - Pairing options with meals: Pickled okra pairs well with rich dishes. Serve them alongside fried chicken or barbecue. They also add a nice crunch to salads or can be layered in a sandwich for added flavor and texture. For the complete recipe, check out the Full Recipe section. {{image_2}} To add heat to your sweet pickled okra, you can include crushed red pepper flakes. This will give your dish a nice kick. You might also try jalapeños or other hot peppers for more spice. Adjust the amount based on your heat preference. I suggest starting with half a teaspoon and tasting as you go. This way, you control the heat and keep the sweetness intact. If you want to change the sweetness, use less sugar or add more vinegar. You can even switch the apple cider vinegar for white vinegar or rice vinegar. Each type of vinegar offers a different flavor. Experiment with different ratios to find your ideal balance of sweet and sour. If you’re short on time, try a quick pickle method. Instead of letting the okra sit for 24 hours, you can use a hot brine. Heat the vinegar, sugar, and spices together, then pour it over the okra. Let it sit for just a few hours in the fridge. The flavors won't be as deep, but it’s a fast way to enjoy your pickled okra. Adjust the brine if you want a stronger taste. To keep your sweet pickled okra fresh, store it in the fridge. The cold helps maintain its crunchy texture and bright flavor. Make sure to place it in a clean, airtight jar. This will prevent any unwanted odors from mixing in. Pickled okra can last in the fridge for about 1 month. After that, the taste and texture may change. For the best experience, eat it within this time. If you want to keep your pickled okra longer, consider canning it. Canning creates a seal that helps preserve the okra. For this, you need to sterilize your jars and lids. Fill the jars with okra and brine, then process them in a water bath. Watch for signs of spoilage. If you see any mold, an off smell, or a bulging lid, discard it. Always trust your senses when it comes to food safety. Enjoy your sweet pickled okra as a crunchy snack or a tasty addition to meals! How long does pickled okra last in the fridge? Pickled okra lasts about 2 to 3 months in the fridge. The flavor gets better over time. Can I use frozen okra for pickling? I don’t recommend using frozen okra. Fresh okra gives the best crunch and flavor. What are the health benefits of okra? Okra is low in calories and high in fiber. It also contains vitamins C and K. Eating okra can help with digestion too. Where can I buy sweet pickled okra? You can find sweet pickled okra in grocery stores or farmers' markets. You can also make it at home using the full recipe. How to make pickled okra without sugar? You can use honey or stevia as a natural sweetener. Adjust the amount to taste. Can I use other vinegars for this recipe? Yes, you can use white vinegar or rice vinegar. Each will give a different taste, so feel free to experiment! You learned how to make sweet pickled okra step by step. We covered the ingredients, preparation, and storage tips. The recipe offers fun variations to suit your taste. Whether you like it spicy or sweet, there's an option for everyone. Remember, fresh ingredients and proper storage keep your pickles crunchy and tasty. Enjoy serving them in creative ways, and share your new skills with friends. Happy pickling!

Sweet Pickled Okra Crunchy and Flavorful Delight

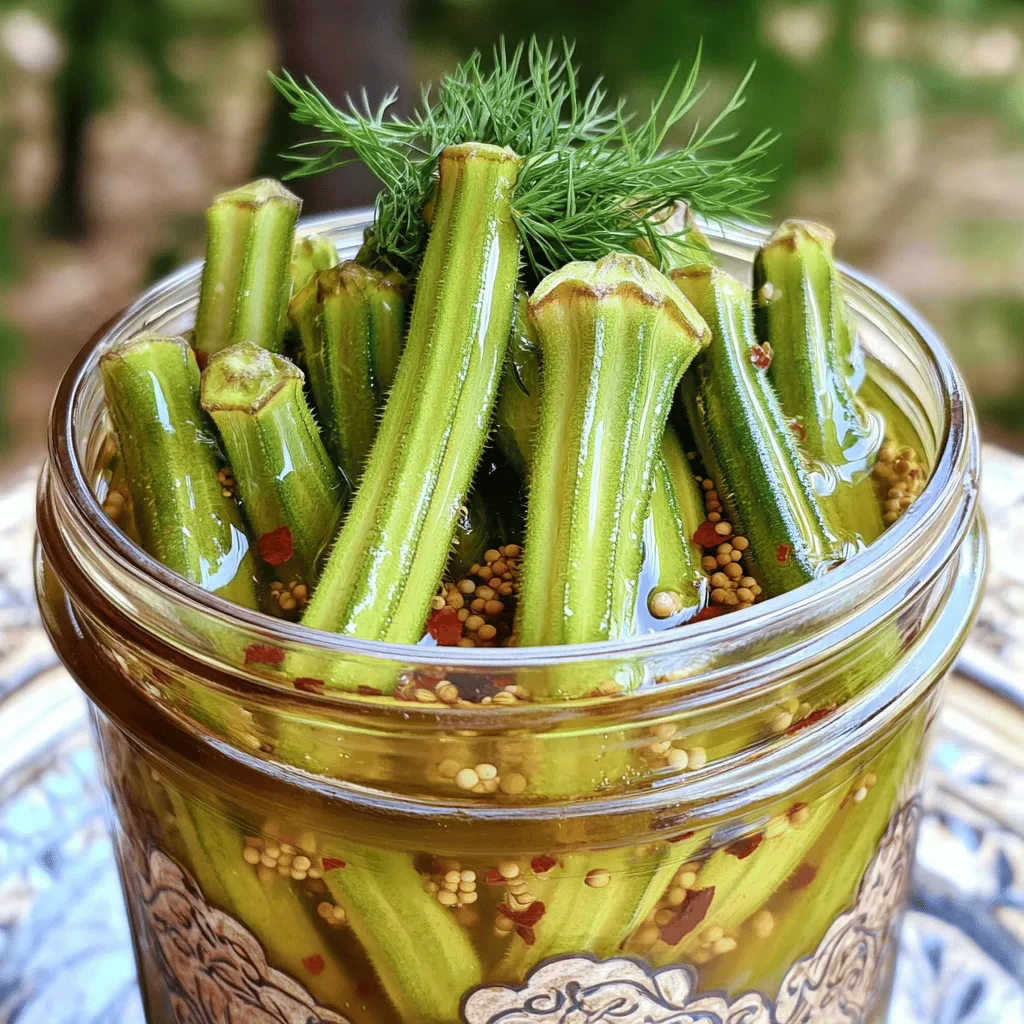
Looking for a tasty and crunchy snack? Sweet pickled okra packs a flavorful punch! Not only is it easy to

- 2 medium zucchinis, thinly sliced - 2 medium yellow squashes, thinly sliced - 1 medium onion, thinly sliced - 2 cups ricotta cheese - 1 cup shredded mozzarella cheese - 1/2 cup grated Parmesan cheese - 2 cloves garlic, minced - 1 teaspoon dried oregano - 1 teaspoon dried basil - Salt and pepper to taste - 2 tablespoons olive oil - Fresh basil leaves for garnish (optional) When you gather your ingredients, freshness is key. Look for firm zucchinis and squashes. The onion should be firm and free from soft spots. A good ricotta cheese makes a big difference in flavor. Each serving provides: - Calories: 280 - Protein: 15g - Carbohydrates: 20g - Fat: 15g - Fiber: 3g - Sugar: 3g This dish offers a nice balance of nutrients. The zucchini and squash add fiber, while the cheeses provide protein and calcium. If you can't find zucchini, try using eggplant or bell peppers. Swap ricotta with cottage cheese for a lighter option. If you prefer a vegan dish, use cashew cheese or tofu as a base. You can also use fresh herbs instead of dried ones for a brighter taste. You can find the full recipe for this delightful dish in the recipe section. Enjoy cooking! To start, wash the zucchinis and yellow squashes. Slice them thinly. A good knife helps with this. Next, slice the onion and mince the garlic. Heat your skillet over medium heat. Add the olive oil. Sauté the onion until it turns clear, about five minutes. Add the minced garlic and spice it up with salt, pepper, oregano, and basil. Stir well and remove from heat. In a large bowl, combine the ricotta cheese, half of the mozzarella, and half of the Parmesan. Mix these well. Season with salt and pepper. Make sure it is all mixed evenly. This cheese filling is creamy and rich. It adds great flavor to your bake. Grease a 9x13 inch baking dish. Start with a layer of zucchini slices at the bottom. Overlap each slice a bit. Next, spread a layer of the cheese mixture over the zucchini. After that, add a layer of sautéed onions. Then, layer the yellow squash slices on top. Top this with the remaining mozzarella and Parmesan cheese. Repeat these layers until you run out of ingredients. Finish with a final layer of cheese. Cover the dish with aluminum foil. Place it in your preheated oven at 375°F (190°C). Bake for 30 minutes. After that, remove the foil. Bake for another 15 minutes until the top is golden and bubbly. Let the bake cool for about 10 minutes before slicing. Serve it warm and enjoy! For more details, you can check the Full Recipe. To get nice layers, slice the zucchini and squash thin. I recommend about 1/8 inch. Lay the slices slightly overlapping. This helps them cook evenly. Start with zucchini at the bottom. Next, add the cheese filling and sautéed onions. Continue layering until all ingredients are used. Make sure to finish with cheese on top. This creates a delicious, golden crust. Herbs can boost the flavor of your dish. I love using dried oregano and basil. They add great taste and aroma. Feel free to mix in fresh herbs too. Chopped fresh basil on top before serving brightens the dish. If you like a bit of spice, add a pinch of red pepper flakes to the cheese mixture. This gives it a nice kick. Ovens can vary in temperature, so watch your bake closely. If your oven runs hot, check for doneness a bit early. The top should be golden and bubbly when done. If your oven runs cool, it may need a few extra minutes. Always cover it with foil if it browns too fast. Following these tips helps ensure a perfect bake every time. For the full recipe, check the details above. {{image_2}} You can add protein to make this dish heartier. Ground turkey or chicken works well. Cook the meat with your onions and garlic until it’s no longer pink. Then, layer it between the veggies and cheese. You could also use cooked sausage for a richer flavor. If you want a meatless option, try adding lentils for protein. For a vegetarian twist, consider adding more vegetables. Spinach, bell peppers, or mushrooms add great taste and texture. Just sauté these veggies with the onions and garlic before layering. You can also sprinkle in some cooked quinoa for a nutritious boost. This keeps the dish filling without meat. This recipe is naturally gluten-free. All the ingredients, like zucchini and squash, are safe for gluten-free diets. Just make sure to check the cheese labels. Some brands may add gluten as a thickener. If you want to make it even heartier, try adding gluten-free pasta between the layers. This gives you a lovely, chewy texture. Feel free to explore these variations in the full recipe. After enjoying your Layered Zucchini and Squash Bake, store leftovers carefully. Let the dish cool down first. Then, cover it tightly with plastic wrap or foil. You can also use an airtight container to keep it fresh. Make sure to store it in the fridge. It will stay good for about 3 to 4 days. When you want to enjoy leftovers, reheat them gently. Preheat your oven to 350°F (175°C). Place the bake in an oven-safe dish. Cover it with foil to keep it moist. Heat for about 20 minutes or until warm. You can also use the microwave for quicker reheating. Just cover the dish, and heat for 1 to 2 minutes. Stir halfway through for even warming. If you want to save some for later, freezing works well. Cut the bake into portions. Wrap each piece in plastic wrap and then foil. This keeps out air and prevents freezer burn. You can freeze it for up to 3 months. When ready to eat, thaw it in the fridge overnight. Reheat in the oven or microwave, just as before. Enjoy your delicious meal anytime! You can prepare the dish a day in advance. First, follow the recipe steps until the layering is done. Cover the dish with foil and store it in the fridge. When you are ready to cook, preheat your oven. Remove the foil and bake for 30 minutes. This method keeps the flavors fresh and helps save time. Yes, you can switch cheeses based on your taste. Try using goat cheese for a tangy flavor. Feta cheese adds a nice salty touch. Cheddar cheese gives a rich taste. Each cheese will change the dish's flavor. Mixing different cheeses can also create a unique experience. This bake pairs well with many sides. A simple green salad adds freshness. Garlic bread is a tasty choice to dip. You can also serve it with grilled chicken or fish for protein. This dish works well for brunch or dinner too. Feel free to explore what fits your meal best! For the full recipe, check the section above. You learned about the key ingredients for a tasty layered zucchini and squash bake. We covered how to prep, mix, and bake this dish in simple steps. I shared tips to help you get the layers just right, and we discussed tasty variations, from adding protein to gluten-free options. Proper storage and reheating keep your leftovers fresh. By focusing on these points, you can create a delightful meal. I hope you enjoy making this bake as much as I do!

Layered Zucchini and Squash Bake Flavorful Dish

Looking for a tasty way to use zucchini and squash? My Layered Zucchini and Squash Bake is packed with flavor

- 4 medium summer squash, sliced - 1 large onion, diced - 2 cloves garlic, minced - 1 cup grated cheddar cheese - 1 cup ricotta cheese - 1 cup breadcrumbs - 2 tablespoons olive oil - 1 teaspoon dried oregano - ½ teaspoon salt - ¼ teaspoon black pepper - 2 large eggs, beaten The star of this dish is summer squash. This squash has a mild taste. It pairs well with many flavors. I slice the squash thinly for even cooking. The onion and garlic add great flavor. Dicing the onion brings out its sweetness. Minced garlic gives a nice kick to the dish. Cheddar and ricotta cheeses make the casserole creamy and rich. I use cheddar for its sharpness. Ricotta adds a light texture. The eggs bind everything together. They help the casserole hold its shape when cut. Seasonings like oregano, salt, and pepper enhance the taste without overpowering it. The salt brings out flavors. Black pepper adds a bit of heat. Dried oregano gives an earthy note that works well with the squash. - Fresh basil - Additional vegetables - Different types of cheese You can customize this casserole with fun add-ins. Fresh basil adds a pop of color and flavor. It also gives a fresh taste that brightens the dish. You might try adding other veggies, too. Bell peppers or zucchini can add more color and texture. If you love cheese, mix in different kinds. Mozzarella will make it extra gooey. Parmesan can add a salty crunch to the top. These options can create a unique twist to the classic recipe. Check out the Full Recipe for more details! Start by slicing the summer squash into thin rounds. Use a sharp knife for even pieces. This helps the squash cook quickly and evenly. Next, dice the onion. Aim for small, even pieces so they cook well. After that, mince the garlic. You want it fine to blend into the dish. In a large skillet, heat two tablespoons of olive oil over medium heat. Add the diced onion. Sauté it for about five minutes until it turns translucent. Then, add the minced garlic. Cook for one more minute until it’s fragrant. Next, add the sliced summer squash to the skillet. Cook this mixture for 7 to 10 minutes. Stir until the squash is tender and slightly golden. In a large mixing bowl, combine the sautéed squash mixture with the beaten eggs, ricotta cheese, half of the cheddar cheese, dried oregano, salt, and black pepper. Mix everything well until it is fully combined. Transfer this mixture into a greased 9x13 inch baking dish. Spread it evenly. Sprinkle the remaining cheddar cheese on top. Finally, add breadcrumbs for a crispy finish. Now, you’re ready to bake! Place the dish in the oven at 375°F (190°C). Bake for 25 to 30 minutes, until the casserole is bubbly and the top is golden brown. You can find the full recipe above for easy reference. To make your summer squash casserole shine, focus on cooking techniques. First, sauté onions and garlic well. Heat your skillet over medium heat. Add olive oil, then onions. Stir until onions become soft and clear, about five minutes. Next, add garlic and sliced summer squash. Cook for seven to ten minutes. You want the squash to be tender and slightly golden. For the cheese melt, layer your grated cheddar on top. This step helps ensure even melting. Bake at 375°F for 25-30 minutes. The cheese should bubble and turn golden. This gives your casserole a rich flavor and appealing look. For tender squash, slice it evenly. Thin slices help the squash cook at the same rate. Avoid thick pieces, or they may not soften well. If you want extra moisture, consider salting the squash before cooking. Let it sit for a few minutes, then drain the excess water. For the topping, breadcrumbs are vital for crunch. I recommend using panko breadcrumbs. They create a light and crispy texture that contrasts well with the creamy filling. Mix them with a little melted butter for added flavor. This will elevate your casserole to a whole new level. For the Full Recipe, check the earlier sections to create this delightful dish. {{image_2}} You can make this casserole even better by adding other seasonal vegetables. Try bell peppers, zucchini, or mushrooms. These veggies add color and flavor. They also increase the nutrition of your dish. Cut them into small pieces and mix them in when you sauté the onions and garlic. If you want a dairy-free option, consider using plant-based cheese. There are many great brands available now. Look for ones that melt well to keep the casserole creamy. You can swap out the cheddar and ricotta with these alternatives. This way, everyone can enjoy the meal. Spicing up the casserole can really elevate the taste. Adding spices like paprika or red pepper flakes gives it a nice kick. You can sprinkle these in while you cook the onions. This step makes the flavors pop and keeps things interesting. Experiment with different cheese combinations, too. Mixing in mozzarella or goat cheese can create unique flavors. Just remember to keep some cheddar for that classic taste. The mix of cheeses adds depth to each bite, making it more enjoyable. For the complete recipe, check out the Full Recipe. After you enjoy your summer squash casserole, store leftovers in the fridge. Place it in an airtight container. This will keep it fresh for up to three days. When you want to reheat, do so in the oven. Preheat the oven to 350°F (175°C). Cover the casserole with foil to keep it moist. Heat for about 20 minutes, or until it is hot all the way through. You can also use the microwave. Heat in short bursts of one minute, checking often to avoid overcooking. If you want to keep your casserole longer, freezing is a great option. To freeze, let the casserole cool completely. Then, wrap it tightly in plastic wrap and aluminum foil. This helps prevent freezer burn. You can store it in the freezer for up to three months. When you're ready to eat, move it to the fridge for a day to thaw. After thawing, reheat in the oven at 350°F (175°C) for about 30-40 minutes. Make sure it is heated through before serving. Enjoy that creamy, cheesy goodness! For the full recipe, check out the details above. Can I use frozen summer squash? Yes, you can use frozen summer squash. Just make sure to thaw and drain it well. This prevents excess water in the casserole. Fresh squash offers a better texture, but frozen works in a pinch. What to serve with summer squash casserole? You can serve this casserole with a fresh salad or some grilled chicken. It pairs well with crusty bread too. Each option adds balance to your meal. How long does summer squash casserole last in the fridge? This casserole lasts about 3 to 5 days in the fridge. Store it in an airtight container for best results. Reheat individual portions in the microwave or oven. Can I make this ahead of time? Yes, you can prepare the casserole a day ahead. Just assemble it, cover, and refrigerate. Bake it right before serving for a fresh taste. Suitable substitutes for ingredients in the recipe? You can swap ricotta cheese for cottage cheese for a lighter option. If you want a dairy-free version, use plant-based cheese. Zucchini can replace summer squash for a different flavor. Breakdown of calories and macros Each serving of summer squash casserole has about 250 calories. It contains 12 grams of protein and 10 grams of fat. Carbohydrates come in at about 30 grams, mostly from the breadcrumbs. Health benefits of summer squash and other ingredients Summer squash is low in calories and high in vitamins. It provides vitamin C and potassium. The cheeses add calcium and protein, making this dish both tasty and nutritious. This blog post covered how to make a delicious summer squash casserole. You learned about the main ingredients, like summer squash, onion, and cheese. I shared step-by-step instructions and useful tips for cooking and serving. In the end, enjoy this dish's flavor and versatility. Feel free to try different veggies and spices. This casserole is great for summer meals or family gatherings. Your cooking can shine with this recipe!

Tasty Summer Squash Casserole Easy Comfort Meal

Are you ready to bring comfort to your dinner table? This Tasty Summer Squash Casserole is easy to make and
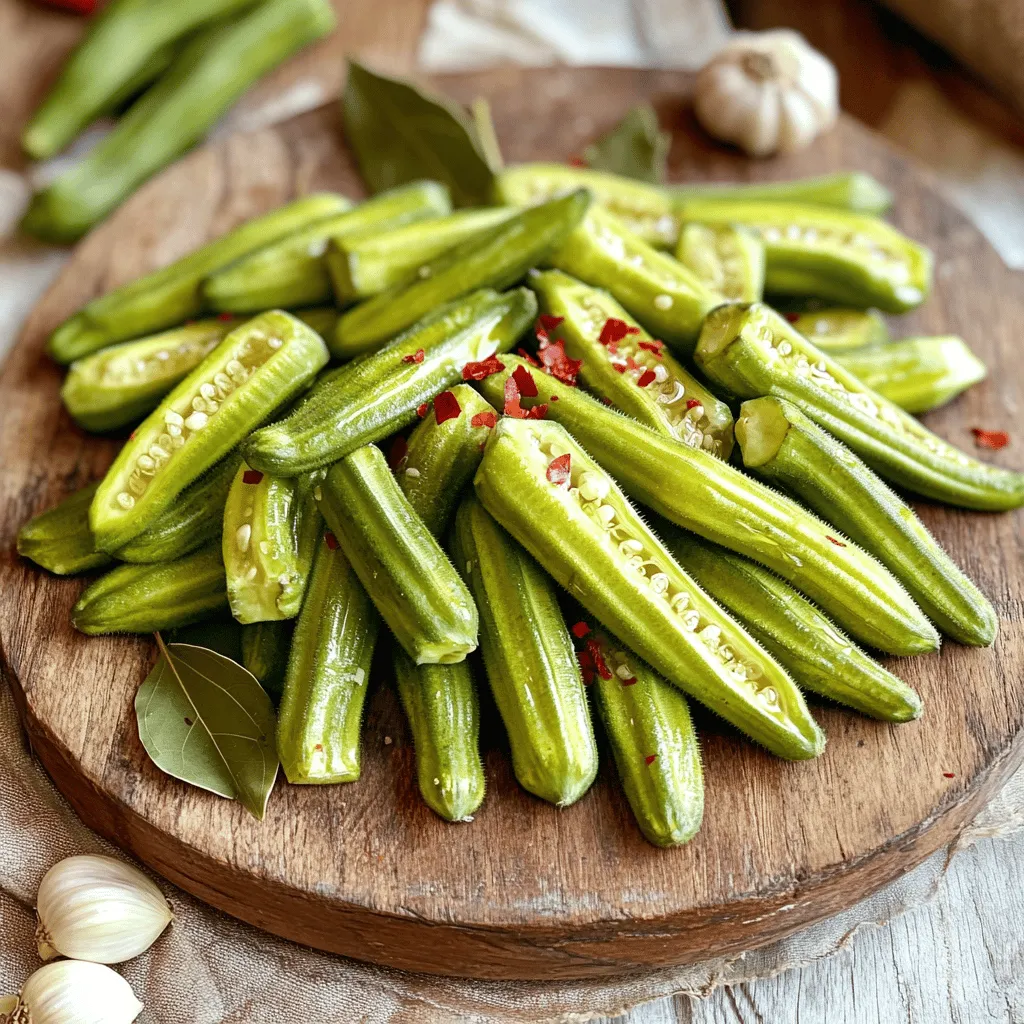
Let's gather the ingredients for this tasty treat. You will need: - 1 pound fresh okra, sliced into 1/2 inch pieces - 1 cup cornmeal - 1/2 cup all-purpose flour - 1 teaspoon baking powder - 1 teaspoon garlic powder - 1 teaspoon paprika - 1/2 teaspoon cayenne pepper (optional for heat) - 1 teaspoon salt - 1/2 teaspoon black pepper - 1 cup buttermilk (or substitute with regular milk) - Vegetable oil for frying Each item plays a key role. Fresh okra gives a nice crunch. Cornmeal adds that crispy texture you want. The spices bring flavor and warmth. Buttermilk helps the coating stick. Don't forget the oil; it gets hot and ensures a golden finish. For the full recipe, you can check out the detailed instructions. Now, let’s get cooking! - Rinse and dry the okra. This step is key. Water on the okra makes it soggy. - Coat okra with buttermilk. This helps the cornmeal stick better. - Mix cornmeal and seasonings. Use cornmeal, flour, baking powder, and spices. - Coat the okra with the dry mixture. Make sure each piece is well covered. - Heat oil to the correct temperature. Aim for 350°F (175°C) for perfect frying. - Fry the okra in batches. Do not overcrowd the pan to keep them crispy. - Drain and season the fried okra. Place them on paper towels to absorb oil. Enjoy your crispy cornmeal fried okra as a snack or side dish! For the full recipe, check out the details above. To get that perfect crunch, drying the okra is key. After rinsing, use paper towels to remove moisture. This step helps the coating stick better and fry up crisp. When frying, do not overcrowd the pan. Fry in small batches to keep the temperature high. This way, each piece cooks evenly and stays crispy. Want to spice things up? Adjust the heat with cayenne pepper. Add more for extra kick, or skip it for a milder flavor. For dipping, I suggest ranch or a spicy aioli. These sauces pair well with the crunchy okra and add a nice contrast. Serve your cornmeal fried okra in a rustic basket. Line it with parchment paper for a nice touch. You can garnish with fresh herbs for color. Using themed dishware can enhance the experience. It makes the dish more appealing and fun to eat. For the full recipe, check this out: [Full Recipe]. {{image_2}} To make a gluten-free version, swap the all-purpose flour. You can use rice flour or chickpea flour. Both work well to give a nice crunch. Mix the cornmeal with your chosen flour. This change keeps the flavor while avoiding gluten. For a spicy kick, add more cayenne pepper. You could also try chili powder or crushed red pepper. Mix these spices with the cornmeal for a bold flavor. Consider adding garlic powder or onion powder to enhance the taste. You can boost the nutrition by adding other veggies. Try bell peppers or zucchini for extra color and flavor. Cheese is also a great mix-in! Use shredded cheddar or parmesan to make it creamy. This adds another layer of taste to your fried okra. For more ideas, check out the Full Recipe. To keep fried okra fresh, store it in an airtight container. Place a paper towel at the bottom to soak up excess moisture. This helps maintain crispiness. You can keep it in the fridge for up to three days. After that, the texture may change and become soggy. To enjoy your okra again, reheating is key. The oven is ideal for keeping that crunchy texture. Preheat your oven to 350°F (175°C). Spread the okra on a baking sheet and bake for about 10 minutes. Keep an eye on it to avoid burning. If you use a microwave, place the okra on a microwave-safe plate. Heat in short bursts to prevent sogginess, but it won't be as crispy. Freezing fried okra is a great way to save leftovers. First, let it cool to room temperature. Then, spread the okra in a single layer on a baking sheet. Freeze until solid, about one hour. After that, transfer the okra to a freezer-safe bag or container. When you're ready to eat, thaw it overnight in the fridge. Reheat in the oven to restore its crunch. To make your okra crispy, focus on the coating and the oil temperature. - Dry the Okra: Start by rinsing and drying the sliced okra. Moisture makes it hard to get crispy. - Coating: Use a mix of cornmeal and flour. The cornmeal gives a nice crunch. - Heat: Ensure your oil is hot, around 350°F (175°C). This helps fry the okra quickly. - Batch Frying: Fry in small batches. This keeps the oil hot and gives an even fry. Yes, you can use frozen okra. However, you need to adjust a bit. - Thaw First: Let the frozen okra thaw completely. You can pat it dry to remove excess moisture. - Quality: Frozen okra may be softer than fresh. This can affect the crunch. - Coating: Make sure to coat the thawed okra well for the best results. The best oils for frying okra are those with high smoke points. - Vegetable Oil: This is a great choice due to its high smoke point. - Canola Oil: Another excellent option that fries well without burning. - Peanut Oil: Offers a nice flavor and has a high smoke point. Frying okra takes about 2-3 minutes per batch. - Watch for Color: Look for a golden brown color. This shows they are done. - Don’t Overcrowd: Frying too many pieces at once can lower the oil temperature. - Drain Well: Once fried, let them drain on paper towels to keep them crispy. For the full recipe, check out the details on how to enjoy this crispy delight! This blog post covered making crispy cornmeal fried okra with detailed steps. We discussed ingredients, preparation, and cooking tips to ensure great results. Remember, let your okra dry before frying for extra crunch. Feel free to experiment with spices or veggies to match your taste. Storing and reheating are easy too, so no need to waste leftovers. Embrace your creativity in the kitchen and enjoy this tasty treat anytime!

Cornmeal Fried Okra Crispy and Flavorful Delight

If you’re craving a crispy, flavorful snack, look no further than Cornmeal Fried Okra! This tasty dish is a Southern

Older posts
Newer posts
← Previous Page1 … Page23 Page24 Page25 … Page64 Next →

dsad

© 2025 flavorsprint • Built with GeneratePress

Our Policies

  • Copyright Policy
  • Cookie Policy
  • GDPR Policy
  • Privacy Policy
  • Disclaimer
  • Terms Of Use

More Information

  • Home
  • About
  • Contact
  • Appetizers
  • Dessert
  • Dinner
  • Drinks
©2025, flavorsprint About Back To Top