Skip to content
DisclaimerTerms Of UseGDPR PolicyCookie Policy

flavorsprint

  • Home
  • Drinks
  • Appetizers
  • Dinner
  • Dessert
  • About
  • Contact
  • Privacy Policy
DisclaimerTerms Of UseGDPR PolicyCookie Policy

Lillian

- 1 lb boneless chicken thighs - 1 ripe peach, diced - 1/4 cup chipotle sauce - 1 tablespoon olive oil - 1 tablespoon honey - 1 teaspoon garlic powder - Salt and pepper to taste - 4 slider buns - 1 cup arugula or spinach - Sliced pickles, for garnish - Cheese slices (e.g., cheddar, Monterey Jack) - Avocado slices - Additional toppings (e.g., jalapeños) When making my Chipotle Peach Chicken Sliders, I love using these fresh ingredients. The chicken thighs give a juicy bite. The diced peach adds a sweet twist. Chipotle sauce brings in heat and depth. Honey balances the flavors perfectly. Garlic powder gives a nice kick. As for the slider buns, I like to use soft, fresh ones. They hold up well and taste great. The arugula or spinach adds a fresh crunch. Finally, sliced pickles give a tangy pop. Feel free to mix in optional ingredients. Cheese melts nicely over warm chicken. Creamy avocado adds richness. Jalapeños can up the spice if you crave more heat. For the full recipe, check out the complete guide on making these tasty sliders. To start, you need to marinate the chicken thighs with a peach-chipotle mixture. In a bowl, combine diced peach, chipotle sauce, olive oil, honey, garlic powder, salt, and pepper. This mixture will give your chicken a sweet and spicy kick. Place the chicken thighs in a resealable bag or a shallow dish. Pour the marinade over the chicken. Seal the bag or cover the dish. Let the chicken sit in the fridge for at least 30 minutes. For even more flavor, you can marinate it for up to 2 hours. Next, preheat your grill or skillet over medium-high heat. This step is essential for a good sear. Remove the chicken from the marinade and place it on the grill or in the skillet. Cook the chicken thighs for about 6-7 minutes on each side. You want them to reach an internal temperature of 165°F. Look for those perfect grill marks to show they are done. Once your chicken is cooked, let it rest for a few minutes. This helps keep the juices in. Slice each thigh into smaller pieces that will fit your slider buns. Now it’s time to toast the slider buns. Lightly grill them until golden brown. For the best flavor, layer the ingredients in the following order: place a piece of the chipotle peach chicken on the bottom bun, add a handful of arugula or spinach, and top it with sliced pickles. Finally, place the top bun on and press down gently. Enjoy these flavorful bites! You can find the full recipe [here](#). For juicy chicken, marinate it well. Use a mix of peach, chipotle sauce, and spices. The key is to let the chicken soak in this mixture for at least 30 minutes. If you have time, marinate for up to 2 hours. This allows the flavors to really sink in. For the best flavor, use fresh garlic powder and quality chipotle sauce. Don’t forget to season with salt and pepper. These simple steps elevate your chicken. Decide between a grill or skillet. A grill adds great smoky flavor. A skillet is quick and easy. Both work well, so choose what you have. For slider assembly, you will need a sharp knife and a cutting board. A spatula is great for flipping the chicken. Keep everything close to make it easy. Pair your sliders with tasty sauces and dips. A creamy ranch or zesty BBQ sauce fits well. These flavors mix nicely with chipotle peach. Serve with sides like sweet potato fries or a fresh salad. They balance the rich flavors of the sliders. Check out the Full Recipe for more ideas and tips to make your meal even better. {{image_2}} You can switch up the fruit in these sliders. Try using mango or pineapple instead of peach. Both fruits offer a sweet and tangy taste. They pair well with chipotle sauce. You can also explore different sauces. Barbecue sauce or teriyaki sauce can add a new twist. Each option brings a unique flavor, so feel free to experiment. Grilling chicken thighs gives great flavor with less oil. Frying adds extra fat, so grilling is a healthier choice. You can also swap regular buns for whole grain buns. Whole grain options boost fiber and taste just as good. These small changes make your sliders lighter without sacrificing flavor. Think about the season when you make these sliders. In summer, use fresh peaches and arugula for a bright taste. In winter, try roasted vegetables like butternut squash. This adds warmth and heartiness to your meal. Always choose what’s fresh and in season. It makes your sliders tastier and supports local farms. You can find fresh flavors year-round by being creative with your ingredients. For the complete recipe, check out the Full Recipe section. To keep your cooked sliders fresh, store them in an airtight container. This helps lock in moisture and flavor. You can also wrap them tightly in plastic wrap. Cooked sliders stay good for up to three days in the fridge. If you want to enjoy them later, consider freezing them. You can freeze the chicken thighs after marinating them. This preserves the flavor well. Use freezer-safe bags or airtight containers to store them. Remove as much air as possible to prevent freezer burn. Label the bags with the date. The chicken can stay frozen for up to three months. To reheat sliders, use an oven or a skillet. The oven keeps them crispy. Preheat the oven to 350°F and bake for about 10 minutes. For a skillet, heat it over medium-low heat and add a splash of water. Cover to steam the sliders, which keeps them moist. Always check that the chicken is heated through before serving. I suggest marinating the chicken thighs for at least 30 minutes. This gives the chicken time to soak in the peach-chipotle goodness. For even better flavor, you can marinate it for up to 2 hours. Just remember, longer marination enhances the taste. Use a resealable bag or shallow dish to make it easy. Ensure the marinade covers all the chicken pieces well. Yes, you can use chicken breasts. They cook faster than thighs, usually around 5-6 minutes per side. However, chicken thighs have more flavor and stay moist. If you choose breasts, be careful not to overcook them. They can dry out quickly. Adjust your cooking time based on your chicken choice. You have many options for dipping sauces! Here are a few easy and tasty ideas: - Honey mustard sauce: Sweet and tangy, it complements the sliders well. - Ranch dressing: A classic choice that adds creaminess. - Chipotle mayo: For extra spice, mix mayo with chipotle sauce. - Barbecue sauce: A smoky touch that pairs nicely with the chicken. Feel free to experiment and find your favorite! In this blog post, we covered how to make delicious Chipotle Peach Chicken Sliders. We discussed the key ingredients, including chicken thighs and peaches, and gave you step-by-step cooking tips. You learned about flavor variations and how to store your sliders for later. By trying this recipe, you can impress your guests and enjoy great flavor. Experiment with different ingredients and find your perfect combination. Happy cooking!

Chipotle Peach Chicken Sliders Flavorful Bite Recipe

Are you ready to fire up the grill and impress your taste buds? Our Chipotle Peach Chicken Sliders are a

To make the perfect strawberry basil smoothie bowl, you need these ingredients: - 2 cups fresh strawberries, hulled and halved - 1 ripe banana, frozen - 1/2 cup Greek yogurt - 1/2 cup almond milk (or milk of choice) - 1 tablespoon honey or maple syrup (optional, to taste) - 1/4 cup fresh basil leaves, packed - 1/4 cup granola (for topping) - 2 tablespoons chia seeds (for topping) - Extra strawberries and basil for garnish Each of these items brings its own flavor and texture. The strawberries provide sweetness and a rich red color. The frozen banana adds creaminess. Greek yogurt gives protein and tang. Almond milk helps blend everything smoothly. - Strawberries: High in vitamin C, fiber, and antioxidants. Great for skin health. - Banana: Offers potassium and energy. It helps keep you full. - Greek Yogurt: Packed with protein. Good for muscles and gut health. - Almond Milk: Low in calories and dairy-free. A good source of vitamin E. - Honey or Maple Syrup: Natural sweeteners that add flavor and energy. - Basil: Contains vitamins A and K. It has anti-inflammatory properties. - Granola: Provides fiber and a satisfying crunch. - Chia Seeds: High in omega-3s and fiber. They help with digestion. These ingredients make this smoothie bowl not just tasty but also healthy. If you need to change some ingredients, here are some great swaps: - Strawberries: Use raspberries, blueberries, or peaches for a different taste. - Banana: Replace with avocado for creaminess without the sweetness. - Greek Yogurt: Use coconut yogurt for a dairy-free option. - Almond Milk: Any milk works, like oat, soy, or regular dairy milk. - Honey or Maple Syrup: Try agave syrup or stevia for lower calories. - Basil: Mint or spinach can offer a fresh twist. - Granola: Use nuts or seeds for crunch without grains. - Chia Seeds: Flaxseeds work well too. These substitutions keep the essence of the recipe while allowing you to cater to your tastes or dietary needs. For the full recipe, you can refer to the earlier section. Start by gathering your ingredients for the smoothie base. You’ll need fresh strawberries, a ripe frozen banana, Greek yogurt, almond milk, honey (if you want it sweeter), and fresh basil leaves. 1. Hulled Strawberries: Remove the green tops from the strawberries and slice them in half. This makes blending easier. 2. Frozen Banana: Use a ripe banana that you froze earlier. It adds creaminess and natural sweetness. 3. Combine Ingredients: In your blender, add the halved strawberries, frozen banana, Greek yogurt, and almond milk. Add honey if you desire more sweetness. Finally, toss in fresh basil leaves for that unique flavor. To make your smoothie bowl creamy, blend it well. Here are some tips: - Start Slow: Begin blending on a low speed. This helps mix the ingredients without splashing. - Scrape Sides: Stop the blender and scrape down the sides as needed. This ensures everything mixes evenly. - Adjust Consistency: If the mixture is too thick, pour in a bit more almond milk. Blend again until smooth and creamy. How you serve your smoothie bowl matters! Here’s how to make it look great: - Use Bowls: Pour the blended smoothie mixture into nice serving bowls. - Add Toppings: Top with granola, chia seeds, and extra strawberry slices. Garnish with fresh basil leaves for aroma. - Color Contrast: Arrange toppings in patterns for visual appeal. This makes your bowl look even more delicious. For the complete recipe, check out the Full Recipe. Enjoy your refreshing Strawberry Basil Smoothie Bowls! To make the best strawberry basil smoothie bowls, you need good strawberries. Look for bright red berries. They should feel firm but not hard. Avoid berries with green spots or soft spots. Smell them too; sweet scents mean they are ripe. Buy organic strawberries if you can. They often taste better and help the planet. Blending is key for a smooth, creamy bowl. Start by adding your soft ingredients first. This includes the Greek yogurt and banana. Then, add your strawberries and basil. Pour in your almond milk last. This helps everything blend well. Blend on high until smooth. If it is too thick, add a splash of milk. Stop and scrape the sides to ensure everything mixes well. Taste your smoothie before serving. If it needs more sweetness, add honey or maple syrup. Start with a small amount and blend again. Remember, you can always add more, but you can't take it out! Keep in mind that ripe strawberries are naturally sweet too. This can help you decide how much extra sweetness you need. For the full recipe, check out the Strawberry Basil Bliss Smoothie Bowls section. {{image_2}} You can switch up the flavors in your smoothie bowl. Instead of strawberries, try other berries like blueberries or raspberries. They add a nice sweet and tart taste. You can also use peaches for a fresh twist. Just slice them and toss them into the blender. Each fruit gives a different vibe to your bowl. If you want to keep it dairy-free, use coconut yogurt or cashew yogurt. Both options work great and offer a creamy texture. You can also swap Greek yogurt for silken tofu. It blends well and adds a nice protein boost without the dairy. Almond milk is my go-to, but oat milk or soy milk can work too. To amp up the nutrition, add superfoods like spinach or kale. They blend in well and you won’t taste them. You can also toss in a scoop of protein powder for extra energy. Chia seeds are great too; they add a dose of fiber and omega-3s. These small changes can make your smoothie bowl even healthier. Feel free to explore these variations to find your perfect blend. Check out the Full Recipe for more ideas! After you enjoy your strawberry basil smoothie bowls, you might have some left. Store any leftovers in an airtight container. This keeps the flavors fresh. Place it in the fridge. Use these bowls within two days for the best taste. If the smoothie thickens, stir in a bit of almond milk before serving again. If you want to save your smoothie bowls for later, freezing is a great choice. Pour the smoothie mixture into ice cube trays or freezer-safe containers. Once frozen, you can pop out the cubes and store them in a bag. When you want one, blend the cubes with a bit of almond milk. This creates a quick, refreshing snack. You can also keep toppings separate until you're ready to eat. Strawberry basil smoothie bowls taste best fresh. When stored in the fridge, they stay good for about two days. If frozen, they can last up to three months. Always check for any off smells or changes in color. This ensures you enjoy them at their best. For the full recipe, visit the main article. Yes, you can use frozen strawberries. They make the smoothie cold and thick. Frozen berries may change the texture slightly but will still taste great. If you use frozen strawberries, you might not need the frozen banana. Blend them together and enjoy! If you want a substitute for Greek yogurt, try regular yogurt. You can also use dairy-free yogurt made from almonds or coconuts. These options will keep the smoothie creamy. You might want to adjust the sweetness based on the yogurt you pick. To make a vegan version, use plant-based yogurt and almond milk. Replace honey with maple syrup for sweetness. This way, you keep all the flavor while sticking to a vegan diet. You’ll still get a tasty, fresh, and creamy bowl. For the full recipe, check out the Strawberry Basil Bliss Smoothie Bowls. In this article, we explored how to make delicious Strawberry Basil Smoothie Bowls. We broke down key ingredients and their health benefits. I shared tips for blending, presentation, and ingredient substitutions. Plus, you learned about fun variations and storage tips. Keep experimenting with flavors and textures. Enjoy creating your own smoothie bowls. Eating healthy can be tasty and fun!

Strawberry Basil Smoothie Bowls Fresh and Flavorful Snack

Looking for a fresh and tasty snack? Strawberry basil smoothie bowls are perfect for you! I love how easy they

For a successful lemon lavender sheet cake, you need simple, fresh items. Here’s what you will need: - 2 cups all-purpose flour - 1 ½ cups granulated sugar - ¾ cup unsalted butter, softened - 4 large eggs - 1 cup buttermilk - 1 tablespoon dried culinary lavender - 1 tablespoon lemon zest - ½ cup lemon juice (freshly squeezed) - 2 teaspoons baking powder - ½ teaspoon baking soda - ½ teaspoon salt The flour gives structure, while sugar adds sweetness. Butter makes the cake rich. Eggs help with rise and moisture. Buttermilk adds a slight tang and keeps the cake soft. Dried lavender brings a unique floral note, making it special. The glaze is the fun part! It adds shine and flavor. Gather these items: - 2 cups powdered sugar - 3 tablespoons lemon juice - 1-2 teaspoons water (as needed) - Extra dried lavender for garnish (optional) The powdered sugar forms the base of the glaze. Lemon juice brightens it and adds flavor. Water adjusts thickness. If you want, sprinkle some extra lavender on top for a lovely touch. You can find the full recipe [here](Full Recipe). This cake is a treat that brings sunshine to any table! First, you need to preheat your oven. Set it to 350°F (175°C). This step is key to getting a nice rise on your cake. While the oven heats, grab your 13x9 inch baking pan. Grease it well with butter or cooking spray. Then, sprinkle some flour over the greased surface. Shake the pan to coat it evenly. This helps your cake come out easily after baking. Next, we’ll mix the batter. Start by combining the dry ingredients. In a medium bowl, whisk together the flour, dried lavender, baking powder, baking soda, and salt. This is where the magic begins! Set this bowl aside for now. Now, in a large bowl, cream the softened butter with the granulated sugar. Use an electric mixer for about 3 to 5 minutes. You want it to be light and fluffy. Once that’s done, add the eggs one by one. Mix well after each egg. Then, add the lemon zest and lemon juice. Mix until just combined. Gradually add the dry mixture to the wet mix. Alternate with the buttermilk. This keeps the batter creamy. Be careful not to overmix. Just stir until you see no more flour. Pour the batter into your prepared pan. Smooth the top with a spatula. Bake in your preheated oven for 25 to 30 minutes. To check for doneness, insert a toothpick into the center. If it comes out clean, your cake is ready! Once it’s baked, let the cake cool in the pan for about 10 minutes. Then, transfer it to a wire rack. Let it cool completely before glazing. Now for the glaze! In a medium bowl, whisk together the powdered sugar and lemon juice. If it feels too thick, add water a teaspoon at a time. You want it to be drippy, not runny. Once your cake is cool, pour the glaze over the top. Let it drip down the sides for that beautiful effect. If you like, add extra dried lavender on top for a lovely touch. For the full recipe, check out the section above. - How to avoid overmixing the batter: Mix the wet and dry ingredients until just combined. Overmixing can make your cake tough. Use a spatula to fold ingredients together gently. - Ensuring even baking and preventing dryness: Spread the batter evenly in the pan. Use an oven thermometer to check the temperature. Baking at the right heat helps the cake rise evenly and stay moist. - Importance of room temperature ingredients: Make sure your butter and eggs are at room temperature. This helps them mix better and creates a light texture in the cake. - Achieving the perfect drippy consistency: Mix the powdered sugar and lemon juice well. Add water slowly until the glaze drips smoothly off a spoon. Test it to get just the right flow! - Techniques for an aesthetically pleasing glaze: Pour the glaze in the center of the cake. Let it spread towards the edges. This creates a lovely drippy effect. You can also use a spoon to nudge the glaze for a controlled drizzle. - Optional touches like additional garnishes: Sprinkle extra dried lavender on top for a pop of color and flavor. You can also add lemon slices around the cake for a fresh look. For the full recipe of this delightful treat, check out the [Full Recipe]. {{image_2}} You can change the flavor of this cake easily. Try using orange zest instead of lemon zest. The citrus flavor will give a nice twist. You can also swap lavender for chamomile. Chamomile adds a gentle floral taste. If you want something different, use rosemary or thyme. Both herbs can add a savory touch. You can also play with extracts. Instead of vanilla, try almond or lemon extract. A few drops can change the cake's flavor. Just remember to keep the balance right. Too much extract can overpower the cake. If you need a gluten-free cake, there are options. You can use a gluten-free flour blend instead of all-purpose flour. Make sure it has a good structure for baking. Look for blends that include xanthan gum for best results. For a vegan version, you can swap eggs and butter. Use flaxseed meal mixed with water as an egg substitute. Mix one tablespoon of flaxseed with three tablespoons of water. Let it sit for a few minutes until it thickens. For butter, use coconut oil or a vegan butter alternative. This will keep the cake moist and tasty. Check out the Full Recipe for more details on ingredients and instructions. To keep your lemon lavender sheet cake fresh, you have two main options: room temperature or fridge. If you plan to eat it within a couple of days, store it at room temperature. Just make sure to cover it well. You can use foil or plastic wrap. For longer storage, put it in the fridge. An airtight container works best here. This helps keep the cake moist and prevents it from absorbing other smells from the fridge. If you have leftover cake, freezing is a great option. Start by cutting the cake into squares. Wrap each piece in plastic wrap tightly. Then place them in a freezer bag or container. This keeps the cake fresh for up to three months. When you want to enjoy your cake again, thaw it in the fridge overnight. This helps maintain its texture. You can also let it sit at room temperature for a few hours. Just avoid using the microwave, as this can make the cake dry. For the full recipe, check out the Lemon Lavender Sheet Cake with Drippy Glaze. What can I substitute for buttermilk? You can use plain yogurt or milk mixed with lemon juice. For every cup of buttermilk, mix one cup of milk with one tablespoon of lemon juice. Let it sit for five minutes. This will create a similar tangy flavor. How long does the cake stay fresh? The lemon lavender sheet cake stays fresh for about three days at room temperature. If you store it in the fridge, it can last up to a week. Just make sure to cover it to keep it moist. Can I use fresh lavender instead of dried? Yes, you can use fresh lavender! Use three times the amount of fresh lavender as dried. Fresh lavender has a milder flavor, so taste as you go. Why did my cake sink in the middle? If your cake sinks, it may be due to overmixing the batter or not baking long enough. Always mix just until combined. Also, ensure your oven is at the right temperature. Tips for a more lemony flavor? Add more lemon zest or a little extra lemon juice to the batter. You can also add a pinch of lemon extract for a stronger flavor. How do I know when the cake is done? Insert a toothpick into the center of the cake. If it comes out clean or with a few crumbs, the cake is done. If there is wet batter on the toothpick, bake it a little longer. This cake recipe brings together simple ingredients and clear steps. You learned about key components like flour, sugar, eggs, and lavender. I shared tips to help you mix and bake perfectly. The glaze adds a lovely finish, while variations let you explore flavors. Proper storage keeps your cake fresh for longer. With this knowledge, you can create a delightful treat at home! Enjoy experimenting and making it your own. Happy baking!

Lemon Lavender Sheet Cake with Drippy Glaze Delight

If you crave a bright and fresh dessert, then this Lemon Lavender Sheet Cake is your answer! With layers of

- 12 fresh zucchini blossoms, cleaned and trimmed - 1 cup ricotta cheese - 1 cup feta cheese, crumbled - 1/4 cup fresh basil, chopped - 1/4 cup fresh parsley, chopped - Zest of 1 lemon - Salt and pepper to taste - 1 cup all-purpose flour - 1 teaspoon baking powder - 1/2 cup sparkling water (cold) - Olive oil for frying The main stars of this dish are the fresh zucchini blossoms. They provide a delicate flavor and a lovely presentation. For the cheese filling, I use ricotta and feta. This mix gives a creamy texture and a tangy taste. Adding fresh herbs like basil and parsley brightens the flavor. The lemon zest adds a nice touch of freshness. The batter is key to getting that crispy texture. Mixing all-purpose flour and baking powder creates a light and airy coating. Sparkling water is my secret ingredient. It helps the batter bubble up while frying, making the fritters extra crispy. - Suggested herbs and spices - Dipping sauces or accompaniments You can play with the herbs in the filling. Try adding chives or dill for a twist. For dipping sauces, a yogurt sauce or a spicy aioli works well. These additions can take your fritters to the next level. - Mixing bowls - Deep frying pan - Slotted spoon You need a few kitchen tools to make this recipe easy. A mixing bowl is essential for combining the filling. A deep frying pan is best for frying the fritters. It helps achieve that golden brown color. Lastly, a slotted spoon helps drain excess oil after frying. For the full recipe, refer to the main section. Enjoy crafting these delicious stuffed zucchini blossom fritters! To start, combine the cheese and herbs. Use a mixing bowl for this. Add 1 cup of ricotta cheese and 1 cup of crumbled feta cheese. Then, add 1/4 cup of fresh basil and 1/4 cup of fresh parsley. Don’t forget the zest of one lemon! Mix everything until smooth. The texture should be creamy, with bits of herbs for flavor. Taste and add salt and pepper as needed. The filling should be rich and zesty, perfect for the blossoms. Next, we’ll stuff the zucchini blossoms. Gently open each blossom. Take care not to tear them. Use a spoon to fill each blossom with about 1-2 tablespoons of the cheese mixture. You want a nice amount, but not too much that it spills out. To secure the filling, twist the ends of the blossoms. This keeps everything inside during frying. Repeat this for all the blossoms until you finish the filling. Now, let’s make the batter. In another bowl, whisk together 1 cup of all-purpose flour and 1 teaspoon of baking powder. Gradually add 1/2 cup of cold sparkling water. Whisk until the batter is smooth. It should be similar to pancake batter, not too thick or runny. Heat about 1 inch of olive oil in a deep skillet over medium heat. You want the oil to shimmer, which means it’s hot enough. Dip each stuffed blossom into the batter, making sure they are well-coated. Carefully place them in the hot oil, but don’t overcrowd the pan. Fry each side for 2-3 minutes, or until they turn golden brown and crispy. Use a slotted spoon to transfer the fritters to a paper towel-lined plate. This helps drain any extra oil. Keep repeating until all the blossoms are fried. You can check the full recipe for more details. To make crispy fritters, the batter is key. Use cold sparkling water to keep it light. This helps the fritters puff and stay crisp. Dip each stuffed blossom fully in the batter. Avoid overcrowding the pan when frying. This keeps the oil hot and the fritters crisp. Common mistakes include not draining excess oil. After frying, place fritters on paper towels. Don't let them sit too long, or they will become soggy. Make sure your oil is hot enough before frying. If it’s too cold, the fritters will absorb more oil. You can boost flavors by adding herbs. Try a pinch of oregano or thyme for depth. A dash of smoked paprika adds a nice kick. Fresh herbs like dill or chives can also enhance the dish. For garnishing, use fresh herbs or a sprinkle of sea salt. Drizzle a bit of lemon juice right before serving to brighten the dish. Consider serving with a yogurt dip for extra creaminess. This adds a nice balance to the fritters. Pair your fritters with a light salad. A fresh arugula salad with lemon dressing works well. For drinks, a chilled white wine complements the flavors nicely. When plating, stack fritters neatly on a platter. Layer them with fresh herbs and lemon wedges. This makes the dish look inviting and fresh. You can also place fritters in a small basket lined with parchment paper for a casual touch. For more details on making these fritters, check the Full Recipe. {{image_2}} You can switch up the cheese in your stuffed zucchini blossom fritters. Instead of ricotta and feta, try using goat cheese or cream cheese. Both bring a rich and creamy texture. You can even mix in some sharp cheddar for a new flavor. For an extra twist, add items like sun-dried tomatoes or olives to the filling. These add unique tastes that dance on your palate. If you need a gluten-free option, use a gluten-free flour blend for the batter. This keeps your fritters crispy and tasty. For a vegan twist, replace the cheese with a mix of cashew cream and nutritional yeast. A chickpea flour batter also works well for a vegan version. These adaptations make the dish friendly for everyone. Zucchini blossoms are just one option. In spring, you can use squash blossoms or even pumpkin flowers. In summer, try using edible flowers from your garden. These blossoms add color and flavor to your dish. Incorporating local herbs or vegetables also boosts freshness. Think about adding fresh corn or tomatoes for a seasonal touch. For the full recipe on how to make these fritters, check out the [Full Recipe]. To keep your fritters fresh, let them cool first. Place them in an airtight container. Store them in the fridge for up to three days. If you want to keep them longer, freezing is a great option. To reheat and keep the fritters crispy, use an oven or an air fryer. Set your oven to 375°F (190°C). Bake them for about 10 minutes. Avoid microwaving them, as they can get soggy. To freeze fritters, wrap them in plastic wrap and then in foil. This prevents freezer burn. You can freeze them for up to three months. When ready to eat, thaw them in the fridge overnight. Reheat them in the oven for the best texture. For the full recipe of these delicious stuffed zucchini blossom fritters, check out the complete guide. Yes, you can prepare these fritters in advance. Here are some tips: - Prepare the filling: You can mix the cheese and herbs a day before. Store it in the fridge in an airtight container. - Stuff the blossoms: Do this up to two hours before frying. Keep them covered in the fridge. - Batter: Make the batter just before frying. It tastes best fresh. Reheating can be done in a few ways: - Oven method: Preheat the oven to 350°F (175°C). Place fritters on a baking sheet and warm for about 10 minutes. - Air fryer method: Set the air fryer to 350°F (175°C). Heat for about 3-5 minutes for a crispy finish. - Microwave method: This is the least preferred. Heat for 30 seconds but expect them to be less crispy. The oil should shimmer when it's ready. Here’s how to check: - Temperature test: Use a thermometer. Aim for 350°F (175°C). - Bread test: Drop a small piece of bread into the oil. If it bubbles and browns in about 60 seconds, the oil is ready. - Wooden spoon test: Dip the end of a wooden spoon into the oil. If bubbles form around it, the oil is hot enough. For the full recipe, check out the complete instructions above. Enjoy your cooking! This blog post covered how to make delicious stuffed zucchini blossom fritters. We went over the main ingredients, including fresh blossoms and savory cheese. You learned step-by-step instructions for preparing your filling, stuffing the blossoms, and frying. Tips on perfecting taste and texture help you avoid common mistakes. We also explored variations for dietary needs and how to store leftovers properly. With these tips, you can enjoy this tasty dish anytime. Dive in, have fun experimenting, and savor your creations!

Stuffed Zucchini Blossom Fritters Crispy and Delicious

Are you ready to impress your family and friends with a mouthwatering dish? Stuffed zucchini blossom fritters are not just

Matcha green tea powder is the star of this float. It gives a rich green color and a unique flavor. You need 2 teaspoons of matcha powder for one serving. Matcha is a finely ground powder of specially grown green tea leaves. It offers antioxidants and a smooth taste. Choose high-quality matcha for the best results. Sweeteners add the right touch to balance the matcha's earthy flavor. I suggest using 2 tablespoons of honey or agave syrup. You can adjust this to your taste. Honey brings a floral sweetness, while agave is lighter. Both mix well with the sparkling water. Feel free to experiment with other sweeteners, like maple syrup or stevia. Ice cream adds creaminess and fun to your float. Use 1 cup of vanilla ice cream for a classic taste. You can also try other flavors, like matcha or green tea, for an extra kick. Top your float with whipped cream for a special touch. If you want, sprinkle a little extra matcha powder on top for decoration. This makes your drink look pretty and adds more flavor. To start, gather your matcha green tea powder. Place two teaspoons in a small bowl. Add a few tablespoons of hot water, but not boiling. Whisk the mixture until it is smooth and free of lumps. This should take about a minute. Let it cool while you prepare the rest. Grab a tall glass and fill it halfway with ice cubes. Pour in one cup of cold sparkling water over the ice. Next, drizzle in two tablespoons of honey or agave syrup. Gently stir to mix the sweetener with the sparkling water. Now, carefully spoon the whisked matcha on top of the water. This will create a lovely green layer. Then, add a generous scoop of vanilla ice cream right on top of the matcha. If you want, you can top it with whipped cream and a sprinkle of matcha powder for a nice touch. Serve your Matcha Cream Soda Float with a straw and a long spoon. This makes it easy to sip and scoop. Enjoy it on a hot day or share it as a fun treat with friends. You can also pair it with light snacks or fruity desserts for a complete experience. Check the Full Recipe for more detailed steps. You can change the sweetness in your Matcha Cream Soda Float. Start with two tablespoons of honey or agave syrup. Taste it after mixing. If you want it sweeter, add more syrup. If you prefer less sweetness, use less. This makes it your perfect drink. Select high-quality matcha for the best flavor. Look for vibrant green powder. This means it is fresh and full of taste. Ceremonial grade matcha is great for drinks like this. If you want to save money, culinary grade works too. Just keep in mind it may not taste as rich. Make your float look amazing! Use a tall glass to show off the layers. Add ice cubes first, then pour in the sparkling water. Spoon the matcha gently on top. Finally, add the scoop of vanilla ice cream. Finish with whipped cream and a sprinkle of matcha powder. It will wow your friends! {{image_2}} For a dairy-free version, I suggest using coconut ice cream. It gives a rich, creamy taste. Almond milk ice cream is another great choice. Both options keep the float light and refreshing. You can also use a dairy-free whipped topping if you want that extra flair on top. You can play with flavors to make your float even more fun. Try adding a splash of fruit juice, like mango or passion fruit. This adds a bright twist to the matcha. You could also mix in some fresh mint leaves for a cool touch. If you love chocolate, drizzle some chocolate syrup on top for a sweet contrast. If you want to make an adult version, add a splash of vodka or rum. This pairs well with the matcha and soda. Just remember to mix it in gently so the bubbles stay. Serve this at a summer party for a fun treat. Enjoy responsibly! For the full recipe, check the Matcha Cream Soda Float 🥤 section. If you have leftovers, store them in the fridge. Use an airtight container. The float will lose some fizz, but it will still taste good. Enjoy it within one day for the best flavor. I do not recommend freezing the Matcha Cream Soda Float. The ice cream will become icy and change texture. However, you can freeze the matcha mixture separately. Just whisk it with a bit of water before using. Always use fresh matcha for the best taste. Store matcha powder in a cool, dark place. Keep it sealed tightly to avoid moisture. For the sparkling water, buy it fresh to keep the bubbles. This helps your float stay light and fizzy. A Matcha Cream Soda Float is a fun drink. It combines fizzy soda with creamy vanilla ice cream. The drink has a lovely green layer of matcha on top. You enjoy it with a straw and a spoon. The mix of flavors is both sweet and refreshing. It’s perfect for hot summer days. You can easily make one at home. Check out the Full Recipe for step-by-step guidance. Yes, you can. To make a vegan Matcha Cream Soda Float, use plant-based ice cream. Almond, coconut, or soy ice cream works well. Instead of honey, use agave syrup or maple syrup. Both options are great vegan sweeteners. This way, you can enjoy the float without dairy. Matcha offers many health benefits. It contains antioxidants, which help fight free radicals. These can damage your cells. Matcha also boosts your energy without the jitters. This is due to its unique blend of caffeine and an amino acid called L-theanine. Drinking matcha may improve focus and mental clarity. Plus, it supports metabolism and can aid in weight management. Enjoying matcha in a float makes it a tasty treat with benefits! We explored how to make a delicious matcha cream soda float. You learned about key ingredients like matcha powder, sweeteners, and toppings. I shared step-by-step instructions for preparing the drink and creative serving ideas. Tips for customizing your sweetness and choosing the right matcha can enhance your float. Don’t forget our fun variations, including dairy-free options. Enjoy experimenting with this recipe and make it your own. The possibilities are endless!

Matcha Cream Soda Float Refreshing Summer Treat

Looking for a cool summer treat? Discover the joy of a Matcha Cream Soda Float! This refreshing drink combines the

For this peach crisp, use 4 cups of fresh peaches. That is about 6 to 8 peaches. Choose ripe, juicy peaches for the best flavor. Sweet, fresh peaches make the dish shine. We need sweeteners to balance the tartness of the peaches. Use 1/2 cup of granulated sugar. This will help the fruit caramelize. You will also need 1/2 cup of packed brown sugar. It adds a rich flavor and depth. Spices bring warmth to the crisp. Use 1 teaspoon of ground cinnamon for a cozy taste. Add 1/2 teaspoon of nutmeg to enhance the flavor profile. These spices make the dish feel like a hug. For the topping, gather 1 cup of rolled oats and 3/4 cup of all-purpose flour. The oats will provide a nice crunch. You will also need 1/4 teaspoon of salt to balance the sweetness. Lastly, use 1/2 cup of unsalted butter, softened and cut into cubes. This will create a wonderful crumbly texture. For the full recipe, visit the recipe section. Enjoy making your delicious peach crisp! Start by washing the peaches. Use fresh, ripe peaches for the best flavor. Slice the peaches into thin wedges. You should have about four cups of sliced peaches. In a large bowl, mix the peaches with one tablespoon of lemon juice. This keeps the peaches bright and tasty. Add a quarter cup of granulated sugar, half a teaspoon of cinnamon, and nutmeg. Toss everything gently. Set this peach mixture aside to let the flavors blend. In another bowl, combine rolled oats, flour, the remaining quarter cup of granulated sugar, brown sugar, and salt. Mix these dry ingredients well. Next, add half a cup of softened butter, cut into cubes. Use a fork or your fingers to blend the butter into the dry mix. Keep mixing until the mixture looks like coarse crumbs. This will be your crispy topping. Grab a greased 9x13-inch baking dish. Pour the peach mixture into the dish, spreading it evenly across the bottom. Make sure the peaches are in a single layer. Now, sprinkle the crumble topping over the peaches. Ensure you cover all the peaches with the topping. This creates a nice crunchy layer. Preheat your oven to 350°F (175°C). Place the baking dish in the oven. Bake for 35-40 minutes. Look for a golden brown topping and bubbly peaches. Once done, take it out and let it cool for about 10 minutes. This helps the crisp set up a bit. You can find the full recipe for more details on timing and serving. To make a great peach crisp, start with ripe peaches. Look for peaches that feel firm yet slightly soft. Their color should be vibrant, often yellow or orange. Avoid peaches with green spots. I recommend using a mix of clingstone and freestone peaches for texture. Clingstone peaches hold their shape well, while freestone peaches are easy to slice. Wash and slice your peaches just before using them for the best flavor. To get that crunchy topping, use cold butter. Cut it into small cubes and mix it with the dry ingredients. This helps create clumps for a nice crisp. Don’t overmix; leave some lumps. The mixture should look like coarse crumbs. Bake until the topping is golden brown. This usually takes about 35 to 40 minutes. You want the peaches to bubble and be soft, too. Serve your peach crisp warm for the best experience. A scoop of vanilla ice cream is a classic choice. The cold ice cream melts into the warm crisp. You can also add whipped cream for extra creaminess. For a fun twist, drizzle some caramel sauce on top. It adds a lovely sweetness that everyone will enjoy. If you want to try something different, serve it with yogurt for a tangy contrast. The Full Recipe will help you create this delightful dish with ease. {{image_2}} You can enjoy peach crisp without gluten. Use gluten-free oats and flour. This swap keeps the taste and texture great. Just make sure your baking powder is also gluten-free. Mixing in other fruits can make this dish exciting. You can add berries like blueberries or raspberries. Pears or apples also work well. These fruits add new flavors to your peach crisp. To make this peach crisp vegan, swap butter for coconut oil. Use a plant-based butter for a similar taste. Replace the granulated sugar with coconut sugar or maple syrup. These changes keep it tasty while being plant-friendly. For the full recipe, check out the details above. If you have any peach crisp left, store it in the fridge. Place it in an airtight container. It will stay fresh for about three days. You can cover it tightly with plastic wrap too. Cold peach crisp tastes great, but you can warm it up if you want. You can freeze peach crisp for later. First, let it cool completely. Then, wrap it tightly in plastic wrap. After that, put it in a freezer-safe container or bag. It can last for up to three months. When you are ready to eat it, just thaw it in the fridge overnight. To reheat peach crisp, preheat your oven to 350°F (175°C). Place the crisp in a baking dish. Cover it with foil to keep it moist. Heat for about 15-20 minutes. You can also microwave it. Heat it in short bursts, checking to avoid overcooking. Warm peach crisp tastes amazing, especially with ice cream on top. Yes, you can use canned or frozen peaches. However, fresh peaches have the best flavor and texture. If you choose canned peaches, drain them well to avoid excess liquid. For frozen peaches, let them thaw and drain some juice. This helps keep your crisp from becoming soggy. Your peach crisp is done when the topping is golden brown. The peaches should bubble around the edges. A good baking time is about 35-40 minutes at 350°F. Keep an eye on it to avoid burning the topping. When it's done, let it cool for about 10 minutes before serving. If you need a substitute for brown sugar, use white sugar with a little molasses. For every cup of brown sugar, mix 1 cup of white sugar with 1 tablespoon of molasses. You can also use coconut sugar or honey as alternatives. Each will change the flavor a bit, but it can still taste great. You can store peach crisp in the fridge for up to 5 days. Just cover it tightly with plastic wrap or aluminum foil. If you want to keep it longer, freeze it for up to 3 months. Just let it cool completely before you freeze it. Reheat in the oven for a tasty treat. For the full recipe, check out the details above. You can make a delicious peach crisp with fresh peaches, sweeteners, spices, and toppings. I shared step-by-step instructions to guide you through each part. I also included tips to help you pick great peaches and get that crisp just right. If you want to try new flavors, I offered some fun variations too. Lastly, make sure to store your leftovers properly. Enjoy your yummy peach crisp, and remember, baking can be simple and fun!

Classic Peach Crisp Delightful and Easy Recipe

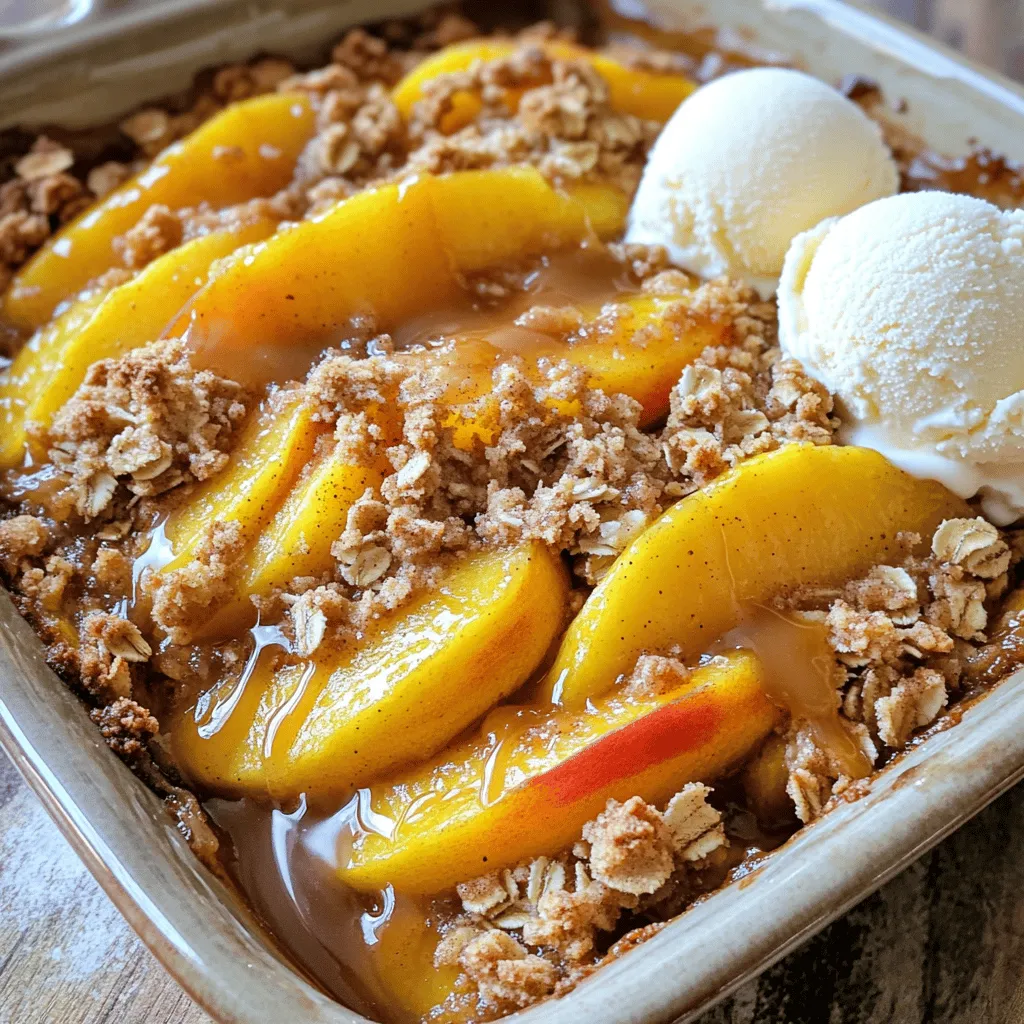
Are you ready to enjoy a warm, sweet Classic Peach Crisp? This recipe is simple and delicious, making it perfect

This easy peach cobbler is a joy to make. You need simple items that you may already have at home. The bright flavor of peaches shines in this dessert. It combines soft fruit with a sweet, buttery topping. You will love how easy it is to prepare this dish. Check out the Full Recipe for all the details. Here are the key ingredients you will need for this delightful dessert: - 4 ripe peaches, peeled and sliced - 1 cup granulated sugar, divided - 1 tablespoon lemon juice - 1 teaspoon vanilla extract - 1 cup all-purpose flour - 1 tablespoon baking powder - 1/2 teaspoon salt - 1 cup whole milk - 1/2 cup unsalted butter, melted - 1 teaspoon ground cinnamon - Vanilla ice cream, for serving (optional) Each ingredient plays a role. The peaches bring sweetness and moisture. Sugar adds sweetness and helps the topping brown. Lemon juice brightens the flavor. Vanilla extract gives a warm note. Flour and baking powder help the cobbler rise. Milk and butter make the batter rich and smooth. Cinnamon adds a nice spice. You can swap some ingredients if needed. Here are a few ideas: - Peaches: Use nectarines or plums for a twist. - Sugar: Brown sugar can add a deeper flavor. - Milk: Almond or oat milk works for a dairy-free option. - Butter: Use coconut oil for a vegan choice. - Flour: Whole wheat flour can make it more hearty. Feel free to get creative with these swaps. The cobbler will still taste great! Start by peeling and slicing four ripe peaches. Fresh peaches work best, but you can use canned if needed. In a bowl, combine the sliced peaches with 1/2 cup of sugar. Add one tablespoon of lemon juice and one teaspoon of vanilla extract. Gently stir to coat the peaches. Let them sit for about 10 minutes. This will help the peaches get sweet and juicy. In a clean bowl, whisk together one cup of all-purpose flour, one tablespoon of baking powder, and 1/2 teaspoon of salt. Add the remaining 1/2 cup of sugar to this mix. Next, slowly pour in one cup of whole milk while whisking. Keep mixing until the batter is smooth. Finally, stir in 1/2 cup of melted unsalted butter. This will make your batter rich and tasty. First, preheat your oven to 350°F (175°C). Pour the batter into a greased 9x13-inch baking dish. Spread it evenly across the bottom. Next, spoon the marinated peaches and their juices over the batter. Do not stir; this helps the cobbler form its layers. Sprinkle a teaspoon of ground cinnamon on top for extra flavor. Bake in the oven for 40 to 45 minutes. The top should look golden brown. A toothpick should come out clean when inserted in the center. Let it cool slightly before serving. For a delightful touch, serve with vanilla ice cream. Enjoy this easy peach cobbler! For the full recipe, check out the section above. To get the best texture in your peach cobbler, use fresh peaches. They give the best flavor. Slice the peaches evenly. This helps them cook at the same time. Mix the batter gently. Over-mixing can make it tough. Pour the batter into a greased dish. This stops it from sticking. Bake at 350°F for about 40-45 minutes. Keep an eye on it. You want a golden brown top. Serve the cobbler warm for the best flavor. A scoop of vanilla ice cream on top adds creaminess. You can also sprinkle some fresh mint leaves for color. For a fun twist, drizzle caramel sauce over the top. It contrasts nicely with the sweet peaches. You can enjoy it as a dessert or with breakfast. To get a nice crisp top, sprinkle cinnamon on the batter before baking. You can also add a bit of sugar on top. This helps it caramelize while baking. If you want more crunch, try adding some oats to the batter. This gives your cobbler a delightful texture. Always watch the baking time closely. A perfect golden brown means it's ready to serve. For the full recipe, check out the section above. {{image_2}} You can switch up the fruit in peach cobbler. Try using fresh or frozen berries. Blueberries, raspberries, or blackberries work well. If you prefer stone fruits, apricots or plums are great choices too. You can even mix different fruits for a fun twist. Each fruit brings its unique flavor, so feel free to experiment! If you want a gluten-free peach cobbler, swap the all-purpose flour. Use a gluten-free flour blend instead. Many brands offer blends that work well in baking. You can also try almond flour or coconut flour. Just adjust the liquid in your recipe, as these flours absorb moisture differently. Add more flavor to your peach cobbler with nuts or spices. Chopped pecans or almonds add crunch and richness. For spices, consider adding nutmeg or ginger along with cinnamon. You can also try a splash of almond extract for a unique twist. These little extras can take your cobbler from good to great! For the full recipe, check out the [Full Recipe]. To keep your peach cobbler fresh, let it cool first. Then, cover it with plastic wrap or foil. You can also place it in an airtight container. Store it in the fridge for up to three days. This keeps the flavors rich and the texture nice. When you're ready to enjoy the leftovers, preheat your oven to 350°F (175°C). Place the cobbler in an oven-safe dish. Cover it with foil to prevent it from drying out. Heat it for about 15-20 minutes. If you want a crispy top, remove the foil for the last five minutes. You can also reheat it in the microwave for about 30-60 seconds. If you want to store peach cobbler for a longer time, freezing works great. First, let the cobbler cool completely. Cut it into portions for easy serving later. Wrap each piece tightly in plastic wrap and then in foil. Place the wrapped pieces in a freezer-safe bag. Label it with the date. You can freeze it for up to three months. To thaw, just leave it in the fridge overnight before reheating. For the full recipe, check out the details above! Yes, you can use canned peaches. They are convenient and save time. Just drain them well and reduce the sugar a bit. Canned peaches are often sweeter, so adjust to your taste. This swap makes the recipe quick and easy, perfect for busy days. The best way to serve peach cobbler is warm. You can add a scoop of vanilla ice cream on top for a delicious mix of hot and cold. A sprig of mint adds a nice touch. Serve it in a bowl to catch all the yummy juices. Your cobbler is done when the top is golden brown. Insert a toothpick in the center. If it comes out clean, it's ready. The edges should be bubbly, and the fruit should be soft. Let it cool slightly before serving to enjoy the best flavor. Peach cobbler is a simple, sweet delight made from fresh peaches and a light batter. We explored key ingredients and substitutions to fit your needs. I shared step-by-step instructions for perfect assembly and baking. Tips on texture and serving made it easier for you. You can try variations like different fruits or gluten-free options. Remember to store leftovers properly for later enjoyment. With this guide, you can bake a delicious peach cobbler with confidence and creativity. Enjoy making this classic treat!

Easy Peach Cobbler Simple and Tasty Dessert Recipe

Are you craving a warm, delicious treat that’s super easy to make? You’re in the right place! In this blog

- 4 cups fresh peaches, peeled and sliced - 1 cup granulated sugar - 1/4 cup all-purpose flour Peaches are the star of this recipe. Choose ripe, fresh peaches for the best flavor. The sugar helps sweeten the fruit, while flour thickens the filling as it bakes. - 1 teaspoon ground cinnamon - 1/4 teaspoon nutmeg - 1 tablespoon lemon juice Cinnamon and nutmeg add warmth and depth. Lemon juice brightens the flavors, balancing the sweetness of the peaches. - 1 package refrigerated pie crusts (2 crusts) - 1 tablespoon unsalted butter, cut into small pieces - 1 egg, beaten (for egg wash) - Pinch of salt Using refrigerated pie crusts saves time. The butter adds richness to the filling, while the egg wash gives the crust a lovely golden color. Don't forget the pinch of salt; it enhances all the flavors. For the full recipe, check out Easy Peach Pie. First, preheat your oven to 425°F (220°C). This step is key for a crispy crust. Now, gather your ingredients. You will need fresh peaches, sugar, flour, cinnamon, nutmeg, lemon juice, and a pinch of salt. In a large bowl, mix the sliced peaches with sugar, flour, cinnamon, nutmeg, lemon juice, and salt. Stir well until the peaches are covered. This mixture will create a sweet and flavorful filling. Next, roll out one pie crust. Place it in a 9-inch pie dish. Press it gently into the bottom and sides. This helps hold the peach filling. Now, pour the peach mixture into the crust. Spread it evenly for the best taste. Dot the filling with small pieces of butter. This will add richness and flavor to your pie. Roll out the second pie crust and cover the peach filling. Trim any extra dough from the edges. Crimp the edges to seal the pie well. This keeps the filling from leaking out. Cut a few small slits in the top crust. This allows steam to escape while baking. Brush the top crust with the beaten egg for a nice golden color. Bake the pie in your preheated oven for 40-45 minutes. Look for a golden crust and bubbly filling. Once done, remove the pie and let it cool for at least 30 minutes before slicing. Enjoy your homemade peach pie! For the full recipe, check out the details provided earlier. To get the best taste, adjust sugar based on your peaches' sweetness. If your peaches are sweet, use less sugar. For tart peaches, use more sugar. Fresh peaches taste great, but frozen ones work too. If using frozen, thaw and drain excess juice before use. Rolling out pie crusts can be easy. Dust your surface and the dough with flour. Use a rolling pin to flatten the dough evenly. For a golden crust, brush the top with beaten egg. This gives it a nice shine and color when baked. Serve your pie warm for the best flavor. A scoop of vanilla ice cream or whipped cream pairs perfectly. This adds creaminess and balances the pie's sweetness. Garnish with mint leaves for a fresh touch that looks great on the plate. {{image_2}} You can make your peach pie even more exciting. Adding a splash of vanilla or almond extract gives it a warm flavor. Just one teaspoon can change everything! If you feel adventurous, try mixing in some berries like blueberries or raspberries. This mix of fruits adds a fun twist to your classic peach pie. You have choices when it comes to the crust. A homemade pie crust tastes great and adds a personal touch. If you're short on time, store-bought crusts work well too. Another fun idea is to create a crumble topping. This gives your pie a crunchy texture that contrasts nicely with the soft peaches. For those who need gluten-free options, you can make crusts using almond flour or gluten-free flour blends. These alternatives still taste good. If you're watching your sugar intake, you can reduce the sugar in your filling. Try using just half a cup instead of a full cup. This way, you keep the peach flavor without too much sweetness. For the complete recipe, check out the Full Recipe for Easy Peach Pie. To keep your Easy Peach Pie fresh, store it in the fridge. Cover it with plastic wrap or foil. This helps keep the pie from drying out. Make sure it is cool before storing. You can also freeze the pie if you want to save it longer. Wrap it tightly in plastic wrap, then in aluminum foil. This way, it can last up to three months in the freezer. When ready to eat, let it thaw in the fridge overnight. To warm up your peach pie, you have a few options. You can use an oven, microwave, or air fryer. If using the oven, preheat it to 350°F (175°C). Place the pie on a baking sheet and heat for about 15-20 minutes. For the microwave, heat a slice for 30 seconds to 1 minute. If you want a crispy crust, an air fryer works well. Heat the pie at 300°F (150°C) for about 5-7 minutes. To restore the crust's texture, add a few drops of water to the pie before reheating. This helps keep it flaky and soft. Enjoy your warmed pie with a scoop of ice cream for a truly delightful treat! For the complete recipe, check out the Full Recipe. You can tell your peach pie is done when the crust is golden brown. The juices should bubble through the slits in the top crust. A good rule is to bake for 40-45 minutes at 425°F (220°C). Let it cool for at least 30 minutes before slicing. This cooling time helps the filling set. Yes, you can use canned peaches! If you choose canned peaches, make sure they are in juice, not syrup. Drain and rinse them before using. You may want to cut back on the sugar in the recipe since canned peaches are often sweeter. Adjust the flour to help thicken the juices. Mixing peaches with other fruits can enhance the flavor. Here are popular choices: - Blueberries - Raspberries - Blackberries - Strawberries - Apples Combining fruits adds depth to your pie. Just adjust the sugar depending on the sweetness of the extra fruit. Use the Full Recipe for more details on how to create your pie! You can create an easy peach pie with simple steps and fresh ingredients. You learned about the key parts: fresh peaches, sugar, and a flaky crust. I shared tips on achieving the perfect pie, like using fresh peaches and adjusting sugar. You saw variations to suit your taste, like adding berries or making a crumble. Lastly, I covered how to store leftovers and reheat them perfectly. Now, you have all the tools to bake a delicious peach pie that everyone will love. Enjoy baking and sharing your sweet creation!

Easy Peach Pie Delightful and Simple Dessert Recipe

Who doesn’t love a sweet slice of peach pie? This Easy Peach Pie is a delightful dessert that anyone can

For this summery bread, you'll need these simple ingredients: - 2 cups grated summer squash (zucchini or yellow squash) - 1 ½ cups all-purpose flour - 1 teaspoon baking powder - ½ teaspoon baking soda - ½ teaspoon salt - 1 teaspoon ground cinnamon - ½ teaspoon nutmeg - ½ cup granulated sugar - ¼ cup brown sugar, packed - 2 large eggs - ½ cup vegetable oil - 1 teaspoon vanilla extract - ½ cup chopped walnuts or pecans (optional) - ½ cup raisins or chocolate chips (optional) Summer squash is the star of this dish. It adds moisture and a subtle flavor. You can use either zucchini or yellow squash. Grating it makes it easy to mix into the batter. Before you add it, let it sit with a little salt. This step helps draw out extra moisture. Squeezing it with a towel after helps keep your bread from getting too soggy. You can customize your summer squash bread with fun add-ins. Chopped walnuts or pecans add a nice crunch. They also bring a rich flavor that pairs well with the spices. If you have a sweet tooth, consider adding chocolate chips. They melt into the bread, creating little pockets of sweetness. Raisins are another option if you prefer dried fruit. Feel free to mix and match these add-ins to suit your taste! Start by preheating your oven to 350°F (175°C). Next, grease a 9x5-inch loaf pan. Grate 2 cups of summer squash, either zucchini or yellow squash. In a medium bowl, sprinkle a pinch of salt over the grated squash. Let it rest for 15 minutes. This step helps to draw out extra moisture. After 15 minutes, take a clean kitchen towel and gently squeeze out the excess water from the squash. In a large mixing bowl, whisk together: - 1 ½ cups all-purpose flour - 1 teaspoon baking powder - ½ teaspoon baking soda - ½ teaspoon salt - 1 teaspoon ground cinnamon - ½ teaspoon nutmeg In a separate bowl, combine: - ½ cup granulated sugar - ¼ cup brown sugar, packed - 2 large eggs - ½ cup vegetable oil - 1 teaspoon vanilla extract Beat these ingredients until smooth. Now, gently fold in the drained squash into the wet mixture. Gradually add the dry mixture to the wet one. Stir gently until just combined. Avoid overmixing. If you like, fold in ½ cup of chopped walnuts or pecans and ½ cup of raisins or chocolate chips. Pour the batter into the greased loaf pan. Spread the top evenly. Place it in the oven and bake for 45-55 minutes. Check for doneness by inserting a toothpick into the center. If it comes out clean, your bread is ready. Once baked, take it out and let it cool in the pan for 10 minutes. After that, transfer the bread to a wire rack to cool completely. Enjoy your Irresistible Summer Squash Bread! For the full recipe, refer back to the ingredients section. When picking summer squash, look for firm, smooth skin. Choose ones that feel heavy for their size. Avoid squash with soft spots or blemishes. Fresh squash has a bright color. Zucchini and yellow squash both work well in this recipe. You can grate them easily for the bread. For the best taste, use squash that is in season. One common mistake is overmixing the batter. Mix just until ingredients blend. Overmixing can make the bread tough. Another mistake is not measuring ingredients correctly. Use dry measuring cups for flour and sugar. Too much flour can dry out your bread. Always check your oven temperature with an oven thermometer. Baking at the wrong temperature can lead to uneven cooking. To store leftover squash bread, let it cool completely first. Wrap it in plastic wrap or foil. You can also place it in an airtight container. Keep it at room temperature for up to three days. For longer storage, freeze slices in a single layer. Once frozen, place them in a bag. You can enjoy your bread later as a tasty treat. For the full recipe, check the section above! {{image_2}} You can make summer squash bread gluten-free. Use a gluten-free flour blend instead of all-purpose flour. Many blends work well, but look for one that includes xanthan gum. This helps the bread hold its shape. The texture may be slightly different, but the taste will still shine through. To make this bread vegan, swap the eggs for flax eggs. Mix one tablespoon of ground flaxseed with three tablespoons of water. Let it sit until it thickens, about five minutes. Use a plant-based oil, like coconut or canola oil, instead of vegetable oil. This keeps the bread moist and delicious. You can boost the flavor of your summer squash bread easily. Add a teaspoon of vanilla or almond extract for a sweet touch. For spice lovers, consider adding a pinch of ginger or allspice. If you want a chocolate twist, fold in some cocoa powder or chocolate chips. You can also mix in dried fruit or citrus zest for a fun twist. For the full recipe, check out the details to create your own perfect loaf. You can store your summer squash bread at room temperature. Wrap it tightly in plastic wrap or place it in an airtight container. This keeps it fresh for up to three days. Make sure to keep it in a cool, dry place. If you live in a warm area, check for mold before eating. If you want to keep the bread longer, refrigeration is a good choice. Wrap the bread in plastic wrap and then in foil. This helps prevent it from drying out. In the fridge, it will stay fresh for about a week. Just be sure to let it come back to room temperature before serving. Freezing is the best way to save your summer squash bread for later. Slice the bread before freezing for easy serving. Wrap each slice in plastic wrap, then place them in a freezer-safe bag. This way, you can grab one slice or more as needed. The bread can last up to three months in the freezer. When you're ready to eat, thaw it in the fridge or on the counter. You can also pop it in the toaster for a warm treat! For the complete recipe, check out the full recipe. Yes, you can use zucchini instead of summer squash. Both have a similar texture and taste. Zucchini is often easier to find, so feel free to swap. Grate it just like you would with summer squash. The bread will still be moist and delicious. You can make this recipe healthier by using whole wheat flour instead of all-purpose flour. You can also reduce the sugar by half. Adding applesauce can replace some oil. For a boost of nutrition, mix in seeds or use less oil. These changes keep the bread tasty and nutritious. Summer squash bread is great warm or at room temperature. Slice it and spread a little cream cheese or butter for extra flavor. You can also serve it with fresh fruit. Pair it with a cup of tea or coffee for a lovely treat. For a fun twist, toast the slices and add toppings like avocado or hummus. This blog post covered everything about making summer squash bread. We explored ingredients, from favorite flavors to possible add-ins like nuts and chocolate chips. I walked you through each step, from preparation to cooling. You learned tips for selecting squash and avoiding common mistakes. We discussed tasty variations, storage methods, and answered your FAQs. In the end, summer squash bread is fun and simple to make. Try it, and enjoy sharing this treat with others. Your baking journey starts now!

Irresistible Summer Squash Bread Quick and Easy Recipe

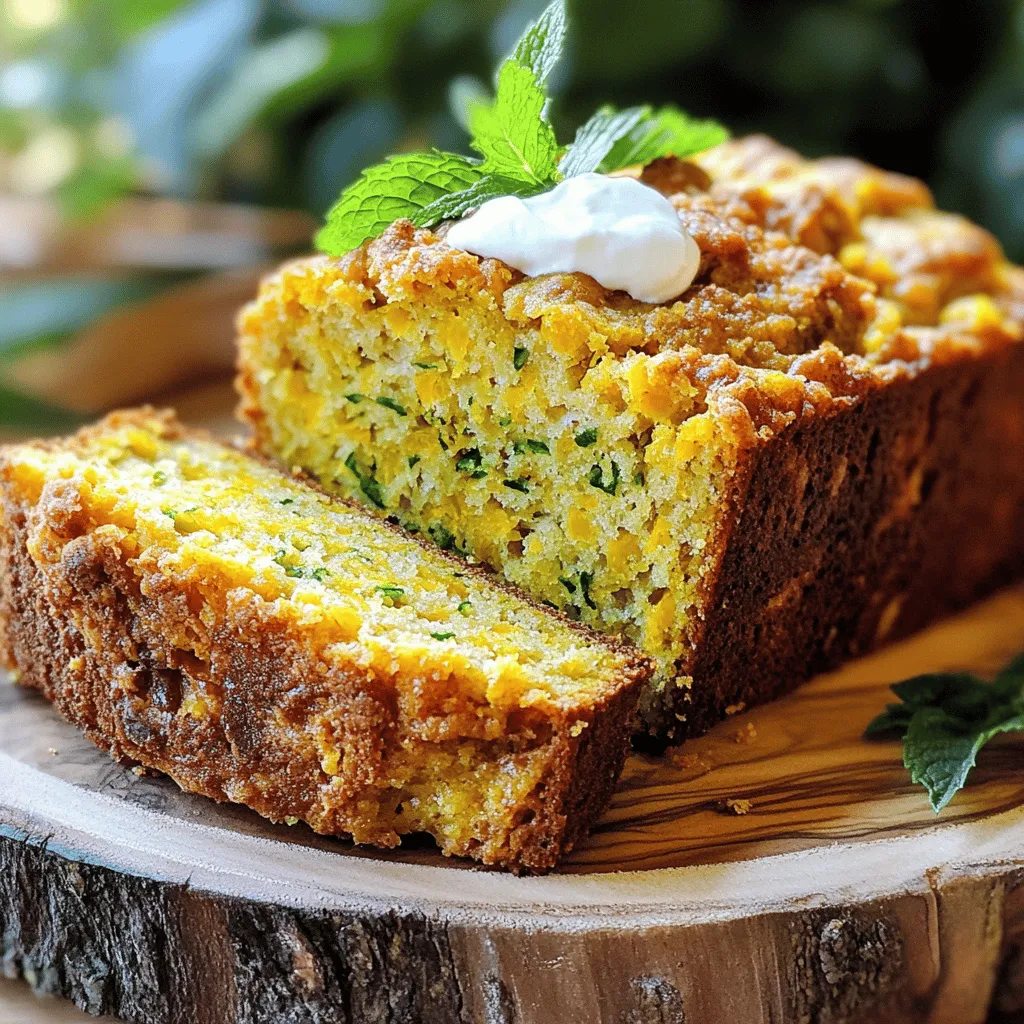
Looking for a delicious way to use up summer squash? You’ve found it! This Irresistible Summer Squash Bread recipe is

To make Peach Cobbler Cheesecake, gather these simple items: - 1 ½ cups graham cracker crumbs - ½ cup unsalted butter, melted - 2 tablespoons sugar - 3 (8 oz) packages cream cheese, softened - 1 cup sugar - 1 teaspoon vanilla extract - 3 large eggs - 1 cup sour cream - 1 ½ cups fresh peaches, peeled and diced - 1 teaspoon cinnamon - ½ teaspoon nutmeg - ¼ cup brown sugar When measuring your ingredients, use dry measuring cups for solids. For liquids, a clear measuring cup works best. Fill the cup to the line and check at eye level. This step helps avoid mistakes. For sticky items like butter or honey, use a spoon to pack it in tightly. Level the top with a straight edge. This ensures you have the right amount. If you don’t have all the ingredients, don’t worry! Here are some swaps you can try: - For graham cracker crumbs, use vanilla wafer crumbs or crushed cookies. - If you need a dairy-free option, replace cream cheese with cashew cream. - For eggs, you can use unsweetened applesauce or mashed bananas. One egg equals ¼ cup of applesauce. These substitutions can still give you a tasty Peach Cobbler Cheesecake. For the full recipe, check the details above! Start by preheating your oven to 325°F (160°C). This helps the pie cook evenly. In a medium bowl, mix together 1 ½ cups graham cracker crumbs, ½ cup melted unsalted butter, and 2 tablespoons of sugar. You want the mix to look like wet sand. Next, press this mixture into the bottom of a 9-inch springform pan. Make sure it’s even and compact. Bake the crust for 10 minutes. Once done, take it out and let it cool. In a large bowl, take 3 packages of softened cream cheese. Beat it with an electric mixer for 2-3 minutes until smooth. Gradually add 1 cup of sugar and 1 teaspoon of vanilla extract. Mix until it’s all blended well. Now, add 3 large eggs, one at a time. Mix well after each one. Then, add 1 cup of sour cream and mix until it’s smooth. Now, gently fold in 1 ½ cups of diced fresh peaches, 1 teaspoon of cinnamon, ½ teaspoon of nutmeg, and ¼ cup of brown sugar. Make sure all the ingredients are mixed evenly. Pour the cheesecake filling over the cooled crust in your springform pan. Smooth the top with a spatula. Bake in the oven for 50-60 minutes. The edges should be set, but the center can be a bit jiggly. After baking, turn off the oven and leave the cheesecake inside. Keep the door slightly open for 1 hour. This step helps prevent cracks. Once cooled, let it reach room temperature. Refrigerate for at least 4 hours, but overnight is best. When ready, carefully remove the springform pan and slice the cheesecake into wedges. Enjoy your peach cobbler cheesecake! For more details, check the Full Recipe. To create a great crust, use fresh graham cracker crumbs. You can crush them by hand or in a food processor. Mix the crumbs with melted butter and sugar. Press this mix firmly into the bottom of your pan. This step is key. Bake for just 10 minutes to set it without overdoing it. A well-made crust gives your cheesecake a solid base. Cracks can ruin the look of your cheesecake. To prevent this, avoid overmixing the batter. Mix just until smooth. Baking at a lower temperature helps too. After baking, turn off the oven but leave the cheesecake inside for an hour. This gradual cooling helps. Lastly, chill the cheesecake in the fridge for at least four hours before slicing. Serve your cheesecake with a fresh touch. Top slices with extra diced peaches for color. A sprinkle of cinnamon adds warmth. A dollop of whipped cream makes it extra special. You can also pair it with a scoop of vanilla ice cream for a treat. For drinks, sweet tea or a light white wine works well. For the full recipe, check out our detailed guide. {{image_2}} You can change the fruit in this cheesecake. Try using apples, berries, or cherries. Each fruit brings its own taste. Apples give a crisp bite, while berries add a tart twist. For cherries, pit and chop them first. Adjust the sugar based on the fruit's sweetness. Fresh fruit works best, but frozen can work if you thaw and drain them well. Adding flavors can make this cheesecake even better. You can mix in lemon zest for a bright kick. Almond extract gives a subtle nutty taste. A splash of bourbon or rum can add depth. Spice lovers can use ginger or cardamom for warmth. Just remember, a little goes a long way. Taste as you mix to find your perfect blend. To make this cheesecake gluten-free, swap the graham crackers. Use gluten-free cookie crumbs or almond flour instead. For the crust, mix the crumbs with melted butter and sugar like in the original recipe. Ensure all other ingredients are gluten-free too. This way, everyone can enjoy the dessert without worry. Check labels on your products to be safe. For the complete method and ingredients, check out the Full Recipe. After enjoying your peach cobbler cheesecake, you may have leftovers. To keep them fresh, follow these steps: - Allow the cheesecake to cool completely at room temperature. - Wrap it tightly with plastic wrap. This prevents air from drying it out. - Place the wrapped cheesecake in the fridge. It stays fresh for up to five days. If you cut slices, wrap each slice separately for better storage. This way, you can grab a piece at any time! If you want to save your cheesecake for later, freezing is a great option. Here’s how to do it: - Allow the cheesecake to cool completely. - Wrap it well in plastic wrap, then in aluminum foil. Make sure it’s airtight. - Label with the date and type of cheesecake. - Place it in the freezer. It can last for up to three months. When you are ready to enjoy it again, simply transfer it to the fridge to thaw overnight. You might want to warm up your cheesecake. Here’s the best way to do it: - Preheat your oven to 325°F (160°C). - Unwrap the cheesecake and place it on a baking dish. - Heat for about 10-15 minutes. This warms it without drying it out. After reheating, let it cool for a few minutes before serving. Enjoy the delightful flavor as if it were fresh! Peach Cobbler Cheesecake needs to set for at least 4 hours. For the best texture, I recommend letting it chill overnight. This helps it firm up and makes slicing easier. The longer it sets, the better the flavor blends together. Yes, you can use canned peaches! Just make sure to drain them well. Canned peaches can be softer, so cut them into smaller pieces. This keeps the cheesecake from getting too mushy. Fresh peaches give a brighter taste, but canned ones work just fine. Common mistakes include overmixing the batter and not letting it cool properly. Overmixing adds too much air, causing cracks. Always mix just until combined for a smooth texture. Also, avoid opening the oven door while baking. This can cause the cheesecake to sink or crack. Let it cool slowly in the oven for the best results. This guide covered everything you need for the perfect Peach Cobbler Cheesecake. We explored ingredients, steps for prep, and baking tips. I shared ways to avoid cracks and suggested delicious flavor twists. You learned how to store and reheat leftovers too. Remember to have fun and be creative! Each bite should remind you of summer. Now, get in the kitchen and make your own cheesecake masterpiece!

Peach Cobbler Cheesecake Flavorful Dessert Delight

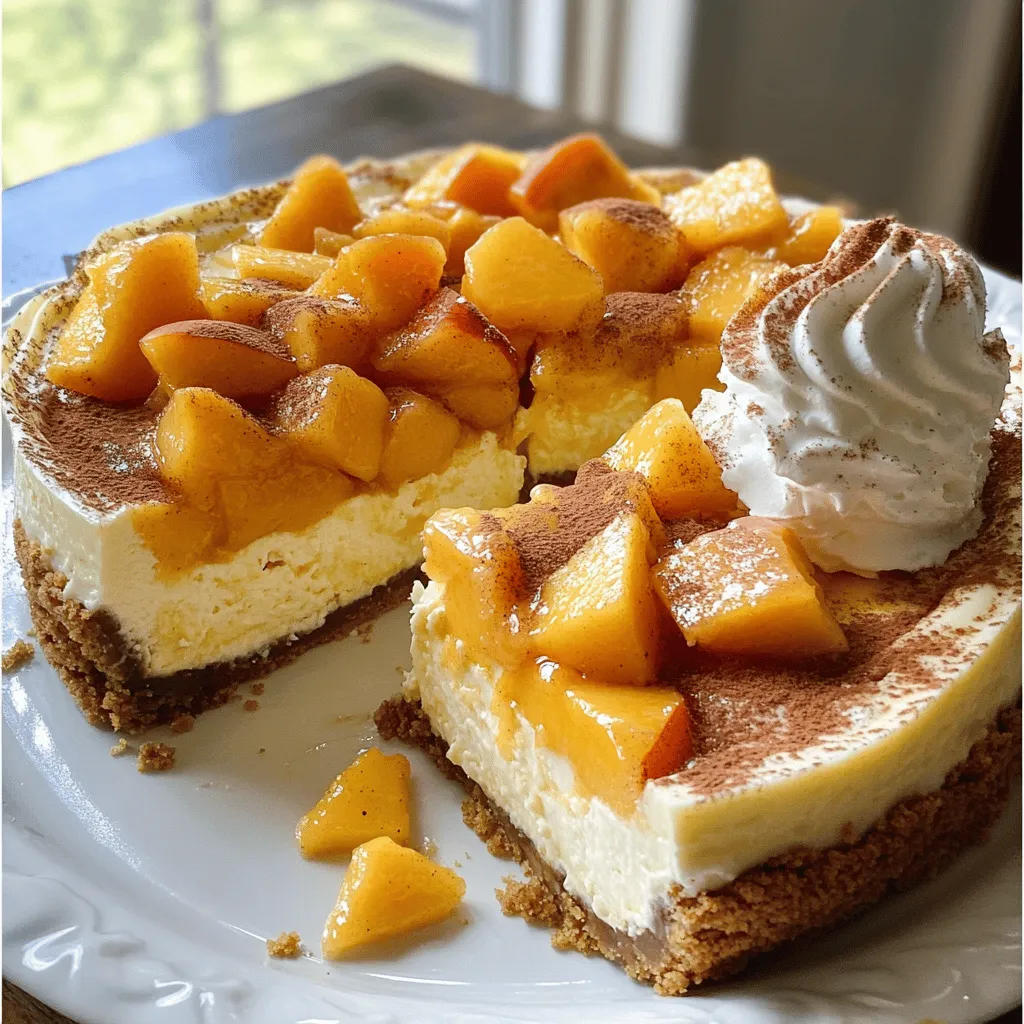
Craving a dessert that combines two favorites? Meet Peach Cobbler Cheesecake! This creamy treat blends rich cheesecake with sweet, juicy

Older posts
Newer posts
← Previous Page1 … Page22 Page23 Page24 … Page65 Next →

dsad

© 2025 flavorsprint • Built with GeneratePress

Our Policies

  • Copyright Policy
  • Cookie Policy
  • GDPR Policy
  • Privacy Policy
  • Disclaimer
  • Terms Of Use

More Information

  • Home
  • About
  • Contact
  • Appetizers
  • Dessert
  • Dinner
  • Drinks
©2025, flavorsprint About Back To Top