Skip to content
DisclaimerTerms Of UseGDPR PolicyCookie Policy

flavorsprint

  • Home
  • Drinks
  • Appetizers
  • Dinner
  • Dessert
  • About
  • Contact
  • Privacy Policy
DisclaimerTerms Of UseGDPR PolicyCookie Policy

Lillian

- 1 cup elbow macaroni - 1 cup dill pickles, chopped - 1/2 cup cherry tomatoes, halved - 1/2 cup cheddar cheese, cubed - 1/4 cup red onion, finely sliced - 1/4 cup Greek yogurt - 1 tablespoon Dijon mustard - 1 tablespoon fresh dill, chopped - Salt and pepper to taste - Wooden skewers - Metal skewers Gather these ingredients to make pickle pasta skewers. The elbow macaroni serves as the base. Dill pickles add a tangy crunch. Cherry tomatoes bring freshness, while cheddar cheese adds creaminess. Red onion gives a slight bite. Greek yogurt acts as a smooth dressing, enriched with Dijon mustard and fresh dill. These flavors create a perfect balance. When it comes to skewers, you can use either wooden or metal options. Wooden skewers are easy to find and disposable, while metal skewers are reusable and eco-friendly. Choose what works best for you! If you want the full recipe, check out the section on step-by-step instructions. These ingredients will help you create a fun dish that everyone will love! To cook elbow macaroni, bring a large pot of salted water to a boil. Add 1 cup of elbow macaroni. Cook it according to the package instructions. The pasta should be tender but firm when done. After cooking, drain the pasta in a colander. Rinse the pasta under cold water. This stops the cooking process and cools it down for the salad. In a large mixing bowl, combine the cooked macaroni with the following ingredients: - 1 cup dill pickles, chopped - 1/2 cup cherry tomatoes, halved - 1/2 cup cheddar cheese, cubed - 1/4 cup red onion, finely sliced Next, make the dressing. In a small bowl, whisk together: - 1/4 cup Greek yogurt - 1 tablespoon Dijon mustard - 1 tablespoon fresh dill, chopped - Salt and pepper to taste Mix until smooth. Pour this dressing over the pasta and gently toss everything together until coated. Now, it’s time to skewer! Grab your skewers and begin threading the pasta mixture onto them. Alternate with extra pieces of dill pickles, cherry tomatoes, and cheddar cubes. This not only adds flavor but also makes the skewers colorful. For a uniform presentation, try to keep the pieces the same size. Finally, arrange the completed skewers on a platter. You can chill them in the fridge for about 30 minutes to enhance the flavors, if you like. To boost flavor, try adjusting your seasoning. Adding a pinch of garlic powder can give your skewers a nice kick. You can also sprinkle in some smoked paprika for a warm, earthy taste. Marinating the ingredients can deepen their flavor. Toss the cherry tomatoes and pickles in a little olive oil and dill before mixing them with the pasta. Let them sit for about 15 minutes. This simple step makes a big difference. Serve your pickle pasta skewers with a side of ranch or a tangy vinaigrette. These dips enhance the flavors and add a creamy element. For a fun display, arrange the skewers in a tall glass. You can even garnish with extra dill on top. This not only looks great but adds fragrance too. Grilling your skewers can add a smoky flavor. Simply preheat the grill and cook them for about 5 minutes on each side. This method gives the pasta a nice char. If you prefer a cold snack, serve the skewers straight from the fridge. They stay fresh and crunchy. These are perfect for warm days or picnics. {{image_2}} You can change the pasta type for your pickle pasta skewers. Try penne, rotini, or even gluten-free pasta. Each type gives a different texture and taste. For cheese, cheddar is great, but you can mix it up. Use mozzarella for a milder flavor. Feta adds a salty kick. Goat cheese gives a creamy texture that many love. Spices and herbs can change the whole dish. Add garlic powder for a bit of zest. A dash of chili flakes brings heat. Fresh herbs like basil or parsley can brighten the skewers. Want more nutrition? Toss in veggies like bell peppers or cucumbers. They add color and crunch. You can even sneak in some spinach for extra greens. Make holiday-themed skewers for festive fun. Use red and green ingredients for Christmas. For Halloween, use orange cherry tomatoes and black olives. Kids love fun shapes! Use cookie cutters to cut cheese and veggies. They can help assemble the skewers, making it a fun activity. For the full recipe, check out the complete guide! To store leftover pickle pasta skewers, place them in an airtight container. This helps keep them fresh and tasty. Make sure to refrigerate them as soon as you can. If you have extra ingredients, keep them separate. This way, they stay fresh longer. Freezing pasta skewers is not the best option. The pasta can become mushy when thawed. Instead, focus on short-term storage. If you need to reheat them, gently warm them in the microwave for a few seconds. This keeps the flavors intact without overcooking. In the fridge, these skewers stay fresh for about three days. After that, the taste and texture may decline. Look for signs of spoilage, like a sour smell or slimy texture. If you notice these, it's best to throw them away. Enjoy the pickle pasta skewers while they're at their best! For the full recipe, check out the earlier sections. To make pickle pasta skewers vegetarian, you can add more veggies. Try using bell peppers, cucumbers, or zucchini. These veggies add color and crunch. You can also replace the cheese with plant-based options. Look for vegan cheese, or try using avocado for creaminess. Yes, you can prepare these skewers ahead of time. Aim to make them a few hours before serving. This allows the flavors to mix well. Store them in the fridge in an airtight container. This keeps them fresh until you're ready to enjoy. Many sauces go well with pickle pasta skewers. A classic choice is ranch dressing. It adds a creamy taste. You can also try a spicy mustard or a tangy vinaigrette. For a fun twist, mix Greek yogurt with herbs for a creamy dip. You now have a fun and tasty way to enjoy pickle pasta skewers. We covered essential ingredients, cooking steps, and even tips for flavor. Remember, you can mix it up with different ingredients or make it fit any theme. These skewers can impress at any gathering. Keep experimenting with flavors and presentations. Whether you serve them cold or grilled, you’ll have a hit on your hands. Enjoy creating and sharing these delightful snacks!

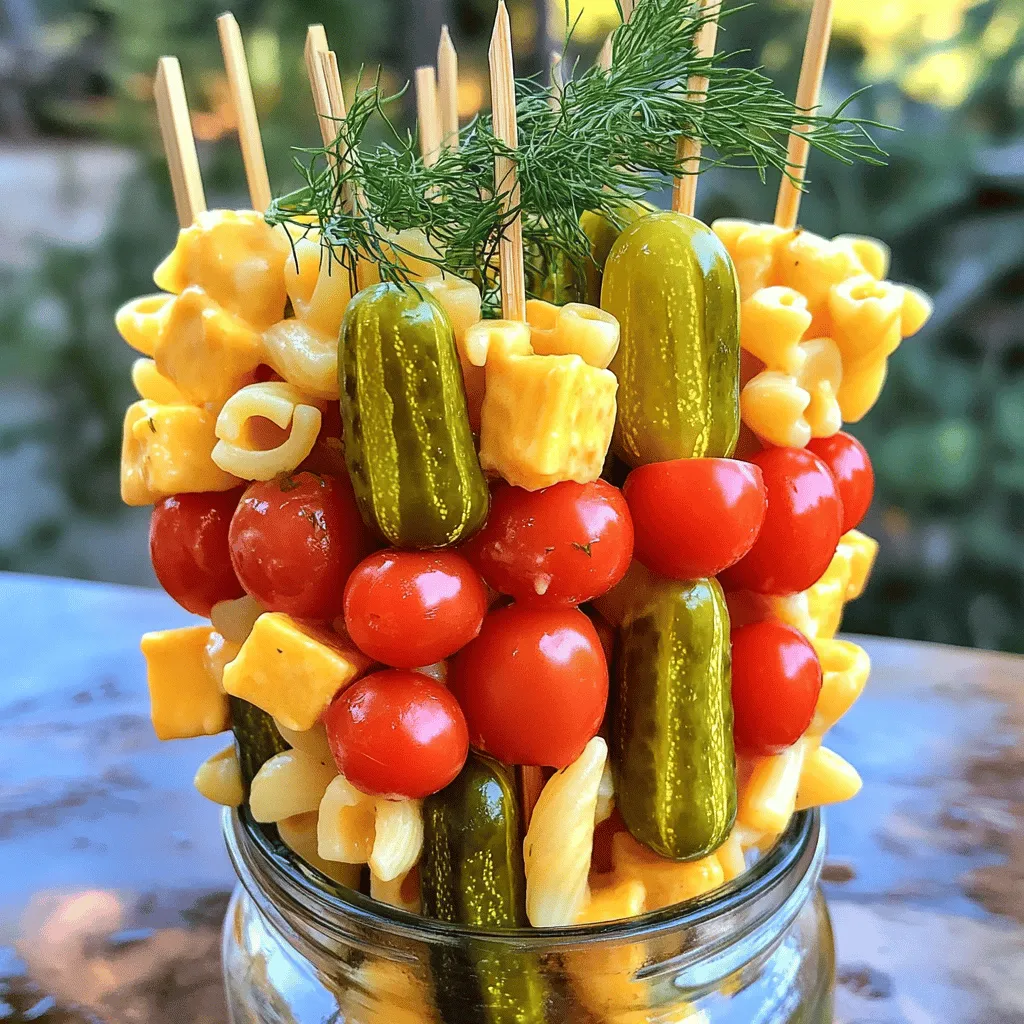
Pickle Pasta Skewers Refreshing and Easy Recipe

Looking for a fun and tasty snack? Try my Pickle Pasta Skewers! This easy recipe is packed with flavor and

- 1 cup cherry soda - 1 cup vanilla ice cream - 1/2 cup fresh cherries, pitted and halved Cherry soda is the star of this float. It adds sweetness and fizz. Vanilla ice cream gives a creamy base that blends perfectly. Fresh cherries bring a burst of flavor and a pop of color. - Whipped cream - Maraschino cherries - Chocolate shavings Whipped cream adds lightness and a fluffy touch. Maraschino cherries make a fun garnish on top. Chocolate shavings can give a rich flavor twist if you want something extra. - Alternative sodas - Dairy-free ice cream options - Fresh versus frozen cherries You can use any fruit soda you like for a twist. If you need it dairy-free, try coconut or almond ice cream. Fresh cherries are best, but frozen work too. Just thaw them before use. For the full recipe, check out the complete set of instructions to make your Cherry Vanilla Floats for Two! Marinating the cherries Start by marinating the fresh cherries. In a small bowl, combine the halved cherries with the vanilla extract. Gently toss them to coat in the vanilla. Let them sit for about 5 minutes. This step boosts the flavor and makes the cherries taste even better. Preparing the glasses While the cherries marinate, grab two tall glasses. Make sure they are clean and ready for the floats. You can chill them in the fridge for a few minutes if you like. This helps keep the floats cold and refreshing. Adding ice cream to the glass Spoon a generous scoop of vanilla ice cream into each glass. I like to use a small ice cream scoop for this. Place it right at the bottom, and let it spread out a bit. Pouring cherry soda and layering ingredients Next, slowly pour the cherry soda over the ice cream. Fill the glass until it's about halfway full. Watch the fizz and bubbles! Then, spoon the marinated cherries on top of the soda and ice cream. Distribute them evenly between the glasses. Finally, add another scoop of vanilla ice cream on top. Let it meld beautifully into the soda. Adding whipped cream and garnishes Now comes the fun part! Top each float with a dollop of whipped cream. Make it nice and fluffy. If you want, sprinkle some chocolate shavings on top for an extra treat. Serving suggestions Place a maraschino cherry on each whipped cream peak. Serve the floats right away with a straw and a long spoon for scooping. Enjoy this sweet treat with a friend! For the complete recipe, check out the Full Recipe section. To achieve the right fizz, use chilled cherry soda. Cold soda creates a lively effervescence. Pour it slowly over the ice cream. This helps keep the bubbles intact. Keep an eye on the fizz as it rises. You want it to dance in the glass. For ice cream consistency, use slightly softened vanilla ice cream. Let it sit out for a few minutes before scooping. This makes it easier to scoop and layer. It also blends nicely with the soda. If the ice cream is too hard, it won't mix well. Using decorative glasses adds flair to your floats. Choose tall, clear glasses to show off the layers. This makes each float look more appealing. You can even use sundae glasses or mason jars. Garnishing creatively makes your floats pop. Top with whipped cream and a maraschino cherry. Add chocolate shavings for an extra treat. Try fresh mint leaves for a splash of color. These small touches can make your floats feel special. For the best snacks or desserts, serve light and crunchy treats. Think pretzels, popcorn, or even cookies. These snacks complement the sweetness of the float well. For drink pairings, try a light lemonade or iced tea. These drinks balance the sweetness of the cherry vanilla float. They also make for a festive occasion. If you want to impress, serve a fruit punch alongside. It keeps the fun going! {{image_2}} You can switch up the flavor with different fruit sodas. Try grape, orange, or even root beer! Each soda brings its own fun twist. If you love chocolate, add some chocolate syrup to the float. A drizzle of caramel can also make it extra tasty. Both options create a rich and creamy treat. If you want a vegan version, use dairy-free ice cream. Coconut milk ice cream works great and adds a nice flavor. You can also find sugar-free sodas that taste just as good. These options let everyone enjoy the float, no matter their diet. For summer, try adding fresh berries or citrus slices. They add color and a burst of flavor. During the holidays, use eggnog soda instead of cherry soda for a festive twist. You can even sprinkle crushed candy canes on top for a fun look. Each season brings new chances to enjoy this treat! To keep your Cherry Vanilla Floats fresh, store the ingredients separately. The soda and ice cream don’t mix well once combined. If you have leftover floats, drink them right away for the best flavor. If you must store them, try to keep the soda in the fridge and the ice cream in the freezer. Use airtight containers to guard against ice crystals forming on the ice cream. You can repurpose leftover cherries in many fun ways. Use them in yogurt or oatmeal for a tasty breakfast. You can also blend them into smoothies for a refreshing drink. If you have extra vanilla ice cream, add it to milkshakes or make sundaes. The cherry soda can be used in cocktails or as a punch base. Get creative and mix flavors! Cherry soda stays fresh for about 6 months when unopened. Once opened, use it within a week. Vanilla ice cream lasts about 2 to 3 months in the freezer. To keep ice cream from freezer burn, seal it well. Always check for off smells or weird textures before using. Following these tips helps you enjoy your floats longer! You cannot make Cherry Vanilla Floats too early. If you prepare them too soon, the ice cream will melt. The float loses its fun fizz too. I suggest making them right before serving. This way, you keep the perfect texture and taste. You can prep some parts ahead. For example, pit and halve the cherries early. You can also measure the vanilla extract. Keep these ready in the fridge until you need them. If you cannot find cherry soda, other drinks work well. You can use grape soda for a different flavor. Lemon-lime soda is also a good choice. It adds a nice citrus kick. If you want a healthier option, try sparkling water with cherry juice. You still get that bubbly effect. Just make sure to adjust the sweetness to your liking. This keeps the float fun and refreshing. To make Cherry Vanilla Floats even more special, think about the setting. They are great for a roller skating party! You can add fun straws and colorful napkins. Use bright glasses to make it festive. For summer picnics, pack the floats in cooler cups. You can also add sprinkles on top of the whipped cream. This gives a fun touch. Sharing these floats with friends makes the moment sweeter. You can find the Full Recipe to help you plan ahead. The cherry vanilla float is a fun and easy treat. You learned about the main ingredients like cherry soda, ice cream, and fresh cherries. We also explored optional add-ons and tasty variations to try. Presentation tips and pairings can make it more special. Storing your leftovers properly ensures nothing goes to waste. Use these tips to enjoy a refreshing float anytime. Now it’s time for you to create, enjoy, and share this delicious drink!

Cherry Vanilla Floats for Two Delightful and Fun Treat

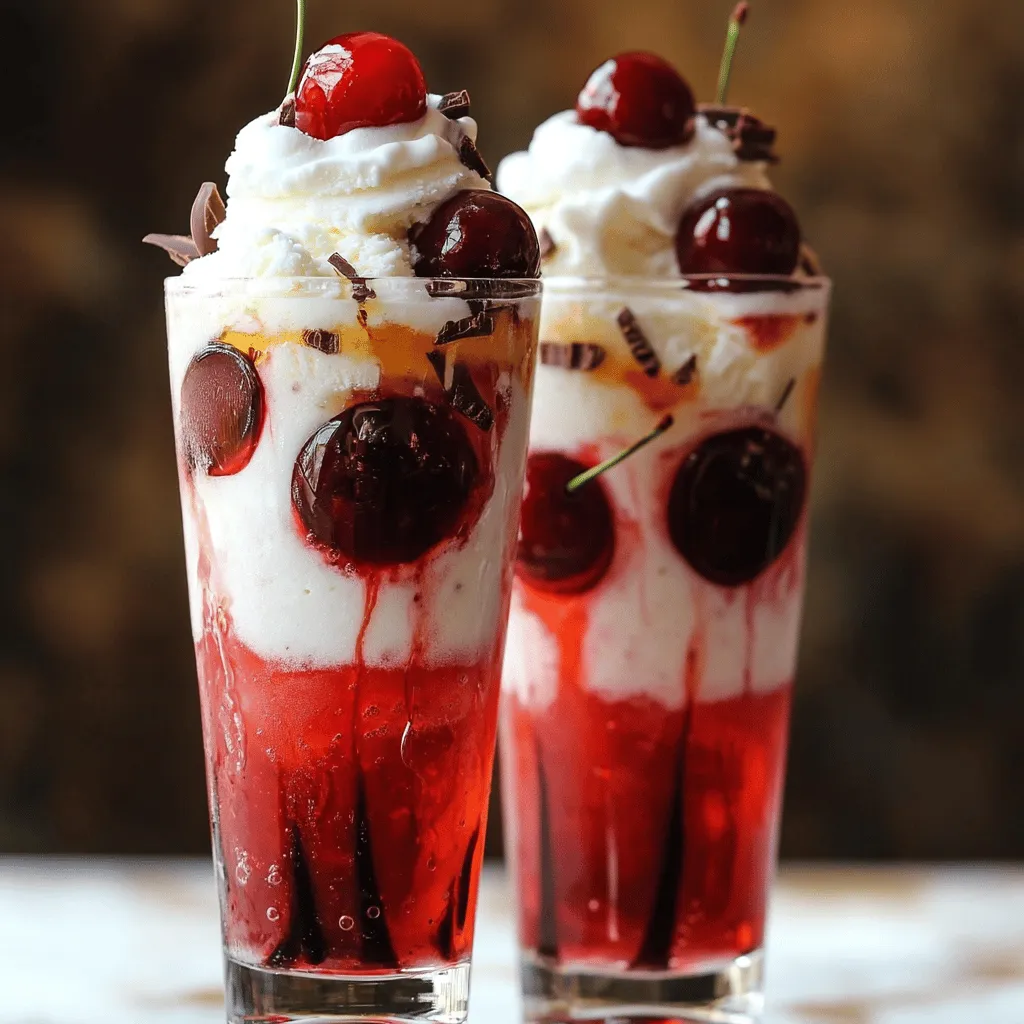
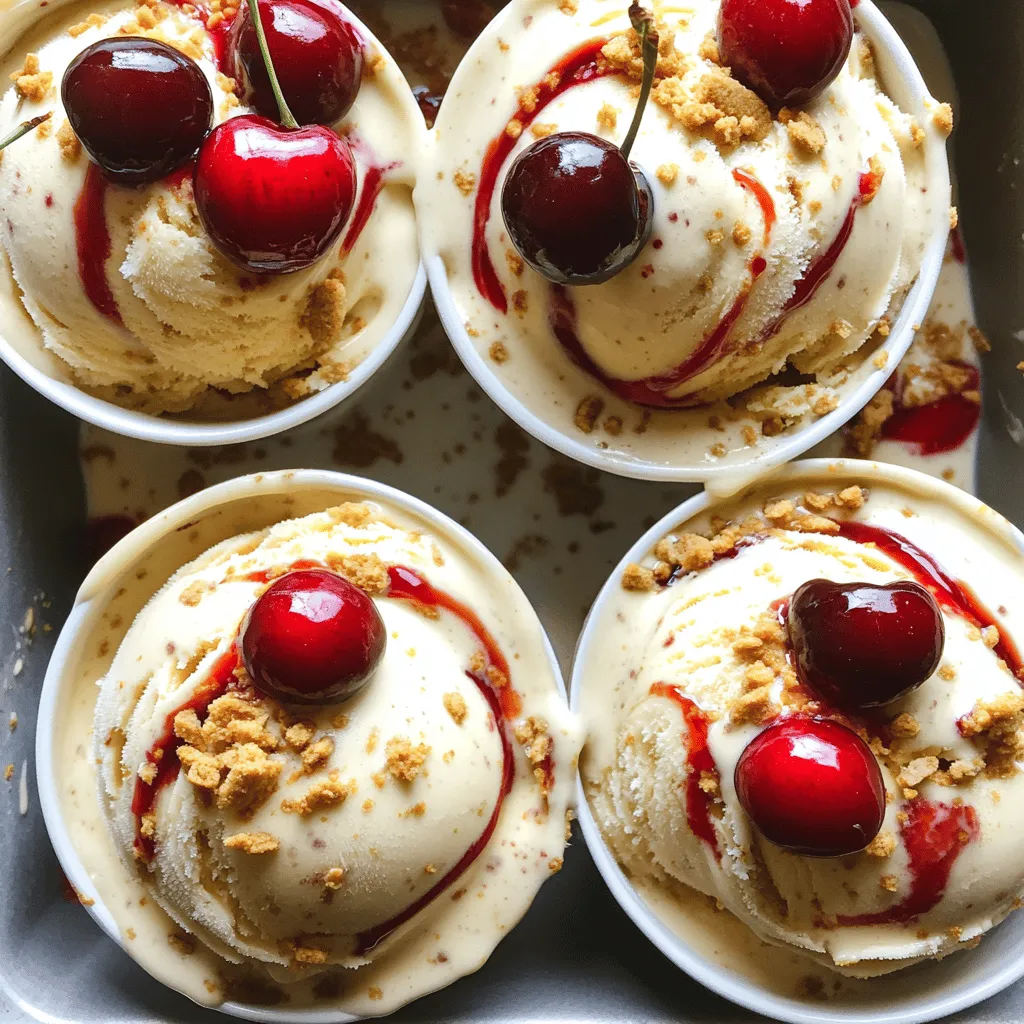
Craving a fun and tasty treat? Let’s whip up some Cherry Vanilla Floats for Two! This delightful drink pairs fizzy

- 1 lb ground beef (80/20 blend) - 6 slider buns - 1 cup dill pickles, sliced - 6 slices cheddar cheese - 1 teaspoon garlic powder - 1 teaspoon onion powder - 1/4 cup mayonnaise - 1 tablespoon Dijon mustard - 1 tablespoon dill pickle juice - Fresh dill (optional) - Additional pickles To make Dill Pickle Cheeseburger Sliders, gather these ingredients first. I love using a good ground beef blend, like 80/20. This mix gives you juicy, flavorful patties. Slider buns should be soft and fresh. They should hold all the goodness without falling apart. Dill pickles add that tangy crunch we all crave. I use sliced pickles for easy stacking. Cheese is a must, and cheddar melts perfectly on hot patties. Now, let's talk about seasonings. Garlic and onion powders boost the beef flavor. They add depth without overpowering the dish. The creamy sauce makes each bite better. Mayonnaise, Dijon mustard, and dill pickle juice come together to create a delicious tang. For garnish, fresh dill adds a nice touch, but it’s optional. I also like to have more pickles on the side. This way, everyone can add as many as they want! This list of ingredients sets you up for success. Check out the Full Recipe for details on preparation and cooking. Enjoy every bite of your sliders! - Preheat your grill or griddle to medium heat. This helps cook the patties just right. - In a large bowl, mix the ground beef with garlic powder, onion powder, salt, and pepper. Use your hands to combine gently. You want it mixed, but not overworked. - Form the meat into six small patties. Make a slight indent in the center of each one. This keeps them flat while cooking. - Grill the patties for about 3-4 minutes on one side. Flip and add a slice of cheddar cheese on each patty. Cook for another 3-4 minutes until the cheese melts and the patties are done to your liking. - Toast the slider buns on the grill or in a toaster until they are golden brown. This adds a nice crunch. - In a small bowl, mix mayonnaise, Dijon mustard, and dill pickle juice to create a tangy sauce. Spread this on the bottom half of each bun. - Stack the cheesy patty on top of the sauce. Add several slices of dill pickles on each patty. Finally, cap it with the top half of the bun. - If you want, add fresh dill on top for extra flavor. Enjoy your tasty sliders right away! Check out the Full Recipe for more detailed steps and tips! To make the best sliders, aim for the right burger doneness. For juicy burgers, cook them to medium. This means an internal temperature of 160°F. Use a meat thermometer for accuracy. Let the patties rest for a few minutes after cooking. This keeps the juices inside. Avoid puffed-up patties by making a small indent in the center of each. This simple trick helps them cook evenly. It also prevents them from ballooning while on the grill. Tweak the sauce flavors to fit your taste. If you like it tangy, add more dill pickle juice. For a creamier sauce, increase the mayonnaise. You can also mix in a splash of hot sauce for some heat. If you want alternatives to dill pickle juice, try lemon juice or apple cider vinegar. Both add a nice tang without overpowering the flavor of the sliders. For a great serving display, arrange the sliders on a large platter. Stack them neatly and add some extra dill pickles on the side. This gives guests a choice to add more if they want. Serve the remaining tangy sauce in a small bowl for dipping. Consider adding chips or fries as a side. These pair well and make the meal even more fun! {{image_2}} To make your Dill Pickle Cheeseburger Sliders even better, you can add spices. A pinch of smoked paprika or cayenne pepper gives a nice kick. You can also experiment with different cheeses. Try pepper jack for heat or gouda for creaminess. Each cheese changes the flavor and makes it fun! If you need gluten-free options, look for special slider buns made from rice or almond flour. These work well and taste great. For a vegetarian choice, use black bean patties or lentil patties. They soak up flavors well and still give you that satisfying bite. You can make sliders in different sizes. Mini sliders are perfect for parties. Standard sliders are filling and great for a meal. Just remember, cooking times will change based on size. Smaller patties cook in about 2-3 minutes per side, while larger ones may take 4-5 minutes. This helps you serve them just right! Store leftover sliders in an airtight container. This keeps them fresh longer. The best time to eat them is within three days. After that, the taste may fade. Keep the components separate if possible. The patties stay good for up to four days. The buns can last about two days. To freeze sliders, wrap each one in plastic wrap. Then, place them in a freezer bag. This prevents freezer burn. You can freeze patties and buns separately. For patties, freeze them flat. This makes them easier to thaw. To thaw, move them to the fridge overnight. You can also use the microwave for faster results. The best way to reheat sliders is in the oven. Preheat it to 350°F. Place the sliders on a baking sheet. Cover them with foil to keep them moist. Heat for about 10-15 minutes. You can also use a skillet on low heat. Add a splash of water and cover it. This keeps the sliders juicy while warming them up. To make Dill Pickle Cheeseburger Sliders, follow these easy steps: 1. Preheat your grill or stovetop griddle over medium heat. 2. In a bowl, mix the ground beef, garlic powder, onion powder, salt, and pepper. 3. Form the beef into six small patties. Make a small indent in the center of each. 4. Grill the patties for 3-4 minutes, then flip them. Add a slice of cheddar cheese. 5. Cook for another 3-4 minutes until the cheese melts. 6. While patties cook, mix mayonnaise, Dijon mustard, and dill pickle juice to make the sauce. 7. Toast the slider buns until golden brown. 8. Spread sauce on the bottom half of each bun, add the patty, and top with pickles. 9. Close the sliders and serve. For the full recipe, check the main article. The best meat for sliders is an 80/20 ground beef blend. This mix gives juicy flavor. The higher fat content helps keep the sliders moist as they cook. You can also try blends with brisket or chuck for unique tastes. A good mix ensures your sliders are not dry and have a great bite. Yes, you can prepare sliders ahead of time. You can form the patties and store them in the fridge for up to a day. This saves time when you're ready to cook. Just remember to keep them covered. You can also mix the sauce ahead and store it in the fridge. Toast the buns just before serving for the best taste. You can customize your sliders easily! Here are some ideas: - Add jalapeños for spice. - Use different cheeses like Swiss or pepper jack. - Top with crispy bacon for crunch. - Swap out the sauce with barbecue or ranch dressing. These changes will give your sliders a unique twist and keep things fun. You learned how to make delicious Dill Pickle Cheeseburger Sliders. We covered key ingredients like beef, cheese, and pickles. Followed by easy prepping, cooking, and assembling steps. You discovered helpful tips for cooking and saucing. We looked at tasty variations and storage options too. Now, it's your turn to try these sliders. Customize them to fit your taste. Enjoy making them for friends and family, and have fun! Happy cooking!

Dill Pickle Cheeseburger Sliders Tasty and Simple Recipe

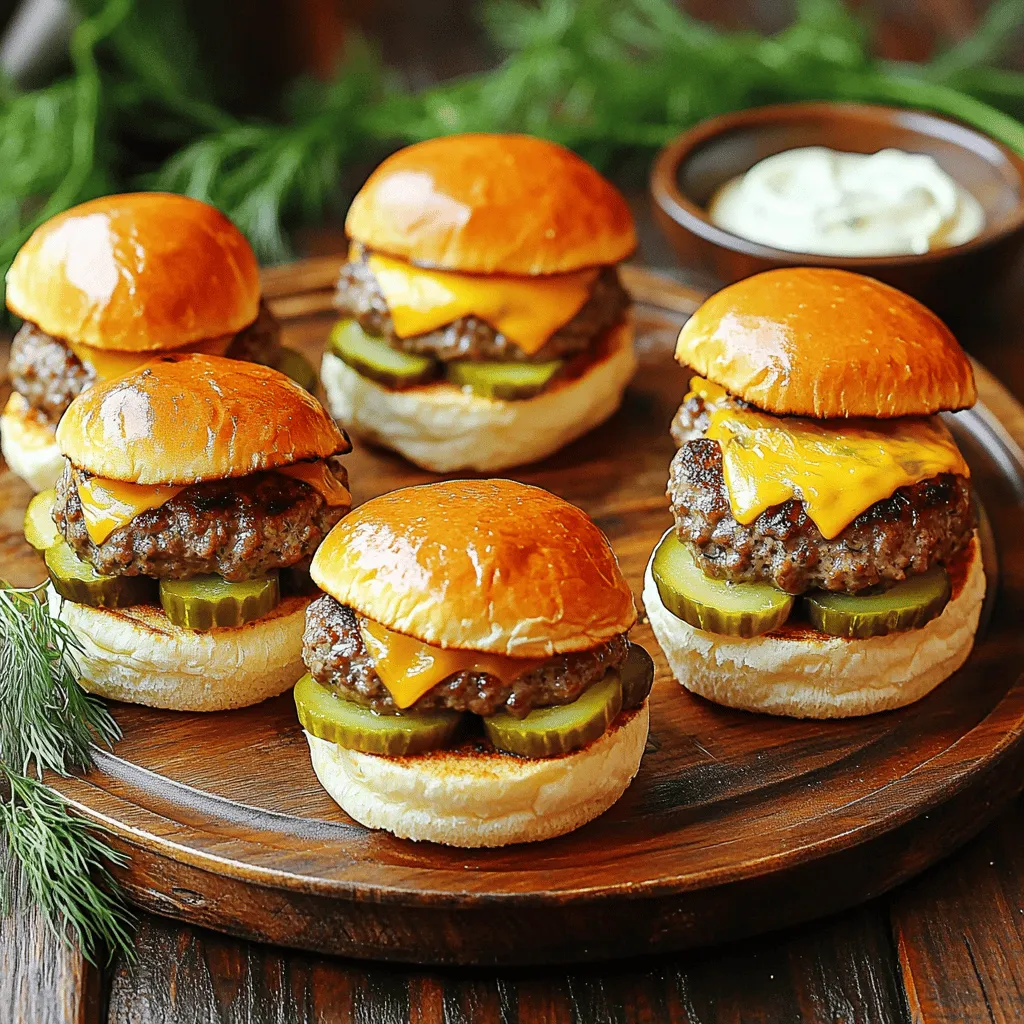
Are you ready to spice up your next gathering with mouthwatering Dill Pickle Cheeseburger Sliders? This easy recipe combines juicy

To make a tasty Strawberry Cherry Trifle, you need these simple items: - 2 cups fresh strawberries, hulled and sliced - 2 cups fresh cherries, pitted and halved - 1 cup heavy whipping cream - 1/4 cup powdered sugar - 1 teaspoon vanilla extract - 1 cup vanilla sponge cake, cut into cubes - 1/4 cup cherry juice - Mint leaves for garnish (optional) Garnishes make your trifle look pretty. Here are some ideas: - Whole cherries on top - Fresh mint leaves - A dusting of cocoa powder - Shaved chocolate for a sweet touch Fresh fruit is key for great taste. Here’s how to pick the best: - Look for bright colors and good shape. - Check for firmness; avoid mushy spots. - Smell the fruit; it should smell sweet and fruity. - Buy in season for the best flavor. These tips help you get delicious strawberries and cherries for your trifle. Remember, fresh ingredients make a big difference in taste! For the full recipe, refer to the main list above. Start by grabbing a medium bowl. Pour in 1 cup of heavy whipping cream. Use an electric mixer and whip the cream until soft peaks form. This means the cream will hold its shape but still be fluffy. Slowly add 1/4 cup of powdered sugar and 1 teaspoon of vanilla extract. Keep beating until stiff peaks form. This makes a rich and sweet whipped cream. Set it aside for later. Now, take another bowl for the fruits. Add 2 cups of sliced strawberries and 2 cups of halved cherries. Make sure the cherries are pitted first. Gently toss the fruits together. This mixes the sweet and tart flavors nicely. You want each bite to have both fruits. Grab your trifle dish or some clear serving glasses. Start with a layer of sponge cake cubes. You can use 1 cup of store-bought or homemade vanilla sponge cake. Drizzle 1/4 cup of cherry juice over the cake to soak it. Next, add a layer of the mixed strawberries and cherries on top of the cake. Then, spread a layer of whipped cream over the fruit. Smooth it out evenly. Repeat these layers until you use all the ingredients. Finish with a fluffy layer of whipped cream on top. For a fun touch, add whole cherries and mint leaves for garnish. Finally, refrigerate the trifle for at least 2 hours. This helps the flavors blend and softens the cake. Enjoy your strawberry cherry trifle delight! For the full recipe, refer to the earlier section. When making a trifle, avoid using overripe fruit. Soft fruit can make the dish mushy. Use fresh strawberries and cherries for the best taste. Another mistake is not whipping the cream enough. You want stiff peaks for good structure. If you overwhip, the cream can become grainy, which is not pleasant. To create beautiful layers, use a clear dish. This lets you see the colors. Start with sponge cake at the bottom. Make sure to drizzle cherry juice on the cake to soak it. Then, add fruit and whipped cream in neat layers. Use a spatula or spoon to smooth out each layer. This helps the dessert look neat and inviting. Serve your trifle in individual cups for a fun twist. This makes it easy for guests to enjoy. Garnish each serving with a mint leaf or a whole cherry. This adds a pop of color and flavor. You can also serve it with a scoop of vanilla ice cream on the side. For the full recipe, check out the details above! {{image_2}} You can change the fruits in your trifle. Use peaches for a sweet twist. Blueberries add a nice color and flavor. Raspberries can bring a tart taste that mixes well. Mix and match your favorite fruits. You can also add nuts for crunch. Walnuts or almonds work well. Just chop them up small before adding. Making a gluten-free trifle is easy. Swap the vanilla sponge cake for gluten-free cake. You can find ready-made options at stores. Or, make your own using gluten-free flour. This way, everyone can enjoy your dessert. Just check the labels on all your ingredients to ensure they are gluten-free. Adjusting the flavor can make your trifle unique. Try adding a splash of almond extract for a nutty taste. You can also use flavored yogurt instead of whipped cream. This adds some tang and creaminess. For a richer flavor, add a layer of chocolate pudding. Each change will add a new twist to your Strawberry Cherry Trifle. Enjoy experimenting! To keep your trifle fresh, cover it tightly with plastic wrap. You can also use a lid if your dish has one. Store it in the fridge for up to three days. The layers may blend together, but it will still taste great! You can make parts of the trifle ahead. Prepare the whipped cream and fruit a day before. Store the whipped cream in a sealed container. Keep the fruit in the fridge in a bowl covered with plastic wrap. Assemble the trifle on the day you plan to serve it. I do not recommend freezing the trifle. The cream will change texture when thawed. If you want to freeze, try freezing the sponge cake cubes and fruit separately. When you're ready to serve, let them thaw and build your trifle fresh. For the full recipe, check out the main article. Yes, you can use frozen fruit! Just thaw it first. Drain excess juice to avoid soggy layers. Frozen fruit is easy and still tasty. It can save time if fresh fruit is not available. You can keep the trifle in the fridge for up to three days. The flavors blend well over time. However, the cake may get soggy if left too long. Make sure to cover it tightly with plastic wrap or a lid. Serve the trifle in clear dishes or glasses. This lets the beautiful layers show. Use a large spoon to scoop it out. It looks great on a party table. For a fun twist, top each serving with extra fruit or mint leaves. For the full recipe, check out the detailed steps above. The blog post covered how to make a delicious Strawberry Cherry Trifle. We discussed the key ingredients and optional garnishes. You learned tips for selecting fresh produce, preparing whipped cream, and layering your trifle. Common mistakes and perfect layering tips helped guide you. We explored variations for different tastes and storage tips for leftovers. In summary, making this trifle is simple and fun. Enjoy experimenting with your own flavors and serving ideas. Happy trifle making!

Strawberry Cherry Trifle Delightful and Easy Recipe

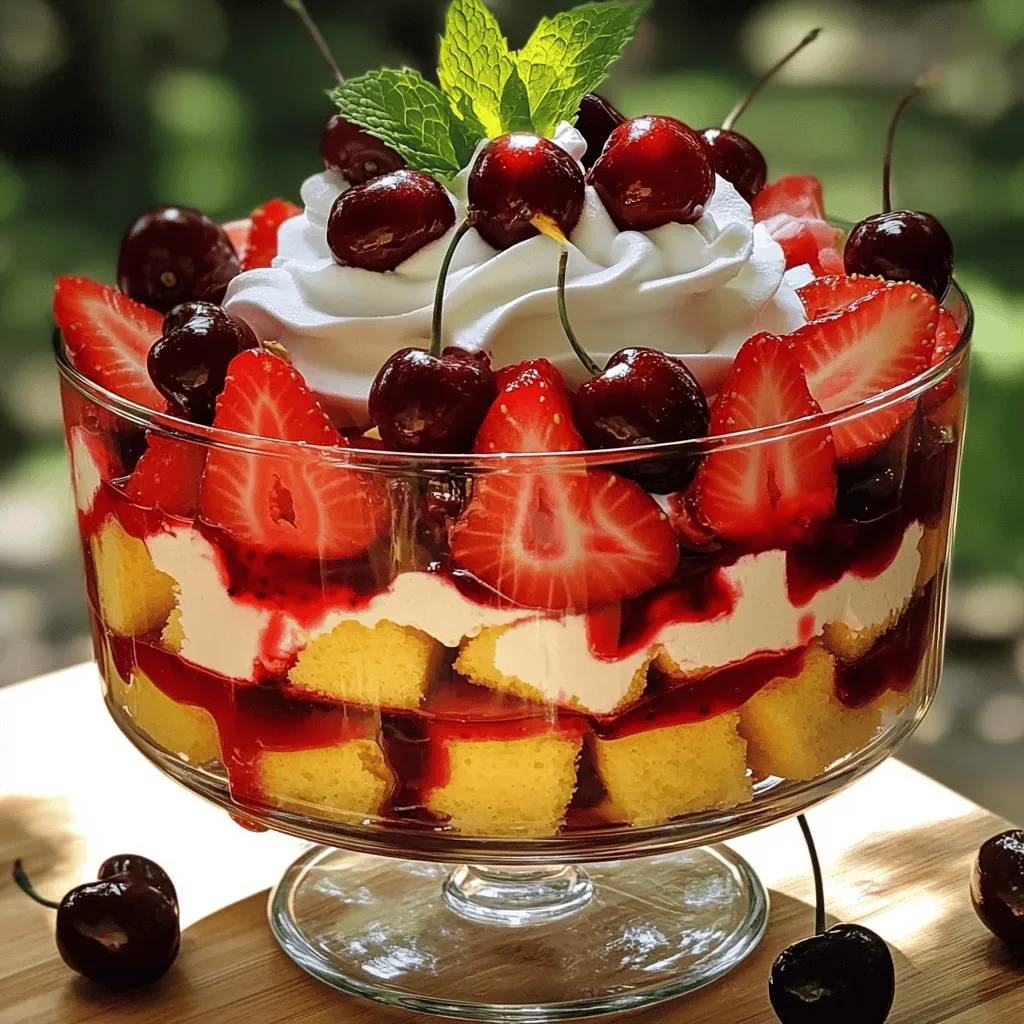
Create a delicious Strawberry Cherry Trifle that’s perfect for any occasion! In this easy recipe, I’ll guide you through each

For pickle brined air fryer wings, you need a few simple ingredients. These items bring out great flavor and crispiness. Here’s what you will need: - 2 pounds chicken wings - 1 cup dill pickle juice - 1 tablespoon garlic powder - 1 teaspoon onion powder - 1 teaspoon paprika - 1 teaspoon black pepper - 1 teaspoon salt - 1/2 teaspoon cayenne pepper (optional for heat) - Cooking spray or olive oil for spraying Each ingredient plays a role in making these wings special. The chicken wings are your main event, while the dill pickle juice adds a tangy kick. It also helps tenderize the meat. The spices and seasonings, like garlic and paprika, give the wings a tasty crust. Using cooking spray or olive oil keeps them from sticking while cooking. For the full recipe, check out the entire guide. You'll find step-by-step directions to make these wings perfectly crispy and full of flavor. Marinating in pickle juice First, grab a large bowl. Place the chicken wings inside. Pour in the dill pickle juice until the wings are fully covered. This brine adds great taste and helps keep the wings juicy. Cover the bowl with plastic wrap. Pop it in the fridge for at least two hours. For even more flavor, let it sit overnight. Preheating the air fryer While the wings soak up all that flavor, it’s time to preheat your air fryer. Set it to 375°F (190°C). Preheating ensures the wings cook evenly and get that perfect crispiness. Mixing spice blend Now, let’s make the spice mix! In a small bowl, combine one tablespoon of garlic powder, one teaspoon of onion powder, one teaspoon of paprika, one teaspoon of black pepper, one teaspoon of salt, and if you like it spicy, add half a teaspoon of cayenne pepper. Mix it well! Coating the wings evenly After marinating, take the wings out of the brine. Let any excess juice drip off. Discard the pickle juice. Sprinkle the spice mix all over the wings. Toss them gently until they are coated evenly. Each wing should be covered in that tasty spice blend. Arranging in the air fryer Before cooking, lightly spray the air fryer basket with cooking spray or brush it with olive oil. This step helps prevent sticking. Place the seasoned wings in a single layer in the basket. Don’t overcrowd them. If you have a lot of wings, you may need to cook them in batches. Cooking time and flipping Cook the wings for 25 to 30 minutes. Halfway through, flip them to ensure they get crispy on both sides. The wings are done when they look golden brown and crispy. Once cooked, let the wings rest for a few minutes before serving. Enjoy your delicious pickle brined air fryer wings! For more details, check the Full Recipe. To get that perfect crunch, cook the wings in one layer. This way, they get good air flow and cook evenly. If you stack them, some wings will steam instead of crisp. Preheat your air fryer to 375°F (190°C). This temperature helps the wings crisp up nicely, creating a golden exterior. Marinating time matters. A short soak of just two hours gives a good flavor, but overnight is best. Longer marination allows the dill pickle juice to soak in deeply. If you want more pickle flavor, try adding some spices to the pickle juice. For more zing, consider adding crushed red pepper or garlic. When serving, think about dipping sauces. Ranch and blue cheese work great with these wings. You can also try spicy mustard for a kick. For garnishing, use fresh herbs like parsley or thyme. They add color and a fresh taste to your dish. Serve the wings on a bright platter to make them shine. For more details, check the Full Recipe. {{image_2}} Want to kick up the heat? Add cayenne pepper to your spice mix. You can also try using chili powder or crushed red pepper flakes. These spices give your wings a nice zing. Just remember to start with a little. You can always add more if you want extra spice. Experimenting with different pickle flavors can be fun. Try bread and butter pickle juice for a sweeter twist. You can also use spicy dill pickle juice for a kick. Using flavored oils, like garlic-infused oil, can add depth. A drizzle of lemon oil gives a fresh touch. These small changes can make your wings unique and exciting. If you don’t have an air fryer, you can bake your wings. Preheat your oven to 400°F (200°C). Place the wings on a baking sheet. Bake for 40-45 minutes, flipping halfway for even cooking. Grilling is another great option. Heat your grill to medium-high. Cook the wings for about 20 minutes, turning them until crispy. Each method brings a different texture, so try them all! To keep your leftover wings fresh, store them in the fridge. Use airtight containers to prevent air from getting in. This helps maintain their taste and texture. They last about three days in the fridge. Make sure to let them cool down before packing. When you want to eat your wings again, keep them crispy. The best way to reheat them is in the air fryer. Set the air fryer to 350°F (175°C). Heat them for about 5 to 7 minutes. This makes them hot and crispy again. Avoid using a microwave, as it can make them soggy. If you want to store wings longer, you can freeze them. Freeze them as soon as they cool down. Place them in a freezer bag or airtight container. They can last up to three months in the freezer. When ready to eat, thaw them in the fridge overnight before reheating. Marinate the wings for at least 2 hours. For the best flavor, overnight is ideal. The longer the wings soak, the more they absorb the tangy taste. This makes the meat flavorful and moist. Yes, you can use frozen wings. Just make sure to thaw them first. Frozen wings may need a bit longer to cook. Always check that they reach an internal temperature of 165°F for safety. Using pickle juice adds a unique flavor. Without it, the wings may taste bland. You can use lemon juice or vinegar as alternatives, but the taste will change. If you skip the brine, add more spices to boost the flavor. These wings pair well with various side dishes. Try serving them with: - Celery sticks - Carrot sticks - French fries - Coleslaw - Dipping sauces like ranch or blue cheese For a complete meal, consider adding a fresh salad or roasted veggies. The crunch of the sides complements the crispy wings. Enjoy your feast! For the complete recipe, check out the Full Recipe section above. In this post, we explored how to make tasty pickle brined air fryer wings. We covered essential ingredients, marinating steps, and cooking techniques to achieve crispy wings. I shared tips for marination and even some fun variations to try. Remember, experimenting can lead to your best wings yet. Enjoy sharing them with friends and family. Happy cooking!

Pickle Brined Air Fryer Wings Flavorful Crispy Delight

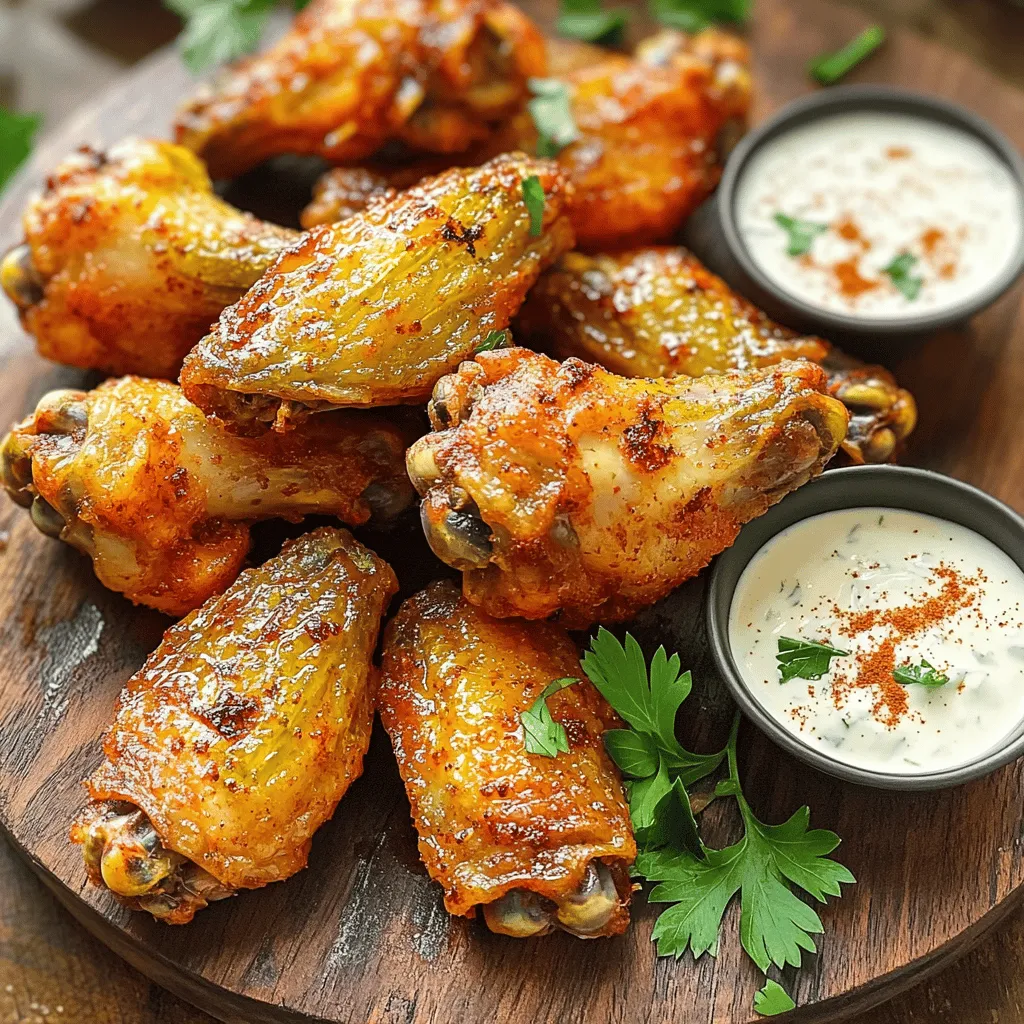
Are you ready to elevate your chicken wing game? My Pickle Brined Air Fryer Wings are bursting with flavor and

- 1 ½ cups all-purpose flour - 1 teaspoon baking powder - ½ teaspoon baking soda - ¼ teaspoon salt - ½ cup unsalted butter, softened - 1 cup granulated sugar - 2 large eggs - 1 teaspoon vanilla extract - ½ cup buttermilk (or milk with 1 tsp vinegar) - ½ cup rainbow sprinkles - Optional: Powdered sugar for dusting When choosing all-purpose flour, look for one with a fine texture. This helps make a light loaf. Baking powder and baking soda are key for rising. Make sure they are fresh for best results. I love using unsalted butter for better control over salt levels. If you want a richer flavor, choose high-quality vanilla extract. The buttermilk adds moisture and a slight tang. If you don't have buttermilk, using milk with vinegar works well too. Rainbow sprinkles are a must for that fun, colorful touch. They add joy to your cake. Each ingredient plays a vital role in making your Funfetti loaf cake perfect. - Flour gives structure and stability to the cake. - Baking powder and baking soda create air pockets, making the cake light. - Salt enhances flavors and balances sweetness. - Butter adds moisture and richness. - Sugar sweetens and helps with browning. - Eggs act as a binder and add moisture. - Vanilla extract boosts the cake's flavor profile. - Buttermilk keeps the cake soft and tender. - Sprinkles bring a fun element and visual appeal. By understanding these ingredients, you can make adjustments if needed. This knowledge helps in creating a delicious Funfetti loaf cake. For the complete recipe, check out the Full Recipe section! First, gather all your ingredients. You will need: - 1 ½ cups all-purpose flour - 1 teaspoon baking powder - ½ teaspoon baking soda - ¼ teaspoon salt - ½ cup unsalted butter, softened - 1 cup granulated sugar - 2 large eggs - 1 teaspoon vanilla extract - ½ cup buttermilk (or milk with 1 tsp vinegar) - ½ cup rainbow sprinkles - Optional: Powdered sugar for dusting Start by preheating your oven to 350°F (175°C). Grease a 9x5 inch loaf pan and line it with parchment paper. This helps with easy removal later. In a medium bowl, whisk together the flour, baking powder, baking soda, and salt. Set this aside for later. Next, in a large mixing bowl, cream the softened butter and sugar. Use an electric mixer for about 3-4 minutes until it looks light and fluffy. Add the eggs one by one, mixing well after each. Then, mix in the vanilla extract. Now, it’s time to combine the dry and wet ingredients. Gradually add your dry mix and buttermilk to the butter-sugar mixture. Start and end with the dry ingredients. Mix until just combined; avoid over-mixing. Finally, gently fold in the rainbow sprinkles. This adds that fun color we love! Pour the batter into your prepared loaf pan. Smooth the top with a spatula to make it even. Place it in the preheated oven. Bake for 50-60 minutes. To check if it's done, insert a toothpick into the center. If it comes out clean, your cake is ready! Once baked, let the loaf cool in the pan for about 10 minutes. After that, move it to a wire rack to cool completely. For a fun touch, dust the cooled cake with powdered sugar before slicing. This adds charm and makes it look special. Serve slices on colorful plates. You can even sprinkle more rainbow sprinkles on top for a bright finish. Enjoy your sweet, colorful delight! Baking can be tricky. Here are some mistakes to avoid: - Not measuring ingredients: Use a scale or measuring cups for accuracy. - Overmixing the batter: Mix just until combined to keep the loaf light. - Skipping the oven preheat: Always preheat to help the cake rise well. - Using cold eggs: Let eggs sit at room temp for better mixing. - Not lining the pan: Lining with parchment helps with easy removal. A moist loaf cake is key to great texture. Here are tips: - Use buttermilk: It adds moisture and a slight tang. - Cream butter and sugar well: This adds air for a lighter loaf. - Don’t overbake: Check for doneness with a toothpick; it should come out clean but not dry. - Add sprinkles gently: They should fold in easily without overworking the batter. - Let it cool properly: Cooling helps set moisture; do not rush this step. Flavor and looks matter in baking. Try these tips: - Use high-quality vanilla: Pure extracts boost flavor. - Add zest: Lemon or orange zest gives a fresh twist. - Don’t skimp on sprinkles: More sprinkles make it festive and fun. - Dust with powdered sugar: A light dusting adds a sweet finish. - Serve on colorful plates: Bright plates make your cake pop visually. Enjoy baking your Funfetti loaf cake with these tips! For the full recipe, check the recipe section above. {{image_2}} You can mix up the funfetti loaf cake in many ways. For a fruity twist, add mashed banana or crushed pineapple. Both will make the cake moist and full of flavor. If you want a spiced version, try adding cinnamon or nutmeg. These spices add warmth and depth. For a chocolate lover, swap some flour for cocoa powder. This will give you a rich chocolate funfetti loaf. To make this loaf cake a bit healthier, swap some ingredients. Use whole wheat flour instead of all-purpose flour for more fiber. You can also cut the sugar in half without losing much taste. If you want a vegan option, use flaxseed meal instead of eggs. Just mix 1 tablespoon of flaxseed with 3 tablespoons of water. Let it sit for a few minutes to thicken. You can also use applesauce instead of butter for a lower-fat option. Funfetti loaf cake is perfect for any occasion. For birthdays, add themed sprinkles that match the party colors. You could also use pastel sprinkles for Easter. For a Halloween treat, add orange and black sprinkles. Decorate with fun toppings like themed candies or icing. Each theme transforms the cake into a fun, festive treat. Check out the Full Recipe for more ideas! To keep your Funfetti loaf cake fresh, wrap it tightly in plastic wrap. This method keeps the cake moist and soft. You can also place it in an airtight container. Store it at room temperature for easy access. If you want to keep it longer, refrigerate it. However, this might change the texture a bit. Freezing your Funfetti loaf cake is easy. First, let it cool completely. Then, wrap it in plastic wrap and foil. This double layer helps prevent freezer burn. You can freeze it for up to three months. When you're ready to eat, thaw it in the fridge overnight. It tastes just as good! If stored properly, your cake lasts about three days at room temperature. Look for signs of spoilage, like a dry texture or off smell. If you see any mold, it's best to toss it. A fresh slice should be moist and smell sweet. Enjoy your colorful treat while it’s at its best! For the full recipe, check out the ingredients and steps listed above! Yes, you can use regular milk. Just add 1 teaspoon of vinegar to it. Let it sit for 5-10 minutes to create a buttermilk substitute. This makes your cake tender and fluffy. Check the loaf by inserting a toothpick into the center. If it comes out clean, your cake is ready. It should also feel firm to the touch. The edges may pull away slightly from the pan, indicating it's baked through. You can use chocolate chips, nuts, or dried fruit. For a fun twist, try crushed candy or edible glitter. Each alternative will change the flavor and look of your cake, making it unique. This blog post covers everything about baking a great loaf cake. You learned about key ingredients and why they matter. I shared step-by-step instructions to help you bake with ease. We discussed tips to avoid common mistakes and how to keep your cake moist. I also offered fun variations to try and how to store your cake properly. You now have the tools to bake confidently and enjoy delicious results. Happy baking!

Funfetti Loaf Cake Sweet and Colorful Delight

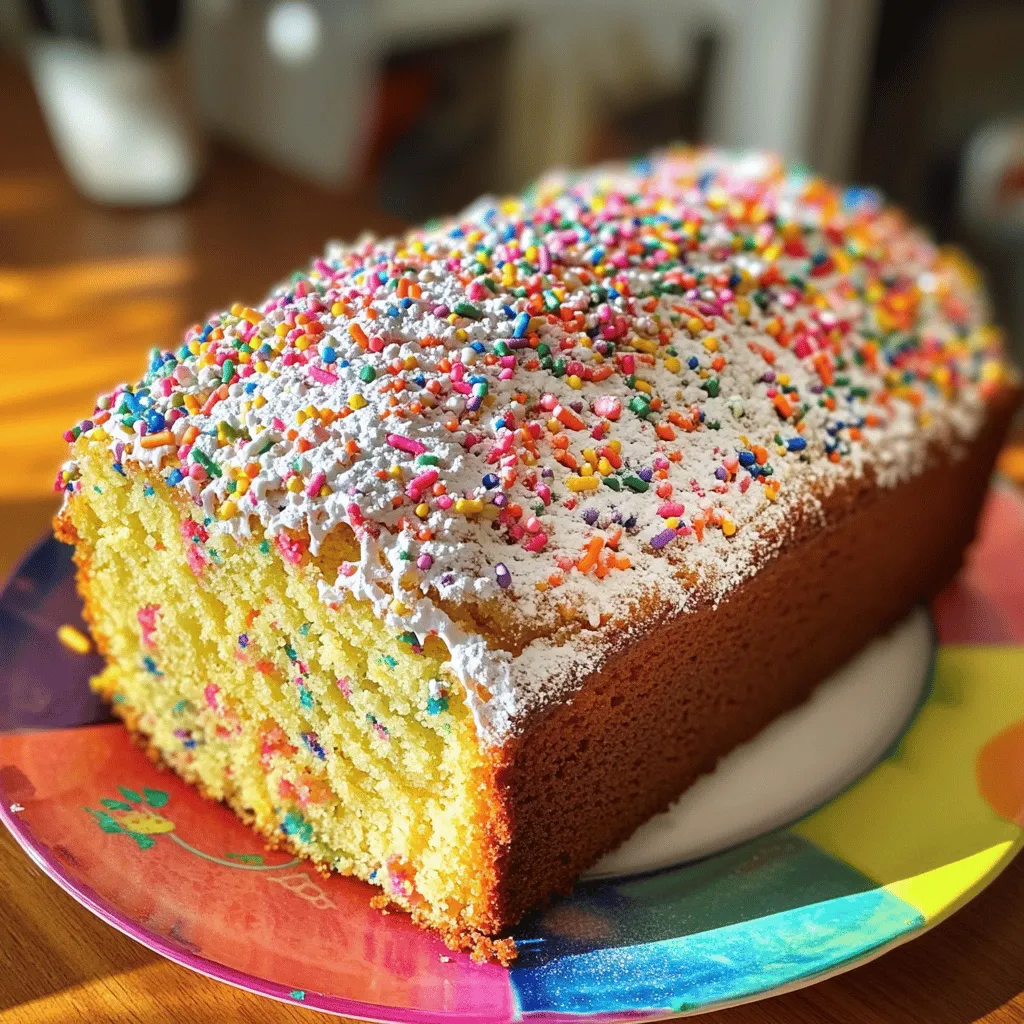
Are you ready to bake a Funfetti Loaf Cake that bursts with color and sweetness? This easy recipe will bring

- 2 cups heavy whipping cream - 1 cup sweetened condensed milk - 1 cup cherry cola soda These ingredients form the base of our No Churn Cherry Cola Ice Cream. Heavy whipping cream gives it a rich and creamy texture. Sweetened condensed milk adds sweetness and smoothness. Cherry cola soda brings that classic flavor that makes this treat special. - 1 cup fresh cherries, pitted and chopped (or frozen, thawed) - ½ cup chocolate chips (optional) - ¼ cup crushed graham crackers (optional for texture) You can add fresh cherries for a burst of fruity flavor. Chocolate chips add a nice crunch and richness, while crushed graham crackers give a fun texture. Feel free to mix and match based on your taste! - Mixing bowls - Electric mixer - Freezer-safe container You will need mixing bowls to combine your ingredients. An electric mixer helps whip the cream until it's airy and light. Lastly, a freezer-safe container is essential for freezing your ice cream mixture. This setup makes the process easy and fun! To make the whipped cream, start with cold heavy whipping cream. Pour it into a large mixing bowl. Use an electric mixer on medium speed. Whip it until you see soft peaks. Soft peaks mean the cream holds its shape but still flows. This is key for a light texture. Here are some best practices: - Chill your mixing bowl and beaters in the fridge first. - Avoid over-whipping, as it can turn the cream grainy. - Stop when the peaks form and look soft but not stiff. In a separate bowl, mix sweetened condensed milk and cherry cola soda. Stir it well until you don’t see any lumps. This mix gives your ice cream its signature flavor. Next, add the vanilla extract for extra depth. The combo of these ingredients brings a wonderful sweetness. Now it’s time to fold the cherry cola mix into the whipped cream. Use a spatula to gently combine them. Folding helps keep the air in the whipped cream. This keeps your ice cream light and fluffy. You can also add extras at this stage: - Mix in fresh, chopped cherries for bursts of flavor. - If you like chocolate, add chocolate chips for a treat. - Crushed graham crackers add crunch and texture. Carefully fold in these ingredients until they are blended. Pour the mixture into a freezer-safe container. Smooth the top with a spatula. Cover it and freeze. After at least six hours, your no-churn cherry cola ice cream is ready to enjoy! You can find the full recipe above. To make great no churn ice cream, focus on a smooth texture. Start with cold heavy cream for the best results. This helps whip air into the cream, giving your ice cream lightness. To avoid an icy texture, freeze the mixture quickly. Use a shallow container to speed up the freezing process. A loaf pan works well, as it offers more surface area. The key to this treat is balancing sweetness with the cherry cola flavor. Too much sweetness can overpower the cola. Taste the mixture before freezing. Adjust the cherry cola or sweetened condensed milk as needed. To enhance the cherry flavor, add a splash of cherry juice. You can also mix in cherry extract for a more intense taste. Fresh cherries add texture and freshness. For a fun presentation, serve in colorful bowls. Top with whole cherries for a pop of color. A drizzle of cherry cola adds flair and a burst of flavor. Pair this ice cream with chocolate cake or graham crackers for extra delight. You can also enjoy it with a sprinkle of nuts for added crunch. Check out the Full Recipe for more delicious tips! {{image_2}} You can play with flavors in your no churn cherry cola ice cream. A tropical fruit version is fun. Just swap the cherries for tropical fruits. Think mango, pineapple, or passion fruit. They add a bright twist. The cola flavor pairs well with these fruits. You can also try a chocolate cola twist. Mix in chocolate syrup or chocolate chips. This gives you a rich treat. Both options add excitement to your ice cream. If you're looking for healthier choices, consider low-sugar options. Use diet cherry cola instead of regular. It cuts down sugar without losing taste. You can also use sugar-free sweetened condensed milk. It keeps the creamy texture while being lighter. For those needing dairy-free, options exist. Use coconut cream in place of heavy cream. It adds a light coconut flavor. Almond milk can work too, but it may change the texture. Seasonal ideas can make your ice cream more festive. Try adding holiday-themed variations. Use crushed peppermint candies for a winter treat. Or mix in pumpkin puree for fall flavors. In summer, add fresh fruits like strawberries or raspberries. These fruits brighten the ice cream and add freshness. You can even make a mixed berry version. Just toss in whatever berries you find for a colorful dessert. Explore these variations to make your no churn cherry cola ice cream unique. For the full recipe, check out the detailed instructions above. To keep your No Churn Cherry Cola Ice Cream fresh, use an airtight container. This helps prevent ice crystals from forming. I recommend covering the surface with plastic wrap before sealing the lid. For the best taste, enjoy it within two weeks. When you are ready to serve, take the ice cream out of the freezer. Let it sit for about 5 to 10 minutes. This makes it easier to scoop. You can also run warm water over the outside of the container for a few seconds. This ice cream lasts up to two months in the freezer. After that, it may lose some flavor. Look for signs of spoilage, like ice crystals or an off smell. If you see these, it's best to toss it out. If you have leftover heavy cream, use it in coffee or pancakes. You can make whipped cream for desserts too. For leftover cherries, add them to yogurt or oatmeal. You could also blend them into smoothies. If you want another recipe, try making a cherry pie with those extra cherries. Making this ice cream is quick and easy. It takes about 15 minutes to prep. Then, freeze it for at least 6 hours. The total time is around 6 hours and 15 minutes. Make sure to plan ahead for freezing. Yes, you can use diet cherry cola. Just know that it may change the flavor a bit. The taste will be less sweet, and the texture might be lighter. If you like less sugar, go for it! You can mix in many fruits. Strawberries, blueberries, or raspberries work great. They add color and taste. You can also try peaches or pineapple for a tropical twist. Get creative with your favorite fruits! Yes, you can make this ice cream without heavy cream. Use coconut cream or almond milk instead. The ice cream will be lighter but still tasty. The texture may be a bit different, so keep that in mind. Now you know how to make a delicious No Churn Cherry Cola Ice Cream. We covered the main ingredients, helpful tips, and fun variations. You can select optional add-ins for unique flavors. Remember, the right technique keeps the ice cream creamy. Enjoy experimenting with different fruits or even a chocolate twist for a fun treat. With a bit of practice, you'll master this easy dessert! Get ready to impress friends and family with your tasty creation.

No Churn Cherry Cola Ice Cream Delightful Frozen Treat

Do you want a fun and tasty treat without an ice cream maker? Let’s dive into the delightful world of

- 1 pound chicken tenders - 1 cup dill pickle juice - 1 cup bread crumbs (preferably panko) - 1/2 cup grated Parmesan cheese - 1 teaspoon garlic powder - 1 teaspoon onion powder - 1 teaspoon paprika - Salt and pepper to taste - 1/2 cup all-purpose flour - 2 large eggs, beaten - Cooking oil (for frying) Dill pickle chicken tenders are a fun twist on a classic dish. The main ingredients give it a unique flavor that is hard to resist. The chicken tends to soak up the dill pickle juice well, making it juicy and tangy. The seasoning helps enhance the chicken's taste. I love using Parmesan cheese; it adds a nice salty touch. Garlic and onion powder bring out rich flavors, while paprika gives a hint of smokiness. Adjust the salt and pepper to your liking. For the coating, I use panko bread crumbs. They create a crunchy texture that makes each bite satisfying. The flour and eggs help the breading stick to the chicken. This is key for a crispy finish. Gather all these ingredients before you start cooking. It makes the process easier and more fun. You can find the full recipe for detailed steps. Marinating is key for great flavor. The dill pickle juice adds a tasty tang that seeps into the chicken. I recommend marinating for at least one hour. If you can, leave it overnight. This extra time makes the chicken tender and flavorful. Mixing the dry ingredients well is important. In a shallow dish, combine the bread crumbs, Parmesan cheese, garlic powder, onion powder, paprika, salt, and pepper. Stir until everything is evenly mixed. To get that crispy coating, make sure to press the chicken firmly into the mixture. This helps it stick better and gives you a crunch when you bite in. You can fry or bake the chicken tenders. For frying: 1. Heat oil in a large skillet over medium heat. 2. Once the oil is hot, add the chicken in batches. 3. Cook for about 3-4 minutes on each side until golden brown. 4. Remove them and place on a paper towel to drain excess oil. For baking: 1. Preheat your oven to 400°F (200°C). 2. Place the coated tenders on a lined baking sheet. 3. Lightly spray with cooking oil for crispness. 4. Bake for 15-20 minutes, flipping halfway through for even cooking. Both methods give you delicious, crispy chicken tenders. For the full recipe, be sure to check it out. To get that crunchy texture, focus on a few key factors: - Use panko bread crumbs for extra crunch. - Ensure the oil is hot before frying. - Avoid overcrowding the pan; fry in batches. Common mistakes include: - Not drying the chicken after marinating. - Skipping the flour step before the egg wash. - Not pressing the breading into the chicken firmly. Dill pickle chicken tenders taste great with simple dips. - Ranch dressing pairs well. - Extra dill pickle juice adds a tangy kick. For sides, try: - Crispy fries for a classic combo. - Fresh coleslaw for a crunchy contrast. To boost flavor, consider adding herbs and spices: - A pinch of cayenne for heat. - Fresh dill for more dill flavor. Adjust salt and pepper according to your taste. Don't hesitate to experiment with your favorite spices! Find what makes your taste buds dance. For the full recipe, check the earlier sections. {{image_2}} Baking and frying give different results for dill pickle chicken tenders. - Baking: This method is healthier and easier. It uses less oil and keeps the kitchen cleaner. However, you might miss that crispy texture. - Frying: This gives a golden, crunchy outside. It can be messier and uses more oil. But the taste is often richer. If you want a healthier option, try air frying. It uses hot air to cook the chicken. This way, you get a crispy finish with less oil. Add spices to the breading for extra flavor. You can mix in: - Cayenne pepper for heat - Dried herbs like oregano or thyme - Lemon zest for a fresh twist Using flavored bread crumbs can change the taste. Look for garlic, Italian herbs, or even spicy varieties. This small change can make your tenders stand out. If you want to switch up the main ingredient, try these options: - Tofu: This is great for a meat-free meal. Just press it to remove excess water. Marinate it the same way as chicken. - Cauliflower: Cut into florets, dip, and coat just like chicken. For a dairy-free option, use nut-based cheese or skip the cheese altogether. You can still get a nice crunch with the right bread crumbs. This way, everyone can enjoy these tasty tenders. For the full recipe, check out the [Full Recipe]. To keep your leftover dill pickle chicken tenders fresh, store them in a sealed container. This helps reduce air exposure. You can also wrap them tightly in plastic wrap. Cooked chicken tenders last about 3 to 4 days in the fridge. Always check for any changes in smell or texture before eating. For long-term storage, you can freeze your chicken tenders. First, let them cool completely. Then, place them in a single layer on a baking sheet. Freeze them for about 1 hour. Once frozen, transfer the tenders to a freezer bag. This way, they won’t stick together. To reheat, you can bake them straight from the freezer. Heat your oven to 400°F (200°C) and bake for 20-25 minutes until hot. Check for signs of spoilage before eating your chicken tenders. Look for any off smell or slimy texture. If you see any discoloration or mold, it’s best to discard them. Always prioritize safety by throwing away spoiled food. Yes, you can use frozen chicken tenders. Just make sure to thaw them first. Thawing helps in marinating and ensures even cooking. The flavors from the dill pickle juice will still soak in well. If you skip this step, the tenders might not taste as good. If you don't have dill pickle juice, you can use other options. Try vinegar mixed with water and a bit of sugar for a tangy kick. You can also use lemon juice or apple cider vinegar. These alternatives will not give the same taste but will still add flavor. Making this recipe gluten-free is simple. Just switch the all-purpose flour with gluten-free flour. You can also use gluten-free bread crumbs. Make sure to check the labels to avoid any hidden gluten. This way, everyone can enjoy these tasty chicken tenders without worry. This post covered how to make delicious chicken tenders, from marinating to cooking. I shared tips to ensure crispiness and serving ideas for perfect meals. You can also explore variations and storage tips for leftovers, making these tenders a flexible dish. Remember, great taste comes from simple steps and quality ingredients. Enjoy your cooking adventure!

Dill Pickle Chicken Tenders Crispy and Flavorful Dish

Looking for a fun and tasty twist on chicken tenders? You’ve come to the right place! My Dill Pickle Chicken

- 1 pound flank steak, cut into 1-inch cubes - 2 tablespoons olive oil - 1 teaspoon salt - 1/2 teaspoon black pepper - 1 red bell pepper, cut into 1-inch pieces - 1 yellow bell pepper, cut into 1-inch pieces - 1 small red onion, cut into wedges - Wooden or metal skewers - 1/2 cup fresh parsley, finely chopped - 1/4 cup fresh cilantro, finely chopped - 2 garlic cloves, minced - 1/2 teaspoon red pepper flakes (adjust for spice preference) - 1/4 cup olive oil - 2 tablespoons red wine vinegar substitute (or lemon juice) - 1/2 teaspoon salt - 1/4 teaspoon black pepper Gather these ingredients to create the perfect herb garden chimichurri steak skewers. Each item plays a vital role in the flavor. Flank steak forms the base, offering a rich and hearty taste. The olive oil adds moisture and promotes a nice sear when grilling. Salt and black pepper bring out the natural flavors of the meat. The colorful bell peppers and onion not only add crunch but also a pop of color. They enhance the visual appeal, which is crucial for any dish. For the chimichurri sauce, fresh herbs are key. Parsley and cilantro provide a bright, fresh taste. Garlic adds depth, while red pepper flakes offer a hint of heat. Olive oil binds everything together and creates a smooth sauce. Red wine vinegar or lemon juice gives that tangy kick, balancing the richness of the steak. These ingredients ensure your skewers are not just tasty, but also vibrant and attractive. Check out the Full Recipe for more detailed instructions. - Combine flank steak with 2 tablespoons olive oil, 1 teaspoon salt, and 1/2 teaspoon black pepper. - Toss until the steak is evenly coated. - Let marinate at room temperature for at least 20 minutes, or refrigerate for 1 hour. Marinating the steak makes it tender and full of flavor. I often let it sit longer for better taste. The olive oil helps the seasoning stick and adds richness. - Mix 1/2 cup fresh parsley, 1/4 cup fresh cilantro, 2 minced garlic cloves, and 1/2 teaspoon red pepper flakes in a bowl. - Add 1/4 cup olive oil, 2 tablespoons red wine vinegar, 1/2 teaspoon salt, and 1/4 teaspoon black pepper. - Stir until well combined, then set aside. Chimichurri sauce is bright and fresh. It adds a punch to your skewers. Letting it sit helps the flavors blend, making it even better. - Thread marinated steak cubes onto skewers. - Alternate with pieces of red bell pepper, yellow bell pepper, and red onion. - Leave space between each piece for even cooking. Assembling skewers is fun! You can mix colors and shapes. This not only makes them pretty but also adds different flavors. - Preheat your grill or grill pan over medium-high heat. - Lightly oil the grill grates to prevent sticking. - Grill skewers for about 8-10 minutes, turning occasionally. Check for doneness by cutting into the steak. Medium rare is about 130°F, while medium is closer to 140°F. These cooking times keep the steak juicy and make it perfect for serving. For the full recipe, check back to see all the details! For the best flavor, marinate your steak for at least 20 minutes. If you have time, let it sit in the fridge for up to 1 hour. This longer time allows the flavors to soak into the meat. When marinating, balance the salt, pepper, and oil well. Too much salt can overpower the dish, while too little leaves it bland. Set your grill to medium-high heat. This temperature allows the steak to sear nicely while cooking through. To keep the skewers from sticking, lightly oil the grill grates. You can also coat the skewers with a bit of oil before placing them on the grill. This simple step helps your skewers slide off easily when done. Serve your chimichurri steak skewers warm. Let them rest for a few minutes after grilling, so the juices stay inside. For a nice touch, add fresh herbs as a garnish. You can serve them with extra chimichurri sauce on the side for dipping or drizzling. Pair these skewers with grilled veggies, rice, or a refreshing salad for a complete meal. {{image_2}} You can swap steak for chicken, shrimp, or even hearty veggies. Each protein brings its own taste and texture. For chicken, marinate it for at least 30 minutes. Shrimp cooks quickly, so 15 minutes is enough. If using veggies, cut them into bite-sized pieces. Marinate veggies for about 20 minutes. This adds flavor and keeps them tender. Chimichurri is flexible! You can swap parsley for oregano or basil for a twist. Each herb gives a unique taste. Want more zing? Add some citrus, like lime or lemon juice. You can also increase the heat by adding more red pepper flakes or fresh chili. Adjust these to suit your taste buds. Don't stop at just meat and peppers! You can add zucchini, mushrooms, or cherry tomatoes for extra flavor. Each veggie adds color and crunch. Try making themed skewers, like Mediterranean with olives and feta, or Tex-Mex with corn and jalapeños. These tweaks make your skewers fun and exciting. For the full recipe, check out the linked details! To store leftover skewers, place them in an airtight container. This keeps them fresh. You can also wrap them in plastic wrap. Make sure they cool down first. In the fridge, they last about three days. If you want them to last longer, consider freezing. For reheating skewers, the best method is using the oven. Preheat the oven to 350°F. Place the skewers on a baking sheet. Cover them with foil to keep moisture in. Heat for about 10-15 minutes. You can also use a microwave. If using a microwave, place a damp paper towel over the skewers. This helps prevent drying. To keep the chimichurri fresh, store it separately. Store chimichurri sauce in a jar with a lid. In the fridge, it lasts up to a week. You can also freeze chimichurri. Pour it into ice cube trays and freeze. This way, you can use it later. Yes, you can freeze chimichurri steak skewers. First, make sure they are cool. Wrap each skewer in plastic wrap. Then, place them in a freezer bag. Squeeze out the air before sealing. They can last up to three months in the freezer. To thaw, take the skewers out of the freezer. Place them in the fridge overnight. You can also use the microwave if you need them fast. Just make sure to check for even thawing. Enjoy the flavors of your herb garden chimichurri steak skewers anytime! For the full recipe, refer back to the beginning. Chimichurri sauce is great for more than just steak skewers. You can use it on grilled chicken, fish, or veggies. It adds a fresh, zesty flavor to many dishes. You can even use it as a marinade or a dipping sauce. Try it on roasted potatoes or as a salad dressing. The options are endless! For best results, marinate steak for at least 20 minutes at room temperature. If you have more time, let it sit in the fridge for 1 hour. For strong flavor, marinate overnight. Just remember, the longer you marinate, the more intense the taste. Yes, you can make chimichurri in advance! It stays fresh for up to one week in the fridge. To keep the flavor strong, store it in an airtight container. Just make sure to stir it well before using. This way, you’ll enjoy the full taste when you serve it with your steak skewers. To grill steak skewers perfectly, preheat your grill to medium-high heat. Oil the grates lightly to prevent sticking. Place the skewers on the grill for 8-10 minutes. Turn them occasionally to cook evenly. For medium-rare, aim for an internal temperature of about 130°F. Always let the skewers rest a few minutes after grilling to keep the juices inside. Steak skewers offer a tasty and fun way to enjoy grilling. We covered the essential ingredients, marinated the steak, and created a fresh chimichurri sauce. Grilling tips helped ensure perfectly cooked skewers. You can also customize recipes with different proteins and veggies. Remember to store leftovers properly to keep them fresh. With so many ways to enjoy this dish, I encourage you to get creative. Happy grilling!

Herb Garden Chimichurri Steak Skewers Flavor Delight

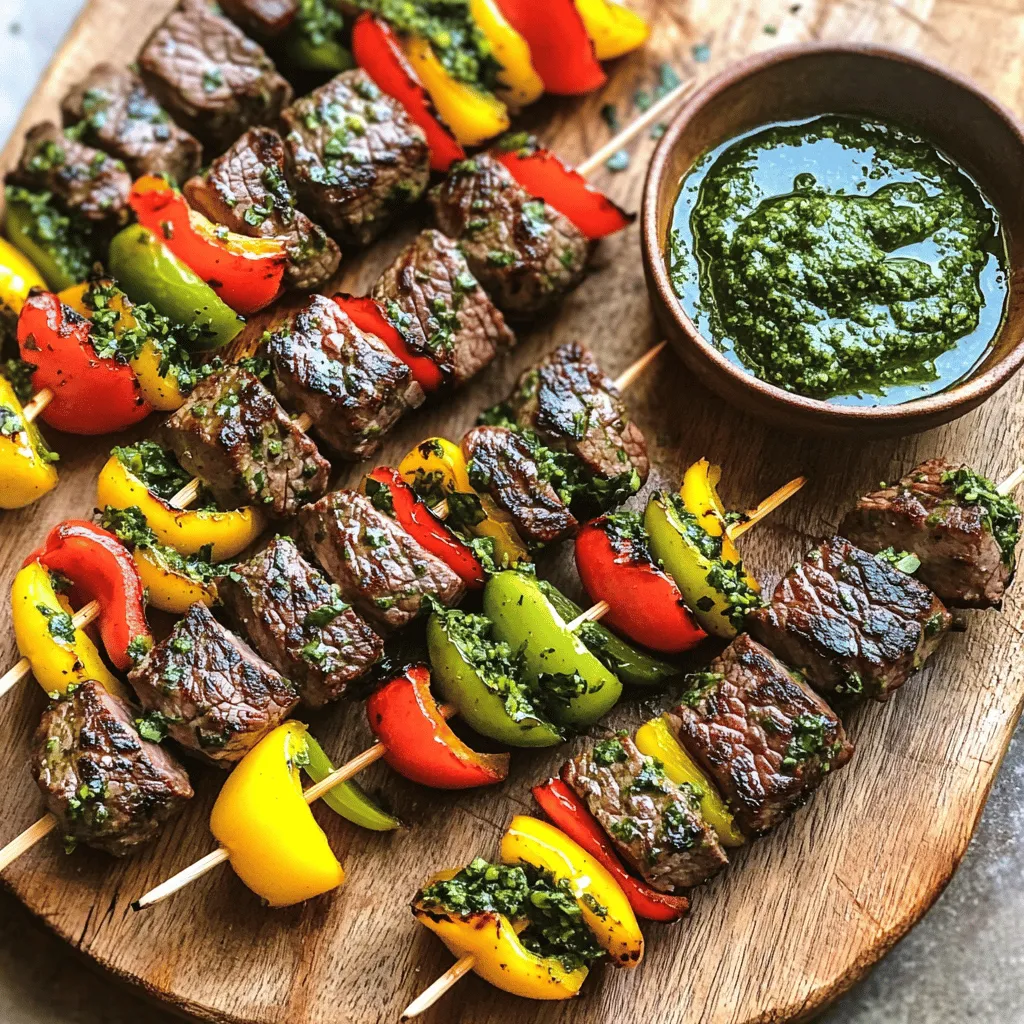
Get ready for a flavor adventure! In this post, I’ll share how to create scrumptious Herb Garden Chimichurri Steak Skewers.

- 1 cup rolled oats - 2 cups almond milk - 1 scoop vanilla protein powder The base of this recipe is simple and healthy. Rolled oats offer fiber and energy. Almond milk adds creaminess without dairy. Vanilla protein powder boosts protein, making your breakfast more filling. - 1 cup fresh or frozen cherries - 2 tablespoons almond butter - 1 tablespoon chia seeds Cherries bring a sweet and tart flavor. They also add color and nutrients. Almond butter gives a rich taste and healthy fats. Chia seeds add a fun texture and more fiber. - 1 tablespoon maple syrup - 1 teaspoon vanilla extract - Sliced almonds for topping You can add maple syrup for extra sweetness. Vanilla extract enhances the flavor of your oats. Sliced almonds on top add a nice crunch and look great. For the full recipe, check out the instructions provided. 1. Start by mixing the base ingredients. In a large bowl, add 1 cup of rolled oats, 2 cups of almond milk, and 1 scoop of vanilla protein powder. Stir it well. Make sure the protein powder blends smoothly with the oats and milk. This step is key for a creamy texture. 2. Next, incorporate flavor enhancers. Add 2 tablespoons of almond butter, 1 tablespoon of chia seeds, and 1 tablespoon of maple syrup if you want it sweeter. Pour in 1 teaspoon of vanilla extract for extra flavor. Mix everything until it feels smooth and creamy. 3. Now, gently fold in the cherries. You can use either fresh or frozen cherries. Halve them first. This way, they mix evenly in the oats. Make sure the cherries are distributed well throughout the mixture. This adds a burst of flavor in each bite. 1. After preparing the mixture, transfer it to a container. A mason jar or airtight container works best. Seal it tightly. This helps keep the oats fresh while they soak overnight. 2. The importance of overnight soaking cannot be stressed enough. It allows the oats to absorb the liquid. This makes them soft and ready to eat in the morning. Let the mixture sit in the refrigerator for at least 6 hours, but overnight is best. 1. When ready to serve, give the oats a good stir. This helps mix everything together again. If the oats feel too thick, add a splash of almond milk. This will adjust the consistency to your liking. 2. For topping ideas, I suggest using sliced almonds and extra cherries. This adds crunch and visual appeal. You can also try a drizzle of almond butter for more flavor. Enjoy your nutritious breakfast! For the complete recipe, check out the Full Recipe section. To make your Overnight Cherry Almond Protein Oats perfect, mixing is key. First, add the protein powder slowly. Stir well until it blends smoothly with the oats and almond milk. This step helps avoid clumps. Next, choose a good almond milk. Unsweetened options keep it healthy. If you prefer a sweeter taste, consider flavored almond milk. You can adjust the sweetness by adding maple syrup. Start with one tablespoon and taste. If you want it sweeter, add more. Feel free to switch fruits too! Try bananas or berries for a fun twist. You can also use different nut butters, like peanut or cashew butter, for varied flavors. When serving, think outside the bowl. Use mason jars or clear cups to show off the layers. For a pretty touch, garnish with extra cherries and a sprinkle of sliced almonds on top. This not only looks great but adds crunch and taste too. Enjoy making your meal beautiful as well as delicious! {{image_2}} You can play with flavors in your overnight oats. One fun option is chocolate cherry protein oats. Just add cocoa powder to the base mix. This gives you a rich, chocolatey taste that pairs well with cherries. You can also try tropical cherry protein oats. Swap cherries for fresh pineapple or mango. This brightens the dish and adds a fun twist. If you want to change the protein powder, you can use plant-based or whey powder. Each type adds a different taste and texture. You can also choose dairy-free milk. Almond milk is great, but oat or coconut milk works too. Go for what you like best. You can switch up the fruit based on what's in season. In summer, try strawberries or peaches instead of cherries. In fall, think about using diced apples or pears. You can also change the nuts you use. If you can't find almonds, walnuts or pecans make good options. These choices keep your oats fresh and exciting. For the full recipe, check out the detailed steps above! For Overnight Cherry Almond Protein Oats, choose airtight containers. These keep the oats fresh longer. Glass containers are great, but I love using mason jars. They seal well and look cute too! You can store these oats in the fridge for up to five days. After that, they may spoil. Look for changes in color or a sour smell. If you see any mold, toss them out. You can enjoy your oats cold right from the fridge. If you like them warm, heat them in the microwave. Add a splash of almond milk for better texture when reheating. This keeps them creamy and delicious. Enjoy your tasty meal! Yes, you can skip the protein powder. To add protein, use Greek yogurt or cottage cheese. Both options mix well and add creaminess. You can also add nuts or seeds for extra protein without changing the flavor too much. To make more servings, double or triple the ingredients. For example, if you want to serve four, just use two cups of oats and four cups of almond milk. Keep the ratios the same for the other ingredients. This way, you get the perfect flavor. This recipe is healthy and filling. A serving has about 300-400 calories, depending on the toppings. Each bowl gives you around 15-20 grams of protein, which is great for muscle repair. Benefits include: - Oats: They are high in fiber. They help with digestion and keep you full. - Cherries: They are rich in antioxidants. They may help reduce inflammation. - Almond Butter: It has healthy fats and adds creaminess. This nut butter also provides extra protein. Overnight Cherry Almond Protein Oats combine nutrition and taste. We covered the main and optional ingredients, preparation steps, and tips for success. You can easily customize your oats, using different fruits or nut butters. Remember to store them properly and watch for spoilage. This recipe offers a simple way to enjoy a healthy breakfast. Experiment with flavors and enjoy the benefits of a good start to your day. Cooking should be fun, and these oats make it easy. Enjoy your delicious creation!

Overnight Cherry Almond Protein Oats Easy and Tasty Meal

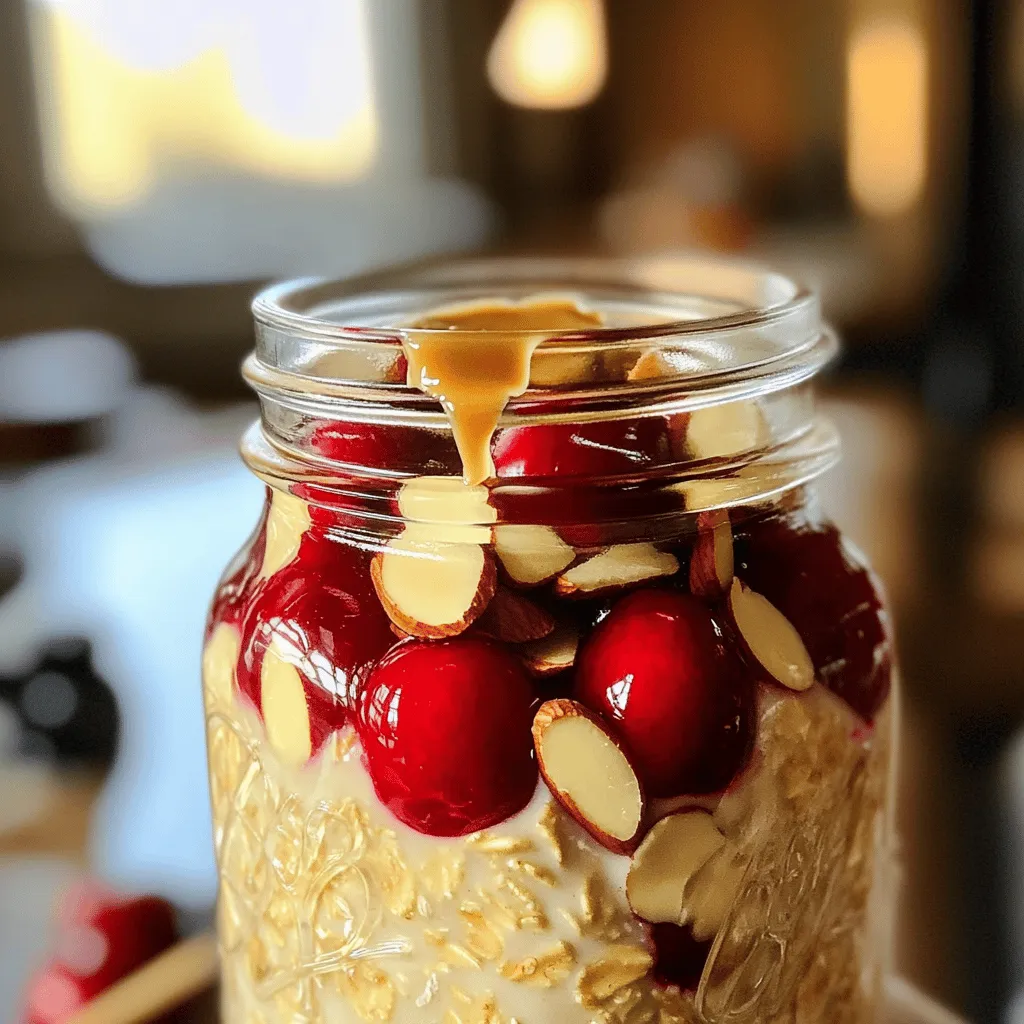
Looking for a quick and tasty breakfast? You’re in the right place! Overnight Cherry Almond Protein Oats are easy to

Older posts
Newer posts
← Previous Page1 … Page21 Page22 Page23 … Page65 Next →

dsad

© 2025 flavorsprint • Built with GeneratePress

Our Policies

  • Copyright Policy
  • Cookie Policy
  • GDPR Policy
  • Privacy Policy
  • Disclaimer
  • Terms Of Use

More Information

  • Home
  • About
  • Contact
  • Appetizers
  • Dessert
  • Dinner
  • Drinks
©2025, flavorsprint About Back To Top