Skip to content
DisclaimerTerms Of UseGDPR PolicyCookie Policy

flavorsprint

  • Home
  • Drinks
  • Appetizers
  • Dinner
  • Dessert
  • About
  • Contact
  • Privacy Policy
DisclaimerTerms Of UseGDPR PolicyCookie Policy

Lillian

- 1 lb ground chicken or turkey - 1/4 cup breadcrumbs - 2 green onions, finely chopped - 2 cloves garlic, minced - 1 tablespoon fresh ginger, grated - 1 tablespoon jerk seasoning - 1/2 teaspoon allspice - 1/4 cup fresh cilantro, chopped - 1/4 cup mayonnaise - 1 tablespoon lime juice - Mini brioche or sesame slider buns - Lettuce leaves for garnish The main part of these sliders is the meatballs. I use ground chicken or turkey. This keeps them light but tasty. I mix in breadcrumbs, green onions, garlic, ginger, and jerk seasoning. Adding allspice and cilantro gives it a great flavor. The jerk seasoning adds a spicy kick. I love how it wakes up the taste buds. To hold everything together, I use mini brioche or sesame slider buns. These buns are soft and buttery. They pair well with the spicy meatballs. I also add lettuce for crunch and freshness. - Sliced tomatoes - Other condiments for serving You can add sliced tomatoes to your sliders. This adds a juicy bite. You might also want some condiments. Options like hot sauce or extra mayonnaise can enhance the flavor. - About 150 calories per slider - Key nutrients include protein, fiber, and healthy fats Each slider contains about 150 calories. They pack a good amount of protein from the meat. The breadcrumbs add some fiber, too. This makes them fill you up without feeling heavy. Plus, they taste great! First, preheat your oven to 400°F (200°C). This helps the meatballs cook evenly. While the oven heats up, line a baking sheet with parchment paper. This makes clean-up easy and helps the meatballs brown nicely. In a large bowl, combine the following ingredients: - 1 lb ground chicken (or turkey) - 1/4 cup breadcrumbs - 2 green onions, finely chopped - 2 cloves garlic, minced - 1 tablespoon fresh ginger, grated - 1 tablespoon jerk seasoning - 1/2 teaspoon allspice - 1/4 cup fresh cilantro, chopped Mix everything well. This ensures that every meatball is packed with flavor. Now, shape the mixture into small meatballs, about 1-inch in size. Place them on your prepared baking sheet. Leave some space between each meatball for even cooking. Bake the meatballs in the oven for 20-25 minutes. Look for a golden brown color to know they are done. While they bake, prepare the sauce. In a small bowl, mix: - 1/4 cup mayonnaise - 1 tablespoon lime juice This creamy lime dressing adds a fresh touch to your sliders. Once the meatballs are cooked, slice the slider buns in half. On the bottom half of each bun, spread some creamy dressing. Then, add a piece of lettuce, a meatball, and a slice of tomato if you like. Top with the other half of the bun. For the complete recipe, check out the Full Recipe section. Enjoy your tasty jerk meatball sliders! To make the best jerk meatballs, pay attention to cooking time. Bake them for 20 to 25 minutes at 400°F (200°C). Check for a nice golden color. If your meatballs are larger, add five more minutes to cook them through. Avoid overmixing the meatball mixture. This can make them tough. Also, don’t skip the breadcrumbs. They help keep the meatballs juicy. These sliders shine with fresh toppings. Try adding sliced tomatoes and crunchy lettuce. They add color and taste. You can also serve them with a side of sweet potato fries or a fresh salad. This turns your sliders into a full meal. For a fun twist, serve them with pickles or a spicy dipping sauce. This adds flair to your party spread. Want to boost the flavor? Add some chopped jalapeños or a dash of hot sauce to the meatball mix. This can give your sliders a kick that everyone will love. For better texture, try adding finely chopped bell peppers or grated zucchini. These ingredients add moisture and crunch. Don’t forget to check out the Full Recipe for more tips and tricks to master your jerk meatball sliders! {{image_2}} You can switch up the protein in your meatballs. Try ground beef or a plant-based option. For a twist, use different sauces. A mango chutney or spicy barbecue sauce can add unique flavors. Mini sliders are fun for parties! They are easy to grab and enjoy. You can also use regular-sized buns for heartier servings. Try different types of bread too. Brioche, sesame, or even ciabatta can give each slider its own flair. Think about adding local spices. A pinch of cumin or paprika can change the taste. You can also include toppings from other cuisines. For example, consider adding kimchi or tzatziki for a fresh twist on jerk flavors. Check out the Full Recipe to explore these ideas! To keep your jerk meatball sliders fresh, store them in an airtight container. Refrigerate them right after they cool. If you want to keep them longer, you can freeze them. Just wrap each slider in plastic wrap before placing them in a freezer bag. This helps to avoid freezer burn. Leftovers last about three days in the fridge and up to three months in the freezer. For the best texture, reheat meatballs in the oven. Preheat your oven to 350°F (175°C). Place the meatballs on a baking sheet and cover them with foil. Heat for about 10-15 minutes. This keeps them moist. You can also reheat them in the microwave. Use a microwave-safe dish and add a splash of water. Cover it and heat for 1-2 minutes. This method helps maintain flavor too. You can prepare sliders in advance for busy days. Make the meatballs and store them in the fridge. You can assemble them when you're ready to eat. This saves time and effort. You can also make the creamy lime dressing ahead. Just keep it in the fridge. It’s a great way to have quick meals ready to go. Try pairing them with a fresh salad or veggies for a complete meal. What can I serve with Jerk Meatball Sliders? You can serve many tasty sides with Jerk Meatball Sliders. Here are some ideas: - Coleslaw for crunch and freshness. - Sweet potato fries for a sweet touch. - Grilled corn for a smoky flavor. - A fruit salad for a cooling contrast. These sides will balance the spicy flavors of the sliders and make your meal more fun. Can I use pre-made jerk seasoning? Yes, you can use pre-made jerk seasoning. It saves time and still gives great flavor. Just check the label for spice levels. Some brands can be very spicy, while others are mild. Adjust the amount based on your taste. How long does it take to make Jerk Meatball Sliders? Jerk Meatball Sliders take about 40 minutes to prepare and cook. You can whip them up in about 15 minutes. Baking takes another 20 to 25 minutes. This timing is perfect for a quick weeknight meal or a fun party snack. Is this a quick recipe for weeknights? Yes, this recipe is quick and easy. You can make these sliders in under an hour. It’s a great choice if you want something tasty without spending all evening in the kitchen. What dietary restrictions does this recipe cater to? This recipe is great for many diets. It uses chicken or turkey, which is lean and tasty. You can also make it dairy-free by skipping the mayo or using a dairy-free substitute. How to make Jerk Meatball Sliders gluten-free? To make Jerk Meatball Sliders gluten-free, you can use gluten-free breadcrumbs. Many stores offer them now. Just check the labels to be sure they are safe for your needs. This way, everyone can enjoy the sliders! Jerk meatball sliders are fun and easy to make. We covered all the main ingredients, from ground chicken to jerk seasoning. You learned step-by-step instructions for mixing, baking, and assembling your sliders. I shared tips to perfect your meatballs and ideas to serve them well. You can also try variations to suit your taste and needs. With these recipes, you can enjoy bold flavors and yummy meals. Start making these sliders for your next gathering!

Jerk Meatball Sliders Flavor-Packed Party Delight

Are you ready to spice up your next gathering? Jerk Meatball Sliders are here to add flavor and fun to

- Coconut Milk - Pumpkin Puree - Maple Syrup - Vanilla Extract - Pumpkin Pie Spice - Optional Garnish To make a great Dairy-Free Pumpkin Cold Foam, you need just a few ingredients. Each one plays a key role in taste and texture. I recommend using full-fat coconut milk. It gives a rich, creamy feel. Pumpkin puree is the star of this recipe. It adds sweetness and flavor. Maple syrup brings a touch of natural sweetness. You can adjust the amount based on your taste. For extra flavor, add vanilla extract and pumpkin pie spice. These help to enhance the pumpkin flavor. At the end, I suggest a sprinkle of cinnamon as an optional garnish. It adds a nice touch and looks great. - Plant-Based Creamers - Almond Milk Options - Oat Milk Benefits If you want to switch things up, there are excellent dairy alternatives. Plant-based creamers offer a creamy texture without dairy. They come in many flavors, so you can pick one that suits your taste. Almond milk is another popular choice. It has a lighter feel but still tastes great. Just be sure to use unsweetened almond milk to keep the sweetness balanced. Oat milk is a fantastic option too. It has a naturally sweet taste and a creamy texture. This can really enhance your pumpkin cold foam. Each of these alternatives will help you create a delicious drink. For the full recipe, check out the method above. Mixing Coconut Milk and Pumpkin Start by taking one cup of coconut milk. I like to use full-fat for creaminess. In a medium bowl, add 1/4 cup of pure pumpkin puree. Mix them well until the blend is smooth and creamy. The coconut milk adds richness, while the pumpkin gives flavor. Adding Sweeteners and Spices Next, add one tablespoon of maple syrup. Adjust it based on your taste. Then, mix in one teaspoon of vanilla extract. Finally, sprinkle in half a teaspoon of pumpkin pie spice. Whisk everything together until it's fully combined. You want the mixture to thicken slightly for the foam. Blending Techniques Transfer your pumpkin mix to a blender. Blend it on high for about one to two minutes. You are aiming for a light and frothy texture. This step is key for that airy foam. Achieving the Right Consistency If your foam seems too thin, blend a bit longer. You want it thick enough to sit on top of your drink. If it’s too thick, add a splash of coconut milk and blend again. Ideal Beverages for Topping Fill a glass with ice cubes. Pour your favorite cold coffee or brewed chai tea over the ice. The cold foam pairs well with both drinks. It adds creaminess and a nice flavor. Presentation Tips Spoon the creamy pumpkin foam generously on top of your drink. For a special touch, dust a pinch of cinnamon on top. It looks pretty and adds extra flavor. Enjoy your Dairy-Free Pumpkin Cold Foam! For the full recipe, click here. To get that creamy cold foam, you need to mix well. Start with coconut milk and pumpkin puree. Make sure they blend smoothly. If the mix separates, try whisking longer. The goal is a thick foam that stays together. For creaminess, use full-fat coconut milk. This gives a rich texture. When you blend, do it at high speed. This adds air and makes it light and fluffy. To spice up your foam, try adding more flavors. Cinnamon and nutmeg can bring warmth. A dash of ginger adds a nice kick. You can also use cardamom or allspice for a twist. If you want to change the sweetness, use agave syrup or honey. These can replace maple syrup. Just adjust to your taste. Remember, a little goes a long way! You can find the complete recipe in the Full Recipe section. {{image_2}} You can easily switch up the flavor of your dairy-free pumpkin cold foam. Here are two fun ideas: - Chocolate Pumpkin Foam: Add 1-2 tablespoons of cocoa powder when mixing. This rich flavor pairs great with coffee or chai. - Vanilla Cinnamon Foam: Mix in 1 teaspoon of ground cinnamon and an extra splash of vanilla. This gives a warm, cozy taste perfect for fall. If you want to enjoy this foam but need some changes, try these options: - Low-Sugar Options: Use a sugar substitute like stevia or monk fruit. Adjust the amount to match your taste. - Nut-Free Alternatives: If you have nut allergies, use oat milk or soy milk instead of coconut milk. Both options work well and keep the foam creamy. Feel free to get creative with these variations and modifications. You can make this pumpkin cold foam fit your tastes and needs. For the full recipe, check out the link above. To keep your dairy-free pumpkin cold foam fresh, use an airtight container. Glass jars work well. Leave a little space at the top for expansion. Store it in the fridge. The foam will stay good for 3 to 5 days. If you notice any changes in smell or look, it's best to toss it. You can use leftover foam in many ways. Try adding it to smoothies for a creamy texture. It also works great on pancakes or waffles. You can even stir it into oatmeal for a fall twist. For meal prep, make a big batch and divide it into smaller containers. This way, you can enjoy it throughout the week. To make your foam thicker, blend it longer. The air you add helps create volume. Aim for about 1-2 minutes in the blender. You can also try these ingredient adjustments: - Add more pumpkin puree. This gives a thicker texture. - Use less coconut milk. Reducing the liquid will boost creaminess. Yes, you can use different types of milk. Here are some good substitutes: - Almond milk. It has a light flavor and is easy to find. - Oat milk. This adds a nice creaminess and works well in drinks. - Soy milk. It's rich and can also be a great option. Yes, this recipe is vegan-friendly! Here’s why: - Coconut milk is plant-based and dairy-free. - Pumpkin puree is pure vegetable goodness. - Maple syrup is a natural sweetener from trees. If you want to make it even more vegan-friendly, you can use agave syrup instead of maple syrup. It’s a great alternative! You learned how to make a delicious pumpkin foam. We explored key ingredients like coconut milk and pumpkin puree, along with creamy dairy alternatives. I shared easy steps for mixing and serving, with tips for the best texture. You discovered fun flavor twists and how to store leftovers effectively. Experiment with variations to find your favorite. This foam will enhance many drinks and meals. Enjoy your kitchen adventures and make it uniquely yours!

Dairy-Free Pumpkin Cold Foam Easy and Creamy Recipe

If you love fall flavors but want to skip the dairy, I’ve got just the thing for you! This easy

- 2 cups all-purpose flour - 1 teaspoon baking soda - 1 teaspoon baking powder - 2 teaspoons ground cinnamon - 1/2 teaspoon ground nutmeg - 1/4 teaspoon ground ginger - 1/4 teaspoon salt - 1 cup pumpkin puree - 1 cup brown sugar - 1/2 cup granulated sugar - 1/2 cup vegetable oil - 2 large eggs - 8 oz cream cheese, softened - 1/2 cup unsalted butter, softened - 2 cups powdered sugar - 1 teaspoon vanilla extract - 1/2 teaspoon ground cinnamon I love to gather my ingredients before I start baking. This helps keep things neat. First, for the dry ingredients, I use flour, baking soda, baking powder, cinnamon, nutmeg, ginger, and salt. These spices bring a warm flavor to the cookies. Next, I mix my wet ingredients. I add pumpkin puree, brown sugar, granulated sugar, vegetable oil, and eggs. The pumpkin puree is key. It gives the cookies moisture and a great taste. Finally, I prepare the frosting. I blend cream cheese and butter until smooth. Then, I add powdered sugar, vanilla, and ground cinnamon. This frosting makes the cookies extra special. For the full recipe, check out the complete list of ingredients and steps. Enjoy baking! - Preheat your oven to 350°F (175°C) and line baking sheets with parchment paper. - In a large bowl, combine pumpkin puree, brown sugar, granulated sugar, and vegetable oil. Mix well until smooth. - In a separate bowl, whisk together flour, baking soda, baking powder, cinnamon, nutmeg, ginger, and salt. - Gradually add the dry ingredients to the wet mixture, mixing until just combined. It’s okay if a few lumps remain. - Using a cookie scoop or tablespoon, drop rounded balls of dough onto the prepared baking sheets, leaving space between each cookie. - Bake for 12-15 minutes until the edges are golden and the centers are soft. - In a medium bowl, beat cream cheese and butter until creamy. - Gradually mix in powdered sugar and vanilla until smooth and fluffy. Add ground cinnamon for extra flavor. - Once the cookies cool, spread frosting generously on each one. - Optional: Add decorative touches like a sprinkle of cinnamon or pumpkin seeds for a festive look. - Ensure ingredients are at room temperature for even mixing. - Do not overmix the dough to avoid tough cookies. To make soft and chewy cookies, start with room temperature ingredients. This helps them blend well and gives the cookies a nice texture. If the butter or eggs are cold, it can lead to uneven mixing. You want a smooth dough, not a lumpy one. Mix the dough gently. Overmixing can lead to cookies that are hard instead of soft. When you combine wet and dry ingredients, stir just until you see no more flour. - Chill the frosting slightly before applying for easier spreading. - Use a spatula or piping bag for decorative frosting. I find that chilling the cream cheese frosting makes it easier to spread. When it’s cool, it holds its shape better. If you want to get fancy, use a piping bag. You can create fun shapes and designs that look great on the cookies. A spatula works well too. Just scoop up some frosting and spread it on top of each cookie. You can make it smooth or add a swirl for a fun look. - Adjust baking time for preferred cookie softness or crispness. - Experiment with adding nuts or dried fruits for extra flavor. Baking time can change how your cookies turn out. For soft cookies, bake for the lower end of the time range. If you like a crispy edge, bake a little longer. You can also add nuts like walnuts or pecans for a nice crunch. Dried fruits, like cranberries or raisins, add sweetness and texture. They make each bite interesting and tasty! For the full recipe, check out the details above. {{image_2}} You can easily change up the flavors in your pumpkin cookies. Here are two fun ideas: - Add chocolate chips or white chocolate for a sweet twist. The chocolate pairs well with the warm spices. - Incorporate a bit of orange zest for a citrusy note. This adds a fresh flavor that brightens the cookies. Need to make some changes for dietary needs? Try these swaps: - Substitute gluten-free flour for a gluten-free option. This keeps the cookies tasty for those avoiding gluten. - Use vegan cream cheese and butter for a dairy-free version. This way, everyone can enjoy these treats. Get creative with how you decorate your cookies! - Create Halloween-themed cookies by using food coloring in the frosting. This adds fun colors that kids will love. - Use festive cookie cutters for unique shapes. You can make pumpkins, ghosts, or any shape you like for special occasions. For the complete recipe, check out the Full Recipe section! Store your cookies in an airtight container at room temperature. This keeps them soft and fresh. For longer freshness, refrigerate cookies with frosting. The cool temperature helps the cream cheese stay firm and tasty. You can freeze un-frosted cookies for up to 3 months. This is a great way to save some for later. When you want them, just thaw and frost them before serving. This method keeps the texture perfect. These cookies are typically fresh for 1 week at room temperature. However, frosted cookies may last a little shorter due to the cream cheese. It's best to enjoy them within a few days for the best taste. Yes, canned pumpkin puree is the best option for convenience and taste. Using canned pumpkin saves time and ensures a smooth texture. I always reach for quality brands that offer rich flavor. This ingredient makes the cookies moist and flavorful. If you want to use fresh pumpkin, cook and puree it before use. To make cookies soft and chewy, avoid overbaking them. Check for doneness at the 12-minute mark. The edges should be lightly golden, while the centers remain soft. After baking, let them cool on the sheet for five minutes. This helps them hold moisture, keeping them chewy and delicious. Yes, the cookies are delicious on their own if you prefer a less sweet treat. The pumpkin flavor shines through, making them tasty even without frosting. If you choose to skip the frosting, consider adding nuts or spices for extra texture and flavor. These cookies pair wonderfully with coffee or tea, and are great for fall gatherings. Serve them on a pretty plate, and add a sprinkle of cinnamon for flair. Guests will love the taste, and it adds a nice touch to your table setting. These pumpkin cookies are easy and fun to make. You learned about the ingredients, instructions, and tips for perfect cookies. The best part? You can change flavors or make them gluten-free or vegan. Storing your cookies properly will keep them fresh. Remember, these treats taste great on their own or frosted. Enjoy baking and sharing these delights this fall!

Pumpkin Cookies with Cream Cheese Frosting Delight

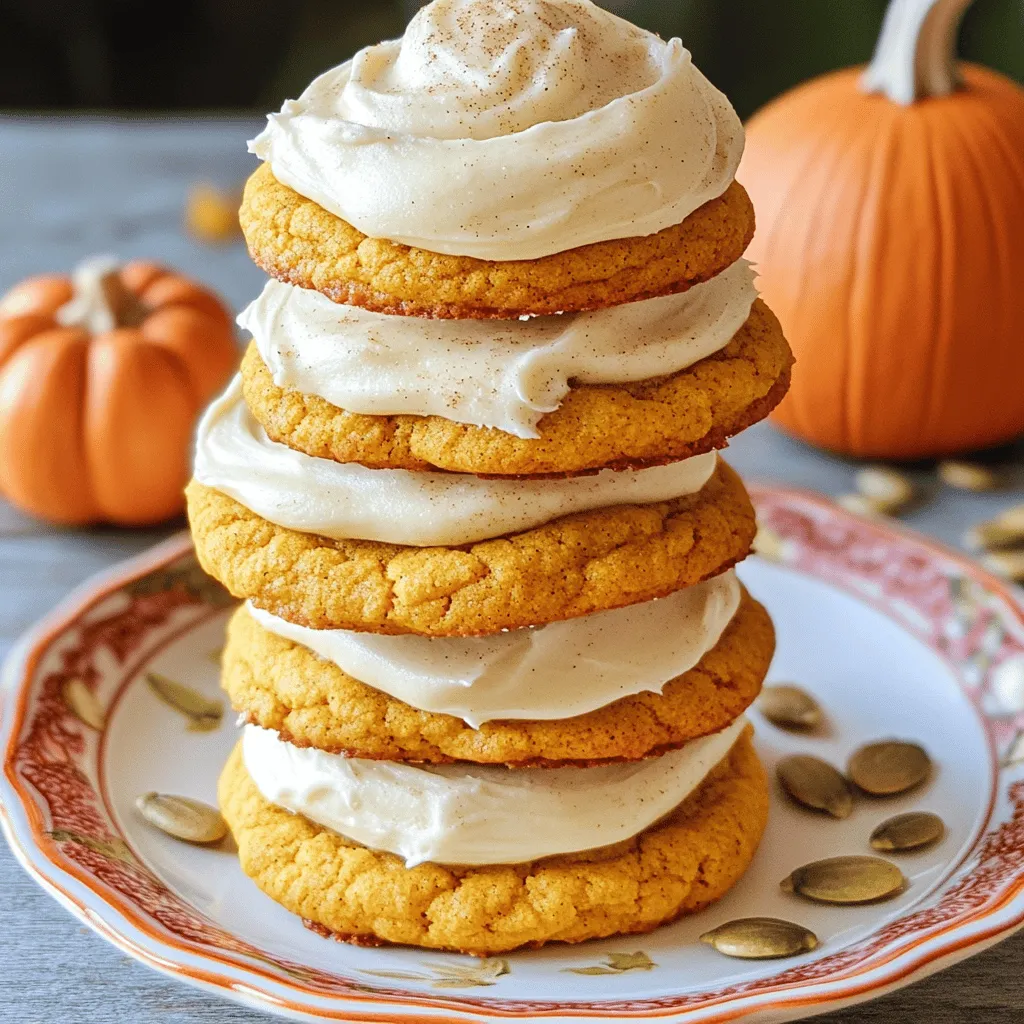
Looking for a fall treat that will delight your taste buds? Look no further than these Pumpkin Cookies with Cream

To make buffalo chicken sliders, you will need these key ingredients: - 2 cups cooked, shredded chicken - 1/2 cup buffalo sauce - 1/4 cup ranch dressing - 1/2 cup shredded cheddar cheese - 1/2 cup diced celery - 12 slider buns - 1 tablespoon olive oil - Lettuce leaves for garnish - Optional: sliced jalapeños for extra heat These ingredients come together to create a tasty treat. The shredded chicken gives a nice base. The buffalo sauce adds a kick, while ranch dressing brings creaminess. Cheddar cheese melts perfectly, and diced celery adds a crunch. If you want a lighter version, consider these swaps: - Use grilled chicken instead of fried. This reduces the fat. - Swap ranch dressing for Greek yogurt. This adds protein and cuts calories. - Choose whole wheat slider buns for more fiber. These changes keep the flavor but make the dish healthier. To enhance your buffalo chicken sliders, try these seasonings and add-ins: - Garlic powder adds depth to the taste. - Onion powder gives a sweet flavor. - A pinch of paprika can add smokiness. - For more heat, mix in some cayenne pepper. Feel free to mix and match these seasonings. They will give your sliders a unique twist. For a fresh touch, add chopped green onions or cilantro. For the full recipe, check out the detailed instructions. To start, gather your ingredients. You will need 2 cups of cooked, shredded chicken, 1/2 cup of buffalo sauce, 1/4 cup of ranch dressing, and 1/2 cup of shredded cheddar cheese. Don’t forget 1/2 cup of diced celery for crunch! In a large mixing bowl, add the shredded chicken first. Then, pour in the buffalo sauce. Mix well until the chicken is fully coated. Next, add the ranch dressing and shredded cheddar cheese. Stir until everything is well combined. Finally, toss in the diced celery for a fresh bite. Now it’s time to build your sliders! Preheat your oven to 350°F (175°C). While it warms up, slice the slider buns in half, placing the bottom halves in a greased baking dish, cut side up. Spoon a generous amount of the buffalo chicken mixture onto each bun. Make sure to pile it high! Place the top halves of the slider buns on the chicken. To get a nice golden color, brush the tops lightly with olive oil. Bake your sliders in the preheated oven for about 15-20 minutes. Watch them closely! You want the buns to be toasted and the chicken heated through. When they are done, take them out and let them cool for a couple of minutes. This step helps keep the sliders from falling apart when you serve them. Serve warm, garnished with fresh lettuce leaves and optional sliced jalapeños for a spicy kick. For the complete recipe, refer to the Full Recipe above. To keep your sliders moist, use enough buffalo sauce. The sauce adds flavor and moisture. Mix in ranch dressing too; it enhances the creaminess. When cooking, avoid overbaking the sliders. Stay alert while they bake, and take them out when they are golden brown. You can also add a touch of olive oil to the chicken mix. This small step helps keep everything juicy. If you have leftover chicken, reheating it right is key. You can use an oven or stovetop. For the oven, preheat it to 350°F (175°C). Place the chicken in an oven-safe dish. Cover it with foil to lock in moisture. Heat for about 15-20 minutes. On the stovetop, add a splash of broth or water to a pan. Heat it on low, stirring gently until warm. Both methods will keep the chicken tasty. Buffalo chicken sliders are a hit at parties. Serve them on a large platter for a fun look. You can add sides like veggie sticks or chips. For a tasty twist, offer different sauces like blue cheese or more buffalo sauce. If you want extra heat, serve sliced jalapeños on the side. Guests love customizing their sliders! For more ideas, check out the Full Recipe for Buffalo Chicken Sliders. {{image_2}} If you want more heat, add jalapeños. Simply slice fresh jalapeños and mix them into the chicken. You can also place slices on top of the sliders before baking. This adds a punch to the creamy ranch and tangy buffalo sauce. You can adjust the amount based on your heat preference. More jalapeños means spicier sliders. It’s a fun way to change things up! You can make a veggie version, too. Instead of chicken, use shredded jackfruit or cauliflower. Cook them in the buffalo sauce just like you would with chicken. Both options soak up the flavor well. Top with the same ranch dressing and cheese. You’ll still get that tasty buffalo flavor without meat. It’s perfect for your vegetarian friends! If you need gluten-free buns, look for gluten-free slider options at the store. Many brands offer soft and tasty buns. You can also use lettuce wraps instead of bread. Just scoop the chicken mix into leaves of romaine or iceberg. This keeps the flavors while being gluten-free. You won’t miss the bread with this fresh twist! For more details, check the Full Recipe for Buffalo Chicken Sliders. To keep your leftover sliders fresh, place them in an airtight container. Make sure to separate the sliders with parchment paper to prevent sticking. Store them in the fridge, where they will last for about three days. If you have extra buffalo chicken mixture, you can store that too, in a separate container. When you're ready to enjoy the sliders again, preheat your oven to 350°F (175°C). Place the sliders on a baking sheet. Cover them with foil to keep them moist. Heat for about 10 to 15 minutes. This method helps keep the buns soft and the chicken warm. If you want a crispy top, remove the foil for the last few minutes. If you want to save sliders for later, freezing is a great option. Wrap each slider tightly in plastic wrap. Then, place them in a freezer bag. They can last up to three months in the freezer. When you're ready to eat, let them thaw in the fridge overnight before reheating. This keeps them tasty and ready for your next meal. You can find the full recipe in the article above. Yes, you can make Buffalo Chicken Sliders in advance. Prepare the chicken mix and assemble the sliders. Cover them and store in the fridge until you are ready to bake. This saves time and adds flavor. The sliders will taste great even after chilling. Shredded rotisserie chicken works best for these sliders. It is tender and full of flavor. You can also use grilled or boiled chicken. Just shred it well before mixing with the buffalo sauce. This gives you a juicy and tasty base for the sliders. Look for local restaurants or food trucks that specialize in wings or comfort food. Many places serve their own twist on Buffalo Chicken Sliders. You can also explore online reviews to find highly-rated spots near you. Don't forget to try different styles! Absolutely! You can use barbecue sauce for a sweeter flavor. Asian sauces like teriyaki can also work well. Just remember to adjust the other ingredients to match the sauce's taste. This opens up new flavor profiles for your sliders. Serve these sliders with crunchy coleslaw or crispy fries. Vegetable sticks with ranch dressing are a great choice too. You can add a fresh salad to balance the flavors. These sides will enhance your meal and make it more enjoyable. Add more buffalo sauce or include sliced jalapeños in the chicken mix. You can also serve the sliders with hot sauce on the side. This lets each person adjust the spice level to their liking. It’s perfect for those who love a fiery kick! Wrap the sliders in foil after baking to keep them warm. You can also place them in a slow cooker on low heat. This will help maintain their temperature while serving. It's an easy way to keep them warm for guests. Yes, you can use regular burger buns or even mini bagels. Just adjust the amount of chicken mix for larger buns. This gives you more options and can be fun for different gatherings. Enjoy creating your own unique version! For the complete guide, check out the Full Recipe. It includes all the details you need to make these delicious Buffalo Chicken Sliders at home. You’ll find the perfect balance of flavors and easy steps to follow! Buffalo chicken sliders are easy and fun to make. We covered main ingredients, health substitutes, and key seasonings. I detailed how to prepare the chicken mix and assemble the sliders. You learned tips for keeping your sliders moist and how to use leftovers. We also discussed tasty variations and storage options. As you try these recipes, remember: sliders should be simple and enjoyable. Your gatherings will be a hit with buffalo chicken sliders on the menu!

Buffalo Chicken Sliders Savory Flavorful Treat

If you’re craving a tasty bite that packs a punch, Buffalo Chicken Sliders are the way to go! These little

To make the perfect pumpkin spice latte, you'll need some key ingredients. Here is what you need: - 2 cups brewed strong coffee or espresso - 1 cup milk (dairy or non-dairy) - 2 tablespoons pumpkin puree - 2 tablespoons maple syrup (or sugar) - 1 teaspoon pumpkin pie spice (plus more for garnish) - 1/2 teaspoon vanilla extract - Whipped cream (for topping, optional) These ingredients come together to create a drink that warms you up on chilly days. Using high-quality ingredients can really enhance the flavor of your latte. Here are some tips for choosing the best: - Coffee or Espresso: Go for freshly roasted beans. A dark roast gives a rich taste. - Milk: If you like creaminess, choose whole milk. For a lighter option, try almond or oat milk. - Pumpkin Puree: Use 100% pure pumpkin, not pumpkin pie filling. This gives more natural flavor. - Maple Syrup: Opt for pure maple syrup instead of imitation. It adds a lovely touch of sweetness. - Spices: Fresh spices are always better. They bring out the best flavors in your drink. Want to take your latte up a notch? Consider these add-ins: - Nutmeg: A pinch can add warmth. - Cinnamon: Use ground cinnamon for a spicy kick. - Cocoa Powder: A spoonful can create a chocolate twist. - Vanilla Bean: Fresh vanilla bean adds a unique flavor. - Caramel Drizzle: For a sweet touch, drizzle some caramel on top. Feel free to mix and match these add-ins to suit your taste. Enjoy crafting your perfect pumpkin spice latte! For the full recipe, check out the instructions provided earlier. To make your pumpkin spice latte, start with the milk. In a small saucepan, combine: - 1 cup milk (dairy or non-dairy) - 2 tablespoons pumpkin puree - 2 tablespoons maple syrup (or sugar) - 1 teaspoon pumpkin pie spice - 1/2 teaspoon vanilla extract Whisk this mixture over medium heat. Keep stirring until it warms up. Do not let it boil. Once warm, take it off the heat. Use a milk frother or a whisk to froth the milk. You want it creamy and light. Now, brew your strong coffee or espresso. Pour 2 cups into a large coffee mug. Slowly add the warm pumpkin spiced milk on top of the coffee. Stir gently to mix them well. If you like, add whipped cream on top. Finish with a sprinkle of pumpkin pie spice for a nice touch. Enjoy your cozy fall treat right away! Frothing milk can be tricky, but I have some tips! First, use cold milk for the best froth. Warm it slowly to keep it smooth. If you're using a frother, move it up and down in the milk. This motion helps create more bubbles. If you don’t have a frother, you can shake the milk in a jar. Just make sure the lid is tight! Shake it until it’s frothy, then heat gently. For a great pumpkin spice latte, strong coffee or espresso is key. Use dark roast coffee for a rich flavor. If using a coffee maker, use double the amount of coffee grounds you usually use. For espresso, follow your machine’s instructions for a double shot. This gives your latte the perfect base to mix with the spiced milk. Always brew fresh for the best taste. Enjoy! You can find the full recipe [here](#). When making a pumpkin spice latte, avoid using canned pumpkin pie filling. This mix has added sugars and spices. Always use plain pumpkin puree for the best taste. Don't boil the milk mixture; it should be hot but not bubbling. This keeps the milk creamy and smooth. Make sure to whisk well to mix all the flavors. If you skip this step, you may get clumps in your drink. You can add your own twist to the classic latte. Try using almond or oat milk if you want a dairy-free option. Add a dash of nutmeg for extra warmth. If you like it sweeter, add more maple syrup or honey. You can also mix in a shot of espresso for a stronger flavor. For a fun twist, top it with crushed graham crackers or a drizzle of caramel. Serve your pumpkin spice latte in a warm mug. This keeps the drink hot longer. If you're serving guests, make a big batch. That way, everyone can enjoy it together. Always add whipped cream on top for a special touch. A sprinkle of pumpkin pie spice makes it look pretty, too. Use a fun straw for a playful look. Enjoy your cozy fall drink with a slice of pie or a warm cookie for a perfect treat. For the complete recipe, check out the Full Recipe. {{image_2}} You can make a tasty pumpkin spice latte without dairy. Use almond milk, oat milk, or coconut milk instead. These options bring a unique flavor while keeping it creamy. When using non-dairy milk, heat it gently to avoid curdling. This way, your latte stays smooth and delicious. If you prefer cold drinks, try an iced pumpkin spice latte. Start with strong brewed coffee or espresso. Cool it down before adding ice. Then, mix in your pumpkin spice milk as per the full recipe. Top with whipped cream if you like. It’s a refreshing twist for warm days. Want to cut back on sugar? You can use stevia, agave syrup, or honey. These sweeteners add flavor without the extra calories. Adjust the amount based on your taste. Start with a little, then add more if needed. This keeps your latte tasty and guilt-free. When it comes to pumpkin spice lattes, homemade is often best. Store-bought versions may have extra sugars and preservatives. They can taste different than fresh-made. Making it at home lets you control the ingredients. You know what goes in your drink. Plus, the smell of fresh spices fills your kitchen. That’s hard to beat! If you have leftover latte, store it in the fridge. Use an airtight container to keep it fresh. It’s best to drink it within two days. The flavors stay nice for a bit but can fade. If you used whipped cream, remove it before storing. The cream won’t keep well. To reheat your latte, pour it into a small pot. Heat it over low to medium heat. Stir gently to mix the flavors. Avoid boiling it, as this can change the taste. You can also use a microwave. Heat it in short bursts, stirring in between. This way, you get a nice warm drink again. Enjoy your cozy treat! The Pumpkin Spice Latte began at Starbucks in 2003. This drink brought fall flavors to coffee. It quickly became a favorite for many. People love its warm, cozy taste. The blend of pumpkin, spice, and coffee made it special. Now, many cafes offer their own versions. You can even make it at home using the Full Recipe. Yes, you can use non-dairy milk! Almond, soy, oat, or coconut milk work great. These options give your latte a unique taste. Choose one that you enjoy. Each milk adds a different flavor and texture. Just follow the same steps in the recipe. Your Pumpkin Spice Latte will still be delicious! To make a vegan Pumpkin Spice Latte, use non-dairy milk. Replace dairy milk with almond, oat, or soy milk. Use maple syrup instead of sugar for sweetness. This keeps the drink plant-based and tasty. Follow the Full Recipe, and you’ll have a cozy vegan treat. Enjoy every sip without feeling guilty! You learned how to make a great pumpkin spice latte at home. We talked about the key ingredients, step-by-step prep, and tips for perfect results. You can customize it in many ways, from dairy-free options to sweetener choices. Remember, storage matters, too! Don’t let leftovers go to waste. With these tricks, you can enjoy this warm drink anytime. Making your own latte can be fun and satisfying. Enjoy every sip of your homemade creation!

Classic Pumpkin Spice Latte Cozy and Flavorful Recipe

Fall is here, and that means it’s time for the classic Pumpkin Spice Latte! This warm drink brings cozy comfort

- 1 cup water - 1/2 cup brown sugar - 1/2 cup granulated sugar - 2 tablespoons loose black tea or 4 black tea bags - 3/4 cup pure pumpkin puree - 1 teaspoon ground cinnamon - 1/2 teaspoon ground nutmeg - 1/4 teaspoon ground ginger - 1/4 teaspoon ground cloves - 1 teaspoon vanilla extract To make pumpkin spice tea syrup, gather your ingredients first. Each one adds a cozy touch. The water acts as the base. Both sugars bring sweetness and depth. Black tea gives a rich flavor, while pumpkin puree adds creaminess. The spices turn this syrup into a warm hug in a jar. Vanilla extract ties it all together with a lovely aroma. Make sure to use pure pumpkin puree. This ensures the best taste and texture. You can find it in most stores. If you prefer, you can also make your own. Just cook and blend fresh pumpkin until smooth. This syrup is simple to prepare. Once you have your ingredients ready, you can follow the full recipe to create this delightful treat. 1. Bringing water to a boil Start by pouring 1 cup of water into a medium saucepan. Place it on the stove over medium heat. Wait until the water starts to boil gently. This step is key for dissolving the sugars. 2. Dissolving sugars Once the water is boiling, add 1/2 cup of brown sugar and 1/2 cup of granulated sugar. Stir well until the sugars are fully dissolved. This mix creates a sweet base for our syrup. 3. Steeping black tea Next, add 2 tablespoons of loose black tea or 4 black tea bags to the boiling water. Let it steep for about 5 minutes. If you use loose tea, make sure to strain it out after steeping. This tea adds depth to the syrup. 1. Incorporating pumpkin and spices After steeping, add 3/4 cup of pure pumpkin puree to the saucepan. Then, mix in 1 teaspoon of ground cinnamon, 1/2 teaspoon of ground nutmeg, 1/4 teaspoon of ground ginger, and 1/4 teaspoon of ground cloves. Whisk everything together until smooth. The spices bring warmth and flavor. 2. Simmering the mixture Lower the heat to a simmer. Let the mixture cook for about 10 minutes. Stir occasionally to prevent it from sticking. This step helps thicken the syrup and blend the flavors. 1. Straining and storing the syrup Once finished simmering, remove the saucepan from the heat. Stir in 1 teaspoon of vanilla extract for extra flavor. Let the syrup cool slightly, then strain it through a fine-mesh sieve into a jar. Discard any solids left behind. 2. Cool and refrigerate Allow the syrup to cool to room temperature. After that, seal the jar and place it in the fridge. Your syrup can stay fresh for up to 2 weeks. Enjoy your homemade Pumpkin Spice Tea Syrup in many drinks! For the full recipe, check out the earlier section. To make your pumpkin spice tea syrup even better, you can adjust the spice levels. If you like it spicier, add more cinnamon or ginger. For a milder taste, use less of these spices. You control the flavor, so taste as you go. Using quality tea types can also boost the flavor. I suggest using loose black tea for a rich taste. If you prefer tea bags, choose a brand known for its strong flavor. This choice will make your syrup shine. Serving your syrup can be just as fun as making it! Drizzle it over hot chai or lattes for a cozy treat. You can also use it in smoothies or pancakes. For garnishing, sprinkle some cinnamon on top or add a cinnamon stick. A slice of fresh pumpkin or a star anise can add a nice touch too. This way, your drink looks as good as it tastes! Pumpkin is not just tasty; it also has great nutritional advantages. It is full of vitamins A and C, which help your body stay healthy. Plus, pumpkin is low in calories, making it a smart choice. The spices in your syrup offer benefits too. Cinnamon can help balance blood sugar. Ginger may aid digestion. Nutmeg has calming effects. These spices not only taste good but can also support your health. {{image_2}} You can easily switch to organic ingredients for a healthier twist. For sweetening, try using organic sugars like coconut sugar or organic brown sugar. These options add a nice hint of flavor. For the pumpkin, choose organic pumpkin puree. It tastes fresher and is free from chemicals. If you want a sugar-free syrup, use substitutes like stevia or monk fruit. These sweeteners can match the taste of sugar without the calories. Begin with a small amount. Then, taste and adjust until you reach your desired sweetness. Get creative with flavor! You can add spices like cardamom or allspice for a warm kick. These spices mix well with pumpkin and tea. If you love herbal teas, try infusing the syrup with chamomile or rooibos. This adds a unique twist to your syrup, making it even cozier. For the complete recipe, check out the Full Recipe. To keep your pumpkin spice tea syrup fresh, use a clean glass jar. Glass prevents any reaction with the syrup. You can also use a plastic container with a tight lid. Make sure it is dry and clean before pouring in the syrup. After pouring, seal the container well to avoid air exposure. This helps maintain the flavor. In the fridge, this syrup lasts about two weeks. Keep it in the coldest part of your fridge for best results. After two weeks, check for any changes. If you see mold, or if the syrup smells off, it’s time to toss it. Fresh syrup will smell sweet and spicy. Enjoy your syrup in those first two weeks for the best taste. You can use Pumpkin Spice Tea Syrup in many fun ways. Here are some ideas: - Tea Beverages: Add a splash to your favorite black or chai tea. - Lattes: Mix it into steamed milk for a tasty pumpkin spice latte. - Cocktails: Drizzle it in cocktails for a cozy twist. - Oatmeal: Stir it into your morning oatmeal for a sweet kick. The syrup adds a warm, spiced flavor to any drink or dish. Yes, you can use Pumpkin Spice Tea Syrup in baking. Here are some ideas: - Muffins: Swap it for sugar in muffin recipes for a pumpkin flavor. - Cakes: Use it in cake batters or as a glaze for cakes. - Cookies: Add it to cookie dough for a fun twist on classic recipes. This syrup brings a warm, spiced taste to your baked goods. Yes, Pumpkin Spice Tea Syrup is vegan. Here’s why: - Plant-Based Ingredients: All the ingredients come from plants. - No Animal Products: It contains no eggs, milk, or honey. You can enjoy this syrup in your drinks or recipes without worry. This blog post covered the essential steps to make Pumpkin Spice Tea Syrup. You learned about the key ingredients and how to prepare, combine, and finalize the syrup. I shared tips for flavor enhancement, presentation, and health benefits, plus variations for organic and sugar-free options. In the end, this syrup can add warmth to drinks and recipes. Enjoy making it and share it with others!

Pumpkin Spice Tea Syrup Simple and Cozy Recipe

As the cozy season rolls in, there’s no better way to embrace the warm flavors of fall than with my

- 2 cups cold brew coffee - 1 cup heavy cream - 1/4 cup pumpkin puree - 2 tablespoons maple syrup (or to taste) - 1 teaspoon vanilla extract - 1 teaspoon pumpkin spice (plus extra for garnish) - Ice cubes - Whipped cream (optional for topping) You can swap heavy cream for coconut cream or almond milk. This works well if you want a lighter drink. If you have homemade pumpkin puree, feel free to use that instead of canned. It adds a fresh taste. For sweetness, try agave syrup or honey. Adjust the amount based on your taste. Using high-quality coffee beans makes a big difference. Fresh cold brew offers a rich taste that enhances your drink. When choosing pumpkin, pick seasonal ones for the best flavor. Fresh pumpkins are sweeter and creamier than canned versions. They bring out the true essence of fall in your drink. To make the pumpkin cream, start by mixing the heavy cream, pumpkin puree, maple syrup, vanilla extract, and pumpkin spice in a bowl. Use a hand mixer or whisk to whip the mixture. Whip until it becomes light and fluffy. This fluffy texture is key to a great drink. You want it to hold its shape without being too stiff. Now, let's build the drink. Take a tall glass and fill it with ice cubes. Pour in the cold brew coffee, leaving some space at the top. This space is for the pumpkin cream. Next, gently spoon the pumpkin cream over the cold brew. For a fun look, you can swirl it with a spoon. This creates a beautiful marbled effect. For an extra special touch, add whipped cream on top of the pumpkin cream. This adds a nice contrast and rich flavor. Finally, sprinkle some pumpkin spice on top for garnish. This gives your drink that cozy fall vibe. Enjoy your tasty Copycat Pumpkin Cream Cold Brew! To make your pumpkin cream cold brew pop, try adding spices. A pinch of nutmeg or cinnamon can deepen the flavor. You can also mix in a dash of ginger for extra warmth. Want a twist? Use flavored syrups, like caramel or hazelnut. This gives your drink a new layer of taste. Brew time matters for cold brew coffee. Aim for 12 to 24 hours for the best flavor. The longer you steep, the richer it gets. Once brewed, store it in the fridge. Use an airtight container to keep it fresh. Cold brew can last up to two weeks if stored right. You can easily customize your drink. For a vegan version, swap heavy cream for coconut cream or almond milk. These options still give a rich texture. Adjust the sweetness to your liking. If you like it sweeter, add more maple syrup or try agave nectar instead. For the full recipe, check out the details above. {{image_2}} You can change your drink by trying different coffee styles. If you prefer iced coffee, make cold brew using a strong blend. This gives you a bold taste. You can also brew espresso for a stronger flavor. Pour it over ice and add the pumpkin cream. This method adds depth. As the seasons change, so can your flavors! Try adding a splash of caramel or chocolate syrup. This can make your drink feel extra special. You can also mix in other spices like nutmeg or ginger. These flavors pair well with pumpkin. Experiment with holiday flavors like peppermint or eggnog. They can add fun to your drink! Have fun with toppings! Whipped cream is a great start. You can sprinkle cinnamon or cocoa powder on top. For a latte art effect, use a toothpick to swirl the cream. This creates pretty designs. You might also add crushed graham crackers for a crunchy touch. These little details make your drink look and taste amazing! To keep your cold brew coffee fresh, store it in a sealed container. A glass jar works best. Keep it in the fridge. Cold brew coffee stays good for about two weeks. The flavor may fade over time, so drink it sooner for the best taste. For your pumpkin cream, use an airtight container. This keeps it fresh in the fridge. It stays good for up to three days. When you're ready to use it, give it a quick whip to regain that fluffy texture. Avoid storing it at room temperature, as it may spoil quickly. Don't throw away leftover pumpkin cream! You can use it in pancakes or cakes for added flavor. If you have extra pumpkin puree, store it in the freezer. It will stay fresh for up to three months. Use it later in smoothies or soups. This way, nothing goes to waste, and you enjoy delicious flavors all season long. For the full recipe, visit the link above. To make this tasty drink, you start by mixing the pumpkin cream. Combine heavy cream, pumpkin puree, maple syrup, vanilla, and pumpkin spice in a bowl. Whip this mixture until it’s light and fluffy. Next, fill a glass with ice and pour in the cold brew coffee. Leave some space at the top for the pumpkin cream. Spoon the whipped pumpkin cream over the cold brew. You can swirl it a bit for a marbled look. For extra fun, add whipped cream on top and sprinkle pumpkin spice. Then, enjoy your homemade fall drink! You can find the full recipe in the article. Yes, you can make this drink dairy-free! For the cream, use coconut cream or almond milk. Both options will give you a rich flavor. You can also try oat milk for a creamier texture. Just make sure to adjust the sweetness to match your taste. These non-dairy options still let you enjoy the fall flavors. Cold brew coffee can last in the fridge for up to two weeks. Store it in a sealed container to keep it fresh. If you have leftover pumpkin cream, it can last about three days in the fridge. Keep it in an airtight container for the best results. Always check for freshness before using, especially if it’s been a while! This blog post covered making a delicious Pumpkin Cream Cold Brew. We discussed key ingredients like cold brew coffee, pumpkin puree, and heavy cream. I shared tips on selecting fresh ingredients and suggested fun variations. You learned about storage and how to customize your drink to fit your tastes. With these insights, you can now create tasty drinks at home. Enjoy experimenting with flavors and make it your own!

Copycat Pumpkin Cream Cold Brew Tasty Fall Delight

Fall is here, and that means cozy drinks are back! If you love the taste of pumpkin spice, you’ll adore

Pumpkin Cream Cheese Muffins 🧁 Ingredients: - 1 cup canned pumpkin puree - 1/2 cup cream cheese, softened - 1/2 cup granulated sugar - 1/2 cup brown sugar, packed - 1/3 cup vegetable oil - 2 large eggs - 1 teaspoon vanilla extract - 1 1/2 cups all-purpose flour - 1 teaspoon baking soda - 1/2 teaspoon baking powder - 1 teaspoon ground cinnamon - 1/2 teaspoon ground nutmeg - 1/4 teaspoon ground ginger - 1/4 teaspoon salt These muffins need a mix of wet and dry items to shine. Here’s what you need: - Canned pumpkin puree gives the muffins their rich flavor and moist texture. - Cream cheese adds creaminess and a slight tang. - Granulated sugar and brown sugar together provide a sweet balance. - Vegetable oil keeps the muffins moist and soft. - Large eggs help bind the ingredients and add structure. - Vanilla extract adds a lovely aroma and taste. - All-purpose flour is the base for the muffins. - Baking soda and baking powder help them rise and become fluffy. - Ground cinnamon, nutmeg, and ginger give the muffins their warm, spiced flavor. - Salt enhances all the flavors and balances the sweetness. This simple list of ingredients creates a delightful muffin. Feel free to explore the Full Recipe to see how these components come together for a perfect treat. Start by gathering all your ingredients. You need: - 1 cup canned pumpkin puree - 1/2 cup cream cheese, softened - 1/2 cup granulated sugar - 1/2 cup brown sugar, packed - 1/3 cup vegetable oil - 2 large eggs - 1 teaspoon vanilla extract - 1 1/2 cups all-purpose flour - 1 teaspoon baking soda - 1/2 teaspoon baking powder - 1 teaspoon ground cinnamon - 1/2 teaspoon ground nutmeg - 1/4 teaspoon ground ginger - 1/4 teaspoon salt Once you have everything, preheat your oven to 350°F (175°C). This step warms the oven for baking. Line a muffin tin with paper liners or spray it with cooking spray to prevent sticking. In a large bowl, mix the pumpkin puree, softened cream cheese, granulated sugar, brown sugar, vegetable oil, eggs, and vanilla extract. Blend these until smooth and creamy. This mix is the heart of your muffins. In a separate bowl, whisk together the flour, baking soda, baking powder, and spices. This dry mix adds flavor and lifts the muffins. Now, gently combine the wet and dry mixes. Stir until just blended. Don’t worry about lumps; they add character. Overmixing can make the muffins tough. Scoop the batter into the prepared muffin tin. Fill each cup about 2/3 full for the best rise. Bake for 18 to 20 minutes. Check with a toothpick; it should come out clean. After baking, let the muffins cool in the pan for about 5 minutes. Then, transfer them to a wire rack. This step helps them cool evenly. For an extra touch, dust with powdered sugar or drizzle cream cheese glaze on top. Enjoy your delicious pumpkin cream cheese muffins! To make the best pumpkin cream cheese muffins, start with fresh ingredients. Canned pumpkin puree is great, but check the date. Use room-temperature cream cheese for easy mixing. This helps create a smooth batter. Mix wet and dry ingredients separately. This keeps your muffins light. When you combine them, stir gently. Overmixing makes muffins dense and tough. Avoid using too much flour. Scooping flour straight from the bag packs it down. Instead, spoon it into your measuring cup and level it off. This ensures the right amount. Watch your baking time closely. Every oven is different. Use a toothpick to check for doneness. If it comes out clean, your muffins are ready. Want to make your muffins even better? Add spices like allspice or cloves for depth. You can also toss in chocolate chips or nuts for crunch. For a moist muffin, try adding a splash of orange juice or apple sauce. This adds flavor and keeps them fluffy. Don't forget to serve them warm. A little butter on top makes them a true delight. For the full recipe, check out the [Full Recipe]. {{image_2}} You can make these muffins even better by adding nuts or chocolate chips. Chopped walnuts or pecans give a nice crunch. They also add healthy fats and protein. If you want something sweet, add chocolate chips. Semi-sweet or dark chocolate chips work great. Just fold them into the batter before you scoop it into the muffin tin. This small change can make your muffins more exciting! Spices can change the whole taste of these muffins. You can try adding allspice or cloves for a warmer flavor. A pinch of cardamom can give it a unique twist. If you like heat, a bit of cayenne pepper can add a fun kick. Mix and match different spices to find your favorite flavor profile. Each time you bake, you can create a new and tasty experience. If you need gluten-free muffins, swap the all-purpose flour for a gluten-free blend. Make sure the blend has xanthan gum for the best texture. For a vegan version, use flax eggs instead of regular eggs. Just mix one tablespoon of ground flaxseed with three tablespoons of water for each egg. You can also use plant-based cream cheese. These options help everyone enjoy the deliciousness of pumpkin cream cheese muffins. You can find the full recipe for more details! To keep your pumpkin cream cheese muffins fresh, store them in an airtight container. This helps maintain their moisture and flavor. Line the bottom of the container with a paper towel. Place the muffins on top and cover with another paper towel. This method absorbs excess moisture and keeps the muffins from getting soggy. They can last at room temperature for up to three days. If you want to save some muffins for later, freezing is a great option. First, let the muffins cool completely. Then, wrap each muffin tightly in plastic wrap. Place the wrapped muffins in a freezer-safe bag or container. Make sure to label them with the date. They can stay fresh in the freezer for up to three months. When you're ready to enjoy them, just thaw them in the fridge overnight. To reheat your muffins, you have a few choices. Use the microwave for a quick fix. Heat them for about 15-20 seconds. This warms them up while keeping their soft texture. For a crispier muffin, use the oven. Preheat it to 350°F (175°C) and warm the muffins for about 5-10 minutes. This method brings back their fresh-baked taste. Enjoy them warm for the best flavor! Yes, you can use fresh pumpkin. First, cook the pumpkin until soft. Then, mash it until smooth. Use the same amount as canned pumpkin. Fresh pumpkin gives a nice taste, but it may change the moisture level. Adjust baking time if needed. To check if the muffins are done, insert a toothpick into the center. If it comes out clean, the muffins are ready. You can also look for a golden-brown top. The muffins should spring back when lightly pressed. These muffins are great warm. You can serve them with butter or cream cheese spread. For a fun twist, add a drizzle of maple syrup. Pair them with coffee or tea for a cozy treat. You can also arrange them on a nice plate for guests. At room temperature, these muffins last about 2 to 3 days. Keep them in an airtight container to stay fresh. If you want them to last longer, consider freezing them. They freeze well for up to 3 months. Just thaw before serving. For the full recipe, check above. You’ve learned how to make delicious pumpkin cream cheese muffins. From gathering simple ingredients to following easy steps, making these treats is fun and rewarding. Remember the tips to avoid common mistakes and explore variations. Whether you want to add nuts or make them gluten-free, there's a recipe for everyone. Store your muffins well to keep them fresh. Enjoy baking, and share these yummy muffins with friends and family!

Pumpkin Cream Cheese Muffins Perfectly Moist Delight

If you love fall flavors, you need to try my Pumpkin Cream Cheese Muffins! These muffins are soft, moist, and

To make Easy Christmas Fudge, gather these simple ingredients: - 2 cups semi-sweet chocolate chips - 1 cup sweetened condensed milk - ½ cup unsweetened cocoa powder - 1 teaspoon vanilla extract - ¼ teaspoon salt - ¾ cup chopped nuts (walnuts, pecans, or your choice) - ½ cup dried cranberries or holiday sprinkles for decoration When choosing your ingredients, quality matters. Use good chocolate chips for rich flavor. Sweetened condensed milk should be thick and creamy. If you want a lighter fudge, you can swap out the semi-sweet chocolate for milk chocolate. You can also use coconut milk or almond milk as a substitute for sweetened condensed milk if you prefer a dairy-free option. Adding toppings makes your fudge festive! Try these fun ideas: - Use dried cranberries for a tart burst of flavor. - Holiday sprinkles add color and joy. - You can also top the fudge with crushed candy canes for a minty twist. - For a fancy touch, sprinkle some sea salt on top before chilling. These little details make your Easy Christmas Fudge even more special. Start by lining an 8x8 inch baking dish with parchment paper. Make sure to leave some paper hanging over the edges. This will help you lift out the fudge later. It is a simple step but very helpful. Next, take a medium saucepan and put it on low heat. Add 2 cups of semi-sweet chocolate chips and 1 cup of sweetened condensed milk. Stir the mix gently. Keep stirring until the chocolate is fully melted and smooth. This process takes just a few minutes. Once melted, remove the saucepan from heat. Add in the unsweetened cocoa powder, vanilla extract, and salt. Mix well until everything is combined. It should look rich and creamy. Then, fold in the chopped nuts gently. Make sure they are evenly spread throughout the chocolate mix. Now, pour the fudge mixture into your prepared baking dish. Use a spatula to smooth the top. For a festive touch, sprinkle dried cranberries or holiday sprinkles on top. Press them down lightly into the fudge. Place the dish in the fridge for at least 2 hours. After it sets, lift the fudge out using the parchment paper. Cut it into squares or rectangles. Enjoy your sweet holiday treat! For the full recipe, check the details above. To get smooth and creamy fudge, use fresh ingredients. Old chocolate can clump. Melt the chocolate and milk slowly over low heat. Stir often to blend well. If you want a softer fudge, add a bit more sweetened condensed milk. For a firmer texture, let it chill longer. One mistake is not using low heat. High heat can burn the chocolate. Another is skipping the salt. A little salt brings out the sweet taste. Also, don’t rush the cooling process. If you cut it too soon, the fudge may fall apart. Chop your chocolate chips for even melting. Use a heavy saucepan to help with heat distribution. Make sure the pan is completely dry. Water can seize the chocolate, making it grainy. Stir gently and keep an eye on it. When it’s almost melted, remove it from the heat and stir until smooth. For a full recipe, check out the Christmas Chocolate Bliss Fudge. {{image_2}} One fun twist on classic fudge is to add peppermint. You can use peppermint extract for flavor. Just add ½ teaspoon of it when mixing in the cocoa powder. For a festive touch, crush some candy canes and sprinkle them on top. This adds a nice crunch and a pop of color. Your fudge will taste like a holiday treat in every bite. Nuts can elevate your fudge to a new level. You can use walnuts, pecans, or any nuts you like. Just chop them roughly before adding them to the mix. Use about ¾ cup of chopped nuts for a good crunch. They bring a rich flavor and texture that pairs nicely with the smooth chocolate. You can even toast the nuts lightly for an extra depth of taste. Think about adding holiday flavors like cranberry or orange to your fudge. Dried cranberries work great for a fruity twist. Mix in about ½ cup when you add the nuts. For an orange flavor, use the zest of one orange. This gives a fresh, bright taste to your fudge. These flavors make your fudge not just sweet, but also festive and unique. Check out the Full Recipe for detailed instructions on each variation. Store your Easy Christmas Fudge in an airtight container. Keep it in a cool, dry place. The fridge works well too. Just make sure it is wrapped well. This keeps it fresh and soft. When stored properly, this fudge lasts about two weeks. If you keep it in the fridge, it can stay good for three weeks. Just check for any signs of spoilage before eating. You can freeze fudge for later. Cut it into squares and wrap each piece in plastic wrap. Then place them in a freezer bag. This way, you can enjoy your fudge for up to three months! When you want some, just let it thaw in the fridge overnight. For full details, check the Full Recipe. Making Easy Christmas Fudge is quick and simple. It takes about 15 minutes to prepare. After that, you need to chill it for at least 2 hours. So, the total time is about 2 hours and 15 minutes. Perfect for a busy holiday! Yes, you can use different types of chocolate. Dark chocolate, milk chocolate, or even white chocolate all work well. Each type brings a unique taste. Just remember, this may change the final flavor. To cut fudge neatly, use a sharp knife. Make sure your knife is clean and dry. For best results, warm the knife under hot water first. Wipe it dry, then slice the fudge. This helps create clean edges. Absolutely! You can skip the nuts if you prefer. Just leave them out of the recipe. The fudge will still be tasty and rich. You can also add extra toppings if you like. To make this fudge gluten-free, you don’t need to change much. All the ingredients in the recipe are naturally gluten-free. Just double-check the labels on your chocolate and other ingredients to ensure they are safe. If you need a substitute for sweetened condensed milk, try coconut milk and sugar. Combine equal parts coconut milk and sugar, and cook until thick. You can also use evaporated milk with added sugar to achieve a similar taste. For the best results, use the Full Recipe. We covered everything you need for making delicious fudge. You learned about key ingredients, steps, tips, and fun variations. Remember to pay close attention to texture and avoid common mistakes. Proper storage will keep your fudge fresh for longer. With this knowledge, you can create yummy treats for any occasion. Enjoy sharing your fudge with friends and family, and don't be afraid to get creative with flavors!

Easy Christmas Fudge Simple and Sweet Holiday Treat

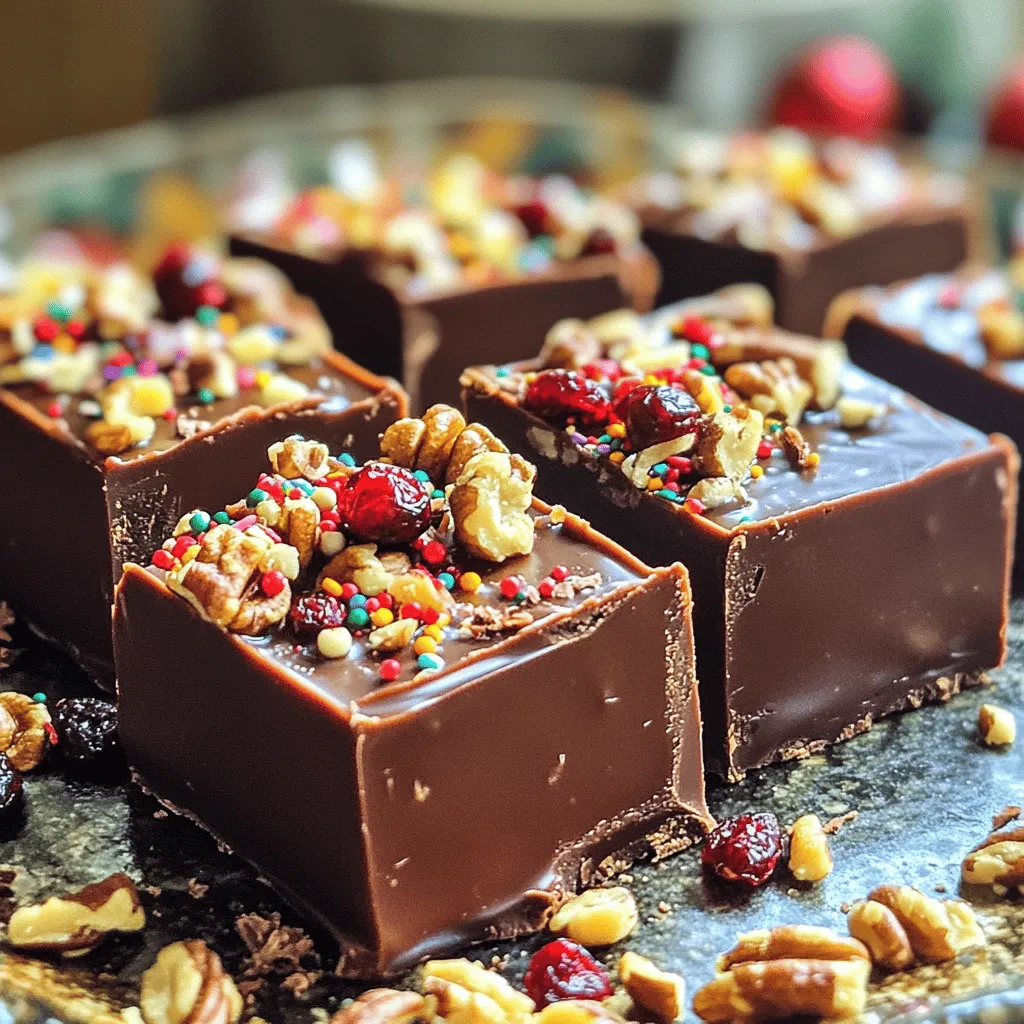
Get ready to impress your family and friends with my Easy Christmas Fudge! This simple and sweet holiday treat requires

To create your Halloween Harvest Chex Mix, you need some key items. These are the building blocks of your tasty treat: - 3 cups Rice Chex cereal - 3 cups Corn Chex cereal - 1 cup mini pretzels - 1 cup candy corn - 1 cup M&M's (preferably seasonal colors) - 1 cup dark chocolate chips - 1/2 cup pumpkin seeds (pepitas) - 1/2 cup maple syrup - 1 teaspoon cinnamon - 1 teaspoon vanilla extract - 1/4 teaspoon sea salt These ingredients mix well to create a sweet and crunchy snack. The Rice Chex and Corn Chex give a great base. The mini pretzels add a salty crunch. Candy corn and M&M's bring fun colors and sweetness. Dark chocolate chips add richness, while pumpkin seeds offer a great texture. You can boost the taste with some fun add-ins. Here are a few ideas: - Dried cranberries for tartness - Nuts like almonds or pecans for crunch - White chocolate chips for extra sweetness - Sprinkles in Halloween colors for a festive touch These additions can make your Chex Mix even more special. Mix and match to find your favorite combination. For a Halloween vibe, focus on colors like orange, black, and purple. You can use M&M's in seasonal colors or add spooky sprinkles. Serve your mix in a pumpkin-shaped bowl or in clear bags tied with orange ribbons. These touches make your treat look festive and fun for any Halloween gathering. Use your creativity to make it a true Halloween delight! Making Halloween Harvest Chex Mix is easy. Gather all your ingredients first. You will need a large bowl and a baking sheet lined with parchment. This will keep your mix from sticking. Preheat your oven to 325°F (160°C). This step is key for the perfect crunch. 1. In the large bowl, add 3 cups Rice Chex and 3 cups Corn Chex. 2. Next, toss in 1 cup mini pretzels, 1 cup candy corn, 1 cup M&M's, 1 cup dark chocolate chips, and 1/2 cup pumpkin seeds. 3. Mix all these together gently. You want a good blend without crushing anything. 4. In a small pan, heat 1/2 cup maple syrup, 1 teaspoon cinnamon, 1 teaspoon vanilla extract, and 1/4 teaspoon sea salt. Whisk for about 2-3 minutes. 5. Pour this warm syrup over the Chex mix. Stir well so every piece gets coated. 1. Spread the mix on your baking sheet evenly. Break up any big clumps. 2. Bake for 10-12 minutes. Stir halfway to avoid burning. This helps all parts get crispy. 3. When done, let the mix cool completely on the sheet. Once cool, break it into pieces for serving. 4. Store it in an airtight container or place it in a fun bowl for your Halloween party. For more details and a complete list of ingredients, check out the Full Recipe. You can make your Chex mix special. Start by adding your favorite nuts. Almonds or cashews work great. You can swap out the pretzels for cheese crackers. Want more sweetness? Add mini marshmallows or dried fruit. You can also use white chocolate chips for a fun twist. Mix and match flavors to find what you love best. Make your Chex mix look festive. Use a big bowl that fits the theme. Choose a bowl shaped like a pumpkin or a cauldron. You can also fill small treat bags with your mix. Tie them with orange or black ribbons for fun. Scatter some spooky decorations around the bowl to grab attention. A Halloween tablecloth can add to the vibe too. Many people forget to stir the mix while baking. This can cause some pieces to burn. Make sure to break up any big clusters before baking. Using too much syrup can make your mix sticky. Keep an eye on the time in the oven. If you bake too long, it can become too hard. Follow the Full Recipe for the best results. {{image_2}} You can change the cereals in your Halloween Harvest Chex Mix. Try using Honey Nut Chex for a sweet twist. Cinnamon Chex adds a warm flavor. You can also mix in Cheerios or Kix for a fun crunch. Each cereal brings its own taste and texture. Experiment and find your favorite blend! Sweeteners can change the flavor profile of your mix. Instead of maple syrup, use honey or agave syrup. Brown sugar adds a rich taste that pairs well with nuts. For spices, cinnamon is great, but you can also use nutmeg or pumpkin spice. These flavors will make your mix even more festive. You can adapt this Chex mix for any holiday. For Thanksgiving, add nuts and dried cranberries. For Christmas, try red and green M&M's with peppermint bits. You can create a spring mix with pastel candies and fruity cereals. Each season offers its own fun colors and flavors to explore. To keep your Halloween Harvest Chex Mix fresh, use an airtight container. This helps to lock in flavor and crunch. You can also use a resealable bag. Just squeeze out as much air as you can before sealing. Store it in a cool, dry place away from sunlight. When stored properly, your Chex Mix can last up to two weeks. After that, it may lose its crunch. To check for freshness, look for any changes in smell or texture. If it feels stale, it's best to toss it. Keep an eye on the chocolate chips; they can melt or change texture over time. If you want to store your Chex Mix for longer, freezing is a great option. Place it in a freezer-safe bag or container. Make sure to remove as much air as possible. It can last up to three months in the freezer. When you're ready to enjoy it, just thaw it at room temperature for a few hours. Always check for any changes in texture before serving. Yes, you can make this Halloween Harvest Chex Mix ahead of time. It stays fresh for about a week in an airtight container. Making it early saves time for your Halloween party. Just prepare it a few days before. This way, you can focus on other fun things for the celebration. If you need allergy-friendly options, there are many simple swaps. Try using gluten-free Chex cereals if you want to avoid gluten. For nut allergies, skip pumpkin seeds or use sunflower seeds instead. Replace M&M's with allergy-friendly chocolate or candy. Lastly, ensure your pretzels are nut-free and gluten-free if needed. To make your Chex Mix more festive, consider adding seasonal sprinkles or themed candies. You can use Halloween-themed chocolates or even candy eyeballs for a spooky touch. Mixing in some dried fruits, like raisins or cranberries, adds color and flavor. Serving it in a fun Halloween bowl makes it stand out even more. For the full recipe and details, check out the [Full Recipe]. You now know how to make Halloween Harvest Chex Mix. We covered key ingredients, cooking steps, and tips for fun presentations. Customizing your mix adds personal flair, while proper storage keeps it fresh. Remember to avoid common mistakes for better results. Try different cereals and flavors to keep things exciting. This mix will impress at any Halloween party. Enjoy making your Chex Mix a spooky treat everyone will love!

Halloween Harvest Chex Mix Simple and Tasty Treat

Get ready to celebrate Halloween with a fun snack! My Halloween Harvest Chex Mix is easy to make and packed

Older posts
Newer posts
← Previous Page1 … Page18 Page19 Page20 … Page65 Next →

dsad

© 2025 flavorsprint • Built with GeneratePress

Our Policies

  • Copyright Policy
  • Cookie Policy
  • GDPR Policy
  • Privacy Policy
  • Disclaimer
  • Terms Of Use

More Information

  • Home
  • About
  • Contact
  • Appetizers
  • Dessert
  • Dinner
  • Drinks
©2025, flavorsprint About Back To Top