Skip to content
DisclaimerTerms Of UseGDPR PolicyCookie Policy

flavorsprint

  • Home
  • Drinks
  • Appetizers
  • Dinner
  • Dessert
  • About
  • Contact
  • Privacy Policy
DisclaimerTerms Of UseGDPR PolicyCookie Policy

Lillian

The stars of the show in these tasty cookies are quite simple to find. Here’s what you need: - 1 cup natural peanut butter (smooth or chunky) - 1 ripe banana, mashed - 1/2 cup brown sugar - 1/2 cup rolled oats - 1/2 teaspoon baking soda - 1/4 teaspoon salt - 1 teaspoon vanilla extract - 1/2 cup dark chocolate chips (or milk chocolate if preferred) - Optional: Chopped walnuts or pecans for added crunch Each ingredient plays a key role. The natural peanut butter gives rich flavor and creaminess. The ripe banana adds natural sweetness and moisture. Brown sugar enhances the caramel notes and makes the cookies chewy. Rolled oats add texture, while baking soda helps them rise. A pinch of salt balances the sweetness perfectly. Vanilla extract adds depth, and chocolate chips give a delightful surprise in every bite. If you want some extra crunch, tossing in walnuts or pecans is a great idea. This mix of ingredients makes the cookies simple yet delicious, perfect for any occasion! First, set your oven to 350°F (175°C). This step is key for even baking. While the oven heats, grab a baking sheet and line it with parchment paper. This keeps the cookies from sticking and makes cleanup easy. In a large bowl, combine 1 cup of natural peanut butter and 1 ripe banana that you have mashed. Use a fork to mix them well. You want a smooth blend. Next, add 1/2 cup of brown sugar to the bowl. Stir until it’s fully mixed in with the peanut butter and banana. This adds sweetness and moisture. Now it’s time to add the dry ingredients. Toss in 1/2 cup of rolled oats, 1/2 teaspoon of baking soda, and 1/4 teaspoon of salt. Stir everything together until well combined. The oats give a nice texture, while the baking soda helps the cookies rise. After this, fold in 1 teaspoon of vanilla extract and 1/2 cup of chocolate chips. Mix well to ensure even distribution. Using a tablespoon, scoop out dough portions and place them on the baking sheet. Leave about 2 inches between each scoop. This space allows the cookies to spread. Flatten each cookie slightly with the back of your spoon. Bake for 10 to 12 minutes, or until the edges look lightly golden. Once they’re done, let the cookies cool on the baking sheet for about 5 minutes. This helps them set. After that, transfer them to a wire rack to cool completely. For a fun touch, serve the cookies on a decorative plate alongside banana slices or a dollop of extra peanut butter. Enjoy your Peanut Butter Banana Cookies with a glass of cold milk! To get those chewy bites, use ripe bananas. They add moisture and flavor. Mix the dough gently, and don’t overwork it. This keeps the cookies soft. Bake until the edges are golden but the centers look soft. They will firm up as they cool. You can swap natural peanut butter for almond butter if you're allergic. For sweetness, try maple syrup instead of brown sugar. If you want a healthier option, use coconut sugar. You can also replace dark chocolate chips with dried fruit for a fruity twist. Store cookies in an airtight container at room temperature. They stay fresh for about three days. For longer storage, freeze them. Place the cookies in a freezer bag, and they last for up to three months. Just thaw them at room temperature before enjoying. {{image_2}} You can make these cookies even better for you. Try using natural sweeteners like honey or maple syrup in place of brown sugar. This swap adds sweetness without refined sugar. You can also use almond flour instead of rolled oats. This change makes the cookies gluten-free. Another option is to add protein powder. This gives your cookies a boost of nutrition. Want to get creative? You can add spices like cinnamon or nutmeg for warmth. These spices work well with peanut butter and banana. For a tropical twist, mix in shredded coconut. You can also try different mix-ins like dried fruit or seeds. Sunflower seeds or chia seeds add crunch and health benefits. Don’t forget to experiment with different types of chocolate chips, too! If you have dietary needs, these cookies can adapt. For a gluten-free option, swap rolled oats for gluten-free oats. This ensures you can enjoy them without worry. If you're nut-free, use sunflower seed butter instead of peanut butter. It gives a similar taste and texture. You can still enjoy these cookies while meeting your needs. Always check labels to avoid any hidden allergens. To keep your cookies fresh, store them in an airtight container. This method helps retain their soft texture. Place parchment paper between layers to avoid sticking. If you prefer, you can also use a resealable bag. Just make sure to squeeze out as much air as possible before sealing. If you want to save some cookies for later, freezing is a great option. First, let the cookies cool completely. Then, place them in a single layer on a baking sheet. Freeze them for about one hour. Once frozen, transfer them to a freezer-safe bag. Be sure to label the bag with the date. These cookies can last up to three months in the freezer. Peanut butter banana cookies stay fresh for about one week at room temperature. For longer freshness, keep them in the fridge. This can extend their life to about two weeks. Always check for signs of spoilage, like an off smell or changes in texture. Enjoy your treats while they are at their best! Yes, you can! Natural sweeteners like honey or maple syrup work well. Just remember, they may change the texture slightly. Try using about a third less than brown sugar. Adjust the wet ingredients if the dough feels too wet. You can use almond butter or sunflower seed butter. Both options give a nice taste. Just make sure they are creamy for the best texture. This way, you still keep a tasty cookie. Look for golden edges. The center may be soft but will firm up as they cool. You can also use a toothpick to check; if it comes out clean, they are ready. Yes, you can make the dough and chill it. Place it in the fridge for up to 24 hours. This helps enhance the flavors, and you can bake fresh cookies whenever you want! Just scoop and bake when you're ready. This article showed you how to make tasty peanut butter banana cookies. We covered all the ingredients, step-by-step instructions, and useful tips. You learned about fun variations, storage tips, and answered common questions. Enjoy making these cookies with friends or family. They are easy and fun to bake. Satisfy your cravings and share these treats with others. You now have the tools to enjoy fresh cookies anytime!

Ingredient PB Banana Cookies Quick and Delightful Treat

If you love cookies, you’ll adore these Ingredient PB Banana Cookies! They’re quick, easy, and perfect for any sweet tooth.

To create your creamy pumpkin Alfredo bake, gather these ingredients: - 12 oz fettuccine pasta - 2 tablespoons olive oil - 2 cloves garlic, minced - 1 cup canned pumpkin puree - 1 cup heavy cream - 1 cup grated Parmesan cheese - 1 teaspoon nutmeg - 1 teaspoon salt - ½ teaspoon black pepper - 1 cup ricotta cheese - 1 cup shredded mozzarella cheese - Fresh parsley for garnish If you need to change some ingredients, here are some options: - Pasta: Use gluten-free pasta if needed. - Cream: Swap heavy cream for coconut cream for a lighter option. - Cheese: Use vegan cheese for a dairy-free dish. - Pumpkin: Substitute with butternut squash puree for a different flavor. Choosing fresh ingredients makes a big difference in taste. Here’s how to pick the best: - Pasta: Look for pasta with a firm texture, and check the expiration date. - Pumpkin: Choose pure canned pumpkin, not pumpkin pie filling for the best flavor. - Cheese: Buy cheese from a reputable brand, and choose blocks over pre-grated for freshness. - Parsley: Look for vibrant green leaves without any yellow or brown spots. Start by boiling water in a large pot. Add salt to the water for flavor. Once it boils, add 12 oz of fettuccine pasta. Cook it according to the package until it is al dente. This means it should still have a slight bite. After cooking, drain the pasta and set it aside. In a large skillet, heat 2 tablespoons of olive oil over medium heat. Add 2 cloves of minced garlic. Sauté it for about 1 minute until it smells great. Next, stir in 1 cup of canned pumpkin puree. Add 1 cup of heavy cream and 1 cup of grated Parmesan cheese. Sprinkle in 1 teaspoon of nutmeg, 1 teaspoon of salt, and ½ teaspoon of black pepper. Cook this mixture for 3-5 minutes, stirring often. The sauce should be warm and well mixed. In a large bowl, mix the cooked fettuccine with the creamy pumpkin sauce. Make sure every piece of pasta gets coated. Next, take a 9x13 inch baking dish. Layer half of the pasta mixture on the bottom. Spoon half of 1 cup of ricotta cheese in small dollops on top. Pour the rest of the pasta mixture over the ricotta layer. Then add the remaining ricotta and 1 cup of shredded mozzarella cheese on top. Cover the dish with aluminum foil. Bake it in the oven at 375°F (190°C) for 20 minutes. After that, remove the foil and bake for another 10-15 minutes. The cheese should be bubbly and golden when it is done. Let it cool for 5 minutes before serving. Sprinkle fresh parsley on top for a nice touch. To get the sauce just right, start with the right cream. Heavy cream makes it rich and smooth. As you cook, stir often. This keeps the sauce from sticking. If it gets too thick, add a splash of pasta water. This helps loosen it up. You want a creamy texture that clings to the pasta. For a flavor boost, mix cheeses. Parmesan gives a nutty taste. Ricotta adds creaminess. Mozzarella melts beautifully on top. Try adding a bit of goat cheese for a tangy touch. Mixing these cheeses creates a balanced flavor. Each bite becomes a tasty surprise. Timing is key for serving. Bake until the cheese is bubbly and golden. Let it sit for five minutes after baking. This helps the sauce set and cool slightly. It makes serving easier and safer. Keep an eye on the clock. Serve it warm for the best flavor. {{image_2}} You can make Creamy Pumpkin Alfredo Bake even better by adding protein. Chicken or sausage works great. For chicken, use cooked, shredded pieces. Add it to the pasta and sauce mix before baking. If you use sausage, cook it first and crumble it into the dish. This adds a hearty flavor and makes it a full meal. For a vegetarian twist, skip the meat and add seasonal veggies. Spinach, kale, or roasted bell peppers blend well with the creamy sauce. You can also toss in some sautéed mushrooms for extra taste. These veggies add color and nutrition, making your dish vibrant and healthy. If you want a lighter version, switch the heavy cream for low-fat milk or a non-dairy option. You can also use half the amount of cheese or replace it with a lighter cheese. Greek yogurt is a great swap for ricotta, giving a creamy texture without extra fat. This way, you enjoy the flavor without feeling too heavy. To keep your Creamy Pumpkin Alfredo Bake fresh, let it cool first. Once cooled, cover the dish with plastic wrap or aluminum foil. If you have extra, transfer it to an airtight container. Store it in the fridge for up to three days. This keeps the flavors intact and prevents drying out. When you're ready to enjoy the leftovers, preheat your oven to 350°F (175°C). Place the bake in an oven-safe dish and cover it with foil. Bake for about 15-20 minutes, or until it's warmed through. This method helps keep the cheese melty and the pasta creamy. You can also reheat it in the microwave. Use a microwave-safe dish and heat in 30-second intervals, stirring in between. If you want to save some for later, freezing is a great option. First, let the bake cool completely. Then, cut it into portions and place them in freezer-safe containers. Label each container with the date. The bake will last for about three months in the freezer. To reheat, let it thaw overnight in the fridge, then follow the reheating instructions above. This way, you’ll have a cozy meal ready whenever you need it! Yes, you can! While I love fettuccine for its wide shape, you can use any pasta. Penne, rigatoni, or even gluten-free pasta works well. Just make sure to cook it al dente, so it holds up in the bake. Using different pasta shapes can change the dish's look and feel, too. Absolutely! To make a vegan version, swap the heavy cream with coconut cream or a plant-based cream. Use nutritional yeast instead of Parmesan for a cheesy taste. For ricotta, try a store-bought vegan option or make your own using blended tofu with lemon juice. These swaps keep the dish creamy and delicious without dairy. You can prepare this dish ahead in several ways. First, cook the pasta and make the sauce. Then, mix them together and layer them in your baking dish. Cover it tightly and store it in the fridge for up to 24 hours. When ready to eat, just bake it straight from the fridge, adding a few extra minutes to the bake time. This makes it easy to enjoy a cozy meal without much fuss! This blog post covered all you need for a Creamy Pumpkin Alfredo Bake. You learned about ingredients, easy steps, and helpful tips to get it just right. Remember to choose fresh ingredients and play with flavors to suit your taste. Don't forget about storing leftovers and making this dish ahead of time. Enjoy your baking journey and make it your own!

Creamy Pumpkin Alfredo Bake Flavorful Comfort Dish

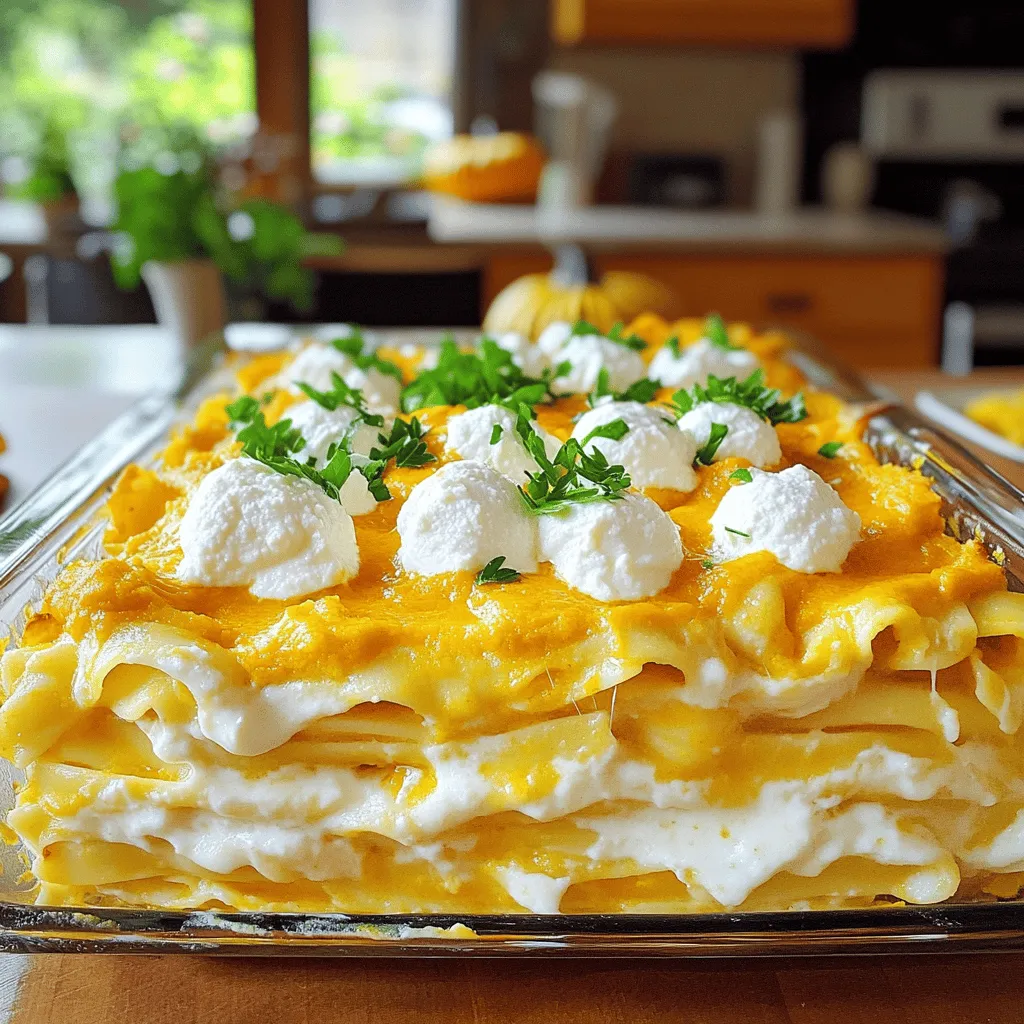
Warm, creamy, and delicious, my Creamy Pumpkin Alfredo Bake is the comfort food you need! This dish blends rich flavors

To make Garlic Herb Salmon & Asparagus, you will need: - 4 salmon fillets - 1 bunch of fresh asparagus, trimmed - 4 cloves garlic, minced - 2 tablespoons olive oil - 1 teaspoon dried oregano - 1 teaspoon dried thyme - 1 lemon, zested and juiced - Salt and pepper to taste - Fresh parsley, chopped, for garnish You can swap ingredients if needed. For salmon, try trout or chicken. Instead of olive oil, use avocado oil for a different taste. If you don’t have fresh asparagus, green beans work well too. You can use lemon juice from a bottle if you lack fresh lemons. Instead of dried herbs, fresh herbs can add great flavor. Just double the amount if you switch to fresh. When it comes to herbs, fresh and dried both have their perks. Fresh herbs offer bright, bold flavors. They work well when you add them at the end of cooking. Dried herbs are handy for their long shelf life. They pack a strong flavor punch, so use less than fresh. In this recipe, I use both types to balance taste and ease. First, gather all your ingredients. You need four salmon fillets, one bunch of fresh asparagus, four cloves of garlic, and two tablespoons of olive oil. You also need dried oregano, dried thyme, one lemon, salt, and pepper. Finally, get some fresh parsley for garnish. Next, preheat your oven to 400°F (200°C). This step is key for even cooking. Line a large baking sheet with parchment paper. This makes for easy cleanup later. Now, in a small bowl, mix the minced garlic, olive oil, oregano, thyme, lemon zest, lemon juice, salt, and pepper. This mixture is your herb glaze. Stir it well until all the ingredients blend nicely. Place the salmon fillets on one side of the prepared baking sheet. Make sure to leave space between each fillet. Brush half of the garlic herb mixture over each salmon fillet. This adds flavor and moisture. On the other side of the baking sheet, lay out the trimmed asparagus. Drizzle the rest of the garlic herb mixture over the asparagus. Sprinkle the asparagus with salt and pepper. This step enhances the taste. Next, bake everything in the preheated oven for 15 to 20 minutes. The salmon should flake easily with a fork when done. The asparagus should be tender but still crisp. To check if the salmon is done, use a fork. Gently press down on the thickest part of the fillet. If it flakes easily, it is cooked. For the asparagus, it should be bright green and slightly soft but not mushy. If the salmon is not done, return it to the oven for a few more minutes. Keep an eye on both the salmon and asparagus to avoid overcooking. Once cooked, remove everything from the oven. Let it cool for a couple of minutes before serving. Garnish with freshly chopped parsley for a pop of color. To make the herb glaze, you need a few simple steps. First, mix minced garlic with olive oil. Then add dried oregano, thyme, lemon zest, and lemon juice. Don’t forget to season with salt and pepper. This blend gives the salmon and asparagus a fresh taste. Make sure to brush the glaze on thick. It adds flavor and moisture. If you want more zing, try adding red pepper flakes for a kick. You will need some basic tools to make this dish. A large baking sheet is essential for roasting. Use parchment paper for easy cleanup. A small bowl helps mix the herb glaze. A brush will let you spread the glaze evenly on the salmon. A fork is handy to test if the salmon is done. If you have a meat thermometer, use it to check the internal temperature of the salmon. It should read 145°F for perfect doneness. Serve the salmon and asparagus right from the oven. This dish looks great on a plate. Garnish with fresh parsley for color. Pair with a side of rice or quinoa for a complete meal. A simple green salad also works well. You can even serve it with a slice of lemon for extra zest. If you have leftovers, store them in the fridge for a tasty lunch. Enjoy this dish with family and friends for a cozy dinner. {{image_2}} You can switch out salmon for other proteins. Chicken breasts work well and cook nicely. Try using shrimp for a quick option. Tofu is a great plant-based choice for a vegetarian meal. Adjust the cooking time for these proteins. Chicken may need a few extra minutes, while shrimp cooks faster. Asparagus shines in this dish, but you can mix it up. Broccoli or green beans add a nice crunch. Bell peppers bring color and sweetness. You can even add zucchini or cherry tomatoes for extra flavor. Just ensure all vegetables are cut to similar sizes for even cooking. To boost flavor, consider adding spices. Paprika or chili flakes can give your dish a kick. Fresh herbs like dill or basil can replace the dried ones. For a tangy twist, add a splash of balsamic vinegar. A sprinkle of feta cheese before serving makes everything richer. After enjoying your Garlic Herb Salmon & Asparagus, store any leftovers right away. Place the salmon and asparagus in an airtight container. Make sure to keep them separate if possible. This helps maintain their texture. Leftovers will last in the fridge for up to three days. When you want to eat them, make sure to check for freshness first. Reheating is easy. Preheat your oven to 350°F (175°C). Place the salmon and asparagus on a baking sheet. Cover with foil to keep them moist. Heat for about 10-15 minutes. You can also reheat in the microwave. Use medium heat for 1-2 minutes. Check to ensure they are warm throughout. The goal is to avoid overcooking. If you have more leftovers than you can eat, freezing is a great option. Wrap the salmon and asparagus tightly in plastic wrap. Then, place them in a freezer-safe bag. Try to squeeze out the air to prevent freezer burn. You can freeze them for up to three months. When you are ready to eat, let them thaw in the fridge overnight. Reheat as mentioned above, and enjoy! Yes, you can use frozen salmon. Just make sure to thaw it first. This will help it cook evenly. You can thaw it overnight in the fridge or place it under cold water for a quicker method. Once thawed, follow the same steps for the herb glaze and baking. This dish pairs well with many sides. Here are some great options: - Quinoa or rice - A fresh green salad - Garlic bread - Roasted potatoes - Steamed broccoli These sides will add flavor and texture to your meal. To check if your salmon is cooked, look for a few signs: - It should flake easily with a fork. - The color should change from bright pink to a light pink or opaque. - The internal temperature should reach 145°F (63°C). Using these tips will help you serve perfectly cooked salmon every time. This blog post covered key ingredients, step-by-step cooking instructions, and helpful tips. We explored how to make a great herb glaze and suggested ways to serve your dish. Variations showed different proteins, vegetables, and flavor boosts. I also shared storage tips and answered common questions. Remember, cooking is fun! Use these ideas and techniques to make your next meal special. Enjoy your time in the kitchen!

Garlic Herb Salmon & Asparagus Sheet Pan Delight

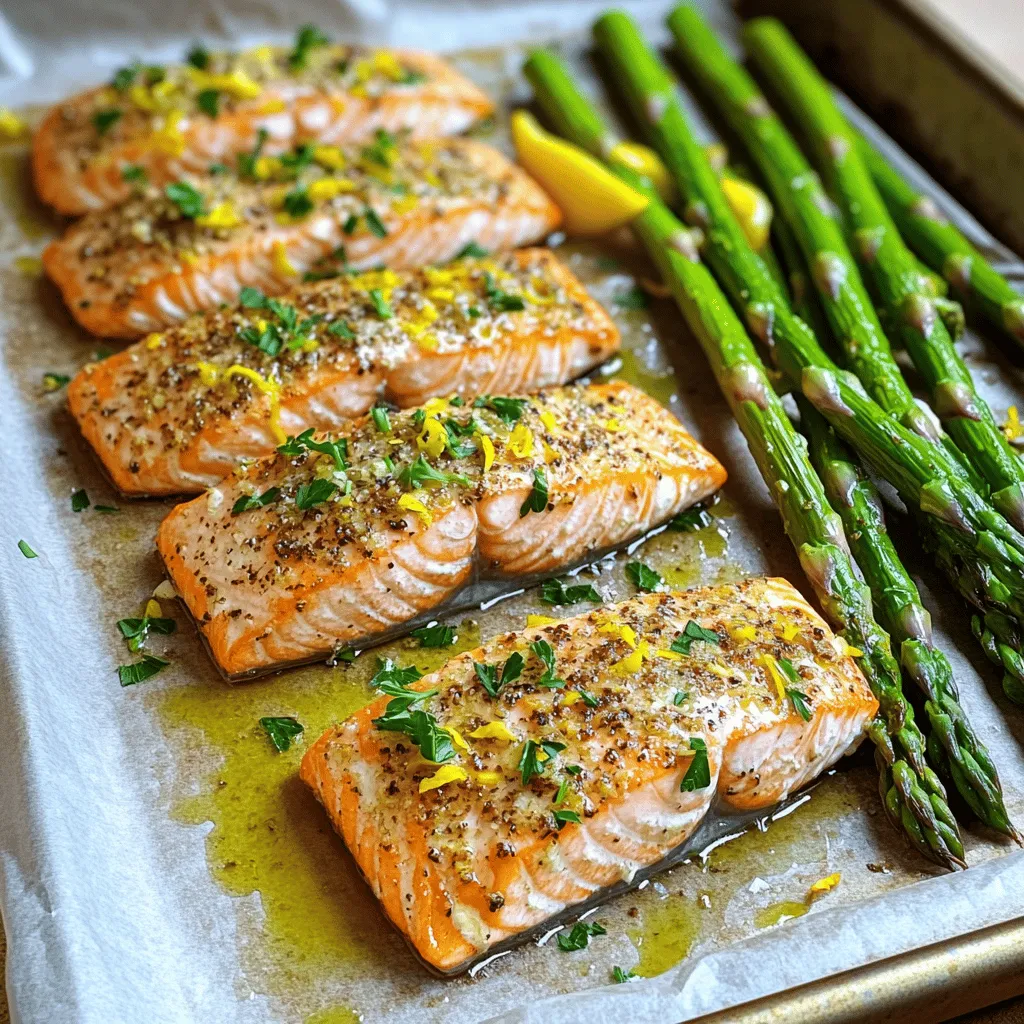
Get ready to enjoy a simple and tasty meal with my Garlic Herb Salmon & Asparagus Sheet Pan Delight! This

To make lemon poppy seed yogurt pancakes, gather these simple ingredients: - 1 cup all-purpose flour - 2 tablespoons poppy seeds - 1 tablespoon baking powder - 1/2 teaspoon baking soda - 1/4 teaspoon salt - 1 cup plain yogurt (Greek or regular) - 1 large egg - 1/4 cup milk (or almond milk) - Zest of 1 lemon - 2 tablespoons fresh lemon juice - 2 tablespoons honey or maple syrup (optional for sweetness) - Butter or oil for cooking These ingredients blend to create a light and zesty pancake that is both refreshing and satisfying. You can easily swap some of these ingredients if needed: - Use whole wheat flour instead of all-purpose flour for more fiber. - Swap poppy seeds with chia seeds for a different crunch. - Replace plain yogurt with buttermilk for a tangy flavor. - Use flaxseed meal mixed with water instead of the egg for a vegan option. - Almond milk can replace regular milk for a dairy-free version. These substitutions let you enjoy the pancakes while catering to your dietary needs. Here’s what you can expect in a serving of these pancakes, which is about two pancakes: - Calories: Approximately 220 - Protein: 7 grams - Carbohydrates: 35 grams - Dietary Fiber: 2 grams - Sugars: 5 grams - Fat: 6 grams These pancakes offer a good balance of nutrients, making them a tasty treat for breakfast or brunch. Enjoying them with fresh fruit can add even more vitamins and minerals! Start by gathering your dry ingredients. In a large mixing bowl, add 1 cup of all-purpose flour. Then, sprinkle in 2 tablespoons of poppy seeds. Next, add 1 tablespoon of baking powder, 1/2 teaspoon of baking soda, and 1/4 teaspoon of salt. Use a whisk to combine these ingredients well. Mixing them together helps the pancakes rise and become fluffy. Now, it’s time for the wet ingredients. In another bowl, add 1 cup of plain yogurt. You can use Greek yogurt or regular yogurt. Crack in 1 large egg and pour in 1/4 cup of milk. You can choose almond milk if you like. Next, add the zest of 1 lemon and 2 tablespoons of fresh lemon juice. If you want some sweetness, add 2 tablespoons of honey or maple syrup. Whisk everything together until it’s smooth and creamy. Pour the wet mixture into the dry ingredients. Stir gently until just combined. It’s okay if the batter has a few lumps; do not overmix. This keeps the pancakes soft. Heat a non-stick skillet or griddle over medium heat. Add a little butter or oil to coat the surface. Now, pour 1/4 cup of the pancake batter onto the skillet for each pancake. Cook for 2-3 minutes. You’ll see bubbles form on top and the edges will look set. Flip the pancakes and cook for another 1-2 minutes until they turn golden brown. Repeat with the remaining batter, adding more butter or oil as needed. Serve your pancakes warm with honey or maple syrup, and top with extra lemon zest for a burst of flavor. To make your pancakes fluffy, use fresh baking powder. Check the date on the container. Mix the dry and wet ingredients separately first. When you combine them, stir gently. Some lumps are okay. Overmixing can make pancakes tough. The yogurt adds moisture and richness, which helps with texture. Heat your skillet over medium heat. Too hot, and the pancakes burn. Too cool, and they won't cook through. Add a little butter or oil before each batch. When you pour the batter, look for bubbles forming. This means it’s time to flip. Cook until both sides are golden brown. If you have leftover pancakes, let them cool first. Stack them with parchment paper between each one. Store them in an airtight container in the fridge. They last about 3 to 4 days. You can also freeze pancakes. Just place them in a freezer bag. They stay good for up to 2 months. To reheat, use a toaster or microwave. Enjoy them warm! {{image_2}} You can easily make gluten-free lemon poppy seed pancakes. Just swap regular flour for a gluten-free blend. Look for one that works well in baking. This will keep the pancakes light and fluffy. Make sure your baking powder is gluten-free too. It’s best to check labels for any hidden gluten. Want to change up the flavor? You can add fruits like blueberries or raspberries to the batter. They add freshness and taste. Grated ginger or a pinch of cinnamon can also enhance the flavor. If you like nuts, try adding chopped walnuts or pecans. This adds a nice crunch to your pancakes. To make vegan lemon poppy seed pancakes, replace the egg with a flax egg. Mix one tablespoon of ground flaxseed with three tablespoons of water. Let it sit for about five minutes. For the milk, use almond milk or any plant-based option. You can use maple syrup for sweetness. The result will still be tasty and fluffy! Toppings can make your Lemon Poppy Seed Yogurt Pancakes even better. Here are some ideas: - Fresh blueberries: Their sweetness pairs well with lemon. - Sliced strawberries: They add color and a fruity touch. - A dollop of yogurt: This enhances the creamy texture. - Whipped cream: It adds richness and height. - Extra lemon zest: This boosts the lemon flavor. Feel free to mix and match these toppings. Each one adds a unique taste that makes your pancakes shine. The right drink can enhance your pancake experience. Here are some great pairings: - Freshly squeezed orange juice: It adds a bright, citrusy note. - Herbal tea: Chamomile or mint can balance the flavors. - Coffee: A light roast works well with the lemon. - Milk: A classic choice that complements the richness. Choose your favorite drink to enjoy with your pancakes. Each sip will make your meal even better! When should you serve these delightful pancakes? Here are some perfect occasions: - Weekend brunch: A great way to start a leisurely day. - Special celebrations: Birthdays or holidays deserve a treat. - Family gatherings: They bring everyone together at the table. - Casual weekday breakfast: Add a special touch to any morning. No matter the occasion, these pancakes will impress everyone. They are a treat worth sharing! Yes, you can make these pancakes ahead of time. After cooking, let them cool completely. Place them in an airtight container or wrap them in plastic wrap. They can last in the fridge for up to three days. You can also freeze them for up to a month. Just separate layers with parchment paper to avoid sticking. To reheat pancakes, I recommend using a toaster or microwave. For the toaster, pop them in for a few minutes until warm. If using a microwave, place them on a plate and cover with a damp paper towel. Heat in 30-second increments until warm. This keeps them soft and fluffy. To make these pancakes lighter, try these tips: - Increase baking powder: Add an extra 1/2 teaspoon of baking powder for more lift. - Separate eggs: Whisk the egg whites until soft peaks form, then fold them into the batter. - Use buttermilk: Replace the regular milk with buttermilk for a fluffier texture. These changes will enhance the pancake's lightness and fluffiness. In this post, we explored the best ways to make pancakes. We covered key ingredients and tasty substitutes. You learned how to mix and cook pancakes to get the perfect texture. I shared useful tips for cooking and storing your pancakes. You can also try different variations, like gluten-free or vegan. Finally, we discussed great toppings and drink pairings. Pancakes can be fun to make and enjoy anytime! I hope you try these ideas.

Lemon Poppy Seed Yogurt Pancakes Fresh and Fluffy Treat

Wake up to the bright flavors of Lemon Poppy Seed Yogurt Pancakes! These fluffy treats are easy to make and

- 1 lb boneless, skinless chicken breasts - 1 medium onion, chopped - 2 cloves garlic, minced - 1 can (14.5 oz) diced tomatoes with green chilies - 1 can (15 oz) black beans, drained and rinsed - 1 can (15 oz) corn, drained - 4 cups chicken broth - 1 tablespoon ground cumin - 1 tablespoon chili powder - 1 teaspoon smoked paprika - Salt and pepper to taste To make this soup, I start with chicken breasts that are boneless and skinless. They cook tenderly in the slow cooker. I chop one medium onion and mince two cloves of garlic. These add great flavor. I use canned goods, too. A 14.5 oz can of diced tomatoes with green chilies brings spiciness. I also add one 15 oz can of black beans and one 15 oz can of corn. For the broth, I pour in four cups of chicken broth. I season the soup with one tablespoon of ground cumin, one tablespoon of chili powder, and one teaspoon of smoked paprika. Finally, I add salt and pepper to taste. These spices give the soup a warm, rich flavor. - Fresh cilantro - Lime - Tortilla chips for serving After cooking, I like to garnish the soup. Fresh cilantro adds a bright touch. A squeeze of lime gives it a nice zing. I enjoy serving the soup with crunchy tortilla chips, too. They add texture and fun to every spoonful. 1. Start by placing the chicken breasts at the bottom of your slow cooker. This helps keep the chicken moist. 2. Next, add the chopped onion and minced garlic on top of the chicken. These add great flavor. 3. Pour in the diced tomatoes with green chilies, black beans, and corn. Each adds a nice texture and taste. 4. Now, pour the chicken broth over all the ingredients. This creates a rich base for the soup. 5. Sprinkle the ground cumin, chili powder, smoked paprika, salt, and pepper evenly over everything. This step is key for that bold flavor. - Cook on low for 6-8 hours or on high for 3-4 hours. Cooking on low gives a deeper flavor. - About 30 minutes before serving, use two forks to shred the chicken while it’s still in the slow cooker. This makes it easier to mix with the soup. - After shredding, stir in the lime juice. This brightens up the soup and adds a fresh taste. - Serve the soup hot, garnished with fresh cilantro. This adds a lovely color and flavor. - Top each bowl with a handful of tortilla chips for extra crunch. - Pair your soup with a side of avocado or a refreshing drink like iced tea. This balances the meal perfectly. To make your soup taste great, adjust the seasoning to your liking. After cooking, taste the soup. You might want to add more salt or spices. This will enhance the flavor and make it more enjoyable. For chicken tenderness, use boneless, skinless chicken breasts. Cook them low and slow. This keeps the chicken juicy. Shred the chicken in the slow cooker about 30 minutes before serving. This lets the meat soak up more flavor. Choose the right slow cooker size for your meal. A 6-quart slow cooker works well for this recipe. It holds all the ingredients without overflowing. If you use a smaller one, it might not fit everything. Avoid common slow cooker mistakes. Don’t lift the lid too often while cooking. This lets heat escape and can slow down cooking. Always make sure your ingredients are covered with liquid for even cooking. {{image_2}} You can easily switch up the protein in this soup. Instead of chicken, try turkey. Ground turkey works well and cooks quickly. If you want a meatless option, use beans. Black beans are great, but you can also use pinto or chickpeas. For a vegetarian or vegan twist, leave out all meat. Add more veggies, like zucchini or bell peppers, for texture. You could also use vegetable broth instead of chicken broth. This keeps the soup flavorful without meat. Want to spice things up? Add more heat! Try extra chili powder or diced jalapeños. If you prefer a milder flavor, use less spice at first. You can always add more later. Incorporating different vegetables can also change the soup's flavor. Consider adding diced carrots or corn. You can even throw in some spinach for a nutrient boost. Just add them during the last hour of cooking to keep them fresh. To keep your soup fresh, use airtight containers. Glass containers are a great choice. They do not stain and keep flavors well. You can also use plastic containers. Just make sure they seal tight. Store your soup in the fridge for up to three days. If you want to keep it longer, freeze it. It can last up to three months in the freezer. Just remember to let it cool before you store it. Reheat your soup on the stovetop for the best flavor. Pour the soup into a pot and heat over medium. Stir it often to warm it evenly. You can also use the microwave. Pour the soup into a bowl and cover it. Heat for 1-2 minutes, stirring halfway through. Check the temperature before serving. To keep the flavor and texture, avoid boiling the soup. This helps keep the chicken tender and the broth rich. You can store this soup in the fridge for up to four days. Make sure to use an airtight container. This helps keep the soup fresh and tasty. Yes, you can freeze Slow Cooker Chicken Tortilla Soup. Place it in a freezer-safe container. It will last for up to three months in the freezer. Just remember to leave some space in the container for expansion. I love serving this soup with tortilla chips for crunch. You can also add avocado slices or fresh lime on top. A side salad or cornbread works well too. Yes, you can use frozen chicken in the slow cooker. It will take longer to cook, about 8-10 hours on low. Always ensure the chicken reaches a safe internal temperature of 165°F before serving. This blog post showed how to make delicious Slow Cooker Chicken Tortilla Soup. We covered the main ingredients and prep steps to build flavor. You learned cooking times and best ways to serve. I shared tips for perfecting the recipe and variations to suit your taste. Finally, I included storage tips for leftovers and answered common questions. Remember, this soup is easy to adapt, so feel free to experiment! It's a cozy dish you can enjoy anytime. Now, it’s your turn to cook and create!

Savory Slow Cooker Chicken Tortilla Soup Recipe

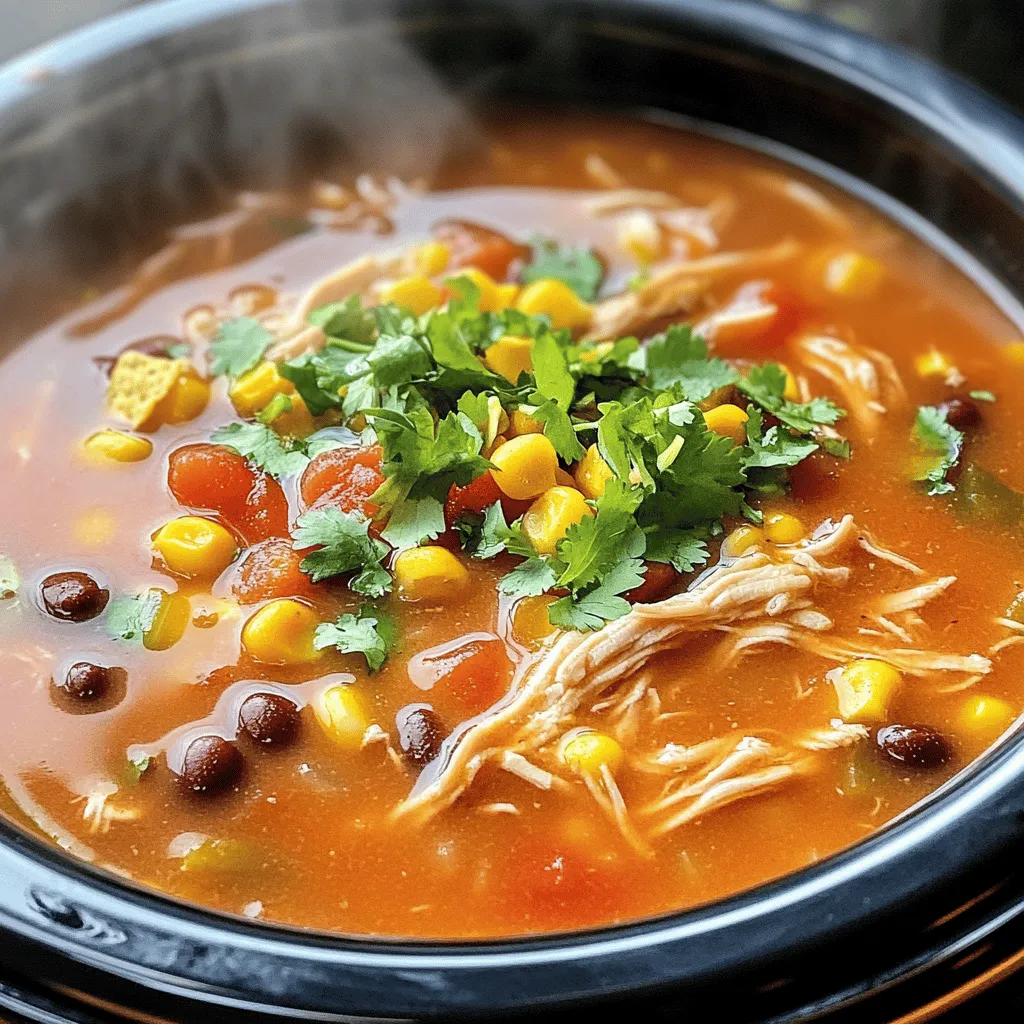
Do you crave a warm, flavorful meal that practically cooks itself? Look no further than my Savory Slow Cooker Chicken

To make Greek Yogurt Berry Cheesecake Parfaits, gather these ingredients: - 2 cups Greek yogurt (plain or vanilla-flavored) - 1 cup cream cheese, softened - 1/4 cup honey or maple syrup - 1 teaspoon vanilla extract - 1 1/2 cups mixed berries (strawberries, blueberries, raspberries) - 1 teaspoon lemon juice - 1 cup granola (your choice) - Fresh mint leaves for garnish (optional) Each serving of Greek Yogurt Berry Cheesecake Parfaits provides a balanced mix of nutrients. The parfaits are rich in protein from Greek yogurt and cream cheese. The berries add vitamins and antioxidants. The granola gives you healthy carbs and fiber. Each parfait has about 250-300 calories, depending on the sweetener and granola used. They are a tasty yet healthy treat. If you need to swap some ingredients, here are a few great options: - Greek Yogurt: Try dairy-free yogurt for a vegan version. - Cream Cheese: Use a plant-based cream cheese if you want a dairy-free option. - Honey: Maple syrup works well for a vegan choice. - Mixed Berries: You can use any berries you like or even peaches and apples. - Granola: Choose sugar-free granola or make your own with oats and nuts. These substitutions keep the parfaits delicious while meeting your dietary needs. First, grab a mixing bowl. Add softened cream cheese and Greek yogurt. You can use plain or vanilla yogurt. Then, pour in the honey or maple syrup. I prefer honey for its rich flavor. Add a teaspoon of vanilla extract for a nice touch. Now, use a hand mixer to blend everything. Mix until it’s smooth and creamy. Make sure there are no lumps. This step creates a delicious cheesecake-like base for your parfaits. Next, take a small bowl and toss in your mixed berries. You can use strawberries, blueberries, and raspberries. Drizzle a teaspoon of lemon juice over the berries. This helps enhance their flavor. Let the berries sit for about 5 to 10 minutes. This time allows the berries to soak up the lemon juice. It makes them taste even better in your parfaits. Now, it's time to build your parfaits. Get your parfait glasses or bowls ready. Start by spooning a layer of the yogurt mixture into the bottom of each glass. Make sure to fill it nicely but don’t overdo it. Next, add a layer of the marinated mixed berries. Follow that with a sprinkle of granola for crunch. Repeat the layers until the glasses are filled. I like to end with a layer of berries on top. For a finishing touch, add a dollop of the yogurt mixture and a fresh mint leaf. This step makes your parfaits look extra special. To get the best texture for your parfaits, blend your cream cheese and Greek yogurt well. Start with softened cream cheese. This step helps avoid lumps. Use a hand mixer for smoothness. Mix until the texture is creamy and fluffy. If you want a thicker parfait, add more Greek yogurt. For a lighter feel, use less cream cheese. These parfaits are great for breakfast or dessert. Serve them in clear glasses to show off the layers. You can also add a drizzle of honey on top for extra sweetness. If you want a crunch, sprinkle more granola right before serving. For a refreshing twist, you can add a squeeze of lemon over the berries. Make your parfaits look fancy with simple touches. Use clear glasses to highlight the colorful layers. Top each parfait with whole berries and a mint leaf. This not only looks nice but also adds freshness. You can also use small spoons for a cute touch. Serve chilled for the best experience. {{image_2}} You can change the flavor of your Greek yogurt berry cheesecake parfaits easily. Here are some fun ideas: - Add spices: Try cinnamon or nutmeg for warmth. - Incorporate extracts: Swap vanilla for almond or coconut extract. - Mix in zest: Add lemon or orange zest for a fresh twist. These simple changes can make each parfait unique and exciting. Experiment with flavors you love! You don't have to stick with mixed berries. Other fruits work great, too. Consider these options: - Bananas: Slice them and layer them for a creamy taste. - Peaches: Use fresh or canned peaches for a sweet, juicy layer. - Pineapple: Chopped pineapple adds a tropical vibe. Feel free to mix and match. The more fruits, the more fun! Switching up sweeteners can change the taste of your parfaits. Here are some ideas: - Agave nectar: A lower-glycemic option that adds sweetness. - Stevia: A natural, zero-calorie sweetener for a lighter treat. - Coconut sugar: This adds a caramel touch to your parfait. Try these sweeteners to find your perfect balance. Each one brings a new flavor to your dessert! To keep your Greek yogurt berry cheesecake parfaits fresh, place them in the fridge. Use airtight containers or cover the parfait glasses with plastic wrap. This way, they stay cool and tasty. Leftovers can last for about three days. Freezing parfaits is not the best idea. The layers might change texture when thawed. If you must freeze, consider only the yogurt mixture and berries. Place them in a freezer-safe bag, and they will last for about two months. Just remember to thaw them in the fridge before use. To enjoy your parfaits at their best, assemble them just before serving. If you prepare them early, store the granola separately. Adding granola at the last moment keeps it crunchy. Also, keep the mixed berries fresh by rinsing them just before use. Enjoy your parfaits while they are bright and flavorful! Yes, you can use non-dairy yogurt in this recipe. Options like coconut or almond yogurt work well. Keep in mind that the flavor and texture may change a bit. Look for a brand that is thick and creamy. This will help mimic the richness of traditional Greek yogurt. Parfaits stay fresh in the fridge for up to three days. Store them in airtight containers to keep them cool. After that, the granola may get soggy. If you want to keep the crunch, add the granola right before eating. This keeps every layer tasting fresh and delicious. You can prepare these parfaits a day in advance. Just layer the yogurt and berries but save the granola. Keep the granola separate to add later. This way, you’ll have a tasty treat ready to go. Perfect for busy mornings or last-minute guests! This guide covered all you need to make delicious parfaits. We discussed ingredients, nutrition, and substitutions. I provided step-by-step instructions for preparing, marinating, and layering. You learned tips for texture, serving, and presentation. We explored flavor variations and storage methods to keep parfaits fresh. Remember, parfaits are versatile and can be customized easily. Enjoy experimenting and making this treat your own!

Greek Yogurt Berry Cheesecake Parfaits Delightful Treat

Indulging in a sweet treat doesn’t have to mean guilt. My Greek Yogurt Berry Cheesecake Parfaits are a creamy delight

- 1 medium head of cauliflower, cut into florets - 1/2 cup cornstarch - 1/4 cup all-purpose flour - 1/2 teaspoon garlic powder - 1/2 teaspoon ginger powder - 1/2 teaspoon salt - 1/4 teaspoon black pepper - 1 cup vegetable oil (for frying) - 2 tablespoons soy sauce - 1 tablespoon rice vinegar - 1 tablespoon hoisin sauce - 1 tablespoon sesame oil - 1 tablespoon sugar - 2 teaspoons red chili flakes (adjust to taste) - 1 green onion, finely chopped - Sesame seeds - Large mixing bowl - Slotted spoon - Large skillet or wok - Paper towels - Whisk Gather all these ingredients and tools before you start cooking. This will make the process smoother and more enjoyable. Each ingredient plays a key role in the dish. The cauliflower gives it a great base, while the sauces add depth and flavor. Optional garnishes like green onions and sesame seeds add a nice touch, making the dish look vibrant and inviting. Start by cutting one medium head of cauliflower into small florets. Each piece should be about the size of a golf ball. This size helps them cook evenly. Rinse the florets under cold water. Shake off any excess water and set them aside. In a large bowl, mix the dry ingredients. Combine 1/2 cup of cornstarch, 1/4 cup of all-purpose flour, 1/2 teaspoon of garlic powder, 1/2 teaspoon of ginger powder, 1/2 teaspoon of salt, and 1/4 teaspoon of black pepper. Stir them well. This will create a light batter that sticks to the cauliflower. Heat 1 cup of vegetable oil in a large skillet over medium-high heat. To test if the oil is ready, drop a small piece of batter in. If it sizzles, you are good to go. Dip each cauliflower floret in the batter. Make sure they are covered well, but shake off the extra batter. Fry the florets in batches for about 4-5 minutes. They should be golden brown and crispy. Use a slotted spoon to take them out and let them drain on paper towels. In a separate bowl, mix the sauce ingredients. Combine 2 tablespoons of soy sauce, 1 tablespoon of rice vinegar, 1 tablespoon of hoisin sauce, 1 tablespoon of sesame oil, 1 tablespoon of sugar, and 2 teaspoons of red chili flakes. Whisk until smooth. This sauce adds great flavor to the dish. After frying, pour out most of the oil from the skillet, leaving about 1 tablespoon. Heat the sauce mixture in the same skillet over medium heat. Once it bubbles, add the fried cauliflower. Toss gently to coat the florets evenly in the sauce. Cook for 1-2 minutes to heat everything through. Remove from heat. For a nice finish, sprinkle chopped green onions and sesame seeds on top before serving. Frying is key to making General Tso’s cauliflower crispy and tasty. Here are some tips: - Use a large skillet or wok. This gives you space to fry the cauliflower evenly. - Heat the oil to medium-high. If it’s too low, the cauliflower will absorb oil and become soggy. - Fry in small batches. This helps keep the oil temperature steady. You want your cauliflower to be crunchy and golden. Here’s how: - Make sure to coat each floret well with the batter. This adds a nice crunch. - Allow excess batter to drip off. This prevents clumping and helps with crispiness. - Keep an eye on the color. Fry until golden brown, about 4-5 minutes. To boost the flavor of your dish, try these tips: - Mix different sauces. Adding more soy sauce or hoisin can enhance the taste. - Adjust the spice. If you love heat, add more red chili flakes to the sauce. - Use fresh herbs. Finely chop some cilantro or basil for a fresh touch. {{image_2}} You can easily make General Tso’s Cauliflower vegan and gluten-free. Use a gluten-free flour blend instead of all-purpose flour. For the soy sauce, choose a gluten-free version. This way, everyone can enjoy this dish without worry. To add more heat, increase the red chili flakes. You can also add fresh sliced chilies for a kick. If you like it less spicy, just reduce the flakes. Adjust to your taste for a perfect balance. Serve General Tso’s Cauliflower over rice or noodles. It pairs well with steamed broccoli or snap peas. For a crunch, add roasted peanuts or cashews. Garnishing with green onions and sesame seeds adds a nice touch. Enjoy this dish as a main or side. To keep your General Tso's cauliflower fresh, first let it cool. Place the leftovers in an airtight container. Store it in the fridge for up to three days. Make sure to separate any sauce to avoid sogginess. This helps keep the cauliflower crispy longer. When you’re ready to eat leftovers, reheat them in a pan. Heat some oil over medium heat. Add the cauliflower and cook for about five minutes. This keeps it crispy. You can also microwave it, but it may soften. If you use a microwave, cover it with a paper towel to avoid drying out. You can freeze General Tso's cauliflower if you want to save it for later. First, let it cool completely. Place it in a freezer-safe bag or container. Remove as much air as possible before sealing. It can last up to three months in the freezer. To use, thaw it in the fridge overnight and reheat as mentioned above. General Tso’s Cauliflower is a tasty dish. It uses cauliflower instead of chicken. The florets get coated in a crispy batter. Then, they are fried until golden brown. Finally, a sweet and spicy sauce covers the crispy cauliflower. This dish is perfect for those who love bold flavors. Yes, you can make General Tso’s Cauliflower ahead of time. Prepare the cauliflower and fry it. Store it in an airtight container in the fridge. When ready to serve, heat the sauce and toss the cauliflower in it. This way, you save time and still enjoy a fresh meal. Absolutely! Cauliflower is low in calories and high in vitamins. It provides fiber, which is great for digestion. This makes it a healthy choice compared to fried chicken. Plus, it is rich in antioxidants, which help your body fight diseases. The spice level depends on how much chili flakes you use. The recipe suggests two teaspoons, but you can adjust it. If you like it hotter, add more chili flakes. For a milder taste, use less. This dish can be as spicy as you want! This blog covered everything you need for General Tso's Cauliflower. We explored key ingredients and tools, then walked through step-by-step cooking. You learned tips for frying and variations like vegan options. I shared how to store leftovers and answered common questions. In conclusion, this dish is simple and tasty. You can customize it to fit your needs. Enjoy cooking and have fun experimenting with flavors!

General Tso’s Cauliflower Flavorful and Simple Dish

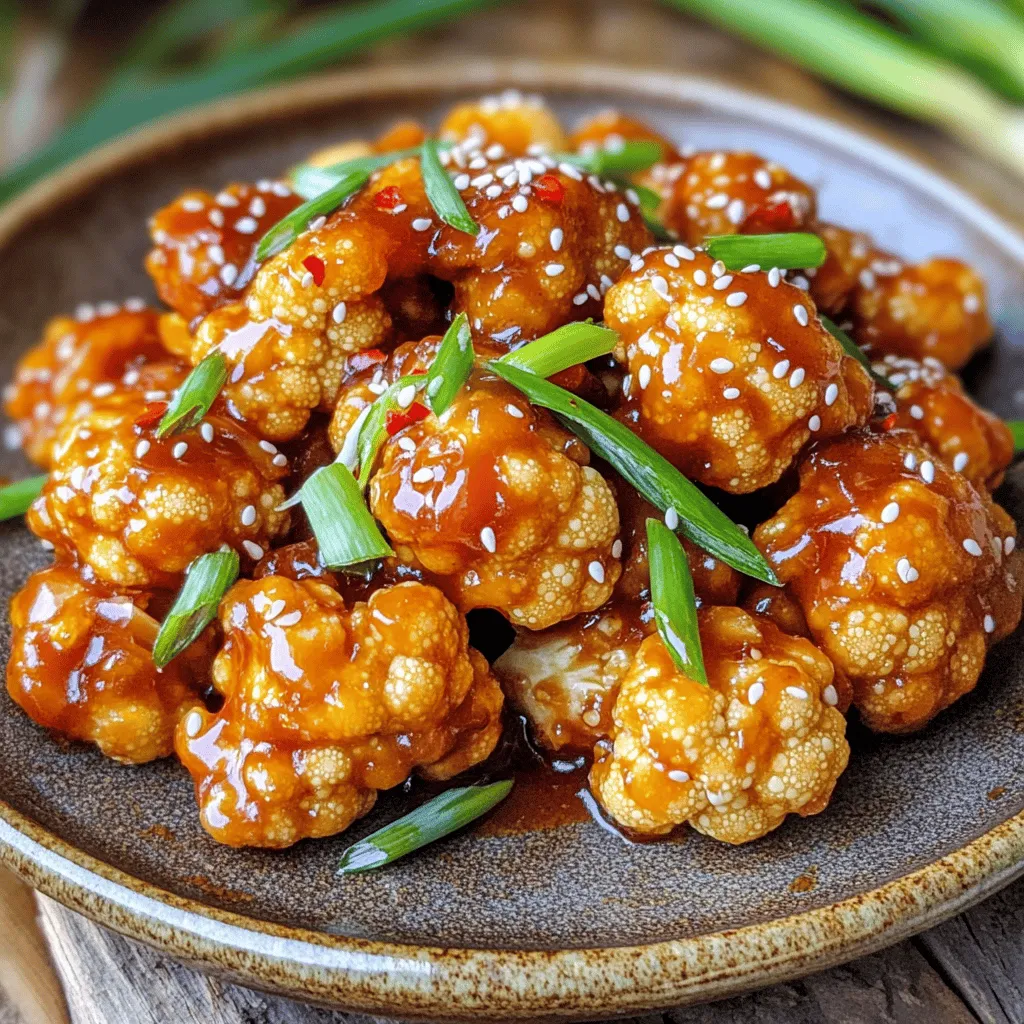
If you love bold flavors, you’re in for a treat! General Tso’s Cauliflower is a tasty twist on the classic

To make chocolate dipped snickerdoodle cookies, you will need: - 1 cup unsalted butter, softened - 1 ½ cups granulated sugar - 2 large eggs - 2 teaspoons vanilla extract - 3 cups all-purpose flour - 2 teaspoons cream of tartar - 1 teaspoon baking soda - ½ teaspoon salt - 3 tablespoons cinnamon sugar (mix of 3 tablespoons granulated sugar and 1 tablespoon cinnamon) - 1 cup semi-sweet chocolate chips - 1 tablespoon coconut oil (for smooth chocolate dipping) Measuring ingredients correctly is key to great cookies. Use dry measuring cups for flour and sugar. Level off each cup with a straight edge. For butter, use the wrapper markings to cut the right amount. Use a liquid measuring cup for eggs and vanilla. It helps to crack eggs into a small bowl first to avoid shells. Don’t worry if you run out of something! Here are some great swaps: - Use margarine if you don’t have butter. - Swap granulated sugar with brown sugar for a richer taste. - You can use coconut flour instead of all-purpose flour, but adjust the amount to 1 cup. - If you lack cream of tartar, use 1 teaspoon of lemon juice or vinegar instead. These tips will help you make delicious cookies no matter what! Start by preheating your oven to 350°F (175°C). Line two baking sheets with parchment paper. In a large bowl, cream together 1 cup of softened unsalted butter and 1 ½ cups of granulated sugar. Mix for about 3-4 minutes until it's light and fluffy. Next, add 2 large eggs, one at a time, and 2 teaspoons of vanilla extract. Beat well after each egg. In another bowl, whisk together 3 cups of all-purpose flour, 2 teaspoons of cream of tartar, 1 teaspoon of baking soda, and ½ teaspoon of salt. Gradually add this dry mixture to the wet mixture. Mix until just combined. Scoop tablespoons of dough and roll them into balls. Then, roll each ball in a cinnamon sugar mix made from 3 tablespoons of granulated sugar and 1 tablespoon of cinnamon. Place the dough balls on the baking sheets, spaced 2 inches apart. Bake for 10-12 minutes. Look for lightly golden edges. Once baked, let them cool for a few minutes on the sheets before moving them to a wire rack. To melt the chocolate, take 1 cup of semi-sweet chocolate chips and 1 tablespoon of coconut oil. Place them in a microwave-safe bowl. Microwave in 30-second bursts, stirring in between, until the chocolate is smooth. After the cookies have cooled completely, dip half of each cookie into the melted chocolate. Let any excess chocolate drip off. Place the dipped cookies back on the baking sheets. Allow the chocolate to set at room temperature or refrigerate for about 15-20 minutes until firm. To get soft and chewy cookies, focus on your butter. Make sure it is soft but not melted. When you cream the butter and sugar, beat them well. This step adds air, creating a light texture. Don’t overmix the dough after adding flour. Just mix until you see no dry flour. This keeps the cookies chewy. Use fresh spices for the best flavor. Ground cinnamon should be fresh for a warm taste. Adding a pinch of nutmeg can elevate the flavor too. Consider using dark chocolate instead of semi-sweet for a richer taste. Vanilla extract is key; choose pure vanilla for a true flavor boost. Don’t forget to sprinkle extra cinnamon sugar on top before serving! For a stunning display, arrange cookies on a decorative platter. A tiered stand adds height and interest. Sprinkle extra cinnamon sugar around the base for a lovely touch. You can also drizzle melted chocolate over the top for flair. Add a few sprigs of mint or edible flowers for color. Presenting your cookies beautifully makes them even more inviting! {{image_2}} You can change the chocolate for dipping. Semi-sweet chocolate works great, but try dark chocolate for a richer taste. If you love milk chocolate, that’s a sweet choice, too. You can even mix chocolates. Use half semi-sweet and half milk for a tasty combo. Each type gives a unique flavor to your cookies. If you want gluten-free cookies, swap the all-purpose flour for a gluten-free blend. Look for a mix that works for baking. It helps to add a bit more moisture. You can add an extra egg or a splash of milk to keep the dough soft. These tweaks make your cookies just as delightful without the gluten! Mix-ins can make your cookies even more fun. Try adding nuts for a crunch. Chopped pecans or walnuts work well. You can also add dried fruit like raisins or cranberries for a chewy element. For a bit of spice, throw in some butterscotch chips. Each mix-in gives your cookies a new twist. The options are endless, so get creative! Store your chocolate dipped snickerdoodle cookies in an airtight container. This keeps them fresh and soft. Place parchment paper between layers to avoid sticking. Keep the cookies at room temperature for the best taste. If you live in a humid area, use a cool spot. You can freeze these cookies for later enjoyment. First, let the cookies cool completely. Then, place them in a single layer on a baking sheet. Freeze them for about one hour. Once frozen, transfer the cookies to a freezer bag. Remove as much air as possible before sealing. Chocolate dipped snickerdoodle cookies last about one week at room temperature. In the freezer, they can last up to three months. For the best quality, eat them within the first month. Thaw frozen cookies at room temperature before enjoying their soft texture. Yes, you can make these cookies ahead of time. Prepare the cookie dough and roll it into balls. Place the dough balls on a baking sheet and freeze them. Once frozen, store them in a zip-top bag. When ready to bake, just take out the dough and bake as directed. This method keeps your cookies fresh and ready for any occasion. Store your leftover cookies in an airtight container. This keeps them soft and fresh. If you want to keep them for more days, add a piece of bread to the container. The bread helps maintain moisture. You can also stack the cookies with parchment paper between layers to avoid sticking. If you lack cream of tartar, you can use lemon juice or white vinegar instead. Use 1 teaspoon of either for each teaspoon of cream of tartar needed. This swap helps to achieve that classic snickerdoodle taste. Another option is to just skip it; the cookies will still taste great, but they may not be as fluffy. You learned about the key ingredients and how to measure them. I shared tips for prepping, baking, and adding chocolate. We examined tricks for great texture and flavor. I also covered fun variations and smart storage methods. Remember, making cookies can be simple and enjoyable. With the right mix and a little care, you’ll create tasty treats everyone will love. Enjoy your baking!

Chocolate Dipped Snickerdoodle Cookies Delightful Treat

Looking for a sweet delight? Let me introduce you to chocolate-dipped snickerdoodle cookies! These treats blend soft, chewy cookies with

- 2 cans (15 oz) white beans (cannellini or great northern), drained and rinsed - 2 tablespoons olive oil - 1 medium onion, diced - 3 cloves garlic, minced - 2 medium carrots, diced - 2 celery stalks, diced - 1 bell pepper, diced - 4 cups vegetable broth - 1 can (14 oz) diced tomatoes, with juices - 1 teaspoon dried oregano - 1 teaspoon dried thyme - 1 teaspoon smoked paprika - Salt and pepper to taste - 2 cups fresh kale, roughly chopped - 1 tablespoon lemon juice Canned white beans are the stars of this dish. They add creaminess and protein. I love using cannellini or great northern beans since they work well in the stew. Fresh vegetables like onion, carrots, and celery give a nice base. They add flavor and nutrients. Garlic and bell pepper boost the taste even more. Herbs and spices bring everything together. Dried oregano and thyme offer a classic Tuscan flavor. Smoked paprika adds a lovely warmth. You can adjust the salt and pepper to suit your taste. Finally, the kale gives a pop of color and extra nutrition. The lemon juice adds brightness at the end. - Fresh basil or parsley - Olive oil drizzle Garnishes make the dish look and taste better. Fresh basil or parsley adds a nice green touch. A drizzle of olive oil on top gives a rich finish. These simple additions make a big difference. Enjoy your stew with these tasty touches! First, heat 2 tablespoons of olive oil in a large pot. Use medium heat. Add one diced onion, two diced carrots, and two diced celery stalks. Sauté these for about five minutes. You want them to soften but not brown. Next, stir in three minced garlic cloves and one diced bell pepper. Cook for two more minutes. The smell will be amazing! Now, add four cups of vegetable broth and one can of diced tomatoes with their juices. Sprinkle in one teaspoon each of dried oregano, dried thyme, and smoked paprika. Don't forget to add salt and pepper to taste. Bring this mixture to a gentle simmer. Once simmering, add two cans of drained and rinsed white beans. Let the stew cook for 15 to 20 minutes. Stir occasionally. This helps the flavors blend nicely. Towards the end, add two cups of roughly chopped fresh kale. Cook for another five minutes until the kale wilts. This adds a nice pop of color and nutrition. Before serving, stir in one tablespoon of lemon juice. This gives the stew a bright taste. Taste your stew and adjust the seasoning as needed, adding more salt or pepper if you like it stronger. Enjoy the warmth and comfort of your Tuscan white bean stew! To make your stew shine, use high-quality broth. A rich broth adds depth and warmth. You can use homemade broth if you have it. If you use store-bought, look for low-sodium options. Adjust spices to taste as you cook. This stew loves herbs like oregano and thyme. If you want a kick, add a pinch of chili flakes. Prep your vegetables ahead of time. Chop the onions, carrots, and celery the night before. Store them in the fridge for easy access. This saves you time when you cook. Consider batch cooking this stew. You can double the recipe and freeze half. This way, you have a quick meal ready for busy days. Pair the stew with crusty bread for a hearty meal. Serve it with a side salad for freshness. Presentation matters too! Use deep bowls for serving. Garnish with fresh basil or parsley. A drizzle of olive oil on top adds flair and flavor. This makes your dish look nice and inviting! {{image_2}} You can change the beans in this stew. Try kidney beans or black beans. They add a new taste and texture. Different beans can also give you a fun twist. Adding protein is easy too. You can mix in diced chicken or turkey. If you want a heartier meal, use sausage or bacon. For a vegetarian option, try adding tofu or tempeh. These choices can make the stew even more filling. This stew is perfect for vegan or vegetarian diets. Just use vegetable broth and skip any meat. You can also add more veggies like zucchini or mushrooms for extra flavor. If you need a gluten-free option, this stew is great! All the ingredients are naturally gluten-free. Just make sure your broth is labeled gluten-free. This way, everyone can enjoy this tasty dish! To keep your Tuscan white bean stew fresh, refrigerate it within two hours of cooking. Use an airtight container. This stew lasts up to four days in the fridge. For long-term storage, you can freeze the stew. Let it cool completely before transferring it to a freezer-safe container. It can last up to three months in the freezer. When you’re ready to enjoy it again, just thaw it in the fridge overnight before reheating. When reheating, the best methods are on the stove or in the microwave. For the stove, pour the stew into a pot over medium heat. Stir often and heat until it’s hot. If using the microwave, place the stew in a microwave-safe bowl. Heat it in short intervals, stirring in between, until hot. To keep the flavor and texture, add a splash of vegetable broth if it seems too thick. This helps restore its creamy goodness. For Tuscan stew, cannellini and great northern beans are great choices. Cannellini beans are creamy and have a nutty taste. They hold their shape well. Great northern beans are tender and mild, perfect for stews. Both types add a nice texture and flavor. You can use either type in this recipe. Just drain and rinse them before adding. Yes, you can make this stew in advance. It tastes even better the next day. To store, let it cool and place it in an airtight container. Keep it in the fridge for up to three days. If you want to keep it longer, you can freeze it. To reheat, warm it in a pot over medium heat. Add a splash of broth if it seems too thick. Stir often to heat it evenly. You can add heat in a few simple ways. Try adding red pepper flakes for a nice kick. You can also use diced jalapeños or fresh chili peppers. If you like it really spicy, add hot sauce to taste. Just remember to start small and taste as you go. This way, you can control the heat to match your preference. This blog post dives into making a hearty Tuscan stew. We explored key ingredients like canned white beans, fresh veggies, and spices. I shared steps for prepping, simmering, and serving. Plus, I offered tips to boost flavors and save time. You can substitute ingredients or adjust for dietary needs. Storing leftovers is easy with the right methods. Enjoy your cooking journey and savor each bite of your delicious stew!

One Pot Tuscan White Bean Stew Flavorful Comfort Meal

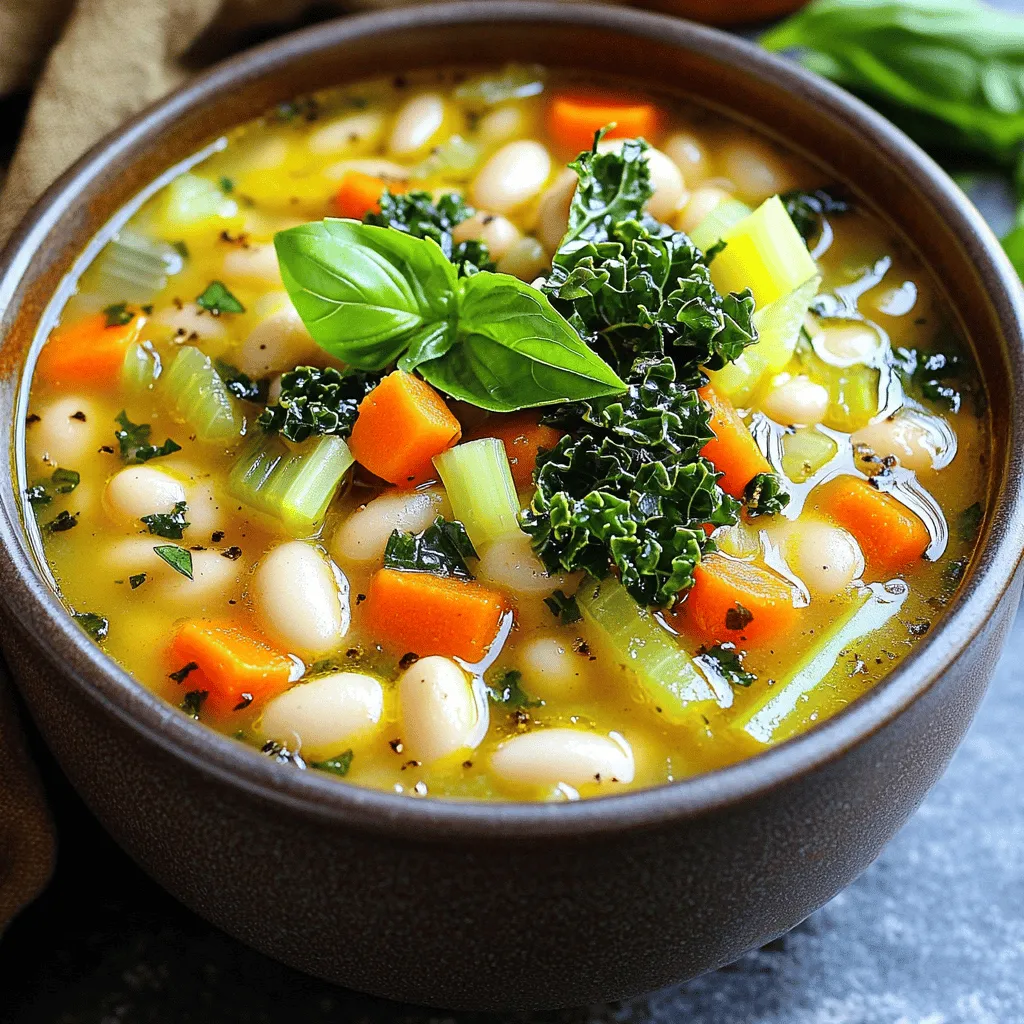
Looking for a cozy meal that warms your soul? This One Pot Tuscan White Bean Stew is packed with flavor

To make tasty air fryer lemon pepper wings, you need some simple and fresh ingredients. Here’s the list: - 2 lbs chicken wings - 2 tablespoons olive oil - 2 teaspoons lemon pepper seasoning - 1 teaspoon garlic powder - 1 teaspoon onion powder - 1 teaspoon smoked paprika - 1/2 teaspoon salt - 1/4 teaspoon black pepper - Zest of 1 lemon - Fresh parsley, chopped (for garnish) - Lemon wedges (for serving) Each of these ingredients plays a key role in creating that crispy and flavorful snack. The chicken wings are the star here, and using fresh wings helps them cook evenly. Olive oil adds moisture and helps the spices stick. Lemon pepper seasoning brings a zesty kick. The garlic and onion powders add depth to the flavor. Smoked paprika gives a slight smokiness that enhances the dish. Salt and black pepper balance the flavors perfectly. Adding lemon zest brightens the wings and gives them a fresh taste. Don’t forget the parsley! It adds a pop of color and a fresh touch when you serve the wings. Lemon wedges on the side are essential for an extra burst of flavor when you bite in. Enjoy your cooking! First, you need to dry the chicken wings. Use paper towels to pat them dry. This step is key for crispiness. Moisture on the wings can make them soggy. The drier they are, the better they will crisp up in the air fryer. Next, let’s mix the spices. In a large bowl, combine 2 tablespoons of olive oil and the spices. Use 2 teaspoons of lemon pepper seasoning, 1 teaspoon of garlic powder, 1 teaspoon of onion powder, 1 teaspoon of smoked paprika, 1/2 teaspoon of salt, and 1/4 teaspoon of black pepper. Don’t forget the zest of 1 lemon! Mix it well until you have a smooth blend. Now, it’s time to coat the wings. Add the dried wings to the bowl. Toss them in the seasoning mix until they are evenly coated. Make sure every wing gets some flavor! Before cooking, preheat your air fryer to 380°F (190°C) for about 5 minutes. This step ensures even cooking. Once preheated, place the seasoned wings in a single layer in the basket. Avoid overcrowding; this helps them crisp. Cook the wings for 25-30 minutes. Halfway through, shake the basket gently. This helps with even cooking. When done, the wings should be golden brown and crispy. Enjoy your tasty air fryer lemon pepper wings! To get crispy air fryer wings, start by drying them well. Pat the wings with paper towels. This step removes moisture and helps crisp the skin. Next, season the wings generously. Use a mix of olive oil, lemon pepper seasoning, garlic powder, onion powder, smoked paprika, salt, and black pepper. This blend adds flavor and aids in crisping. Cook the wings at 380°F (190°C). This temperature is perfect for getting that golden brown color. Remember to shake the basket halfway through cooking. This ensures all wings cook evenly and become crispy. Garnishes make your wings pop. Fresh parsley adds a nice touch and color. You can also serve lemon wedges. The zesty flavor pairs well and enhances the dish. Pair your wings with dipping sauces for extra flavor. Classic choices include ranch and blue cheese. You can also try garlic aioli or spicy sriracha for a twist. If your wings are not crispy enough, check a few things. Ensure you dried the wings thoroughly. Also, don’t overcrowd the air fryer basket. This can trap steam and prevent crisping. For wings that are overcooked or unevenly cooked, adjust your cooking time. Use a meat thermometer to check doneness. Wings should reach an internal temperature of 165°F (74°C). If they are unevenly cooked, try shaking the basket more often. This helps distribute heat better during cooking. {{image_2}} You can switch up the flavors of your wings easily. If you're not a fan of lemon pepper, consider these alternatives: - Garlic Parmesan: Use garlic powder and grated Parmesan cheese. - Buffalo Sauce: Toss wings in spicy buffalo sauce after cooking. - Barbecue: Brush wings with your favorite barbecue sauce for a sweet taste. Feel free to get creative! You can mix spices like cumin, cayenne, or even a hint of curry powder. Each change brings a new twist to the dish. Chicken wings are great, but you can try other proteins too. Here are some options: - Chicken Thighs: They stay juicy and cook well. Adjust the cooking time to 30-35 minutes. - Turkey Wings: They are larger, so cook for about 35-40 minutes at the same temperature. - Cauliflower Wings: For a vegetarian option, use cauliflower florets. Air fry for 15-20 minutes. Each protein has its own unique taste and texture, making your meal fun and varied. You can easily adapt this recipe to fit your diet. Here are some ideas: - Gluten-Free: Most spices are gluten-free. Just ensure your seasoning mix is safe. - Low-Sodium: Use less salt or find salt-free seasoning blends. Eating well doesn't mean giving up taste. You can enjoy these wings and still meet your dietary needs. To store leftover wings, first let them cool down. Once cool, place them in an airtight container. Keep the container in your fridge. This way, the wings stay fresh for up to three days. For best results, separate layers with parchment paper. This will help keep them crispy. To reheat wings, the air fryer is your best friend. Preheat it to 375°F (190°C). Place the wings in the fryer basket in a single layer. Heat them for about 5-7 minutes, shaking halfway through. This method revives their crispiness. If you don’t have an air fryer, you can use an oven. Preheat it to 350°F (175°C). Spread the wings on a baking sheet and cover with foil. Heat for 10-15 minutes. Remove the foil for the last few minutes to crisp them up. Enjoy your tasty wings again! Cook air fryer lemon pepper wings for 25-30 minutes at 380°F (190°C). This time gives you a crispy texture. I suggest shaking the basket halfway through cooking. This ensures even cooking and crisping for all the wings. Yes, you can use frozen chicken wings. Increase the cooking time to 30-35 minutes. Keep the temperature at 380°F (190°C). You may need to check them for doneness. Make sure they reach a safe internal temperature of 165°F (74°C). Lemon pepper wings taste great with several dipping sauces. Here are some popular options: - Ranch dressing - Blue cheese dressing - Honey mustard - Spicy buffalo sauce - Garlic aioli These sauces add a nice contrast to the zesty flavor of the wings. Enjoy experimenting with different dips! To make crispy lemon pepper chicken wings, you need the right ingredients and steps. Start by drying the wings and evenly coating them with seasoning. The air fryer cooks them perfectly when preheated and shaken during cooking. Remember to try different spices or proteins to mix it up. Store leftovers safely, and use the air fryer for easy reheating. Enjoy your wings with your favorite dips. With these tips, you can make tasty wings easily, impressing your friends and family. Happy cooking!

Air Fryer Lemon Pepper Wings Crispy and Flavorful Snack

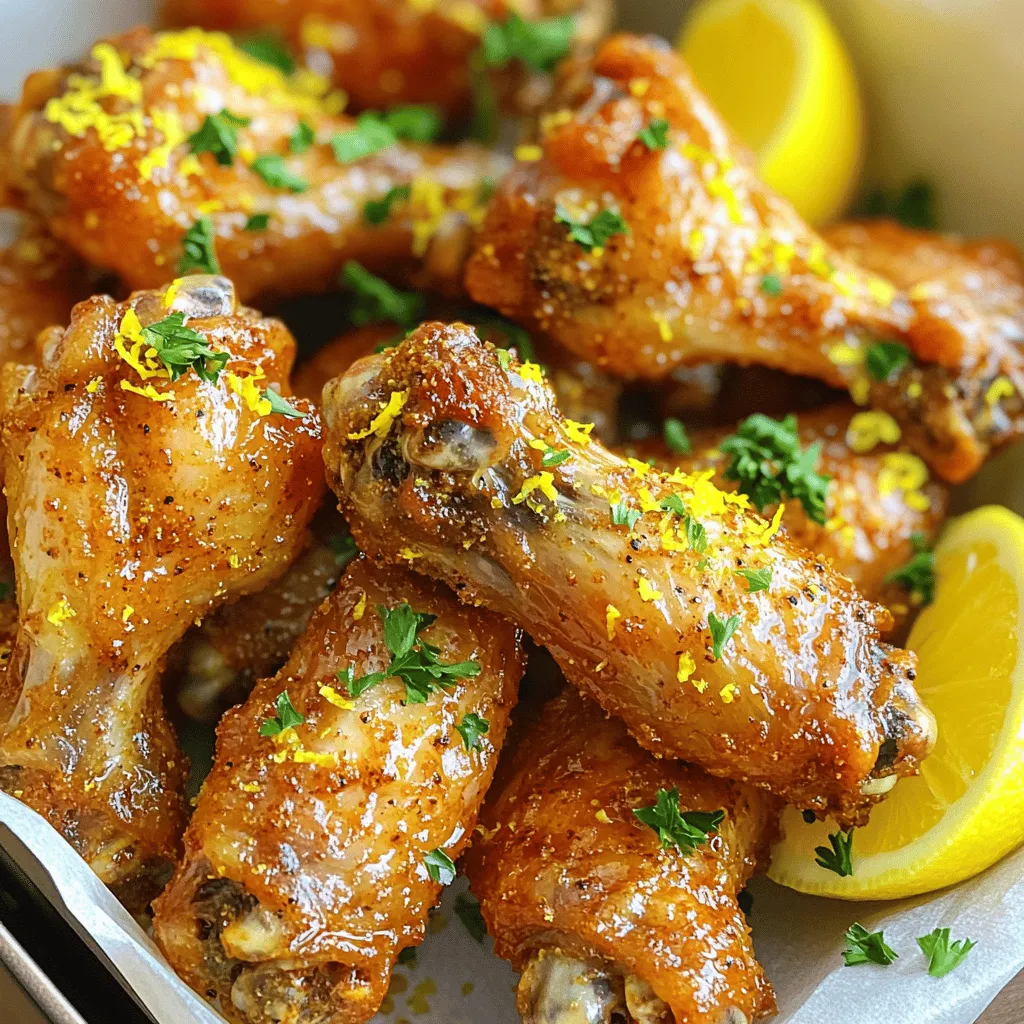
Craving a crispy, flavorful snack? Air fryer lemon pepper wings are the perfect choice! These wings are quick to make

Older posts
Newer posts
← Previous Page1 … Page16 Page17 Page18 … Page93 Next →

dsad

© 2025 flavorsprint • Built with GeneratePress

Our Policies

  • Copyright Policy
  • Cookie Policy
  • GDPR Policy
  • Privacy Policy
  • Disclaimer
  • Terms Of Use

More Information

  • Home
  • About
  • Contact
  • Appetizers
  • Dessert
  • Dinner
  • Drinks
©2025, flavorsprint About Back To Top