Skip to content
DisclaimerTerms Of UseGDPR PolicyCookie Policy

flavorsprint

  • Home
  • Drinks
  • Appetizers
  • Dinner
  • Dessert
  • About
  • Contact
  • Privacy Policy
DisclaimerTerms Of UseGDPR PolicyCookie Policy

Lillian

- 2 cups cooked penne pasta - 2 cups shredded rotisserie chicken - 1 cup Buffalo sauce - 1 cup cream cheese, softened - 1 cup shredded cheddar cheese - 1/2 cup crumbled blue cheese - 1/4 cup ranch dressing - 1/2 cup chopped green onions (for garnish) - Salt and pepper to taste - 1 tablespoon olive oil Gathering the right ingredients is key for this dish. Start with the cooked penne pasta and shredded rotisserie chicken. These make a strong base. The Buffalo sauce adds the spicy kick we love. Next, you’ll want to grab your dairy items. Cream cheese gives a smooth texture. Shredded cheddar cheese adds richness, while blue cheese brings a bold flavor. For extra flavor, don't skip the ranch dressing. It balances the spice of the Buffalo sauce. Chopped green onions are perfect for topping. They add color and a fresh taste. Finally, season with salt and pepper to your liking. A drizzle of olive oil before baking helps crisp the top. This mix of ingredients will create a tasty, cheesy pasta bake that everyone will enjoy. {{ingredient_image_1}} - Preheat your oven to 350°F (175°C). - Get a 9x13 inch baking dish ready. - In a big bowl, mix the cooked penne pasta, shredded chicken, and Buffalo sauce. - Add the softened cream cheese and ranch dressing. Stir until it blends well. - Fold in half of the shredded cheddar cheese and the blue cheese. Season with salt and pepper to taste. - Pour the mixture into the baking dish. Spread it out evenly. - Top with the rest of the cheddar cheese. - Drizzle a tablespoon of olive oil over the top for extra flavor. - Bake it in the oven for 25-30 minutes, until the cheese is bubbly and golden. - Let it cool for a few minutes before serving. To make your Cheesy Buffalo Chicken Pasta Bake shine, use high-quality Buffalo sauce. A good sauce adds depth and richness. Mix all your ingredients thoroughly. This ensures every bite bursts with flavor. Bake your dish until the cheese is bubbly and golden. This gives a nice crust on top. After you take it out of the oven, let it cool for a few minutes. Cooling helps the bake set, making it easier to serve. Make your dish look great by garnishing with chopped green onions. This adds color and freshness. Serve with extra ranch or blue cheese on the side. It gives everyone a chance to add their own flavor kick. Pro Tips Use Leftover Chicken: This recipe is perfect for using up leftover rotisserie chicken, saving time and reducing waste. Customize Spice Level: Adjust the amount of Buffalo sauce based on your heat preference. For milder flavor, use less sauce or mix in some regular hot sauce. Cheese Variations: Feel free to experiment with different types of cheese like Monterey Jack or pepper jack for an extra kick! Make Ahead: This dish can be prepared a day in advance. Assemble everything in the baking dish, cover, and refrigerate. Bake when ready to serve! {{image_2}} To change the heat in your Cheesy Buffalo Chicken Pasta Bake, consider two options. First, use a mild Buffalo sauce. This keeps the flavor while making it kid-friendly. Second, for those who love heat, add sliced jalapeños. They bring a nice kick to the dish. Just mix them in with the pasta and chicken. If you want to switch things up, try these ingredient swaps. You can use shredded turkey instead of chicken. This works great if you have leftover turkey. Another option is to swap blue cheese for feta cheese. If blue cheese isn’t your favorite, just leave it out. Your pasta will still taste fantastic! For a gluten-free version, swap the penne pasta for gluten-free pasta. There are many great gluten-free pastas available today. They cook just like regular pasta. This way, everyone can enjoy this cheesy, spicy delight without worry! Store any leftovers in an airtight container. This keeps them fresh. You can refrigerate it for up to 3-4 days. Just make sure to seal it tightly. You can freeze this dish for up to 3 months. Make sure to use a freezer-safe container. When you want to eat it, just thaw in the fridge overnight. Then, reheat it in the oven for the best results. The oven works best for even heating. Preheat it to 350°F (175°C). Add a splash of broth before you heat it. This helps keep the pasta moist and tasty. Enjoy your Cheesy Buffalo Chicken Pasta Bake warm and delicious! Yes, you can prepare the dish and store it before baking. Just mix all the ingredients, then cover it well in the baking dish. You can keep it in the fridge for up to a day. When you are ready to bake, just pop it in the oven. This makes meal prep easy! You can serve this bake with several sides. Consider fresh side salads for a crunchy contrast. Garlic bread pairs well too, adding that buttery, crusty element. Coleslaw is a great choice as well; its creaminess complements the spicy pasta. If you want more heat, add hot sauce to the mix. You can also use a spicier Buffalo sauce. Another option is to fold in some chopped jalapeños. Each of these choices will give your dish a nice kick! This Cheesy Buffalo Chicken Pasta Bake combines simple ingredients for a tasty dish. You mix cooked penne, rotisserie chicken, and creamy cheeses, then bake until bubbly. Remember to use a good Buffalo sauce for the best flavor. You can adjust the spice and even switch ingredients based on your taste. This recipe allows for great leftovers, whether you refrigerate or freeze them. Enjoy making this dish, and happy cooking!

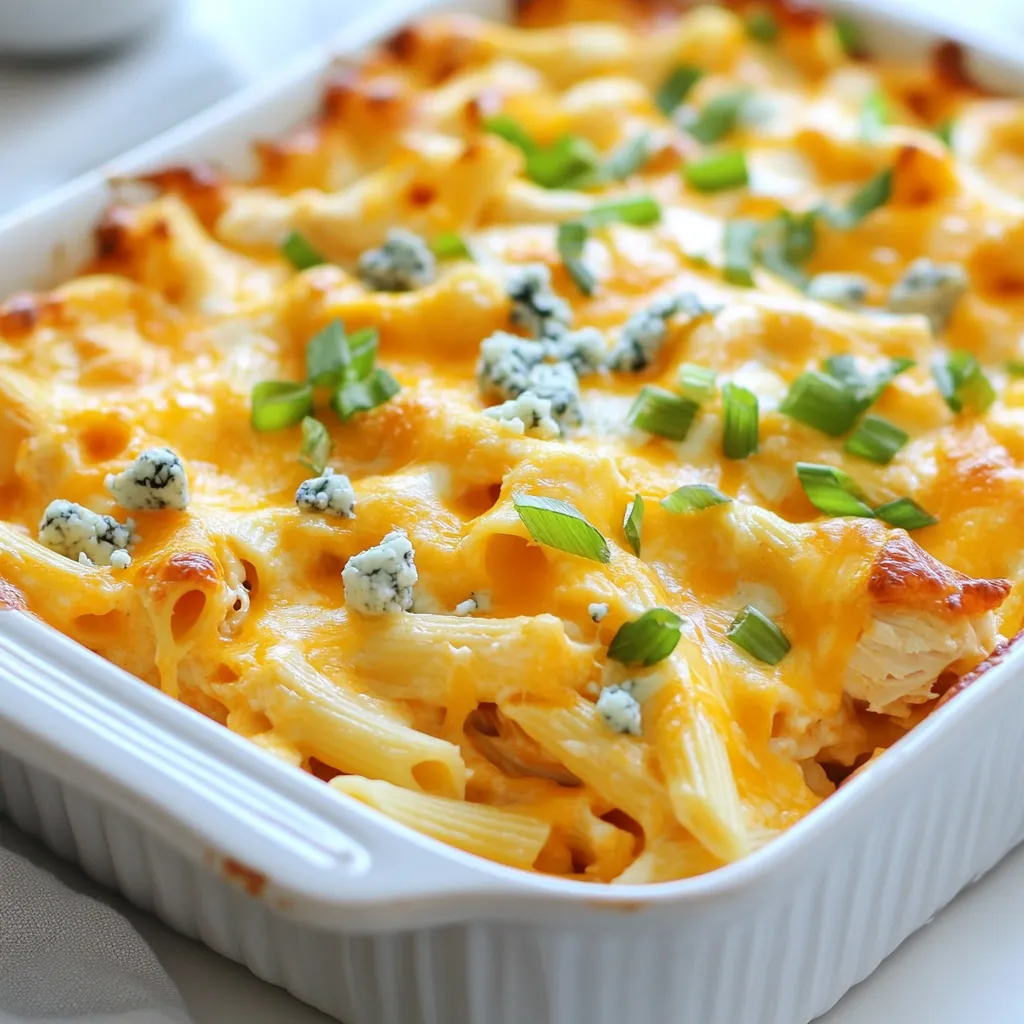
Cheesy Buffalo Chicken Pasta Bake Easy and Delicious Meal

Are you ready for a dish that’s both easy and delicious? My Cheesy Buffalo Chicken Pasta Bake combines tender pasta,

- 1 lb boneless, skinless chicken thighs, cut into bite-sized pieces - 1/2 cup cornstarch - 2 tablespoons olive oil - 1/2 teaspoon salt - 1/2 teaspoon black pepper - 1/2 teaspoon garlic powder - 1/2 teaspoon onion powder - 1/4 teaspoon red pepper flakes (optional for spice) - 1/2 cup orange juice (freshly squeezed if possible) - 1 tablespoon soy sauce (low sodium) - 2 tablespoons honey - 1 tablespoon rice vinegar - Zest of 1 orange - 1 tablespoon sesame seeds (for garnish) - Thinly sliced green onions (for garnish) Gather these ingredients to make tasty air fryer orange chicken. This dish is quick and easy. You can find most of these items at your local store. Fresh orange juice makes a big difference in flavor. Always choose the best ingredients for the best results. Cornstarch helps give the chicken a crispy coating. The spices add great flavor and warmth. Using low-sodium soy sauce keeps the dish healthy. Honey balances the tangy orange juice. Don't forget the sesame seeds and green onions for garnish! They add a nice touch to your meal. {{ingredient_image_1}} - First, mix the cornstarch, salt, black pepper, garlic powder, onion powder, and red pepper flakes in a bowl. This mix gives the chicken its crunchy texture and flavor. - Next, coat the chicken pieces in this mixture. Make sure every piece is evenly covered. Shake off any extra cornstarch to avoid clumps. - Preheat your air fryer to 375°F (190°C). This helps the chicken cook evenly and get crispy. - Drizzle olive oil over the coated chicken. Toss the chicken again to spread the oil evenly. - Arrange the chicken in a single layer in the air fryer basket. Cook it for 12-15 minutes. Shake the basket halfway through cooking. This step helps the chicken brown on all sides. - While the chicken cooks, make the orange sauce. In a small saucepan, combine orange juice, soy sauce, honey, rice vinegar, and orange zest. - Place the saucepan over medium heat. Bring the mixture to a simmer and let it cook for 5-7 minutes. Stir it often to prevent sticking. You want the sauce to thicken a bit. - Once the chicken is ready, move it to a mixing bowl. Drizzle the orange sauce over the chicken. Toss gently until every piece is coated well. - Return the sauced chicken to the air fryer basket. Cook for an extra 2-3 minutes. This final step caramelizes the sauce for added flavor. - Remove the chicken from the air fryer, and garnish it with sesame seeds and thinly sliced green onions before serving. Enjoy your meal! To get crispy chicken, start with cornstarch. Coat each piece well to form a nice crust. The oil helps the chicken brown nicely. Make sure to shake the basket halfway through cooking. This step keeps the chicken from sticking and helps it cook evenly. Do you like heat? Add red pepper flakes to the cornstarch mix. Just a little will give your dish a nice kick. For the sauce, you can change its thickness too. If you want it thicker, let it simmer longer. If you prefer a lighter sauce, reduce the cooking time. Garnishes can elevate your dish. While sesame seeds are great, consider adding chopped peanuts or cilantro. For sides, serve the orange chicken with steamed rice or crispy vegetables. These pair well and balance the sweet sauce. Pro Tips Choose the Right Chicken: For the juiciest results, use boneless, skinless chicken thighs instead of breasts, as they remain tender and flavorful during cooking. Coating Technique: Ensure the chicken pieces are evenly coated in cornstarch for a perfectly crispy texture. Shake off any excess to avoid clumping. Fresh Ingredients Matter: Using freshly squeezed orange juice and zest enhances the flavor of the sauce, giving it a vibrant and aromatic quality. Perfect Caramelization: Return the coated chicken to the air fryer for a couple of minutes after adding the sauce to achieve a delicious caramelized finish. {{image_2}} You can use chicken breast instead of chicken thighs. Chicken breast is lean and cooks well. Cut it into bite-sized pieces just like the thighs. If you prefer a vegan option, try using tofu. Firm tofu works best. Press it to remove excess water, then cut it into cubes. Coat it with cornstarch just like the chicken. This way, you still get a crispy texture. Adding different citrus flavors can really boost the taste. Try adding lemon or lime juice to the sauce. You can also mix in some zest from these fruits. They add a fresh kick! Experimenting with spices can change the dish, too. Consider adding ginger or a bit of cayenne pepper for extra warmth. These flavors create a new twist on classic orange chicken. Think beyond plain rice or noodles. You could serve it with fried rice for a fun mix. You can also add steamed broccoli or snap peas to the plate. They add color and nutrition. For a crunchy side, try a simple cucumber salad. It’s refreshing and complements the dish nicely. Enjoy your meal in a bowl for a cozy experience! To store cooked orange chicken, let it cool first. Place it in an airtight container. This helps keep it fresh. You can store it in the fridge for up to four days. Use glass or plastic containers that seal well. Glass is great for reheating too. To reheat orange chicken in the air fryer, set it to 350°F (175°C). Place the chicken in the basket. Heat for about 5-7 minutes. This will keep it crispy. If you don’t have an air fryer, you can use the oven. Preheat it to 350°F (175°C) and bake for 10-15 minutes. Yes, you can freeze cooked orange chicken. Let it cool completely before freezing. Use a freezer-safe container or a zip-top bag. Remove as much air as possible. It will keep well for up to three months. To thaw, move it to the fridge overnight. Reheat it in the air fryer or oven as mentioned. Cooking orange chicken in an air fryer takes about 12 to 15 minutes. Preheat your air fryer to 375°F (190°C) first. Place the chicken pieces in a single layer in the basket. Shake the basket halfway through cooking to ensure even browning. When done, the chicken should be golden brown and cooked through. Yes, you can use chicken breasts instead of thighs. Chicken breasts are leaner and will still taste great. Just remember, they may cook a bit faster. Check for doneness around the 10-minute mark. Adjust your cooking time as needed to keep them juicy. Air fryer orange chicken pairs well with several side dishes. Here are a few ideas: - Steamed rice - Fried rice - Stir-fried veggies - Noodles - Salad Feel free to mix and match based on your taste. To thicken the sauce, you can simmer it longer. Cook it on medium heat for about 5 to 7 minutes. You can also mix a bit of cornstarch with water to create a slurry. Add this to the sauce while it simmers. This will help it thicken nicely. This orange chicken recipe comes together using simple steps and fresh ingredients. You coat chicken pieces, fry them until crispy, and toss them in a sweet and tangy sauce. Remember to shake the basket to keep everything even. Feel free to swap ingredients or add more spices to fit your taste. Whether as a weeknight dinner or a special meal, this dish is both fun to make and delicious. Enjoy your delicious orange chicken any way you like!

Air Fryer Orange Chicken Quick and Flavorful Dish

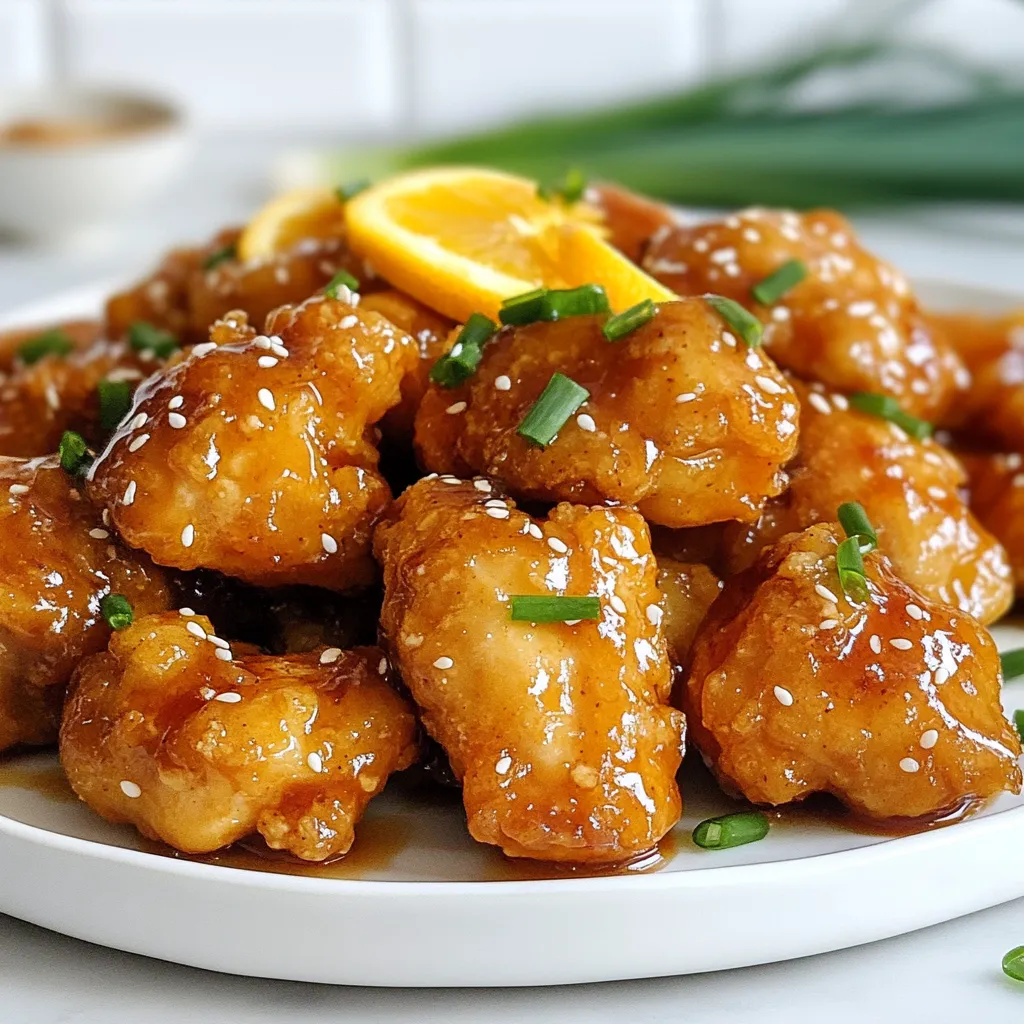
Ready for a dish that’s quick, easy, and bursting with flavor? Air Fryer Orange Chicken is here to save your

- 1 pound ground turkey - 1 red bell pepper, diced - 1 green bell pepper, diced - 1 yellow onion, chopped - 3 cloves garlic, minced - 1 teaspoon smoked paprika - 1 teaspoon cumin - ½ teaspoon chili powder - Salt and pepper to taste - 2 tablespoons olive oil - 1 can (15 oz) black beans, drained and rinsed - 1 cup corn kernels (fresh or frozen) - 1 lime, juiced - Fresh cilantro, for garnish Ground turkey is the star of this dish. It offers a lean protein that cooks quickly and absorbs flavors well. The bell peppers add vibrant colors and a sweet crunch. Onions and garlic create a savory base, enriching the overall taste. Spices like smoked paprika, cumin, and chili powder bring warmth and depth. Black beans and corn add texture and nutrients, making the meal hearty. For the best flavor, choose fresh vegetables. Look for firm bell peppers and a crisp onion. Fresh garlic cloves add more punch than pre-minced options. Use high-quality ground turkey, preferably lean, for a healthy dish. Look for organic or non-GMO black beans if possible. Fresh lime juice is better than bottled for brightness. Always check expiration dates on canned goods for the best quality. {{ingredient_image_1}} Start by gathering your ingredients. You will need: - 1 pound ground turkey - 1 red bell pepper, diced - 1 green bell pepper, diced - 1 yellow onion, chopped - 3 cloves garlic, minced - 1 teaspoon smoked paprika - 1 teaspoon cumin - ½ teaspoon chili powder - Salt and pepper to taste - 2 tablespoons olive oil - 1 can (15 oz) black beans, drained and rinsed - 1 cup corn kernels (fresh or frozen) - 1 lime, juiced - Fresh cilantro, for garnish Chop the onion, garlic, and peppers. Make sure to rinse the beans. This step helps to prep your dish for quick cooking. Heat olive oil in a large skillet over medium heat. Once hot, add the chopped onion. Sauté for about 3 minutes until it is soft and translucent. Next, stir in the minced garlic. Cook it for another minute until you smell the aroma. Add the ground turkey to the skillet. Break it apart with a spoon and cook for 5-7 minutes. It should be browned and no longer pink. Season the turkey with smoked paprika, cumin, chili powder, salt, and pepper. Stir well to ensure the flavors mix nicely. Now, toss in the diced red and green bell peppers. Sauté these for 4-5 minutes until they are tender. After that, mix in the black beans and corn. Cook for another 3-4 minutes until everything is heated through. Finally, squeeze the lime juice over the mixture and stir. Taste your dish and adjust the seasoning if needed. Remove the skillet from heat. Garnish your meal with fresh cilantro. This adds a pop of color and flavor. Serve the turkey and pepper skillet hot. It pairs well with rice or tortillas. You can also enjoy it on its own for a lighter meal. This dish is not only tasty but also quick to make on busy weeknights. To get the best texture, start with a hot skillet. This helps the turkey brown nicely. When you add the onion, cook it until it's soft. This step builds a great base. Make sure to break up the turkey well as it cooks. This prevents clumps and lets the meat brown evenly. When you add the peppers, don’t rush it. Give them time to get tender. This will bring out their sweet taste. To boost flavor, use fresh herbs. I love adding cilantro right before serving. It gives a fresh taste that brightens the dish. Don’t skip the lime juice. It adds a nice zing that makes everything pop. If you like heat, try adding diced jalapeños. You can also mix in some hot sauce for an extra kick. For a smoky flavor, use smoked paprika. It adds depth without being too spicy. One common mistake is overcooking the turkey. This can make it dry. Cook it just until it’s no longer pink. Another mistake is not seasoning enough. Taste as you go! Adjust the salt and pepper to your liking. Avoid adding too many ingredients at once. This can lower the heat in your pan, making it hard to brown the meat. Lastly, don’t forget to let the dish rest for a minute before serving. This lets the flavors meld together. Pro Tips Use Lean Turkey: Opt for 93% lean ground turkey for a healthier dish with less fat while still being flavorful. Add More Veggies: Feel free to incorporate additional vegetables like zucchini or spinach for extra nutrients and color. Spice it Up: Adjust the amount of chili powder to your taste; add a pinch of cayenne pepper for an extra kick! Serve with Toppings: Consider serving with toppings like avocado, sour cream, or shredded cheese for added creaminess and flavor. {{image_2}} You can swap ground turkey for other proteins. Ground chicken works well. It has a similar taste and texture. You can also use lean ground beef. This gives a heartier flavor. If you want something different, try ground pork. For a spicy kick, chorizo adds great taste. Just adjust the spices to match the protein you use. If you want a meatless dish, there are many options. Use plant-based ground meat as a substitute. This keeps the texture but adds no meat. You can also use lentils for extra fiber. Cooked quinoa is another great choice. It brings a nice nutty flavor. Simply replace the turkey with your chosen option and follow the same steps. You can easily change some ingredients if needed. Bell peppers can be swapped for zucchini or mushrooms. Both add nice flavor and texture. If you don’t have black beans, kidney beans work too. You can even use chickpeas for a twist. Fresh cilantro can be replaced with parsley for a different taste. Just keep the core spices like paprika and cumin for that bold flavor. After enjoying your Turkey and Pepper Skillet, store the leftovers right away. Let the dish cool to room temperature first. Then, transfer it to an airtight container. This keeps the meal fresh for up to three days in the fridge. Label the container with the date so you know when to use it. If you want to save some for later, freezing works well. Portion the skillet into smaller containers. Make sure to leave some space at the top, as the food will expand when it freezes. You can freeze it for up to three months. When ready to eat, just thaw it overnight in the fridge. Reheat your Turkey and Pepper Skillet on the stove for the best results. Use low to medium heat and stir often to avoid burning. If it seems dry, add a splash of water or broth. You can also use a microwave. Place it in a microwave-safe dish, cover it, and heat in short bursts. Stir in between until it’s hot all the way through. Enjoy your meal again! To add some heat, use more chili powder. You can also add a diced jalapeño. If you want even more spice, try a splash of hot sauce. Another option is to sprinkle in some red pepper flakes. Taste as you go to make sure it’s just right for you. Yes, ground chicken works well in this dish. It has a similar texture and flavor. Just cook it the same way as the turkey. You may want to adjust the spices slightly, as chicken can be milder. This swap keeps the meal light and healthy. Turkey and Pepper Skillet pairs nicely with rice or quinoa. You can also serve it with warm tortillas for a fun twist. A fresh salad on the side adds crunch and color. For a heartier meal, consider adding some avocado or guacamole. This blog post covered the key ingredients, step-by-step cooking, and tips for making Turkey and Pepper Skillet. You learned about choosing quality ingredients and enhancing flavors. We explored protein options, storage methods, and common mistakes to avoid. Remember, the right ingredients and techniques lead to a great dish. Use this guide to create tasty meals that impress. Happy cooking!

Turkey and Pepper Skillet Flavorful Easy Weeknight Meal

Looking for a quick, tasty meal that packs a punch? Try my Turkey and Pepper Skillet! This easy weeknight dish

- 8 oz cream cheese, softened - 1/2 cup cranberry sauce (homemade or store-bought) - 1 small jalapeño, finely diced (seeds removed for less heat) - 1/4 cup green onions, finely chopped - 1/2 teaspoon garlic powder - 1/4 teaspoon salt - 1/4 teaspoon black pepper This dip starts with cream cheese. It gives a smooth and rich base. Next, we add cranberry sauce. This brings a sweet and tangy flavor. The jalapeño adds a nice kick. Remember to remove the seeds for less heat. Green onions add freshness and crunch. Garlic powder, salt, and black pepper enhance the taste. - 1/2 cup shredded cheddar cheese - Fresh cilantro for garnish Cheddar cheese is optional but adds creaminess. It also boosts the flavor. Fresh cilantro makes a great garnish. It adds color and a touch of herbaceousness. You can mix and match these ingredients as you like. {{ingredient_image_1}} Mixing the Cream Cheese and Cranberry Sauce Start with 8 ounces of softened cream cheese. Add 1/2 cup of cranberry sauce to a mixing bowl. Use a hand mixer or spatula to blend them until smooth. Incorporating Additional Ingredients Next, finely dice 1 small jalapeño and remove the seeds if you want less heat. Add the jalapeño to the bowl. Then, chop 1/4 cup of green onions and toss them in too. Add 1/2 teaspoon of garlic powder, 1/4 teaspoon of salt, and 1/4 teaspoon of black pepper. Stir everything together until well mixed. Folding in Cheddar Cheese (if using) If you like extra creaminess, fold in 1/2 cup of shredded cheddar cheese. This step is optional but adds great flavor and texture. Transferring to a Serving Bowl Once mixed, transfer the dip to a serving bowl. Use a spatula to smooth the top for a nice look. Garnishing with Cilantro For a fresh touch, garnish with chopped cilantro. It adds color and flavor, making the dish pop. Suggested Serving Accompaniments Serve your dip with crackers, sliced baguette, or fresh vegetable sticks. This adds crunch and makes it fun to eat! Using Fresh Ingredients Using fresh ingredients makes a big difference. Fresh cream cheese gives a rich taste. Fresh cranberries can add a bright zing. I love homemade cranberry sauce for its sweet and tart flavor. Always use fresh jalapeños for a better kick. Adjusting Spice Levels with Jalapeños If you like heat, keep the seeds in the jalapeño. For less heat, remove the seeds. You can also try using less jalapeño. Start with a small amount and taste as you go. This way, you find your perfect heat level. Incorporating Cheddar Cheese Adding cheddar cheese gives the dip a nice twist. It adds both creaminess and flavor. Use sharp cheddar for a bolder taste. Fold it in after mixing other ingredients. This keeps the dip smooth and creamy. Achieving Creaminess To make the dip extra creamy, use softened cream cheese. Mixing well is key. A hand mixer can help blend everything smoothly. If you want, add a splash of milk. This makes it even creamier without changing the flavor. Pro Tips Adjust the Heat: If you prefer a milder dip, ensure to remove all the seeds and white membranes from the jalapeño, or substitute with a milder pepper. Homemade Cranberry Sauce: For a fresh twist, consider using homemade cranberry sauce; it adds a more vibrant flavor compared to store-bought versions. Chill for Flavor: Allowing the dip to chill in the refrigerator for at least 30 minutes enhances the melding of flavors, making the dip even more delicious. Serving Suggestions: Pair with a variety of dippers such as pita chips, pretzels, or even apple slices for a sweet and savory combination. {{image_2}} You can easily change the taste of your Cranberry Jalapeño Cream Cheese Dip. Adding spices can give it a kick. Try a pinch of cayenne for heat or smoked paprika for a smoky taste. These small changes make a big difference. Incorporating nuts or fruits can also bring new flavors. Chopped pecans or walnuts add crunch. Diced apples or pears offer a sweet contrast to the heat. Get creative and find what you like best! If you want a vegan option, use a vegan cream cheese substitute. Many brands offer great taste and texture. This way, everyone can enjoy the dip. For gluten-free serving suggestions, serve the dip with rice crackers or veggie sticks. Both options are tasty and safe for those with gluten issues. Enjoying this dip can be done by all! To keep your Cranberry Jalapeño Cream Cheese Dip fresh, store it correctly. - Refrigeration Instructions: Place the dip in an airtight container. This prevents it from absorbing other smells. Keep it in the fridge right after serving. It stays fresh and tasty for later enjoyment. - Freezing the Dip: You can freeze the dip if you want to save some for later. Use a freezer-safe container. Make sure to leave some space at the top. The dip will expand as it freezes. - How Long It Lasts in the Fridge: Your dip is good for about 3 to 5 days in the fridge. Make sure it stays sealed tightly to maintain its flavor and texture. - Signs of Spoilage: Check for changes in smell or color. If it smells sour or has an off-color, it’s best to toss it out. Always trust your senses. If in doubt, throw it out! Can I make this dip ahead of time? Yes, you can make this dip ahead of time. Just mix all the ingredients and store it in the fridge. It tastes even better after chilling for a few hours. What can I substitute for jalapeños? You can use bell peppers for a milder flavor. If you want some heat, try using diced serrano peppers. Adjust the amount based on your taste. How can I make it less spicy? To reduce the spice, remove the seeds from the jalapeño before dicing. You can also use less jalapeño in your mix. Another option is to add more cream cheese to balance the heat. What to serve with Cranberry Jalapeño Cream Cheese Dip? This dip pairs well with crackers, sliced baguette, or fresh veggie sticks. You can create a colorful platter for your guests. Is this dip suitable for gluten-free diets? Yes, this dip is gluten-free. Just ensure you serve it with gluten-free crackers or veggies. Always check labels to be safe! This blog post covered how to make a tasty Cranberry Jalapeño Cream Cheese Dip. We explored key ingredients, like cream cheese and jalapeños, plus optional adds like cheddar. You learned how to prepare, serve, and enhance this dish. Remember to store it properly for the best flavor. With these tips and ideas, you’ll impress everyone at your next gathering. Enjoy making this dip your own and share it with friends!

Cranberry Jalapeño Cream Cheese Dip Flavorful Delight

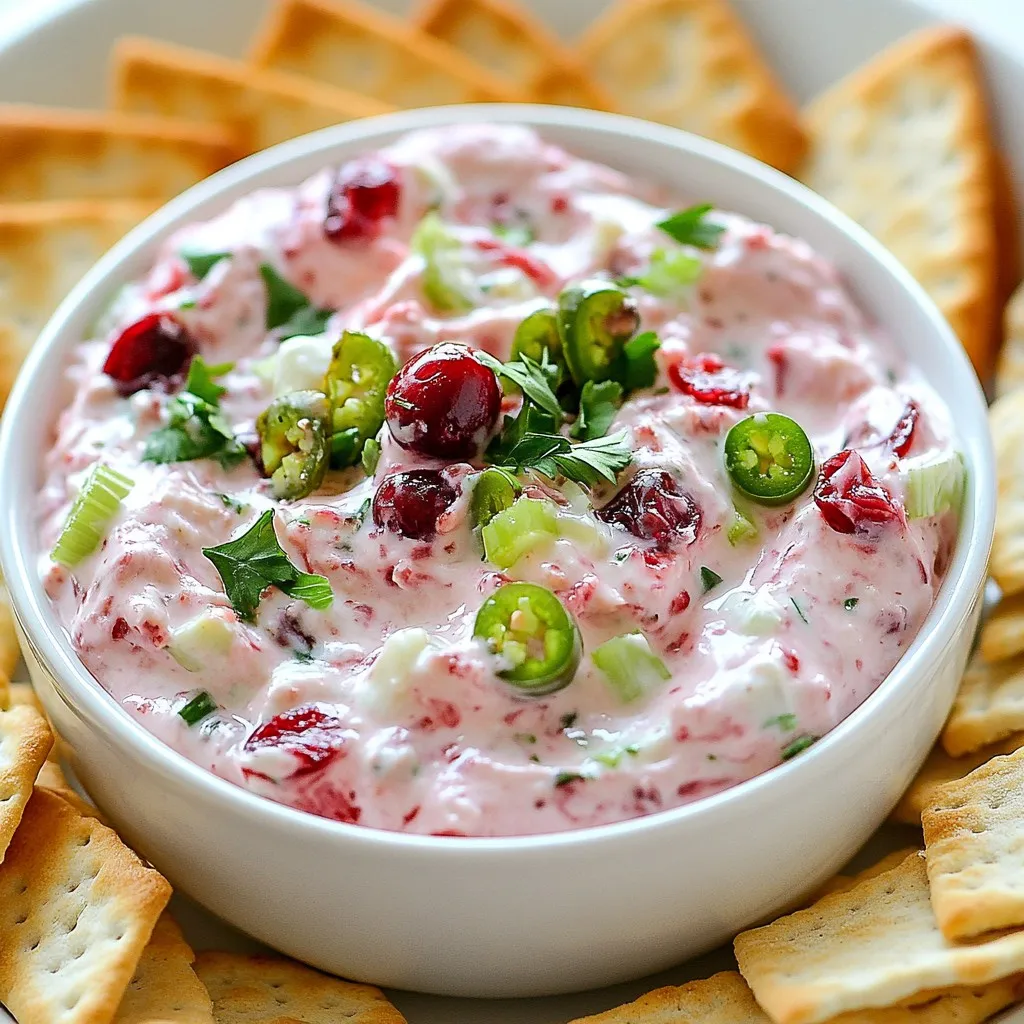
Looking for a dip that’s both sweet and spicy? Try my Cranberry Jalapeño Cream Cheese Dip! With creamy cheese and

To make Old Fashioned Vegetable Beef Soup, gather these key ingredients: - 1 lb beef stew meat, cut into 1-inch cubes - 2 tablespoons olive oil - 1 large onion, diced - 3 cloves garlic, minced - 4 medium carrots, sliced - 3 stalks celery, sliced - 2 medium potatoes, diced - 1 cup green beans, trimmed and cut into 1-inch pieces - 1 can (14.5 oz) diced tomatoes, undrained - 6 cups beef broth - 1 bay leaf - 1 teaspoon dried thyme - Salt and pepper to taste - Fresh parsley, chopped (for garnish) You can swap some of these items based on what you have. For the beef stew meat, use chuck roast or even ground beef. If you need a lighter option, try chicken. Instead of beef broth, vegetable broth works well too. You can also mix in other veggies, like peas or corn. If you do not have fresh parsley, dried herbs can add flavor too, but use less. Fresh ingredients usually taste better in soup. Fresh carrots and celery give crunch and flavor. However, canned tomatoes are fine. They add richness and save time. When using canned goods, rinse them to reduce sodium. Both fresh and canned can work, so use what you prefer. Remember, fresh herbs can boost flavor, but dried will still do the job. Use what you have on hand. {{ingredient_image_1}} To start, gather all your ingredients. You will need: - 1 lb beef stew meat, cut into 1-inch cubes - 2 tablespoons olive oil - 1 large onion, diced - 3 cloves garlic, minced - 4 medium carrots, sliced - 3 stalks celery, sliced - 2 medium potatoes, diced - 1 cup green beans, trimmed and cut into 1-inch pieces - 1 can (14.5 oz) diced tomatoes, undrained - 6 cups beef broth - 1 bay leaf - 1 teaspoon dried thyme - Salt and pepper to taste - Fresh parsley, chopped (for garnish) This is important for a smooth cooking process. 1. Heat the olive oil in a large soup pot over medium-high heat. 2. Add the beef stew meat. Brown it on all sides for about 5-7 minutes. 3. Remove the beef and set it aside. 4. In the same pot, add the diced onion and minced garlic. Sauté until the onion turns translucent, about 3-4 minutes. 5. Next, add the sliced carrots, celery, and diced potatoes. Cook these for about 5 minutes, stirring often. 6. Return the browned beef to the pot. Add the green beans, diced tomatoes (with their juice), beef broth, bay leaf, dried thyme, salt, and pepper. 7. Bring everything to a boil. Once it boils, reduce the heat to low. Cover the pot and let it simmer for 1.5 to 2 hours. Stir occasionally and adjust the seasoning as needed. 8. When the soup is ready, remove the bay leaf. Stir in fresh parsley just before serving. Browning the meat adds deep flavor. Here are some tips: - Use a wide pot for better heat distribution. - Don’t crowd the pot; brown in batches if needed. - Let the meat sit without stirring for a few minutes. This helps it brown better. - Ensure the oil is hot enough before adding the meat. You can test it by adding a small piece of beef; it should sizzle right away. These steps will help you create a rich and flavorful soup, perfect for any meal. To make your soup really shine, use fresh herbs. Fresh parsley adds a bright touch. You can also try adding a splash of Worcestershire sauce. This adds depth and richness. If you like a kick, a dash of hot sauce works well too. For extra umami, toss in a bit of soy sauce. Remember, balance is key. Tasting as you go helps you find the right mix. Using a slow cooker is a great option. Just brown the meat first, then add all the ingredients. Set it on low for 6-8 hours. The flavors meld beautifully over time. If you're short on time, the Instant Pot is perfect. After browning the meat, add all the ingredients. Cook on high pressure for 35 minutes. Quick and tasty! Seasoning is where your soup can really pop. Start with the basics: salt and pepper. Taste after the soup simmers for a while. You can adjust the salt to your liking. If you want more flavor, add extra thyme or even rosemary. A squeeze of lemon juice at the end brightens everything up. Don’t forget, seasoning can change based on your taste, so experiment! Pro Tips Brown the Meat: Ensure you brown the beef stew meat well to enhance the flavor of the soup. This step adds a rich depth to the final dish. Use Fresh Herbs: For a brighter flavor, consider adding fresh thyme or parsley instead of dried. Fresh herbs can elevate the taste of your soup. Adjust the Vegetables: Feel free to customize the vegetable mix based on what you have on hand or prefer. Peas, corn, or bell peppers are great additions! Let it Rest: Allow the soup to cool before refrigerating. The flavors will meld together even more, making it taste even better the next day! {{image_2}} You can change the veggies in this soup to fit your tastes. If you want to go lighter, use zucchini or bell peppers. Both add great flavor and color. For a heartier twist, add butternut squash or sweet potatoes. You can also swap out green beans for peas or corn. Be brave and mix different veggies from your fridge! If you prefer chicken or turkey, this soup works great with them. Use boneless, skinless chicken thighs or breasts. Just cut them into bite-sized pieces. Brown them the same way as beef. This gives you a lighter soup but keeps it just as hearty. Ground turkey is another option. It cooks quickly and fits well in this dish. To make this soup gluten-free, use gluten-free beef broth. Check labels to make sure it’s safe. You can also skip the bay leaf if you are unsure. This soup is already packed with flavor from the meat and veggies. Enjoy it with gluten-free bread or crackers to keep things simple and tasty. After making your Old Fashioned Vegetable Beef Soup, let it cool down. Once cool, place the soup in a tight container. It will stay fresh in the fridge for about three to four days. Always check for signs of spoilage before eating. If you see mold or smell something off, toss it. To freeze your soup, follow the same cooling process. Use freezer-safe containers or bags. Leave some space at the top, as soup expands when it freezes. This soup can last in the freezer for up to three months. When you're ready to enjoy it again, just pull it out and thaw in the fridge overnight. Reheat your soup on the stove for the best taste. Heat it over medium heat, stirring often. You can also use a microwave. Pour the soup into a bowl and heat it in short bursts, stirring in between. Make sure it’s hot all the way through before serving. If it thickens too much, add a bit of broth or water to get your desired consistency. Old Fashioned Vegetable Beef Soup lasts about 3 to 4 days in the fridge. Store it in an airtight container. This helps keep it fresh and tasty. The flavors often deepen over time, making it even better the next day. Yes, you can make this soup ahead of time. It freezes well too. Prepare it on a weekend, then freeze portions. This is a great way to have a quick meal ready for busy days. Just thaw and reheat when you need it. Serve this soup with crusty bread or crackers. A fresh salad also pairs well. You might enjoy a slice of cornbread on the side for a warm touch. Each option enhances the meal and makes it more filling. This blog post covers everything needed to make Old Fashioned Vegetable Beef Soup. We explored key ingredients, substitutions, and differences between fresh and canned items. You learned step-by-step cooking methods and tips for browning meat. Flavor enhancements, cooking variations, and seasoning adjustments help you personalize your dish. Storage tips ensure your soup stays fresh and tasty for longer. With answers to common questions, you're now ready to create a delicious soup that suits your taste. Enjoy making your own tasty version of this classic recipe!

Old Fashioned Vegetable Beef Soup Flavorful Comfort Dish

When you crave warmth and comfort, nothing beats a bowl of Old Fashioned Vegetable Beef Soup. This dish blends hearty

- 1 cup plain Greek yogurt - 1/2 cup fresh or dried cranberries - 1/4 cup honey - 1/4 cup chopped walnuts (toasted) - 1 tablespoon lemon juice - 1 teaspoon vanilla extract - Pinch of salt - Optional garnish: Fresh mint leaves This creamy Greek yogurt cranberry dip is both simple and delicious. First, gather all your ingredients. The base of this dip is one cup of plain Greek yogurt. It gives a smooth and rich texture. Next, you’ll need half a cup of cranberries. You can use fresh or dried cranberries based on your taste. Fresh cranberries offer a tart flavor, while dried ones add sweetness. For sweetness, add a quarter cup of honey. This natural sweetener balances the tartness of the cranberries. A tablespoon of lemon juice adds a bright, zesty flavor that wakes up the dish. Don’t forget the walnuts! A quarter cup of toasted, chopped walnuts adds crunch and depth. You’ll also need a teaspoon of vanilla extract for warmth and a pinch of salt to enhance all the flavors. If you want, add fresh mint leaves as a garnish. They add a lovely pop of color and freshness. Now, make sure you have everything ready to enjoy this tasty dip! {{ingredient_image_1}} To prepare the cranberries, you have two options. If you choose fresh cranberries, boil them. Place them in a small pot of water. Let them boil for about five minutes until soft. After that, drain the water and let them cool. For dried cranberries, the process is easier. Just chop them coarsely with a knife. This makes them ready to mix into the dip. Now, let’s mix the ingredients. In a medium bowl, take one cup of plain Greek yogurt. Add the cooled fresh cranberries or chopped dried ones. Then, pour in one-fourth cup of honey, one tablespoon of lemon juice, and one teaspoon of vanilla extract. Don’t forget a pinch of salt. Use a spatula to gently fold everything together. You want it well mixed, but be careful not to crush the cranberries. Next, add one-fourth cup of chopped walnuts. Gently fold them in, too. This keeps them crunchy and adds a nice texture to your dip. Now it's time to adjust the sweetness. Taste the dip. If you want it sweeter, add more honey to your liking. Once you have the perfect flavor, transfer the dip to a serving bowl. Refrigerate it for at least 30 minutes. This chilling time helps the flavors blend together. Before you serve, garnish the dip with fresh mint leaves for a nice pop of color. You can serve it with fresh fruit, crackers, or vegetable sticks. Enjoy your creamy Greek yogurt cranberry dip! To make your dip taste just right, balance the sweetness with honey. Start with 1/4 cup and taste it. If you like it sweeter, add a bit more honey. This makes a big difference. When mixing your dip, be gentle with the walnuts. You want their crunch to stay. After you fold in the walnuts, try not to stir too much. This keeps them nice and crunchy. For the best dippers, use fresh fruit, crackers, or veggie sticks. Apples and pears pair well with the tartness of cranberries. Carrot sticks and celery add a nice crunch. You can even try pretzels for a salty bite. To present your dip at parties, use a shallow bowl. Surround it with your dippers for a colorful spread. Adding fresh mint leaves on top looks great and adds a fresh taste. Pro Tips Use Fresh Cranberries for Brightness: Fresh cranberries bring a vibrant tartness that perfectly complements the creamy yogurt, enhancing the overall flavor profile. Toast Your Walnuts: Toasting the walnuts before adding them not only intensifies their nutty flavor but also adds a delightful crunch to the dip. Chill Before Serving: Allowing the dip to chill for at least 30 minutes helps the flavors meld together, resulting in a more harmonious taste. Experiment with Sweetness: Adjust the amount of honey to your taste; you can also try alternatives like maple syrup or agave for a different flavor twist. {{image_2}} You can switch things up with flavored Greek yogurt. Try vanilla or honey yogurt for added taste. This small change can give your dip a new twist. If you want a nut-free option, skip the walnuts. Substitute them with sunflower seeds or pumpkin seeds. They still add crunch without the nuts. To elevate your dip, consider adding spices. A dash of cinnamon or nutmeg can give it warmth. If you like a bit of heat, try a pinch of cayenne pepper. For a fresh touch, experiment with citrus zest. Grating some lemon or orange zest into the dip can brighten the flavor. These small changes can make your dip more exciting. To keep your dip fresh, store it in an airtight container. A glass or plastic container works well. Make sure to cover the dip tightly to prevent air from getting in. This helps keep it creamy and tasty. If you have any leftover dip, scoop it into the container right after serving. This way, it won’t sit out too long and lose its flavor. The dip lasts about 3 to 5 days in the fridge. Always check for changes in smell or color. If it smells sour or looks off, it’s best to throw it away. Another sign of spoilage is if you see any mold. Trust your senses to keep your food safe and tasty! Can I use Greek yogurt substitutes? Yes, you can use regular yogurt if you prefer. However, Greek yogurt is thicker and creamier. It adds a nice texture. You might also try dairy-free yogurt made from almond or coconut. This way, you can keep the flavor rich. What can I serve with this dip? This dip pairs well with many tasty options. You can use fresh fruit like apples or strawberries. Crackers and veggie sticks also work great. You can make a colorful platter for your guests. They will love the variety! How do I make this dip vegan-friendly? To make this dip vegan, swap honey for maple syrup or agave nectar. Use a plant-based yogurt too. This will keep the dip creamy and tasty without any animal products. You won’t lose any flavor. Nutritional benefits of the dip This dip is packed with healthy ingredients. Greek yogurt offers protein and probiotics. Cranberries are rich in antioxidants. Walnuts give healthy fats and a crunchy texture. This dip is not just tasty; it’s nutritious too! Can this dip be made ahead of time? Yes, you can make this dip a day in advance. Just store it in the fridge. The flavors will blend more, making it even tastier. Just remember to add the mint leaves just before serving for freshness! This blog post provides a clear guide to making a creamy Greek yogurt cranberry dip. You learned about the ingredients and step-by-step instructions. The tips and variations offered help you personalize the dip to your taste. Storing it properly ensures you enjoy it longer. Always be mindful of freshness and serving ideas to impress guests. Enjoy creating this delightful dip that adds a tasty touch to any gathering!

Creamy Greek Yogurt Cranberry Dip Tasty and Easy Recipe

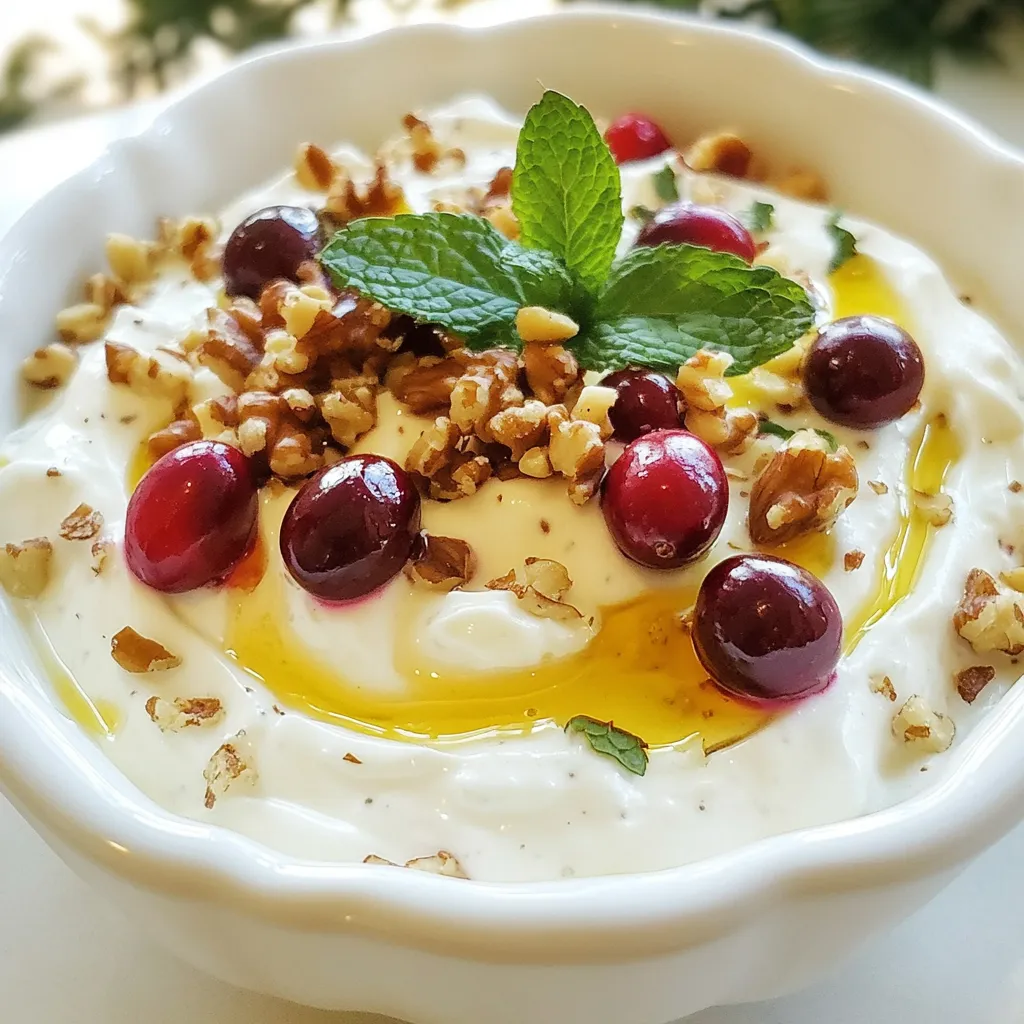
Looking for a delicious and easy dip? My Creamy Greek Yogurt Cranberry Dip is just what you need. With simple

- 1 lb boneless, skinless chicken breast, diced - 1 cup cauliflower florets - 1 cup low-sodium chicken broth - 1/2 cup plain Greek yogurt - 1 tablespoon olive oil - 3 cloves garlic, minced - 1 teaspoon onion powder - 1 teaspoon dried thyme - Salt and pepper to taste - 1 tablespoon nutritional yeast (optional for cheesy flavor) - Additional vegetables like carrots or bell peppers - Herbs for freshness (e.g., parsley or basil) To create my Healthy Low Calorie Creamy Chicken, I focus on fresh and wholesome ingredients. The main star is the boneless, skinless chicken breast. It provides lean protein, which is great for muscle health. I add cauliflower florets to give the dish a creamy texture without heavy cream. The Greek yogurt adds a rich, tangy flavor while keeping the calories low. For seasonings, olive oil and garlic bring depth to the dish. I often use onion powder and dried thyme to enhance the flavor. Salt and pepper are basic but essential to make everything pop. If you want a cheesy flavor without the calories, sprinkle in some nutritional yeast. I love to personalize this recipe. You can toss in extra vegetables like carrots or bell peppers for added nutrition. Fresh herbs like parsley or basil can brighten up the dish. These optional add-ins make the meal even more colorful and tasty. {{ingredient_image_1}} - In a large pot, heat 1 tablespoon of olive oil over medium heat. - Add 3 cloves of minced garlic and sauté for about 1 minute until fragrant. - Next, add 1 pound of diced chicken breast. - Season the chicken with salt, pepper, 1 teaspoon of onion powder, and 1 teaspoon of dried thyme. - Cook for about 5-6 minutes until the chicken is browned and cooked through. - Add 1 cup of cauliflower florets and 1 cup of low-sodium chicken broth to the pot. - Bring the mixture to a boil, then reduce the heat. - Let it simmer for about 10 minutes, until the cauliflower is tender. - Once the cauliflower is cooked, remove the pot from the heat. - Use an immersion blender to blend the mixture until smooth. - If you don't have an immersion blender, transfer it to a regular blender in batches. - Return the smooth mixture to low heat. - Stir in 1/2 cup of plain Greek yogurt and nutritional yeast if you want a cheesy flavor. - Finally, add 1 cup of chopped spinach and cook for an additional 2-3 minutes until the spinach is wilted. - Taste and adjust seasoning if needed, adding more salt or pepper as desired. To achieve a smooth and creamy texture, use an immersion blender. This tool blends the dish right in the pot. It saves time and reduces cleanup. If you don’t have one, a regular blender works well too. Just be careful when transferring hot liquid. You can adjust the dish’s thickness easily. Add more chicken broth for a thinner sauce. If you prefer a thicker texture, mix in more Greek yogurt. This adds creaminess without many calories. Don't shy away from spices and herbs. They can transform your dish. Try adding paprika for a bit of heat. Fresh herbs like parsley or basil can brighten the flavor. Mix and match to find what you enjoy. Balancing seasoning is key. Taste your dish as you cook. Add salt and pepper gradually. This helps you avoid over-seasoning. Remember, you can always add more, but you can’t take it away! Pair your creamy chicken with healthy sides. Whole-grain rice or quinoa works great. Both add fiber and nutrients. You can also serve it with a side of steamed veggies for extra color and crunch. For a beautiful presentation, serve the chicken in individual bowls. Garnish with fresh parsley or a sprinkle of black pepper. This adds a pop of color and makes the dish more appealing. Pro Tips Use Fresh Ingredients: Fresh garlic and spinach will enhance the flavor of the dish significantly compared to dried or frozen options. Adjust Consistency: If you prefer a thicker sauce, add less broth. For a thinner consistency, gradually incorporate more broth until desired. Experiment with Spices: Feel free to add other spices like paprika or cayenne for an extra kick, or switch out the thyme for herbs like rosemary or oregano. Store Leftovers Properly: To keep the creamy chicken fresh, store in an airtight container in the refrigerator for up to 3 days, and reheat gently on the stove. {{image_2}} You can swap chicken for turkey if you like. Turkey has a similar taste and is low in fat. Tofu is a great vegan choice. It absorbs flavors well and adds protein. For a creamy vegan dish, try plant-based yogurt. It gives a rich taste without dairy. Want to add a zing? A splash of lemon juice does wonders. It brightens the dish and brings freshness. If you crave heat, add red pepper flakes. They give a nice kick that many enjoy. You can mix and match flavors to suit your taste. Choosing low-fat yogurt is a smart move. It cuts calories while keeping the creaminess. You can also use less olive oil. Try steaming or baking instead of frying. These methods maintain flavor without adding extra fat. Experiment to find what you like best! To keep your creamy chicken fresh, use airtight containers. Glass containers work well since they seal tight. You can also use plastic containers. Make sure to cool the dish before sealing. This helps avoid moisture build-up. Store it in the fridge right away. You can freeze creamy chicken for later. First, let it cool completely. Then, pour it into freezer-safe bags or containers. Remove as much air as possible. Label with the date before placing it in the freezer. To thaw, move it to the fridge overnight. Reheat it in a pot over low heat. Stir often to ensure even heating. This dish can stay fresh in the fridge for about 3-4 days. If frozen, it lasts about 2-3 months. Look for signs of spoilage, like a sour smell or discoloration. If you see any signs, it’s best to throw it away. Enjoy your creamy chicken while it’s still fresh! Yes, you can. To make this dish dairy-free, replace Greek yogurt with a dairy-free yogurt. Look for options made from coconut or almond. They give a creamy texture and keep the flavor. You can swap cauliflower with broccoli or zucchini. Both vegetables work well and add a nice texture. They also blend smoothly and keep the dish light. To spice things up, add red pepper flakes or chopped jalapeños. You can also mix in hot sauce while cooking. Adjust to your taste for the perfect kick. - Other common user inquiries include asking about meal prep tips and how to store leftovers. For meal prep, you can chop the chicken and veggies ahead of time. Store them in the fridge for easy cooking later. For leftovers, keep them in an airtight container for up to three days. This recipe combines easy ingredients like chicken and cauliflower into a creamy dish. We covered the main steps, from sautéing garlic to blending flavors smoothly. I shared tips to enhance texture and flavor, making your meal even better. You can also explore variations using different proteins or spices. Storing leftovers properly can save you time and reduce waste. Enjoy this recipe and make it your own. Happy cooking!

Healthy Low Calorie Creamy Chicken Delightful Dish

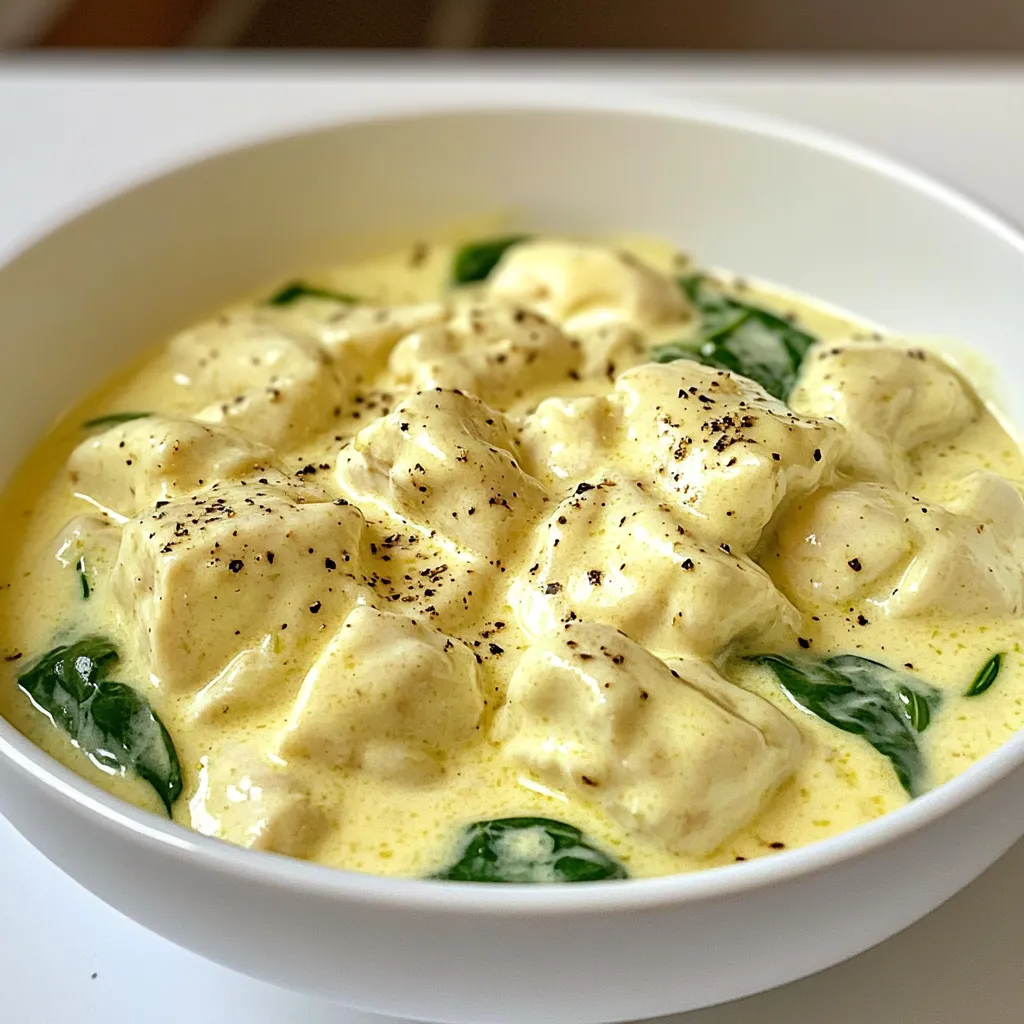
Are you looking for a meal that’s both tasty and healthy? Discover my recipe for Healthy Low Calorie Creamy Chicken

Here are the key components for the Street Corn Chicken Rice Bowl: - 2 cups cooked jasmine or basmati rice - 1 lb boneless, skinless chicken thighs, diced - 1 cup sweet corn (fresh, frozen, or canned) - 1/2 cup red bell pepper, diced - 1/2 cup red onion, finely chopped - 1 avocado, sliced - 1/4 cup cilantro, chopped - 1 lime, juiced - 1 tsp chili powder - 1 tsp cumin - 1/2 tsp garlic powder - 1/4 cup mayonnaise - 1/4 cup crumbled cotija cheese (or feta cheese) - Olive oil - Salt and pepper to taste For optional ingredients, consider these customizations: - Add jalapeños for heat. - Use different cheese like cheddar or mozzarella. - Add black beans for protein and fiber. - Top with green onions for extra crunch. These ingredients make a bowl full of flavor. You can mix and match to make it your own! {{ingredient_image_1}} To make the chicken good, start with a hot skillet. Heat 2 tablespoons of olive oil over medium-high heat. Season your diced chicken thighs with chili powder, cumin, garlic powder, salt, and pepper. This mix gives the chicken a kick. Add the chicken to the skillet. Cook for about 8-10 minutes. Stir often. You want it golden brown. When it's done, take it off the heat and set it aside. For that delicious charred corn flavor, use the same skillet. Add sweet corn and red onion. Sauté for about 3-4 minutes until the corn heats up and gets a bit charred. This step adds a nice depth of flavor. Next, stir in the diced red bell pepper. Cook for another 2 minutes. You'll want these veggies to stay crisp, so don’t overcook them. Once done, remove them from heat. To create a creamy sauce, take a small bowl. Mix 1/4 cup of mayonnaise with the juice of one lime. Stir until it’s smooth. This sauce adds a refreshing zing to the bowl. Don’t forget to taste it! Add a pinch of salt and pepper as needed. Now comes the fun part: assembling the bowl! Start with a generous scoop of cooked rice at the bottom. This is your base. Top it with the sautéed chicken, corn, and bell pepper mixture. For a pop of color, add sliced avocado on top. Drizzle the lime mayo all over. Finish with crumbled cotija cheese and chopped cilantro. This gives it a fresh look and taste. Cooking times may change based on your stove type or the chicken size. For a standard gas stove, chicken thighs cook well in about 8-10 minutes. If your stove is electric, it may take a bit longer. Always check the chicken for a golden color. If you use larger pieces, add a few extra minutes. Make sure the internal temp reaches 165°F for safety. To boost flavor, consider adding more spices. Try smoked paprika or cayenne for heat. You can also mix in some fresh lime zest for brightness. For toppings, crunchy tortilla strips or diced jalapeños can add texture. You can swap the cotija cheese with feta or queso fresco for different tastes. Each addition can make your bowl unique. For a restaurant-style look, layer your bowl with care. Start with rice as a base, then pile on the chicken mixture. Arrange avocado slices neatly on top. Drizzle the lime mayo in a zigzag for flair. Finally, sprinkle cilantro and cheese evenly to make it pop. A colorful presentation will delight your eyes and appetite. Pro Tips Marinate the Chicken: For extra flavor, marinate the diced chicken thighs in lime juice, chili powder, and cumin for at least 30 minutes before cooking. This enhances the taste and tenderness. Use Fresh Corn: If available, use fresh corn for the best flavor and texture. Grilling the corn before adding it to the skillet adds a delightful smoky taste. Customize Your Toppings: Feel free to add your favorite toppings such as diced tomatoes, jalapeños, or sour cream for a personal touch and varied flavors. Make it Veggie-Friendly: Substitute the chicken with grilled zucchini or mushrooms for a delicious vegetarian version while keeping the same spices for flavor. {{image_2}} You can swap chicken for many proteins. Try shrimp or beef for a new taste. Tofu is great for a plant-based option. Pork works well too, adding a savory kick. Each protein gives a unique flavor, enhancing the dish. To make this dish meatless, skip the chicken. Use chickpeas or black beans instead. They add protein and fiber. For the sauce, use vegan mayo or cashew cream. This creates a creamy texture without dairy. You can still enjoy all the vibrant flavors. You can change the spices to fit your taste. Add smoked paprika for a deeper flavor. Try adding fresh herbs like oregano or dill for freshness. You can also use different types of cheese, like queso fresco. Each change brings a new twist to your bowl. You can keep your Street Corn Chicken Rice Bowl in the fridge for up to three days. Ensure it cools before you store it. Use a tight container to keep it fresh and avoid spills. To freeze, wait until the bowl is cool. Separate the chicken and veggies from the rice. Use airtight containers or freezer bags. This helps keep the texture right. You can freeze it for up to three months. When ready to eat, thaw it in the fridge overnight. Reheat your bowl gently to keep all the flavors. Use a microwave or a skillet. If using a microwave, cover it with a damp paper towel. Heat in short bursts, stirring in between. This will avoid drying it out. If using a skillet, add a splash of water and cover. Cook on low heat until warm. Enjoy the great taste! Yes, you can meal prep this dish. Meal prepping saves time and makes meals easy. Start by cooking the rice and chicken in bulk. Store each item separately in airtight containers. Keep the corn and veggies together. This helps avoid sogginess. You can assemble the bowls when you're ready to eat. Just heat up the rice and chicken. Add the toppings fresh for the best taste. If you cannot find cotija cheese, use feta cheese as a great alternative. Feta has a similar texture and taste. You could also try ricotta salata or even queso fresco. For a dairy-free option, use a vegan cheese that crumbles well. Nutritional yeast is another tasty choice, adding a cheesy flavor without dairy. To make this dish milder, reduce the chili powder. You can also skip the garlic powder. Adding sour cream can cool down the heat too. For more spice, add extra chili powder or even fresh jalapeños. You can mix in hot sauce at the end for a kick. Adjust according to your taste buds! The Street Corn Chicken Rice Bowl is a flavorful and fun dish. We covered the key ingredients, step-by-step cooking methods, and tips to enhance your meal. You can easily customize it with different proteins or go meatless. Storing leftovers is simple too. Remember, the secret to great taste lies in the details. Enjoy experimenting with flavors and making this dish your own. Your kitchen can be a place of creativity and delicious meals.

Street Corn Chicken Rice Bowl Flavorful and Easy Meal

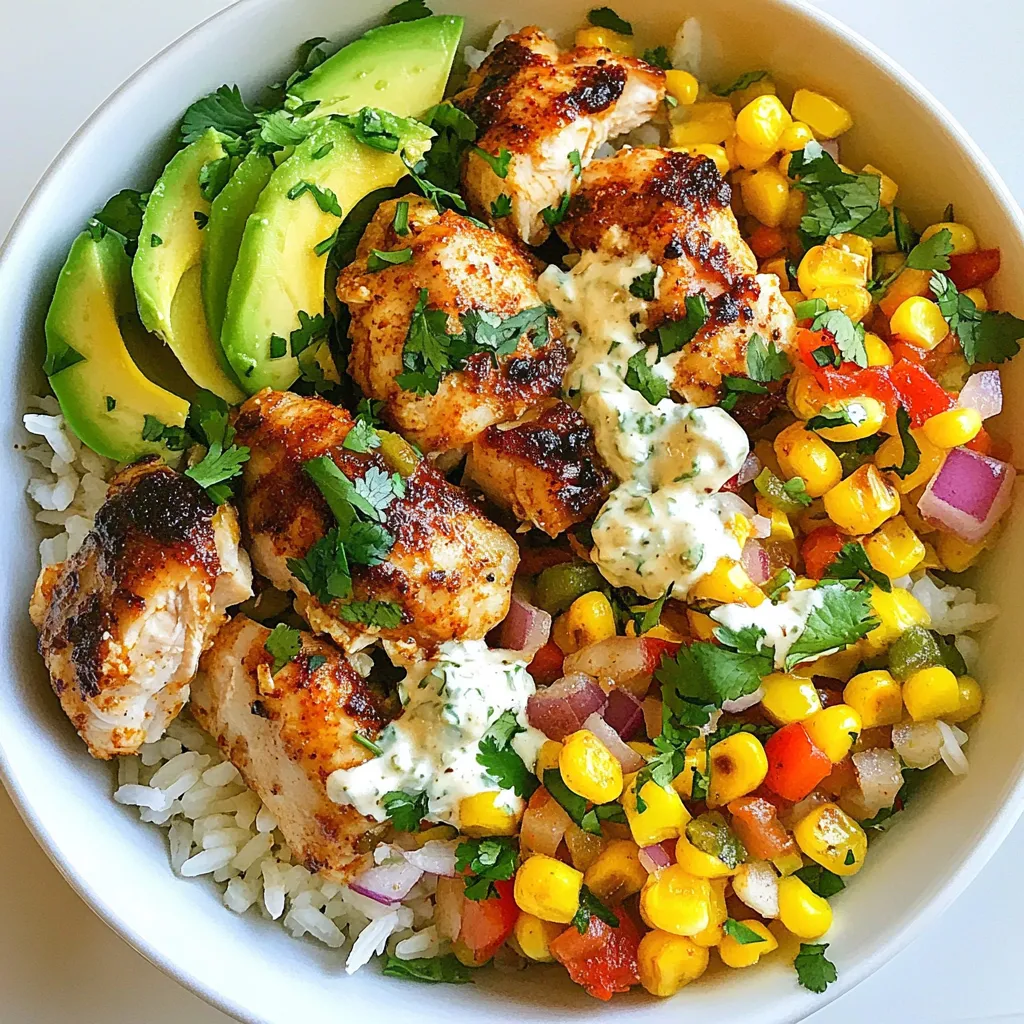
Are you ready for a tasty adventure? This Street Corn Chicken Rice Bowl is your new go-to meal. Packed with

- 2 boneless, skinless chicken breasts - 3/4 cup teriyaki sauce (homemade or store-bought) - 2 cups jasmine rice - 2 cups water - 1 tablespoon olive oil - 1 cup broccoli florets - 1 red bell pepper, sliced - 1 small carrot, julienned - 2 green onions, chopped - Sesame seeds for garnish - Salt and pepper to taste You can change your teriyaki chicken rice bowls to suit your taste. Here are some ideas: - Add snap peas or bell pepper for extra crunch. - Use brown rice for a heartier base. - Try pineapple chunks for sweetness. When you shop for veggies, look for bright colors and firm textures. Here are some quick tips: - For broccoli, choose florets that are dark green and tight. - Pick bell peppers that feel heavy for their size. - Carrots should be crisp and free of soft spots. Fresh produce makes your dish vibrant and tasty. Enjoy the colors and flavors! {{ingredient_image_1}} To start, take the two chicken breasts. Place them in a bowl or a zip-top bag. Pour in the teriyaki sauce until the chicken is fully coated. This step is key for flavor. Let the chicken marinate for at least 30 minutes. If you have time, two hours in the fridge works great too. This lets the chicken soak up all the tasty goodness. Next, rinse your jasmine rice under cold water. Keep rinsing until the water runs clear. This removes extra starch and helps it cook better. In a medium saucepan, add the rinsed rice and two cups of water. Bring this to a boil over medium heat. Once it boils, turn the heat down low. Cover it and let it simmer for 15 minutes. When the time's up, fluff the rice with a fork and keep it covered. Now, it’s time to cook the chicken. Heat a tablespoon of olive oil in a large skillet over medium-high heat. Take the chicken out of the marinade but save the sauce. Place the chicken in the skillet and cook it for about 6-7 minutes on each side. You want it to reach 165°F on a meat thermometer. While the chicken cooks, get your veggies ready. Chop the broccoli, slice the red bell pepper, and julienne the carrot. Once the chicken is cooked, add the reserved teriyaki marinade to the skillet. Toss in the veggies too. Cook everything for another 3-4 minutes. You want the veggies to stay bright and crisp. Slice the chicken into strips and add it back to the skillet. Stir to coat everything in the sauce. Now, you can assemble your rice bowls. Spoon the jasmine rice into bowls and top with the teriyaki chicken and veggies. Finish with chopped green onions and a sprinkle of sesame seeds. Enjoy your yummy meal! To boost flavor, marinate the chicken. Use 3/4 cup of teriyaki sauce. Let the chicken soak for at least 30 minutes. If you have time, marinate for up to 2 hours. This helps the chicken absorb the sauce well. For a homemade twist, mix soy sauce, honey, garlic, and ginger. It tastes fresh and bright. Cook the chicken over medium-high heat. Heat olive oil in your skillet first. Make sure to remove excess marinade before cooking. This prevents burning. Cook each side for 6-7 minutes until it reaches 165°F. Use a meat thermometer for safety. Let the chicken rest for a few minutes before slicing. This keeps it juicy. You can add more veggies for color and nutrition. Try snap peas, bell peppers, or zucchini. Just chop them into bite-sized pieces. Stir-fry with the broccoli and carrots for 3-4 minutes. This keeps them crispy. You can also add spinach or bok choy at the end. They wilt nicely and add flavor. Pro Tips Marinating Time: Allow the chicken to marinate for at least 30 minutes, but for optimal flavor, try to marinate it for up to 2 hours in the refrigerator. Rice Rinsing: Rinse the jasmine rice thoroughly under cold water until the water runs clear to remove excess starch, resulting in fluffier rice. Cooking Temperature: Ensure the skillet is hot enough before adding the chicken to get a nice sear, which locks in moisture and flavor. Vegetable Crunch: Stir-fry the vegetables until they are tender-crisp to retain their vibrant color and nutritional value. {{image_2}} If you want a meat-free meal, try vegetarian teriyaki rice bowls. Replace the chicken with tofu. Tofu absorbs flavors well. Cut it into cubes and marinate it in teriyaki sauce. Then, cook it in the skillet until golden. Add the same veggies, like broccoli and bell pepper. This dish is healthy and still very tasty. You can switch to brown rice for a heartier option. Brown rice has more fiber than jasmine rice. It takes longer to cook, so adjust your time. Rinse it well before cooking. Use two cups of water for every cup of rice. Cook it for about 40-45 minutes until soft. The nutty flavor of brown rice pairs well with teriyaki chicken. Feel free to mix things up with different proteins. Shrimp cooks fast and adds a nice flavor. Use large shrimp and sauté them until pink. Beef works great too. Use thin slices of flank steak and marinate them. Cook them quickly to keep them tender. Each protein brings its unique taste to the dish. Choose what you love best! To store your teriyaki chicken rice bowls, let them cool first. Use an airtight container to keep them fresh. You can place the chicken and veggies on top of the rice in the container. This helps keep the rice from getting soggy. Store them in the fridge for up to three days. When you're ready to eat, you can reheat the bowls. Use the microwave for quick heating. Place the bowl in the microwave and cover it with a damp paper towel. Heat for 1-2 minutes, stirring halfway through. This helps heat the food evenly. You can also reheat in a skillet over low heat. Add a splash of water to keep the rice moist. If you want to freeze your teriyaki chicken rice bowls, make sure they cool completely first. Use freezer-safe containers or bags. Freeze them for up to three months. When you’re ready to enjoy, thaw in the fridge overnight. Then, reheat in the microwave or skillet as mentioned above. This way, you’ll have a tasty meal ready for busy days! The best teriyaki sauce is one that balances sweet and salty. You can choose homemade or store-bought sauces. Look for options with natural ingredients. This ensures better flavor and fewer additives. If you want to try a store-bought sauce, brands with less sugar are often best. You can also explore different flavors, like garlic or ginger, for variety. Yes, you can make teriyaki chicken rice bowls ahead of time. Marinate the chicken and store it in the fridge. Cook the rice and veggies, then keep them in separate containers. This way, you can mix them when ready to serve. The flavors will develop, making your meal even tastier the next day. Just reheat everything before serving. Making homemade teriyaki sauce is easy! Here’s a simple recipe: - 1/2 cup soy sauce - 1/4 cup honey or brown sugar - 1/4 cup rice vinegar - 1 tablespoon sesame oil - 1 garlic clove, minced - 1 teaspoon fresh ginger, grated Mix all ingredients in a small pot over low heat. Stir until the sugar dissolves. Let it cool before using. You can adjust the sweetness or saltiness to your taste. Teriyaki chicken rice bowls pair well with many sides. Here are some great options: - Steamed edamame - Pickled vegetables - Seaweed salad - Sliced cucumbers with rice vinegar - Miso soup These sides add flavor and texture, making your meal more exciting. You can even try different combinations to find your favorite! You learned how to make tasty teriyaki chicken rice bowls. We covered key ingredients, tips for fresh produce, and step-by-step cooking. I shared ideas for variations, like making it vegetarian or using different proteins. You can also store and reheat your food easily. In summary, this dish is flexible and fun to make. Enjoy experimenting with flavors and ingredients. With practice, your meals will impress everyone!

Teriyaki Chicken Rice Bowls Quick and Easy Recipe

Are you ready to whip up a tasty meal in no time? My Teriyaki Chicken Rice Bowls are quick, simple,

- 1 pound ziti pasta - 1 pound ground beef or turkey - 2 cans (15 ounces each) marinara sauce - 1 can (14 ounces) diced tomatoes, drained For Million Dollar Baked Ziti, the main ingredients create a rich and hearty dish. The ziti pasta forms the base of this meal. You can use either ground beef or turkey for protein. The marinara sauce and diced tomatoes add depth and flavor. - 1 cup ricotta cheese - 1 cup cottage cheese - 2 cups shredded mozzarella cheese - 1/2 cup grated Parmesan cheese Cheese is a star in this dish. I blend ricotta and cottage cheese for creaminess. Mozzarella adds stretch, while Parmesan gives a salty finish. Layer these cheeses for the best taste and texture. - 1 medium onion, chopped - 3 cloves garlic, minced - 1 teaspoon Italian seasoning - 1 teaspoon red pepper flakes (optional) - Salt and pepper to taste Flavor is key in this recipe. I use fresh onion and garlic for a strong base. Italian seasoning brings warmth, while red pepper flakes add a hint of heat. Don’t forget to season with salt and pepper to enhance all the flavors. {{ingredient_image_1}} First, preheat your oven to 375°F (190°C). This step warms the oven for even cooking. Next, take 1 pound of ziti pasta. Cook it according to the package instructions until it is al dente. This means it should be firm but not hard. After cooking, drain the pasta and set it aside. Now, let’s make the meat sauce. In a large skillet, heat 2 tablespoons of olive oil over medium heat. Once the oil is hot, add 1 chopped onion and 3 minced garlic cloves. Sauté for about 3 to 4 minutes until the onion is soft. Next, add 1 pound of ground beef or turkey. Cook it until it is brown. Break the meat apart as it cooks. If there is excess fat, drain it. Stir in 2 cans of marinara sauce and 1 can of drained diced tomatoes. Add 1 teaspoon of Italian seasoning, red pepper flakes if you want spice, and salt and pepper to taste. Let this simmer for about 5 to 7 minutes. In a separate bowl, mix 1 cup of ricotta cheese, 1 cup of cottage cheese, and half of the 2 cups of shredded mozzarella cheese. Season this cheese mix with a bit of salt and pepper. In a large mixing bowl, combine the cooked ziti pasta with the meat sauce. Make sure the pasta is well coated. Now, grab a greased 9x13-inch baking dish. Spread half of the ziti mixture evenly at the bottom. Dollop spoonfuls of the cheese mixture on top. Layer the remaining ziti mixture over it. Finally, sprinkle the top with the rest of the mozzarella and all 1/2 cup of grated Parmesan cheese. Cover with aluminum foil and bake for 20 minutes. Remove the foil and bake for an additional 15 to 20 minutes until it is bubbly and golden on top. Let it cool slightly before serving. Don’t forget to garnish with fresh basil leaves for a nice touch! To make sure your ziti pasta is al dente, cook it for about two minutes less than the package says. This way, the pasta won’t get mushy when you bake it later. After draining, toss it with a splash of olive oil to prevent sticking. For that bubbly golden top, cover the dish with foil for the first part of baking. This traps steam and helps everything cook evenly. When you remove the foil, the top will brown nicely. If you want an extra crispy layer, broil it for a few minutes at the end. Just keep a close eye on it! To make your meal even better, serve Million Dollar Baked Ziti with a side salad. A fresh green salad adds a nice crunch. Garlic bread is another great side. It soaks up the sauce perfectly. Top each serving with fresh basil. The bright, herbal taste contrasts well with the rich flavors of the ziti. You can also sprinkle some extra Parmesan cheese on top for a cheesy finish. For serving, use a large, shallow dish. This way, everyone can see the layers of cheese and sauce. A clear glass dish looks great, too. It shows off the colors and textures. To enhance the visuals, add more fresh basil leaves on top. A sprinkle of red pepper flakes can also add a pop of color. Serve with a slice of lemon on the side. It adds a bright touch and a hint of flavor when squeezed over the dish. Pro Tips Use Fresh Ingredients: Fresh herbs and quality cheese can elevate the flavors of your baked ziti significantly. Consider using fresh basil or oregano instead of dried. Mix Cheeses for Flavor: Combining different types of cheese, like mozzarella and provolone, can enhance the creaminess and flavor profile of your dish. Layering is Key: For a more even distribution of flavors, layer the pasta and cheese mixture instead of mixing them all together. This will ensure every bite is delicious! Let it Rest: Allowing the baked ziti to rest for about 10 minutes after coming out of the oven will help it set, making it easier to serve without falling apart. {{image_2}} You can switch up the meat in a baked ziti. Instead of ground beef, use ground turkey or sausage. This change gives a lighter taste. Ground turkey keeps the dish lean but still tasty. Sausage adds a spicy kick, perfect for flavor lovers. If you want to skip meat, try a vegetarian option. Use mushrooms or lentils as a base. They add texture and depth. You can also load up on veggies like spinach or zucchini. This keeps the dish hearty and wholesome. Cheese plays a big role in baked ziti. While ricotta and mozzarella are classic, feel free to mix it up. Try adding provolone or gouda for a unique taste. These cheeses melt well and add creaminess. For those avoiding dairy, there are great alternatives. Look for cashew or almond-based cheeses. These options taste great and keep the dish creamy. They can be a fantastic choice for a healthier version of your baked ziti. While marinara sauce is a staple, homemade options shine. You can make your own sauce with fresh tomatoes, garlic, and herbs. This adds a personal touch and fresh flavor to the dish. Don’t be afraid to experiment with different sauces. Try a creamy alfredo or a spicy arrabbiata for a twist. Each sauce brings its own flavor, making the dish feel new each time. To keep your Million Dollar Baked Ziti fresh, cool it first. Place it in a shallow dish for faster cooling. Cover it tightly with plastic wrap or aluminum foil. You can also use airtight containers. Label the containers with the date. This way, you know when to use them. You can freeze baked ziti for later. After it cools, cut it into portions. Wrap each piece tightly in plastic wrap. Then, place the wrapped portions in a freezer bag. Remove as much air as you can. For best taste, use it within three months. When you're ready to eat, thaw it overnight in the fridge. To reheat without drying out, use the oven. Preheat it to 350°F (175°C). Place the ziti in a baking dish. Add a splash of marinara sauce for moisture. Cover with foil and heat for about 20 minutes. If you prefer the microwave, use a microwave-safe dish. Heat in short bursts, stirring in between. Enjoy your tasty meal! You can use cottage cheese instead of ricotta. It gives a similar texture. Cream cheese works too, but you must soften it first. Another option is Greek yogurt. It adds creaminess and a little tang. If you want a vegan choice, use silken tofu blended until smooth. Each of these options will keep your baked ziti creamy and delicious. Yes, you can prepare it ahead. Cook the pasta and meat sauce, then mix them. Layer the pasta and cheese in a dish. Cover it tightly with foil and store it in the fridge. You can make it one day in advance. Just bake it when you’re ready to eat. If you want to freeze it, let it cool first. Wrap it well and freeze for up to three months. Baked ziti lasts about 3 to 5 days in the fridge. Make sure you store it in an airtight container to keep it fresh. If you see any signs of spoilage, like a funny smell, throw it away. To enjoy it later, just reheat it in the oven or microwave. Million Dollar Baked Ziti is a tasty and fun dish to make. We covered the main ingredients like ziti pasta, ground meat, and cheese. I shared tips for cooking the perfect sauce and achieving that bubbly cheese topping. You can even switch up the proteins and cheeses to suit your taste. Remember to store leftovers properly so they stay fresh. This dish is great for gatherings or a cozy family meal. With these easy steps, you’ll impress anyone who tries it! Enjoy your cooking adventure!

Million Dollar Baked Ziti Flavorful Family Feast

If you’re craving a hearty dish that’s sure to please everyone, you’re in the right spot! Million Dollar Baked Ziti

Older posts
Newer posts
← Previous Page1 … Page111 Page112 Page113 … Page115 Next →

dsad

© 2025 flavorsprint • Built with GeneratePress

Our Policies

  • Copyright Policy
  • Cookie Policy
  • GDPR Policy
  • Privacy Policy
  • Disclaimer
  • Terms Of Use

More Information

  • Home
  • About
  • Contact
  • Appetizers
  • Dessert
  • Dinner
  • Drinks
©2025, flavorsprint About Back To Top