Skip to content
DisclaimerTerms Of UseGDPR PolicyCookie Policy

flavorsprint

  • Home
  • Drinks
  • Appetizers
  • Dinner
  • Dessert
  • About
  • Contact
  • Privacy Policy
DisclaimerTerms Of UseGDPR PolicyCookie Policy

Lillian

- 4 medium zucchini, sliced - 1 cup marinara sauce - 1 cup mozzarella cheese, shredded - 1/2 cup pepperoni slices (or veggie pepperoni for a vegetarian option) - 1/2 cup bell peppers, diced (red and green) - 1/4 cup onion, finely chopped - 2 cloves garlic, minced - 1 teaspoon dried oregano - 1 teaspoon dried basil - Salt and pepper to taste - 1/2 cup Parmesan cheese, grated - Olive oil for greasing the baking dish - Fresh basil or parsley - 9x13 inch baking dish - Skillet - Aluminum foil - Knife and cutting board To make Zucchini Pizza Casserole, you need fresh ingredients. Choose medium zucchinis that feel firm to the touch. Slice them thin for easy cooking and layering. Marinara sauce adds rich flavor. I love using a good quality brand. Shredded mozzarella gives that gooey cheese pull we all love. For protein, I often use pepperoni. You can go for veggie pepperoni if you want a meat-free option. Bell peppers add color and crunch. A mix of red and green looks great. Onions and garlic bring an aromatic base. I chop onions finely so they blend well. Fresh herbs like oregano and basil boost the flavor. Don't forget salt and pepper for seasoning! Parmesan cheese on top gives a nice, crispy finish. Lastly, olive oil helps prevent sticking. Having these ingredients ready makes the cooking process smooth and fun! {{ingredient_image_1}} - Preheat oven to 350°F (175°C). - Grease the baking dish with olive oil. First, I set the oven to 350°F. This heat will cook the casserole just right. I then take some olive oil and grease a 9x13-inch baking dish. This step helps the casserole not to stick. - Sauté garlic and onion in a skillet until fragrant. - Add sliced zucchini and season with herbs. Next, I heat some olive oil in a skillet. I add minced garlic and chopped onion. I sauté them until they smell great, about 3-4 minutes. After that, I mix in the sliced zucchini. I season this with salt, pepper, oregano, and basil. I let them cook for about 5 minutes until they soften. - Spread marinara sauce, zucchini mixture, cheese, and pepperoni in layers. - Finish with Parmesan cheese on top. In the greased dish, I spread half of the marinara sauce first. Then, I layer half of the sautéed zucchini mixture on top. I sprinkle half of the mozzarella cheese over the zucchini. Next, I add half of the pepperoni slices and diced bell peppers. I repeat this layering with the rest of the marinara, zucchini, cheese, and pepperoni. Finally, I top it all off with a generous sprinkle of grated Parmesan cheese. - Cover with aluminum foil and bake for 25 minutes. - Remove foil and bake for an additional 15 minutes. I cover the dish with aluminum foil and place it in the oven. I bake it for 25 minutes. After that, I remove the foil and bake for another 15 minutes. This step makes the cheese bubbly and golden brown. To get the best taste from your Zucchini Pizza Casserole, you need to sauté your zucchini right. Start with medium heat. Use a little olive oil in your skillet. Cook the zucchini for just five minutes. This will help keep it from getting too soft. If you cook it too long, it can make your casserole watery. For seasoning, I love using dried oregano and dried basil. These herbs give great flavor without much effort. You can also add garlic powder or crushed red pepper for a bit of kick. Always taste as you go. This is key to making your casserole delicious. When you serve your Zucchini Pizza Casserole, think about sides that add freshness. A simple side salad with greens and a light dressing works well. You can also serve some garlic bread to soak up the sauce. For a nice touch, garnish each slice with fresh basil or parsley. This adds color and a burst of flavor. You can also sprinkle a little extra cheese on top right before serving for a melty finish. Getting kids to eat their veggies can be tough, but this casserole makes it easy. You can tweak the flavors by using less seasoning. Some kids prefer a milder taste, so adjust to what they like. Consider swapping out the pepperoni for diced chicken or turkey. You can also add their favorite toppings, like mushrooms or olives. Letting kids help with toppings can make them excited to eat their creation! Pro Tips Use Fresh Zucchini: Fresh zucchini has a firmer texture and better flavor. Look for ones that are firm and free of blemishes. Layering Is Key: Ensure even cooking by layering ingredients properly. Start with sauce, then zucchini, cheese, and toppings to create a balanced flavor throughout. Let It Rest: Allow the casserole to cool for a few minutes after baking to help it set. This makes slicing easier and prevents it from falling apart. Customize Your Toppings: Feel free to add other veggies or proteins based on your preference, such as mushrooms, olives, or cooked sausage for added flavor. {{image_2}} You can easily make this dish vegetarian. Swap the pepperoni for veggie pepperoni or omit it entirely. You can add extra veggies for flavor. Try mushrooms, spinach, or zucchini. They all work well. Bell peppers add nice sweetness, while onions give depth. To cut carbs, use fewer zucchinis. Instead, add more cheese for richness. You can replace marinara with a low-carb sauce. Look for options with less sugar. This keeps the flavors strong without the extra carbs. You will still enjoy a tasty meal. To make this dish gluten-free, check your marinara sauce. Ensure it does not have gluten. Most sauces are safe, but it's best to check. You can use gluten-free bread crumbs on top for crunch. This adds texture without any gluten. To store your Zucchini Pizza Casserole, let it cool first. Once cool, cover it tightly with plastic wrap or transfer it to an airtight container. This helps keep it fresh and prevents odors from mixing in the fridge. Make sure to eat it within three to four days for the best taste. If you want to freeze the casserole, slice it into portions. Wrap each piece in plastic wrap, then place them in a freezer-safe bag or container. Label the bag with the date. This way, you’ll know when you made it. To reheat, thaw it overnight in the fridge. Then, bake it at 350°F (175°C) until hot, about 20-25 minutes. In the fridge, the Zucchini Pizza Casserole lasts about three to four days. If you freeze it, it can last up to three months. Just remember, the sooner you eat it, the better it will taste! Yes, you can swap in many veggies. Try adding mushrooms for a meaty texture. Spinach or kale can add nutrients and flavor. You can even use cauliflower rice for a low-carb option. Just chop them small so they cook evenly. Mix and match based on your taste. Look for the cheese to be bubbling and golden. The edges should be slightly crispy. You can also check if the zucchini is tender by poking it with a fork. If it goes in easily, your casserole is ready. Yes, you can make this dish in advance. Just prepare it up to the baking step. Cover it and store it in the fridge. When you're ready, bake it straight from the fridge. You may need to add a few extra minutes to the cooking time. This way, you save time on busy days! Zucchini Pizza Casserole combines fresh veggies, cheese, and bold flavors for a great meal. You learned the needed ingredients, cooking steps, and tips for success. Whether you want a vegetarian twist or a low-carb option, there are many ways to make it your own. This dish is tasty and easy to prepare, making it perfect for families and hungry eaters. Enjoy your baking journey and delight in serving this delicious casserole. It’s sure to be a hit at your table!

Zucchini Pizza Casserole Flavorful and Easy Recipe

Are you looking for a fun and easy meal idea? Try making a Zucchini Pizza Casserole! This dish packs all

For Coconut Lime Chicken, you need these simple ingredients: - 4 boneless, skinless chicken breasts - 1 cup coconut milk - Zest and juice of 2 limes - 2 tablespoons honey - 3 cloves garlic, minced - 1 teaspoon ginger, grated - 1 tablespoon olive oil - Salt and pepper to taste - Fresh cilantro, for garnish - Lime wedges, for serving These ingredients create a tasty dish. Each one adds a special flavor. If you need to swap some items, here are a few ideas: - Chicken: You can use boneless thighs instead of breasts. - Coconut milk: Almond or soy milk works, but it will change the taste. - Honey: Maple syrup is a great swap. It will add a different sweetness. - Ginger: If you don’t have fresh ginger, use ground ginger. Use less, about 1/4 teaspoon. - Cilantro: Parsley is a good alternative if you dislike cilantro. These options can help you use what you have at home. Coconut Lime Chicken is not only delicious, but it can also be healthy. Here’s what you can expect per serving: - Calories: 290 - Protein: 30g - Fat: 15g - Carbohydrates: 10g - Fiber: 1g - Sugar: 5g This dish gives you good protein and healthy fats. It's a great choice for dinner! {{ingredient_image_1}} Start by mixing the marinade. In a bowl, whisk together these ingredients: - 1 cup coconut milk - Zest and juice of 2 limes - 2 tablespoons honey - 3 cloves garlic, minced - 1 teaspoon ginger, grated - Salt and pepper to taste Make sure everything blends well. This mix adds rich flavor to the chicken. Once mixed, place the chicken breasts in a large resealable bag or a shallow dish. Pour the marinade over the chicken, ensuring it coats each piece. Seal the bag or cover the dish. Refrigerate for at least 1 hour. For the best taste, let it sit overnight. When you're ready to cook, preheat your grill or a large skillet over medium-high heat. If using a skillet, add 1 tablespoon of olive oil. Remove the chicken from the marinade. Let any extra marinade drip off. Save the marinade for later. Grill the chicken for 6-7 minutes on each side. Check the internal temperature; it should be 165°F (75°C). The chicken should look golden and cooked through. While the chicken cooks, take the reserved marinade. Pour it into a saucepan and bring it to a boil over medium heat. Let it simmer for about 5 minutes until it thickens. This will create a tasty sauce to drizzle over the chicken. Once the chicken is done, serve it hot. Drizzle the thickened marinade over the chicken for added flavor. Garnish with fresh cilantro and lime wedges on the side. This dish pairs well with rice or a fresh salad. Enjoy the bright, zesty taste of coconut lime chicken! To get the best taste from your Coconut Lime Chicken, marinate the chicken longer. I recommend at least one hour. If you can, let it sit overnight. This gives the chicken time to soak in all the yummy flavors from the coconut milk, lime, and spices. The lime zest adds a bright touch. Don't skip this step! Grilling or pan-searing helps lock in the juices. Use a meat thermometer to check the chicken's internal temp. Aim for 165°F (75°C) for safety and juicy meat. Cooking time can vary based on the thickness of your chicken breasts. Thinner pieces will cook faster, about 5-6 minutes per side. Thicker ones may need a bit more time, around 7-8 minutes per side. Always check for doneness with a thermometer. If you use a grill, maintain a medium-high heat. For stovetop cooking, use medium heat and add olive oil to avoid sticking. If you see the chicken getting too dark, lower the heat slightly. Pair your Coconut Lime Chicken with fresh, bright sides. Here are a few great options: - Coconut Rice: This adds a creamy texture and complements the marinade. - Steamed Broccoli: The crunch balances the softness of the chicken. - Mango Salsa: This adds sweetness and a tropical twist. - Quinoa Salad: Packed with nutrients, it’s a healthy choice. - Grilled Corn: This brings a sweet, charred flavor. These sides enhance the meal and make it feel special. Enjoy mixing and matching! Pro Tips Marinate Longer for Depth: Allowing the chicken to marinate overnight will intensify the flavors, making every bite more delicious. Check Doneness with a Thermometer: To ensure perfect cooking, use a meat thermometer to check that the internal temperature reaches 165°F (75°C). Balance Sweetness with Acidity: Adjust the honey in the marinade according to your taste; if you prefer less sweetness, add more lime juice for a tangy kick. Serve with a Side: Pair this dish with a fresh salad or coconut rice to complement the flavors and create a complete meal. {{image_2}} You can add vegetables to your Coconut Lime Chicken for extra flavor and nutrition. Try bell peppers, zucchini, or snap peas. Toss the veggies in the marinade with the chicken. They will soak up the tasty coconut and lime flavors. Cook them along with the chicken, adding them to the grill or skillet. This way, you create a colorful dish that's both healthy and filling. You can cook Coconut Lime Chicken on the grill or in a skillet. Grilling gives a nice smoky flavor and beautiful grill marks. It adds a fun outdoor vibe to your meal. If you use a skillet, you can control the heat better and avoid flare-ups. Both methods work well. Choose what fits your kitchen setup or mood. If you like heat, make a spicy version of Coconut Lime Chicken. Add red pepper flakes or diced jalapeños to the marinade. This will give your dish a kick. You can also mix in some sriracha for extra flavor. The heat pairs well with the sweet coconut and tangy lime. It creates a balance that excites your taste buds. After you enjoy your Coconut Lime Chicken, store any leftovers properly. Let the chicken cool down first. Then, place it in an airtight container. This keeps it fresh. You can store it in the fridge for up to 3 days. Make sure to label the container with the date. This helps you remember when you made it. When you are ready to eat your leftovers, reheating is easy. You can use the microwave or the stove. If you use the microwave, put the chicken on a microwave-safe plate. Heat it in 30-second bursts until hot. If you prefer the stove, add a little olive oil to a pan. Heat the chicken on medium until warm. This helps keep it juicy and tasty. Freezing Coconut Lime Chicken is a great way to save it for later. First, let the chicken cool completely. Then, wrap each piece tightly in plastic wrap. Place the wrapped chicken in a freezer bag. You can store it in the freezer for up to 3 months. When you are ready to eat, thaw the chicken in the fridge overnight. Then, reheat it as mentioned above. Enjoy your delicious meal again! You can serve Coconut Lime Chicken with many tasty sides. Here are my favorites: - Steamed rice for a creamy base. - Quinoa for a healthy twist. - Grilled vegetables for added color. - A fresh salad to balance the meal. These sides enhance the chicken’s flavor and make a complete meal. Yes, you can use bone-in chicken. Just adjust the cooking time. Bone-in chicken takes longer to cook than boneless. Grill it for about 10-12 minutes on each side. Always check the internal temperature to ensure it reaches 165°F (75°C). This way, you keep the chicken juicy and full of flavor. To check if the chicken is done, use a meat thermometer. Insert it into the thickest part of the chicken. If it reads 165°F (75°C), it is fully cooked. Another way to check is by cutting the chicken. The juices should run clear, with no pink meat inside. This ensures you have safe and tasty chicken. In this blog post, we explored how to make Coconut Lime Chicken. We covered ingredients, substitutions, and even nutritional facts. The step-by-step instructions guide you from marinade to serving. I shared tips for more flavor and cooking adjustments. You can also try fun variations, like adding veggies or extra spice. Finally, I explained how to store and reheat leftovers. Enjoy cooking and savoring this flavorful dish!

Coconut Lime Chicken Flavorful and Easy Recipe Guide

Craving a zesty and tropical dish? Try my Coconut Lime Chicken! This recipe is flavorful, easy to make, and perfect

- 20 potstickers (homemade or store-bought) - 6 cups chicken or vegetable broth - 2 tablespoons sesame oil - 3 green onions, chopped - 2 cloves garlic, minced - 1 inch ginger, grated - 2 cups bok choy, chopped - 1 cup mushrooms, sliced (shiitake or button) - 1 cup carrots, julienned - 3 tablespoons soy sauce (low sodium) - 1 tablespoon rice vinegar - Fresh cilantro for garnish - Chili oil (optional, for heat) - Salt and pepper to taste In this soup, potstickers are the star. You can use store-bought or make them at home. The broth serves as a base, giving your soup rich flavor. I prefer using chicken broth, but vegetable broth works well too. Aromatics like garlic, ginger, and green onions add depth. They create a warm and inviting scent as you cook. The vegetables bring freshness and crunch. Bok choy gives it a nice green touch. Mushrooms add umami, while carrots bring sweetness. For seasoning, I recommend low-sodium soy sauce. It keeps the salt levels in check. Rice vinegar adds a tangy kick. Fresh cilantro brightens the soup. If you like heat, drizzle chili oil on top. This simple list of ingredients creates a comforting bowl of potsticker soup. Each component plays a role, making every spoonful delightful. {{ingredient_image_1}} To start, heat 2 tablespoons of sesame oil in a large pot over medium heat. Next, add 3 chopped green onions, 2 minced garlic cloves, and 1 inch of grated ginger. Sauté these for about 2 minutes. The smell will be amazing! This step brings out the flavors. It sets a good base for your soup. Now it's time to add some color! Toss in 1 cup of sliced mushrooms and 1 cup of julienned carrots. Cook these for about 3 to 4 minutes. You want the veggies to soften a bit. They will add nutrition and taste to your soup. Next, pour in 6 cups of chicken or vegetable broth. Bring everything to a simmer. This will take just a few minutes. Once it's simmering, add 2 cups of chopped bok choy and your 20 potstickers. Gently stir to mix. Let this cook for 5 to 7 minutes. The potstickers should be heated through. Finish by stirring in 3 tablespoons of low-sodium soy sauce and 1 tablespoon of rice vinegar. Season with salt and pepper to your liking. Your soup is ready to serve! When making potsticker soup, the broth is key. You can use homemade or store-bought broth. Homemade broth has a rich flavor and can be made from scraps. It takes time but is worth it. If you use store-bought, choose low-sodium options. This helps control the salt in your soup. To keep potstickers intact, handle them gently. Add them to the broth once it simmers. Avoid stirring too hard; this could break them. Let them cook for about five to seven minutes. This warms them up without losing shape. You can enhance the flavor of your potsticker soup easily. Try adding a pinch of red pepper flakes for heat. Fresh herbs like basil or mint also add a nice touch. If you want richer flavor, add a teaspoon of hoisin sauce. This sweet sauce pairs well with the savory broth. You can also toss in a splash of fish sauce for depth. Pro Tips Make Your Own Broth: For an extra depth of flavor, consider making your own broth using chicken or vegetable scraps, herbs, and spices. Cooking Potstickers: If using frozen potstickers, do not thaw them before adding to the soup; they will cook perfectly while heating through in the broth. Veggie Variations: Feel free to customize the soup by adding other vegetables like bell peppers, snap peas, or spinach for added nutrition and color. Spice it Up: Adjust the heat level by adding more chili oil or incorporating fresh sliced chilies into the soup for a spicy kick. {{image_2}} You can change the protein in this soup to suit your taste. If you want a lighter option, use tofu. Firm tofu works best. Just cut it into small cubes and add it when you add the potstickers. If you prefer meat, try ground pork or chicken. Cook the meat in the pot before adding the broth. This adds a nice depth of flavor. You can also mix proteins. For example, use half chicken and half mushrooms for a tasty twist. If you want to make this soup vegetarian or vegan, it's easy to swap ingredients. Use vegetable broth instead of chicken broth. Replace potstickers with vegetable ones if you can find them. Make sure all your sauces are vegan. For soy sauce, look for a brand that is labeled vegan. You can also add more veggies, like bell peppers or snow peas, for added nutrition and flavor. If you like heat, you can spice up your potsticker soup. Add chili oil to the broth for a nice kick. Start with one tablespoon and taste. You can always add more if needed. You can also use fresh chili peppers. Slice them thin and add them while cooking the vegetables. This gives a fresh, spicy flavor. Adjust the heat to your liking. Enjoy your soup the way you like it! Store your potsticker soup in an airtight container. Let it cool before sealing. This helps keep the flavors fresh. You can refrigerate the soup for up to three days. If you want to keep it longer, freeze it instead. To freeze, pour the soup into freezer-safe bags. Remove as much air as you can before sealing. When you are ready to eat the leftovers, reheat the soup gently. Use a pot on low heat. Stir often to avoid sticking. This will keep the potstickers from breaking apart. You can also use the microwave. Heat in short intervals, stirring each time. This helps heat it evenly. The soup tastes best when fresh, but it lasts well. In the fridge, consume it within three days. If frozen, it will stay good for about two months. After that, the taste may fade. Always check for off smells or colors before eating. Enjoy your comforting bowl of soup! Yes, you can make potstickers from scratch! First, mix flour and water to create a dough. Then, roll it out thin and cut it into circles. For the filling, combine ground meat or veggies with spices. Place a spoonful of the filling in each circle. Fold and seal the edges tightly. Finally, pan-fry and steam them for a crispy outside and juicy inside. Making potstickers is fun and gives you a fresh taste! If you can't find bok choy, try using other greens. Napa cabbage or Swiss chard works well. You can also use spinach or kale for a different flavor. Just chop them into small pieces like bok choy. Remember that cooking time might change based on the green you choose. Enjoy experimenting with your soup! To make this soup gluten-free, use gluten-free soy sauce. Check the broth too, as some contain gluten. You can also find gluten-free potstickers in stores. If you're making them from scratch, use gluten-free flour for the dough. This way, you can enjoy the soup without worry! This soup is simple and fun to make. You need potstickers, flavor-packed broth, and fresh veggies. Sauté your aromatics and cook the vegetables first. Then, bring it all together for a warm bowl of goodness. Remember, you can adapt this recipe with different proteins and spice levels. Store leftovers properly so they stay fresh. Enjoy the delicious journey of making your own potsticker soup!

Homemade Potsticker Soup Comforting and Simple Recipe

Looking for a comforting soup that’s easy to make? Try my Homemade Potsticker Soup! This dish is perfect for busy

- 12 oz rigatoni pasta - 2 large zucchinis, diced - 1 lb Italian sausage (mild or spicy) - 2 cups cherry tomatoes, halved - 3 cloves garlic, minced - 1 teaspoon red pepper flakes (optional) - 1 tablespoon olive oil - 1 teaspoon dried oregano - Salt and pepper to taste - Fresh basil leaves for garnish - Grated Parmesan cheese for serving Each ingredient plays a key role in this dish. The rigatoni pasta serves as the base, holding all the flavors. Zucchini adds a fresh crunch and a touch of sweetness. Italian sausage gives a hearty flavor, while cherry tomatoes add juiciness and acidity. Garlic provides a warm, aromatic touch. Red pepper flakes can add a spicy kick, but it’s optional. Olive oil helps to cook the sausage and adds richness. Oregano brings an earthy note, while salt and pepper enhance all the flavors. Fresh basil and Parmesan cheese finish the dish, adding brightness and creaminess. Feel free to get creative with your ingredients! You can swap rigatoni for any pasta you like, such as penne or fusilli. For a vegetarian option, try using plant-based sausage or mushrooms for depth. If you don't have cherry tomatoes, use diced regular tomatoes. Zucchini can be replaced with bell peppers or spinach for different flavors. Instead of Parmesan, you can use Pecorino or nutritional yeast for a dairy-free alternative. {{ingredient_image_1}} Start by boiling water in a large pot. Add salt to the water for flavor. Once the water boils, add 12 oz of rigatoni pasta. Cook it according to the package directions until it is al dente. This usually takes about 10 minutes. When done, drain the pasta. Save about 1 cup of the pasta water. This water will help your sauce later. Next, heat 1 tablespoon of olive oil in a large skillet over medium heat. Add 1 lb of Italian sausage to the skillet. Use a wooden spoon to break it apart as it cooks. Brown the sausage for about 5 to 7 minutes. Make sure it is cooked through and no longer pink. This step adds a lot of flavor to your dish. Now it’s time for the veggies! Add 3 minced garlic cloves and 2 diced zucchinis to the skillet. Stir them in and cook for about 3 to 4 minutes. You want the zucchini to become tender. Next, add 2 cups of halved cherry tomatoes and 1 teaspoon of red pepper flakes, if you like heat. Season with 1 teaspoon of dried oregano, salt, and pepper. Cook this mixture for about 5 more minutes. The tomatoes should soften and release their juices, creating a lovely sauce. Finally, add the drained rigatoni to the skillet. Pour in some of the reserved pasta water a little at a time. Toss everything together until the rigatoni is well coated in the sauce. Cook for another 2 to 3 minutes. Now, your rigatoni with sausage, zucchini, and tomatoes is ready to be served! To make perfect rigatoni, remember to use plenty of salt in your water. This adds flavor to the pasta. Cook it until it’s al dente, which means it should still have a slight chew. Keep a cup of pasta water. This water helps bind the sauce to the pasta. If you find the dish too dry, add a bit of this water to moisten it. You can save time by prepping your ingredients first. Dice the zucchini and halve the cherry tomatoes before you start cooking. This way, you can move quickly from one step to another. Consider cooking the sausage while the pasta boils. This lets you make the most of your time in the kitchen. To boost the flavor, try using fresh herbs. Fresh basil adds a bright note. You can also use fresh oregano if you have it. For an extra kick, add red pepper flakes. They bring heat without overpowering the dish. Lastly, a drizzle of high-quality olive oil before serving enhances richness. Grated Parmesan cheese on top adds a savory finish. Pro Tips Cook Pasta Al Dente: Be sure to cook the rigatoni until it's al dente for the best texture. This will help it hold up well when mixed with the sauce. Use Fresh Ingredients: Opt for fresh zucchini and high-quality Italian sausage to enhance the flavor of your dish. Fresh produce makes a noticeable difference! Adjust Seasoning Gradually: When seasoning your dish, start with a small amount of salt and pepper and adjust as needed. This ensures you don’t over-season your sauce. Enhance with Olive Oil: A drizzle of good-quality olive oil just before serving adds richness and flavor. It’s a simple finishing touch that elevates the dish. {{image_2}} To make a vegetarian version, swap the sausage for plant-based protein. You can use lentils, chickpeas, or your favorite meat substitute. This change keeps the dish hearty and satisfying. Use extra veggies like bell peppers or mushrooms for added flavor. They’ll give depth and texture to your meal. If you love spice, add more heat! Use spicy Italian sausage instead of mild. You can also add more red pepper flakes. Try adding sliced jalapeños for an extra kick. This spicy twist makes your dish exciting and full of bold flavors. You can mix in other tasty ingredients too. Spinach or kale adds vibrant color and nutrition. Roasted red peppers can enhance the taste with a sweet, smoky flavor. If you want a creamy texture, stir in some ricotta or cream cheese. Each addition can change the dish while keeping it delicious and fresh. To keep your rigatoni with sausage, zucchini, and tomatoes fresh, store it in an airtight container. Let the dish cool down before sealing it. This helps prevent moisture build-up, which can make your pasta soggy. You can keep it in the fridge for up to three days. When you’re ready to enjoy leftovers, heat the pasta in a skillet over medium heat. Add a splash of water or stock to keep it moist. Stir often until it's heated through, about 5 minutes. You can also use the microwave. Just cover the dish and heat in 30-second bursts, stirring in between, until hot. If you want to freeze your rigatoni, place it in a freezer-safe container after it cools. It can last up to three months in the freezer. When you're ready to eat, thaw it overnight in the fridge. Reheat as mentioned above. This way, you can have a delicious meal ready for a busy day! Rigatoni usually takes about 10-12 minutes to cook. Check the package for specific times. Cook until it is al dente, which means it should have a slight bite. This texture holds up well with the sauce. Yes, you can use other types of pasta. Penne, fusilli, or even spaghetti work great. Just adjust the cooking time based on the pasta shape. Each type brings a different feel to the dish. You can pair rigatoni with a side salad. A simple green salad with vinaigrette works well. Garlic bread is also a nice choice. For a drink, consider a light red wine or sparkling water. These options balance the flavors and make your meal more satisfying. This blog post covered key parts of making rigatoni. We discussed ingredients, cooking steps, and tips for success. We explored variations and storage methods. For perfect rigatoni, choose quality ingredients and follow the steps closely. Don't hesitate to try new twists, like adding veggies or spice. Keep these tips in mind as you cook. Enjoy your rigatoni experience!

Rigatoni with Sausage Zucchini and Tomatoes Dish

If you’re looking for a dish that’s hearty, tasty, and easy to make, you’ve hit the jackpot! Rigatoni with sausage,

- 2 large sweet potatoes, peeled and diced - 1 medium onion, chopped - 2 garlic cloves, minced - 1 tablespoon fresh ginger, grated - 1 can (14 oz) coconut milk - 4 cups vegetable broth - 1 tablespoon olive oil - 2 teaspoons ground cumin - 1 teaspoon ground coriander - 1/2 teaspoon turmeric - Salt and pepper to taste - Fresh cilantro or parsley for garnish - Lime wedges for serving To make this soup, you start with sweet potatoes. They give the dish its natural sweetness. The aromatics are next. Onion, garlic, and ginger add depth and warmth. Coconut milk and vegetable broth create a creamy base. Spices are very important. Ground cumin adds a warm, earthy flavor. Ground coriander gives a hint of citrus. Turmeric adds a golden color and slight bitterness. Adjust salt and pepper to your liking. Finally, garnishes add freshness. Cilantro or parsley brightens the soup. Lime wedges bring a zesty kick. This combination makes for a delightful dish. Each ingredient plays a role in creating a balanced flavor. Enjoy the process of gathering these ingredients! {{ingredient_image_1}} First, heat olive oil in a large pot over medium heat. Add the chopped onion. Sauté for about 5 minutes until the onion looks clear. Next, stir in the minced garlic and grated ginger. Cook for about 2 minutes until you smell a nice aroma. Now, add the diced sweet potatoes to the pot. Stir well to mix everything. Cook the sweet potatoes for 3 to 4 minutes. This helps them soak up those great flavors. It’s time to spice things up! Sprinkle in ground cumin, ground coriander, and turmeric. Don’t forget to add salt and pepper too. Mix everything well so the spices coat the sweet potatoes. Next, pour in the vegetable broth. Bring this mixture to a boil. Once it’s boiling, lower the heat. Let it simmer for 20 to 25 minutes. The sweet potatoes should become soft during this time. Remove the pot from the heat. Use an immersion blender to blend the soup until it’s smooth and creamy. If you don’t have one, carefully transfer the soup to a regular blender in batches. Now, stir in the coconut milk. Heat the soup gently for another 5 minutes. Taste it and adjust the seasoning with more salt and pepper if needed. Serve the soup hot. Garnish with fresh cilantro or parsley. Add lime wedges on the side for a bright flavor! To get the best texture, I recommend using an immersion blender. This tool lets you blend the soup right in the pot. It’s quick and easy! If you use a regular blender, be careful. Hot soup can spill. Blend in small batches to stay safe. Aim for a creamy consistency. Sweet potatoes are naturally smooth. Once you blend the soup, the coconut milk adds extra creaminess. If it's too thick, add a little more broth or water until it’s just right. To boost the flavor, consider adding spices. A pinch of cayenne pepper brings heat. You can also use smoked paprika for a smoky taste. Other spices like nutmeg or cinnamon can add warmth. If you want to add protein, marinate chicken or tofu in cumin and coriander. This will tie the flavors together when you serve them with the soup. This soup pairs well with crusty bread. A fresh salad adds a nice crunch too. For garnish, use fresh cilantro or parsley to add color. A sprinkle of lime juice brightens each bite, making it more refreshing. Pro Tips Use Fresh Spices: Freshly ground spices can elevate the flavor of your soup significantly. Consider grinding your cumin and coriander just before adding them to the pot. Adjust Consistency: If you prefer a thinner soup, gradually add more vegetable broth or coconut milk until you reach your desired consistency. Garnish Creatively: Experiment with different garnishes such as roasted pumpkin seeds or a swirl of coconut cream for added texture and flavor contrast. Make It Ahead: This soup can be made a day in advance. The flavors deepen as it sits, making it taste even better the next day! {{image_2}} You can easily change the vegetables in this soup. Try adding carrots or butternut squash for a new twist. These options add extra sweetness and nutrients. If you're looking for creaminess without dairy, use nut milk or seed milk instead of coconut milk. Almond or cashew milk can work well here, too. If you want a kick of heat, add chili peppers or red pepper flakes. Adjust the amount based on your spice level. For a more authentic taste, include spices like paprika or berbere. These regional spices can really elevate the flavor. This soup is already vegan-friendly. You can leave out any animal products and keep it plant-based. To make it gluten-free, ensure you use gluten-free vegetable broth. For those watching sodium, use low-sodium broth and limit added salt. This way, you can enjoy it without worry. After making African Sweet Potato Soup, let it cool down. Transfer the soup to airtight containers. This keeps the flavors fresh. Store it in the fridge for up to four days. If you want to enjoy it later, proper cooling is key. Always cool the soup before sealing it. This helps avoid condensation inside the container. You can freeze this soup for longer storage. Pour the cooled soup into freezer-safe bags or containers. Remove as much air as possible to prevent freezer burn. It can last for up to three months in the freezer. When you’re ready to eat it, thaw the soup in the fridge overnight. To reheat, pour the soup into a pot and heat over medium-low. Stir often to ensure even warming. You can also use the microwave if you prefer. Just heat in short bursts and stir in between. Batch cooking is a smart way to save time. Make a bigger pot of soup and store it for the week. Portion the soup into single servings. This makes it easy to grab on busy days. Use small containers for quick access. You can also label each container with the date. This helps track freshness. African Sweet Potato Soup is a dish with deep roots in many African cultures. Sweet potatoes are a staple in African cooking. They offer warmth and comfort, especially in cooler months. This soup is creamy, rich, and full of flavor. Sweet potatoes pack a punch when it comes to nutrition. They are high in fiber, vitamins, and minerals. They provide energy and help keep you full. Their natural sweetness balances the spices in the soup. This makes it not only delicious but also a healthy choice. Yes, you can make African Sweet Potato Soup ahead of time. It stores well in the fridge for up to five days. To prepare, let the soup cool completely. Then, transfer it to an airtight container. If you want to freeze it, pour it into freezer-safe bags. Flatten the bags for easy storage. When you’re ready to eat, thaw in the fridge overnight. Reheat gently on the stove. You can easily change the spice level of this soup. For a milder version, reduce the cumin and coriander. You can also skip the turmeric if you prefer a less intense flavor. If you like it spicy, add chili flakes or diced peppers. You can also use fresh ginger for a bolder taste. Taste the soup as you go. Adjust the spices until you find the right balance for you. This blog post covered how to make African sweet potato soup. We reviewed the key ingredients, from sweet potatoes to coconut milk. I shared step-by-step instructions, including how to sauté aromatics and blend for smoothness. You learned tips for texture and flavor, plus variations for dietary needs. Finally, I discussed storage and meal prep for your soup. This soup is more than a dish; it’s a taste of culture. Try it, and enjoy the journey!

African Sweet Potato Soup Flavorful and Nourishing Dish

Looking for a cozy dish that warms your heart? African Sweet Potato Soup is rich, creamy, and packed with flavor.

- 1 lb ground beef - 4 medium-sized russet potatoes, peeled and thinly sliced - 1 cup cheddar cheese, shredded - 1 cup mozzarella cheese, shredded The ground beef is the star here. It gives the casserole its rich flavor and hearty feel. I always choose a good quality beef for the best result. Potatoes add that comforting base. Use russet potatoes for their fluffiness. The cheeses bring creaminess and taste. Cheddar adds sharpness, while mozzarella gives that lovely stretch. - 1 medium onion, finely chopped - 2 cloves garlic, minced - 1 teaspoon paprika - 1 teaspoon dried oregano - Salt and pepper to taste Onion and garlic are essential for depth. They create a savory base that wakes up the flavors. I prefer finely chopping the onion for even cooking. Paprika brings warmth and a hint of smokiness. Oregano adds a fresh, herbal note. Don’t forget to season with salt and pepper. This will enhance the overall taste. - 1 cup sour cream - 1 cup beef broth - 2 tablespoons olive oil Sour cream adds creaminess and tang. It balances the richness of the cheese and beef. Beef broth gives moisture and depth. I always choose low-sodium broth to control salt levels. Olive oil is key for sautéing. It helps cook the onion and garlic until soft and fragrant. {{ingredient_image_1}} Preheating the Oven Start by preheating your oven to 375°F (190°C). This step is key. A hot oven ensures even cooking for your casserole. Sautéing Onion and Garlic In a large skillet, heat 2 tablespoons of olive oil over medium heat. Add 1 finely chopped onion and 2 minced garlic cloves. Stir them until the onions turn soft and clear. This mix adds great flavor to the beef. Browning the Beef Now, add 1 pound of ground beef to the skillet. Use a spatula to break it apart. Cook until it turns brown, which takes about 5-7 minutes. Make sure to drain any excess fat if you see it. Seasoning the Mixture As the beef cooks, season it with 1 teaspoon of paprika, 1 teaspoon of dried oregano, and a pinch of salt and pepper. Mix well to ensure every bite has rich flavor. Layering Potatoes and Beef In a greased 9x13-inch baking dish, start with half of the 4 medium-sized russet potatoes, thinly sliced. Spread these evenly at the bottom. Add a sprinkle of salt and pepper. Next, layer half of the cooked ground beef mixture over the potatoes. Adding the Sauces and Cheeses In a mixing bowl, combine 1 cup of sour cream and 1 cup of beef broth. Mix until smooth. Pour half of this mixture over the beef. Then, sprinkle half of the 1 cup of cheddar cheese and half of the 1 cup of mozzarella cheese on top. Repeat these layers with the remaining potatoes, beef, sauce, and cheeses. Finish with the rest of the cheese on top for that gooey finish. Ensuring Tender Potatoes To get tender potatoes, slice them thinly. Thin slices cook faster and absorb flavors better. You can soak them in cold water for 30 minutes to help remove excess starch. This step keeps them from turning mushy. Tips for Cheesy Texture For that creamy, cheesy goodness, mix both cheddar and mozzarella. Cheddar gives a sharp flavor, while mozzarella adds stretchiness. Layer the cheese between the potato and meat layers. This keeps it rich and melty. Adjusting Baking Times Baking times can change based on your oven. If your casserole is not bubbling after 30 minutes, check it. The potatoes should be fork-tender. You can cover it with foil if it browns too fast. Using a Thermometer Using a thermometer can help you check the doneness. The internal temp should reach 160°F (71°C) for the beef to be safe. This ensures your meal is not just tasty, but safe to eat. Garnishing Ideas Fresh parsley adds color and freshness. Sprinkle it on just before serving. You can also use chives or green onions for a nice crunch. Serving Suggestions Serve the casserole with a simple salad. A light green salad pairs well with the cheesy richness. You can also offer crusty bread for a comforting meal. Pro Tips Use Starchy Potatoes: Russet potatoes are ideal for casseroles due to their high starch content, which helps achieve a fluffy texture. Layering for Flavor: Ensure you layer the ingredients evenly to allow the flavors to meld beautifully throughout the casserole. Customize Your Cheese: Feel free to mix different types of cheese, such as pepper jack or gouda, for a unique twist on the traditional flavor. Let it Rest: Allow the casserole to rest for about 10 minutes after baking. This helps the layers set and makes serving easier. {{image_2}} Alternative Proteins You can swap ground beef for other meats. Ground turkey or chicken works well. If you want to keep it light, try using ground lamb. For a plant-based option, use lentils or crumbled tempeh. Dairy-Free Options If you're dairy-free, consider using cashew cream instead of sour cream. For cheese, look for dairy-free shreds made from nuts or soy. This keeps the dish creamy without the dairy. Gluten-Free Adaptations This casserole is easy to make gluten-free. Just ensure that your broth and any cheese used are gluten-free. Always check labels to be safe. Vegetarian or Vegan Versions For a vegetarian version, skip the meat and add more veggies. You can use mushrooms and bell peppers. To make it vegan, replace sour cream with a plant-based option and use vegan cheese. Adding Vegetables You can add veggies for more flavor and nutrients. Consider adding spinach, zucchini, or bell peppers. Just chop them small so they mix well. Spicing It Up If you like heat, add red pepper flakes or a dash of hot sauce. You can also change the seasonings to suit your taste. Try adding cumin or chili powder for a different twist. Refrigeration Guidelines Let your casserole cool down first. Then, cover it tightly with plastic wrap or foil. Store it in your fridge for up to three days. This keeps it fresh and tasty for later meals. Freezing the Casserole If you want to keep it longer, freezing is a great option. Cut the casserole into individual portions. Wrap each piece in plastic wrap, then place them in a freezer-safe container or bag. You can freeze it for up to three months. This way, you always have a quick meal ready. Best Methods for Reheating When it’s time to eat, you can reheat the casserole in the oven or microwave. For the oven, preheat it to 350°F (175°C). Place the casserole in an oven-safe dish and cover it with foil. Heat for about 20-30 minutes. In the microwave, heat individual portions for about 2-3 minutes. Make sure each piece is hot all the way through. Maintaining Cheese Consistency To keep the cheese creamy and melty, avoid overheating. When using the microwave, stir the casserole halfway through. This helps heat it evenly. How Long Can It Last? When stored in the fridge, your Cheesy Ground Beef Potato Casserole lasts for about three days. If frozen, it stays good for up to three months. Always check for signs of spoilage before eating. Signs of Spoilage Look for changes in color or smell. If it smells sour or has a strange texture, it’s best to throw it away. Trust your senses to keep you safe! You can prepare this casserole a day early. Start by cooking the ground beef and onions as usual. After mixing in the seasonings, let it cool. Layer the casserole in a dish, but do not bake it yet. Cover it tightly with foil and store it in the fridge. When you are ready to eat, bake it straight from the fridge. Just add an extra 10 minutes to the cooking time. This way, you save time and still enjoy a warm, cheesy meal. Yes, you can mix and match different cheeses! Cheddar and mozzarella are classic, but you can try others. Here are some great combinations: - Gouda for a smoky flavor - Monterey Jack for extra creaminess - Pepper Jack for a spicy kick Experiment with your favorite cheeses to find a taste you love! This casserole is filling, so simple sides work best. Here are some tasty options: - A fresh green salad with vinaigrette - Steamed broccoli or green beans for a healthy touch - Garlic bread for extra flavor These sides add balance and make your meal even more enjoyable. This blog post covered how to make a tasty Cheesy Ground Beef Potato Casserole. We explored key ingredients, like ground beef and potatoes, and highlighted important techniques, such as sautéing onions and browning beef. You learned handy tips for cooking and presenting your dish. Plus, I shared variations to fit different diets and preferences. Now, it's time to bake your casserole and enjoy! With these steps, you'll create a meal that's sure to please everyone.

Cheesy Ground Beef Potato Casserole Simple Comfort Meal

Craving a cozy meal that warms your soul? Look no further! This Cheesy Ground Beef Potato Casserole is the ultimate

Here is a list of the ingredients you need to make Vegan Lemon Lentil Turmeric Soup: - 1 cup green or brown lentils, rinsed - 1 medium onion, diced - 2 cloves garlic, minced - 1 carrot, diced - 2 celery stalks, diced - 1 teaspoon turmeric powder - 1 teaspoon ground cumin - 6 cups vegetable broth - 1 lemon (zest and juice) - Salt and pepper to taste - 2 tablespoons olive oil - Fresh cilantro or parsley for garnish Each ingredient plays a key role in the taste and health of this soup. Lentils provide protein and fiber. They are also low in fat. Onions and garlic add flavor and help your immune system. Carrots and celery give a nice crunch and more nutrients. Turmeric and cumin bring warmth and depth to the flavor. Don't forget the lemon! It adds brightness and a fresh zing. Olive oil gives richness, while salt and pepper balance all the flavors. Finally, use fresh herbs like cilantro or parsley to top it off. They add color and a burst of freshness. With these ingredients ready, you can start making a soup that warms the soul and nourishes the body. Enjoy the process of cooking, and let the aromas fill your kitchen. {{ingredient_image_1}} - Heat 2 tablespoons of olive oil in a large pot. - Add 1 medium diced onion and 2 minced garlic cloves. - Sauté until the onion becomes translucent, about 5 minutes. This step builds the soup's foundation. The onion and garlic add rich flavors. The olive oil helps with cooking and adds healthy fats. - Stir in 1 diced carrot and 2 diced celery stalks. - Cook for an additional 4-5 minutes until slightly softened. - Sprinkle in 1 teaspoon of turmeric and 1 teaspoon of cumin. Mix everything well to coat the veggies with spices. This step adds color and warmth to the dish. Turmeric and cumin bring health benefits too. - Add 1 cup of rinsed lentils and 6 cups of vegetable broth to the pot. - Bring to a boil, then reduce the heat to simmer. Cover the pot and let it cook for about 25-30 minutes. This allows the lentils to absorb flavors and become tender. As the lentils cook, they will soften and thicken the soup. The broth helps create a warm and comforting dish. To make your soup creamy, use an immersion blender. Blend only half of the soup for a nice mix of smooth and chunky. This gives your soup a rich feel. If you don't have a blender, you can mash some lentils with a fork. For flavor, always taste as you go. Add salt and pepper slowly. A little at a time helps avoid over-seasoning. You can also squeeze in extra lemon juice for brightness. This adds a fresh lift. Cooking lentils well is key. Rinse them before cooking to remove dirt. Cook them in the broth, not water. This helps them soak up all the flavor. Check them after 25 minutes. They should be soft but not mushy. When it comes to veggies, chop them evenly. This helps them cook at the same time. Sauté them until they are just soft. This keeps their color bright and taste fresh. Enjoy the vibrant look of your soup as much as its taste! Pro Tips Soaking Lentils: Soaking your lentils for a few hours can reduce cooking time and enhance their digestibility. Adjusting Consistency: If you prefer a thinner soup, simply add more vegetable broth or water to reach your desired consistency. Flavor Boost: For an extra flavor boost, consider adding a bay leaf or a sprig of thyme while simmering the soup. Storage Tips: This soup stores well in the refrigerator for up to 5 days and can also be frozen for longer storage. Just reheat before serving! {{image_2}} You can switch up the lentils in this soup. Black beans or chickpeas work well. Quinoa or barley can also add a nice texture. For herbs, try using dill or basil instead of cilantro or parsley. Each herb brings its unique flavor. Want some heat? Add a pinch of cayenne or chili powder. This spice brings warmth without hiding the soup's zest. Pair this soup with crusty bread or a fresh salad. These sides complement the soup and add crunch. Enjoy your meal with a squeeze of extra lemon for brightness. To keep your Vegan Lemon Lentil Turmeric Soup fresh, store it in an airtight container. Make sure the soup cools down before sealing it. This helps stop bacterial growth. It lasts in the fridge for about 4 to 5 days. If you want to enjoy it later, freezing is a great option. To freeze leftovers, let the soup cool first. Then, pour it into freezer-safe bags or containers. Leave some space at the top for expansion. This keeps the soup from bursting. When you want to eat it, take it out of the freezer and place it in the fridge overnight to thaw. For reheating, warm it on the stove over low heat. Stir often to avoid sticking. You can also microwave it in a bowl. Just cover it to keep moisture in. Enjoy your soup with fresh flavor! Yes, you can use other lentils. Red lentils cook faster and become soft. Green or brown lentils hold their shape better. Each type adds a different texture to the soup. Experiment with your favorite lentils for varied flavor! Absolutely! This soup stores well in the fridge. It can last up to five days. Just let it cool before storing it in an airtight container. You can also freeze it for up to three months. Simply thaw and reheat when you're ready to enjoy! To spice it up, add some red pepper flakes. You can also add a chopped jalapeño for heat. For more flavor, try adding smoked paprika or a splash of hot sauce. Fresh herbs like thyme or basil can enhance the taste, too. Experiment to find your perfect blend! Yes, you can blend part of the soup for creaminess. Use an immersion blender or a regular blender. Blend until you reach your desired texture. This adds a rich and smooth feel to the soup without using dairy. This soup pairs well with crusty bread or a fresh salad. A side of quinoa or brown rice also complements it. You can even serve it with a dollop of vegan yogurt for added creaminess! Store leftovers in an airtight container. Keep it in the fridge for up to five days. For longer storage, freeze it in portions. This way, you can enjoy it later without waste. This blog post outlined a tasty lentil soup recipe, showing you the best ingredients and steps. You learned about cooking lentils, using spices, and storing leftovers. Remember to mix and match your flavors for variety. The soup is a warm hug in a bowl, perfect for any day. Enjoy your creation, and don’t hesitate to share your own twists! Each bowl is a chance to explore new tastes. Keep on cooking and have fun with it!

Vegan Lemon Lentil Turmeric Soup Nutritious Delight

Are you ready to savor a bowl of warmth with a twist? This Vegan Lemon Lentil Turmeric Soup is not

For the Cranberry Citrus Dipping Sauce, you will need: - 2 cups fresh cranberries - 1 cup orange juice - Zest of 1 orange - 1/4 cup honey or maple syrup (adjust to taste) - 1 tablespoon lemon juice - 1/2 teaspoon ground cinnamon - 1/4 teaspoon ginger powder - 1/4 teaspoon salt - 1 tablespoon cornstarch mixed with 2 tablespoons water (for thickening, optional) You can make this sauce your own with simple swaps. If you don’t have honey, maple syrup works just as well. For a different citrus twist, try lemon juice instead of orange juice. You can also use lemon zest for a unique flavor. If you want to avoid sugar, use a sugar substitute that measures like honey or maple syrup. Choosing fresh cranberries is key. Look for berries that are bright and firm. Avoid any that are soft or have blemishes. For the orange, pick one that feels heavy for its size. A good orange should have a bright peel and smell sweet. Fresh juices and zest give the best flavor. If you can, juice the orange right before adding it to the sauce for a burst of freshness. {{ingredient_image_1}} Start by rinsing 2 cups of fresh cranberries under cold water. Check for any bruised or soft ones, and toss those out. Next, grab a medium saucepan. You will add the rinsed cranberries along with 1 cup of orange juice and the zest of 1 orange. For sweetness, include 1/4 cup of honey or maple syrup. You can adjust this later if needed. Add 1 tablespoon of lemon juice, 1/2 teaspoon of ground cinnamon, 1/4 teaspoon of ginger powder, and 1/4 teaspoon of salt. Now, place your saucepan over medium heat. Stir the mixture occasionally as it heats up. You want to bring it to a simmer. This will take about 10 to 15 minutes. As it cooks, the cranberries will burst and soften. Keep stirring to prevent sticking. Once done, taste the sauce. If you want it sweeter, add more honey or maple syrup. If you like a thicker sauce, I have a quick trick. Mix 1 tablespoon of cornstarch with 2 tablespoons of water in a small bowl to make a slurry. Gradually add this slurry to your simmering sauce while stirring. Cook it for an extra 2 to 3 minutes. This will give you a nice, thick texture. Finally, remove the sauce from heat and let it cool before serving. This cranberry citrus dipping sauce pairs well with many dishes. Use it with roasted meats like turkey, chicken, or pork. It also makes a great dip for cheese platters or fresh veggies. Try it on sandwiches for a zesty twist. You can even drizzle it over pancakes or waffles for a delightful breakfast treat. To boost the flavor, add a pinch of zest from a lemon or lime. This adds a bright note to the sauce. You can also mix in fresh herbs like mint or rosemary for an earthy taste. If you like heat, a dash of cayenne pepper can bring a surprising kick. Experiment with spices to find your perfect blend. Avoid using dried cranberries; they will not give you the same texture. Make sure to rinse fresh cranberries well and discard any bruised ones. If you add too much sweetener, it can overpower the sauce. Always taste as you go. Lastly, don't skip the simmering step; this is when the flavors meld beautifully. Pro Tips Fresh Cranberries are Key: Using fresh cranberries will provide the best flavor and texture for your dipping sauce. Frozen cranberries can work in a pinch, but fresh ones are ideal for that burst of tartness. Adjusting Sweetness: Taste your sauce as it cooks. The sweetness can vary based on the tartness of the cranberries, so feel free to adjust the honey or maple syrup to your desired level. Enhance with Spices: Feel free to experiment with additional spices like nutmeg or allspice for a warm, festive flavor profile that complements the cranberries beautifully. Serving Suggestions: This sauce pairs wonderfully with roasted meats, especially turkey or pork. It can also be used as a vibrant dip for cheese platters or served alongside desserts like cheesecake. {{image_2}} You can change the flavor by adding spices. Try a pinch of nutmeg for warmth. Cardamom adds a sweet touch too. If you want a kick, add a dash of cayenne pepper. Each spice gives the sauce a new twist. You can mix and match to find your favorite blend. If honey or maple syrup is not your choice, use agave nectar. You can also use brown sugar for a richer taste. For a low-calorie option, try stevia. Adjust the amount to your liking. Each sweetener gives a unique flavor profile, so taste as you go. Mix in other fruits for extra flavor. Fresh raspberries or blueberries work great with cranberries. You can even add chopped apples for crunch. If you love tropical flavors, try pineapple or mango. These fruit combinations can make your sauce even more exciting. Experiment to find your perfect mix! After enjoying your cranberry citrus dipping sauce, let it cool fully. Pour it into an airtight container. This helps keep the sauce fresh and tasty. You can store it in the fridge for up to one week. Be sure to label the container with the date. This way, you’ll know how long it has been there. If you want to keep the sauce longer, freezing is a great choice. Use a freezer-safe container or a sealable freezer bag. Make sure to leave some space at the top, as liquids expand when frozen. Your sauce can stay fresh in the freezer for about three months. When you’re ready to use it, thaw it overnight in the fridge. The sauce stays good in the fridge for up to seven days. If you see any mold or an off smell, it’s best to toss it. You can use leftover sauce in many ways. Drizzle it over roasted meats, mix it into yogurt, or use it as a salad dressing. Get creative and enjoy your cranberry citrus dipping sauce! Cranberry citrus dipping sauce can last up to one week in the fridge. Store it in an airtight container to keep it fresh. If you want to keep it longer, consider freezing it. Just make sure to leave some space in the container, as the sauce will expand when frozen. Yes, you can use frozen cranberries! They work well in this recipe. Just add them directly to the saucepan without thawing. You may need to cook them a bit longer to break them down. This option is great if fresh cranberries are hard to find. Cranberry citrus dipping sauce goes well with many dishes. It is perfect with roasted meats like turkey or chicken. You can also serve it with cheese plates or on a charcuterie board. It adds a bright flavor to savory dishes and complements sweet treats like desserts. This guide covered key steps to make a tasty cranberry citrus dipping sauce. I shared a full list of ingredients, offered swaps, and gave tips on choosing fresh items. I walked you through preparation, cooking, and ways to adjust the sauce for perfect thickness. I also provided serving ideas and common mistakes to avoid. Remember, you can customize flavors and store leftovers wisely. I hope you feel ready to create your sauce and impress at your next meal. Enjoy your cooking adventure!

Cranberry Citrus Dipping Sauce Flavorful and Fresh

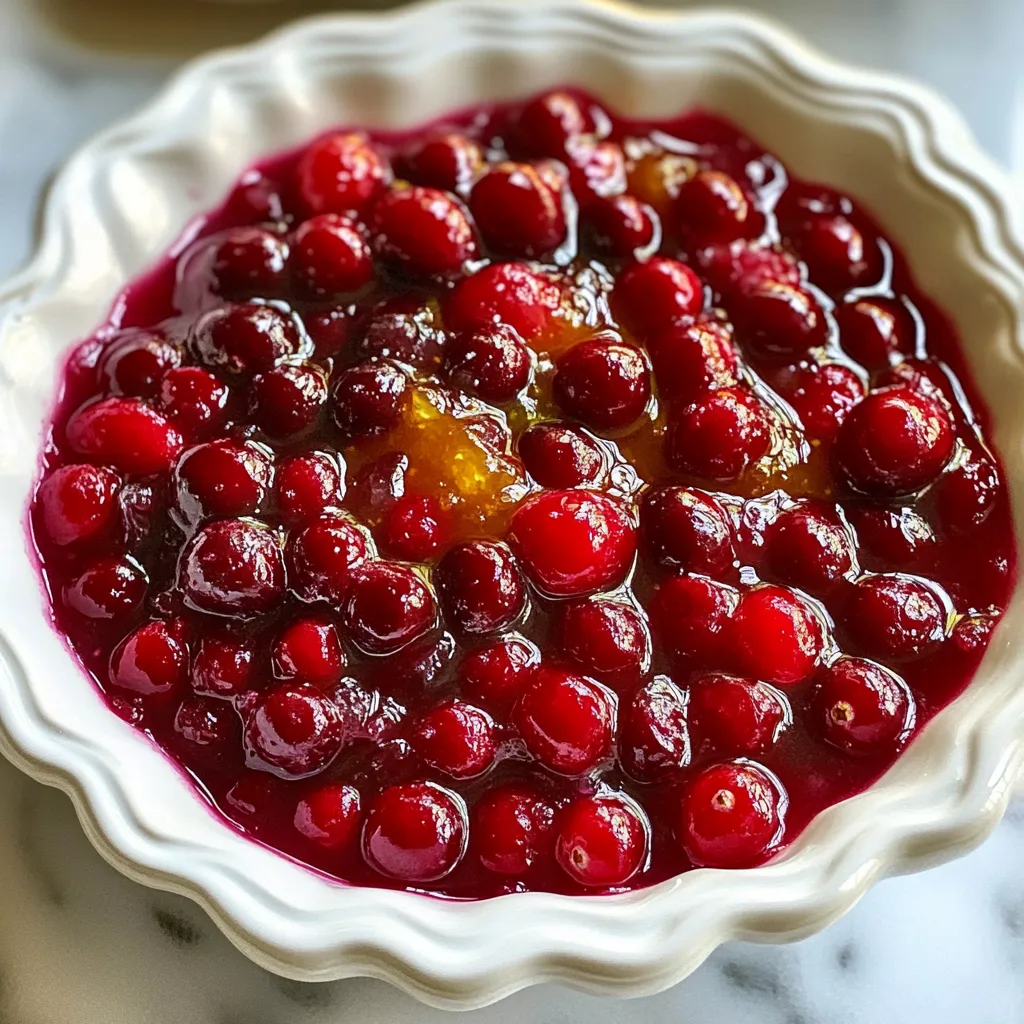
Are you ready to upgrade your appetizer game? This Cranberry Citrus Dipping Sauce is a burst of flavor and freshness

To make high protein creamy beef pasta, gather these ingredients: - 250g whole grain pasta (penne or fusilli) - 300g lean ground beef - 1 cup Greek yogurt - ½ cup grated Parmesan cheese - 2 cloves garlic, minced - 1 small onion, finely chopped - 1 tablespoon olive oil - 1 teaspoon Italian seasoning - ½ teaspoon red pepper flakes (optional) - Salt and pepper to taste - Fresh parsley, chopped (for garnish) This dish packs a protein punch. Lean ground beef offers high protein and iron. Greek yogurt adds creaminess and protein without excess fat. Whole grain pasta provides fiber, keeping you full longer. Parmesan cheese gives flavor and calcium. You can swap ingredients if needed. Try turkey or chicken instead of beef for a leaner option. Use low-fat yogurt for fewer calories. If you want a dairy-free meal, go for almond or soy yogurt. You can replace Parmesan with nutritional yeast for a vegan twist. {{ingredient_image_1}} First, fill a large pot with water and add salt. Bring it to a boil. Once it boils, add 250g of whole grain pasta. Cook the pasta according to the package instructions until it is al dente. This should take about 8-10 minutes. After cooking, drain the pasta. Save ½ cup of the pasta water for later. Next, grab a large skillet and heat 1 tablespoon of olive oil over medium heat. Add 1 small chopped onion and 2 minced garlic cloves. Sauté for about 2-3 minutes until the onion turns translucent. This step adds great flavor to your dish. Now, increase the heat to medium-high. Add 300g of lean ground beef to the skillet. Season it with salt, pepper, 1 teaspoon of Italian seasoning, and ½ teaspoon of red pepper flakes if you like spice. Cook while breaking it apart with a spatula until it is browned, about 5-7 minutes. After the beef is cooked, reduce the heat to low. Mix in 1 cup of Greek yogurt and ½ cup of grated Parmesan cheese. Stir until smooth. If the sauce is thick, add reserved pasta water slowly until it reaches your desired creaminess. Add the drained pasta to the skillet with the beef sauce. Toss gently to coat the pasta well. Taste and add more salt or pepper if needed. This step makes sure every bite is full of flavor. Divide the creamy beef pasta among plates. Garnish with chopped parsley for a fresh look. For a nice touch, sprinkle extra Parmesan on top. You can serve this in large bowls for a family-style meal or on individual plates for a fancy dinner. Enjoy your high protein creamy beef pasta! To make great pasta, use a big pot. Fill it with water and add salt. Boil the water before adding the pasta. Stir it once to prevent sticking. Cook it till it's al dente, which is firm but not hard. Save some pasta water for later. This water can help make your sauce smooth. For a rich and creamy sauce, use Greek yogurt and Parmesan cheese. Mix them well over low heat. If your sauce is too thick, add a bit of the saved pasta water. This will give you the right texture. You can also try adding a splash of milk for extra creaminess. If you want more heat, add red pepper flakes. Start with a small amount, and taste as you go. If you prefer less spice, skip them altogether. You can also use sweet paprika for flavor without the heat. Always balance the spices with salt and pepper for the best taste. Pro Tips Use Leaner Cuts: Opt for lean ground beef to keep the dish healthy and reduce excess fat without sacrificing flavor. Customize Your Seasoning: Feel free to adjust the Italian seasoning and red pepper flakes to suit your taste preferences for a personalized flavor. Make It Veggie-Loaded: Add sautéed vegetables like spinach, bell peppers, or mushrooms for extra nutrition and color. Save Leftovers Smartly: Store any leftovers in an airtight container in the fridge for up to 3 days; reheat gently on the stove with a splash of water or broth. {{image_2}} You can swap the lean ground beef for other proteins. Ground turkey or chicken works well. If you like a richer taste, try ground lamb. For a fun twist, use sausage or chorizo. These choices add unique flavors to the dish. Each alternative keeps the meal high in protein. You can easily make this dish vegetarian. Replace the beef with lentils or chickpeas. Both options provide protein and fiber. You could also use mushrooms for a meaty texture. Tofu is another great choice to add protein. When using tofu, make sure to press it first to remove extra water. While whole grain pasta is great, feel free to explore other types. You can use spaghetti, fettuccine, or even zoodles (zucchini noodles). Each pasta type changes the dish's texture. Try gluten-free pasta if you need a gluten-free option. Whole grain pasta adds fiber, but all choices work well with the creamy sauce. Store leftovers in an airtight container. This keeps the pasta fresh. Let it cool before sealing. Place it in the fridge if you plan to eat it within three days. For longer storage, use the freezer. To freeze, portion the creamy beef pasta into freezer-safe containers. Leave some space at the top for expansion. Seal tightly to prevent freezer burn. It can last up to three months in the freezer. When you are ready to eat, thaw the pasta in the fridge overnight. Reheat it on the stove over low heat. Add a splash of water or milk for moisture. Stir gently until warmed through. You can also microwave it in a safe dish. Cover it to keep the moisture in. Enjoy your warm, creamy beef pasta! This beef pasta is high in protein due to the lean ground beef and Greek yogurt. Ground beef gives you a solid protein boost. Greek yogurt adds even more protein while making the sauce creamy. Whole grain pasta also contributes some protein. Together, these ingredients create a satisfying and nutritious meal. Yes, you can use a different sauce if you prefer. A marinara or alfredo sauce can work well. You can also experiment with homemade sauces for a unique taste. Just keep in mind that changing the sauce can alter the protein content. You can store the creamy beef pasta for up to three days in the fridge. Make sure to place it in an airtight container. This helps keep it fresh and tasty. If you want to keep it longer, freezing is a great option. Absolutely! You can use non-dairy yogurt or cheese to make this meal dairy-free. Look for options that are high in protein. Almond or coconut-based yogurts can work well. Just ensure they fit your taste and dietary needs. Some great side dishes to pair with this creamy beef pasta include: - Steamed broccoli - Garlic bread - Garden salad - Roasted vegetables - Grilled zucchini These sides will complement the pasta and add more nutrition to your meal. This blog post covered the key ingredients and steps to make creamy beef pasta. We explored ingredient swaps, cooking tips, and storage methods to make it easier for you. Each section aimed to give you helpful info for creating a delicious dish. Remember, this recipe is flexible and can fit many tastes. Experiment with different proteins or sauces to make it your own. Enjoy cooking and sharing this comforting meal with friends and family!

High Protein Creamy Beef Pasta Satisfying Meal Idea

If you want a meal that packs a protein punch and is so creamy it’s hard to resist, you’ve found

- 4 boneless, skinless chicken breasts - 1 can (10.5 oz) cream of chicken soup - 1 can (10.5 oz) cream of mushroom soup - 1 cup chicken broth - 1 cup long-grain white rice - 1 cup frozen mixed vegetables (peas, carrots, corn) The main ingredients make this casserole easy and tasty. The chicken gives protein, while the soups add creaminess. Rice absorbs all the flavors and makes it filling. The mixed veggies add color and nutrients. - 1 teaspoon garlic powder - 1 teaspoon onion powder - 1 teaspoon dried thyme - Salt and pepper to taste These seasonings bring the dish to life. Garlic and onion powder add depth. Thyme gives a nice touch of earthiness. Salt and pepper are key for flavor balance. - Cheese - Other vegetable variations - Protein substitutes You can make this dish your own! Cheese on top adds a rich layer. Try different veggies like broccoli or bell peppers for new flavors. If you want a twist, use turkey or tofu instead of chicken. Each choice opens up a world of taste! {{ingredient_image_1}} 1. Preheat your oven to 350°F (175°C). This ensures even cooking for the casserole. 2. Prepare the casserole dish by greasing a 9x13 inch dish. This helps prevent sticking and makes for easy cleanup. 1. Combine the soups and broth in a large mixing bowl. Add the cream of chicken soup, cream of mushroom soup, and chicken broth. Mix in garlic powder, onion powder, thyme, salt, and pepper. Stir until you have a smooth mixture. 2. Prepare the rice layer by spreading uncooked long-grain white rice evenly on the bottom of the greased casserole dish. This will soak up the flavors as it cooks. 1. Arrange the chicken and vegetables by placing the chicken breasts on top of the rice. Season them with more salt, pepper, and thyme for added flavor. Then, sprinkle the frozen mixed vegetables around the chicken. 2. Cover the dish tightly with aluminum foil. Make sure it is sealed well to keep the moisture in while it bakes. 1. Bake the casserole in the preheated oven for 1 hour. This allows the chicken to cook through and the rice to absorb the flavors. 2. Add cheese by carefully removing the foil after 1 hour. Sprinkle shredded cheddar cheese on top and return it to the oven. Bake uncovered for an additional 15-20 minutes until the cheese is melted and bubbly. Let it sit for 10 minutes before serving. Enjoy your cozy no-peek chicken casserole! - To prevent dry chicken, use boneless, skinless breasts. They stay moist. - Keep the casserole covered with foil while baking. This locks in steam. - Be sure to season your chicken well. A little salt and pepper go a long way. - Check the chicken's doneness with a meat thermometer. It should reach 165°F. - Pair this casserole with a fresh green salad. It adds crunch and color. - Serve with warm crusty bread. It’s perfect for soaking up the creamy sauce. - Try a side of roasted vegetables for added nutrition and flavor. - Garnish with fresh herbs like parsley or thyme. They add a pop of color. - Serve in individual bowls for a cozy touch. It makes each serving special. - Drizzle a bit of melted butter over the top before serving. It adds shine and richness. Pro Tips Use Fresh Herbs: Fresh thyme can elevate the flavor of your casserole. If you have fresh herbs on hand, feel free to substitute them for dried herbs for a brighter taste. Check Chicken Temperature: To ensure your chicken is perfectly cooked, use a meat thermometer. The internal temperature should reach 165°F (75°C). Customize Vegetables: Feel free to use any combination of frozen or fresh vegetables. Green beans, broccoli, or bell peppers work great as substitutes or additions. Let It Rest: Allow the casserole to sit for about 10 minutes after removing it from the oven. This helps the flavors meld and makes serving easier. {{image_2}} You can swap out proteins in No-Peek Chicken Casserole. Try using turkey or pork. These meats work well and keep the dish tasty. Using different soups can change the flavor. You can use cream of celery or even tomato soup. These options can add a fun twist to this classic dish. For gluten-free options, use gluten-free rice. Make sure to check the soups too. Some brands offer gluten-free versions of cream soups. If you're looking for dairy-free variations, try coconut cream instead of regular cream soups. You can also skip cheese or use a dairy-free cheese option. This keeps the dish creamy without dairy. Adding spices can brighten up the casserole. Try paprika or cayenne for some heat. A pinch of cumin can also add depth to the flavor. Incorporating fresh herbs can elevate the dish. Use thyme or parsley for a fresh taste. You can sprinkle them on top before serving for a pop of color and flavor. After you make No-Peek Chicken Casserole, let it cool. Place the dish in the fridge within two hours. Use a tight lid or cover it with plastic wrap. This keeps it fresh and safe. I recommend using glass or plastic containers with secure lids. They seal well and help avoid spills. To freeze leftovers, let the casserole cool completely. Cut it into portions for easy serving. Wrap each piece in plastic wrap, then place them in a freezer bag. Make sure to label the bags. To thaw, move a portion to the fridge overnight. Reheat in the oven at 350°F until heated through, about 20-30 minutes. In the fridge, No-Peek Chicken Casserole lasts about three to four days. If you freeze it, it can last up to three months. Always check for signs of spoilage. Look for an off smell, changes in color, or mold. If you see any of these, it's best to toss it. No-Peek Chicken Casserole is a simple, one-dish meal. It combines chicken, rice, and creamy soups. This dish cooks in the oven without needing to peek. You layer uncooked rice at the bottom, then add soup and chicken. Frozen mixed vegetables stir in well. It’s warm, filling, and perfect for any night. Key characteristics include: - Creamy texture: The soups add richness. - Easy preparation: Just mix, layer, and bake. - Comfort food: It's hearty and satisfying. Yes, you can use cooked chicken in this recipe. It's a great way to save time. You can shred or chop leftover rotisserie chicken. Just reduce the baking time to about 30 minutes. This keeps the chicken moist and tender. You can make No-Peek Chicken Casserole lighter with a few swaps. - Use brown rice: It adds fiber and nutrients. - Opt for low-fat soups: These cut down on calories. - Add more veggies: Use fresh or frozen options like broccoli or bell peppers. - Choose lean chicken: Skinless chicken thighs are a good choice. Yes, you can prepare this casserole ahead of time. - Prep the night before: Mix the ingredients and layer them in the dish. - Cover and chill: Store it in the fridge overnight. - Baking: If it’s cold from the fridge, add about 10-15 more minutes to the bake time. This method makes it easier on busy nights. You can also freeze it for later. Just thaw it in the fridge before cooking. In this blog post, we explored how to make a delicious No-Peek Chicken Casserole. We covered key ingredients like chicken, rice, and vegetables. We also shared tips for mixing, baking, and serving your dish. Remember, you can make fun changes with different proteins and spices. Don't forget to store leftovers correctly, so they stay fresh longer. Enjoy making and sharing this comforting meal with family and friends!

No-Peek Chicken Casserole Easy Comfort Dish

Are you searching for a cozy dish that’s easy to make and sure to please? Look no further than No-Peek

Older posts
Newer posts
← Previous Page1 … Page107 Page108 Page109 … Page115 Next →

dsad

© 2025 flavorsprint • Built with GeneratePress

Our Policies

  • Copyright Policy
  • Cookie Policy
  • GDPR Policy
  • Privacy Policy
  • Disclaimer
  • Terms Of Use

More Information

  • Home
  • About
  • Contact
  • Appetizers
  • Dessert
  • Dinner
  • Drinks
©2025, flavorsprint About Back To Top