Skip to content
DisclaimerTerms Of UseGDPR PolicyCookie Policy

flavorsprint

  • Home
  • Drinks
  • Appetizers
  • Dinner
  • Dessert
  • About
  • Contact
  • Privacy Policy
DisclaimerTerms Of UseGDPR PolicyCookie Policy

Lillian

To make this creamy and tasty broccoli cheddar soup, you need: - 4 cups broccoli florets - 1 cup chopped onions - 2 cloves garlic, minced - 4 tablespoons unsalted butter - 1/4 cup all-purpose flour - 4 cups vegetable broth - 1 cup milk - 2 cups shredded sharp cheddar cheese - 1/2 teaspoon salt - 1/4 teaspoon black pepper - 1/4 teaspoon nutmeg - Optional: Croutons for garnish If you don’t have an ingredient, here are some easy swaps: - Use chicken broth instead of vegetable broth for a richer flavor. - Almond milk works well if you want a dairy-free option. - Swap cheddar cheese for Gruyère or Monterey Jack for a unique taste. - You can replace flour with cornstarch for a gluten-free version. This soup is not just delicious, but also gives you good nutrients. - Calories: About 350 per serving - Protein: 15 grams - Fat: 22 grams - Carbs: 30 grams - Fiber: 3 grams This soup gives a nice balance of comfort and nutrition. Enjoy every spoonful! {{ingredient_image_1}} Start by melting 4 tablespoons of unsalted butter in a large pot over medium heat. Add 1 cup of chopped onions and 2 cloves of minced garlic. Sauté this mix for about 5 minutes. When the onions look clear, it's time to add your 4 cups of broccoli florets. Cook for another 5 minutes while stirring. This step helps to build flavor and softens the broccoli. Next, sprinkle 1/4 cup of all-purpose flour over the broccoli mix. Stir it in well for about 2 minutes to cook out the raw flour taste. Slowly pour in 4 cups of vegetable broth while stirring to keep lumps away. Bring the soup to a boil. Once boiling, lower the heat and let it simmer for about 10 minutes. You want the broccoli to be tender. Now comes the fun part! Use an immersion blender to blend the soup to your liking. If you like chunks, blend only half the soup. This will give you a nice mix of creamy and chunky textures. After blending, stir in 1 cup of milk and 2 cups of shredded sharp cheddar cheese. Add 1/2 teaspoon of salt, 1/4 teaspoon of black pepper, and 1/4 teaspoon of nutmeg. Cook the soup on low heat for about 5 more minutes, until the cheese melts and the soup warms up. Taste it and adjust the seasoning if needed. When you're ready to serve, ladle the soup into deep bowls. For a nice touch, sprinkle some croutons and extra cheese on top. Enjoy your creamy and flavorful broccoli cheddar soup! To get that silky texture, blend the soup well. I love using an immersion blender. It lets me control the texture. If you want it chunkier, blend just half. After blending, add milk slowly. This helps keep it smooth. Don’t forget to stir in the cheese until it melts. This is key for a creamy finish. Sharp cheddar is my go-to for this soup. It gives a bold taste. You can also try Gruyère for a nutty twist. If you want a milder flavor, use mild cheddar. Mixing cheeses adds depth. Just remember to shred the cheese yourself. Pre-shredded cheese often contains additives that can affect meltability. Watch the heat while cooking. Too high, and the milk can curdle. Ensure the butter is melted before adding flour. This helps avoid lumps. When adding vegetable broth, pour it slowly while stirring. This keeps your soup smooth. Lastly, taste and adjust the seasoning. A little extra salt or pepper can make a big difference. Pro Tips Fresh Broccoli Preference: For the best flavor and texture, use fresh broccoli instead of frozen. Fresh florets will give the soup a vibrant color and crunch. Cheese Variations: Experiment with different types of cheese like Gruyère or Monterey Jack for unique flavor profiles. Just make sure to choose cheeses that melt well. Thickness Control: If you prefer a thicker soup, add more flour when sautéing the onions and garlic. Alternatively, blend less of the mixture for a chunkier texture. Seasonal Add-ins: Consider adding seasonal vegetables like carrots or spinach for extra nutrients and flavor. Just be sure to adjust cooking times accordingly. {{image_2}} Want to boost the flavor of your broccoli cheddar soup? Adding protein is a great way. You can cook diced chicken or crispy bacon and stir it in. Chicken adds a nice, mild taste. Bacon brings a savory crunch. Cook the chicken in the pot before adding the onions. If you use bacon, cook it first and then use the fat to sauté your onions. This will enhance the soup's flavor. If you want a vegan version, swap the milk and cheese with plant-based options. Use almond milk or oat milk instead of regular milk. For cheese, try a vegan cheddar or nutritional yeast. This will give you that cheesy flavor without dairy. You can also use vegetable broth to keep it vegan-friendly. Make sure to check labels for hidden dairy ingredients. You can make your soup even healthier by adding more veggies. Carrots, spinach, or even cauliflower work well. Chop them small and add them when you add the broccoli. This way, they cook evenly. You can sneak in extra nutrients without changing the taste much. Remember, the more colors on your plate, the better for your health! After you make broccoli cheddar soup, let it cool first. Put it in a tight container. The soup stays fresh in the fridge for about three days. When you are ready to eat, check for any signs of spoilage. If it looks or smells off, toss it out. You can freeze broccoli cheddar soup, too. Cool it completely before you freeze it. Use a freezer-safe container, leaving some space at the top. This soup can last in the freezer for up to three months. When you are ready to eat, just thaw it in the fridge overnight. Reheat the soup on the stove over low heat. Stir it often to keep it from sticking. If the soup is too thick, add a splash of milk or broth. You can also use a microwave. Heat it in short bursts, stirring in between. Make sure it’s hot all the way through before you eat. Yes, you can use frozen broccoli. It saves time and works well in soup. Just add it directly to the pot when you cook the onions and garlic. The soup will taste great, and frozen broccoli is just as healthy. To thicken the soup, add more flour. Mix one tablespoon of flour with a little water, then stir it into the soup. Let it simmer for a few minutes. You can also blend in more broccoli for extra thickness. Broccoli cheddar soup pairs nicely with many foods. You can serve it with crusty bread or a fresh salad. Grilled cheese sandwiches are a favorite choice too. For a fun touch, top with crunchy croutons or extra cheese! This blog post covered all you need for a great broccoli cheddar soup. We discussed ingredients, easy steps, and tips for perfect creaminess. You learned how to store leftovers and ways to vary the recipe too. Keep experimenting and adjusting based on what you like. Remember, the best soup is the one made with your favorite flavors and ingredients. Enjoy your cooking adventure!

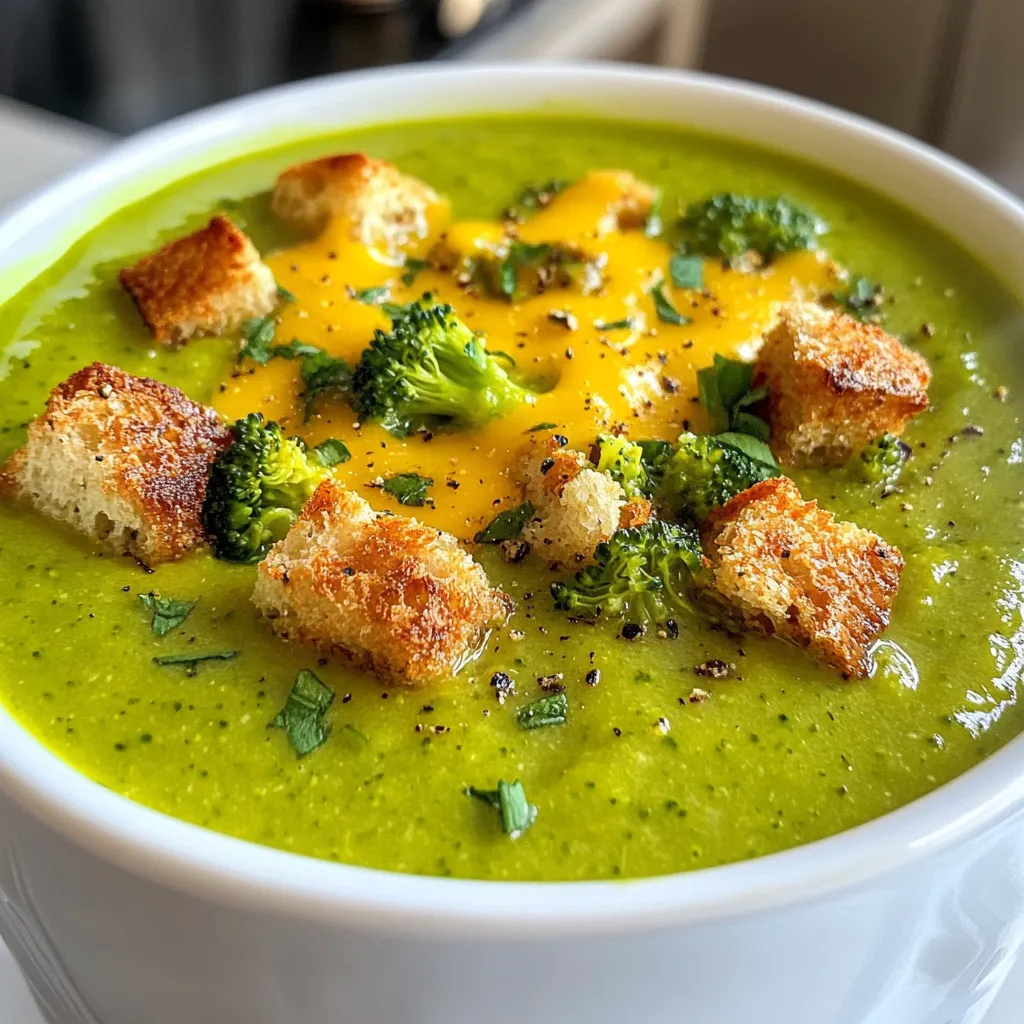
Broccoli Cheddar Soup Creamy and Flavorful Delight

Broccoli cheddar soup is a creamy and tasty dish that warms your heart. In this blog, I’ll share my best

To make Honey Garlic Sausage Sweet Potatoes, you will need: - 4 medium sweet potatoes, diced - 1 pound chicken or turkey sausage, sliced - 3 tablespoons honey - 4 cloves garlic, minced - 1 tablespoon olive oil - 1 teaspoon smoked paprika - ½ teaspoon salt - ½ teaspoon black pepper - 1 tablespoon fresh rosemary, chopped (or 1 teaspoon dried) - 1 cup green beans, trimmed These ingredients create a dish that is sweet, savory, and packed with flavor. Sweet potatoes give a nice texture, while sausage adds heartiness. You can modify this dish based on what you have. Here are some ideas: - Sweet Potatoes: Use butternut squash for a different taste. - Sausage: Try pork or vegetarian sausage if you prefer. - Honey: Maple syrup works well if you want a different sweet flavor. - Garlic: Use garlic powder if fresh garlic is not handy. - Rosemary: Thyme or sage can replace rosemary for a unique twist. These swaps keep the dish tasty while allowing for flexibility. Each serving of Honey Garlic Sausage Sweet Potatoes offers: - Calories: 380 - Protein: 22g - Carbohydrates: 50g - Fat: 12g - Fiber: 7g - Sugar: 10g This meal is balanced and provides a good mix of nutrients. It is filling and suitable for a hearty dinner. {{ingredient_image_1}} Start by prepping your sweet potatoes. Use four medium sweet potatoes and dice them into even cubes. This helps them cook evenly. Next, take a large bowl. Add the diced sweet potatoes to the bowl. Drizzle in one tablespoon of olive oil. Sprinkle one teaspoon of smoked paprika, half a teaspoon of salt, and half a teaspoon of black pepper. Mix everything well, ensuring all the sweet potatoes get coated. Preheat your oven to 400°F (200°C). Once the oven is hot, spread the sweet potatoes on a baking sheet. Make sure they are in a single layer for even roasting. Roast them for 20 minutes, letting them get tender and slightly golden. While the sweet potatoes roast, take a large skillet. Heat it over medium heat. Add one pound of sliced chicken or turkey sausage. Cook it for about 5 to 7 minutes until it’s browned and heated through. After that, stir in four minced garlic cloves. Cook for one more minute until the garlic smells great. Then, add three tablespoons of honey and one tablespoon of chopped fresh rosemary. Mix it all together and heat through. After 20 minutes, pull the sweet potatoes from the oven. Add one cup of trimmed green beans to the baking sheet. Pour the sausage and honey garlic mixture over everything. Toss gently to coat the sweet potatoes and green beans evenly. Return the baking sheet to the oven and roast for another 15 to 20 minutes. You want the green beans tender and the sweet potatoes golden. For the best results, cut the sweet potatoes into uniform pieces. This ensures they cook at the same rate. Keep an eye on the roasting time. Ovens can vary, so check for doneness. If things look too dark, take them out early. You can also add more herbs if you like. Fresh herbs can boost flavor and make the dish pop. When picking sweet potatoes, look for firm, smooth skin. Avoid any with soft spots or blemishes. Choose medium-sized sweet potatoes for even cooking. For sausage, I prefer chicken or turkey for a lighter option. Check the label for quality ingredients and minimal additives. Fresh sausage adds bold flavor, while pre-cooked types save time. To save time, wash and peel sweet potatoes in advance. You can dice them and store in the fridge for up to a day. Slice the sausage while waiting for the oven to preheat. Pre-chop garlic and herbs, too. This way, everything is ready when you start cooking, making the process quick and easy. For added flavor, use fresh herbs like rosemary. They really boost the dish's taste. Try adding a splash of lemon juice just before serving. This brightens the overall flavor. To enhance texture, ensure even roasting. Spread sweet potatoes in a single layer on the baking sheet. This helps them get crispy and golden! Pro Tips Choose Your Sausage Wisely: Opt for a high-quality chicken or turkey sausage for the best flavor and texture. Perfectly Roasted Sweet Potatoes: Make sure to cut the sweet potatoes into uniform pieces to ensure even cooking. Fresh Herbs Make a Difference: Use fresh rosemary if possible, as it adds a vibrant flavor compared to dried herbs. Customize Your Veggies: Feel free to swap in other seasonal vegetables, like bell peppers or zucchini, for added variety. {{image_2}} You can easily adapt this dish for different diets. For a vegan version, use plant-based sausage made from soy or pea protein. Replace honey with maple syrup or agave nectar for sweetness. To make it gluten-free, ensure the sausage is labeled gluten-free. This allows everyone to enjoy the meal. Feel free to swap ingredients based on what you have. Instead of sweet potatoes, use butternut squash or carrots for a twist. If you want more veggies, add bell peppers, zucchini, or broccoli. For the sausage, try pork or beef sausage if you prefer. You can even use beans for added protein. This dish pairs well with many sides. A fresh salad adds a crisp contrast. You might also enjoy serving it with rice or quinoa for extra heartiness. Garlic bread or a light pasta dish can round out the meal nicely. Each option enhances the sweet and savory flavors of the main dish. After you enjoy your Honey Garlic Sausage Sweet Potatoes, store leftovers right away. Let the dish cool to room temperature. Transfer it into an airtight container. This keeps moisture in and prevents smells from mixing. You can store this meal in the fridge for up to three days. When you're ready to eat again, reheating is key. The oven works best for flavor. Preheat your oven to 350°F (175°C). Spread the leftovers on a baking sheet. Heat for about 15 minutes or until warm. This method keeps the sweet potatoes crispy. If you're in a hurry, use a microwave. Place on a microwave-safe plate. Cover it with a damp paper towel. Heat in short bursts, checking every 30 seconds. You can freeze this dish if you want to save it longer. Use a freezer-safe container. It's best to freeze before reheating. Divide the dish into single servings. Label each container with the date. This way, you can enjoy it for up to three months. When ready to eat, thaw it overnight in the fridge. Reheat in the oven or microwave as mentioned above. You can prepare Honey Garlic Sausage Sweet Potatoes ahead of time. First, chop the sweet potatoes and green beans and store them in the fridge. You can also slice the sausage and mix it with garlic, honey, and rosemary. Keep this mixture in a separate container. When you are ready to cook, just follow the roasting steps. This saves time and makes dinner easy. Yes, you can use other types of sausages. Options like pork, beef, or veggie sausage work well. Just make sure they are cooked through. Each sausage brings a unique flavor. Feel free to experiment to find your favorite combination. If you need a honey substitute, try maple syrup or agave nectar. These options add sweetness. You can also use brown sugar mixed with a bit of water for a similar effect. Adjust the amount to taste, as each sweetener varies in sweetness. Honey Garlic Sausage Sweet Potatoes are easy and fun to prepare. You learned about the ingredients, cooking steps, and tips to make it perfect. Don’t forget the variations to meet your needs and dietary choices. Proper storage means you can enjoy leftovers too. This dish is not only tasty but also flexible. Try it out and make it your own. Cooking can be simple and enjoyable!

Honey Garlic Sausage Sweet Potatoes Flavorful Delight

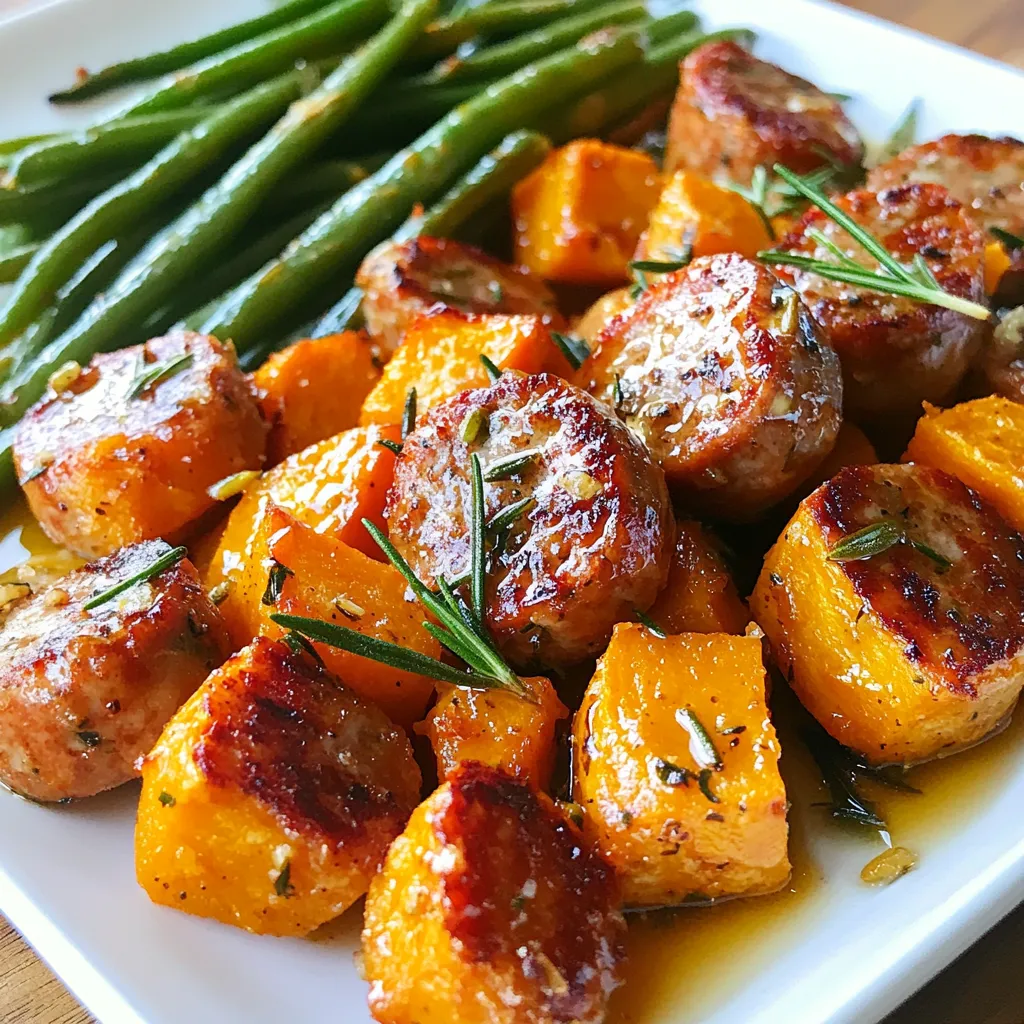
Are you ready to enjoy a delicious meal that’s easy to make? Honey Garlic Sausage Sweet Potatoes is your answer!

- 1 lb boneless, skinless chicken breast, cut into bite-sized pieces - 1 cup broccoli florets - 1 red bell pepper, sliced - 1 cup sugar snap peas - 2 carrots, julienned - 1 tablespoon olive oil - 2 cloves garlic, minced - 1 inch ginger, grated - Zest of 1 orange - Juice of 2 oranges - 2 tablespoons soy sauce (low sodium) - 1 tablespoon honey - 1 teaspoon cornstarch mixed with 2 tablespoons water - Salt and pepper to taste - Sesame seeds and sliced green onions for garnish You can swap chicken for tofu or shrimp for a veggie twist. Use low-sodium soy sauce to cut back on salt. Try coconut aminos for a soy-free option. Instead of honey, use maple syrup for a vegan choice. You can also add more veggies like bok choy or mushrooms for extra nutrients. Garnishing your dish makes it pop! Consider using sesame seeds for crunch. Sliced green onions add color and a fresh taste. You might sprinkle some crushed red pepper for heat. A few cilantro leaves can brighten the dish too. These simple touches enhance both the look and flavor of your meal. {{ingredient_image_1}} First, grab a large bowl. In this bowl, mix the orange zest, orange juice, soy sauce, honey, and minced garlic. This mix gives the chicken a great flavor. Cut the chicken breast into bite-sized pieces. Place the chicken in the bowl and coat it well. Let it marinate for at least 15 minutes. This step is crucial for juicy and tasty chicken. Heat one tablespoon of olive oil in a large skillet or wok over medium-high heat. Once the oil is hot, add the marinated chicken. Do not add the marinade yet; save it for later. Cook the chicken for about 5-7 minutes. You want it to turn golden brown and be fully cooked. Once done, take the chicken out and set it aside. In the same skillet, add grated ginger first. This adds an amazing aroma. Next, toss in the broccoli, sliced red bell pepper, sugar snap peas, and julienned carrots. Stir-fry these vegetables for about 3-4 minutes. You want them to be bright and slightly tender but still crisp. This keeps them healthy and crunchy. Return the cooked chicken to the skillet. Now, pour in the reserved marinade. Bring this mix to a simmer. Stir well to combine all the flavors. Add the cornstarch-water mixture next. This will thicken the sauce nicely. Stir continuously for about 2 minutes. You want a glossy sauce that coats the chicken and vegetables well. Finally, season with salt and pepper to taste. To keep your vegetables crisp, time is key. Stir-fry them quickly over high heat. Cook them for just 3-4 minutes. Start with the hardest veggies first. Add broccoli, carrots, and bell peppers before the soft ones. When they look bright and colorful, they are ready. Don't wait too long! Remove them from heat as soon as they soften a bit. A great way to boost flavor is to use fresh herbs and citrus. Use the zest of the orange to add a strong taste. It gives a burst of freshness without adding calories. Garlic and ginger also help. They add depth and aroma. If you want more zing, a splash of vinegar can work wonders too. Just a little will elevate your dish. For meal prep, chop your veggies ahead of time. Store them in airtight containers in the fridge. You can marinate the chicken the night before. This saves time and adds flavor. When you are ready to cook, just stir-fry everything. Keep the cooked stir-fry in the fridge for easy meals. Enjoy it within three days for the best taste. Pro Tips Marinate for Maximum Flavor: Allow the chicken to marinate for at least 30 minutes to absorb all the flavors from the orange juice and garlic. This will enhance the taste of your stir fry. Use Fresh Ingredients: Whenever possible, opt for fresh vegetables and herbs. They add a vibrant color and crisp texture that frozen or canned options lack. Manage Your Heat: Make sure your skillet or wok is hot enough before adding the chicken. This helps to achieve a nice sear and keeps the meat juicy. Customize Your Veggies: Feel free to swap out the vegetables based on your preference or what's in season. Snow peas, bell peppers, and zucchini are great alternatives. {{image_2}} You can easily swap chicken for other proteins. Tofu offers a great plant-based option. Use firm tofu for the best texture. Simply press the tofu, cut it into cubes, and marinate it just like the chicken. Shrimp is another tasty choice. Peel and devein shrimp, then cook them for 3-4 minutes until pink. Both options work well with the orange sauce. Feel free to get creative with your veggies. You can use bell peppers, snap peas, or even zucchini. Spinach and bok choy add a fresh twist. You can also toss in mushrooms for extra flavor. Mix and match according to what you have. Each veggie brings its own taste and color. This ensures every bite stays exciting and fresh. If you need a gluten-free version, use tamari instead of soy sauce. Tamari has a similar taste but is safe for those with gluten issues. Check the labels on your honey and cornstarch too, as some brands may add gluten. This dish remains healthy and delicious without losing any flavor. Enjoy your meal without worries! To keep your Healthy Orange Chicken Stir Fry fresh, place it in an airtight container. Make sure it cools down first. Store it in the fridge for up to three days. This way, you can enjoy it again without losing flavor. To reheat, use a skillet on medium heat. Add a splash of water or broth to keep it moist. Stir it around for about five minutes until it’s hot. You can also use a microwave; just cover it to keep steam in. Heat in short bursts of one minute, stirring in between. You can freeze this dish if you want to save it for later. Let it cool completely first. Then, store it in a freezer-safe container. It will keep well for up to two months. To eat, thaw it in the fridge overnight before reheating. This keeps the chicken tender and the veggies crisp. You can use coconut aminos as a soy sauce substitute. It has a sweet taste but less salt. Another option is tamari. Tamari comes from soy but is gluten-free. You could also try homemade sauces. Mix water, vinegar, and a bit of salt for a quick fix. Yes, you can prepare this dish ahead of time. Cook the chicken and veggies, then store them in the fridge. Keep the sauce separate to avoid sogginess. When you are ready to eat, heat everything together. This saves time on busy nights. To add heat to your stir fry, use red pepper flakes. Start with a small amount and adjust to taste. You can also try adding Sriracha sauce. For a fresh option, toss in sliced jalapeños. Adjust the spice level to suit your taste. This blog post covered key ingredients, cooking steps, and tips for your dish. I shared ways to make it healthier and avoid overcooked veggies. You can try different proteins and vegetables for variety. Proper storage tips help keep leftovers fresh. Use the FAQs for quick answers on common questions. Enjoy creating your meal with these steps and suggestions. Cooking can be fun and healthy!

Healthy Orange Chicken Stir Fry Tasty Weeknight Meal

Are you ready for a delicious dinner that’s both healthy and quick to make? My Healthy Orange Chicken Stir Fry

To make a tasty Chicken Taco Casserole, you need fresh and simple ingredients. Here’s what you will use: - 2 cups cooked chicken, shredded - 1 can (15 oz) black beans, rinsed and drained - 1 cup corn kernels (frozen or canned) - 1 can (10 oz) diced tomatoes with green chilies - 1 packet taco seasoning - 2 cups tortilla chips, crushed - 2 cups shredded cheddar cheese - 1 cup sour cream - 1/4 cup fresh cilantro, chopped (for garnish) - 1 avocado, diced (for garnish) - 1 jalapeño, sliced (optional for garnish) Each ingredient adds flavor and texture. The cooked chicken is the star, while black beans and corn give it heartiness. The diced tomatoes bring a nice kick, thanks to the green chilies. Taco seasoning ties everything together with its bold taste. Tortilla chips add a crunchy layer, and cheese makes it gooey and delicious. Sour cream adds a creamy touch, and garnishes like cilantro, avocado, and jalapeño bring color and freshness. Feel free to adjust any ingredients to fit your taste. This dish is all about making it yours! {{ingredient_image_1}} - Preheat your oven to 350°F (175°C). - In a large mixing bowl, combine the shredded chicken, black beans, corn, diced tomatoes with green chilies, and taco seasoning. Mix well until all ingredients are coated with the seasoning. - Grease a 9x13 inch baking dish. Spread half of the crushed tortilla chips evenly at the bottom. - Spoon half of the chicken mixture over the tortilla chips. Add half of the cheddar cheese on top. - Repeat the layers: add the remaining tortilla chips, then the rest of the chicken mixture, and top with the rest of the cheddar cheese. - In a separate bowl, mix the sour cream with a splash of lime juice if you want extra flavor. Spread this mixture over the top layer of cheese. - Cover the baking dish with aluminum foil and bake for 25 minutes. - After 25 minutes, remove the foil and bake for an additional 10–15 minutes. Look for the cheese to be bubbly and golden. - When it’s done, take it out of the oven and let it cool for a few minutes. Garnish with chopped cilantro, diced avocado, and sliced jalapeños if you like. - Slice and serve warm. You can dish it out or serve it alongside a fresh green salad. - Choosing the right chicken Use cooked chicken for easy prep. I love rotisserie chicken for great flavor. You can also use leftover chicken from other meals. Just shred it into small pieces for even coverage. - Adjusting spice levels Spice is key in a taco casserole. If you want less heat, use mild taco seasoning. For more kick, try spicy seasoning or add sliced jalapeños. Taste the mixture before baking to find your perfect level. - Best cheese options Cheddar cheese is classic and melts well. You can also mix in Monterey Jack for a creamy texture. If you like bold flavors, try pepper jack cheese for a spicy twist. - Pairing with salads or sides This casserole is filling, so pair it with a light salad. A simple green salad with lime vinaigrette works well. You can also serve it with fresh guacamole or salsa for extra flavor. - Presentation tips for garnishing Presentation matters! After baking, sprinkle fresh cilantro on top. Diced avocado adds color and creaminess. For a pop of heat, add jalapeño slices. Serve it warm for the best taste and look. Pro Tips Use Rotisserie Chicken: For a quicker prep time, consider using store-bought rotisserie chicken. It saves cooking time and adds a delicious flavor. Customize Your Spice Level: Adjust the amount of taco seasoning or add diced jalapeños to the chicken mixture for a spicier kick. Layer with Care: Ensure even layering of ingredients for a balanced flavor in every bite. Spread each layer evenly to prevent sogginess. Garnish for Freshness: Fresh garnishes like cilantro and avocado not only enhance the dish's appearance but also add refreshing flavors that complement the casserole. {{image_2}} Using different proteins You can switch out chicken for turkey, beef, or pork. Each option brings a new flavor. If you use cooked meats, ensure they are shredded or diced. This keeps the dish easy to serve. Vegetarian alternatives For a meatless dish, replace the chicken with more beans or lentils. You can also add sautéed veggies like bell peppers and zucchini. This keeps the casserole hearty and satisfying. Low-carb options If you want a low-carb dish, skip the tortilla chips. Instead, use cauliflower rice for a base. It keeps the texture nice while cutting carbs. Adding more spices Feel free to boost flavor by adding spices. Cumin, paprika, or chili powder can give an extra kick. You can also mix in garlic or onion powder for depth. Additional toppings to consider Don't forget toppings! Sour cream adds creaminess, while fresh cilantro gives brightness. Avocado slices or jalapeños bring freshness and heat. You can even add a squeeze of lime for zest. To keep your chicken taco casserole fresh, store it in the fridge. Place it in an airtight container. It will last for about three to four days. If you want to save it longer, freezing is a great option. Wrap the casserole tightly in plastic wrap, then foil. It can last for up to three months in the freezer. When it's time to enjoy your leftovers, the best way to reheat is in the oven. Preheat the oven to 350°F (175°C). Place the casserole in an oven-safe dish and cover it with foil. Heat for about 20-25 minutes. This helps keep the cheese nice and melty. You can also use the microwave, but be careful. Heat in short bursts, checking often to avoid sogginess. Enjoy your meal just like it was fresh! How long does chicken taco casserole last? Chicken taco casserole lasts about 3 to 4 days in the fridge. Make sure you cover it well to keep it fresh. Store it in an airtight container for best results. Can I make this dish ahead of time? Yes, you can make this dish ahead of time. Prepare the casserole, but don’t bake it. Just cover it and place it in the fridge. When you’re ready to eat, bake it as directed. This saves time on busy days. What can I serve with chicken taco casserole? You can serve chicken taco casserole with a fresh salad or some guacamole. Rice or beans work well too. For a fun twist, add tortilla chips or a side of salsa. This makes your meal even more enjoyable! The chicken taco casserole is easy to make and tasty. You blend cooked chicken, beans, corn, and spices. Then, you layer it all and bake. You can change ingredients and adjust spices to fit your taste. Store leftovers in the fridge or freeze them for later. This dish suits many occasions and is fun to serve. With these tips, you can impress friends and family with your cooking skills. Enjoy your delicious meal!

Chicken Taco Casserole Tasty and Simple Dinner

If you’re looking for a quick and tasty dinner, you’ve found it! My Chicken Taco Casserole is loaded with flavor

To make this sauce, you need fresh cranberries. Use 2 cups of cranberries that you rinsed well. Look for bright red berries. They should feel firm and plump. Avoid any that are mushy or brown. Citrus adds a bright taste. You need 1 cup of orange juice. Fresh-squeezed juice works best. Don't forget to add the zest from 1 orange. The zest gives a nice pop of flavor. To balance the tartness, use sweeteners. You can add 1/2 cup of honey or maple syrup. Maple syrup is a great vegan choice. For spices, add 1/4 teaspoon of ground cinnamon and 1/4 teaspoon of ground ginger. A pinch of salt helps all the flavors shine. For a fun twist, consider garnishes. You can add 1/4 cup of chopped pecans for crunch. Fresh mint leaves also brighten up the dish. They add color and a fresh taste. These garnishes make your sauce look pretty and inviting. {{ingredient_image_1}} Gather your ingredients first. You will need: - 2 cups fresh cranberries, rinsed - 1 cup orange juice - Zest of 1 orange - 1/2 cup honey (or maple syrup for a vegan option) - 1/4 teaspoon ground cinnamon - 1/4 teaspoon ground ginger - A pinch of salt - 1/4 cup chopped pecans (optional, for garnish) - Fresh mint leaves (for garnish) Rinsing the cranberries helps remove dirt. Check for bad berries. You want only fresh ones. Next, zest the orange. This gives a nice citrus flavor. Squeeze the juice from the orange and set it aside. Measure out your honey or maple syrup. Have your spices ready to go. In a medium saucepan, combine all the ingredients. Add the cranberries, orange juice, zest, honey, cinnamon, ginger, and salt. Stir well to mix everything. Place the pan over medium heat. Cook while stirring occasionally. You will hear the cranberries begin to pop after about 10 minutes. This means they are releasing their juices. Once the cranberries burst, reduce the heat. Let the sauce simmer on low for another 5 minutes. This helps it thicken a bit. After that, remove the pan from heat. Allow the sauce to cool to room temperature. It will thicken more as it cools. When the sauce is cool, transfer it to a serving bowl. If you like, sprinkle chopped pecans on top. This adds a nice crunch. Finish by garnishing with fresh mint leaves. They add color and a fresh taste. Your cranberry sauce is now ready to serve! Enjoy it with roasted meats or on a sandwich. When cooking fresh cranberries, always rinse them first. This removes dirt and debris. Use a medium saucepan for even cooking. Combine cranberries with orange juice, zest, honey, cinnamon, ginger, and salt. Stir the mixture well to coat the berries. Cook on medium heat. Watch for the cranberries to pop. This should take about 10 to 15 minutes. Stir occasionally to prevent sticking. Once they burst, lower the heat. Let it simmer for a few more minutes to thicken. You can adjust the sweetness in your cranberry sauce. If you prefer a sweeter sauce, add more honey or maple syrup. Taste the sauce as you go. This way, you can find the right balance for your palate. If you find it too sweet, add a little more orange juice. This helps to balance the flavors without making it too tart. Storing leftover cranberry sauce is simple. Let it cool to room temperature first. Then, transfer it to an airtight container. Place it in the fridge for up to one week. You can also freeze it for longer storage. Just use a freezer-safe container and label it with the date. When ready to use, thaw it in the fridge overnight. Pro Tips Use Fresh Cranberries: Fresh cranberries yield the best flavor and texture for this dish. Avoid using dried cranberries, as they will alter the consistency and sweetness of the sauce. Adjust Sweetness: Depending on your taste preference, you can adjust the amount of honey or maple syrup. Start with 1/2 cup and add more if you prefer a sweeter sauce. Cooling is Key: Allow the sauce to cool completely before serving, as it will thicken further and enhance the flavor as it sits. Garnish Creatively: Experiment with different garnishes like orange slices or pomegranate seeds for a festive touch that adds both color and flavor. {{image_2}} You can make this sauce vegan by using maple syrup instead of honey. Maple syrup adds a rich flavor that pairs well with cranberries. Just replace the honey with the same amount of maple syrup. It keeps the sweetness while making it plant-based. To change the taste, you can add spices or fruits. Try adding a pinch of nutmeg for warmth. You can also mix in diced apples or pears. They bring natural sweetness and extra texture. Experiment with flavors to find your favorite blend. Nuts can add crunch and depth to your sauce. Chopped pecans are a great choice, but walnuts work too. Just sprinkle them on top before serving. This small step makes a big difference in taste and texture. Don’t be afraid to get creative with your toppings! Once your fresh cranberry sauce cools, store it in a clean jar. Make sure to seal the lid tightly. Keep it in the fridge for the best taste. This sauce can last up to a week. Always check for any off smells before use. You can freeze your cranberry sauce if you want to save some for later. Use an airtight container or a freezer bag. Leave some space for the sauce to expand. It can last up to three months in the freezer. When ready to use, thaw it overnight in the fridge. The shelf life of fresh cranberry sauce is about one week in the fridge. If frozen, it can last for three months. You can use it on turkey, pancakes, or yogurt. It adds great flavor to many dishes. Always taste before using to ensure it is still fresh. Yes, you can make fresh cranberry sauce a day ahead. It tastes great when chilled. Just store it in an airtight container in the fridge. The flavors blend well overnight. This makes meal prep easy and stress-free for special events. You know the cranberries are done when they start to pop. This takes about 10-15 minutes. Once they burst, reduce the heat to low. Let it simmer for five more minutes to thicken. The sauce will also thicken as it cools. Yes, you can substitute some ingredients. Use maple syrup instead of honey for a vegan option. You can also try using lemon juice for a different citrus taste. If you don't have cinnamon or ginger, you can skip them or use other spices. Experiment and make it your own! In this post, we explored how to make fresh cranberry sauce. We looked at key ingredients like fresh cranberries, citrus, sweeteners, and spices. I shared step-by-step instructions to guide you in cooking the sauce. Tips for adjusting sweetness and storing leftovers help ensure success. Variations like vegan options and added fruits give you more choices. Overall, fresh cranberry sauce is easy to make and can enhance any meal. Enjoy your cooking and the delicious results!

Ingredient Fresh Cranberry Sauce Simple and Tasty

Are you ready to elevate your holiday meals with a fresh cranberry sauce that’s simple and tasty? In this guide,

- Rice options: You can use white rice or brown rice. White rice cooks faster and is softer. Brown rice is chewier and has more fiber. Both work great in this bowl. - Chicken preparation details: Use 2 diced chicken breasts. I like to season the chicken with smoked paprika and garlic powder. This adds a nice flavor. Cook it until golden brown for about 6-7 minutes. - Optional ingredients for added flavor: You can add 1/2 cup of diced red bell pepper for a sweet crunch. It makes the bowl look colorful too. Don’t forget the toppings! Crumbled feta cheese, diced avocado, and fresh cilantro add creaminess and zest. {{ingredient_image_1}} To start, heat your skillet over medium heat. Add 1 tablespoon of olive oil. Once hot, toss in 2 diced chicken breasts. Season with 1 teaspoon of smoked paprika, 1 teaspoon of garlic powder, salt, and pepper. Cook the chicken for about 6 to 7 minutes. Look for a golden brown color and no pink inside. That means your chicken is done. Next, add 1 cup of corn kernels to the skillet. If you want some color, add 1/2 cup of diced red bell pepper. Sauté for 2 to 3 minutes. You want the corn to heat up and get a bit caramelized. This adds sweetness and flavor to your dish. Now it’s time to build your bowl. Start with 2 cups of cooked rice as your base. Divide the chicken and corn mixture evenly over the rice. This keeps each serving the same. For a tasty finish, sprinkle 1/2 cup of crumbled feta cheese and diced avocado on top. Add fresh cilantro and a squeeze of lime juice. Make sure the bowl looks colorful and inviting. - Alternatives for rice: Quinoa or cauliflower rice work great if you want a change. - Options for chicken: Use rotisserie chicken for a quick fix. Just shred it and add. - Dairy-free cheese options: Try nutritional yeast or vegan cheese for a tasty swap. - Ideas for batch cooking: Cook extra chicken and corn on the weekend. This makes meals easy. - Storage tips for prepped ingredients: Keep chicken and corn in separate containers. They stay fresh longer that way. - Reheating instructions: Warm it up in the microwave for 1-2 minutes. Stir halfway for even heat. - Using different spices: Add cumin or chili powder for a spicy kick. Experiment with flavors! - Adding sauces or dressings: Drizzle with chipotle sauce or a creamy dressing for extra taste. - Recommended accompaniments: Serve with tortilla chips or a fresh salad for crunch. Pro Tips Use Fresh Ingredients: Whenever possible, use fresh corn and ripe avocados for the best flavor and texture in your bowl. Customize Your Bowl: Feel free to add other toppings like diced tomatoes, jalapeños, or even black beans for extra flavor and nutrition. Let the Chicken Rest: After cooking, allow the chicken to rest for a few minutes before serving. This helps keep it juicy and tender. Meal Prep Friendly: This dish is great for meal prep! Cook extra chicken and rice to use throughout the week for quick and easy lunches. {{image_2}} You can easily make a vegetarian version of this bowl. Just swap chicken for black beans or grilled tofu. Both options bring protein and taste. You can add more veggies too! Try bell peppers, zucchini, or even spinach for a fresh crunch. The flavor changes a bit since beans are earthier than chicken. Tofu gives a soft texture, while beans add heartiness. Want to turn up the heat? Add diced jalapeños to the chicken as it cooks. For more spice, use chili powder or cayenne pepper in place of smoked paprika. Garnish with fresh sliced jalapeños or a drizzle of hot sauce. This adds a zesty kick that spice lovers will enjoy. You can also serve this dish in fun ways! Try making wraps or tacos with the mix. Just use tortillas to hold all the tasty fillings. For a lighter meal, make a salad using the same ingredients. You can even switch rice for quinoa or cauliflower rice for a healthy twist. Each option keeps the great flavors while changing the style! To keep your Street Corn Chicken Bowl fresh, store leftovers in the fridge. Use airtight containers for the best results. This helps to keep out air and moisture. Aim to eat leftovers within three days for best taste and safety. Make sure your fridge is set to 40°F (4°C) or lower. This keeps food safe from harmful bacteria. You can freeze parts of this dish for later meals. Freeze the chicken and corn mixture separately from the rice. Rice tends to get mushy when thawed. Use freezer-safe bags or containers. When you want to eat it, thaw the chicken and corn overnight in the fridge. Reheat in a skillet or microwave until hot. Use within three months for best flavor. Each ingredient has its own shelf life. Cooked rice lasts about 4-6 days in the fridge. Cooked chicken stays fresh for 3-4 days. Corn can last about 3-5 days if stored well. Look for signs of spoilage, like off smells or changes in texture. To enjoy the best taste, consume the meal within three days of cooking. It takes about 25 minutes to make this dish. You will spend 10 minutes prepping. Cooking the chicken and corn takes around 15 minutes. This quick time makes it great for busy evenings. You can serve it fresh and warm right away. Yes, you can use frozen chicken and corn. If using frozen chicken, thaw it first in the fridge overnight. This helps it cook evenly. For frozen corn, you can add it directly to the skillet. Just cook it a bit longer to ensure it's hot throughout. You can serve this bowl with a side salad or tortilla chips. A nice beverage option is lime-infused water or iced tea. These pair well with the flavors in the bowl. You can also offer fresh lime wedges for extra zest. Yes, this recipe is gluten-free. All the main ingredients are safe for gluten-free diets. Just ensure you use gluten-free rice and check your seasoning blends. This makes it easy for everyone to enjoy a tasty meal. This blog post covered everything you need for a delicious Street Corn Chicken Bowl. We discussed the key ingredients, preparation steps, and smart tips for meal prep. You can tweak the recipe with variations like vegetarian or spicy options. Proper storage and FAQs help ensure your dish stays fresh and tasty. Experimenting with flavors and ingredients can make this bowl your own. Enjoy creating your perfect meal and share it with family and friends!

Street Corn Chicken Bowl Tasty and Simple Recipe

Are you ready to spice up your dinner routine? The Street Corn Chicken Bowl is both tasty and simple to

- 1 tablespoon olive oil - 1 large onion, chopped - 3 cloves garlic, minced - 2 carrots, diced - 2 celery stalks, diced - 1 bell pepper (green or orange), chopped - 1 cup mushrooms, sliced - 1 can (15 oz) black beans, drained and rinsed - 1 can (15 oz) diced tomatoes with green chilies - 4 cups vegetable broth - 1 teaspoon ground cumin - 1 teaspoon smoked paprika - 1 teaspoon dried oregano - Salt and pepper to taste - 1 cup kale or spinach, chopped - 1 cup corn kernels (fresh or frozen) - Optional: 1-2 tablespoons lemon juice for brightness This stew shines with seasonal ingredients. Carrots and celery add crunch and color. The bell pepper brings a sweet taste. Mushrooms give a meaty feel, while black beans pack protein. Kale or spinach adds a lovely green touch. Using fresh corn gives a sweet burst of flavor. These ingredients not only taste great but are perfect for fall. No bell pepper? Use zucchini or squash instead. If you don't have kale, spinach works well too. Canned beans can swap for cooked lentils. For a thicker stew, add a potato or two. You can also use chicken broth if you prefer. No fresh corn? Frozen corn is a great choice. These swaps keep the stew tasty and fun! {{ingredient_image_1}} 1. Heat 1 tablespoon of olive oil in a large pot over medium heat. 2. Add 1 large chopped onion. Cook until it turns translucent, about 5 minutes. 3. Next, add 3 minced garlic cloves. Sauté for another minute until you smell the garlic. 4. Stir in 2 diced carrots, 2 diced celery stalks, and 1 chopped bell pepper. Cook for 5-7 minutes until the veggies soften. 5. Add 1 cup of sliced mushrooms. Cook until they start to soften, about 3 minutes. 6. Mix in 1 can of drained and rinsed black beans and 1 can of diced tomatoes with their juices. 7. Pour in 4 cups of vegetable broth. 8. Sprinkle in 1 teaspoon of ground cumin, 1 teaspoon of smoked paprika, 1 teaspoon of dried oregano, and salt and pepper to taste. 9. Bring this mix to a boil. 10. Once boiling, reduce the heat to low. Let it simmer for 20 minutes so the flavors blend. 11. In the last 5 minutes, add 1 cup of chopped kale or spinach and 1 cup of corn. Stir well. 12. If you want, add 1-2 tablespoons of lemon juice for a fresh taste. 13. Taste and adjust the seasoning if needed. - Prep Time: 15 minutes - Cook Time: 25 minutes - Total Time: 40 minutes - Servings: This recipe makes 6 servings. - Use fresh, seasonal veggies for a richer taste. - Let it simmer longer for deeper flavors. - Taste as you go; adjust salt and spices to your liking. - A splash of lemon juice brightens the stew's flavor. - Serve in cauldrons for a fun Halloween vibe. Add a plastic spider for a spooky touch! To make your Halloween Witches Brew Stew spookier, use fun serving dishes. I love using large cauldrons or deep bowls. These give it a witchy vibe. Garnish each bowl with fresh parsley. You can also add a dollop of sour cream for creaminess. For a fun touch, place a plastic spider or witch’s figurine on the rim. It adds a playful look that kids enjoy! Want to take the flavor up a notch? Consider adding a dash of hot sauce for heat. You can also mix in a tablespoon of soy sauce for umami. If you like it tangy, squeeze in some lemon juice. This brightens the stew and brings out the flavors. Don’t forget to adjust the salt and pepper to your taste. Always taste before serving! To get the best stew, start with a good sauté. Heat the olive oil well before adding the onions. This step builds flavor. Stir the veggies well and cook until they soften. This helps blend the flavors. Don’t rush the simmering stage. Let the stew sit on low heat for at least 20 minutes. This allows the spices to meld and creates a rich taste. Always add greens like kale near the end, so they stay bright and fresh! Pro Tips Enhance Flavor Depth: Consider adding a splash of balsamic vinegar or a dash of hot sauce for an extra layer of flavor that pairs beautifully with the spices. Vegetable Variations: Feel free to swap in your favorite seasonal vegetables such as pumpkin or zucchini to keep the stew fresh and interesting. Make It Heartier: For a more filling meal, add cooked quinoa or rice to the stew during the last few minutes of cooking. Storage Tips: This stew freezes well! Portion it out into airtight containers and store in the freezer for up to 3 months for quick meals. {{image_2}} This stew is perfect for vegetarians and vegans. It features black beans and vegetables, making it hearty and filling. You can skip any animal-based broth. Just use vegetable broth, which keeps the flavors rich. For added protein, consider using lentils or chickpeas. They also boost the stew's texture. You can add extra veggies like zucchini or bell peppers too. Feel free to swap ingredients based on your taste. If you don’t like black beans, try kidney beans or pinto beans. You can replace the kale with Swiss chard or collard greens. Love a creamy texture? Add in some diced potatoes. If you want a sweeter stew, toss in some sweet potatoes or butternut squash. If you like spice, this stew can easily heat up. Add diced jalapeños or a splash of hot sauce during cooking. You can also increase the smoked paprika for a smoky kick. Try adding crushed red pepper flakes for extra heat. Adjust the spice to your liking, and enjoy a warming bowl of your Witches Brew Stew! After enjoying your Halloween Witches Brew Stew, let it cool. Place the stew in an airtight container. Keep it in the fridge for up to five days. If you want it to last longer, consider freezing it. To reheat the stew, pour it into a pot. Warm it over medium heat, stirring often. You can also use the microwave. Heat it in a microwave-safe bowl, stirring every minute. Make sure it is hot all the way through before serving. For freezing, use a freezer-safe container. Leave some space at the top for expansion. To thaw, move the stew to the fridge overnight. You can also thaw it in the microwave. Just be careful to heat it evenly to prevent hot spots. Yes, you can make this stew ahead of time. It tastes even better the next day. Just let it cool and store it in the fridge. When you are ready to eat, heat it on the stove or in the microwave. This stew is perfect for meal prep. Many sides go well with this stew. Here are some great options: - Crusty bread or rolls - Cornbread muffins - A simple green salad - Roasted or sautéed vegetables - Rice or quinoa for a hearty meal These sides complement the flavors of the stew and add texture. To make this stew gluten-free, use gluten-free vegetable broth. Most canned beans and vegetables are gluten-free, but always check the labels. Avoid using any bread or croutons that contain gluten. This way, everyone can enjoy the spooky and savory stew! This blog post covered the key ingredients, cooking steps, and helpful tips for your Halloween Witches Brew Stew. We included ways to enhance flavors and presented variations to suit all diets. Don't forget storage tips for leftovers and answers to common questions. Now, you're ready to impress with a spooky, tasty stew. Enjoy crafting this dish for your Halloween festivities!

Halloween Witches Brew Stew Spooky and Savory Recipe

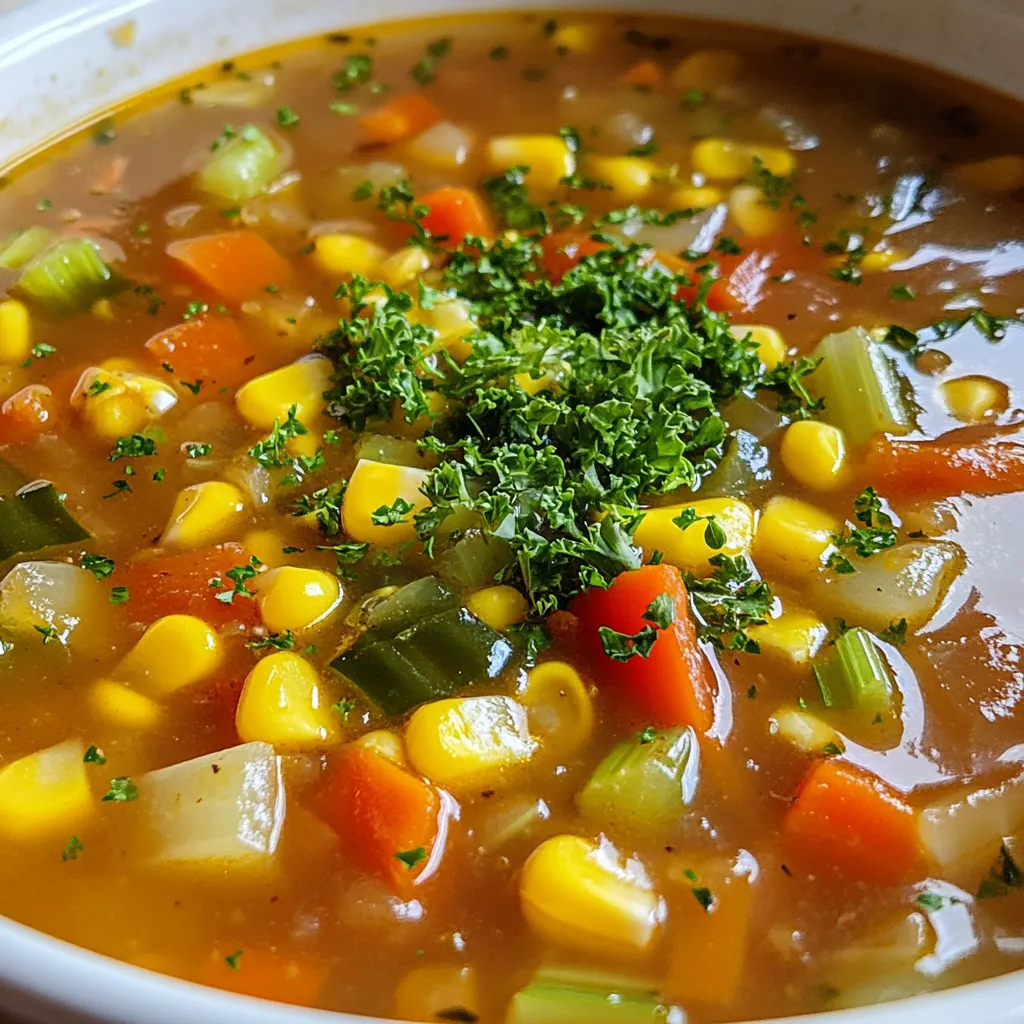
Get ready to brew up some Halloween magic with my spooky and savory Witches Brew Stew! This recipe combines fresh,

To create these tasty meatballs, gather these main items: - 1 pound ground beef (or turkey) - 1/2 cup breadcrumbs - 1/4 cup finely chopped onion - 1/4 cup chopped fresh parsley - 1 egg - 1 teaspoon garlic powder - Salt and pepper to taste - 2 cups cranberry sauce (homemade or store-bought) - 1/4 cup soy sauce - 1 tablespoon Dijon mustard - 1 tablespoon brown sugar - 1 tablespoon apple cider vinegar These ingredients work together to give your meatballs a rich flavor. The ground meat serves as the base, while the breadcrumbs help keep them tender. Onions and parsley add freshness. Cranberry sauce brings sweetness and tanginess, making every bite a delight. You can enhance the taste with a few optional items: - 1 teaspoon onion powder - 1 teaspoon smoked paprika - 1/2 teaspoon crushed red pepper flakes These extras can give your meatballs a unique twist. Onion powder adds depth, smoked paprika offers a hint of smokiness, and red pepper flakes give a kick of heat. Feel free to mix and match based on your taste. If you have specific dietary needs, here are some swaps you can use: - Ground turkey can replace ground beef for a leaner option. - Gluten-free breadcrumbs work well instead of regular breadcrumbs. - Use a flax egg (1 tablespoon ground flaxseed mixed with 3 tablespoons water) instead of an egg for a vegan option. - A low-sodium soy sauce can reduce salt intake. These substitutions help everyone enjoy the dish, regardless of their diet. You can still create flavorful meatballs that fit your needs. {{ingredient_image_1}} To start, gather your ingredients. In a large bowl, mix together the ground beef, breadcrumbs, and onion. Add in chopped parsley, the egg, garlic powder, salt, and pepper. Use your hands to combine everything well. You want a smooth mixture that sticks together nicely. Now, take a small amount of the meat mixture. Roll it into a ball about one inch in size. This recipe makes about 20 to 25 meatballs. Make sure they are all similar in size for even cooking. Set the meatballs aside on a plate as you work. In a separate bowl, combine the cranberry sauce, soy sauce, Dijon mustard, brown sugar, and apple cider vinegar. Stir until the mixture is smooth and well blended. This sauce will give the meatballs their sweet and tangy flavor. Place the formed meatballs in the slow cooker. Pour the cranberry sauce mixture over them, ensuring they are fully coated. Cover the slow cooker with its lid. Cook on low for 4 to 6 hours or on high for 2 to 3 hours. The meatballs are done when they are tender and cooked through. Stir gently before serving to coat them in sauce. To make juicy meatballs, start with fresh ground meat. You can use beef or turkey. Mixing in breadcrumbs helps keep them moist. Don't overmix the meat; this will make them tough. Aim for small, even meatballs, about one inch wide. This size cooks well and stays tender. Season your meatball mix well. I like using garlic powder for a nice kick. Add salt and pepper to taste; don’t hold back! Fresh parsley gives a burst of flavor and color. You can even try adding spices like paprika or Italian herbs for a unique twist. If your sauce is too thin, you can thicken it easily. One way is to mix a bit of cornstarch with water. Stir this mix into the sauce while it cooks. Another option is to let the sauce cook longer with the lid off. This will help it reduce and thicken naturally. Pro Tips Use Fresh Ingredients: Opt for fresh parsley and homemade cranberry sauce if possible for a burst of flavor. Make Ahead: Prepare the meatballs in advance and freeze them. Just thaw and cook when you’re ready to serve. Adjust Sweetness: Taste the sauce before cooking and adjust the brown sugar to your preference for sweetness. Serve with Sides: These meatballs pair beautifully with rice, mashed potatoes, or even as a hearty sandwich filling. {{image_2}} You can swap ground beef for turkey or chicken. Both work well. Turkey gives a lighter taste. Chicken adds a nice flavor too. Use the same amount, one pound. You can also mix meats for a fun twist. This keeps the recipe fresh and exciting. For a meatless option, try using lentils or chickpeas. Mash them well and mix with breadcrumbs. You can add some finely chopped veggies for texture. Use a plant-based egg substitute to hold it all together. Replace the soy sauce with tamari for a gluten-free option. Want to spice things up? Add red pepper flakes or chopped jalapeños to the meat mix. This gives a great kick. If you like it sweet, try maple syrup instead of brown sugar. You can also add a dash of cinnamon for warmth. Explore what flavors you love! To store leftover meatballs, let them cool down first. Place the meatballs in an airtight container. Make sure to cover them well to keep moisture in. You can keep them in the fridge for up to three days. Label the container with the date, so you know when to use them. To reheat the meatballs, you can use the microwave or the stove. If using a microwave, place the meatballs on a plate. Heat them for one to two minutes on high. If they are cold in the middle, heat them more. For the stove, add a bit of sauce to a pan and warm the meatballs over medium heat. Stir gently until they are hot throughout. Freezing meatballs is a great way to save time. To freeze, first let them cool completely. Place meatballs in a single layer on a baking sheet. Freeze them for an hour, then transfer them to a freezer bag. Remove as much air as you can before sealing. They can stay frozen for up to three months. When ready to use, thaw in the fridge overnight before reheating. Yes, you can use frozen meatballs. They save time and are easy to use. Just place them in the slow cooker. Pour the sauce over them, and cook as normal. The cooking time may need to be longer, about 6-8 hours on low. Cook meatballs for 4-6 hours on low. If you choose high heat, set the cooker for 2-3 hours. The meatballs should be tender and fully cooked. Always check their internal temperature to ensure they reach 165°F. Serve the meatballs over rice or mashed potatoes. This adds a nice base for the sauce. You can drizzle extra cranberry sauce on top for extra flavor. Garnish with fresh parsley for a colorful touch. Yes, you can make this dish ahead of time. Prepare the meatballs and sauce, then store them in the fridge. You can cook them in the slow cooker the next day. This makes meal prep easy and convenient. Cranberry meatballs pair well with several sides. Try fluffy rice or creamy mashed potatoes. You can also serve them with roasted vegetables or a fresh salad. These sides balance the sweet and savory meatballs nicely. This blog post explored how to make tasty slow cooker cranberry meatballs. We looked at key ingredients, from meat choices to flavorful sauces. I shared easy steps for prep, forming meatballs, and cooking. You learned tips for juicy meatballs and ways to add unique flavors. We discussed storage and reheating for future meals. In summary, this recipe is versatile and forgiving. It suits many diets and tastes. Now, you can create a crowd-pleaser that saves time and effort! Enjoy your cooking!

Savory Slow Cooker Cranberry Meatballs Delight

Get ready for a flavor-packed treat with my Savory Slow Cooker Cranberry Meatballs Delight! This easy recipe combines tender meatballs

- 1 cup red lentils, rinsed - 2 tablespoons olive oil - 1 medium onion, chopped - 2 carrots, diced - 2 celery stalks, diced - 3 cloves garlic, minced - 1 can (14 oz) diced tomatoes - 4 cups vegetable broth - 1 cup spinach, chopped - Salt and pepper to taste Red lentils are the heart of this soup. They cook fast and add protein. Olive oil gives a rich flavor and helps cook the veggies. You can use onion, carrots, and celery for a tasty base. Garlic adds depth to each spoonful, making it more aromatic. Diced tomatoes bring sweetness and acidity, balancing the flavors. Vegetable broth makes the soup hearty and full of nutrients. Lastly, spinach adds a fresh touch and vibrant color. - 1 teaspoon ground cumin - 1 teaspoon ground coriander - 1/2 teaspoon smoked paprika For seasoning, I love using ground cumin and coriander. They give warmth and complexity to the soup. Smoked paprika adds a hint of smokiness, making each bite exciting. Together, these flavors create a comforting and rich taste that makes this soup special. - Fresh cilantro or parsley - Olive oil drizzle Garnishes can take your soup to the next level. Fresh cilantro or parsley adds a pop of color and freshness. A drizzle of olive oil right before serving enhances the flavor profile. These small touches make the soup look beautiful and appetizing. {{ingredient_image_1}} Start by heating 2 tablespoons of olive oil in a large pot over medium heat. Once the oil is hot, add one chopped onion, two diced carrots, and two diced celery stalks. Sauté these vegetables for about 5 to 7 minutes. You want them to soften and become fragrant. Next, stir in 3 minced garlic cloves along with 1 teaspoon of ground cumin, 1 teaspoon of ground coriander, and 1/2 teaspoon of smoked paprika. Cook this mixture for another 2 minutes. The spices will bloom and fill your kitchen with a warm aroma. Now, it’s time to add the main ingredients. Pour in 1 cup of rinsed red lentils and one 14-ounce can of diced tomatoes, juice included. Give everything a good stir to combine. Pour in 4 cups of vegetable broth. Bring this mix to a boil. Once boiling, lower the heat to a simmer. Cover the pot and let it cook for about 25 to 30 minutes. The lentils should become tender and flavorful during this time. After the lentils are soft, add 1 cup of chopped spinach to the pot. Stir it in and cook for an additional 5 minutes. This will add color and nutrients to your soup. Finally, season the soup with salt and pepper to taste. Adjust it to your liking. Once you’ve added the final seasonings, your hearty vegetable red lentil soup is ready to serve! Adjusting spices You can change the spice levels to fit your taste. Start with the cumin, coriander, and smoked paprika. If you want more heat, add a pinch of chili powder or cayenne pepper. Taste as you go. This helps you find the perfect balance of flavors. Balancing acidity with tomatoes Tomatoes bring a nice acidity to the soup. If it feels too tangy, add a pinch of sugar. This helps tone down the sharpness. You can also add a splash of lemon juice for a bright finish. Importance of sautéing Sautéing the onion, carrots, and celery first builds a rich flavor base. This step warms the oil and releases the natural sugars in the veggies. Cook them until they soften. This usually takes about 5-7 minutes. Managing simmer time for tenderness Cooking the lentils at a low simmer is key. This gentle heat helps them break down and become tender. Check the soup after 25 minutes. If the lentils are not soft, give them a few more minutes. Ideal serving temperature Serve the soup warm, but not boiling hot. This keeps the flavors fresh and allows you to enjoy each bite. Let it cool slightly before serving. Complementary sides Pair the soup with crusty bread or a fresh salad. These sides add crunch and make the meal more filling. You can also serve it with a dollop of yogurt for creaminess, if you like. Pro Tips Soak Your Lentils: For a creamier texture, soak the red lentils for 30 minutes before cooking. This can also help reduce cooking time. Add a Kick: If you like a bit of heat, consider adding a pinch of red pepper flakes or a diced jalapeño when cooking the vegetables. Herb Variations: Feel free to experiment with herbs! Fresh thyme or dill can add a unique flavor profile to your soup. Batch Cooking: This soup freezes well. Make a double batch and store the extra in airtight containers for a quick meal later. {{image_2}} You can mix up the vegetables in this soup. Try adding: - Sweet potatoes for a sweet touch. - Zucchini for extra moisture. - Bell peppers for a colorful crunch. Feel free to use different broth, too. If you don’t have vegetable broth, use water or chicken broth. Both work well and add flavor. To spice things up, you can add heat. A pinch of red pepper flakes gives a nice kick. If you like it milder, stick with the spices in the recipe. Herbs also boost the taste. Fresh thyme or rosemary can add depth. You can add them while cooking or sprinkle them on top before serving. This soup is naturally vegan and gluten-free. It fits many diets without any changes. You can also make it high in protein. Just add some cooked chicken or turkey for an easy boost. This soup is versatile, so you can tailor it to your taste and needs. Enjoy experimenting! To store your leftover soup, let it cool first. Pour the cooled soup into airtight containers. I recommend using glass or plastic containers with tight lids. This helps keep the soup fresh and tasty. For freezing soup, use freezer-safe containers or heavy-duty freezer bags. Leave some space at the top for the soup to expand as it freezes. When you are ready to eat, take the soup out of the freezer and put it in the fridge overnight to thaw. You can also thaw it in a pot over low heat. Stir often to make sure it heats evenly. In the fridge, your soup will last about 4 to 5 days. Keep an eye on it. If it starts to smell sour or looks off, it’s best to toss it. A good rule is to trust your senses. If it doesn’t look or smell right, don’t eat it! To make your soup creamier, you have a few options. First, blend a portion of the soup. Use an immersion blender or transfer some to a regular blender. Blend until smooth, then mix it back in. This will give a nice, velvety texture. You can also add coconut milk or cream. Stir in about half a cup at the end of cooking. This adds richness and a subtle sweetness. Lastly, you can use more lentils. Cook them longer to break down, which thickens the soup naturally. Yes, you can add meat to your Vegetable Red Lentil Soup. Chicken or turkey works great. Just cook the meat separately and add it to the soup. If using beef, brown it first in the pot before adding the veggies. This gives a deeper flavor. You can also use cooked sausage or ham. Slice it and stir it in during the last few minutes of cooking. This way, the meat warms through but stays juicy. Yes, this soup is very healthy. Red lentils are high in protein and fiber. They help you feel full and support digestion. The vegetables add vitamins and minerals, making it a great meal. Spinach is a superfood. It is rich in iron and vitamins A and C. Overall, this soup is packed with nutrients. It’s a satisfying dish that nourishes your body and soul. This blog post covered the key ingredients and steps for making Vegetable Red Lentil Soup. We explored how to prepare vegetables, enhance flavors, and perfect the recipe. I shared tips for variations, storage, and answered common questions. Remember, this soup is not just tasty; it’s healthy and flexible. You can adjust it to fit your needs. Enjoy making this simple soup, and let it warm your meals and your heart.

Flavorful Vegetable Red Lentil Soup Easy to Prepare

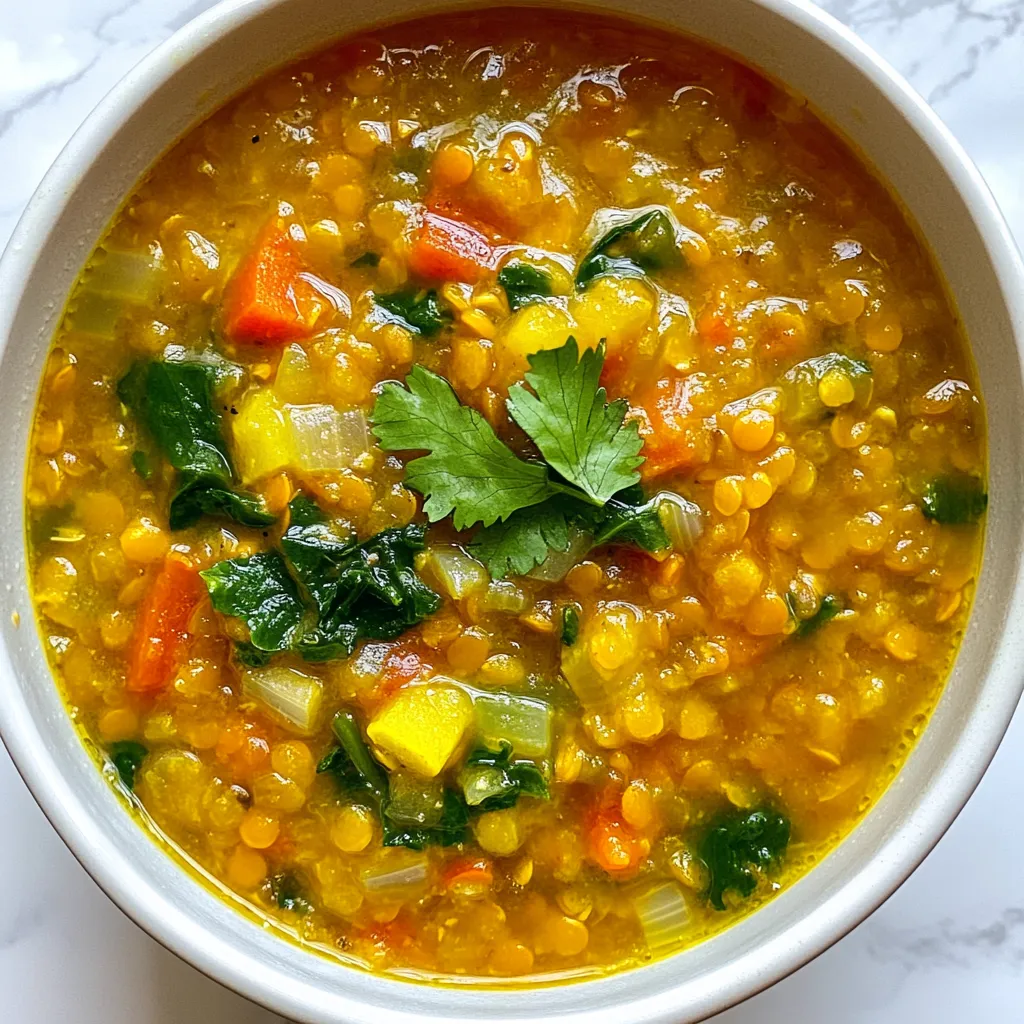
Looking for a warming dish that’s both healthy and easy to make? My flavorful Vegetable Red Lentil Soup is your

- 2 pounds beef chuck, cut into 1-inch cubes - 4 slices of thick-cut bacon, chopped - 1 large onion, diced - 3 cloves garlic, minced - 3 large carrots, sliced - 1 cup pearl onions, peeled - 8 ounces mushrooms, quartered - 2 cups beef broth - 1 tablespoon tomato paste - 1 teaspoon dried thyme - 1 bay leaf Each of these ingredients plays a key role in building flavor. The beef chuck gives the dish its rich base. Bacon adds depth and a savory note. The vegetables, like onions and carrots, provide sweetness. Garlic adds zest, while mushrooms bring umami. - 2 tablespoons olive oil - Salt and pepper to taste - Fresh parsley, chopped (for garnish) Olive oil helps with cooking and adds richness. Salt and pepper enhance the flavors of all the ingredients. Fresh parsley brightens the dish and adds a nice touch when serving. Together, these ingredients create a hearty, savory meal that warms your soul. {{ingredient_image_1}} Start by slicing the vegetables. Dice one large onion and mince three cloves of garlic. Slice three large carrots into thin rounds. For added flavor, peel one cup of pearl onions. Quarter eight ounces of mushrooms. Now, prepare the beef. Cut two pounds of beef chuck into one-inch cubes. If you want a richer taste, you can use thick-cut bacon. Chop four slices and set them aside for later. Next, cook the bacon in a large skillet over medium heat. Crisp it for about five minutes. After it’s crispy, remove it and leave the fat in the pan. Increase the heat to medium-high. Brown the beef cubes in batches. Cook each batch for about five minutes. This step adds flavor, so don’t skip it! Once all the beef is browned, set it aside. In the slow cooker, layer the sautéed ingredients. Start with the browned beef. Add the crispy bacon, onions, garlic, carrots, and mushrooms. Now, pour in two cups of beef broth. Add one tablespoon of tomato paste, one teaspoon of dried thyme, and one bay leaf. Finally, season with salt and pepper to taste. Stir everything well to mix. Cover your slow cooker and set it. For a low setting, cook for seven to eight hours. If you’re in a hurry, you can use the high setting for four to five hours. You’ll know it’s done when the beef is tender. To make your Beef Bourguignon even better, consider these flavor tips: - Substituting Ingredients: If you want to skip bacon, use pancetta. It adds great flavor. For broth, low-sodium beef broth works well. This helps control salt levels. - Adding Red Wine: A good red wine adds depth to the dish. Look for a dry wine, like Pinot Noir. It enhances the beef’s rich taste and makes the meal feel special. Getting the right texture is key for a great dish: - How to Avoid Tough Beef: Choose beef chuck because it is tender and flavorful. Sear it well before adding it to the slow cooker. This helps lock in juices. - Tips for Vegetable Doneness: Cut your vegetables evenly. This helps them cook at the same rate. Add firmer veggies, like carrots, first. Softer ones, like mushrooms, can go in later for even cooking. Presentation matters, so keep these tips in mind: - Best Sides: Serve with creamy mashed potatoes or crusty bread. Both soak up the sauce well. They make the meal feel hearty and satisfying. - Presentation Tips: Use deep bowls for serving. This keeps the dish warm. Top with fresh parsley for color. It adds a nice touch and makes the meal more inviting. Pro Tips Choosing the Right Cut: Use beef chuck for the best flavor and tenderness in slow cooking. Layering Flavors: Browning the meat and sautéing the vegetables before adding them to the slow cooker enhances the dish's overall depth of flavor. Thickening the Sauce: If you prefer a thicker sauce, mix a tablespoon of cornstarch with cold water and stir it in during the last 30 minutes of cooking. Make it Ahead: Beef bourguignon tastes even better the next day, making it a perfect dish for meal prep or entertaining. {{image_2}} You can change the meat in this dish. Try using pork or chicken instead of beef. For a lighter meal, chicken works great. If you prefer a vegetarian option, use hearty mushrooms or lentils. They give a nice texture and taste. You can add more herbs and spices to boost taste. Consider adding rosemary or parsley for a fresh touch. You can also toss in some bay leaves for depth. Different vegetables can change the dish too. Try adding celery or parsnips. They add a new layer of flavor and texture. You can make this meal on the stovetop if you prefer. Brown the meat and veggies, then simmer with the broth. This method takes less time but still gives great flavor. You might also want to try an Instant Pot. It cooks quickly and tenderizes the beef well. Just set it to pressure cook for about 35 minutes. After you finish your meal, let the Beef Bourguignon cool down first. This helps keep your fridge safe. - Store leftovers in an airtight container. - Glass containers work well for easy reheating. - Use smaller containers for quick meals later. If you want to save some for later, freezing is a great option. - First, let the dish cool completely. - Spoon the beef into freezer-safe bags or containers. - Remove as much air as possible to prevent freezer burn. - For best taste, eat within three months. When it’s time to enjoy your leftovers, you have options. - The microwave is quick and easy but can dry out the beef. - The stovetop method is slower but keeps it moist. - For stovetop, add a splash of beef broth while reheating. This helps keep it juicy and flavorful. Yes, you can use other cuts. The best cuts for slow cooking include: - Brisket - Round roast - Short ribs These cuts have more fat and flavor. They break down well over long cooking times. You can store leftovers in the fridge for up to 3 days. Use airtight containers to keep them fresh. If you want to keep them longer, freeze them. In the freezer, they last up to 3 months. Yes, you can make this dish in advance. Prepare it the day before and refrigerate it. Just reheat it on the stove or in the slow cooker. This allows the flavors to deepen. A good wine pairing for Beef Bourguignon includes: - Pinot Noir - Merlot - Cabernet Sauvignon These wines enhance the rich flavors of the dish. Choose a wine you enjoy drinking! Slow Cooker Beef Bourguignon is a hearty dish made with tender beef and rich flavors. We covered key ingredients, step-by-step cooking, and useful tips. Remember to sear the beef and layer ingredients carefully for the best taste. You can try swaps like pork or vegetables for variety. Store leftovers properly to keep them fresh. Now, you can make this dish confidently and impress everyone. Enjoy your cooking adventure!

Savory Slow Cooker Beef Bourguignon Easy Flavorful Meal

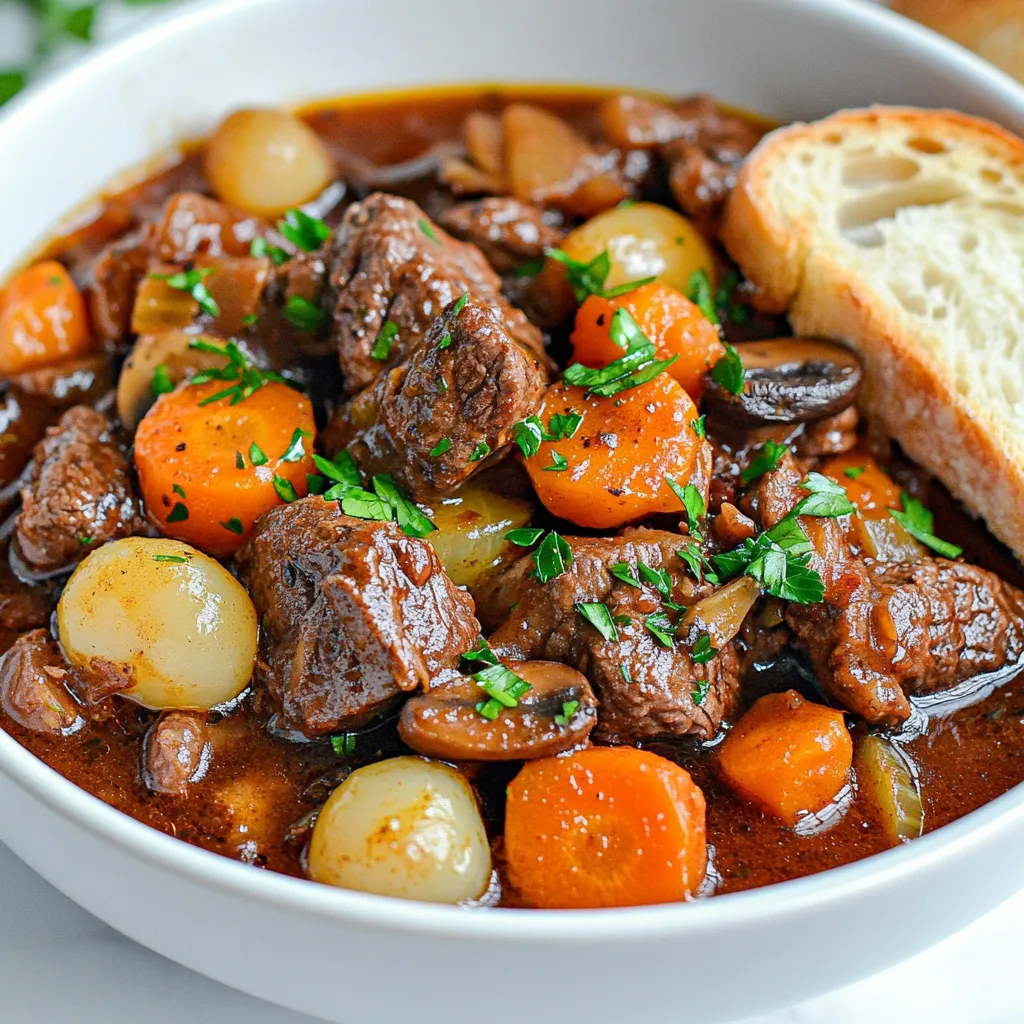
If you’re looking for a warm, satisfying meal, Slow Cooker Beef Bourguignon is your answer. With tender beef and rich

Older posts
Newer posts
← Previous Page1 … Page103 Page104 Page105 … Page115 Next →

dsad

© 2025 flavorsprint • Built with GeneratePress

Our Policies

  • Copyright Policy
  • Cookie Policy
  • GDPR Policy
  • Privacy Policy
  • Disclaimer
  • Terms Of Use

More Information

  • Home
  • About
  • Contact
  • Appetizers
  • Dessert
  • Dinner
  • Drinks
©2025, flavorsprint About Back To Top