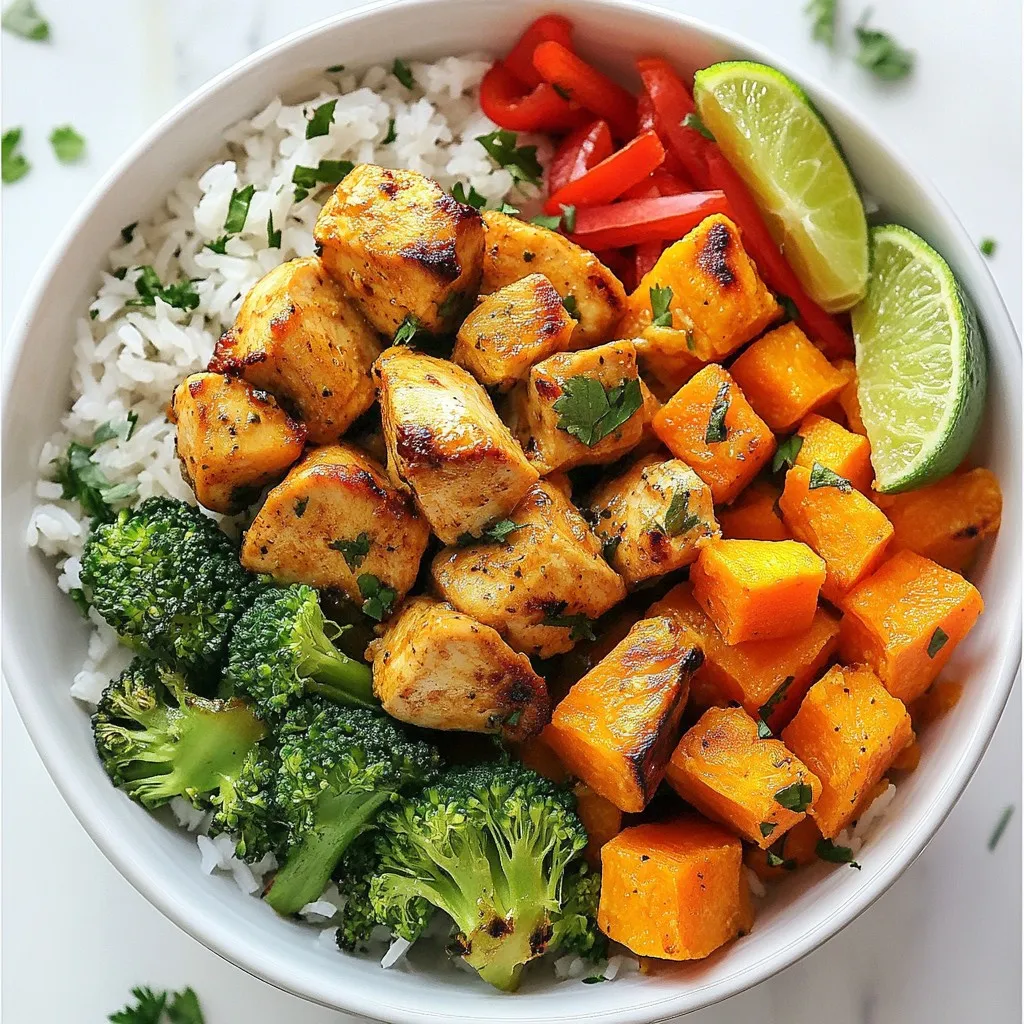
Chicken and Sweet Potato Rice Bowls Flavorful Delight
Are you ready to transform your meals with a burst of flavor? My Chicken and Sweet Potato Rice Bowls offer
Are you ready to transform your meals with a burst of flavor? My Chicken and Sweet Potato Rice Bowls offer
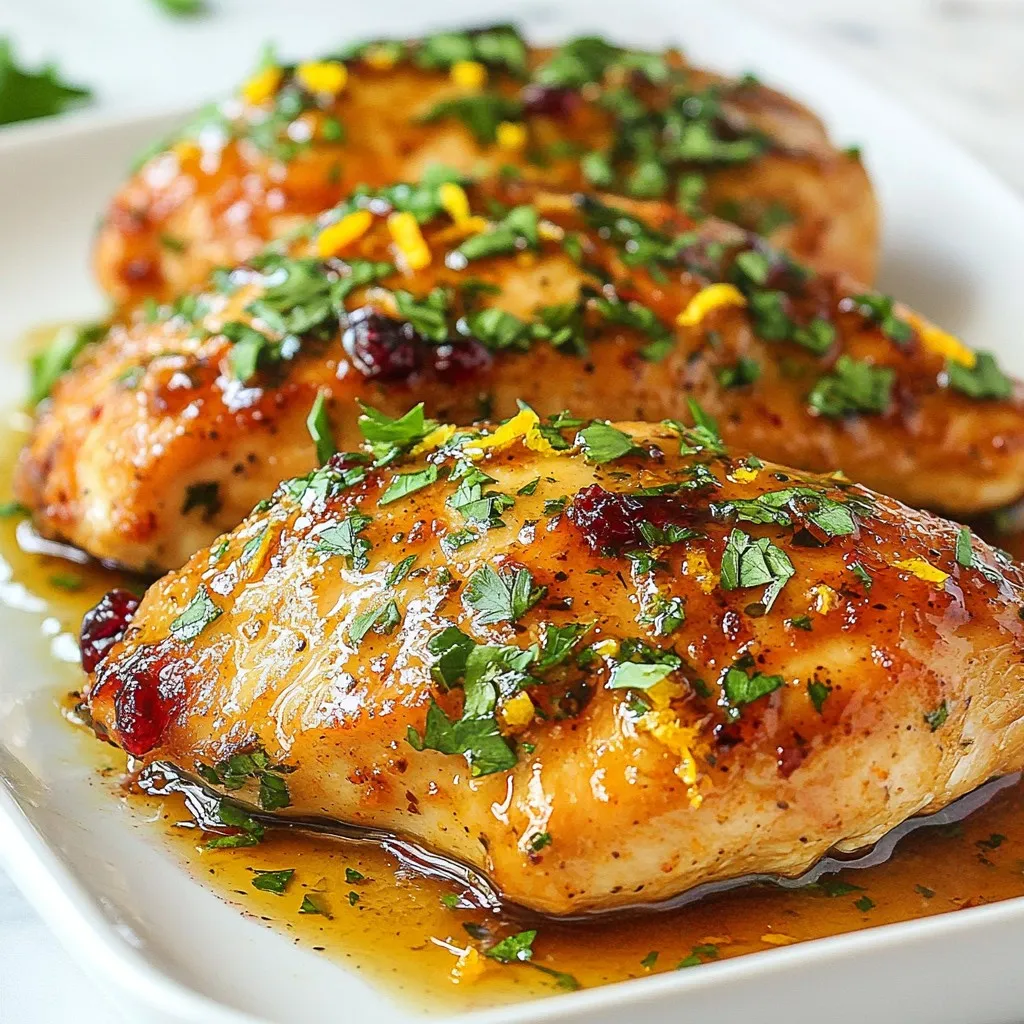
Ready to wow your family with a dish that bursts with flavor? This Cranberry Orange Glazed Chicken recipe is both

Are you craving a comforting meal that’s both simple and delicious? Look no further than this Easy Italian Meatloaf recipe!

Looking for a quick, nutritious meal? Cottage cheese power bowls are your answer! These bowls combine creamy cottage cheese with
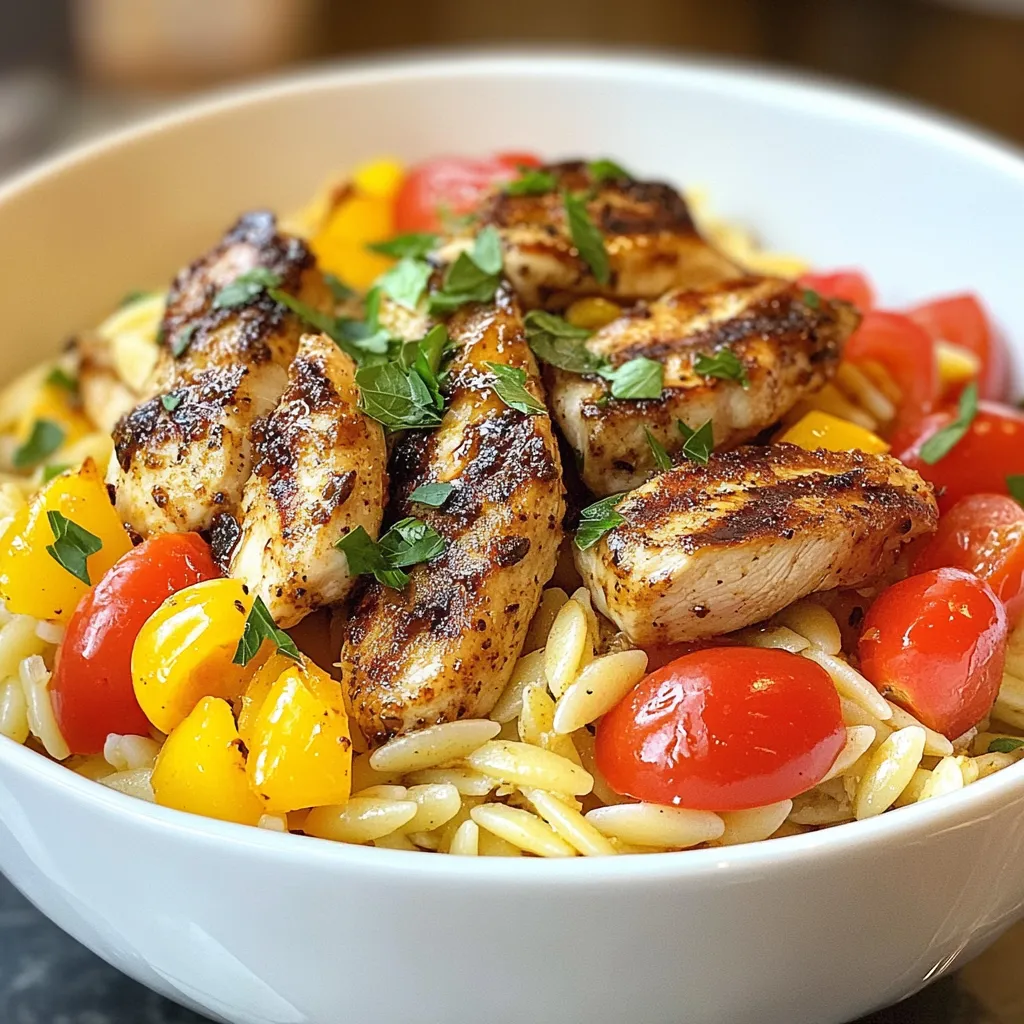
Get ready to spice up your dinner routine with my Cajun Chicken Orzo! This one-pan recipe bursts with bold flavors
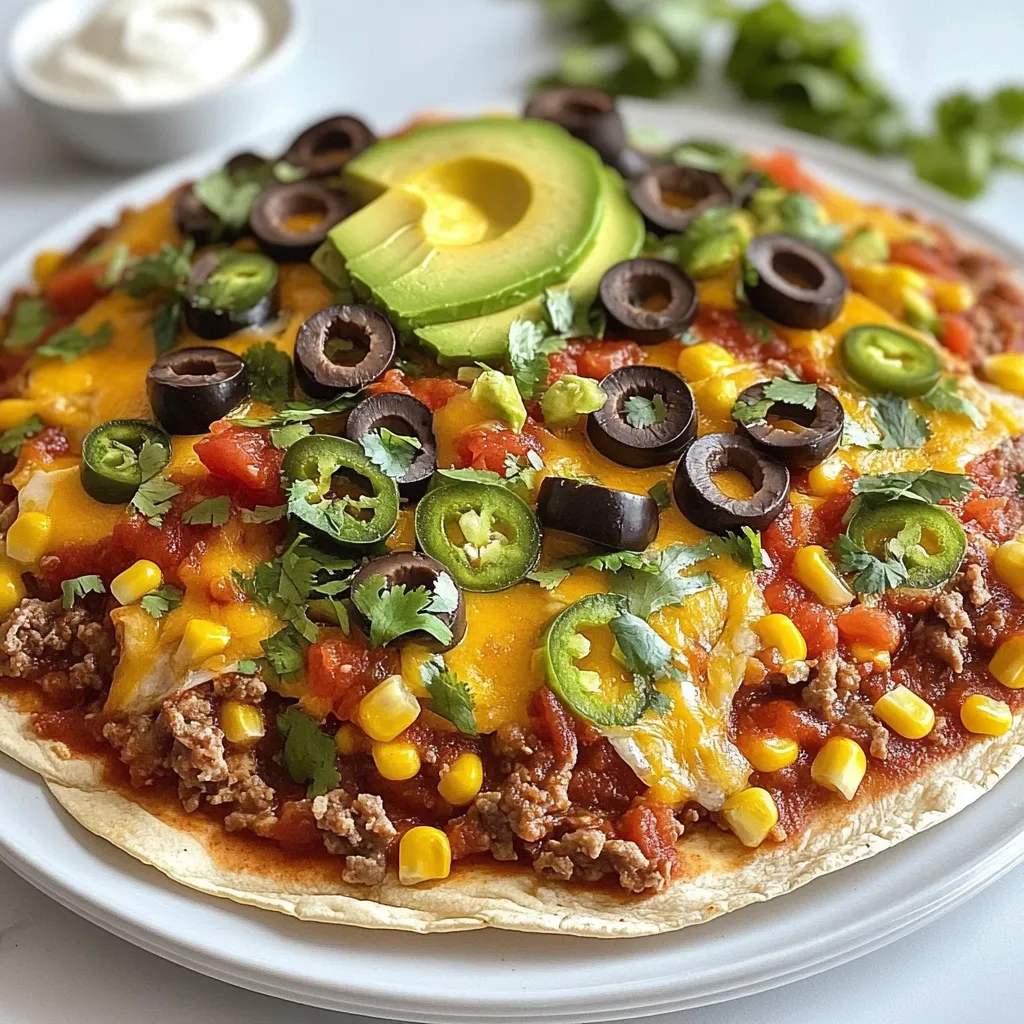
Are you ready to spice up your pizza night? I’m excited to share an easy and flavorful Homemade Mexican Pizza
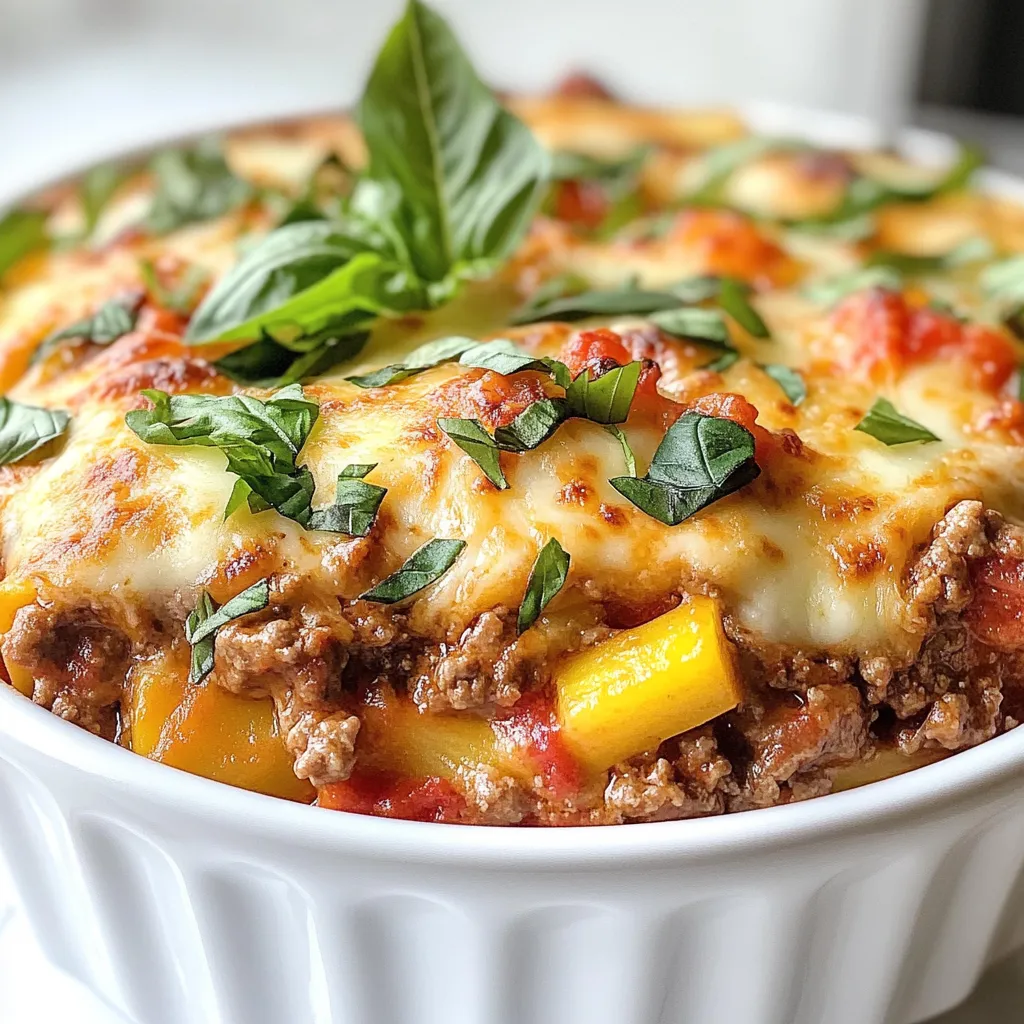
Are you craving a comforting Italian dish without the carbs? This Keto Lasagna Skillet packs all the flavor you love
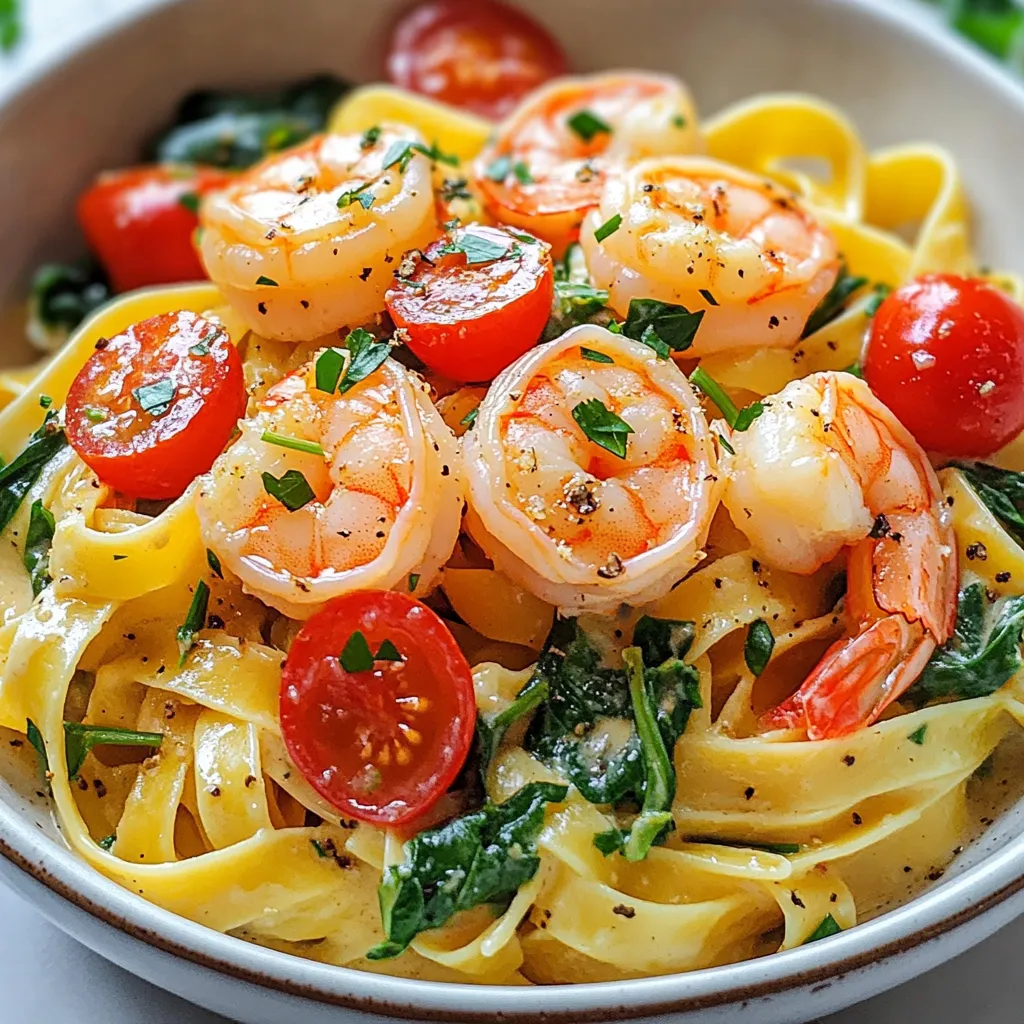
If you’re craving a dish that’s both creamy and packed with flavor, you’re in the right place! My Creamy Garlic
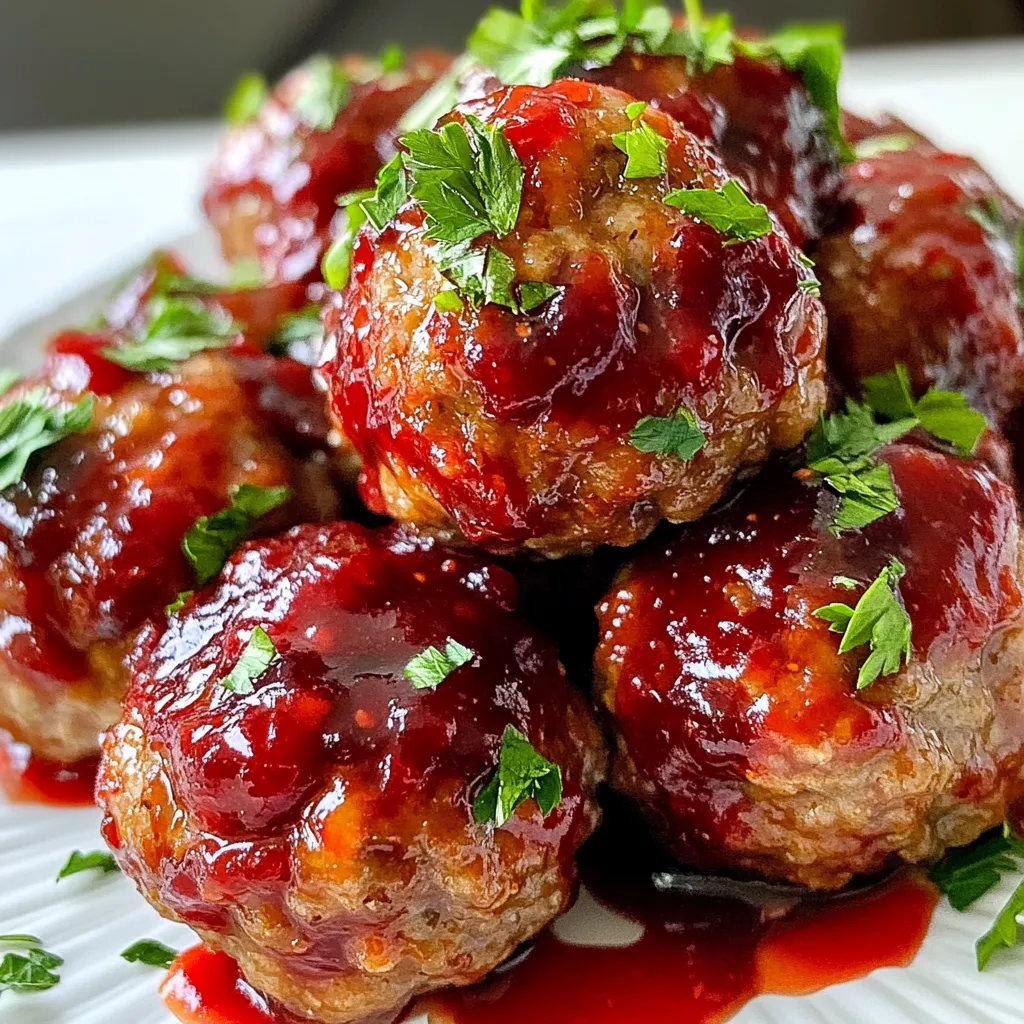
Looking to elevate your meatballs? This Cranberry BBQ Sauce brings a sweet and tangy flavor that transforms your dish. With
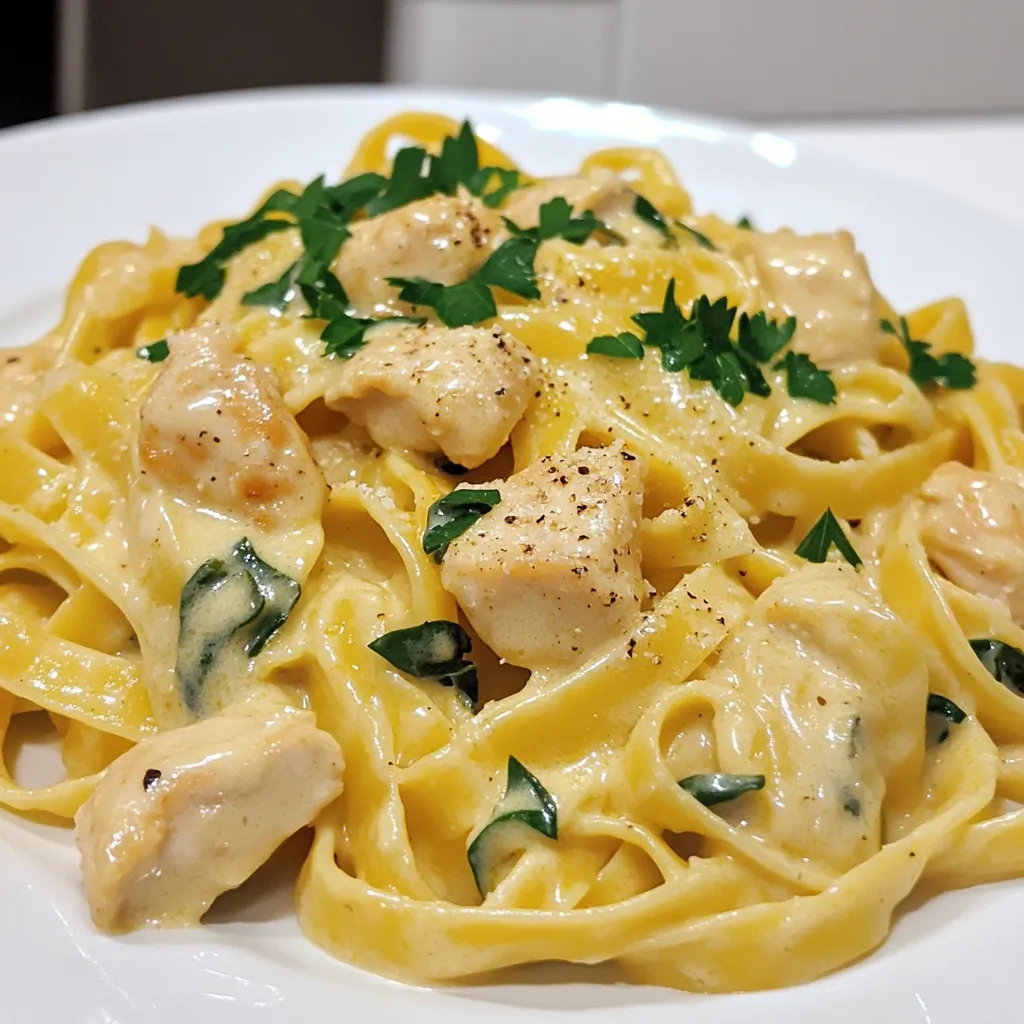
Looking for an easy dinner that packs a flavor punch? You’ve found it! This Creamy Garlic Parmesan Chicken Pasta is
