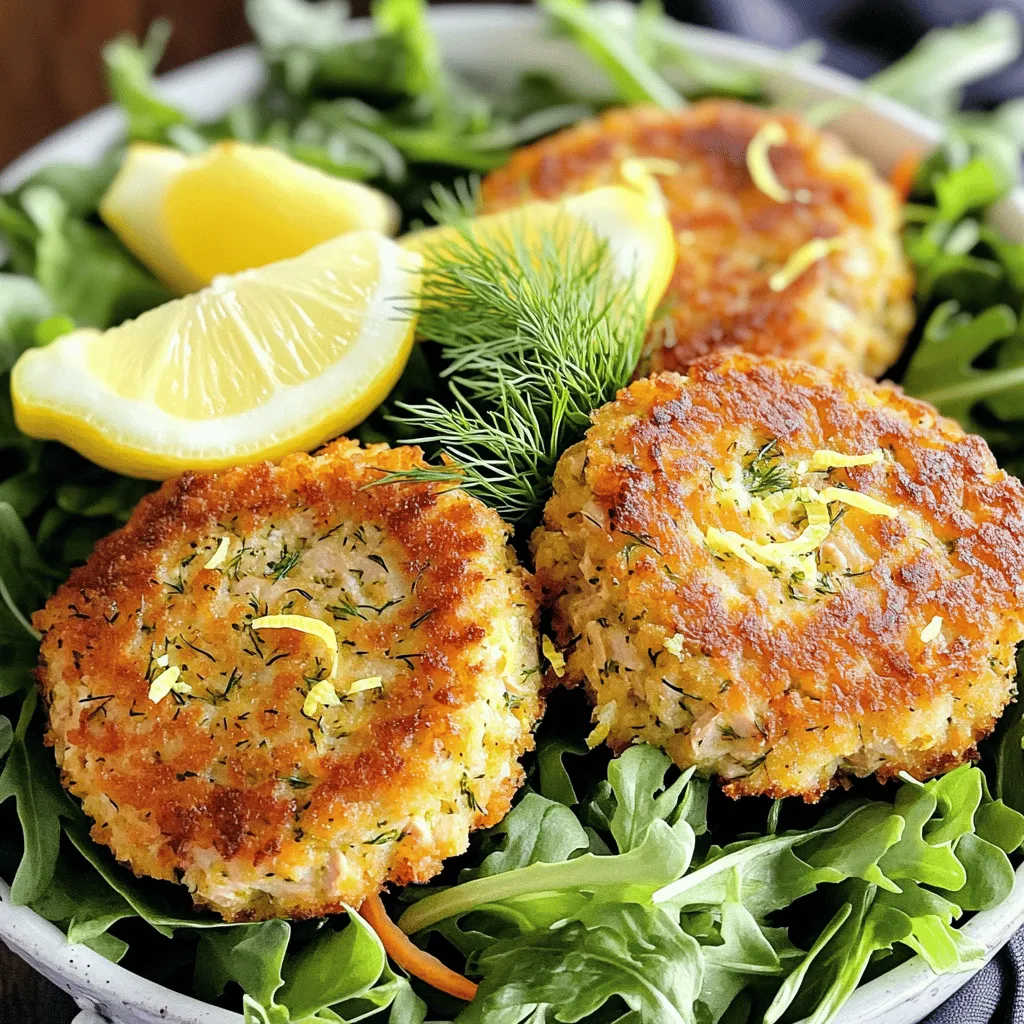
Get ready to elevate your weeknight dinners with my Air Fryer Lemon Dill Tuna Cakes! These crispy and flavorful bites are not only simple to make, but they’re also packed with deliciousness I know you’ll love. Whether you’re a busy parent or a gourmet cook, these tuna cakes offer a quick meal option without skimping on taste. Let’s dive into the easy ingredients and steps to create this delightful dish!
Ingredients
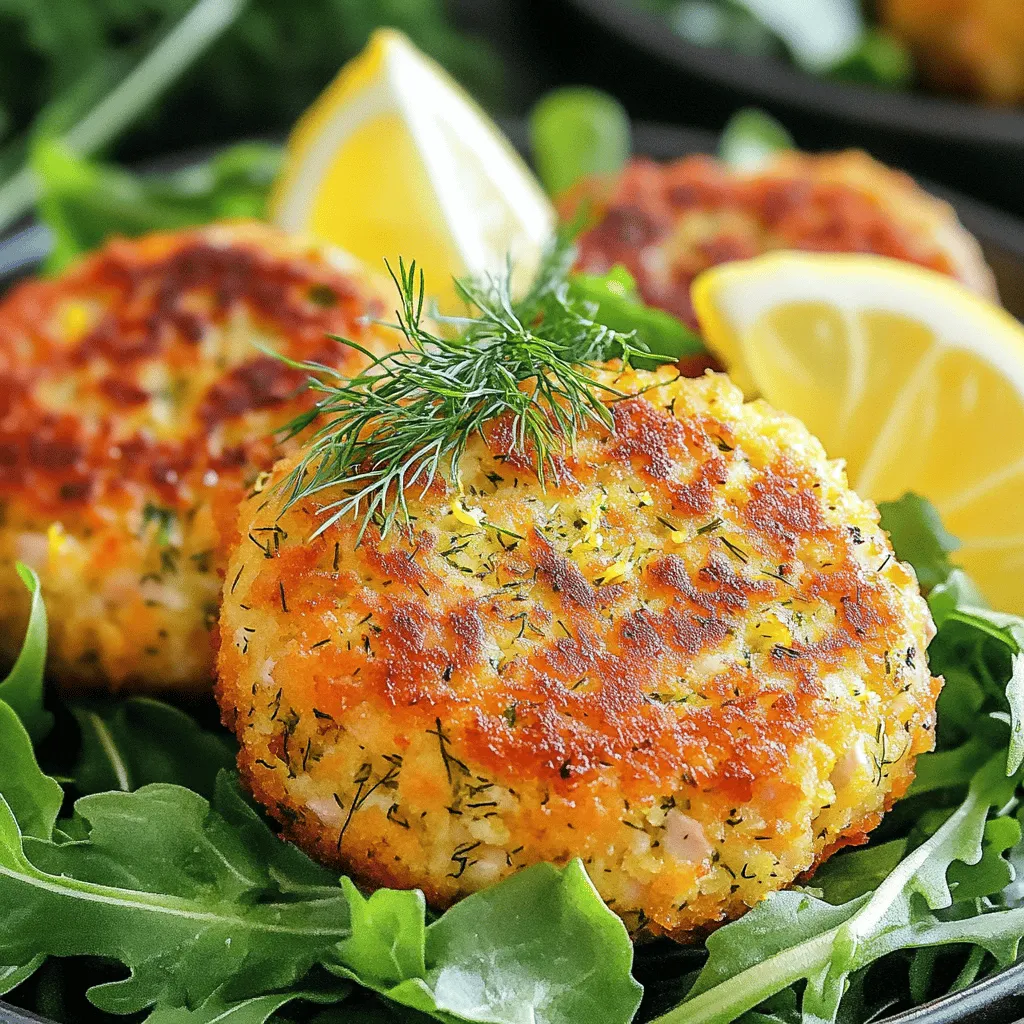
Full List of Ingredients
– Tuna: Use two cans of 5 oz tuna, drained. I suggest brands like Starkist or Bumble Bee for good quality.
– Breadcrumbs: I recommend panko breadcrumbs for extra crunch. They give a light and crispy texture. Regular breadcrumbs work too, but they may not be as crunchy.
– Fresh vs. dried dill: Fresh dill has a brighter and bolder taste. Dried dill is more subtle and less potent. I prefer fresh for this recipe.
– Required spices and condiments: You will need mayonnaise, Dijon mustard, garlic powder, onion powder, salt, and pepper. These enhance the flavor of the cakes and make them delicious.
These ingredients come together to create a dish that is both tasty and easy to make. Enjoy crafting your air fryer lemon dill tuna cakes!
Step-by-Step Instructions
Mixing the Ingredients
Start by grabbing a large mixing bowl. Drain the tuna and add it to the bowl. Then, mix in the breadcrumbs, mayonnaise, egg, and Dijon mustard. Use a fork to combine these wet ingredients well. Next, add the lemon zest, dill, garlic powder, onion powder, salt, and pepper. Keep mixing until everything is blended nicely. This mix is where the magic begins, as the flavors come together.
Forming the Tuna Cakes
Now it’s time to shape your tuna cakes. Take small portions of the mixture and form them into patties. You want them to be about the size of your palm. Press them firmly to help them hold together. If they feel too crumbly, add a bit more mayonnaise or egg to bind them. This step is crucial for a good texture in the air fryer.
Air Frying the Tuna Cakes
Preheat your air fryer to 375°F (190°C). This should take around 5 minutes. While it heats up, lightly spray the air fryer basket with olive oil. Place the tuna cakes in a single layer, ensuring they have space around them. If you have many cakes, cook them in batches. After placing the cakes, spray the tops lightly with olive oil for extra crispiness. Air fry for 8-10 minutes. Flip them halfway through for even cooking. Look for a golden brown color on both sides. Once done, let them cool for a minute before serving.
Tips & Tricks
Perfecting Texture and Flavor
To make your Air Fryer Lemon Dill Tuna Cakes even better, you can adjust the seasoning. If you love a bit more zing, add more lemon zest. If you prefer a kick, try a dash of cayenne pepper. This will boost the flavor and make your cakes pop.
For added crunchiness, use panko breadcrumbs. They create a great texture that makes each bite satisfying. Spray a bit of olive oil on top before cooking. This helps achieve that golden, crispy finish.
Adapting the Recipe
If you have dietary restrictions, you can make easy swaps. Use gluten-free breadcrumbs if you need a gluten-free option. You can also replace mayonnaise with Greek yogurt for a lighter version.
For flavor variations, think about adding spices. Paprika gives a smoky taste, while cumin adds warmth. Mixing in fresh herbs like parsley or cilantro can also change the flavor. Experiment and find what you love!
Variations
Alternative Ingredients
You can change up the tuna cakes by using different canned fish. Salmon works great. It adds a rich flavor. Chicken also makes a nice swap. Just keep the other parts of the recipe the same.
You can add extra veggies too. Chopped onion gives a sweet crunch. Bell peppers add color and taste. Be sure to dice them small so they mix well. You want a good blend of flavors in every bite.
Serving Suggestions
Side dishes can really make your meal shine. A fresh salad works well. You can toss in greens, tomatoes, and cucumbers. Roasted veggies are another tasty choice. They add warmth and texture.
For dipping sauces, try tartar sauce. It pairs perfectly with the tuna cakes. Aioli is another great option. Its creamy taste complements the cakes well. You can even mix up your own sauce. Just blend mayo with lemon juice and herbs for a zesty kick.
Storage Info
Storing Leftovers
To keep your tuna cakes fresh, place them in an airtight container. You can use glass or plastic containers. Make sure they cool down before sealing. This helps prevent moisture buildup, which can make them soggy. Store the cakes in the fridge for up to three days. If you want to save them for longer, freezing is a great option.
Reheating Tips
When reheating, you want to keep that crispy texture. The best way is to use your air fryer again. Preheat your air fryer to 350°F (175°C). Place the tuna cakes back in the basket for about 5 minutes. This will help them regain their crunch. You can also use a skillet on medium heat. Just add a tiny bit of oil to help crisp them up. Avoid using the microwave, as it can make them soft and mushy.
FAQs
How do I know when the tuna cakes are done?
You can tell when the tuna cakes are done by their color and texture. Look for a golden-brown crust on both sides. If they are crispy and firm to the touch, they are ready to eat. The inside should feel warm and moist but not wet. Using a food thermometer is also a good idea. The center should reach 145°F (63°C) for safety.
Can I freeze tuna cakes?
Yes, you can freeze tuna cakes. First, let them cool completely. Then, place them in a single layer on a baking sheet. Freeze them until solid. After that, transfer them to a freezer bag or container. Make sure to remove as much air as possible. When you’re ready to eat, thaw them in the fridge overnight. Then, reheat them in the air fryer for a crispy finish.
Are air fryer tuna cakes healthy?
Air fryer tuna cakes are quite healthy. They use canned tuna, which is high in protein and omega-3 fatty acids. Fresh dill adds flavor and nutrients. Using panko breadcrumbs keeps them light and crispy. The recipe uses a small amount of mayonnaise, which keeps the fat content low. Overall, these tuna cakes are a tasty and nutritious choice for a meal.
This blog post detailed everything you need for perfect tuna cakes. We covered key ingredients, effective mixing, and shaping techniques. You learned how to air fry them for a crispy finish. I shared tips for adjusting flavors and alternative ingredients for variety. Finally, proper storage and reheating methods ensure your cakes stay tasty.
Try these methods for a delicious meal. Enjoy your cooking, and share your successes!