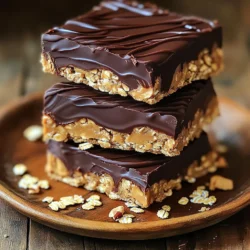
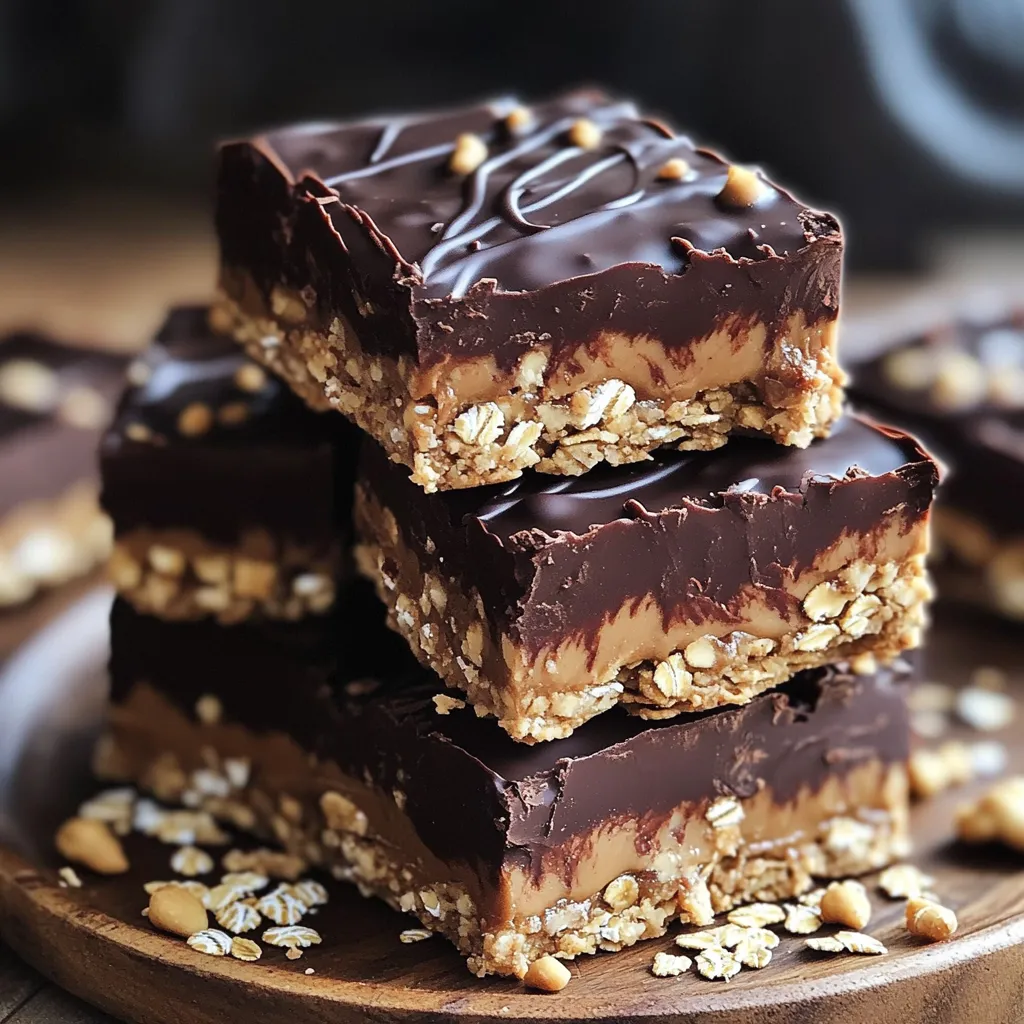
Are you craving a sweet treat that’s easy to make and healthy? Look no further than these no-bake chocolate peanut butter oat bars! With just a few simple ingredients, you can create a delicious snack that’s perfect for anytime. Whether you want a quick breakfast or a tasty dessert, these bars satisfy your cravings without the fuss. Let’s dive into the recipe and discover how easy they are to whip up!
Ingredients
In this section, I will list the key ingredients for No-Bake Chocolate Peanut Butter Oat Bars. Each one plays an important role in flavor and texture.
List of Ingredients
– 2 cups rolled oats
– 1 cup creamy peanut butter
– 1/2 cup honey or maple syrup
– 1/2 cup dark chocolate chips
– 1/4 cup unsweetened cocoa powder
– 1 teaspoon vanilla extract
– Pinch of salt
– Optional: 1/2 cup chopped nuts (almonds or walnuts)
These ingredients work together to create a tasty, no-bake treat. Rolled oats give the bars a chewy base. Creamy peanut butter adds richness and protein. Honey or maple syrup provides natural sweetness. Dark chocolate chips create a decadent topping. Unsweetened cocoa powder enhances the chocolate flavor. A hint of vanilla adds warmth. A pinch of salt balances the sweetness. If you want a crunch, add nuts.
Gather these ingredients before you start. It makes cooking easier and more fun. You will enjoy every bite of these bars.
Step-by-Step Instructions
Preparation Steps
1. In a large mixing bowl, combine the rolled oats, cocoa powder, and salt. This step ensures the cocoa blends well.
2. In a separate bowl, mix the creamy peanut butter and honey or maple syrup. Heat this mix in the microwave for 30 to 45 seconds. It should be warm and slightly melted. Stir until smooth.
3. Add the vanilla extract to the peanut butter mix, blending until it is nice and creamy.
4. Pour this wet mix over the dry oat mix. Stir well with a spatula until all the oats are coated. For crunch, you can fold in chopped nuts at this point.
Assembling the Bars
1. Line an 8×8 inch baking dish with parchment paper. Leave some paper over the edges. This makes it easy to lift the bars out later.
2. Transfer the oat mixture to the lined dish. Press it down firmly with your hands or the back of a spatula. Aim for an even layer that is compact.
Topping the Bars
1. In a microwave-safe bowl, melt the dark chocolate chips. Do this in 30-second intervals, stirring in between until it is smooth.
2. Pour the melted chocolate over the oat mixture. Use a spatula to spread it evenly across the top.
3. Refrigerate the dish for at least 1 to 2 hours until the chocolate is set.
Now, your bars are ready to enjoy!
Tips & Tricks
Expert Tips for Best Results
– Ensuring even distribution of cocoa powder: Mix the cocoa powder with oats and salt well. This helps spread the chocolate flavor throughout the bars. Look for a light brown color to know it is even.
– How to properly melt chocolate in the microwave: Use a microwave-safe bowl. Heat the dark chocolate chips in short bursts, about 30 seconds. Stir after each burst. This prevents burning and helps the chocolate melt smoothly.
– Techniques for pressing the mixture firmly: Use your hands or the back of a spatula. Press down hard to make it compact. This step keeps the bars from crumbling later.
Serving Suggestions
– Presentation tips for serving: Stack the bars neatly on a plate. This looks nice and makes serving easy. You can also cut them into fun shapes for a treat.
– Drizzle and garnish ideas: Drizzle melted chocolate on top for flair. You can sprinkle oats or chopped nuts as a garnish. This makes the bars look extra tasty and inviting.
Variations
Flavor Variations
You can change the flavor of your bars easily. Try using different nut butters. Almond or cashew butter works great too. They will give your bars a new taste. You can also add dried fruits. Dried cranberries or raisins add a nice chew. This makes the bars more fun and flavorful.
Texture Variations
If you want to change the texture, try different oats. You can use quick oats or steel-cut oats for a new crunch. Each type gives a different bite. Adding seeds is another great idea. Chia or flax seeds can boost nutrition. They add a nice crunch and are good for you. Experiment with these options to find your favorite mix!
Storage Info
Best Storage Practices
To keep your No-Bake Chocolate Peanut Butter Oat Bars fresh, store them in an airtight container. This helps to prevent moisture from ruining their texture. I recommend using a glass or plastic container with a tight seal. Place parchment paper between layers if stacking, so they do not stick together.
Freezing Instructions
If you want to save some bars for later, freezing is a great option. Wrap each bar in plastic wrap or aluminum foil. Then, place them in a freezer-safe bag or container. For best results, eat them within three months. When you’re ready to enjoy, thaw the bars in the fridge overnight. This way, they stay soft and tasty.
FAQs
Common Questions
Can I use natural peanut butter instead?
Yes, you can use natural peanut butter. It adds a nice texture. Just make sure it’s stirred well before using.
How long do these bars stay fresh?
These bars stay fresh for about one week. Store them in an airtight container at room temperature.
What can I substitute for honey or maple syrup?
You can use agave syrup or brown rice syrup. Both will work well in this recipe.
Are these bars gluten-free?
Yes, these bars can be gluten-free. Just use certified gluten-free oats.
Can I make these vegan-friendly?
Absolutely! Use maple syrup instead of honey and vegan chocolate chips. This keeps it plant-based.
These no-bake bars are easy and tasty. We mixed simple ingredients like oats, peanut butter, and chocolate. You learned the steps to prepare, assemble, and store them. I shared tips for great texture and flavor. You can switch ingredients to match your taste and even freeze them. Enjoy making these snacks for yourself or friends. They’re healthy, fun, and a real treat! Try them out and get creative!