
Craving a sweet fall treat that’s easy to make? Look no further! These No-Bake Pumpkin Cheesecake Cups are a perfect way to enjoy pumpkin flavor without any baking. I’ll guide you through every step, from gathering ingredients to serving suggestions. Whether you’re a novice cook or an expert baker, this recipe is simple and fun. Get ready to impress your friends and family with this delicious dessert!
Ingredients
List of Ingredients
– 1 cup graham cracker crumbs
– 4 tablespoons unsalted butter, melted
– 8 oz cream cheese, softened
– 1 cup pumpkin puree
– 1 cup powdered sugar
– 1 teaspoon vanilla extract
– 1 teaspoon ground cinnamon
– 1/2 teaspoon ground nutmeg
– 1/2 teaspoon ground ginger
– 1 1/2 cups whipped cream (or whipped topping)
– Optional: caramel sauce for drizzling
These ingredients create a rich and creamy treat. The graham cracker crumbs form a tasty crust. The pumpkin puree adds natural sweetness and flavor. Cream cheese makes the filling smooth and creamy.
Measurement Conversions for International Readers
– 1 cup = 240 ml
– 4 tablespoons = 60 ml
– 8 oz = 225 g
– 1 cup = 120 g of powdered sugar
– 1 teaspoon = 5 ml
Knowing these conversions helps everyone make the recipe. You can easily find the right amounts no matter where you live.
Suggested Ingredient Substitutions
– Use crushed cookies instead of graham crackers for a different crust.
– Swap cream cheese with a dairy-free cream cheese for a vegan option.
– If you don’t have pumpkin puree, use sweet potato puree instead.
– Replace powdered sugar with honey or maple syrup for a natural sweetener.
These swaps keep the dessert delicious while allowing for dietary needs. Feel free to get creative with ingredients!
Step-by-Step Instructions
Preparing the Crust
To start, grab a medium bowl. Combine 1 cup of graham cracker crumbs with 4 tablespoons of melted unsalted butter. Mix well until the crumbs look like wet sand. This step makes a great base for your cheesecake cups. Next, take about 1-2 tablespoons of this mixture and spoon it into the bottom of your serving cups or jars. Press it down firmly to make a solid crust layer. Set these aside while you make the filling.
Making the Cheesecake Filling
In a large mixing bowl, take 8 ounces of softened cream cheese. Use an electric mixer to beat it until it’s smooth and creamy. Then, add in 1 cup of pumpkin puree, 1 cup of powdered sugar, and 1 teaspoon each of vanilla extract and ground cinnamon. Also, add 1/2 teaspoon each of ground nutmeg and ground ginger. Mix until everything blends well and is smooth. Now, gently fold in 1 1/2 cups of whipped cream. Be careful not to deflate it too much. This makes your filling light and fluffy.
Assembling the Pumpkin Cheesecake Cups
Now, it’s time to put everything together. Spoon or pipe the pumpkin cheesecake mixture over the crust in each cup. Use a spatula or the back of a spoon to smooth the top. Once filled, place the cups in the fridge for at least 2 hours. This helps the mixture set. Before serving, you can drizzle some caramel sauce on top if you want. Add a sprinkle of cinnamon for a nice touch. Enjoy your delicious no-bake pumpkin cheesecake cups!
Tips & Tricks
Ensuring Smooth Cheese Mixture
To make a smooth cheese mixture, start with softened cream cheese. If it’s cold, you will get lumps. Use an electric mixer to beat it well. Mix until it looks creamy with no lumps. After that, add pumpkin puree and powdered sugar. Make sure to mix until everything is combined. This will give you a nice, smooth base for your cheesecake cups.
Folding in Whipped Cream: Best Practices
When you fold in whipped cream, do it gently. Use a spatula to lift the cream from the bottom. Turn the bowl as you mix. This keeps air in the whipped cream. The result is a fluffy and light filling. Avoid stirring too hard, as this will deflate the whipped cream. Take your time, and you will have a lovely texture.
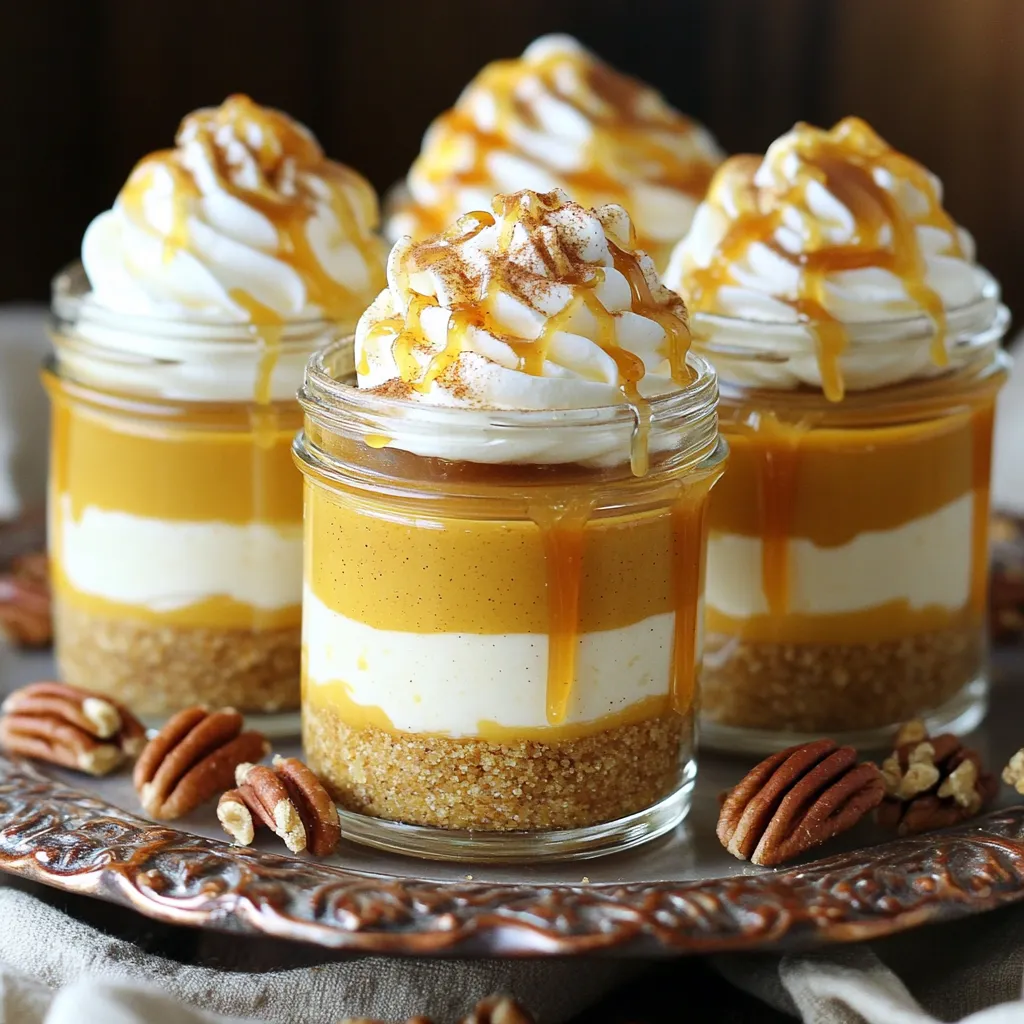
Serving Suggestions for Presentation
For a nice presentation, use clear cups or jars. This shows off the layers of your cheesecake. Add a drizzle of caramel sauce on top for extra flair. You can also sprinkle some cinnamon or add pecans for crunch. Place the cups on a decorative platter. This makes your dessert look even more inviting. Enjoy sharing these treats with friends and family!
Variations
Dairy-Free or Vegan Versions
You can make this dessert dairy-free or vegan. Swap the cream cheese for a dairy-free cream cheese. Look for brands made from nuts or soy. Use coconut cream in place of whipped cream. This will keep the texture rich and creamy. Replace the butter with coconut oil or a vegan butter. Use maple syrup instead of powdered sugar for sweetness. These changes keep the taste delicious without dairy.
Flavor Add-Ins and Mix-Ins
Mixing flavors adds fun to your cheesecake cups. Consider adding chocolate chips for a sweet surprise. You can also stir in chopped nuts, like pecans or walnuts, for crunch. For a fun twist, add a splash of maple syrup or a hint of orange zest. You could even swirl in some caramel sauce for extra flavor. Get creative and make it your own!
Alternative Crust Ideas
Tired of graham crackers? Try different crusts! Use crushed Oreos for a rich, chocolatey base. If you want a nutty flavor, blend almonds or walnuts with dates. For a gluten-free option, use almond flour or gluten-free cookies. You can even make a crust with oats and coconut. Each crust brings a new taste to your cheesecake cups. Choose what suits your mood!
Storage Info
Proper Refrigeration Techniques
To keep your no-bake pumpkin cheesecake cups fresh, store them in the fridge. Use airtight containers or cover them tightly with plastic wrap. This helps keep moisture out and the flavor in. I recommend chilling them for at least two hours before serving. This time allows the cups to set properly.
Freezing Instructions for Long-Term Storage
If you want to store these treats for longer, freezing is a great option. First, let the cups fully set in the fridge. Then, cover each cup with plastic wrap and aluminum foil. This will prevent freezer burn. You can freeze them for up to three months. When ready to eat, thaw them in the fridge overnight for the best results.
Shelf Life of Pumpkin Cheesecake Cups
When stored correctly in the fridge, these cheesecake cups last about three to four days. If you freeze them, they can stay good for up to three months. After thawing, eat any leftovers within two days. This way, you can enjoy your delicious pumpkin cheesecake cups at their best!
FAQs
Can I use fresh pumpkin instead of canned?
Yes, you can use fresh pumpkin. First, roast the pumpkin until soft. Then, scoop out the flesh and puree it. Make sure the puree is smooth. Fresh pumpkin has a bright flavor but may be a bit watery. Drain any excess liquid before using it in your recipe.
How can I make these gluten-free?
To make these cups gluten-free, simply swap the graham cracker crumbs. Use gluten-free graham crackers or a gluten-free cookie crumb. You can also blend nuts or oats into fine crumbs. Just make sure all your ingredients are certified gluten-free.
What is the best way to serve No-Bake Pumpkin Cheesecake Cups?
Serve the cups chilled. Place them on a nice platter for a pretty display. Drizzle caramel sauce on top and add a sprinkle of cinnamon for flair. You can also use whipped cream or pecans as toppings. This adds a nice touch and makes them look great!
You learned about the key ingredients and measurements for pumpkin cheesecake cups. I shared tips for perfecting your cheesecake filling and different ways to serve it. You also discovered fun variations like dairy-free and gluten-free options and how to store your treats.
In conclusion, making these pumpkin cheesecake cups is simple and rewarding. Use fresh ideas and follow the tips for the best results. Enjoy this delightful dessert with friends and family!

