Are you ready to enjoy a comforting treat? My Apple Fritter Quick Bread is just the recipe you need. It’s easy to make and bursting with flavor from fresh apples and warm spices. In this post, I’ll guide you through simple steps to create your own delicious loaf. Perfect for breakfast or an afternoon snack, this quick bread will quickly become a family favorite. Let’s dive into the tasty details!
Ingredients
Key Ingredients for Apple Fritter Quick Bread
– 2 cups all-purpose flour
– 1 cup granulated sugar
– 1 tablespoon baking powder
These three core ingredients make the base of your quick bread. The all-purpose flour gives it structure. Granulated sugar adds sweetness, while baking powder helps the bread rise.
Additional Flavoring Ingredients
– 1 teaspoon cinnamon
– 1/2 teaspoon nutmeg
– 1/4 teaspoon salt
– 1/2 cup unsalted butter, melted
– 1/2 cup milk
– 2 large eggs
– 2 cups peeled and diced apples (Granny Smith or Honeycrisp)
– 1 teaspoon vanilla extract
Cinnamon and nutmeg bring warm flavors to your bread. The butter and milk add moisture, while eggs help bind it all. Diced apples, like Granny Smith, give a nice tartness. Vanilla extract rounds out the taste.
Optional Ingredients for Glaze
– 1 cup powdered sugar
– 2 tablespoons apple cider
– Optional: Chopped pecans or walnuts for topping
For a sweet finish, use powdered sugar and apple cider to make a glaze. Chopped nuts can add crunch on top. This glaze makes the bread look and taste even better.
Step-by-Step Instructions
Preparation Steps
– Preheat the oven to 350°F (175°C).
– Grease a 9×5-inch loaf pan and set it aside.
Mixing the Dry Ingredients
– In a large bowl, combine 2 cups of all-purpose flour, 1 cup of granulated sugar, 1 tablespoon of baking powder, 1 teaspoon of cinnamon, 1/2 teaspoon of nutmeg, and 1/4 teaspoon of salt.
– Whisk until evenly blended.
Mixing the Wet Ingredients
– In another bowl, blend 1/2 cup of melted unsalted butter, 1/2 cup of milk, 2 large eggs, and 1 teaspoon of vanilla extract until fully mixed.
– Pour the wet ingredients into the dry ingredients and stir gently until just combined. A few lumps are fine; do not overmix.
Final Steps for Baking
– Gently fold in 2 cups of peeled and diced apples.
– Pour the batter into the prepared loaf pan. Smooth the top with a spatula. You can add chopped nuts on top for texture, if you like.
– Bake in the preheated oven for 55-65 minutes. To check for doneness, insert a toothpick into the center. It should come out clean.
– Once baked, let the bread cool in the pan for about 10 minutes. Then transfer it to a wire rack.
– While still warm, drizzle a glaze made from 1 cup of powdered sugar mixed with 2 tablespoons of apple cider over the top of the bread for a sweet finish.
Tips & Tricks
Achieving Perfect Texture
– Avoid Overmixing: When mixing the wet and dry ingredients, stir just until combined. Overmixing can make the bread tough. A few lumps are fine.
– Choose the Right Apples: I like using Granny Smith or Honeycrisp apples. They give a nice balance of sweet and tart flavors, which works well in this bread.
Enhancing Flavor
– Optional Add-ins and Toppings: You can add chopped pecans or walnuts on top for a crunchy texture. They add a nice twist to each bite.
– Using Fresh Ingredients: Always use fresh apples and spices. This makes your bread taste much better. Fresh ingredients bring out the natural flavors.
Serving Suggestions
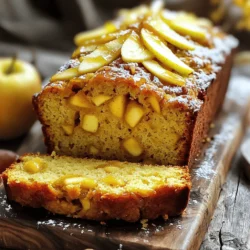
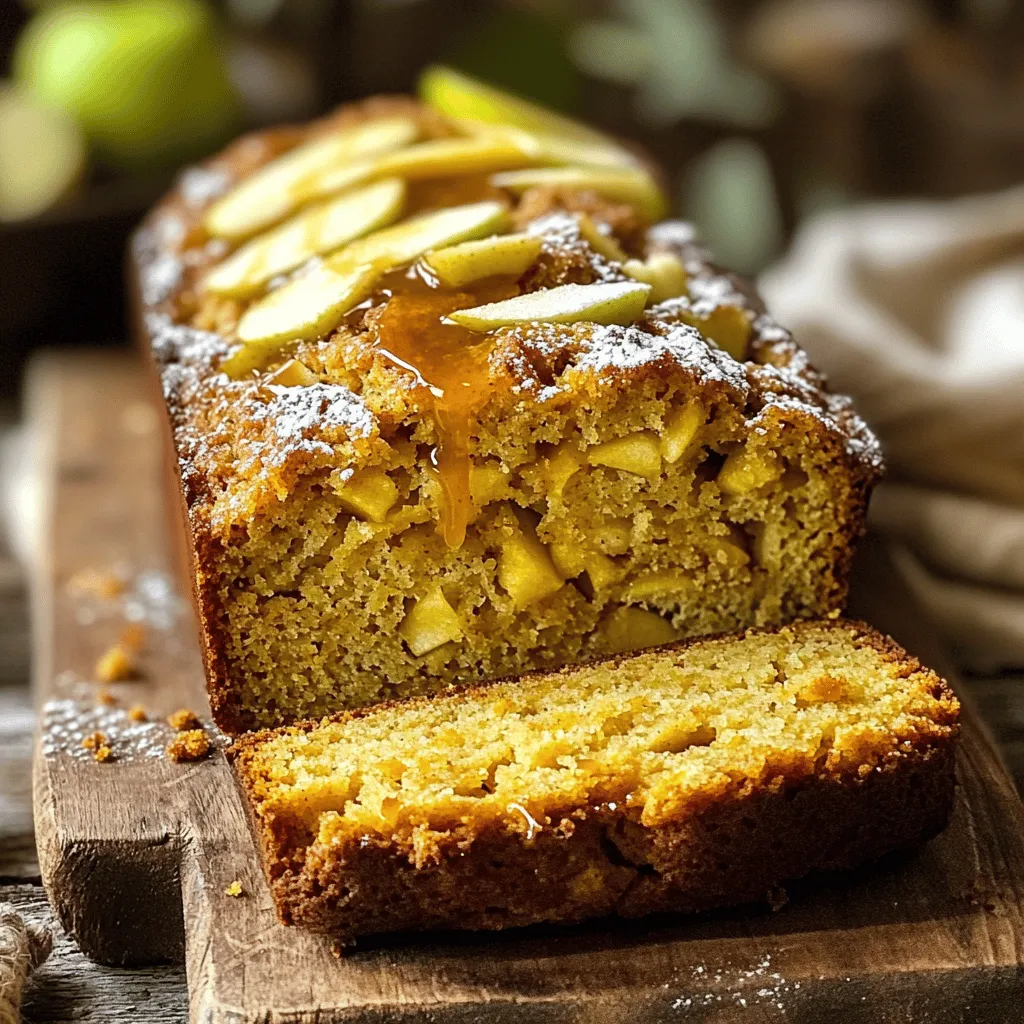
– Presentation Ideas: For serving, slice the bread and place it on a rustic wooden board. Add thin apple slices and a dusting of powdered sugar. This gives a lovely autumn vibe.
– Pairing with Beverages: Enjoy this bread with a cup of warm cider or coffee. The flavors blend perfectly and make your snack time special.
Variations
Nut-Free Options
If you want to make this bread nut-free, simply skip the nuts. The bread will still taste great. You can also try different toppings. Consider using chocolate chips or a sprinkle of cinnamon sugar instead. These will add flavor without the nuts.
Different Apple Varieties
Choosing the right apples is key. I recommend using Granny Smith or Honeycrisp apples. Both add a nice balance of sweet and tart. Granny Smith gives a tangy bite, while Honeycrisp brings sweetness. The apple type impacts the flavor and texture of the bread. You want apples that hold their shape but also soften a bit when baked.
Gluten-Free Version
To make this bread gluten-free, swap the all-purpose flour for a gluten-free blend. Look for a mix made for baking. You may need to adjust the baking time slightly. Check the bread a few minutes early. It may bake faster or slower, depending on the flour used.
Storage Info
How to Store Leftover Quick Bread
– Room Temperature Storage: Keep the bread in an airtight container. This helps keep it fresh. You can store it for up to three days.
– Refrigeration Tips: If you want it to last longer, put it in the fridge. Wrap it tightly in plastic wrap before putting it in a container. It can last up to a week this way.
Freezing the Bread
– Best Practices for Freezing: To freeze the bread, let it cool completely. Wrap it in plastic wrap and then foil. This helps prevent freezer burn. You can freeze it for up to three months.
– Thawing Recommendations: When you’re ready to eat it, take it out of the freezer. Leave it in the fridge overnight to thaw. You can also let it sit at room temperature for a few hours.
Shelf Life
– Expected Longevity of the Bread: At room temperature, the bread lasts about three days. In the fridge, it can last a week. When frozen, it lasts up to three months.
– Signs of Spoilage: Check for mold or an off smell. If it feels dry or hard, it’s best to throw it away. Enjoy your Apple Fritter Quick Bread while it’s fresh!
FAQs
What are the best apples for apple fritter quick bread?
The best apples for this quick bread are Granny Smith and Honeycrisp. Both apples have the right balance of sweetness and tartness. Granny Smith adds a nice tang, while Honeycrisp brings sweetness. You can mix both types for a more complex flavor.
Can I make this recipe ahead of time?
Yes, you can make this quick bread ahead of time. Bake it, then let it cool completely. Wrap it tightly in plastic wrap or foil. Store it at room temperature for up to three days. For longer storage, freeze it. Just make sure to thaw it in the fridge overnight before serving.
How do I know when my quick bread is done?
To check if your quick bread is done, insert a toothpick into the center. If it comes out clean or with a few crumbs, it’s ready. The top should be golden brown, and the bread should feel firm to the touch.
Can I substitute ingredients in this recipe?
You can substitute some ingredients. For example, use brown sugar instead of granulated sugar for a richer flavor. You can also use almond milk instead of regular milk for a dairy-free option. Just remember, substitutions can change the taste and texture slightly.
Apple fritter quick bread brings a delightful mix of sweet and warm flavors. We explored key ingredients like flour, sugar, and apples that create a perfect loaf. The step-by-step instructions ensure great results, while tips enhance texture and flavor. Remember, you can adjust the recipe with different apple varieties or opt for nut-free versions.
In the end, enjoy your quick bread fresh or stored for later. With this guide, you can bake like a pro and share delicious moments. Dive into the flavors, and get baking!