No-Bake Strawberry Shortcake Icebox Cake Delight

WANT TO SAVE THIS RECIPE?

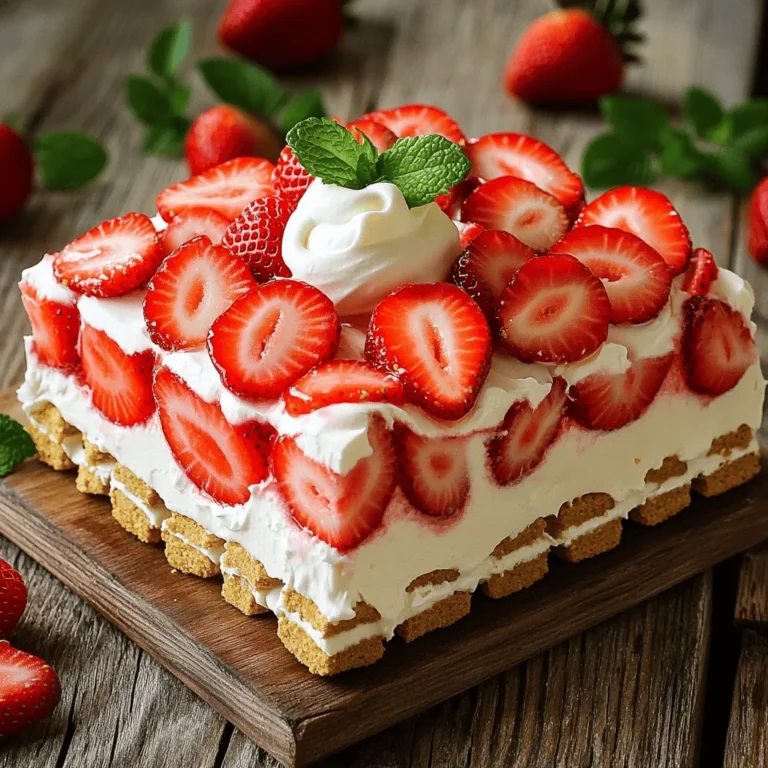
If you crave a simple, sweet treat, you need this No-Bake Strawberry Shortcake Icebox Cake! This dessert is easy to make and perfect for any occasion. With fresh strawberries, creamy whipped topping, and crunchy graham crackers, it hits all the right notes. I’ll guide you through each step, share tips, and even offer tasty variations. Get ready to impress your family and friends with this delightful icy cake!

Ingredients

Fresh Strawberries

You need 2 cups of fresh strawberries for this cake. Start by hulling them. Then, slice them into small pieces. This will help release their sweet flavor. Add 1 tablespoon of granulated sugar to the strawberries. Mix them well and let them sit for about 10-15 minutes. This process makes the strawberries juicy and syrupy, perfect for our cake.

Graham Crackers

You will use 1 package, which is 14 ounces, of graham crackers. These crackers form the base of your cake. They give a wonderful crunch and flavor. Make sure to break them into rectangular pieces to fit nicely in your dish. They will soften as the cake chills, creating a nice layer.

Whipped Cream Ingredients

For the whipped cream, gather 2 cups of heavy whipping cream. This is the star of the cake! You’ll also need 1/2 cup of powdered sugar. This sugar adds sweetness and helps the cream hold its shape. Finally, add 1 teaspoon of vanilla extract for extra flavor. Whipping cream takes time, so be patient. You want it fluffy and thick for the best taste.

Step-by-Step Instructions

Preparing the Strawberries

Start by washing the strawberries. Remove the green tops and slice them. Place the sliced strawberries in a bowl. Add one tablespoon of granulated sugar. Mix them gently. Let them sit for 10 to 15 minutes. This helps the strawberries release juice. You’ll see them become syrupy and sweet. This syrup adds flavor to the cake.

Whipping the Cream

Grab a separate bowl for the cream. Pour in two cups of heavy whipped cream. Start whipping it with a mixer on medium speed. As it thickens, add half a cup of powdered sugar. Don’t forget to add one teaspoon of vanilla extract. Keep whipping until you see stiff peaks. This means the cream is ready. It should be fluffy and thick, perfect for layering.

Assembling the Cake

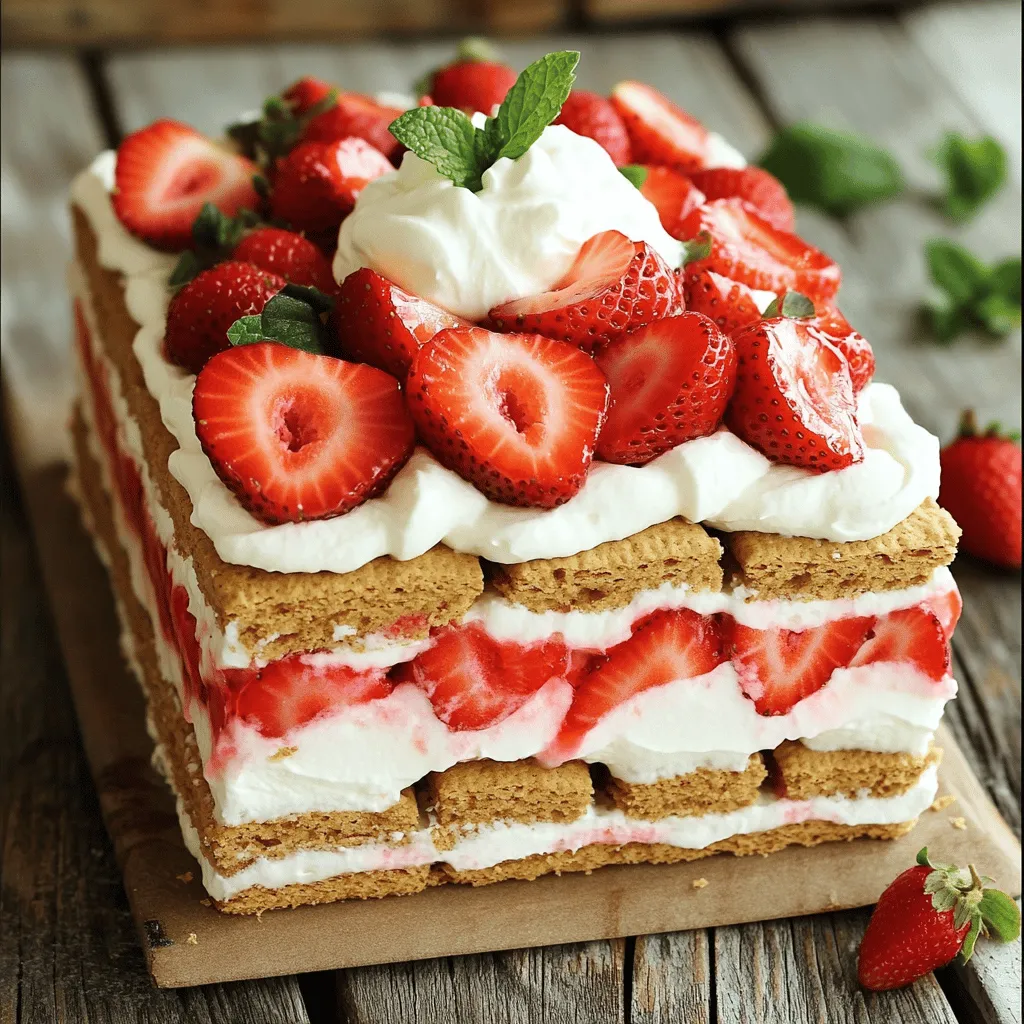
Now, take a 9×13-inch dish. Layer the bottom with graham crackers. Make sure to cover the entire base. Next, spread a layer of whipped cream on top. Use a spatula to smooth it out evenly. Then, scatter some of the syrupy strawberries over the cream. Repeat this process. Alternate layers of graham crackers, whipped cream, and strawberries. Finish with a final layer of whipped cream. Top it with extra strawberries for a nice look. Cover the dish with plastic wrap. Chill it in the fridge for at least four hours. This will let the flavors blend well. When ready to serve, add fresh mint leaves on top for a pop of color.

Tips & Tricks

Perfecting the Whipped Cream

To make the best whipped cream, start with cold ingredients. Chill your bowl and beaters for about 10 minutes. This helps the cream whip up better. Use heavy whipped cream for a rich taste. Add powdered sugar slowly while mixing. This helps it blend well and not clump. Whip until you see stiff peaks. This means the cream will hold its shape. Don’t over-whip, or it can turn into butter.

Layering Techniques

When layering, start with a solid base of graham crackers. Make sure they cover the entire bottom of your dish. Spread whipped cream evenly on top of the crackers. Don’t rush this step; a smooth layer looks best. Add strawberries in a thin, even layer. Repeat this process. You can make as many layers as you like. Just remember that the top should end with whipped cream. This makes for a pretty finish.

Serving Suggestions

For serving, cut the cake into neat squares. Use a sharp knife to get even slices. Place each square on a dessert plate. Drizzle some strawberry syrup around the cake for flair. Garnish with fresh mint leaves on top for a pop of color. This adds a fresh taste too. You can also serve with extra strawberries on the side.

Variations

Flavor Alternatives

You can switch up flavors in this cake. Instead of strawberries, try peaches or blueberries. Use the same method for macerating the fruit. You can also add lemon zest to the whipped cream. This gives a nice, fresh taste. Experimenting with flavors makes this cake fun and unique.

Different Types of Berries

Mixing berries adds color and taste. Raspberries, blackberries, and even mixed berries work well. Each berry brings its own sweetness and tartness. Just remember, if you use tart berries, you might want more sugar. This will balance the flavors nicely.

Gluten-Free Option

If you need a gluten-free cake, swap graham crackers for gluten-free cookies. Look for brands that have a similar texture. You can also use almond flour or coconut flour to make your own. This way, everyone can enjoy a slice.

Storage Info

Refrigeration Tips

To keep your No-Bake Strawberry Shortcake Icebox Cake fresh, store it in the fridge. Cover the dish tightly with plastic wrap to prevent it from absorbing odors. This cake needs to chill for at least four hours, but overnight is best. The longer it sits, the better the flavors blend.

Freezing the Cake

You can freeze this cake if you want to save some for later. To do this, cut the cake into squares. Wrap each piece in plastic wrap and then in aluminum foil. This prevents freezer burn. When you’re ready to eat, thaw it in the fridge overnight.

Shelf Life Instructions

This cake lasts for about 3-4 days in the fridge. After that, the texture may change. If you freeze it, it can last for up to three months. Just remember that freezing may change the texture of the strawberries when thawed. Enjoy every bite while it’s fresh!

FAQs

Can I use frozen strawberries?

Yes, you can use frozen strawberries. Just thaw them first. Frozen strawberries may have more juice. Drain extra liquid before mixing with sugar. This way, your cake won’t be soggy.

How long does the cake need to chill?

The cake needs to chill for at least 4 hours. I recommend letting it chill overnight. This helps the flavors blend well. The graham crackers will soften, creating a better texture.

What can I use instead of graham crackers?

If you want a change, try using vanilla wafers or sponge cake. Both options work well. They will give a different taste and texture. You can also use crushed cookies for fun flavors.

This blog post covered how to make a delicious berry cake. We started with key ingredients: fresh strawberries, graham crackers, and whipped cream. Next, I shared steps for preparing the strawberries, whipping the cream, and assembling the cake. Don’t forget my tips for perfecting layers and fresh ideas for unique flavors. Finally, we discussed storage options to keep your cake fresh. I hope you enjoy making this cake and experimenting with variations. With simple steps, you’ll impress your friends and family with a tasty treat!

You need 2 cups of fresh strawberries for this cake. Start by hulling them. Then, slice them into small pieces. This will help release their sweet flavor. Add 1 tablespoon of granulated sugar to the strawberries. Mix them well and let them sit for about 10-15 minutes. This process makes the strawberries juicy and syrupy, perfect for our cake. You will use 1 package, which is 14 ounces, of graham crackers. These crackers form the base of your cake. They give a wonderful crunch and flavor. Make sure to break them into rectangular pieces to fit nicely in your dish. They will soften as the cake chills, creating a nice layer. For the whipped cream, gather 2 cups of heavy whipping cream. This is the star of the cake! You’ll also need 1/2 cup of powdered sugar. This sugar adds sweetness and helps the cream hold its shape. Finally, add 1 teaspoon of vanilla extract for extra flavor. Whipping cream takes time, so be patient. You want it fluffy and thick for the best taste. Start by washing the strawberries. Remove the green tops and slice them. Place the sliced strawberries in a bowl. Add one tablespoon of granulated sugar. Mix them gently. Let them sit for 10 to 15 minutes. This helps the strawberries release juice. You’ll see them become syrupy and sweet. This syrup adds flavor to the cake. Grab a separate bowl for the cream. Pour in two cups of heavy whipped cream. Start whipping it with a mixer on medium speed. As it thickens, add half a cup of powdered sugar. Don’t forget to add one teaspoon of vanilla extract. Keep whipping until you see stiff peaks. This means the cream is ready. It should be fluffy and thick, perfect for layering. Now, take a 9x13-inch dish. Layer the bottom with graham crackers. Make sure to cover the entire base. Next, spread a layer of whipped cream on top. Use a spatula to smooth it out evenly. Then, scatter some of the syrupy strawberries over the cream. Repeat this process. Alternate layers of graham crackers, whipped cream, and strawberries. Finish with a final layer of whipped cream. Top it with extra strawberries for a nice look. Cover the dish with plastic wrap. Chill it in the fridge for at least four hours. This will let the flavors blend well. When ready to serve, add fresh mint leaves on top for a pop of color. To make the best whipped cream, start with cold ingredients. Chill your bowl and beaters for about 10 minutes. This helps the cream whip up better. Use heavy whipped cream for a rich taste. Add powdered sugar slowly while mixing. This helps it blend well and not clump. Whip until you see stiff peaks. This means the cream will hold its shape. Don’t over-whip, or it can turn into butter. When layering, start with a solid base of graham crackers. Make sure they cover the entire bottom of your dish. Spread whipped cream evenly on top of the crackers. Don’t rush this step; a smooth layer looks best. Add strawberries in a thin, even layer. Repeat this process. You can make as many layers as you like. Just remember that the top should end with whipped cream. This makes for a pretty finish. For serving, cut the cake into neat squares. Use a sharp knife to get even slices. Place each square on a dessert plate. Drizzle some strawberry syrup around the cake for flair. Garnish with fresh mint leaves on top for a pop of color. This adds a fresh taste too. You can also serve with extra strawberries on the side. {{image_2}} You can switch up flavors in this cake. Instead of strawberries, try peaches or blueberries. Use the same method for macerating the fruit. You can also add lemon zest to the whipped cream. This gives a nice, fresh taste. Experimenting with flavors makes this cake fun and unique. Mixing berries adds color and taste. Raspberries, blackberries, and even mixed berries work well. Each berry brings its own sweetness and tartness. Just remember, if you use tart berries, you might want more sugar. This will balance the flavors nicely. If you need a gluten-free cake, swap graham crackers for gluten-free cookies. Look for brands that have a similar texture. You can also use almond flour or coconut flour to make your own. This way, everyone can enjoy a slice. To keep your No-Bake Strawberry Shortcake Icebox Cake fresh, store it in the fridge. Cover the dish tightly with plastic wrap to prevent it from absorbing odors. This cake needs to chill for at least four hours, but overnight is best. The longer it sits, the better the flavors blend. You can freeze this cake if you want to save some for later. To do this, cut the cake into squares. Wrap each piece in plastic wrap and then in aluminum foil. This prevents freezer burn. When you're ready to eat, thaw it in the fridge overnight. This cake lasts for about 3-4 days in the fridge. After that, the texture may change. If you freeze it, it can last for up to three months. Just remember that freezing may change the texture of the strawberries when thawed. Enjoy every bite while it’s fresh! Yes, you can use frozen strawberries. Just thaw them first. Frozen strawberries may have more juice. Drain extra liquid before mixing with sugar. This way, your cake won’t be soggy. The cake needs to chill for at least 4 hours. I recommend letting it chill overnight. This helps the flavors blend well. The graham crackers will soften, creating a better texture. If you want a change, try using vanilla wafers or sponge cake. Both options work well. They will give a different taste and texture. You can also use crushed cookies for fun flavors. This blog post covered how to make a delicious berry cake. We started with key ingredients: fresh strawberries, graham crackers, and whipped cream. Next, I shared steps for preparing the strawberries, whipping the cream, and assembling the cake. Don’t forget my tips for perfecting layers and fresh ideas for unique flavors. Finally, we discussed storage options to keep your cake fresh. I hope you enjoy making this cake and experimenting with variations. With simple steps, you'll impress your friends and family with a tasty treat!

No-Bake Strawberry Shortcake Icebox Cake

Indulge in the delightful layers of this No-Bake Strawberry Shortcake Icebox Cake! With fresh strawberries, creamy whipped cream, and graham crackers, this easy dessert is perfect for summer gatherings. Learn how to create this delightful treat in just a few simple steps and impress your friends and family. Click to explore the full recipe and whip up this refreshing dessert today!

Ingredients
  

2 cups fresh strawberries, hulled and sliced

1 tablespoon granulated sugar

1 package (14 ounces) of graham crackers

2 cups heavy whipped cream

1/2 cup powdered sugar

1 teaspoon vanilla extract

Fresh mint leaves for garnish

Instructions
 

In a medium bowl, combine sliced strawberries with granulated sugar. Toss well and set aside for about 10-15 minutes to allow the strawberries to become syrupy.

    In another mixing bowl, whip the heavy cream until it begins to thicken. Gradually add in the powdered sugar and vanilla extract. Continue whipping until stiff peaks form and the cream is fluffy.

      In a rectangular or square 9x13-inch dish, start assembling the cake.

        Layer the bottom of the dish with graham crackers to create a solid base.

          Spread a layer of whipped cream over the graham crackers, smoothing it out evenly.

            Scatter a portion of the strawberry mixture over the whipped cream layer.

              Repeat the layering process (graham crackers, whipped cream, strawberries) until you reach the top of the dish. The last layer should be whipped cream topped with extra strawberries for decoration.

                Cover the dish with plastic wrap and refrigerate for at least 4 hours (or overnight). This allows the graham crackers to soften and the flavors to meld together.

                  Before serving, garnish with fresh mint leaves for an added touch of freshness.

                    Prep Time: 20 minutes | Total Time: 4 hours + chilling | Servings: 8-10

                      - Presentation Tips: Slice the cake into squares and serve on dessert plates, drizzling additional strawberry syrup from the macerated strawberries around the plate for a beautiful presentation.

                        WANT TO SAVE THIS RECIPE?

                        Leave a Comment

                        Recipe Rating