Get ready to bake the ultimate holiday treat with my Christmas Kitchen Sink Cookies! These cookies pack the perfect mix of flavors and textures. You’ll use whatever you have on hand—chocolate, nuts, dried fruits, and more. With easy steps and tips, you can create a delicious batch that everyone will love. Let’s dive into this fun baking adventure and make your holidays a little sweeter!
Ingredients
List of Ingredients
To make these delightful Christmas Kitchen Sink Cookies, gather the following ingredients:
– 1 cup unsalted butter, softened
– 1 cup brown sugar, packed
– 1/2 cup granulated sugar
– 2 large eggs
– 1 teaspoon vanilla extract
– 2 1/4 cups all-purpose flour
– 1 teaspoon baking soda
– 1/2 teaspoon salt
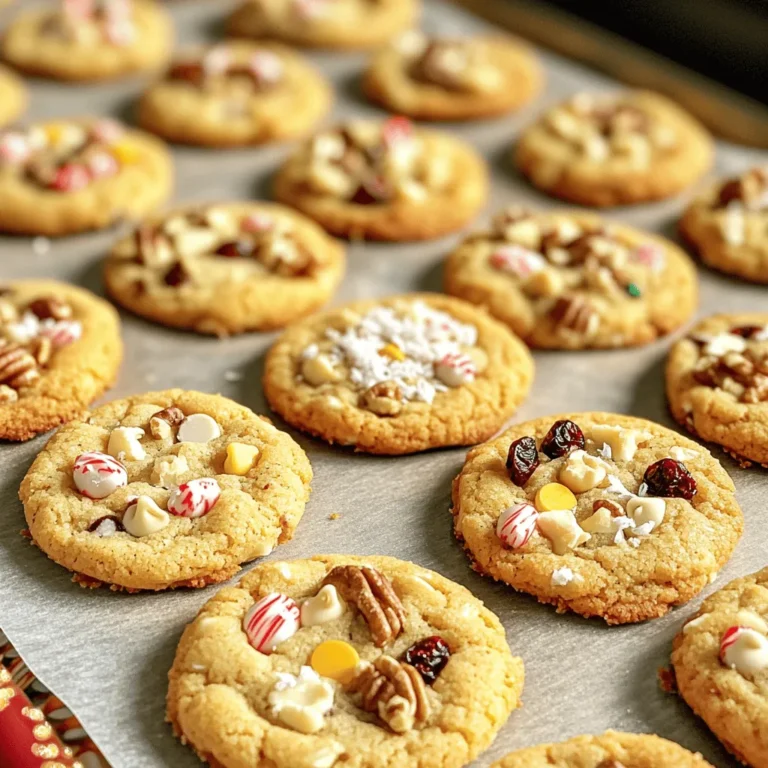
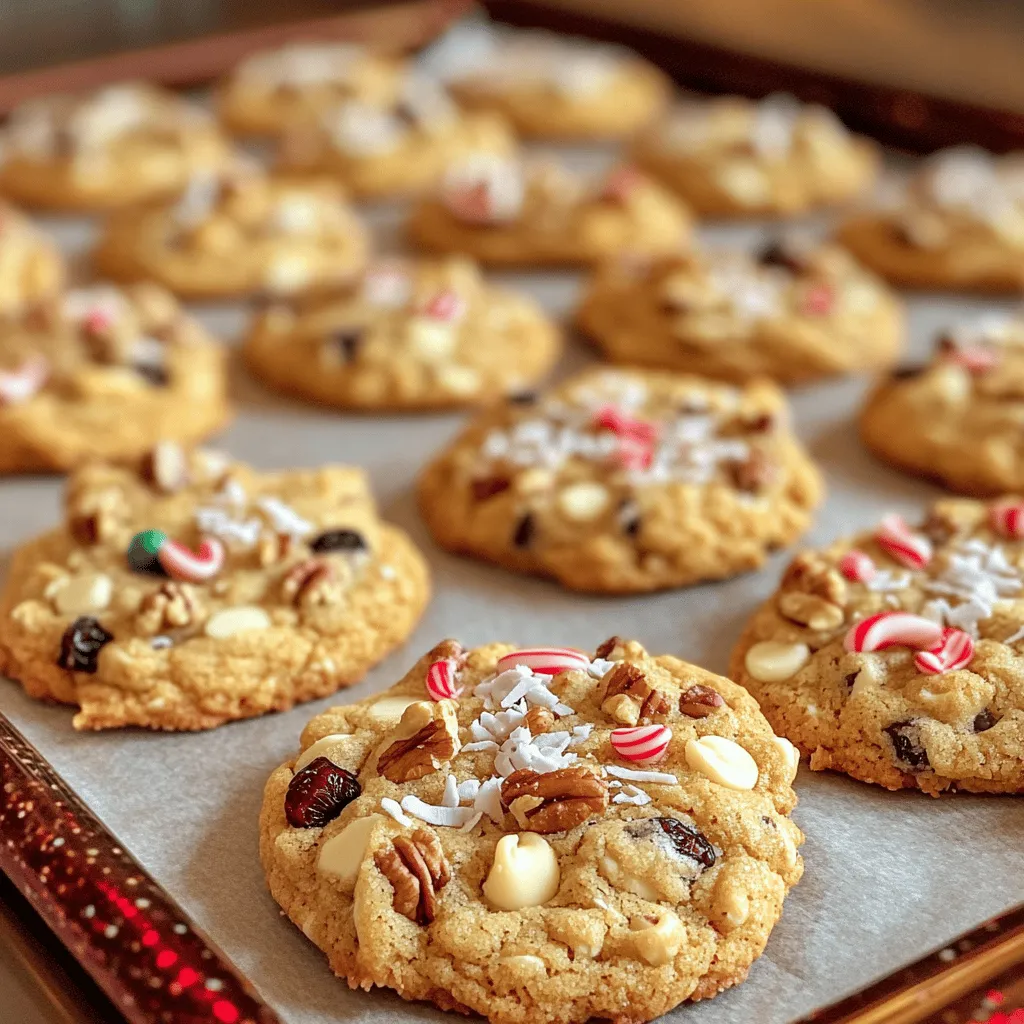
– 1 cup semi-sweet chocolate chips
– 1/2 cup white chocolate chips
– 1/2 cup crushed peppermint candies
– 1/2 cup chopped walnuts
– 1/2 cup dried cranberries
– 1/2 cup shredded coconut
Ingredient Substitutions
If you need to swap ingredients, here are some ideas:
– Use coconut oil instead of butter for a dairy-free option.
– Substitute brown sugar with coconut sugar for a healthier choice.
– If you’re nut-free, leave out walnuts or replace them with sunflower seeds.
– Swap dried cranberries for raisins or chopped dates for a different flavor.
– Use dark chocolate chips instead of semi-sweet for richer cookies.
Tips for Choosing Fresh Ingredients
Choose the best ingredients for great cookies:
– Buy butter that is cold, firm, and smooth.
– Look for sugar that is free of clumps.
– Check eggs for cracks; they should be clean and cool.
– Choose flour that is fine and free from lumps.
– Pick chocolate chips that have a shiny surface.
– Ensure dried fruits are moist, not hard or stale.
Step-by-Step Instructions
Prepping Your Workspace
Start by gathering all your tools. You need a large mixing bowl, a whisk, a spatula, and a cookie scoop. Preheat your oven to 350°F (175°C). Line your baking sheet with parchment paper. This helps the cookies not stick. Make sure your butter is softened. It should be easy to mix.
Detailed Baking Instructions
In your large mixing bowl, cream together the softened butter, brown sugar, and granulated sugar. Mix until it gets light and fluffy. Add in the eggs, one at a time, mixing well after each. Now, add the vanilla extract. In a separate bowl, whisk together the flour, baking soda, and salt. Gradually add this to the butter mixture. Mix until just combined.
Next, fold in all the fun stuff: semi-sweet chocolate chips, white chocolate chips, crushed peppermint, walnuts, dried cranberries, and shredded coconut. Use a cookie scoop or a tablespoon to drop the dough onto your baking sheet. Space them about 2 inches apart. Bake your cookies for 10-12 minutes. They should be golden on the edges but soft in the middle.
Cooling and Storing Cookies
Once baked, take them out of the oven. Let the cookies cool on the baking sheet for 5 minutes. This helps them set. After that, transfer them to a wire rack to cool completely. Store your cookies in an airtight container. They will stay fresh for about a week.
Tips & Tricks
Best Practices for Perfect Cookies
To get the best cookies, follow some simple steps. First, use room temperature butter. It mixes well with the sugars. Make sure to measure your flour correctly. Too much flour makes cookies dry. I like to spoon flour into a measuring cup and level it off. Bake cookies on parchment paper for easy removal. Leave space between the cookies to allow them to spread.
How to Enhance Flavor
You can boost the flavor of your cookies in fun ways. Try adding a pinch of cinnamon or nutmeg for warmth. You can also add a splash of almond extract for a unique twist. Don’t forget the mix-ins! Use different nuts or dried fruits. Each choice makes a new taste. If you love chocolate, mix in dark chocolate chips or chunks.
Common Baking Mistakes and How to Avoid Them
Many mistakes can happen while baking cookies. One common mistake is overmixing the dough. This can make your cookies tough. Mix just until the ingredients combine. Another mistake is baking them too long. Keep an eye on the cookies; they should be golden at the edges but soft in the middle. Lastly, don’t skip cooling the cookies on the wire rack. This helps them firm up nicely.
Variations
Creative Mix-Ins for Your Cookies
Christmas Kitchen Sink Cookies are all about variety. You can mix in almost anything you love. Some great ideas include:
– Chopped dried fruit: Try apricots, cherries, or figs for a sweet touch.
– Nuts: Use pecans, almonds, or macadamia nuts for crunch.
– Cereal: Add crushed cornflakes or rice cereal for a fun texture.
– Candy: Toss in M&M’s, Reese’s pieces, or even mini marshmallows for extra sweetness.
These mix-ins make each cookie unique and fun. You really can’t go wrong with your choices!
Dietary Alternatives (Gluten-Free, Vegan, etc.)
Need to cater to special diets? No problem! Here are some easy swaps:
– Gluten-Free: Use a gluten-free flour blend in place of all-purpose flour. Many options work well.
– Vegan: Replace the butter with coconut oil or a vegan butter. Use flax eggs or chia seeds as an egg substitute.
– Nut-Free: Omit the nuts and add more dried fruit or seeds instead.
These alternatives help everyone enjoy your cookies without worry.
Decorating Tips for Festive Presentation
Make your cookies stand out with some simple decorations. Here are a few ideas:
– Drizzle: Melt some white or dark chocolate and drizzle it over cooled cookies.
– Sprinkles: Use festive sprinkles that match the holiday colors.
– Frosting: Whip up a light frosting for added sweetness and flair.
These tips will make your Christmas Kitchen Sink Cookies look as good as they taste!
Storage Info
How to Store Cookies
To keep your Christmas Kitchen Sink Cookies fresh, store them in an airtight container. This helps lock in moisture and flavor. Place a piece of parchment paper between layers of cookies to prevent sticking. You can also use a cookie jar with a tight lid. This keeps them soft and tasty for longer.
Freezing Cookies for Later Use
Freezing is a great way to save some cookies for later. First, let the cookies cool completely. Then, place them in a single layer on a baking sheet. Freeze them for about 1 hour until firm. After that, transfer the cookies to a freezer-safe bag or container. Label it with the date and type. You can freeze them for up to three months. When you want one, just take it out and enjoy!
Shelf Life of Christmas Kitchen Sink Cookies
These cookies stay fresh for about a week at room temperature. If stored correctly, they can last longer. In the fridge, they stay good for about two weeks. If frozen, they last up to three months. Always check for signs of spoilage before eating. Enjoy your cookies while they are at their best!
FAQs
Can I make Christmas Kitchen Sink Cookies in advance?
Yes, you can make these cookies ahead of time. Prepare the dough and chill it in the fridge. You can store it for up to three days. When you are ready to bake, scoop the dough onto your baking sheet. This way, you can bake fresh cookies right before guests arrive!
What’s the best way to soften butter?
To soften butter, take it out of the fridge. Cut it into small cubes for faster softening. Let the butter sit at room temperature for about 30 minutes. If you need it quicker, place the butter in the microwave for about 10 seconds. Be careful not to melt it!
Can I use different types of chocolate chips?
Absolutely! You can mix and match chocolate chips to your liking. Try dark chocolate, milk chocolate, or even butterscotch chips. Each type adds a unique taste to your cookies. Feel free to get creative with your favorites!
How do I know when my cookies are done baking?
Your cookies will be done when the edges are lightly golden. The centers should still look soft. They will continue to cook as they cool on the baking sheet.
In this post, we explored key ingredients, step-by-step baking, and clever tips for amazing cookies. You learned how to choose fresh ingredients, avoid common mistakes, and enhance flavors. We also looked at fun mix-ins, dietary alternatives, and festive decorating tips.
Remember, baking cookies can be both fun and rewarding. With these tips, you can create delicious treats that everyone will love. Enjoy the process and share your tasty results with friends!

