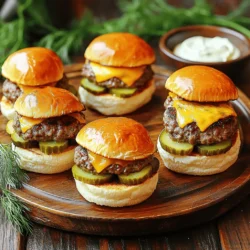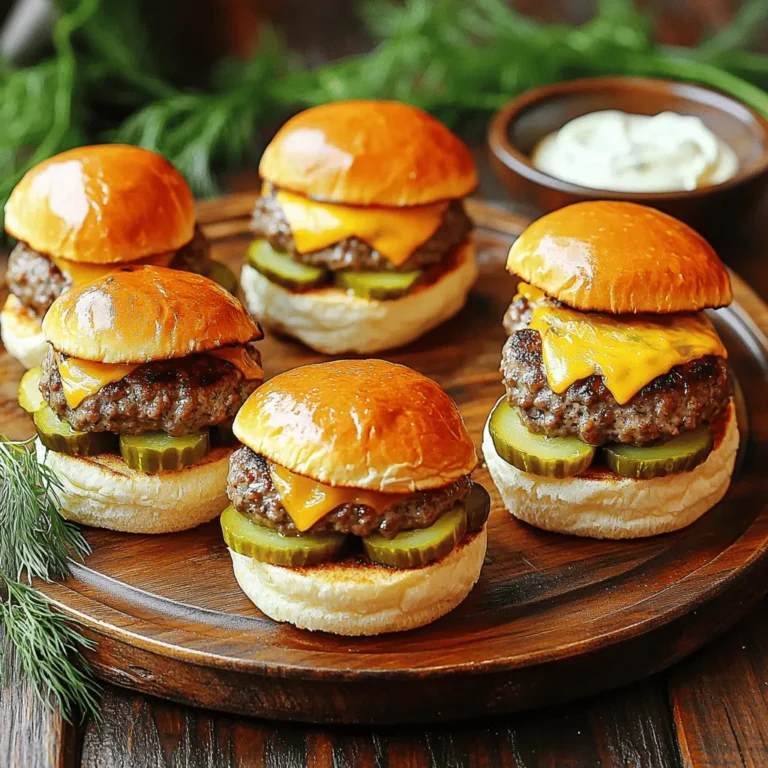
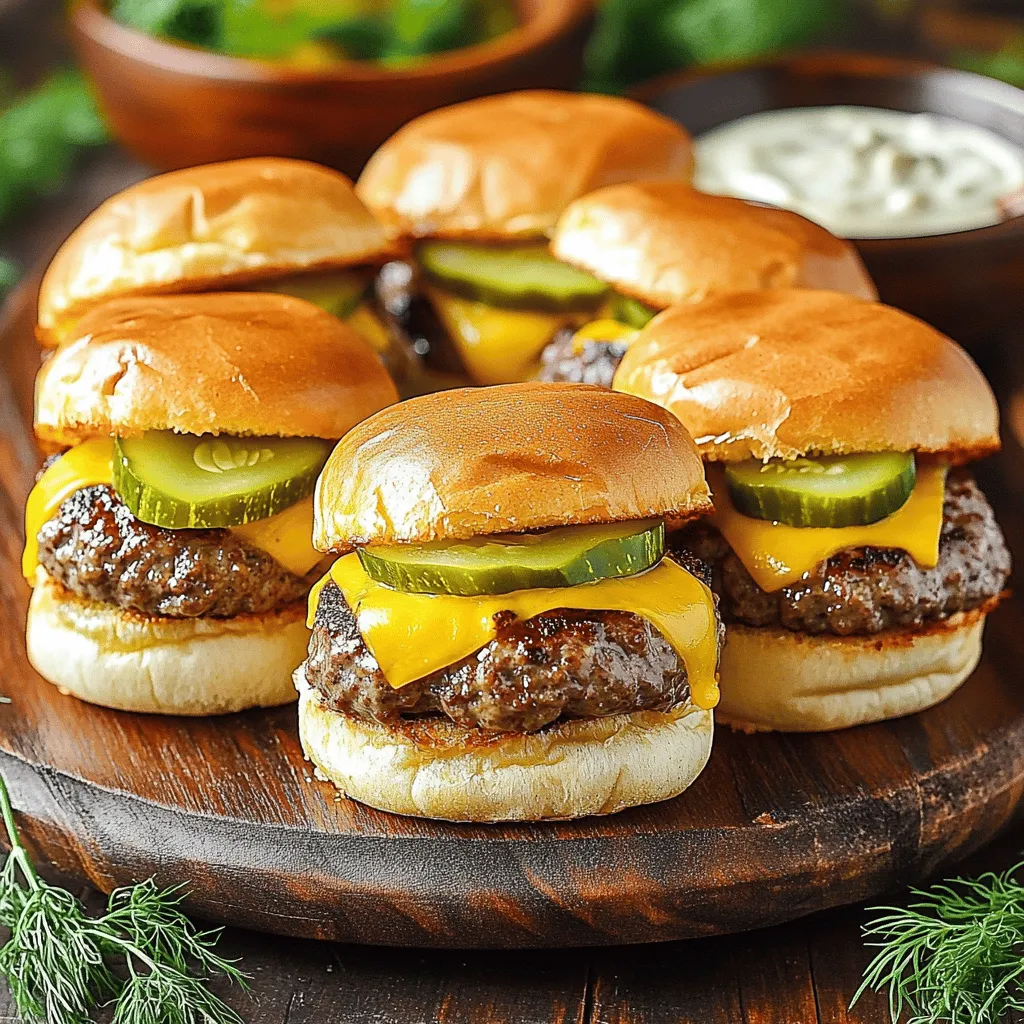
Are you ready to spice up your next gathering with mouthwatering Dill Pickle Cheeseburger Sliders? This easy recipe combines juicy beef, tangy pickles, and melty cheese for a guaranteed hit. In just a few simple steps, you’ll have sliders that everyone will rave about. Let’s dive into the ingredients and see how to create these tasty bites that make any meal special!
Ingredients
Main Ingredients
– 1 lb ground beef (80/20 blend)
– 6 slider buns
– 1 cup dill pickles, sliced
– 6 slices cheddar cheese
Condiments and Seasonings
– 1 teaspoon garlic powder
– 1 teaspoon onion powder
– 1/4 cup mayonnaise
– 1 tablespoon Dijon mustard
– 1 tablespoon dill pickle juice
Garnish Options
– Fresh dill (optional)
– Additional pickles
To make Dill Pickle Cheeseburger Sliders, gather these ingredients first. I love using a good ground beef blend, like 80/20. This mix gives you juicy, flavorful patties. Slider buns should be soft and fresh. They should hold all the goodness without falling apart.
Dill pickles add that tangy crunch we all crave. I use sliced pickles for easy stacking. Cheese is a must, and cheddar melts perfectly on hot patties.
Now, let’s talk about seasonings. Garlic and onion powders boost the beef flavor. They add depth without overpowering the dish. The creamy sauce makes each bite better. Mayonnaise, Dijon mustard, and dill pickle juice come together to create a delicious tang.
For garnish, fresh dill adds a nice touch, but it’s optional. I also like to have more pickles on the side. This way, everyone can add as many as they want!
This list of ingredients sets you up for success.Enjoy every bite of your sliders!
Step-by-Step Instructions
Preparation Steps
– Preheat your grill or griddle to medium heat. This helps cook the patties just right.
– In a large bowl, mix the ground beef with garlic powder, onion powder, salt, and pepper. Use your hands to combine gently. You want it mixed, but not overworked.
Cooking the Patties
– Form the meat into six small patties. Make a slight indent in the center of each one. This keeps them flat while cooking.
– Grill the patties for about 3-4 minutes on one side. Flip and add a slice of cheddar cheese on each patty. Cook for another 3-4 minutes until the cheese melts and the patties are done to your liking.
Assembling the Sliders
– Toast the slider buns on the grill or in a toaster until they are golden brown. This adds a nice crunch.
– In a small bowl, mix mayonnaise, Dijon mustard, and dill pickle juice to create a tangy sauce. Spread this on the bottom half of each bun.
– Stack the cheesy patty on top of the sauce. Add several slices of dill pickles on each patty. Finally, cap it with the top half of the bun.
– If you want, add fresh dill on top for extra flavor. Enjoy your tasty sliders right away!
Tips & Tricks
Cooking Tips
To make the best sliders, aim for the right burger doneness. For juicy burgers, cook them to medium. This means an internal temperature of 160°F. Use a meat thermometer for accuracy. Let the patties rest for a few minutes after cooking. This keeps the juices inside.
Avoid puffed-up patties by making a small indent in the center of each. This simple trick helps them cook evenly. It also prevents them from ballooning while on the grill.
Saucing Suggestions
Tweak the sauce flavors to fit your taste. If you like it tangy, add more dill pickle juice. For a creamier sauce, increase the mayonnaise. You can also mix in a splash of hot sauce for some heat.
If you want alternatives to dill pickle juice, try lemon juice or apple cider vinegar. Both add a nice tang without overpowering the flavor of the sliders.
Presentation Ideas
For a great serving display, arrange the sliders on a large platter. Stack them neatly and add some extra dill pickles on the side. This gives guests a choice to add more if they want.
Serve the remaining tangy sauce in a small bowl for dipping. Consider adding chips or fries as a side. These pair well and make the meal even more fun!
Variations
Flavor Enhancements
To make your Dill Pickle Cheeseburger Sliders even better, you can add spices. A pinch of smoked paprika or cayenne pepper gives a nice kick. You can also experiment with different cheeses. Try pepper jack for heat or gouda for creaminess. Each cheese changes the flavor and makes it fun!
Dietary Modifications
If you need gluten-free options, look for special slider buns made from rice or almond flour. These work well and taste great. For a vegetarian choice, use black bean patties or lentil patties. They soak up flavors well and still give you that satisfying bite.
Slider Size Adjustments
You can make sliders in different sizes. Mini sliders are perfect for parties. Standard sliders are filling and great for a meal. Just remember, cooking times will change based on size. Smaller patties cook in about 2-3 minutes per side, while larger ones may take 4-5 minutes. This helps you serve them just right!
Storage Info
Refrigeration Guidelines
Store leftover sliders in an airtight container. This keeps them fresh longer. The best time to eat them is within three days. After that, the taste may fade. Keep the components separate if possible. The patties stay good for up to four days. The buns can last about two days.
Freezing Instructions
To freeze sliders, wrap each one in plastic wrap. Then, place them in a freezer bag. This prevents freezer burn. You can freeze patties and buns separately. For patties, freeze them flat. This makes them easier to thaw. To thaw, move them to the fridge overnight. You can also use the microwave for faster results.
Reheating Suggestions
The best way to reheat sliders is in the oven. Preheat it to 350°F. Place the sliders on a baking sheet. Cover them with foil to keep them moist. Heat for about 10-15 minutes. You can also use a skillet on low heat. Add a splash of water and cover it. This keeps the sliders juicy while warming them up.
FAQs
How do I make Dill Pickle Cheeseburger Sliders?
To make Dill Pickle Cheeseburger Sliders, follow these easy steps:
1. Preheat your grill or stovetop griddle over medium heat.
2. In a bowl, mix the ground beef, garlic powder, onion powder, salt, and pepper.
3. Form the beef into six small patties. Make a small indent in the center of each.
4. Grill the patties for 3-4 minutes, then flip them. Add a slice of cheddar cheese.
5. Cook for another 3-4 minutes until the cheese melts.
6. While patties cook, mix mayonnaise, Dijon mustard, and dill pickle juice to make the sauce.
7. Toast the slider buns until golden brown.
8. Spread sauce on the bottom half of each bun, add the patty, and top with pickles.
9. Close the sliders and serve.
What is the best type of meat for sliders?
The best meat for sliders is an 80/20 ground beef blend. This mix gives juicy flavor. The higher fat content helps keep the sliders moist as they cook. You can also try blends with brisket or chuck for unique tastes. A good mix ensures your sliders are not dry and have a great bite.
Can I prepare the sliders ahead of time?
Yes, you can prepare sliders ahead of time. You can form the patties and store them in the fridge for up to a day. This saves time when you’re ready to cook. Just remember to keep them covered. You can also mix the sauce ahead and store it in the fridge. Toast the buns just before serving for the best taste.
How do I customize the flavor of my sliders?
You can customize your sliders easily! Here are some ideas:
– Add jalapeños for spice.
– Use different cheeses like Swiss or pepper jack.
– Top with crispy bacon for crunch.
– Swap out the sauce with barbecue or ranch dressing.
These changes will give your sliders a unique twist and keep things fun.
You learned how to make delicious Dill Pickle Cheeseburger Sliders. We covered key ingredients like beef, cheese, and pickles. Followed by easy prepping, cooking, and assembling steps. You discovered helpful tips for cooking and saucing. We looked at tasty variations and storage options too.
Now, it’s your turn to try these sliders. Customize them to fit your taste. Enjoy making them for friends and family, and have fun! Happy cooking!