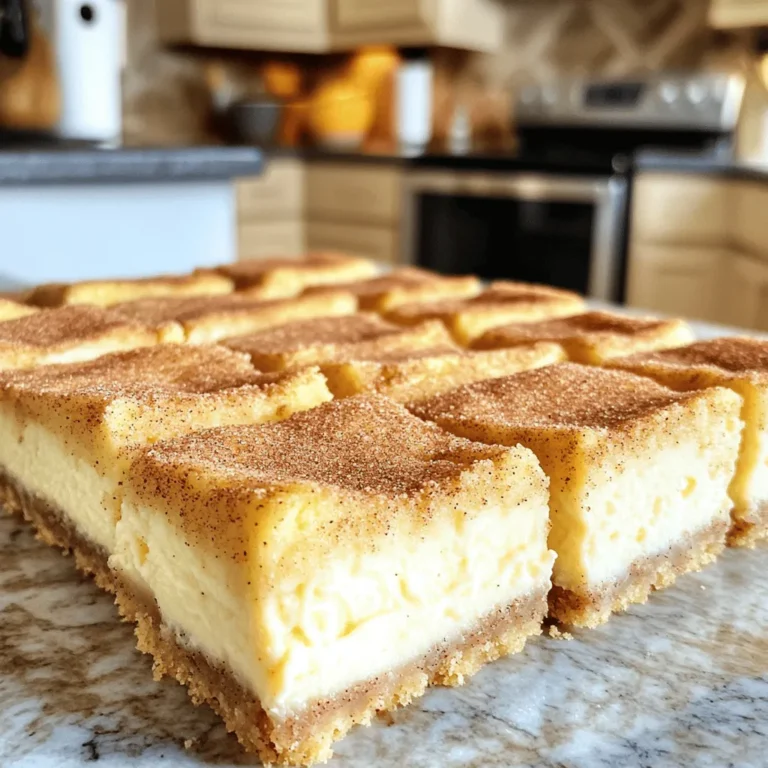
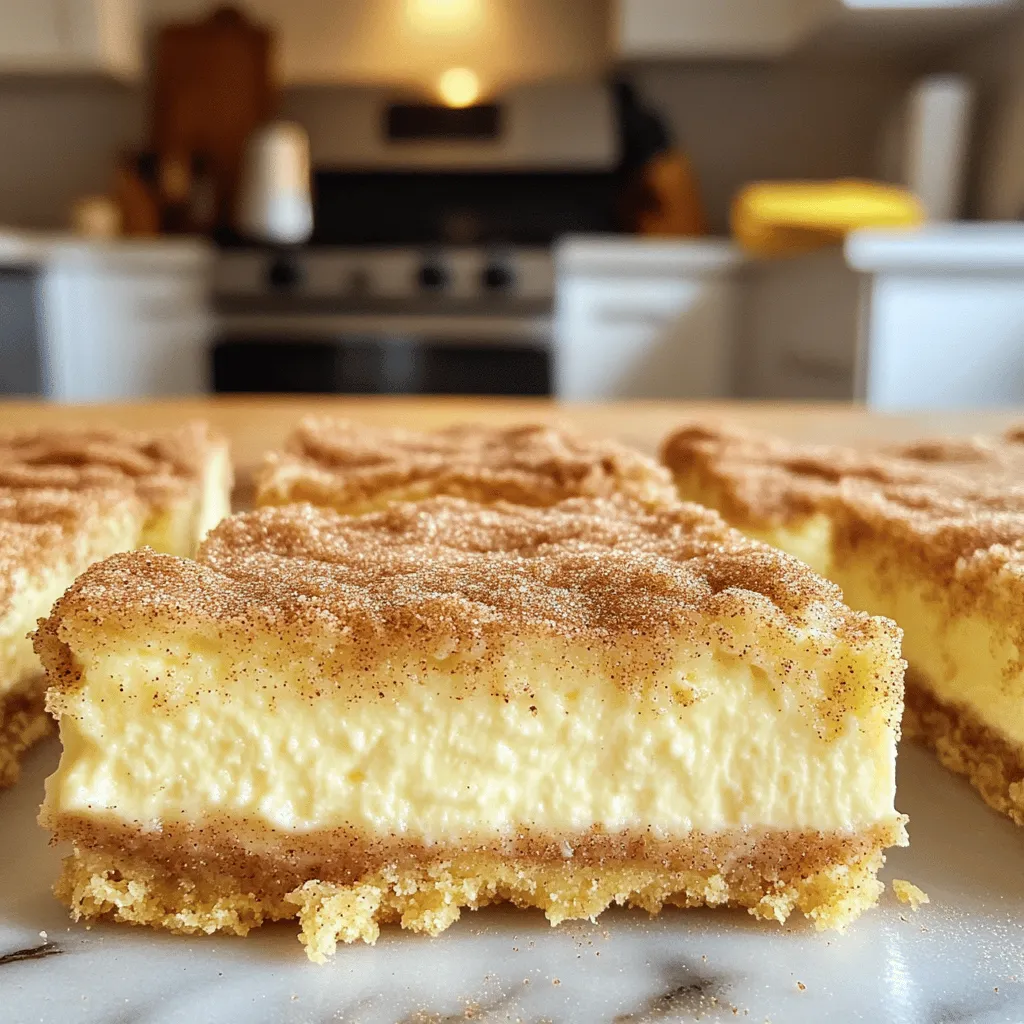
Are you craving a treat that’s both creamy and delicious? Snickerdoodle Cheesecake Bars fit the bill perfectly! These bars combine the classic taste of snickerdoodles with a smooth cheesecake layer. I will guide you through every step, from gathering simple ingredients to baking your perfect dessert. Get ready for a sweet adventure that will impress your friends and family! Let’s dive in and make this tasty treat together!
Ingredients
Dry Ingredients
For the cookie base, gather these dry ingredients:
– 1⅓ cups all-purpose flour
– ½ teaspoon baking soda
– ½ teaspoon cream of tartar
– ½ teaspoon cinnamon
– ¼ teaspoon salt
These ingredients create the perfect chewy texture for your bars.
Wet Ingredients
Next, you will need the wet ingredients:
– ½ cup unsalted butter, softened
– ¾ cup granulated sugar
– 1 large egg
– 1 teaspoon vanilla extract
These wet ingredients help to bind everything together and add flavor.
Cheesecake Layer Components
For the cheesecake layer, collect these components:
– 16 oz cream cheese, softened
– ½ cup granulated sugar
– 1 teaspoon vanilla extract
– 2 large eggs
– 1 tablespoon all-purpose flour
These ingredients create a creamy, smooth cheesecake layer that pairs well with the cookie base.
To finish it off, you’ll need a simple cinnamon sugar topping:
– 2 tablespoons granulated sugar
– 1 teaspoon cinnamon
This topping adds a sweet crunch to each bite.
Step-by-Step Instructions
Prepping the Baking Pan
Start by preheating your oven to 350°F (175°C). Grab a 9×9 inch baking pan and line it with parchment paper. Make sure to leave some paper hanging over the edges. This helps you lift the bars out easily after baking.
Making the Cookie Base
In a medium bowl, whisk together 1⅓ cups of all-purpose flour, ½ teaspoon of baking soda, ½ teaspoon of cream of tartar, ½ teaspoon of cinnamon, and ¼ teaspoon of salt. Set this mix aside. In a large bowl, cream ½ cup of softened unsalted butter with ¾ cup of granulated sugar. Use an electric mixer for about 2-3 minutes until it’s light and fluffy. Now, beat in 1 large egg and 1 teaspoon of vanilla extract. Mix until it is smooth. Gradually add the dry mix to this, stirring until just combined. Press about two-thirds of this dough into the bottom of your prepared pan.
Preparing the Cheesecake Filling
In another bowl, beat 16 oz of softened cream cheese until smooth. Slowly add in ½ cup of granulated sugar, mixing until combined. Next, add 1 teaspoon of vanilla extract and 2 large eggs one at a time. Stir in 1 tablespoon of all-purpose flour. Mix this all until just blended.
Assembling the Layers
Pour the cheesecake filling over the pressed cookie base. Use a spatula to smooth the top. Crumble the remaining dough over the cheesecake layer evenly. In a small bowl, mix together 2 tablespoons of granulated sugar with 1 teaspoon of cinnamon. Sprinkle this topping generously over the crumbled dough.
Baking the Bars
Bake for about 30-35 minutes. You want the cheesecake to be set and the top to be slightly golden. After baking, let the bars cool at room temperature for around 30 minutes. Then, refrigerate for at least 2 hours before slicing them into squares. For the best taste and texture, serve chilled or at room temperature.
Tips & Tricks
Achieving the Perfect Texture
To get the best texture, focus on your cream cheese. Make sure it is very soft before mixing. If it is cold, it will be lumpy. Beat the cream cheese alone first until it is smooth. Then add the sugar. Mix slowly to keep air out. This helps your cheesecake layer stay creamy and rich.
Common Baking Mistakes to Avoid
Many people rush when baking. Don’t forget to preheat your oven fully before baking. If your oven is too cool, the bars will not cook well. Also, avoid opening the oven door while baking. This can drop the temperature and ruin your bars. Lastly, let them cool completely before slicing. This helps them hold their shape.
Serving Suggestions
Serve these bars chilled for a refreshing treat. You can add a dollop of whipped cream on top. Fresh berries also make a great addition. For a fun twist, drizzle some caramel sauce over each bar. These options enhance the flavors and make your dessert even more special.
Variations
Snickerdoodle Cheesecake Bars with Chocolate Chips
Adding chocolate chips makes these bars extra tasty. Use semi-sweet or milk chocolate chips. The richness of the chocolate pairs well with the cinnamon flavor. Simply sprinkle about one cup of chocolate chips on top of the cheesecake layer before adding the crumbled dough. This twist adds a sweet surprise in every bite.
Gluten-Free Alternatives
If you need a gluten-free option, swap the all-purpose flour for a gluten-free blend. Many blends work well, but check for one that mimics regular flour. Make sure the baking soda and cream of tartar are also gluten-free. The texture will still be soft and creamy, just like the original recipe.
Vegan Options
To make these bars vegan, we can replace a few key items. Use a plant-based butter instead of regular butter. Swap the cream cheese for a vegan cream cheese. For the eggs, choose a flaxseed meal mixture or a commercial egg replacer. The bars will still be creamy and delicious, perfect for everyone to enjoy.
Storage Info
How to Store Leftovers
Store your Snickerdoodle Cheesecake Bars in an airtight container. Keep them in the fridge for up to five days. This helps keep them fresh and tasty. Make sure they are fully cooled before storing to avoid condensation. You can also layer parchment paper between the bars to stop sticking.
Freezing Instructions
You can freeze these bars for longer storage. Cut them into squares and wrap each piece tightly in plastic wrap. Place the wrapped bars in a freezer-safe bag or container. They will stay good in the freezer for up to three months. When you are ready to eat, just thaw them overnight in the fridge.
Best Practices for Reheating
To reheat, take the bars out of the fridge. Let them sit at room temp for ten minutes. Warm them in the oven at 350°F (175°C) for about ten minutes. This helps restore their creamy texture. Avoid using the microwave, as it can make them too soft. Enjoy them warm for a cozy treat!
FAQs
How do I know when the Snickerdoodle Cheesecake Bars are done?
You can tell the Snickerdoodle Cheesecake Bars are done by looking at the edges. They should be slightly golden and pull away from the pan. The center will still have a little jiggle, but it should not be liquid. A toothpick inserted in the center should come out mostly clean. If you see some cheesecake on it, that’s okay; it means you have a creamy texture!
Can I use low-fat cream cheese for the cheesecake layer?
Yes, you can use low-fat cream cheese. It will still give you a nice taste and texture. However, the bars may be less creamy than with full-fat cream cheese. I recommend letting it soften well before mixing. This helps it blend smoothly and keeps the flavor rich.
What other toppings can I add to Snickerdoodle Cheesecake Bars?
You can get creative with toppings! Here are some ideas:
– Whipped cream for added sweetness
– Chocolate sauce for a rich finish
– Fresh fruit like berries for a tart touch
– Chopped nuts for crunch
Feel free to mix and match these toppings based on your taste!You’ll find all you need to make this delicious treat!
You now know how to make Snickerdoodle Cheesecake Bars from scratch. We covered the ingredients, step-by-step instructions, and helpful tips. You learned about variations and how to store your bars. Remember, the right texture is key, so follow the tips closely. Don’t be afraid to try different flavors or toppings. Enjoy sharing these treats, and happy baking!

