![To make No Bake Oreo Cheesecake Bars, you need some key ingredients. These items create a creamy and rich dessert that everyone loves. - 24 Oreo cookies, crushed (plus extra for topping) - 1/4 cup unsalted butter, melted - 2 cups cream cheese, softened - 1 cup powdered sugar - 1 teaspoon vanilla extract - 2 cups whipped cream (or cool whip) - 1/2 cup chocolate sauce (for drizzling) Optional ingredients for customization: - Add flavored extracts like mint or almond for a twist. - Mix in fruit like raspberries or strawberries for a fresh taste. - Use gluten-free Oreo cookies if needed. These ingredients are easy to find and fun to work with. You can create a tasty treat that everyone will enjoy. For the full recipe, check out the instructions in the next section. 1. Start with the crust. In a bowl, combine 24 crushed Oreo cookies and 1/4 cup melted butter. Mix until it looks like wet sand. 2. Press the crust mixture firmly into a 9x9-inch baking dish. Use a measuring cup to smooth it out. This will help make a solid base. 3. Now, let’s make the cream cheese filling. In another bowl, beat 2 cups of softened cream cheese until it is nice and smooth. 4. Add 1 cup of powdered sugar and 1 teaspoon of vanilla extract. Mix until fluffy and creamy. Make sure it is well combined. 5. Next, gently fold in 2 cups of whipped cream. Keep folding until you see no streaks. This step adds air and lightness to the filling. 6. Spread the cream cheese mixture over the crust you made. Use a spatula to smooth the top evenly. 7. For a fun touch, crush a few more Oreo cookies. Sprinkle them on top of the cheesecake layer. 8. Drizzle 1/2 cup of chocolate sauce over the top for a sweet finishing touch. - Chill the cheesecake bars in the fridge for at least 4 hours. This helps them set well. - When it’s time to serve, cut the bars into squares. Use a sharp knife for clean cuts. - Place the bars on a decorative plate. You can add extra whipped cream and chocolate sauce on top for a pretty look. This method ensures you get delicious, creamy bars that everyone will love! For more details, check the Full Recipe. - Overmixing the cream cheese filling: Mixing too much makes it dense and heavy. Beat just until smooth and fluffy. - Not pressing the crust firmly enough: A loose crust will crumble when you cut the bars. Press down firmly to get a solid base. - Ensure cream cheese is at room temperature: Cold cream cheese makes it hard to blend. Let it sit out for about 30 minutes before you start. - Use quality whipped cream for better texture: A good whipped cream makes the filling light. Look for ones with simple ingredients for the best taste. - Ideas for garnishing each bar: Top with extra Oreo crumbs, a dollop of whipped cream, or fresh fruit for a pop of color. - Pairing options: Enjoy these bars with a cup of coffee or a glass of dessert wine. The flavors blend well and enhance each bite. For the complete recipe, check out the [Full Recipe]. {{image_2}} You can make No Bake Oreo Cheesecake Bars even more fun by playing with flavors. Adding different extracts can change the taste. For example, mint extract gives a cool twist. Almond extract brings a nice nutty flavor. Simply replace the vanilla extract in the recipe with the one you choose. You can also add fruit to the mix. Chopped strawberries or raspberries add a fresh taste. Fold them into the cream cheese filling for bursts of flavor. You could even make a berry sauce to drizzle on top! This adds color and a fruity touch to each bite. If you need to make some swaps, you have options. You can use gluten-free Oreo cookies for a gluten-free treat. They taste just as good, and no one will know the difference. Just crush them up like regular Oreos. For cream cheese, there are dairy-free options. You can use vegan cream cheese made from nuts or soy. This way, you can serve the bars to those with dairy allergies. They will still be creamy and delicious. You can find the full recipe above to try these variations and substitutions! To keep your No Bake Oreo Cheesecake Bars fresh, store them in the fridge. Place them in an airtight container. This helps prevent them from drying out. If you don’t have a container, wrap them tightly with plastic wrap. Make sure to cover all sides to keep them safe from odors. If you want to save some for later, you can freeze them. First, cut the bars into squares. Then, wrap each square in plastic wrap. Place them in a freezer-safe bag or container. This way, they won’t stick together. When you want to enjoy them, just thaw them in the fridge overnight. For the best taste and texture, consume your bars within a week. After that, they may start to lose flavor. If you see any signs of mold or an off smell, it’s best to toss them. Fresh bars should look creamy and have a nice chocolate aroma. Enjoy them while they are at their best! No Bake Oreo Cheesecake Bars can last about 5 days in the fridge. Make sure to store them in an airtight container. This keeps them fresh and tasty. After a few days, the texture may change, but the flavor stays good. You can enjoy them cold for a nice treat. Yes, you can make these bars ahead of time. I often prepare them the night before a party. Chilling them overnight helps the flavors blend well. Just make sure to cover them tightly with plastic wrap or foil. This keeps them fresh until you are ready to serve. If you don’t have whipped cream, try using cool whip. You can also whip up some heavy cream with sugar. This gives a similar light texture. For a dairy-free option, use coconut cream. It adds a nice flavor and still keeps it creamy. While these bars are meant to be no-bake, you can bake them if you prefer. Just bake the crust at 350°F for 10 minutes before adding the filling. Let it cool completely before spreading the cream cheese mix. Baking changes the texture, so it will taste a bit different. Yes, you can use reduced-fat cream cheese and whipped cream. The taste may change slightly, but the bars will still be delicious. Many people enjoy them just as much. Just remember, using full-fat ingredients often gives a richer flavor and creamier texture. No Bake Oreo Cheesecake Bars are simple and fun to make. We covered key ingredients, preparation steps, and tips to avoid mistakes. Remember to chill the bars for the best texture. You can even customize flavors or substitute ingredients based on your needs. With proper storage, these treats last longer and taste great. Enjoy your creation; it is sure to impress!](https://flavorsprint.com/wp-content/uploads/2025/06/502ac5f7-68f3-4851-ba8a-193489a85c2c-768x768.webp)
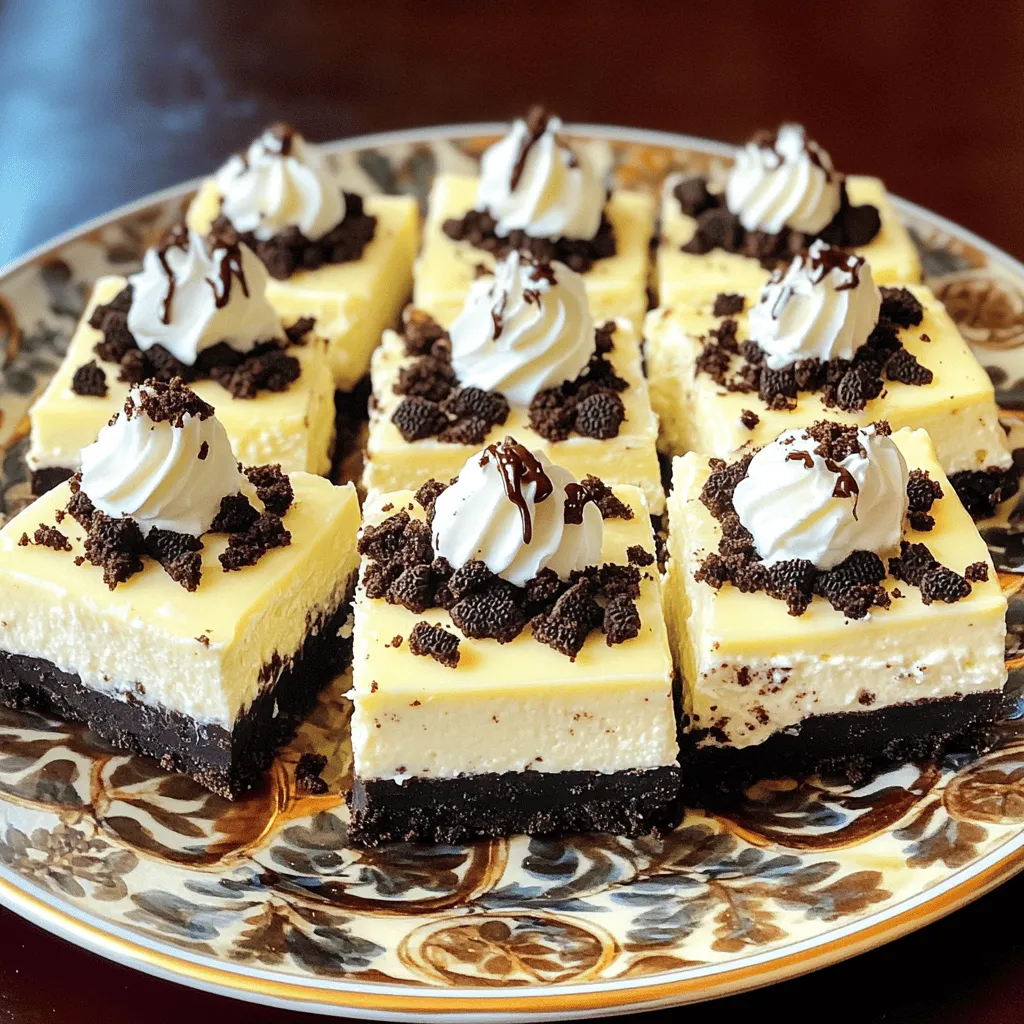
Looking for a quick, tasty dessert? You’ll love these No Bake Oreo Cheesecake Bars! They are easy to make and need no baking. With just a few simple ingredients, you can create a creamy, sweet treat that everyone will adore. Whether it’s a family get-together or a quiet night in, these bars are the perfect choice. Let’s dive in and whip up your new favorite dessert!These items create a creamy and rich dessert that everyone loves.
List of Ingredients
– 24 Oreo cookies, crushed (plus extra for topping)
– 1/4 cup unsalted butter, melted
– 2 cups cream cheese, softened
– 1 cup powdered sugar
– 1 teaspoon vanilla extract
– 2 cups whipped cream (or cool whip)
– 1/2 cup chocolate sauce (for drizzling)
Optional ingredients for customization:
– Add flavored extracts like mint or almond for a twist.
– Mix in fruit like raspberries or strawberries for a fresh taste.
– Use gluten-free Oreo cookies if needed.
These ingredients are easy to find and fun to work with. You can create a tasty treat that everyone will enjoy.
Step-by-Step Instructions
Preparation Steps
1. Start with the crust. In a bowl, combine 24 crushed Oreo cookies and 1/4 cup melted butter. Mix until it looks like wet sand.
2. Press the crust mixture firmly into a 9×9-inch baking dish. Use a measuring cup to smooth it out. This will help make a solid base.
3. Now, let’s make the cream cheese filling. In another bowl, beat 2 cups of softened cream cheese until it is nice and smooth.
4. Add 1 cup of powdered sugar and 1 teaspoon of vanilla extract. Mix until fluffy and creamy. Make sure it is well combined.
5. Next, gently fold in 2 cups of whipped cream. Keep folding until you see no streaks. This step adds air and lightness to the filling.
6. Spread the cream cheese mixture over the crust you made. Use a spatula to smooth the top evenly.
7. For a fun touch, crush a few more Oreo cookies. Sprinkle them on top of the cheesecake layer.
8. Drizzle 1/2 cup of chocolate sauce over the top for a sweet finishing touch.
Chilling and Serving
– Chill the cheesecake bars in the fridge for at least 4 hours. This helps them set well.
– When it’s time to serve, cut the bars into squares. Use a sharp knife for clean cuts.
– Place the bars on a decorative plate. You can add extra whipped cream and chocolate sauce on top for a pretty look.
This method ensures you get delicious, creamy bars that everyone will love!
Tips & Tricks
Common Mistakes to Avoid
– Overmixing the cream cheese filling: Mixing too much makes it dense and heavy. Beat just until smooth and fluffy.
– Not pressing the crust firmly enough: A loose crust will crumble when you cut the bars. Press down firmly to get a solid base.
Best Practices
– Ensure cream cheese is at room temperature: Cold cream cheese makes it hard to blend. Let it sit out for about 30 minutes before you start.
– Use quality whipped cream for better texture: A good whipped cream makes the filling light. Look for ones with simple ingredients for the best taste.
Serving Suggestions
– Ideas for garnishing each bar: Top with extra Oreo crumbs, a dollop of whipped cream, or fresh fruit for a pop of color.
– Pairing options: Enjoy these bars with a cup of coffee or a glass of dessert wine. The flavors blend well and enhance each bite.
Variations
Flavor Variations
You can make No Bake Oreo Cheesecake Bars even more fun by playing with flavors. Adding different extracts can change the taste. For example, mint extract gives a cool twist. Almond extract brings a nice nutty flavor. Simply replace the vanilla extract in the recipe with the one you choose.
You can also add fruit to the mix. Chopped strawberries or raspberries add a fresh taste. Fold them into the cream cheese filling for bursts of flavor. You could even make a berry sauce to drizzle on top! This adds color and a fruity touch to each bite.
Ingredient Substitutions
If you need to make some swaps, you have options. You can use gluten-free Oreo cookies for a gluten-free treat. They taste just as good, and no one will know the difference. Just crush them up like regular Oreos.
For cream cheese, there are dairy-free options. You can use vegan cream cheese made from nuts or soy. This way, you can serve the bars to those with dairy allergies. They will still be creamy and delicious.
Storage Info
Storing No Bake Oreo Cheesecake Bars
To keep your No Bake Oreo Cheesecake Bars fresh, store them in the fridge. Place them in an airtight container. This helps prevent them from drying out. If you don’t have a container, wrap them tightly with plastic wrap. Make sure to cover all sides to keep them safe from odors.
If you want to save some for later, you can freeze them. First, cut the bars into squares. Then, wrap each square in plastic wrap. Place them in a freezer-safe bag or container. This way, they won’t stick together. When you want to enjoy them, just thaw them in the fridge overnight.
Shelf Life
For the best taste and texture, consume your bars within a week. After that, they may start to lose flavor. If you see any signs of mold or an off smell, it’s best to toss them. Fresh bars should look creamy and have a nice chocolate aroma. Enjoy them while they are at their best!
FAQs
How long do No Bake Oreo Cheesecake Bars last in the fridge?
No Bake Oreo Cheesecake Bars can last about 5 days in the fridge. Make sure to store them in an airtight container. This keeps them fresh and tasty. After a few days, the texture may change, but the flavor stays good. You can enjoy them cold for a nice treat.
Can I make these cheesecake bars ahead of time?
Yes, you can make these bars ahead of time. I often prepare them the night before a party. Chilling them overnight helps the flavors blend well. Just make sure to cover them tightly with plastic wrap or foil. This keeps them fresh until you are ready to serve.
What can I use instead of whipped cream?
If you don’t have whipped cream, try using cool whip. You can also whip up some heavy cream with sugar. This gives a similar light texture. For a dairy-free option, use coconut cream. It adds a nice flavor and still keeps it creamy.
Is it possible to bake these cheesecake bars?
While these bars are meant to be no-bake, you can bake them if you prefer. Just bake the crust at 350°F for 10 minutes before adding the filling. Let it cool completely before spreading the cream cheese mix. Baking changes the texture, so it will taste a bit different.
Can I use reduced-fat ingredients without compromising taste?
Yes, you can use reduced-fat cream cheese and whipped cream. The taste may change slightly, but the bars will still be delicious. Many people enjoy them just as much. Just remember, using full-fat ingredients often gives a richer flavor and creamier texture.
No Bake Oreo Cheesecake Bars are simple and fun to make. We covered key ingredients, preparation steps, and tips to avoid mistakes. Remember to chill the bars for the best texture. You can even customize flavors or substitute ingredients based on your needs. With proper storage, these treats last longer and taste great. Enjoy your creation; it is sure to impress!
![To make No Bake Oreo Cheesecake Bars, you need some key ingredients. These items create a creamy and rich dessert that everyone loves. - 24 Oreo cookies, crushed (plus extra for topping) - 1/4 cup unsalted butter, melted - 2 cups cream cheese, softened - 1 cup powdered sugar - 1 teaspoon vanilla extract - 2 cups whipped cream (or cool whip) - 1/2 cup chocolate sauce (for drizzling) Optional ingredients for customization: - Add flavored extracts like mint or almond for a twist. - Mix in fruit like raspberries or strawberries for a fresh taste. - Use gluten-free Oreo cookies if needed. These ingredients are easy to find and fun to work with. You can create a tasty treat that everyone will enjoy. For the full recipe, check out the instructions in the next section. 1. Start with the crust. In a bowl, combine 24 crushed Oreo cookies and 1/4 cup melted butter. Mix until it looks like wet sand. 2. Press the crust mixture firmly into a 9x9-inch baking dish. Use a measuring cup to smooth it out. This will help make a solid base. 3. Now, let’s make the cream cheese filling. In another bowl, beat 2 cups of softened cream cheese until it is nice and smooth. 4. Add 1 cup of powdered sugar and 1 teaspoon of vanilla extract. Mix until fluffy and creamy. Make sure it is well combined. 5. Next, gently fold in 2 cups of whipped cream. Keep folding until you see no streaks. This step adds air and lightness to the filling. 6. Spread the cream cheese mixture over the crust you made. Use a spatula to smooth the top evenly. 7. For a fun touch, crush a few more Oreo cookies. Sprinkle them on top of the cheesecake layer. 8. Drizzle 1/2 cup of chocolate sauce over the top for a sweet finishing touch. - Chill the cheesecake bars in the fridge for at least 4 hours. This helps them set well. - When it’s time to serve, cut the bars into squares. Use a sharp knife for clean cuts. - Place the bars on a decorative plate. You can add extra whipped cream and chocolate sauce on top for a pretty look. This method ensures you get delicious, creamy bars that everyone will love! For more details, check the Full Recipe. - Overmixing the cream cheese filling: Mixing too much makes it dense and heavy. Beat just until smooth and fluffy. - Not pressing the crust firmly enough: A loose crust will crumble when you cut the bars. Press down firmly to get a solid base. - Ensure cream cheese is at room temperature: Cold cream cheese makes it hard to blend. Let it sit out for about 30 minutes before you start. - Use quality whipped cream for better texture: A good whipped cream makes the filling light. Look for ones with simple ingredients for the best taste. - Ideas for garnishing each bar: Top with extra Oreo crumbs, a dollop of whipped cream, or fresh fruit for a pop of color. - Pairing options: Enjoy these bars with a cup of coffee or a glass of dessert wine. The flavors blend well and enhance each bite. For the complete recipe, check out the [Full Recipe]. {{image_2}} You can make No Bake Oreo Cheesecake Bars even more fun by playing with flavors. Adding different extracts can change the taste. For example, mint extract gives a cool twist. Almond extract brings a nice nutty flavor. Simply replace the vanilla extract in the recipe with the one you choose. You can also add fruit to the mix. Chopped strawberries or raspberries add a fresh taste. Fold them into the cream cheese filling for bursts of flavor. You could even make a berry sauce to drizzle on top! This adds color and a fruity touch to each bite. If you need to make some swaps, you have options. You can use gluten-free Oreo cookies for a gluten-free treat. They taste just as good, and no one will know the difference. Just crush them up like regular Oreos. For cream cheese, there are dairy-free options. You can use vegan cream cheese made from nuts or soy. This way, you can serve the bars to those with dairy allergies. They will still be creamy and delicious. You can find the full recipe above to try these variations and substitutions! To keep your No Bake Oreo Cheesecake Bars fresh, store them in the fridge. Place them in an airtight container. This helps prevent them from drying out. If you don’t have a container, wrap them tightly with plastic wrap. Make sure to cover all sides to keep them safe from odors. If you want to save some for later, you can freeze them. First, cut the bars into squares. Then, wrap each square in plastic wrap. Place them in a freezer-safe bag or container. This way, they won’t stick together. When you want to enjoy them, just thaw them in the fridge overnight. For the best taste and texture, consume your bars within a week. After that, they may start to lose flavor. If you see any signs of mold or an off smell, it’s best to toss them. Fresh bars should look creamy and have a nice chocolate aroma. Enjoy them while they are at their best! No Bake Oreo Cheesecake Bars can last about 5 days in the fridge. Make sure to store them in an airtight container. This keeps them fresh and tasty. After a few days, the texture may change, but the flavor stays good. You can enjoy them cold for a nice treat. Yes, you can make these bars ahead of time. I often prepare them the night before a party. Chilling them overnight helps the flavors blend well. Just make sure to cover them tightly with plastic wrap or foil. This keeps them fresh until you are ready to serve. If you don’t have whipped cream, try using cool whip. You can also whip up some heavy cream with sugar. This gives a similar light texture. For a dairy-free option, use coconut cream. It adds a nice flavor and still keeps it creamy. While these bars are meant to be no-bake, you can bake them if you prefer. Just bake the crust at 350°F for 10 minutes before adding the filling. Let it cool completely before spreading the cream cheese mix. Baking changes the texture, so it will taste a bit different. Yes, you can use reduced-fat cream cheese and whipped cream. The taste may change slightly, but the bars will still be delicious. Many people enjoy them just as much. Just remember, using full-fat ingredients often gives a richer flavor and creamier texture. No Bake Oreo Cheesecake Bars are simple and fun to make. We covered key ingredients, preparation steps, and tips to avoid mistakes. Remember to chill the bars for the best texture. You can even customize flavors or substitute ingredients based on your needs. With proper storage, these treats last longer and taste great. Enjoy your creation; it is sure to impress!](https://flavorsprint.com/wp-content/uploads/2025/06/502ac5f7-68f3-4851-ba8a-193489a85c2c-250x250.webp)
