Are you ready to bite into something truly special? This Chocolate Pistachio Kunafa Cake is a treat that combines rich flavors with a crispy base. You’ll enjoy making this cake with simple ingredients and easy steps. Whether it’s for a celebration or just a sweet craving, this dessert is sure to impress. Let’s dive into the recipe and create this delicious masterpiece together!
Ingredients
Essential Ingredients for Chocolate Pistachio Kunafa Cake
To make this cake, you will need some key ingredients. Here’s a list for you:
– 200g kunafa (shredded phyllo dough)
– 100g unsalted butter, melted
– 150g dark chocolate, chopped
– 300ml heavy cream
– 100g powdered sugar
– 1 teaspoon vanilla extract
– 150g unsalted pistachios, finely chopped
– 200g ricotta cheese
– A pinch of salt
– 50g additional pistachio crumbs for topping
These ingredients come together to create a rich and creamy dessert. The kunafa gives a nice crunch, while the chocolate and cream add a smooth texture.
Optional Ingredients to Enhance Flavor
You can add a few optional ingredients to take your cake to the next level:
– Orange or lemon zest for a citrus kick
– A splash of almond extract for a nutty flavor
– Honey or maple syrup for added sweetness
These extras can provide unique notes to the cake. They turn a classic dessert into something special.
Ingredient Substitutions for Dietary Needs
If you have dietary needs, don’t worry! Here are some substitutions:
– Use gluten-free phyllo dough instead of kunafa for a gluten-free option.
– Try coconut cream in place of heavy cream for a dairy-free choice.
– Swap ricotta cheese with tofu or a vegan cream cheese mix for a plant-based version.
These swaps can help you enjoy this cake while sticking to your dietary needs. It’s all about making it work for you!
Step-by-Step Instructions
Prepping the Kunafa Base
To start, gather your ingredients. You will need kunafa, melted butter, and a springform pan. First, preheat your oven to 180°C (350°F). Next, take your kunafa and pour the melted butter over it. Mix well to coat every strand. This step is key for a crispy base.
Spread half of the buttered kunafa in a greased 9-inch springform pan. Press it down firmly to form a solid base. This will hold the delicious filling later.
Making the Chocolate Filling
Now, let’s make the rich chocolate filling. In a saucepan, heat heavy cream over medium heat until it simmers. Remove it from heat and add the chopped dark chocolate. Stir until the chocolate melts and the mixture is smooth.
Add powdered sugar, vanilla extract, ricotta cheese, and a pinch of salt to this chocolate mix. Blend everything until it’s fully combined. This filling is creamy and oh-so-chocolatey!
Assembling and Baking the Cake
Pour the chocolate filling over the kunafa base in the springform pan. Sprinkle finely chopped pistachios on top of the filling. This adds a nice crunch and flavor.
Cover the filling with the remaining kunafa. Press it down gently to create a top layer. Bake the cake in the oven for about 30-35 minutes. You want the top to be golden brown and crispy.
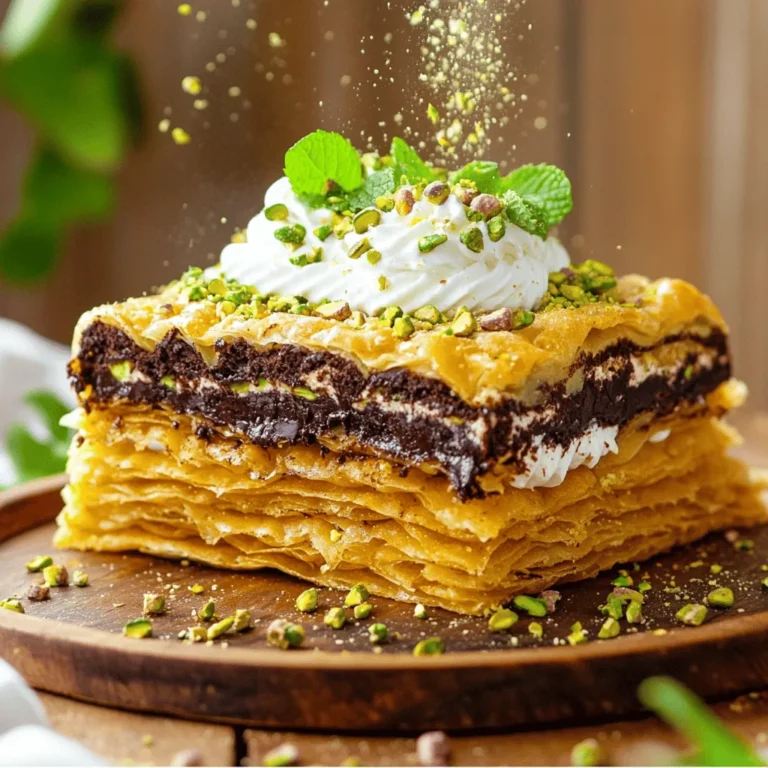
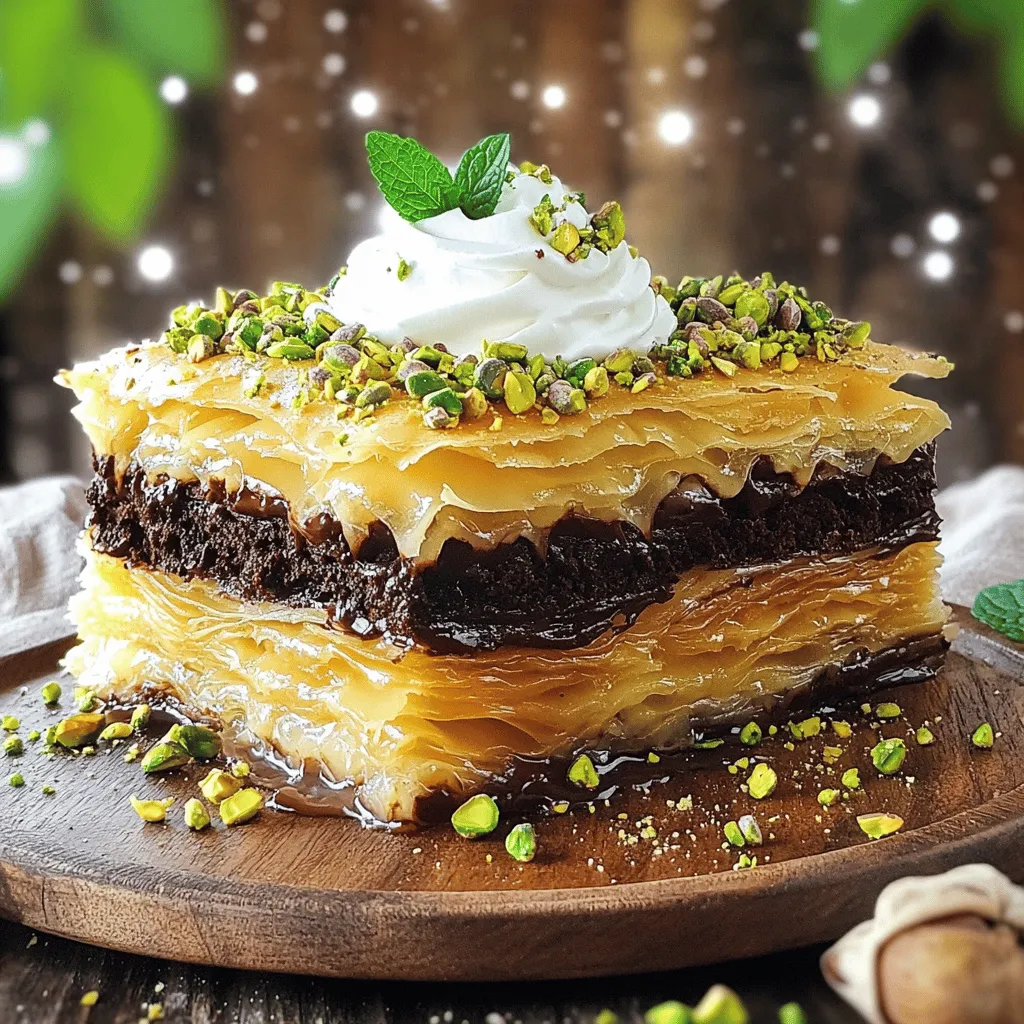
Once baked, let the cake cool in the pan for 15 minutes. Carefully release the springform and transfer the cake to a serving plate. For a lovely finish, dust the top with pistachio crumbs before slicing.Enjoy your creation!
Tips & Tricks
How to Achieve the Perfect Kunafa Texture
To get the best texture in your kunafa, you need to start with dry strands. If the kunafa is too moist, it won’t crisp up right. I recommend breaking it up with your hands. Make sure to coat every strand with melted butter. This step helps each piece get golden and crunchy. Press down firmly when you layer it in the pan. This ensures it holds together when baked and served.
Preventing Chocolate from Seizing
Chocolate can seize up if it gets too hot or touches water. To avoid this, heat the heavy cream slowly. Stir constantly as it warms up. When you add the chocolate, make sure the cream is hot but not boiling. This helps the chocolate melt smoothly. If you see any lumps, just keep stirring until it looks shiny and silky. If the mixture does seize, adding a little hot cream can sometimes rescue it.
Serving Suggestions for Best Presentation
To make your cake look amazing, you can dust the top with pistachio crumbs. This adds a nice color and texture. For a touch of freshness, add some mint leaves on top. Serve with a dollop of whipped cream for extra creaminess. You can also place extra chopped pistachios around the plate for decoration. These small touches can make your cake shine at any gathering.
Variations
Nut-Free Version of Chocolate Pistachio Kunafa Cake
You can make a nut-free version of this cake easily. Simply skip the pistachios. Use sunflower seeds or pumpkin seeds instead. These seeds add a nice crunch without the nuts. They also bring a unique flavor. You can finely chop them and sprinkle them on top. This change makes the cake safe for those with nut allergies.
Different Chocolate Options to Use
For the chocolate layer, you have options! You can use milk chocolate for a sweeter taste. Dark chocolate gives a rich and deep flavor. If you want a twist, try white chocolate. This adds a creamy touch to the cake. You can mix chocolates, too! Just keep the same amount as the recipe states. Each choice changes the cake’s flavor, so feel free to experiment.
Flavor Profile Modifications
Want to change up the flavors? Add some citrus zest! Lemon or orange zest brightens the cake. Just a teaspoon can make a big difference. It balances the rich chocolate and brings freshness. You can also try spices like cinnamon or cardamom. These spices pair well with chocolate. They add warmth and depth to the flavor. Adjust the amount to your taste as you explore new flavors.
Storage Info
Best Practices for Storing Leftovers
Store leftover Chocolate Pistachio Kunafa Cake in an airtight container. Keep it in the fridge to keep it fresh. Make sure to place parchment paper between layers to avoid sticking. This way, you can enjoy it later without losing flavor or texture.
Freezing and Reheating Guidelines
You can freeze this cake for later use. First, let it cool completely. Wrap it tightly in plastic wrap and then place it in a freezer bag. It will stay fresh for up to three months. To reheat, thaw it overnight in the fridge. Then, warm it in the oven at 160°C (320°F) for about 10-15 minutes.
Shelf Life of Chocolate Pistachio Kunafa Cake
When stored properly, this cake lasts about five days in the fridge. If you notice any changes in texture or smell, it’s best to discard it. For the best taste, enjoy it within the first few days. This ensures you experience its full rich flavor.
FAQs
Can I make this cake ahead of time?
Yes, you can make this cake a day ahead.Once cooled, cover it tightly with plastic wrap or foil. This keeps it fresh. Store it in the fridge. When ready to serve, let it sit at room temperature for about 30 minutes. This makes it easier to slice. You can also reheat it in the oven for a few minutes if you prefer it warm.
What can I use instead of ricotta cheese?
If you don’t have ricotta cheese, try mascarpone or cream cheese. Both create a rich texture and add flavor. You can also blend cottage cheese until smooth for a lighter option. These substitutes work well in the recipe. Just remember to adjust the sweetness slightly if needed.
How do I know when the kunafa is done baking?
The kunafa is done when it turns a beautiful golden brown color. Check the edges for a crispy look. The center should feel firm to the touch. If you see bubbling around the edges, that’s a good sign too! Use a toothpick to test the filling; it should come out clean. Enjoy the amazing aroma while it bakes!
This blog post shared all you need to make a tasty Chocolate Pistachio Kunafa Cake. We covered key ingredients, step-by-step instructions, and helpful tips. You learned about variations for dietary needs and storage best practices.
Now, you have the tools to impress your friends and family. Enjoy experimenting with flavors and textures. Your baking adventure starts here!

